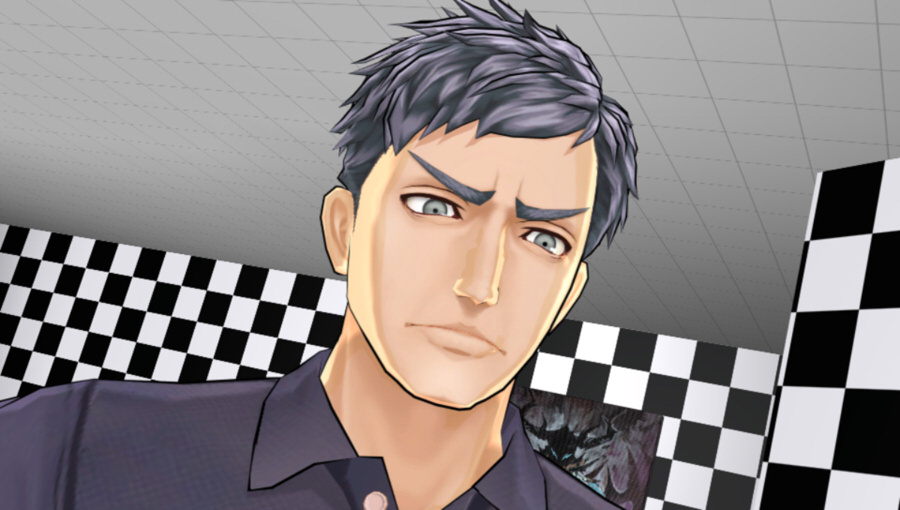
Part 16: Suppression (1 of 2)
Part 16: Suppression (1 of 2)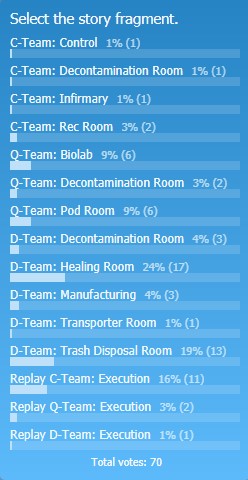
A close one, but it's time to take D-Team through a puzzle room.
A simple fragment structure this time.

So let's get to it.

Music: Sinisterness Phase 3

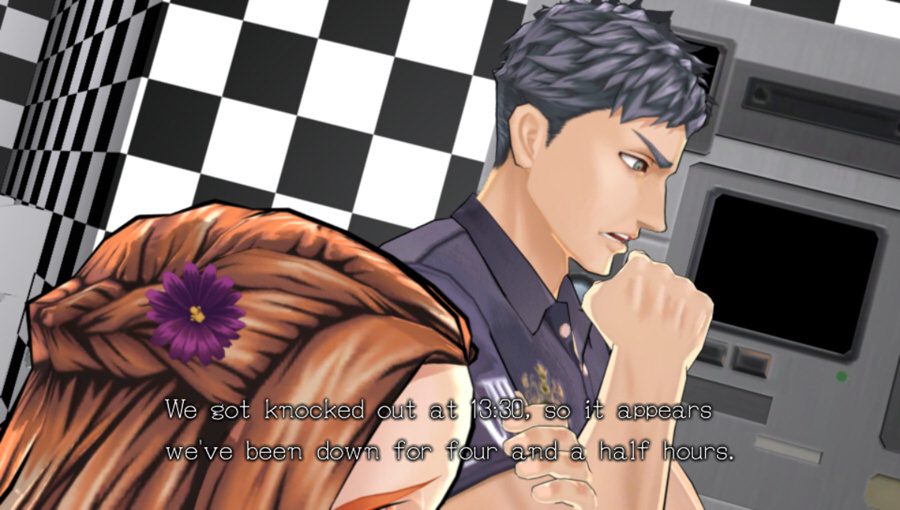
For the first time, we see everyone while they're still knocked out, and about to wake up.
And everyone wakes up, stands up, as a group. Though this GIF makes it look like Sigma and Phi stand up and teleport away.
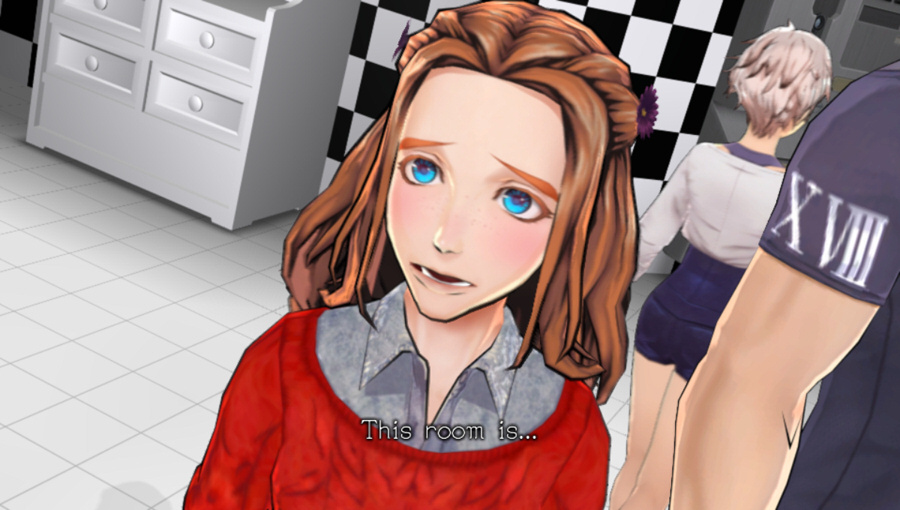
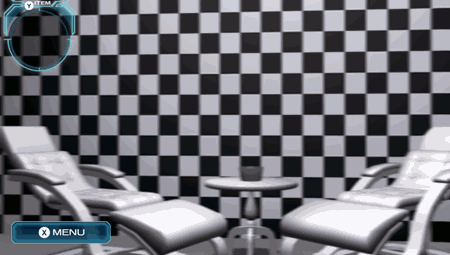
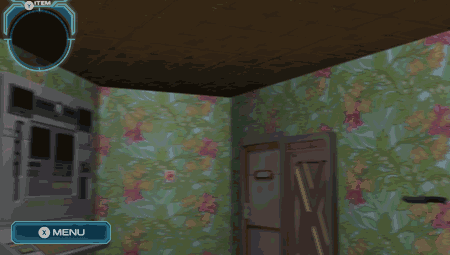
 The Healing Room.
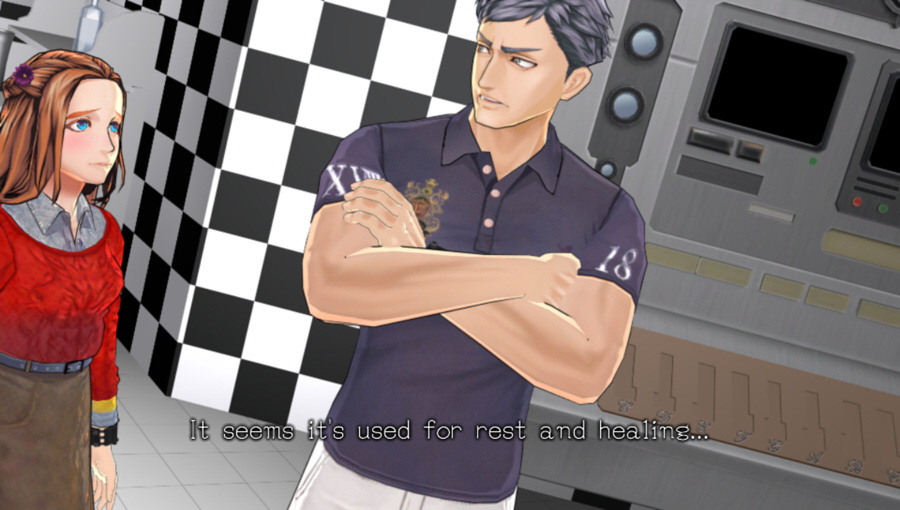
 Not healing physical injuries per se, but to recover from mental fatigue.
That's actually a pretty smart idea for a bomb shelter where a group might have to spend a long time isolated together.
More traditional escape room this time.
 Seems like it.
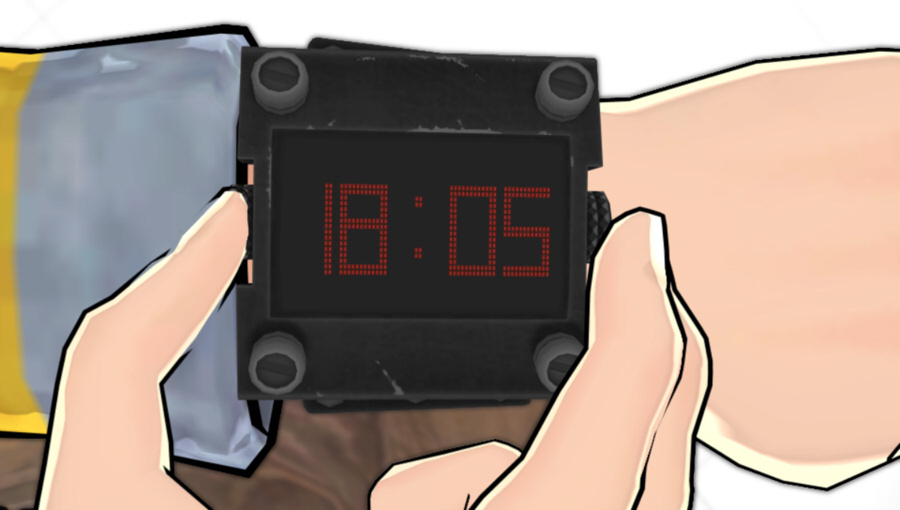
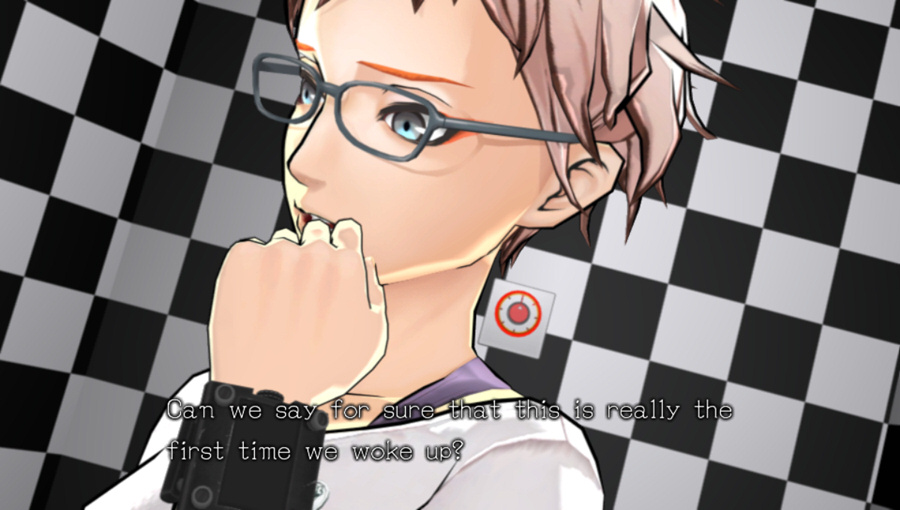
 18:05...
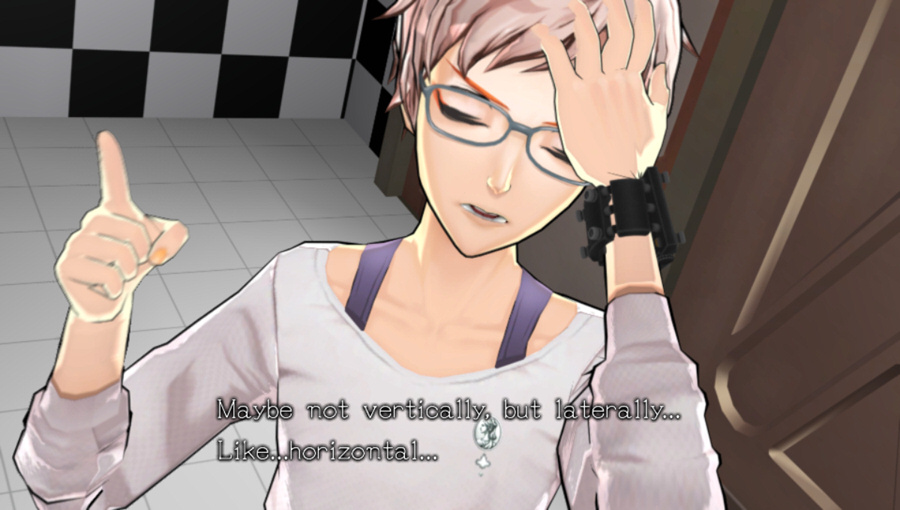
Anothing team waking up at 18:00. In our last two fragments, C-Team and Q-Team each woke up at 18:00, and discovered at the end that D-Team had already died. Does that happen here?
The first hump the player has to get over with ZTD is the Execution fragments - there is a lot of dialogue to get through before any real interactivity is unlocked. The second hump is right around here, the third or fourth puzzle room, where the player has seen just enough to be confused about what's going on but not enough to really make sense of it. The sense of confusion that the characters feel as they wake up with their memory wiped at the start of each fragment mirrors that of the player, who is trying to make sense out of how all these scenes fit together. That parallel is particularly true in the first few fragments after the Execution fragments, where it's not clear what the rules are for unlocking new fragments, or how they fit in with the Execution votes.
In VLR, you can jump all over the timeline, but only to places (and times) you're already been. You still have to unlock everything by moving through time linearly and making decisions along the way, and you always know what's happened to get to any given point on the flowchart. In ZTD, you can pick isolated fragments but you really don't know much more than the characters themselves, and that sense of confusion can be very frustrating at around this point of the game. It pays off eventually, but the player has to push through the first few puzzle rooms to get there. Here, Phi is hinting at the fact that maybe they're not just moving down a single timeline, but across all of them. And in fact, that's what the player is doing, too. It becomes a little more clear after going through a fragment for each team, and then examining the global flowchart to see how (or if) they connect to each other.
 Oh well. There's no point to talking more about it here anyway.
Missing Lip Animations: 13
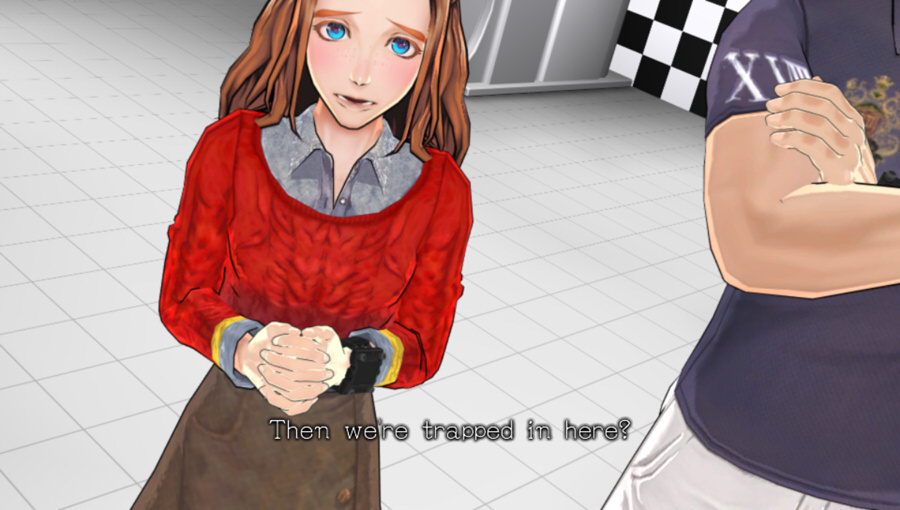
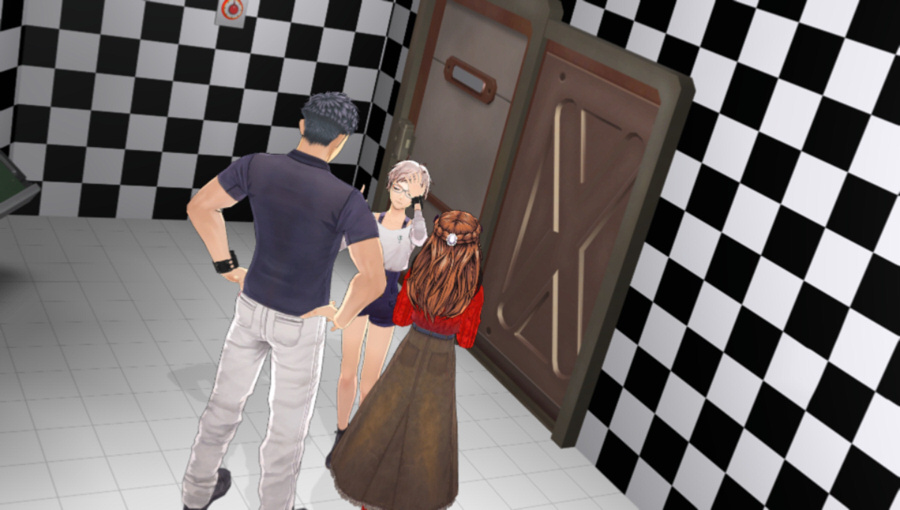
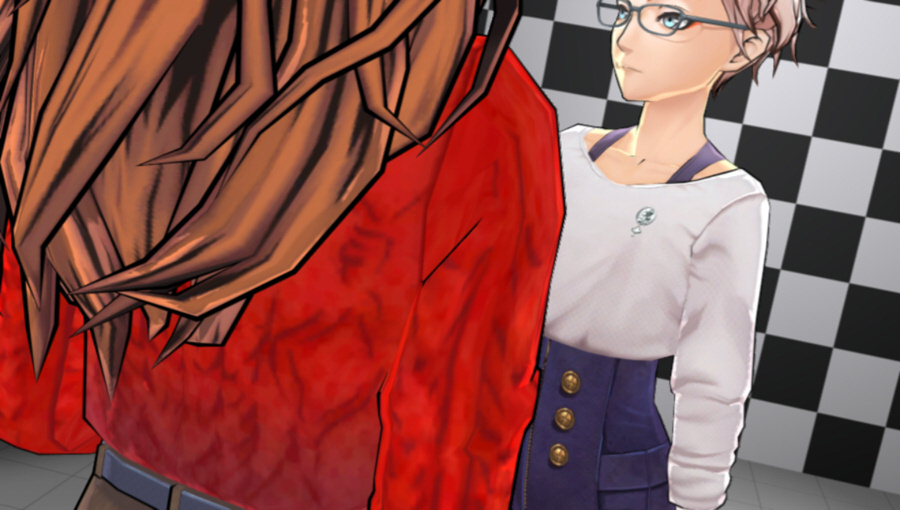
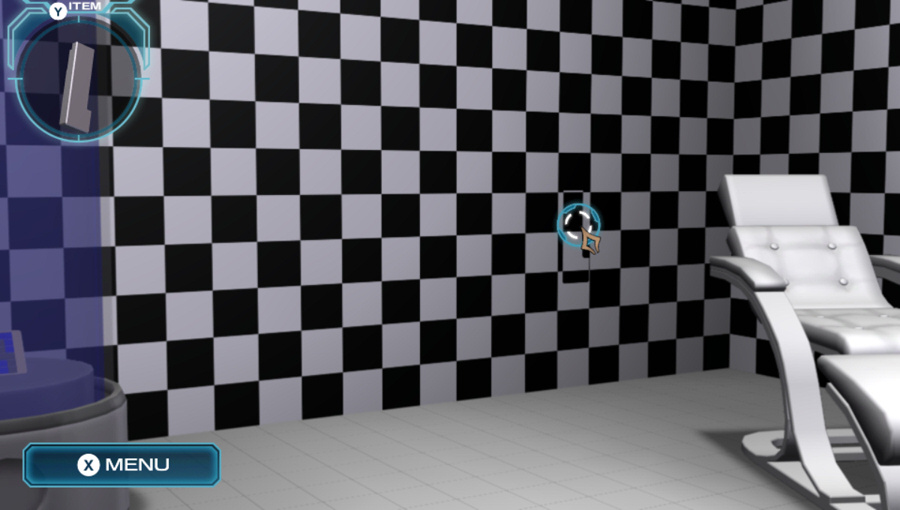
We need to find some way out of this room first. On it.
Sigma's gone through a lot of these puzzle rooms, even if it was 45 years ago for him. He more recently also designed those same puzzle rooms. Phi has just gone through all the puzzle rooms from VLR, from her perspective. So we should be able to crush this room, right?
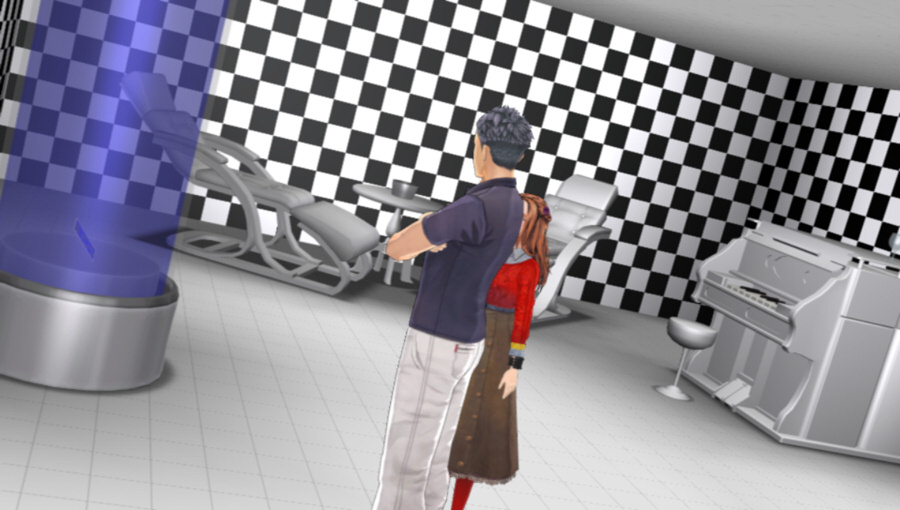
Music: Healing Room (Treatment 2nd Mix)
Interesing decor in here.
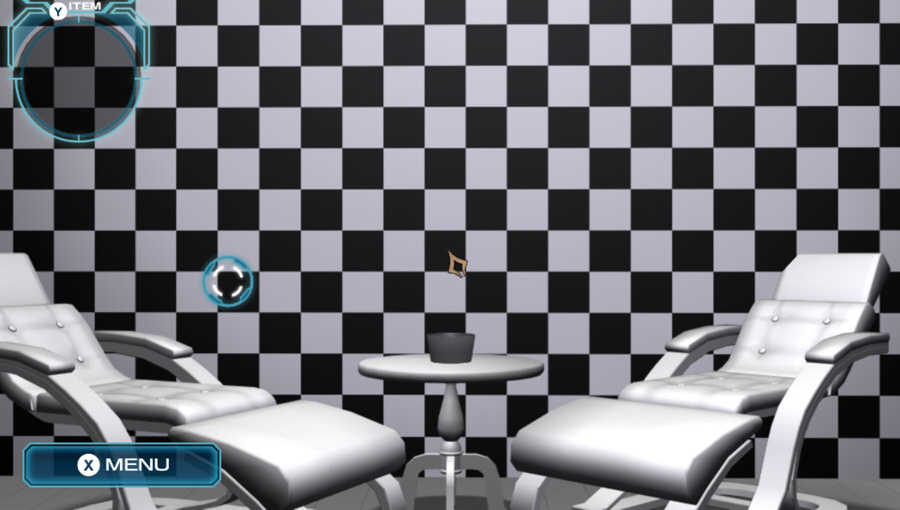
Just a table and a couple of chairs right in front of us.
 I know this isn't the right time, but I feel like everything would get better if we sat here... This must be a mental care room for those forced to live in a confined space.
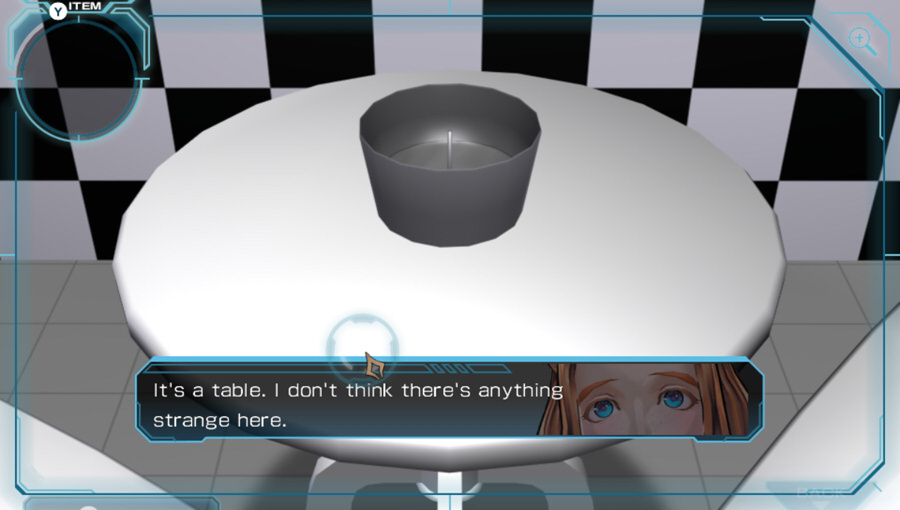
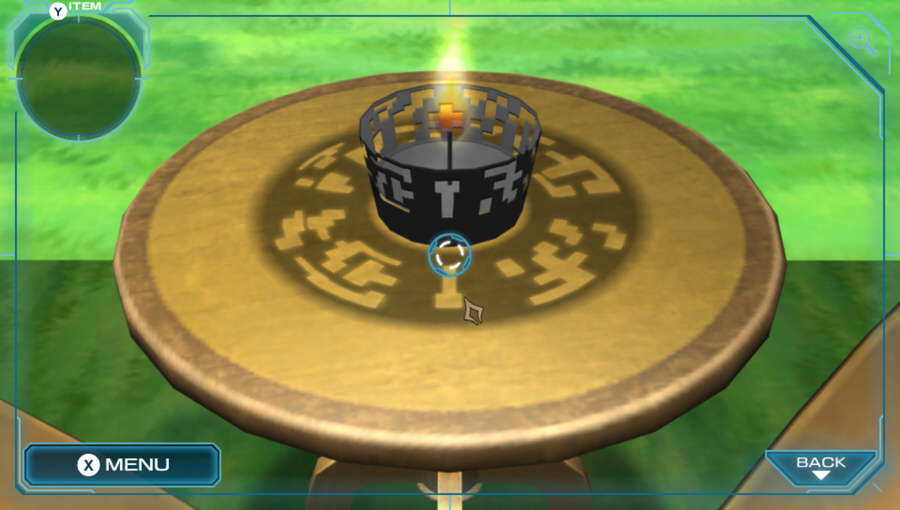
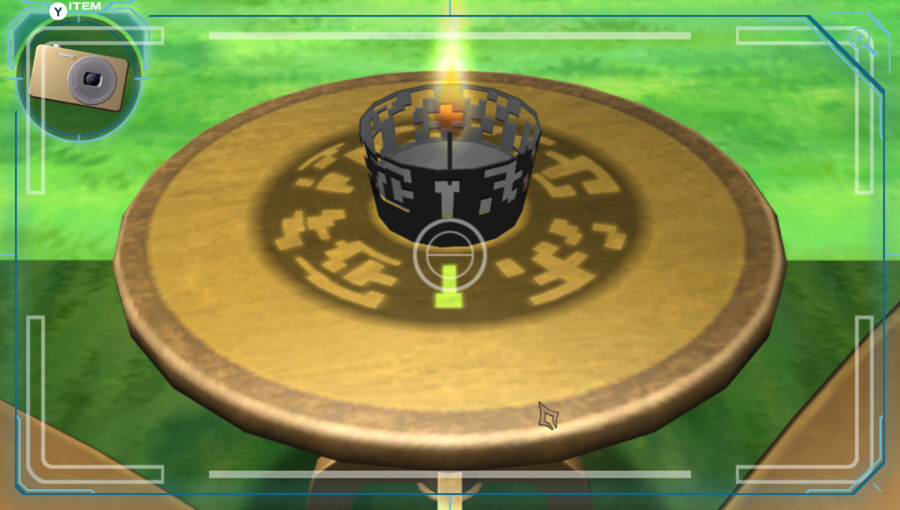
The table isn't interesting, but how about the candle on it?
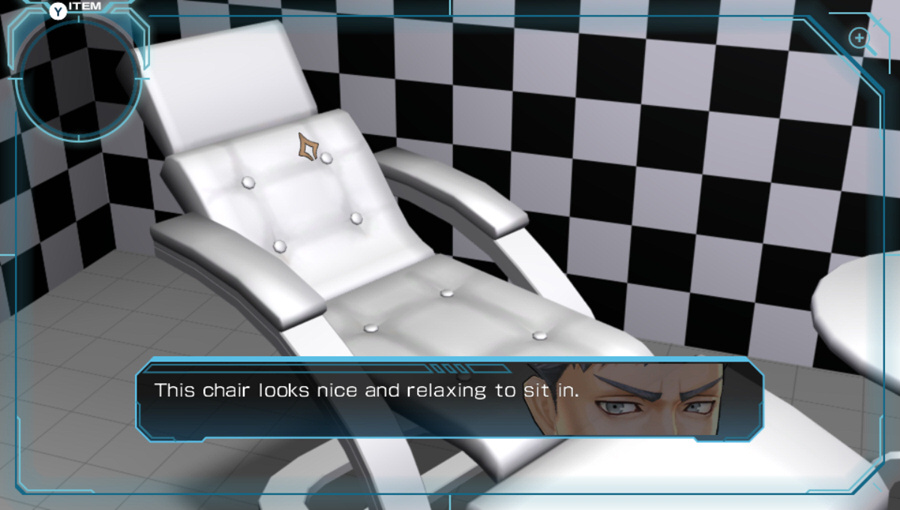
Mmm... This smells really nice. I think it's a scented candle. Those "heal with the power of scent" things that relax and sharpen your mind together? If we have something to light it, we can try it out.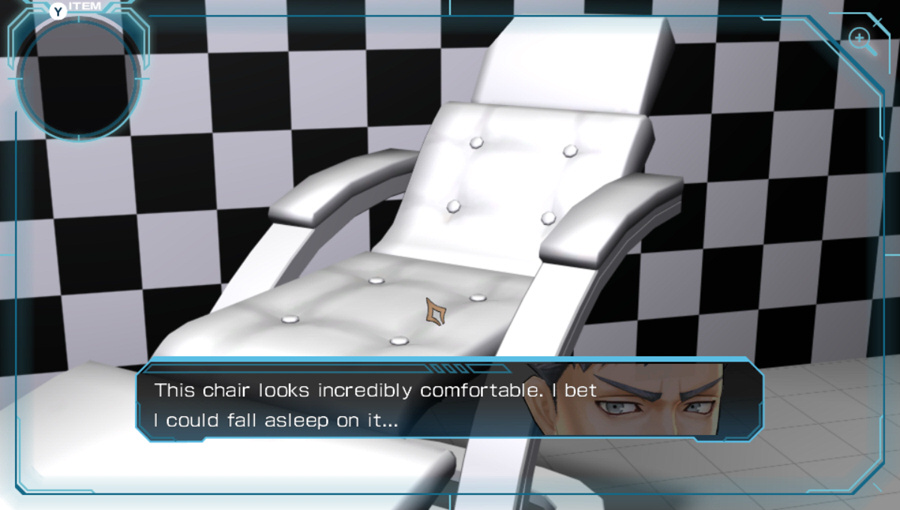 Falling asleep in a recliner... Reverting to your old man tendencies, are you? No, I'm not!
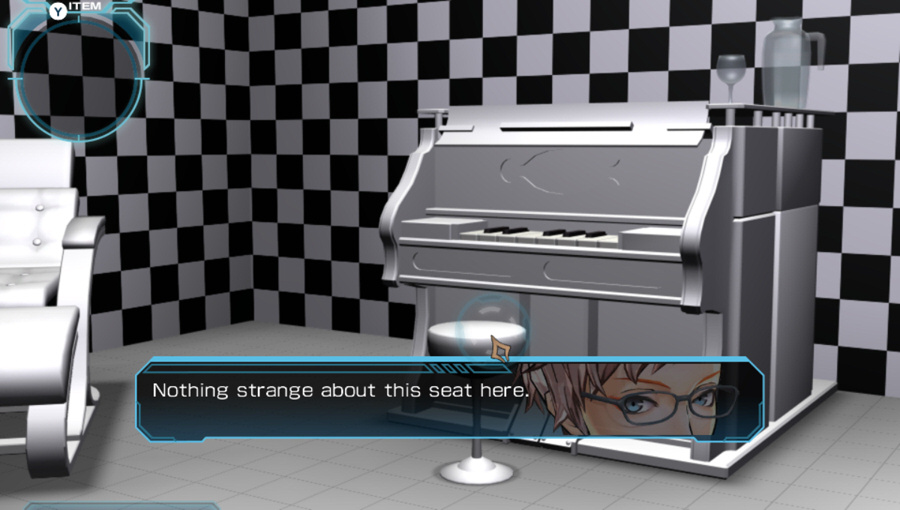 I think the chairs over there are much more comfortable than this one.
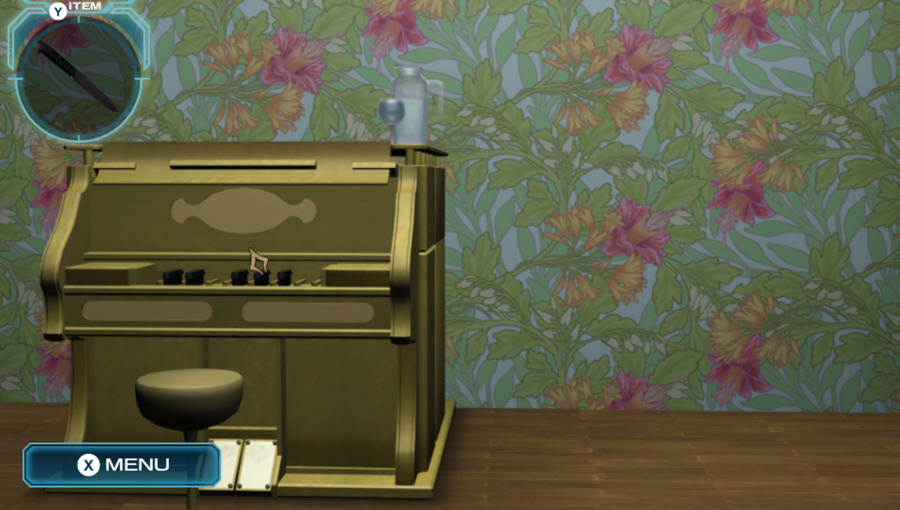
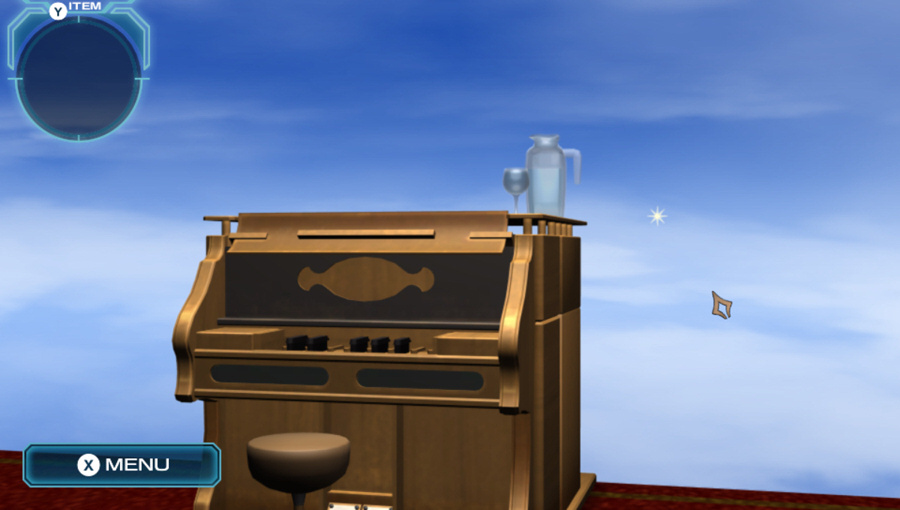
To the right we have a piano. The seat isn't interesting, how about the rest?
 The tambourine! Oh, and also the castanets and the triangle...! Heh. I'm surprised. I'm expecting a great performance from you when we escape here. ...Are you doubting me, Phi? My percussion skills are so good that I made five of my friends cry playing the tambourine. There might be two reasons for that... It's hard to imagine, regardless.
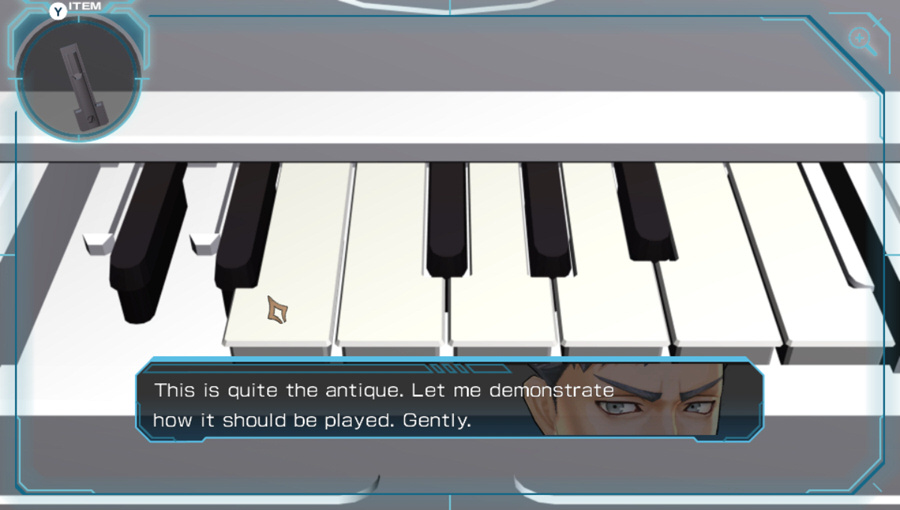
We can also examine the keys themselves.
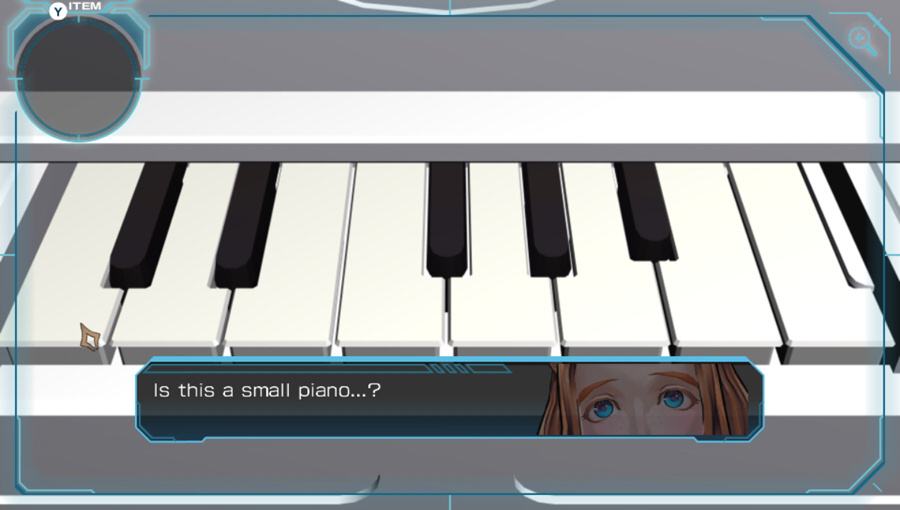 It only has one octave. You can't play very much music on this. Then maybe it isn't here to play music. Does it even work?
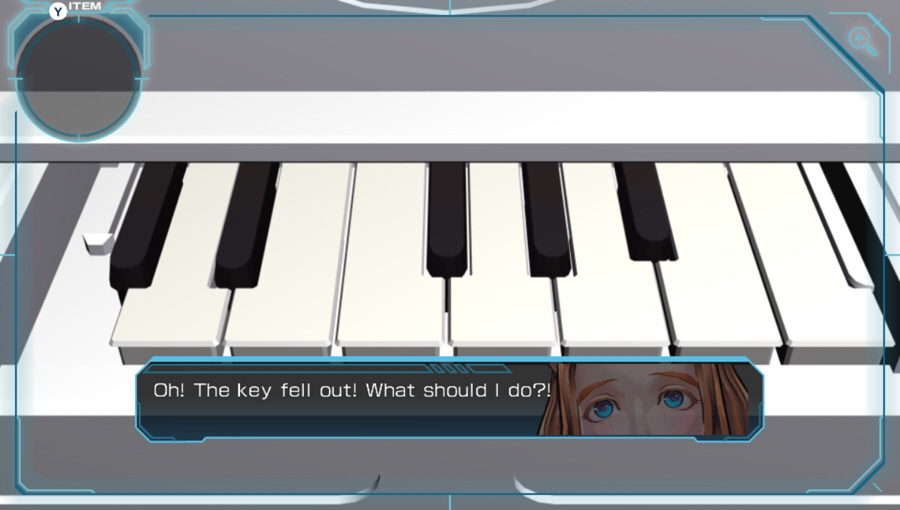
The key is pressed, and makes a sound. But then...
 I don't think you'll get in trouble for breaking it. It's not like Zero will send you a bill.
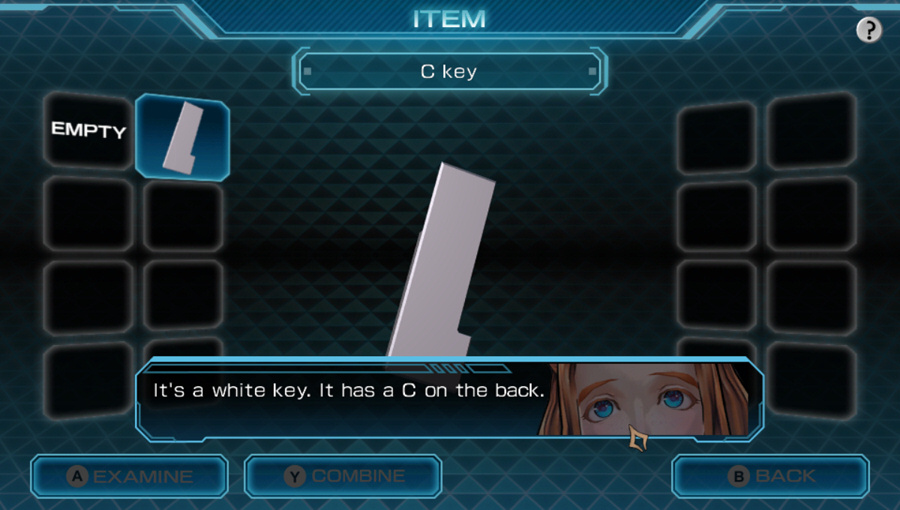 I wonder how C-Team is doing... Let's not dwell on that right now. We have to focus on the task ahead of us.
So the key falls out and we hold onto it. Okay.
There aren't many keys on this instrument, but it does still play. Maybe that was the only key that works... How about this one?The next key is pressed, plays a sound, and also vanishes.
...Another key fell out. If you beat on it like you did, of course it'll do that. It's all right, we don't have to worry.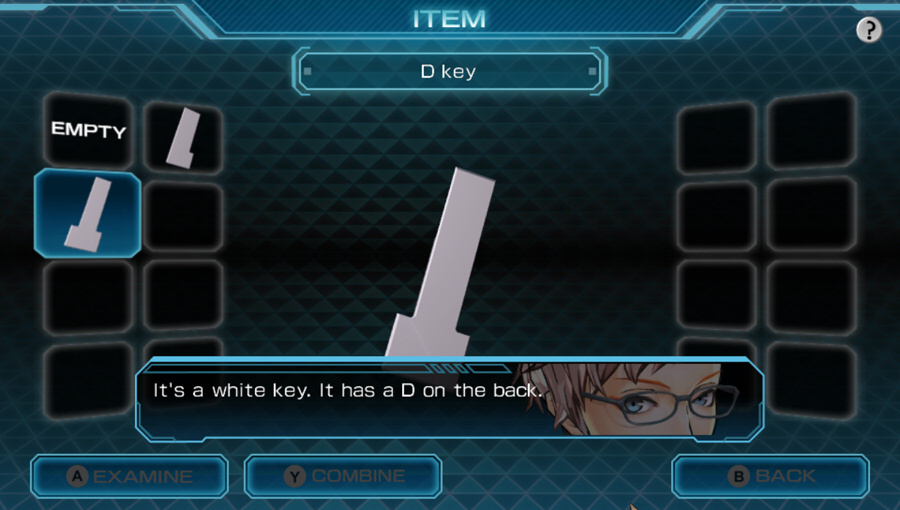 The D is for Diana. Just kidding.
There are still six more keys to go, hang in there.
The third key also falls off...
...Well, that one fell out too. What a fantastic example, old man. Dammit, Zero... Making me look like an idiot...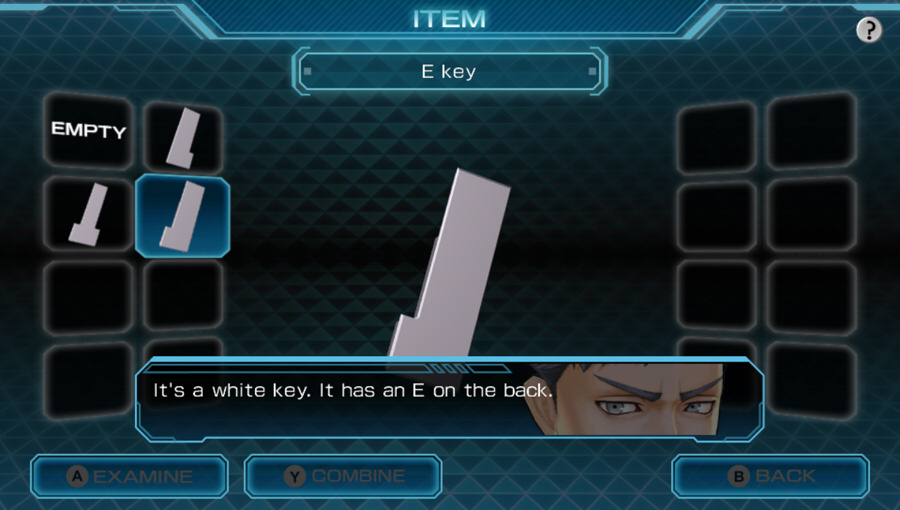 E for, um, email? If we could send one out then maybe someone could rescue us.
Fourth key:
But what's this sound...? Okay, now I'm SURE it's not a piano. If it's not, then what could it be? Now that you said that, it does sound slightly different. It's a white key. It has an F on the back. Maybe for Fahrenheit? Now that I'm paying attention, the room IS a nice temperature.Fifth key:
This isn't a piano. Let's listen to it again... I know! It must be a harpsichord! A harpsichord? Hmm, it does sound like one. It's a white key. It has a G on the back. G for grandpa... Hm? You say something?Sixth key:
It's actually a harpsichord instead of a piano. Harpsichord... It goes by "cembalo" in musical instruction, I believe. The white and black keys on one of these are usually reversed, but not in this case. It's a white key. It has an A on the back. The first letter of the alphabet. But I doubt that means anything here.Seventh key:
What exactly is the difference between a piano and a harpsichord? The number of keys is one, but the biggest difference is the sound they make. Right. A hammer hits the strings in a piano, while a harpsichord has its strings plucked. ...Which makes a sound like this. It's a white key. It has a B on the back. As in B-movies? I hope we don't die in lame B-movie style...Eighth key:
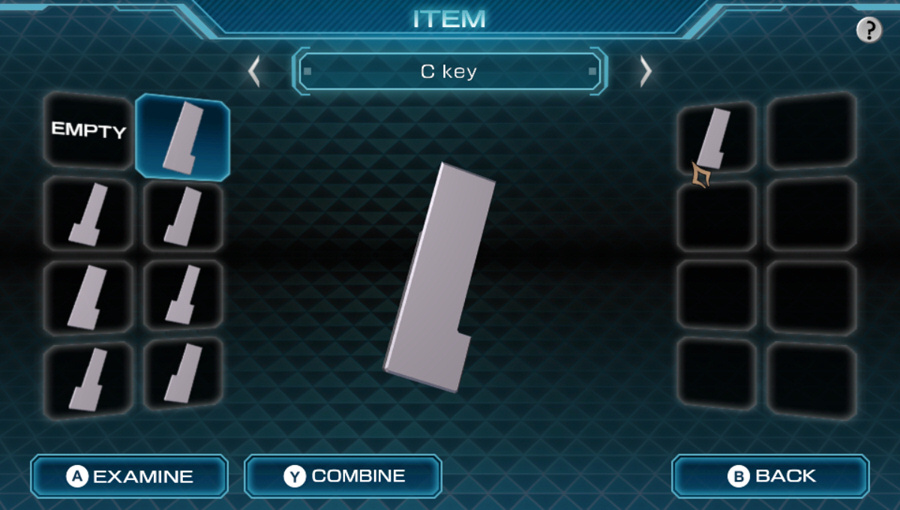
I don't really see a point in trying to figure out why this instrument is here... You're right. All the white keys are off now. What do we do with them? It's a white key. It has a C on the back.Yeah the last one is another "C" key. They're identical and interchangeable.
We've collected eight keys, let's see what else is in this room.
 Then maybe they're useful somewhere else.
That was clicking where the keys were while holding a key. If empty-handed:
There weren't many keys to begin with, and now only the black ones are left... Sooner or later, the same thing will happen to Sigma's hair. Ridiculous! Remember what you saw 45 years in the future, Phi! My hair was fine!So far, I'm liking the D-Team dynamic way better than the other two teams.
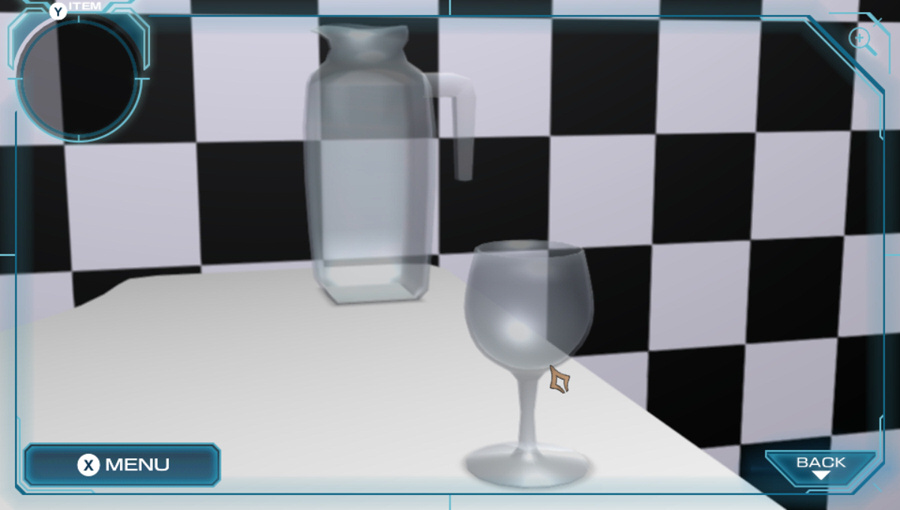
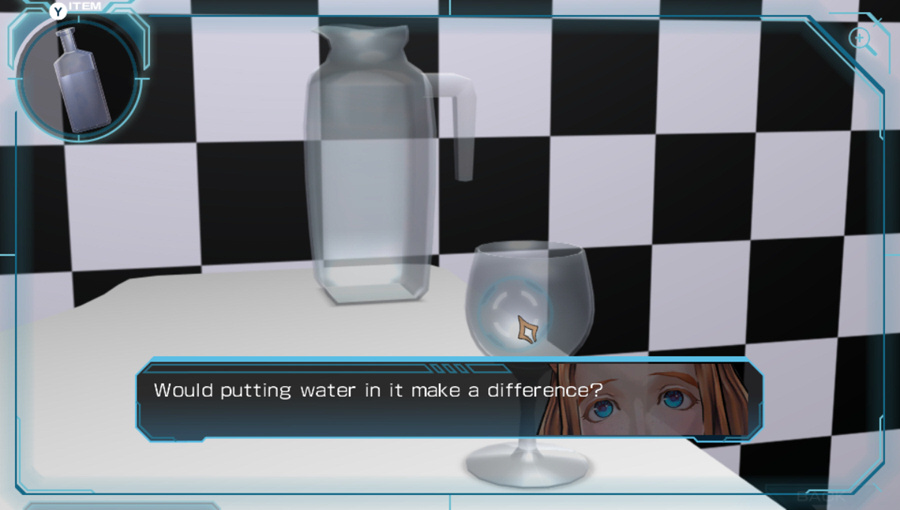
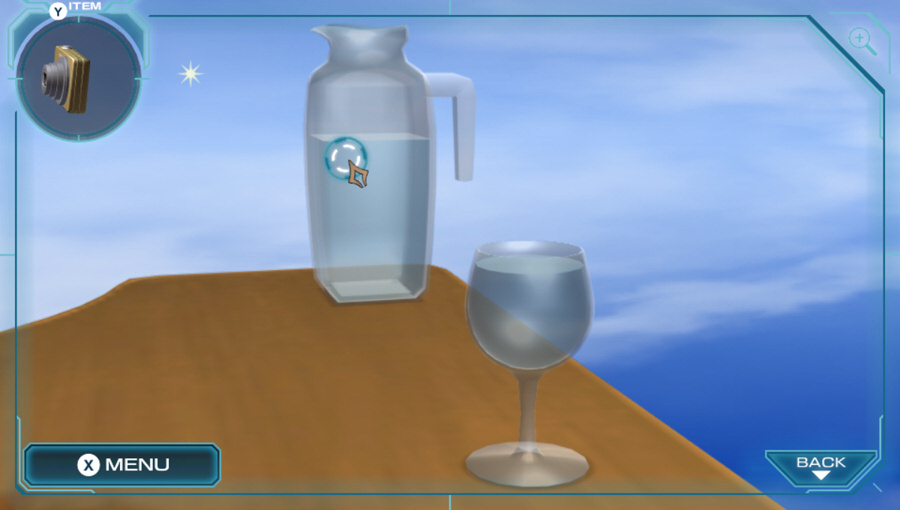
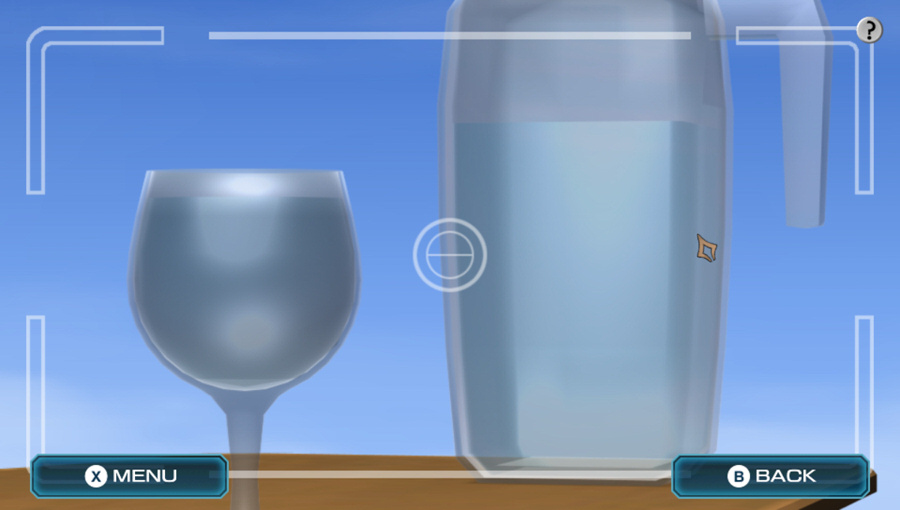
On top of the piano, we have a wine glass and a pitcher.
There's a wine glass here. Huh. It's stuck in place. Why?Because our puzzle solving crew likes to pick up anything that isn't nailed down. Hence why you have a keyboard instrument that is missing all of its keys.
It's a pitcher. Huh? Is this stuck here? We can't use it like this...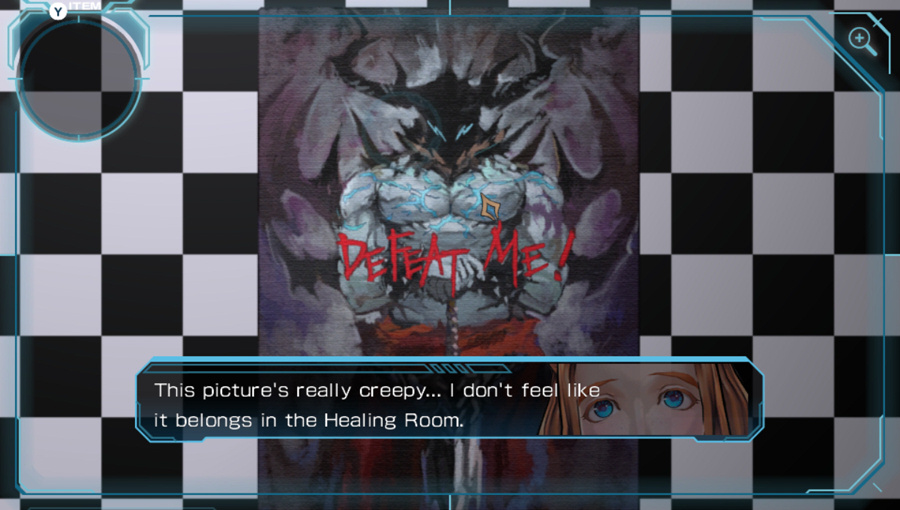
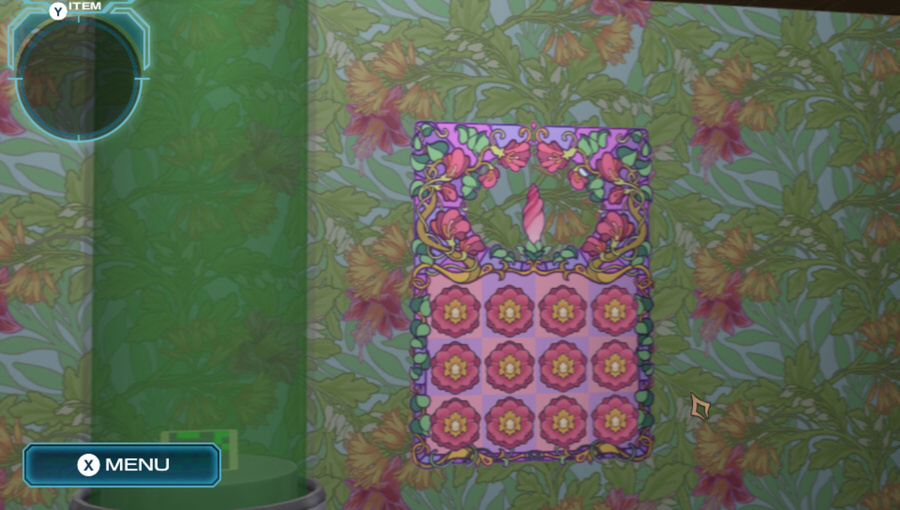
To the right of the piano is this strange poster.
Kind of hard to relax when a giant, scary man is staring you down. The words "Defeat me!" are written on it... What do you think it means? Maybe it's like a punching bag, something to relieve stress...?Second time is slightly more interesting than normal:
A picture of an incredibly muscular man. It says "Defeat me!" Is this from Zero? But how are we supposed to defeat a picture? Rip or burn it?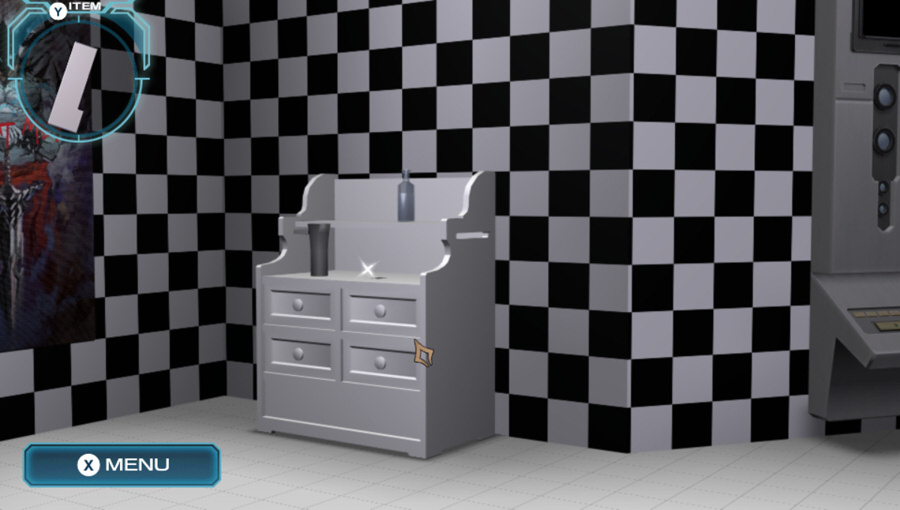
There's something sparkling on the dresser, next to the poster.
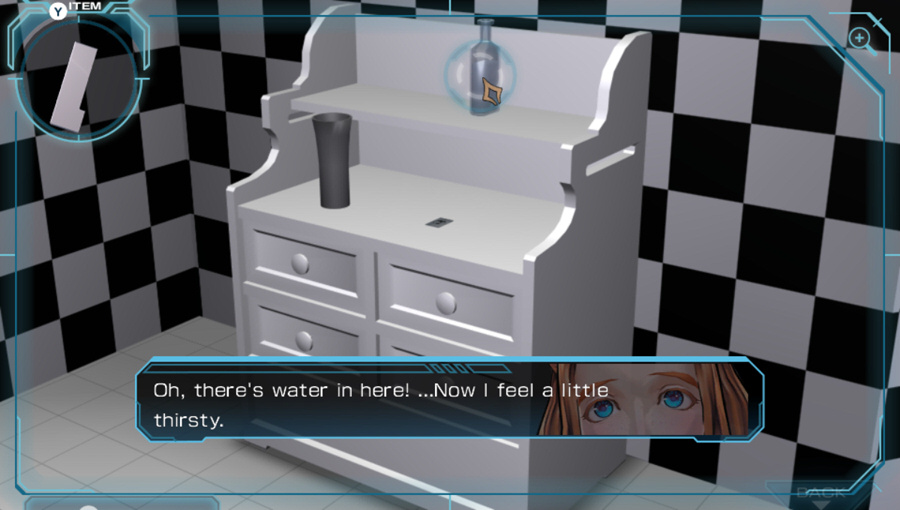
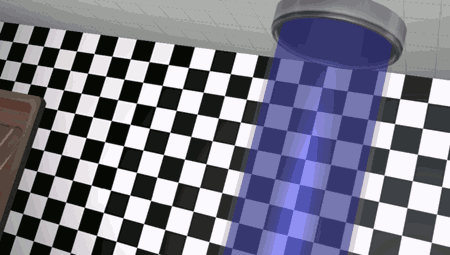
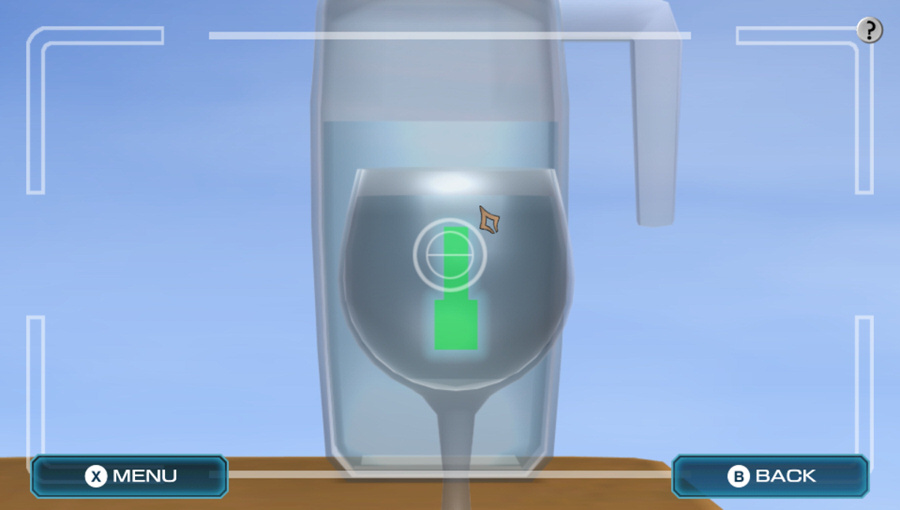
But first, some water.
 It's kind of making me thirsty... You want to drink this? ...I'm going to put a stop to that before you start.
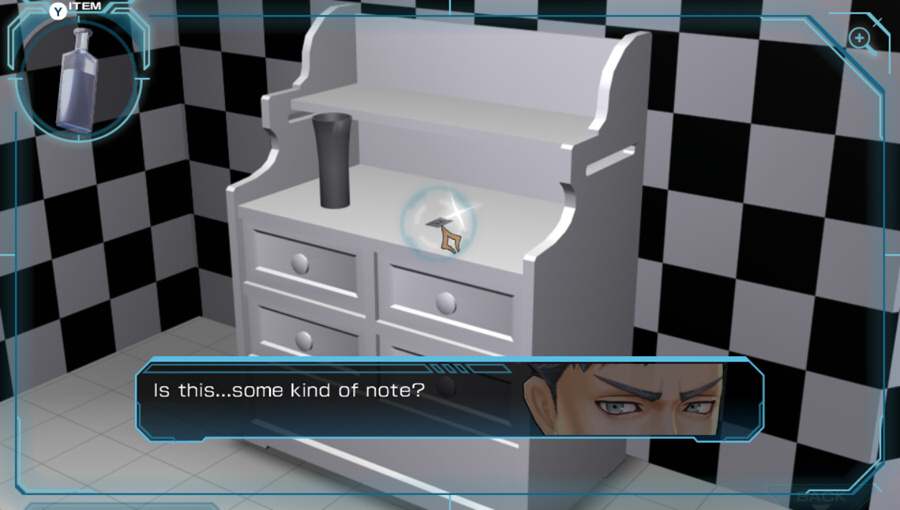
I'm not sure why a note would be sparkling like that but I do like how the game is trying to draw extra attention to small, easily-missed objects.
We just saw the pitcher and glass referenced here. Guess we're supposed to look through them? They're full in the picture, and we just picked up a bottle of water, so...

Trying to combine the tumbler with the water we just got didn't work, so it must be used for something else here.
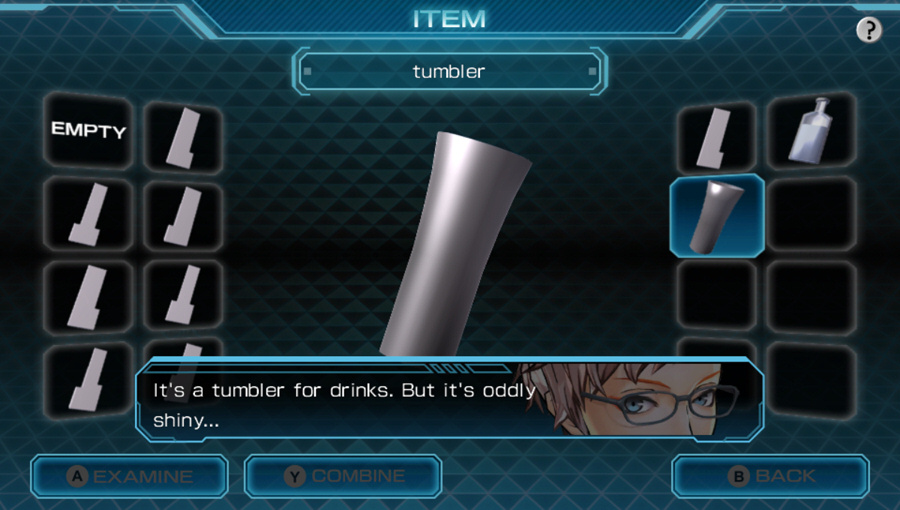 It's polished so much that you can see your reflection, if a bit distorted. Wh-Why did you two suddenly get so close? Your faces are crushing me!
Keep this in mind if we need a distorted reflection later.

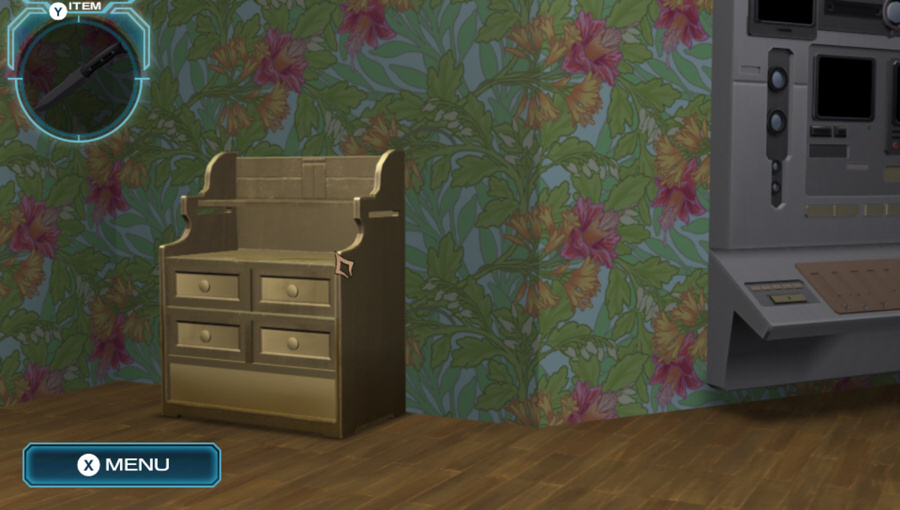
Guess I should show off the text for the cabinet itself.
I've always liked this kind of furniture. I want things like this in my home after I marry, hehe. ...That so. I can see that.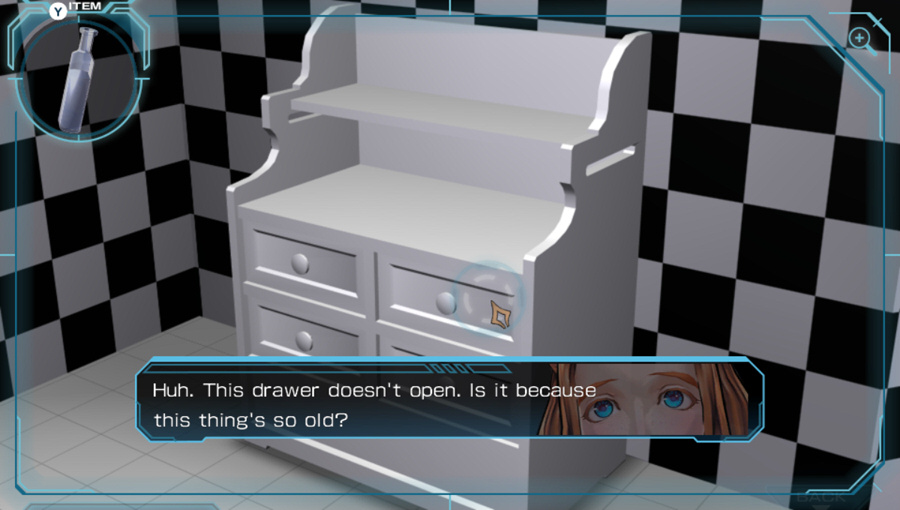 I doubt it. This one here opens.
The drawer opens.
Anything inside? Yeah, some matches. Don't say that, it's bad luck... My heart feels cold now. We can only hope our lives won't end like a shooting star...
Apparently these lines are in reference to The Little Match Girl, a weird Danish folk tale that you can read about in the link if you want. More importantly, we can use them to light something on fire.
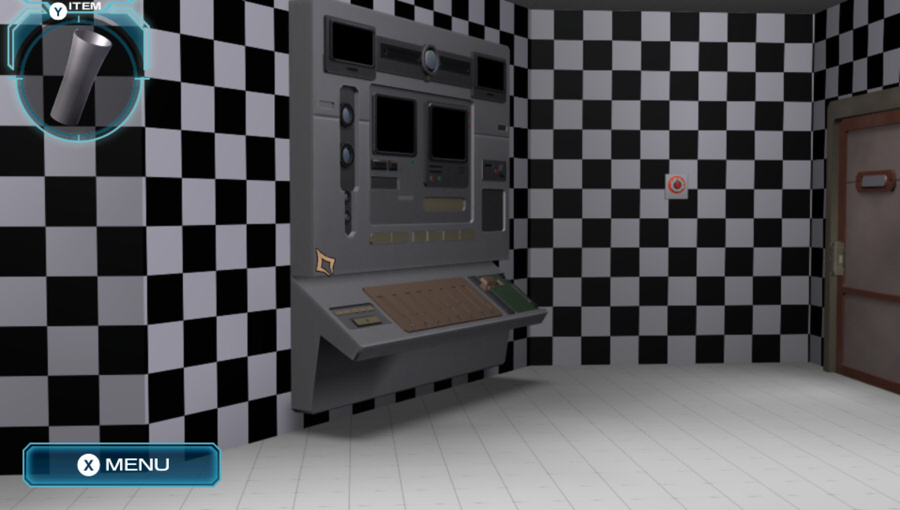
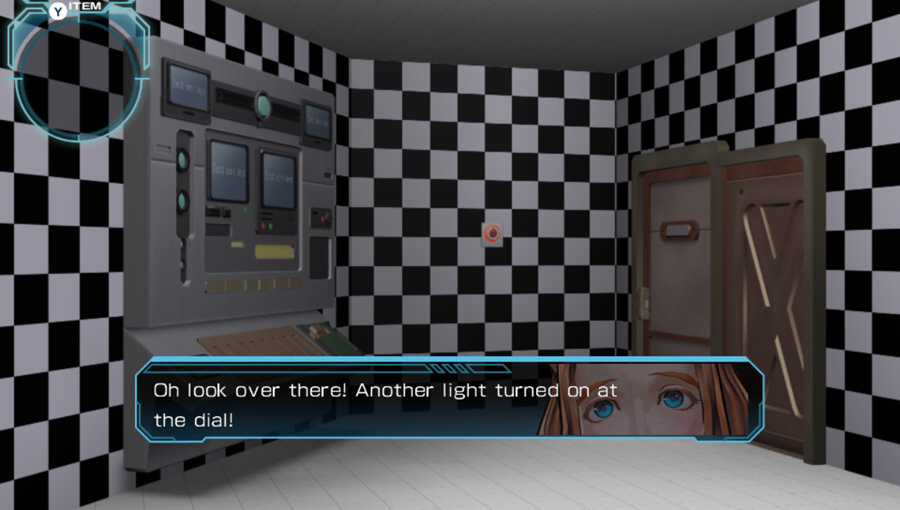
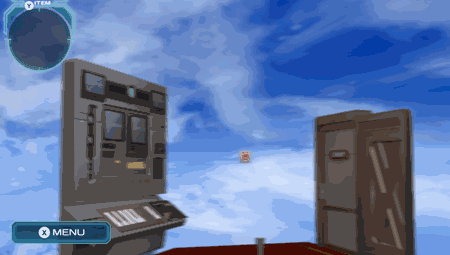
Still more in this room. Some kind of large control panel is up next.
This appears to be some sort of control console... But there's no power.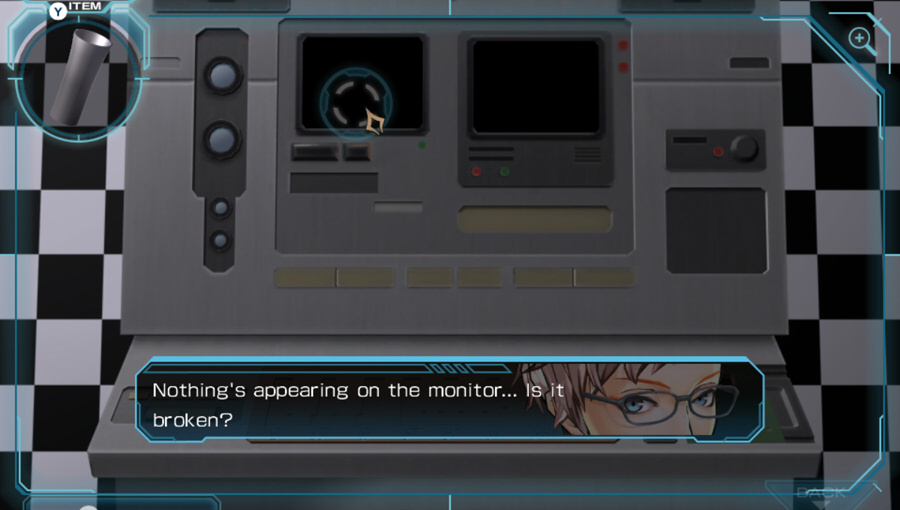 Or it could just be that the power is off.
Not much to this thing yet. There's a button on the lower-left...
This looks like a play button for something. Let's push it. Hmm... Not responding. Does this console even have power?The strangely-shaped slots at the bottom...
What's this? There are eight slots with CEDFGABC beneath them. CDEFGABC... Somehow that seems familiar, like I've seen it before. These slots are unusual shapes. Let's see if we can find a clue about them.Our
Isn't an octave range CDEFGABC? Oh... Come to think of it, this shape looks like a piano keyboard.There's also a lever to the right of the key-slots...
Hmm, this lever can't be pulled down. It's probably locked in place.Let me guess, it needs POWER.
Next to the lever is a panel of some kind...
Does this cover open? Should we give it a try? No, I don't think so. We can't open it now.So, yeah, not much to do here yet. Moving on...
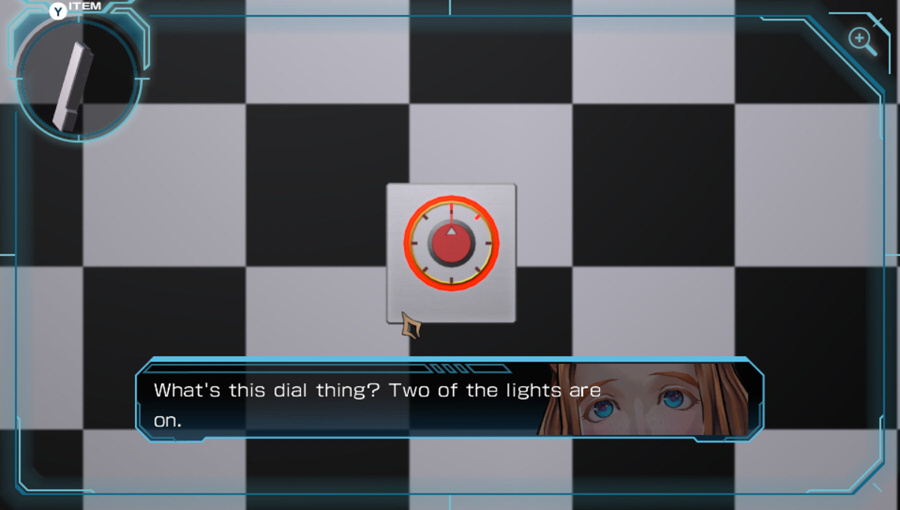
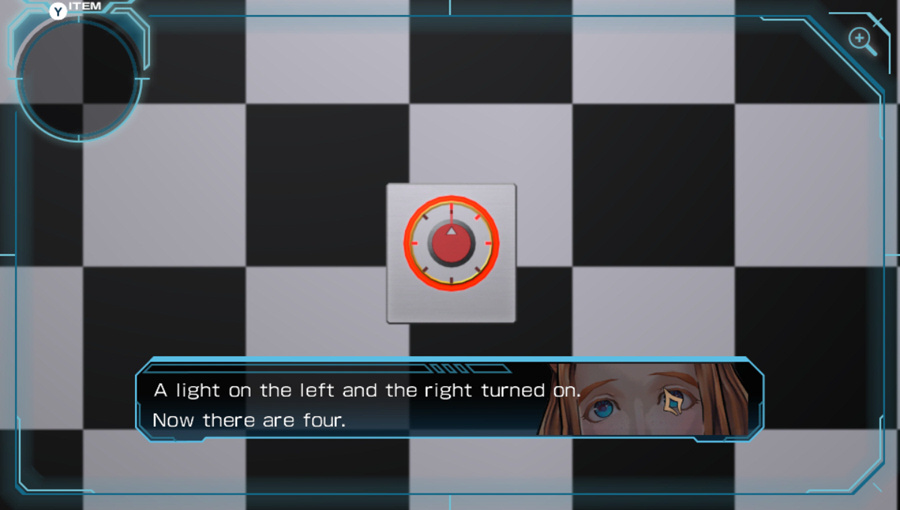
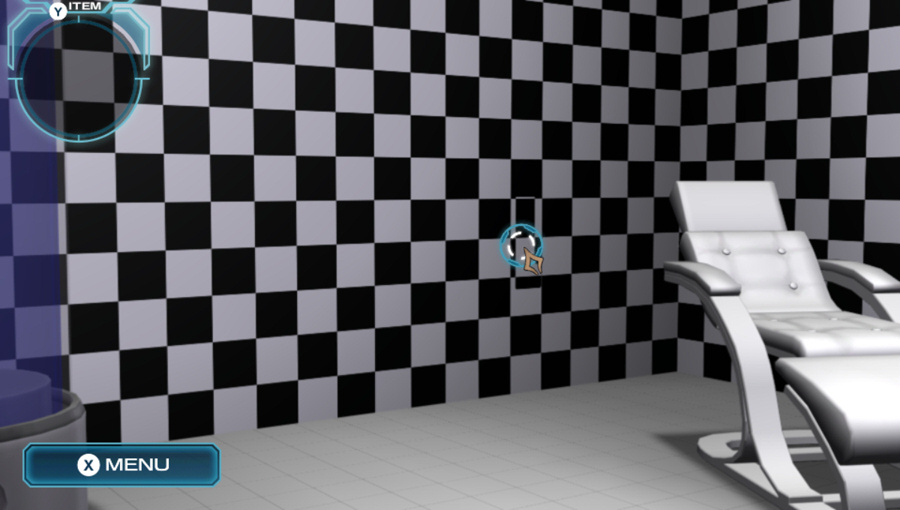
On the wall to the right is a dial. It's hard to see even live but the upper and upper-right dashes are lit up, with the dial currently pointing to the upper line.
Hmm, good question. I'm sure it's safe to touch... No, we should examine it since we have no idea what it is. Trial and error's the only way. There aren't any trials if you die the second you touch it...I think Phi's first line here was supposed to say she's not sure it's safe to touch. Anyway we're going to finish exploring the room first.
...We may as well leave it like this for now.Yes, thank you, Phi.
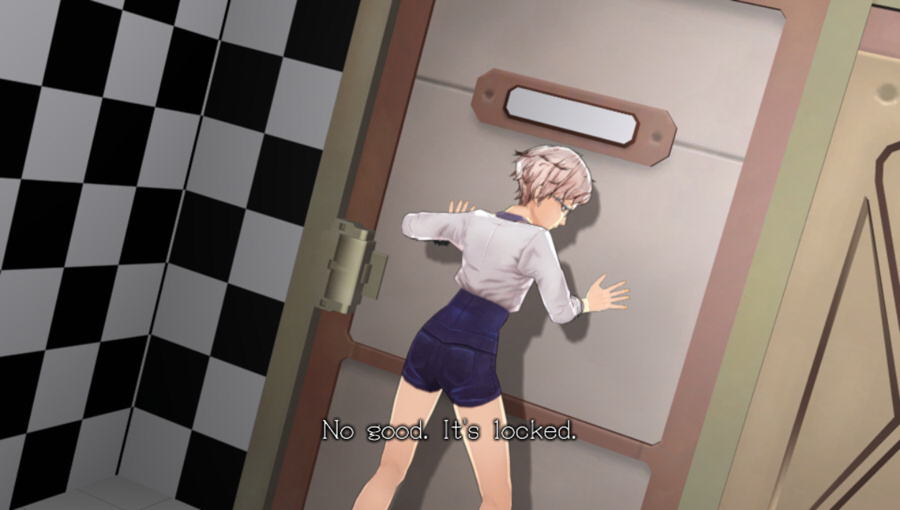
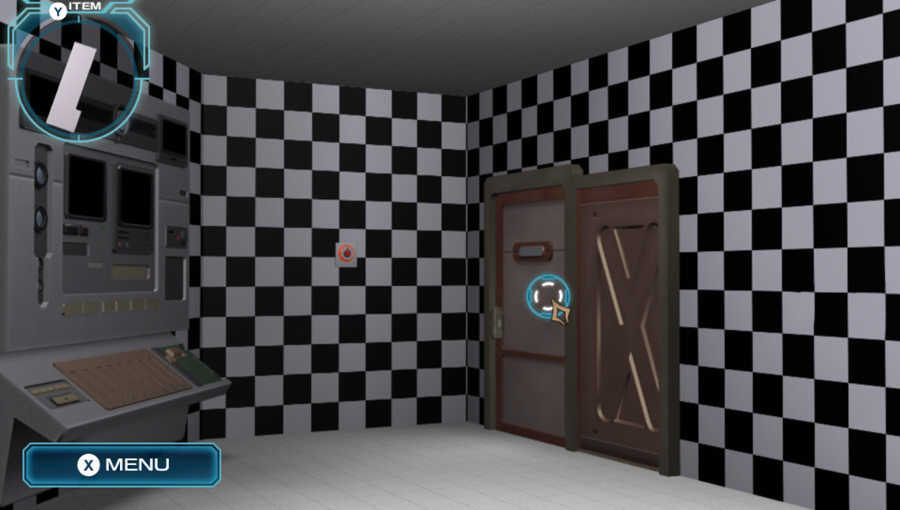 It's no use. It's locked... Then we'll have to play by Zero's rules then. But it's still too early to give up. He's right. Let's do what we can right now.
Doesn't seem to be any method of unlocking the door, either. No keypad or anything like what we saw in the Pantry.
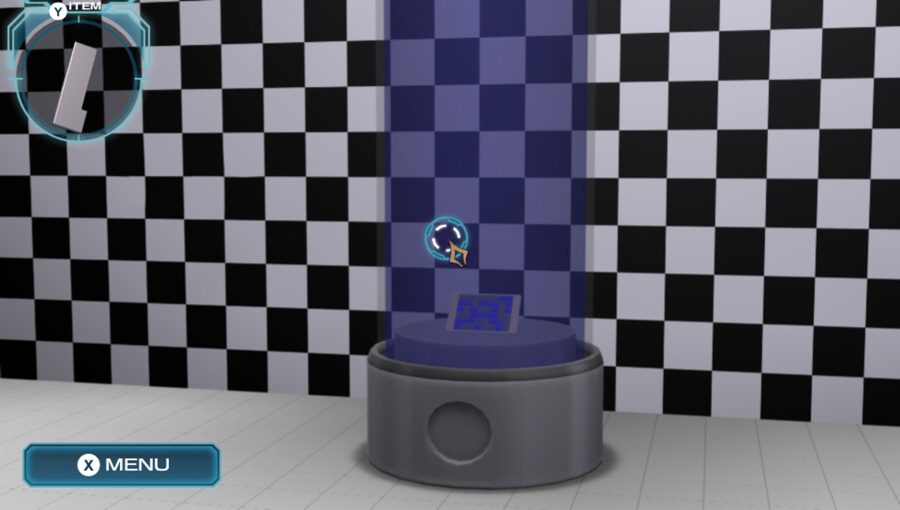
What's this thing?
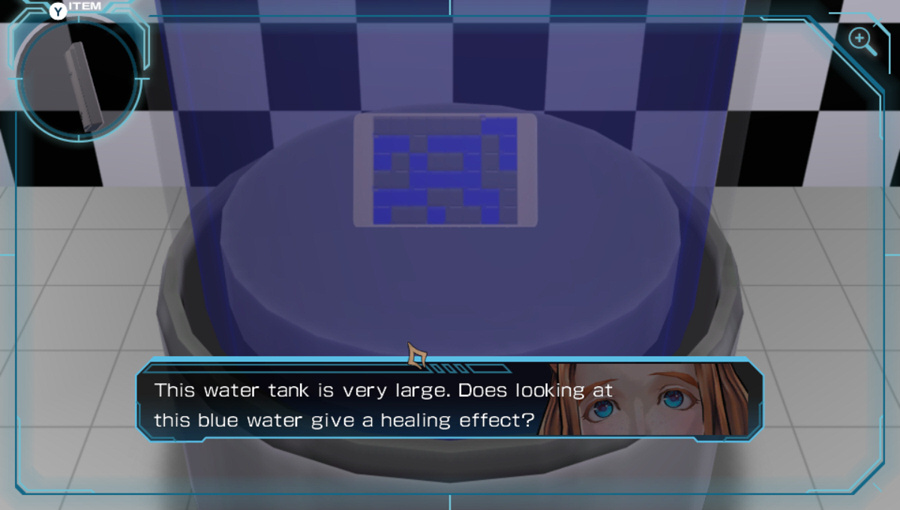 Exactly. The color blue increases serotonin secretion, making your body more relaxed. One can hope it helps with anger management if you're locked up in a place like this.
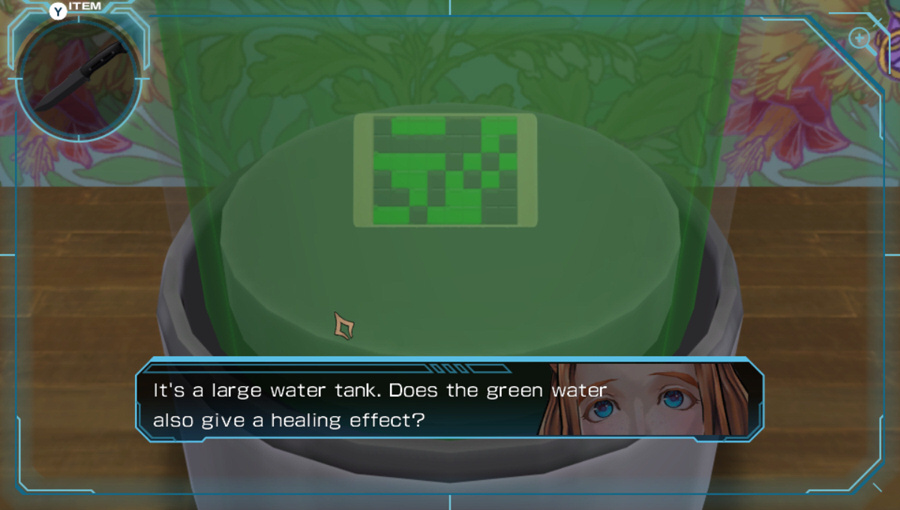
There's a strange display with colored squares on it, how about that?
What's this pixel plate doing inside? It's displaying in black and blue.Well that was helpful.
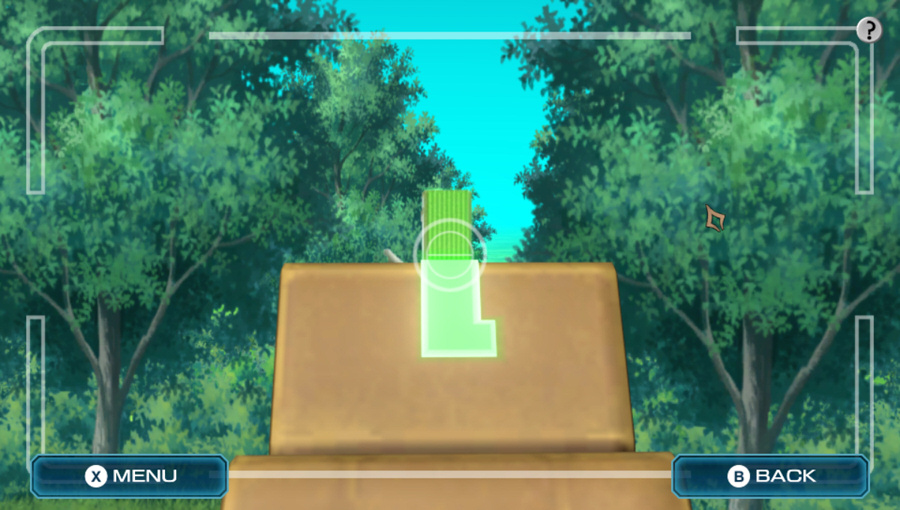
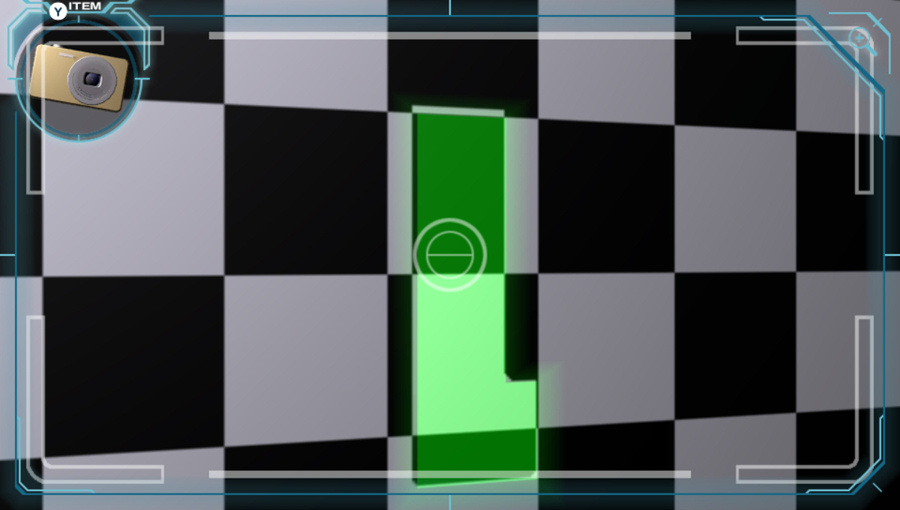
We've almost come full circle. There's just this distortion on the wall to check out.
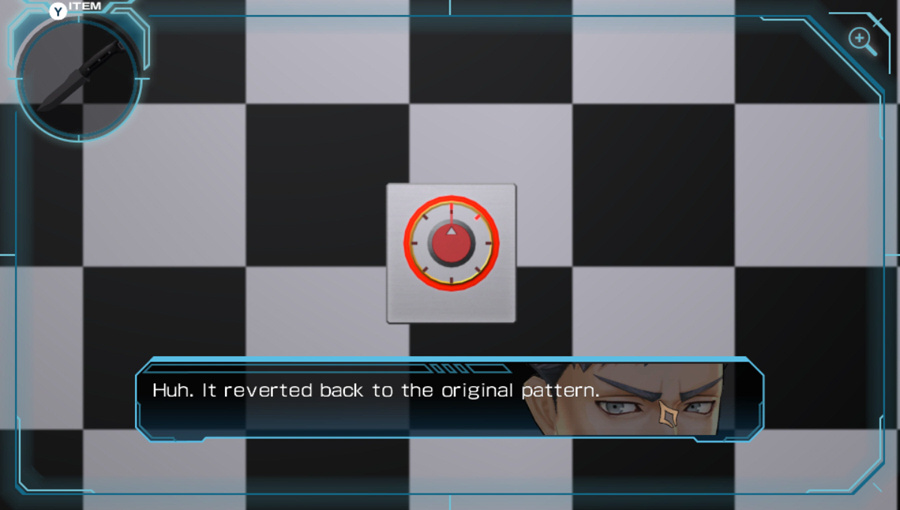
 Hm. Maybe it was made this way on purpose?
Well it seems like an unlikely accident. The reversed colors form something of an "L" shape. Or maybe a piano key...
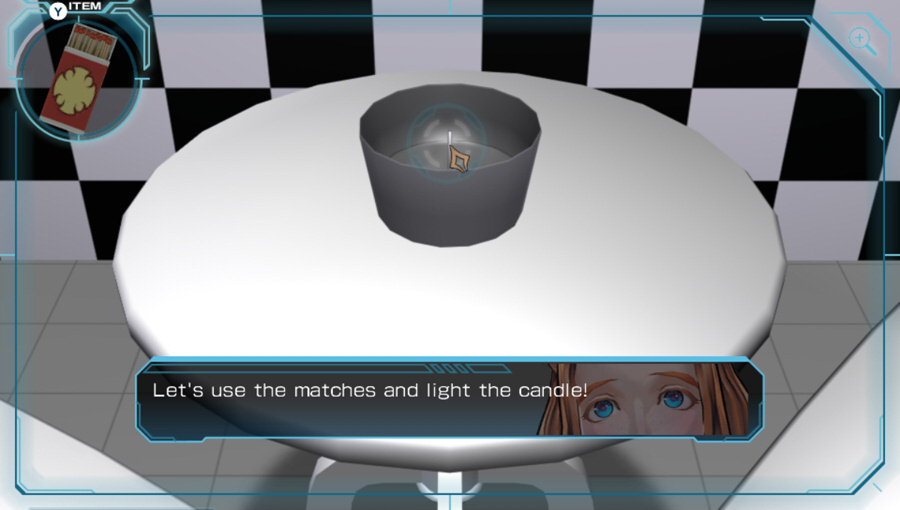
There are a couple things we can do with what we have so far. The first is lighting the candle over on the table.
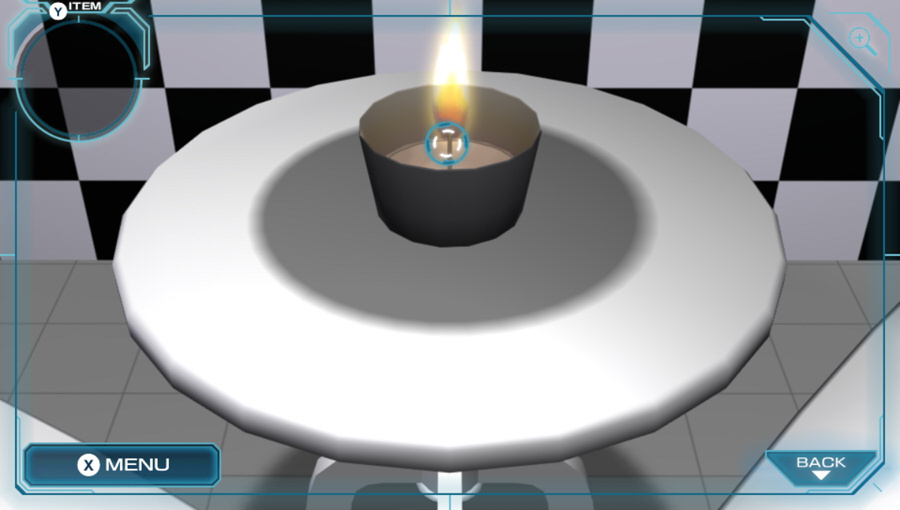 I can smell the scent from the candle filling the room. It'll help us focus. ...So relaxing.
We can also take our water and fill up the wine glass and the pitcher.
 No idea, but we may as well do what we can.
For the pitcher:
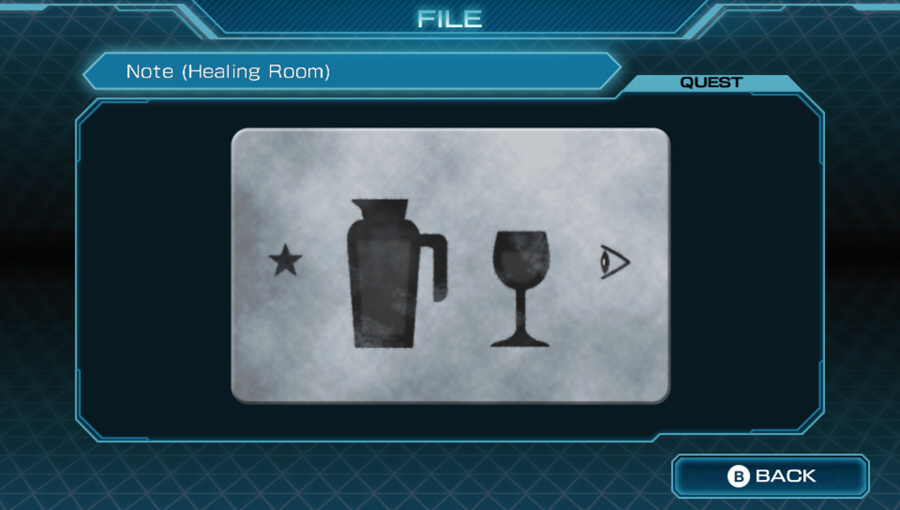
Will something change if we pour water in? Doubt it. But we may as well.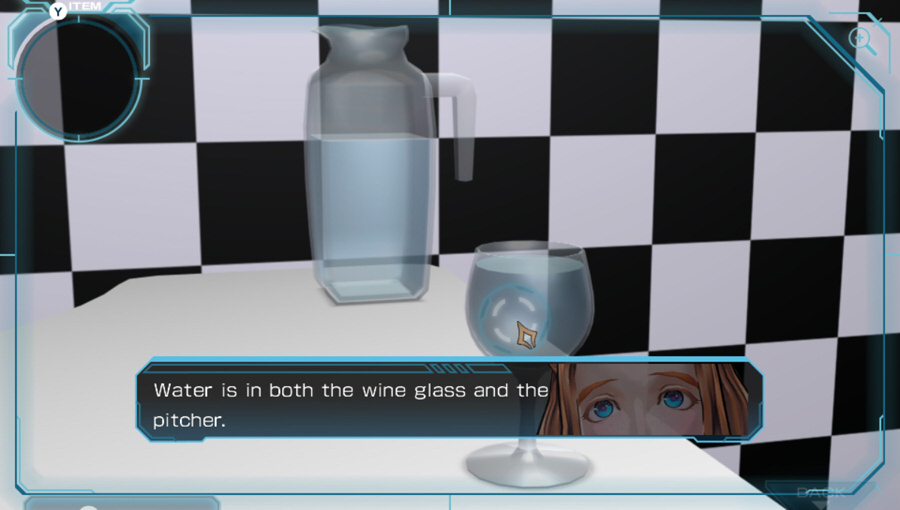 The note we found has a star, a pitcher, a glass, and an eye. What's this star then? I don't see anything like that.
As the dialogue implies, nothing actually happens yet. We still need a star.
Nothing left to do but turn the mystery dial.
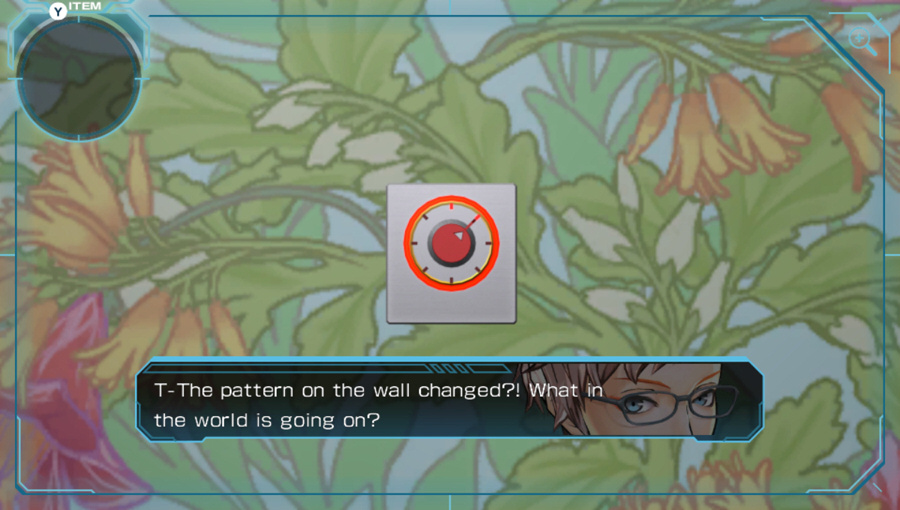 Not just the wall! The chair... The table... Even the color in the water tank! Amazing! It doesn't look like simple projection. Must be some kind of projection mapping technology. What, you're saying it's changing color on its own? Like a chameleon? I wouldn't know. I've never seen this kind of technology before either. Incredible...
Sigma, from 45 years in the future and specifically researching advanced technologies for setting up VLR, hasn't seen this kind of technology.
Other than the color differences, there are a few key changes to go investigate.
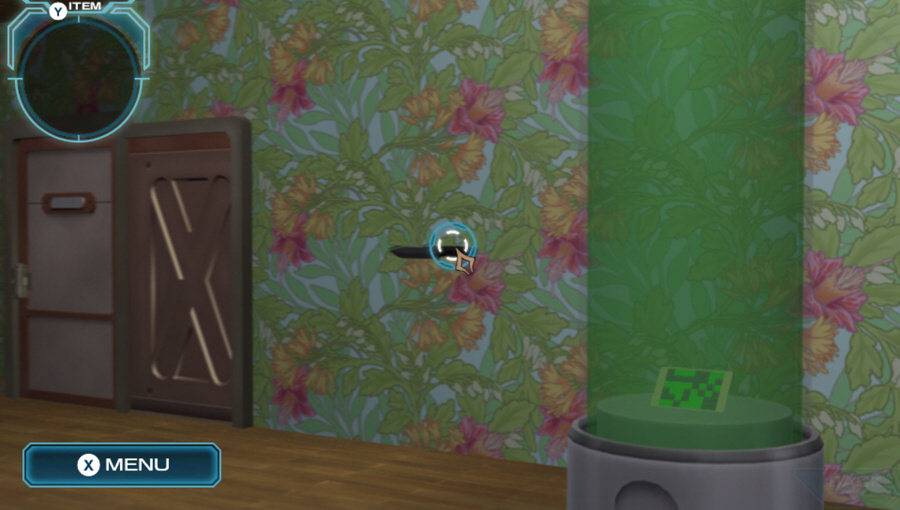
First is this strange black mark on the wall.
 Huh! I didn't catch it before because of the pattern. A weapon... What is Zero planning by giving us this...?
Hmm, more weaponry...
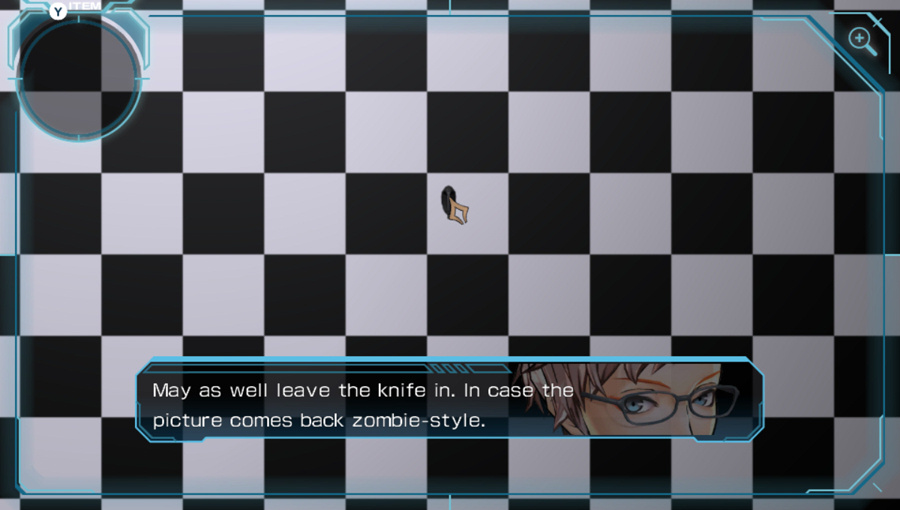
 Oh, be careful handling that! It's very sharp. Could that mean we could use it as a weapon?
The knife is completely invisible in the previous room pattern. It's not selectable at all until now, either. It's kind of a cheat because the size of it on the wall is much bigger than one of the black-and-white tiles, so it really just wasn't here at all until now.
 The color green increases acetylcholine secretion, balancing the mind and body. It's gentle to the eye. What's this pixel plate doing inside? It's displaying in black and green.
The pattern on the pixel plate is different now, but it's not yet clear why.
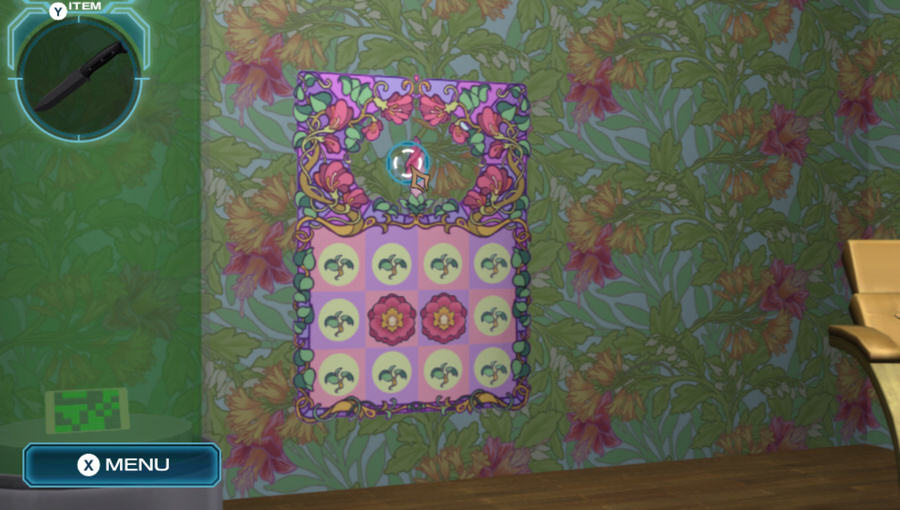
A strange figure on the wall here.
 Yes, but why didn't he just make it a large flower? There must be a reason. Maybe this bud stands for something...
Clicking the area down below gives a different result...
There are both flowers and buds here. Oh, the picture of the flowers changed when I touched it. The picture reacts to being touched... Why don't we see if we can make them all bloom.
Here's another puzzle. Touching a sprout advances it two stages to full bloom, while the neighboring tiles advance one stage from sprout to bud. The goal is to get every panel to bloom, so every sprout has to move two stages while the existing blooms have to not be changed, or get moved three stages to get back to a bloom. Here's the solution at double speed:
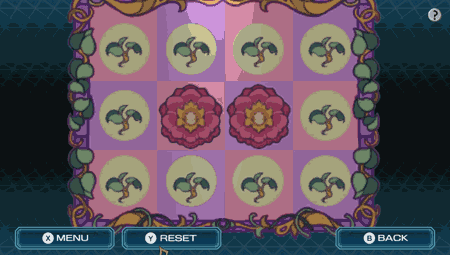
Like many such puzzles, the solution can easily be found by exploiting the symmetry/geometry of the puzzle itself. Just click on every other sprout once.
We made all of them flowers, but ...nothing's happening. Maybe it's just a game? No, I doubt Zero prepared anything meaningless. There should be more to this. Then we'll look at it again later. Let's check other places for now.This sequence is one of the weakest parts of this puzzle room. There's no reason not to have the payoff for solving the puzzle come now, as you'll see in a bit.

Nothing different with the chairs, table, or lit candle. Other than the color, anyway. The text descriptions are the same.
The harpsichord is still the same, too. There's something missing to the right of it, though.
The poster of some guy begging us to defeat him was here before.
The cabinet and the control console are still the same, too. So the only things we really accomplished here are playing the flower game, to no result, and picking up a knife.
 Turning the dial changes the pattern on a large variety of things in this room. I know it's not the best time to say this, but this is amazing! I wish I had one at home!
So let's change the room back.
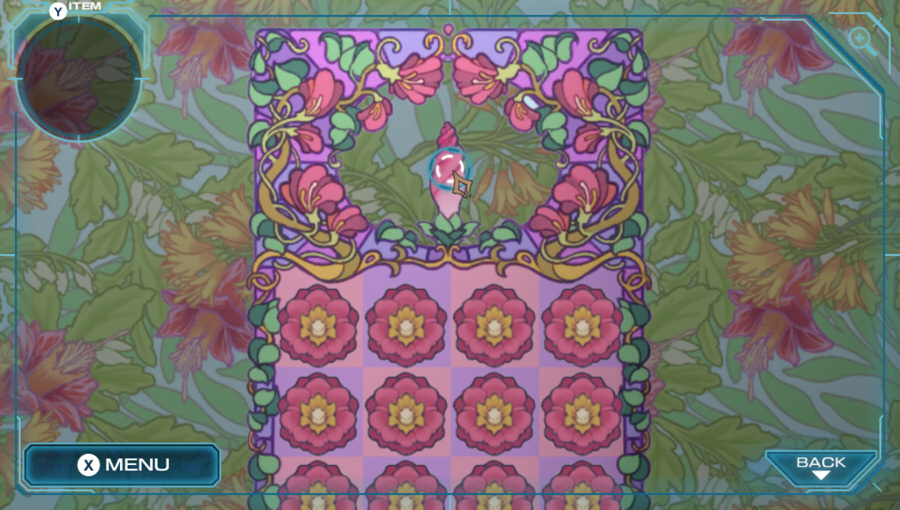
 I still think it's some super involved riddle. No way it'd be this simple...
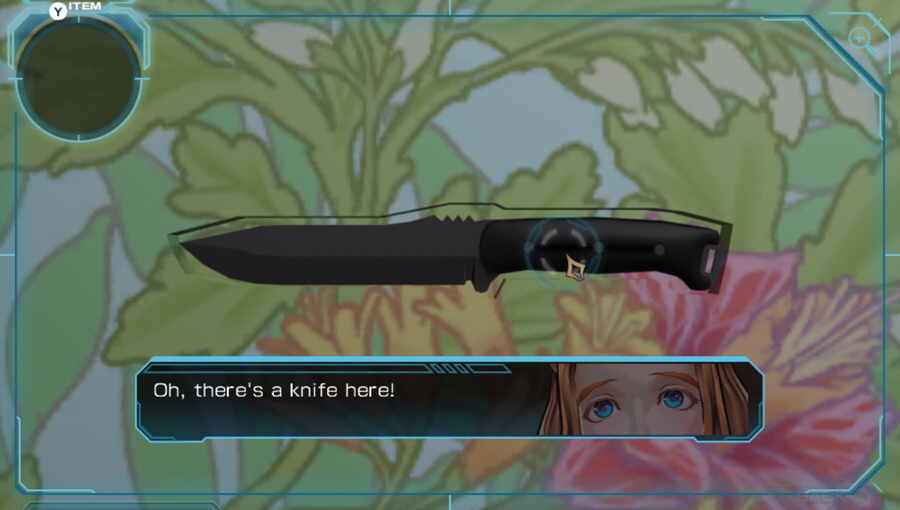
Nope, we just have to stab the poster with the knife.
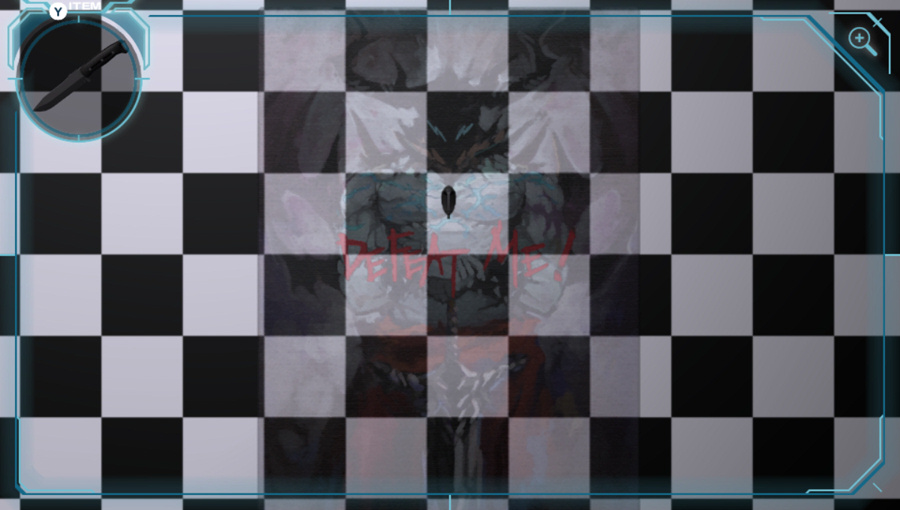
The knife easily penetrates the wall, and the image fades away.
The picture disappeared! We defeated him! I can't believe it... It wasn't a riddle...This puzzle offends Sigma's puzzle-creation sensibilities.
 Maybe we can change the room to another pattern. Let's leave the old fogey to himself.
Somehow, getting rid of the image makes another option on the dial available.
Thanks, Phi.
What the game does not tell you, is that the control console is now powered on. You can tell that the monitors are now lit up, but that's your only clue.
 Maybe there'll be more wall pattern options with the additional lights on. It's possible. Let's see.
We actually unlocked two additional options here.
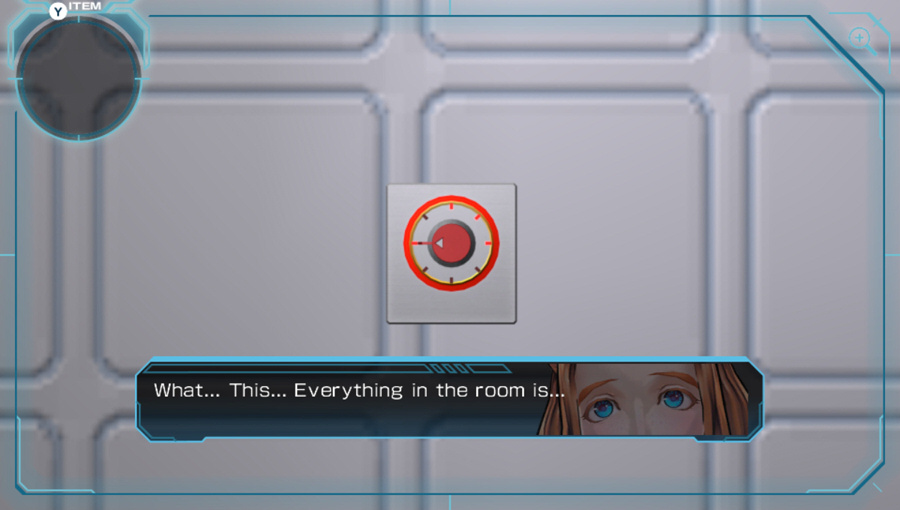 Oh. There's no colors or patterns now. I think the power is off.
The option on the left actually turns off all of the patterns, and is optional and almost completely useless.
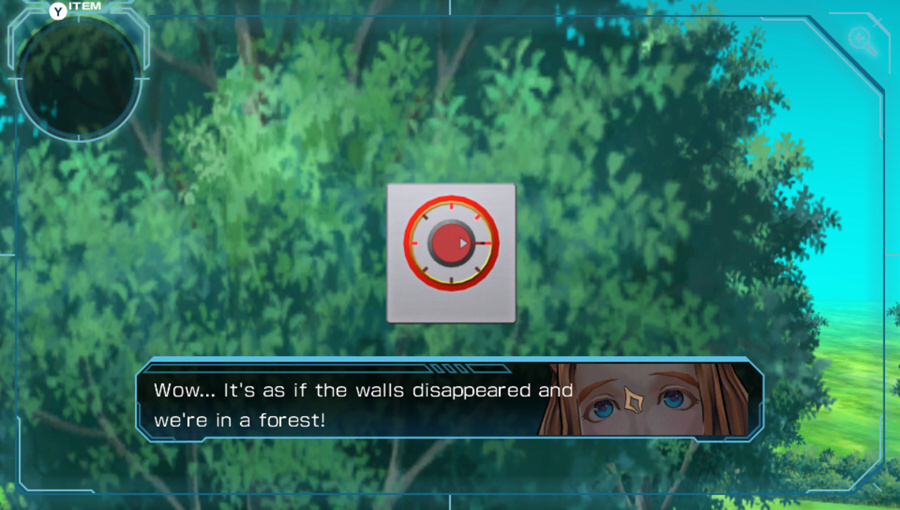 It feels like we're walking in the woods. It's just like being outside... Don't be fooled. It's just an illusion. Let's get out of here and breathe the real forest air.
Maybe the wall patterns are more convincing in person.
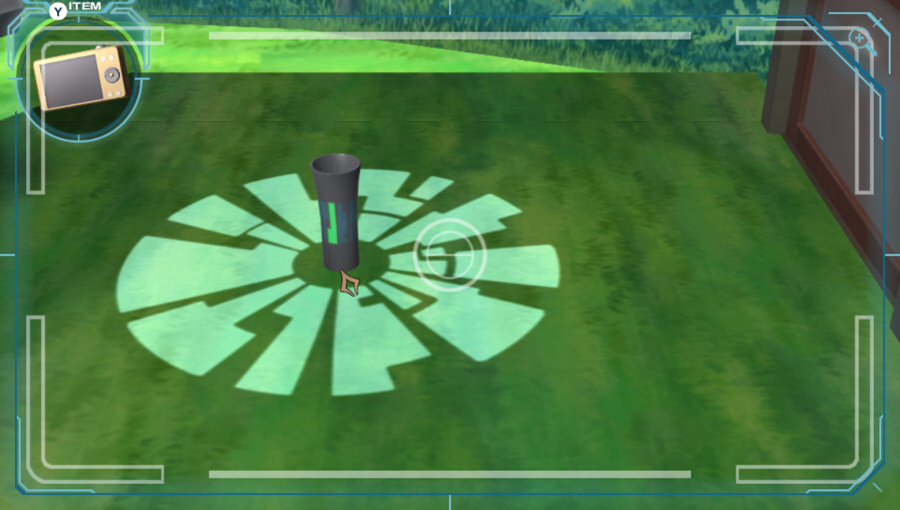
Something new on the floor, here.
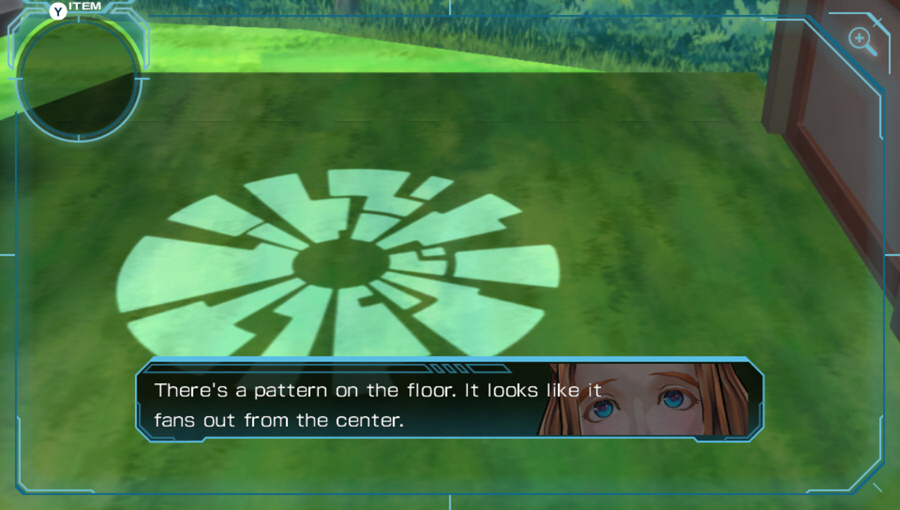
There's a pattern on the floor. It looks like it fans out from the center.
I wonder what it is. If we could look at it from a different angle...The second set of dialogue has a more direct hint.
Hmm... What if we change the angle, or maybe reflect it somehow? A reflection? I think that thing would just fit, so why don't we put it in the middle?Did someone ask for a distorted reflection? Let's put "that thing" there, then.
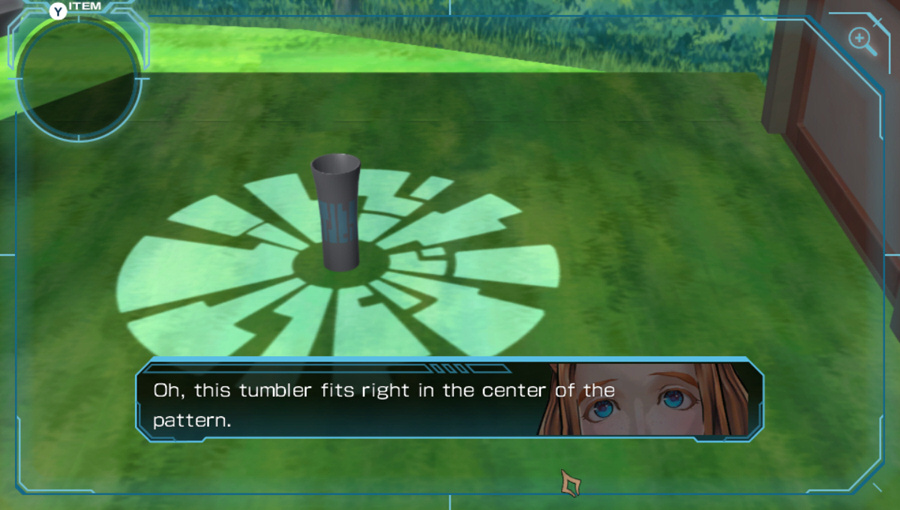 Look at the surface of the tumbler. All the curves are now straight on it. You're right... Do the shapes mean anything?
We still don't know why we're doing all the things we're doing yet. But there's another more direct hint by clicking on the tumbler after it's in place:
The tumbler is in the center of the pattern, which is then reflected onto the sides. The reflections... Doesn't this one look kind of like a key? Oh yeah, it does look like one.Like one of the keys we're holding from the harpsichord, not a traditional key for opening a lock.
Before going any further, let's take a look at the whole room in forest mode:

Now to continue with the guided tour...
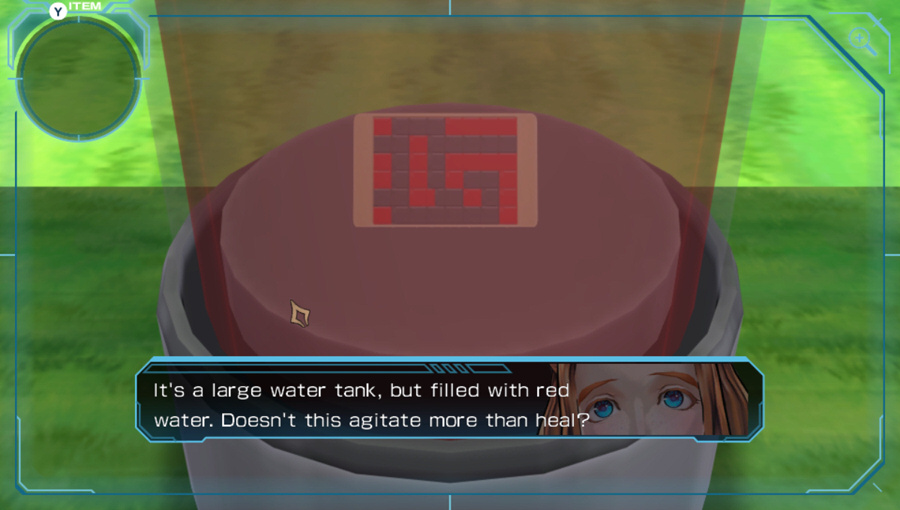 The color red increases adrenaline secretion, which makes you more excited. But that's effective for relieving stress. So, in the end, it's healing.
The water tank is red now.
What's this pixel plate doing inside? It's displaying in black and red.Different colors and patterns on the pixel plate.
Strange distortion on the wall and on the headrest of the chair, here.
The headrest has a different pattern than the rest of the chair. I'm amazed you spotted that. I need to pay more attention to my surroundings...There's another clue on the second click:
I wonder what this pattern is... It feels like it's cut off in the middle.We'll be back here soon.
The candle is casting some unusual shadows, but there's nothing to do here yet.
I can smell the scent from the candle filling the room. This works really well with the forest... It's helping us focus more. This must be what the Healing Room was for originally. So relaxing...
Nothing new with the harpsichord or the cabinet. And the knife is still stuck in the wall.
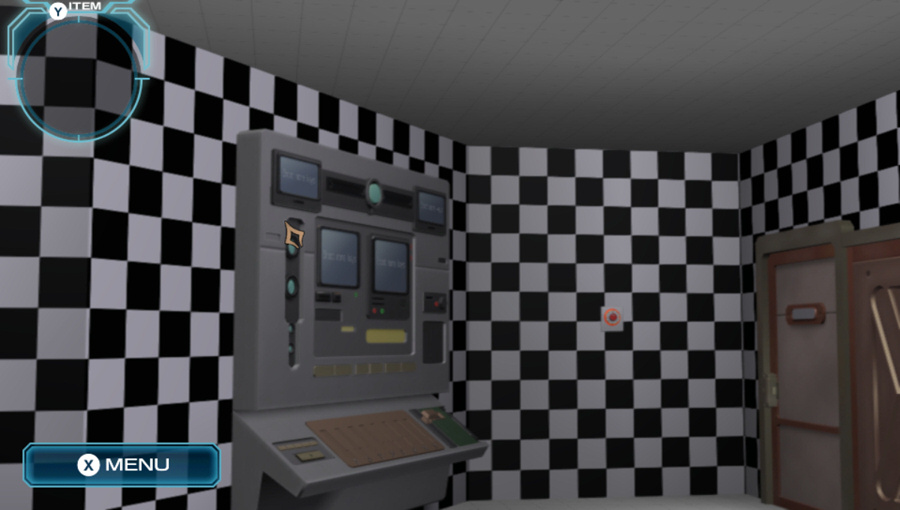
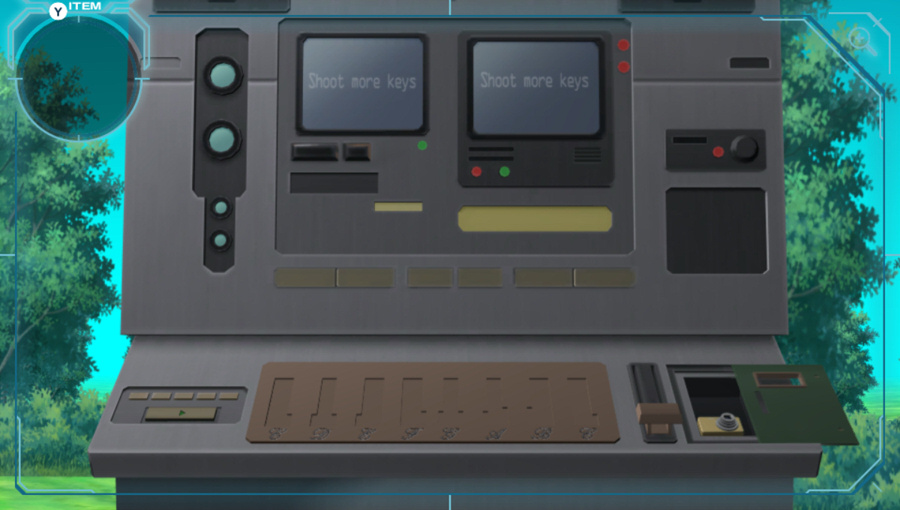
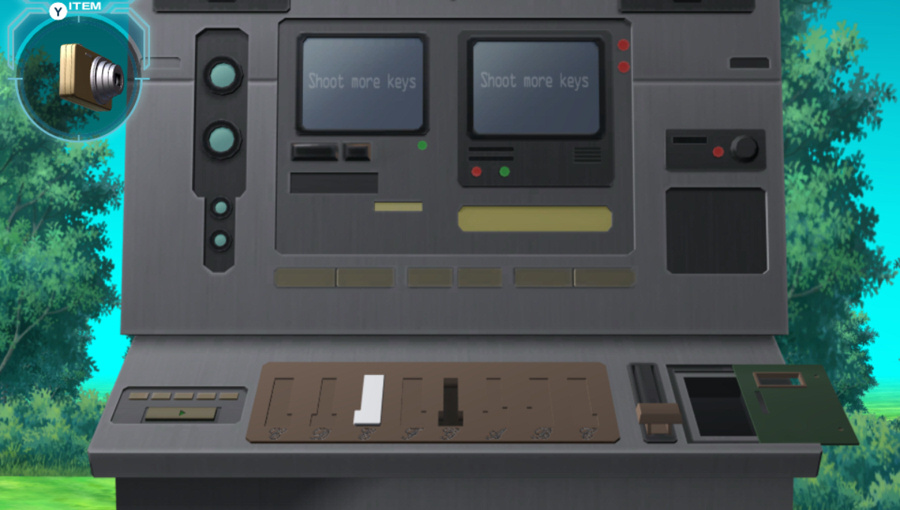
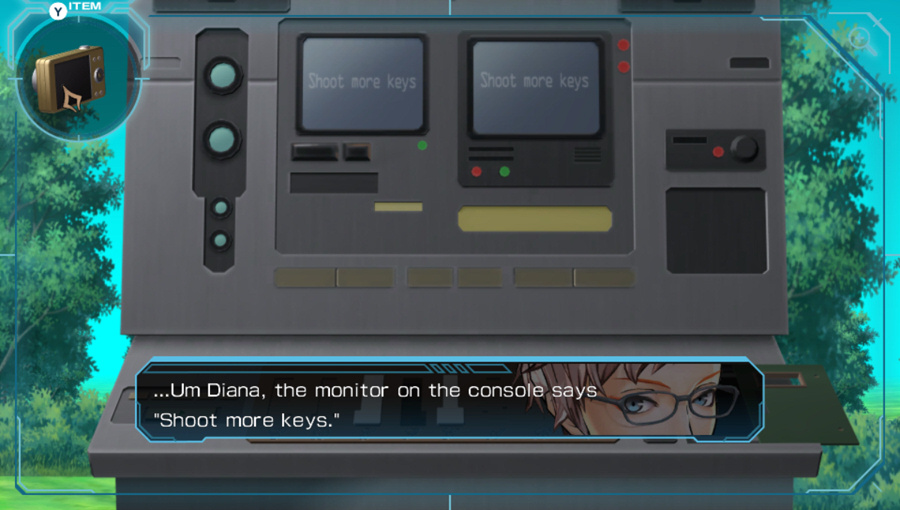
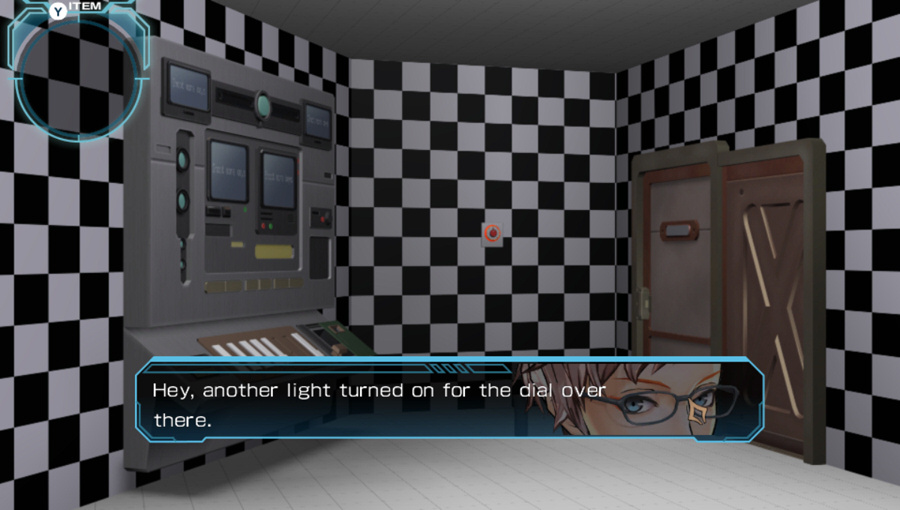
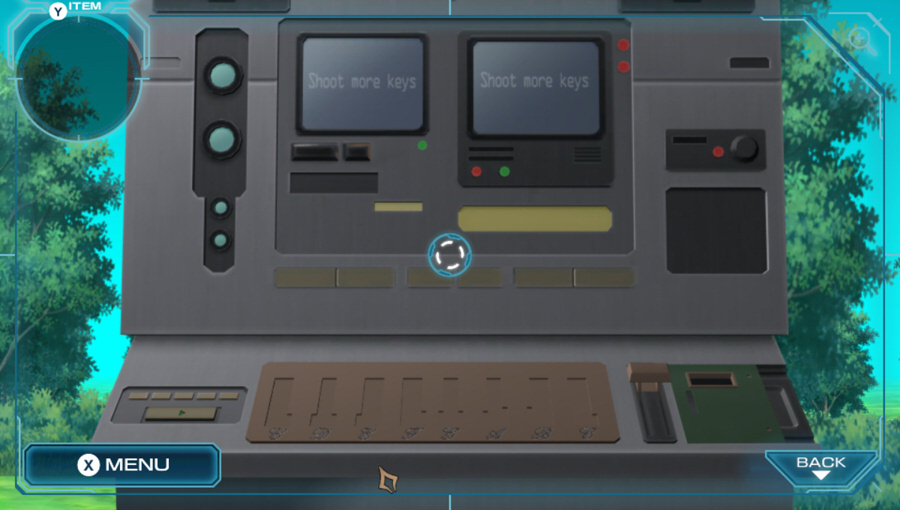 The power is on here, but just what does this device do...?
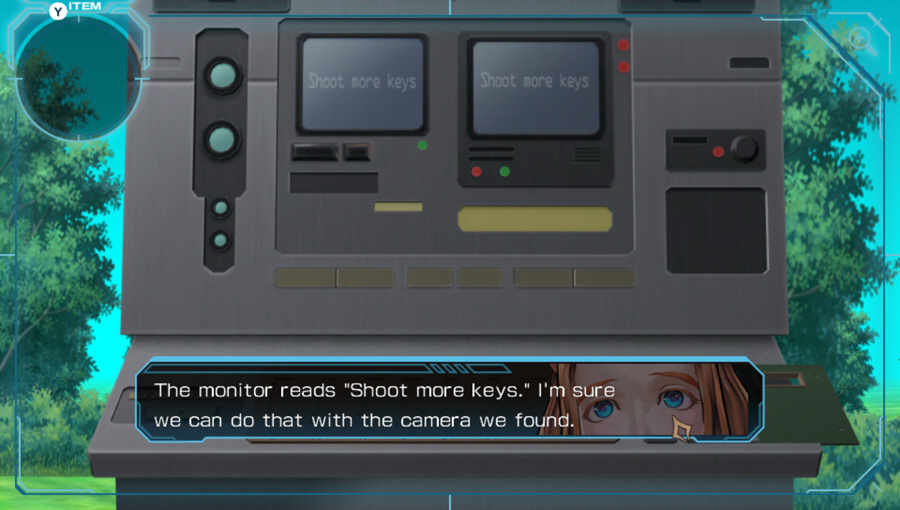
Only thing left is the control console, which now mysteriously has power. I'm pretty sure it got power when we stabbed the image in the wall, but I don't know why. What do those monitors say?
It says... "Shoot more keys"... Is this an instruction from Zero? What exactly is a key? And "shoot" as in with a camera? But we don't have one. It could be a clue for escaping the room. I'm reluctant to follow it, but let's remember it.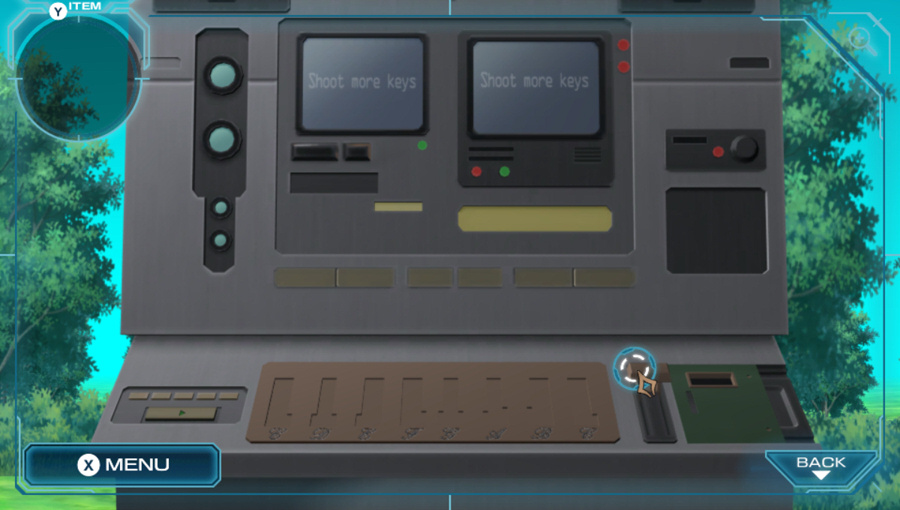
The next step is pulling the lever, which works now that the console has power.
How about we pull this lever down? Hey Sigma, what happened to caution? You're recklessly touching everything you see... Heh, if I worried about that we'd be stuck here forever. Test it all. I'm pulling this.I don't remember VLR having any of its puzzles be outright booby traps, so I'm not sure where Phi's attitude comes from here.
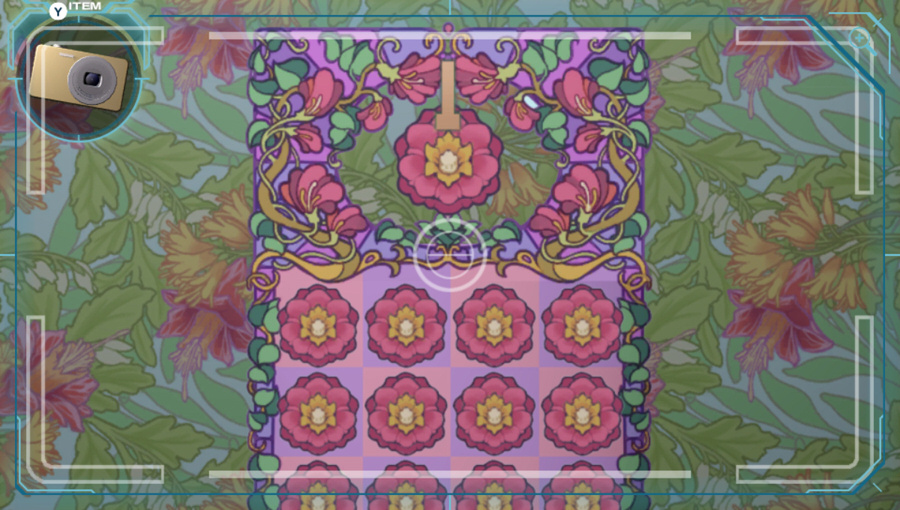
The lever causes the adjacent cover to open, revealing what looks like a camera.
See? Nothing bad happened. In fact, it opened that cover. Let's see what's inside. This old geezer...We still have to actually click on the camera to grab it.
Huh? There's something in here. It's...a digital camera?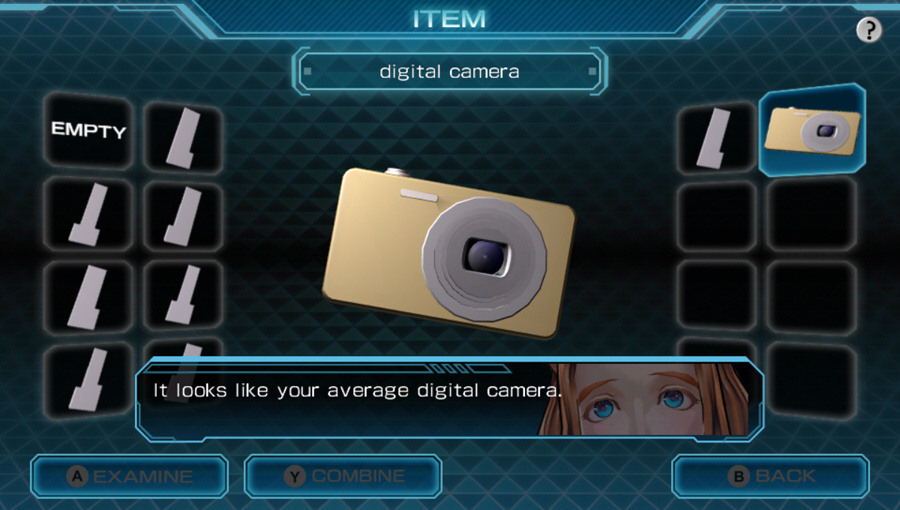 Now when you say average... What are you basing this hypothesis on? She meant for THIS time period, idiot... It really isn't something to ask right now.
We've got a camera, a bunch of images of keys floating around, and an instruction to go shoot some keys.
The hardest part of this room isn't figuring out the puzzles. It's going to be figuring out how to actually move the game camera around to get the shots of each of the keys.
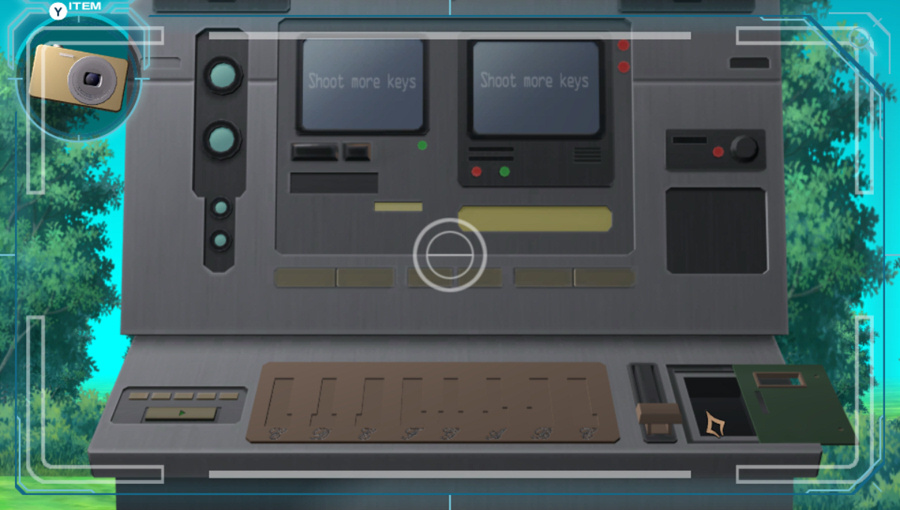
Any time you click something while the camera is held, you take a picture instead of the normal interaction. Which can be annoying if you didn't mean for that to happen.
Okay, I think I took a picture. Diana, do you know what you're supposed to shoot? Uh, oh. Umm...what was it again? ...The monitor on the console has some hints.
I put the camera away, and wonder why I can't just take pictures of all of the keys that I already have.
 Takng pictures is fine, but the problem is "keys". We don't know what those are. Keys... Maybe it means one at a time?
If you haven't been paying any attention or done anything in this room, you might not know what the keys are. But that's a stretch. And one more click on the monitor will have the game spell it out for you explicitly:
The monitor reads "Shoot more keys". We can use the camera to take pictures of "keys". Only problem is what is a key? The kind for locks? Or maybe a computer keyboard? Ah, I know. It might be piano keys, since they're distinctive. Let's look for those.If you somehow got this far without clicking on the
One of our already-solved puzzles has a key waiting for us. The key is highlighted when you take the picture.

The picture is automatically uploaded to the console, and a slot for the key that was just "shot" opens up.
Yes! A key slot opened. A key shape appeared after this pattern was reflected into the tumbler.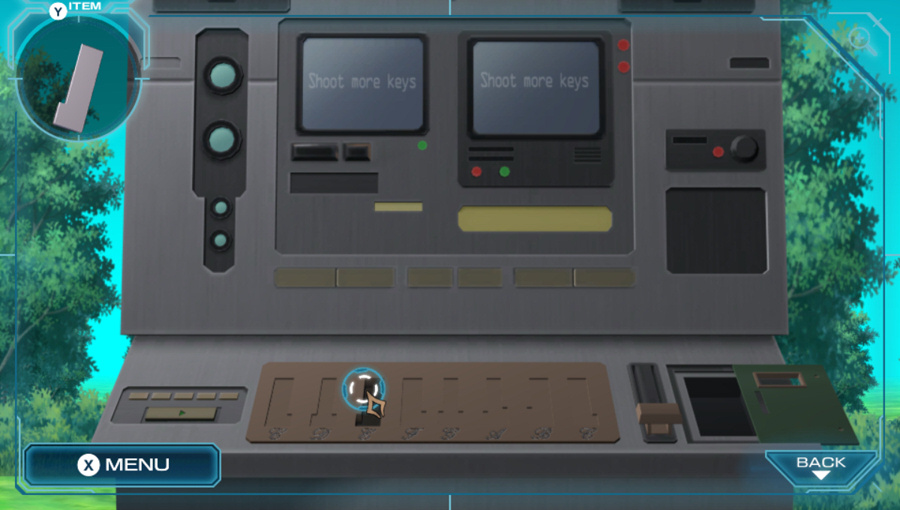
Let's put the key into the slot...
I believe the E key will fit here...The key appears and slides down into the slot.
Hm, pretty snug. I knew I was right.
There's another key here, but it can be tricky to trigger. Selecting the pattern on the wall doesn't do anything, and selecting the pattern on the headrest just gives the same dialogue as before, about the pattern being cut off in the middle.
I gave up for a moment here and took a picture of the weird shadow cast by the candle instead.
And another slot opens up!
The shadow of the pattern on the candle holder makes a key shape here... We got the picture!If you don't put the tumbler in the light ring or if you don't light the candle, the pictures won't work, since the shapes are apparently too distorted to count that way.
Putting the key into the new slot nets some more generic text:
The G key probably fits here. Yeah, just like I thought.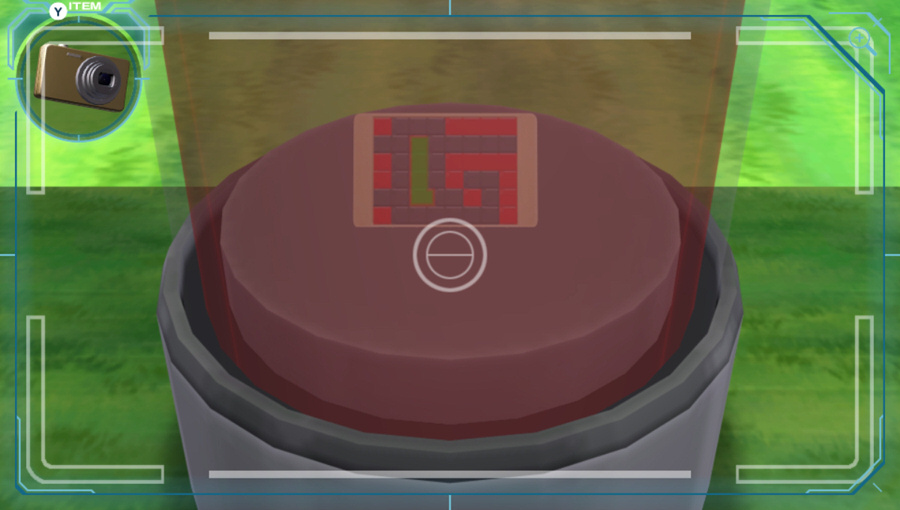
The pixel configuration in the red light hides another key shape.
Only in the red water does the pattern on the plate have something that looks like a key. Yeah, and I think one of the key slots opened.In theory you can figure that out by looking at the plate on the "no patterns" setting and figuring out what color of water will result in an image that has a key shape in it. Or you can just take a picture of the pixel plate under every color and get lucky on the first one, like so.
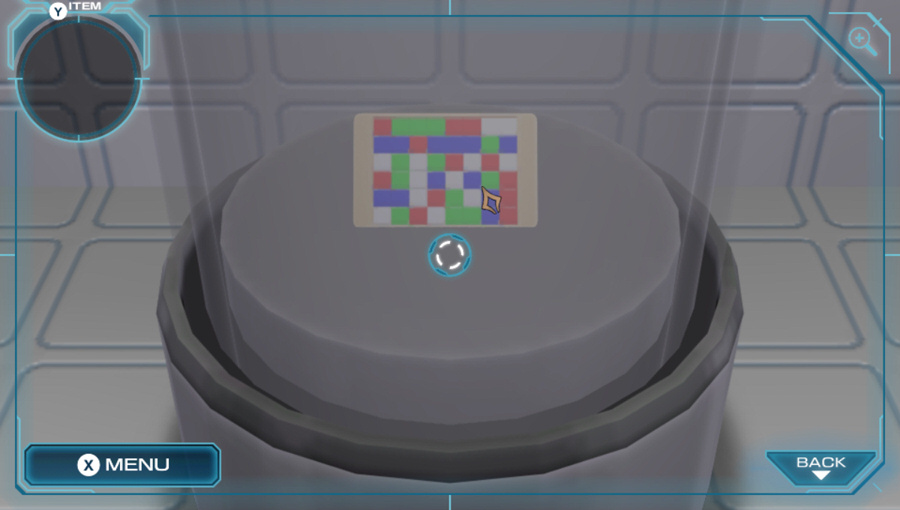
Here's a picture of the plate in the powered-off room, just for completeness.
Pictured is me trying to put in the key while still holding the camera. I've never been talked down to by a game that much.
Keys? Oh, I see...Actually putting the key in is less interesting:
I think the F key would fit here... Ah, it's in perfectly! I knew it.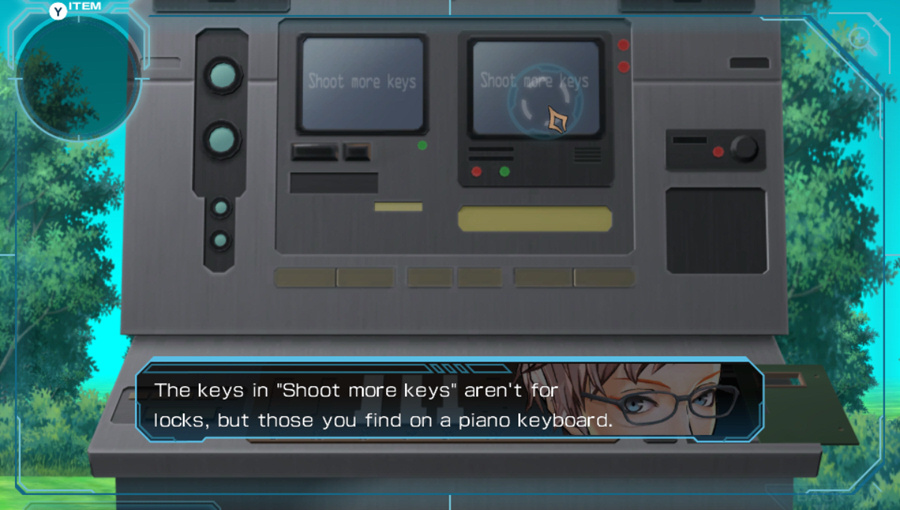
Phi is still preachy if you click on the monitor again.
Back to the chair again. We have to actually click on the pattern while holding the camera. Normally this action would just take a picture...
But here we're taken to a different first-person view with control over the camera for lining up a shot.
So we can line up the headrest with the weird tree stump on the wall, forming a key.
We got the picture! I get it. The pattern on the headrest made a key when matched with the tree trunk.Thanks for explaining that after we already had to figure it out. Putting in the key gets the same generic dialogue:
The C key probably fits here. Yeah, just like I thought.Interesting touch here - either of the C keys in our possession will work in either slot. The other keys, even when the appear to be the same shape, are not interchangeable.
We've shot four keys just from the forest pattern, let's see what we can find on other dial settings. We still have this flower puzzle to figure out.
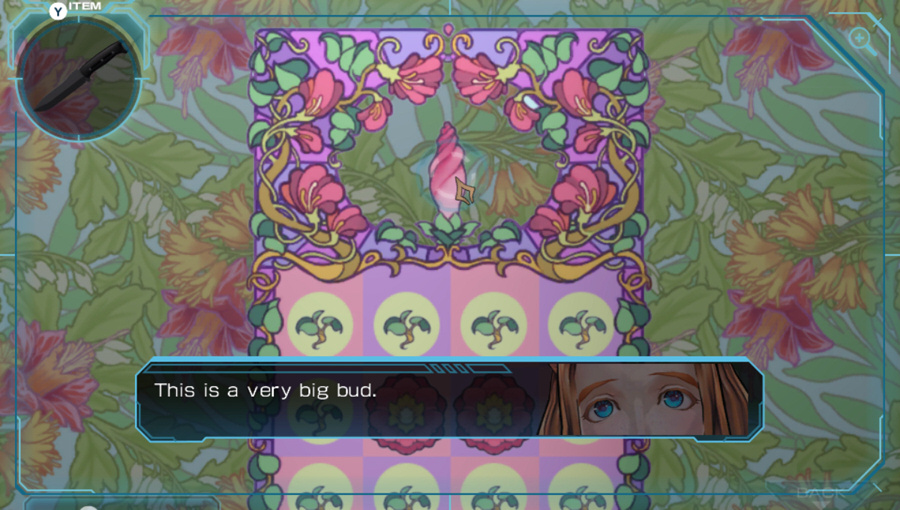
Click the large bud here and it magically transforms into a bloom this time. No idea why. Maybe the power to the console had to be on?
Wow! This is amazing! The bud became a flower! But why did it suddenly bloom? Hold on, one of the petals looks strange. That's the shape of...Who cares why it bloomed this time, we need a picture!
 One of the petals is the shape of a key! Hey, a key slot opened. Let's go take a look.
No new dialogue for putting the key in, so let's move on. The spot on the wall with the flower puzzle held something else in the black-and-white room, if you remember.
 We got the picture! Only this spot looks like a key. We almost missed this.
Not really, it's actually one of the easier ones.
 Doesn't that mean there's a new wallpaper? Let's go change it now!
Once we insert the sixth key and go through the same generic dialogue as every other key, something else happens. We have a new pattern option for the room. Good thing because we already shot all the keys in all the patterns we had.
 What pattern will be added this time? I have to say, this is kind of fun. Fun, huh... I guess I'm having fun too. We should turn the dial again.
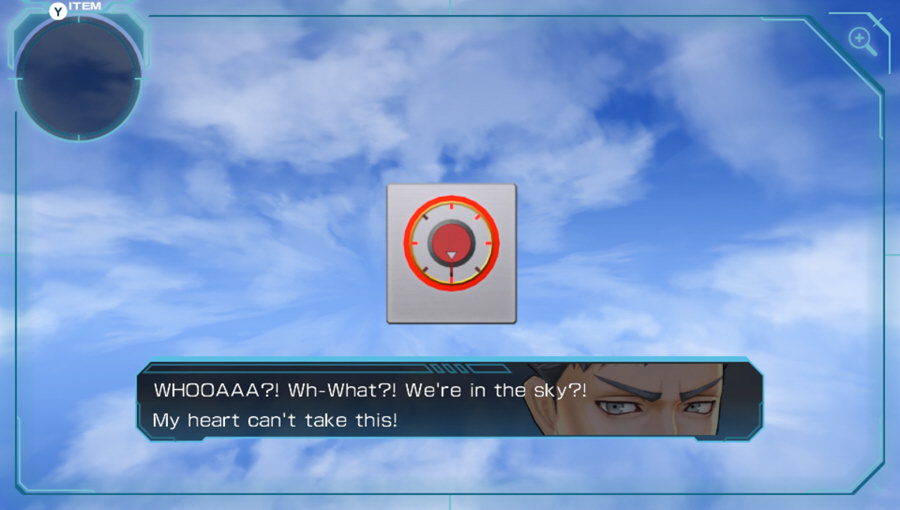 A-Amazing! Whoa, even the ceiling is gone...! It's just like floating in the clouds...
There's a cool effect here with the clouds rapidly moving and giving the appearance that the room is wide open. Here's a shot of the whole room:
Pretty cool, but what are we looking for here?
Well, there's something that looks suspiciously like a distant star in the sky pattern here. One of the first clues we got referenced that.
So I get my view lined up so that the glass and pitcher are lined up with the star behind them both, and take a picture. No luck.
Much like with the chair headrest, we have to get closer to the glassware and click on one of them again while holding the camera.
We're in control of a more zoomed-in view now.
Somehow lining up all three reveals a key made out of light. Don't think about it too much.
All right! It was a good idea to do as the note suggested and look at that star! This is the seventh one!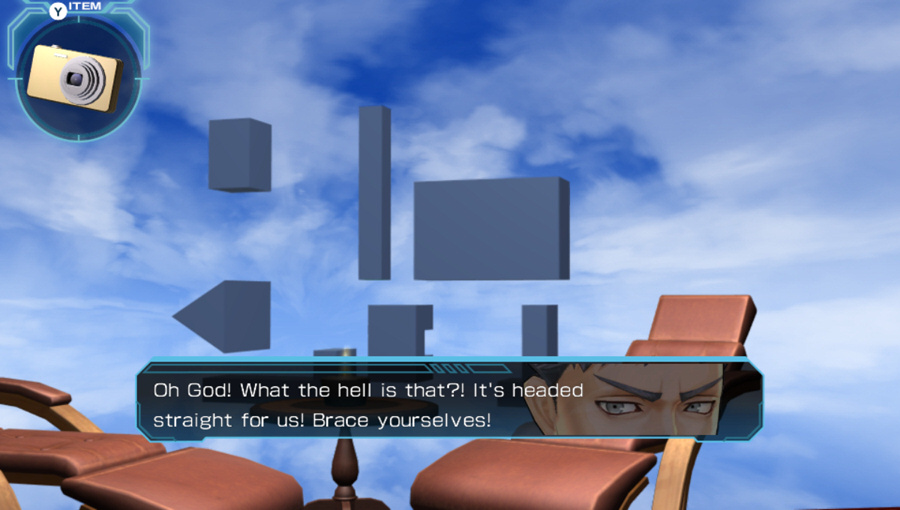
Right after taking that picture, the game turns us around to show floating blocks appearing in the background behind the chairs. They don't actually come at us, but start rotating once they get close.
Relax. It's just a projection on the wall. It looks real, but it's not going to come out. It frightened me... Oh, the cover for the A key is open. Let's put it in.We do, but nothing new happens. The last key obviously has to do with the rotating blocks that just appeared.
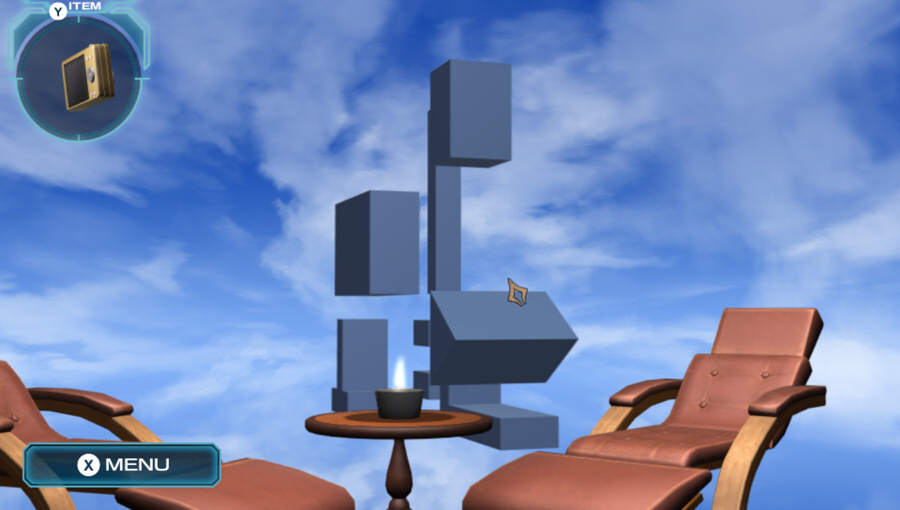
All you have to do here is time it. At a certain point in the rotation...
No, not here. I just thought this shot was a nice view of all the blocks.
Here! With the camera out, one particular side of each block is glowing, and when the view merges them all together, we get the last key.
There's a moment when you can see a key. This is pretty ingenious. All right, let's input the last key.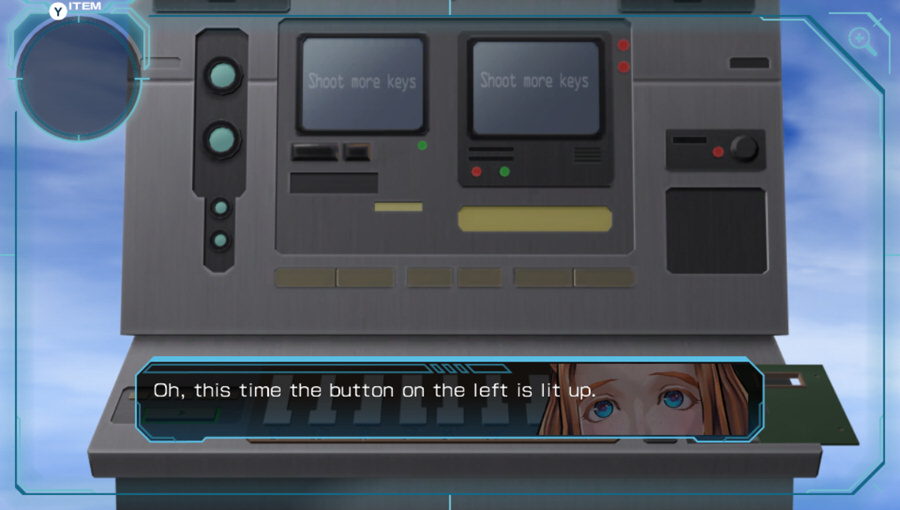
There are the same lines from Diana as the key goes in, but then something new happens. The button on the lower-left is finally active.
You're right. It looks like some sort of play button... Let's check it out.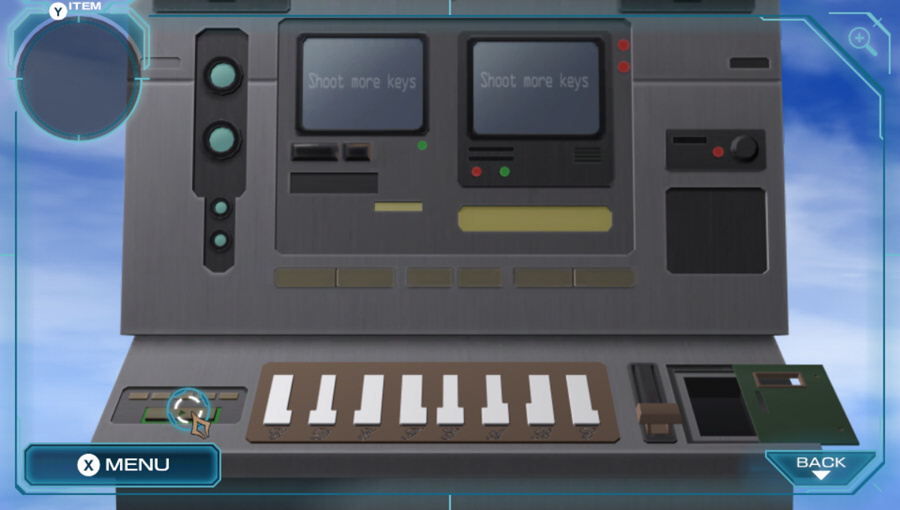
Sure, why not.
This button is flashing. Should we try pressing it? We got this far, so I don't see why not.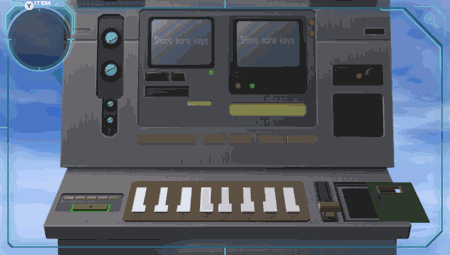
A little tune plays as the keys light up in a certain order. And then all the keys fall out. Whoops.