Recording a DS - How to Make a DS Video Using a Camera
by Tasian
A couple of people asked me to copy this from the first Ouendan LP thread to here. I took the liberty to add a few modifications, including what I changed while recording Ouendan 2.
How to Make a DS Video Using a Camera...
...with results that won't dishonor your ancestors for years.
That guy was so proud of his D rank, too
(Direct Audio Recording will also be covered)
It took a lot of trial and error to make a decent quality DS recording, and even then I wasn't overly happy with the results. However, a few people expressed interest on how I recorded the DS, which I will answer in a couple more sentences. Are you ready for the super mega awesome recording device I used? Are you?! I CAN'T HEAR Y- ... Wait, of course I can't hear you, this is the Internet. Here you go: It's a cardboard box.
 A box?!
 A box?!

Metal Gear?! A box?!
That's right, but it's not any old box. It's a stolen Staples box! I swiped it from work, which is not Staples before you ask. I placed the box on its side, used an X-Acto knife to cut out holes for the camera to rest on and the lighting, and glued a part of the box lid to the bottom to get the appropriate distance between the DS and camera. Here's the "recording device" in position:
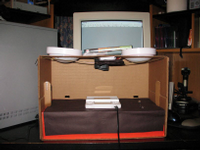
My box of Klonoa 2 is an extremely poor substitute for my camera.
*** Please note ***: Everything I did was tested on a white DS. One time I borrowed my friend's black DS and no matter what I did to the lighting, the screens were way too bright on the camera. Go with a white/light-colored DS if possible. (Fingerprints show up too easily on the black one anyway)
- What Makes a Good Choice For a Camera -
An ideal camera for quality DS video recording will have all these features (and will be pretty expensive, based on my light researching of cameras):
- Manual Focus - Required
- White Balance Can Be Set To Manual - Required
- AVI Video Output Resolution of at least 640 x 480 at 30 Frames Per Second - Any less and it's probably not worth it
- An LCD Viewer
- Aperture Control During Video Recording
- Remote Shutter Control
- Tolerable Video Time Limit - Find out if the camera cuts the video recording after a certain point
- Great Battery Life or AC Adapter (Psion sez:
 Use rechargable batteries to save money!)
The camera I used to record the DS is called the Canon Powershot A630. It doesn't have all the dream camera features, but it gets the job done, plus it's a great camera for normal use:
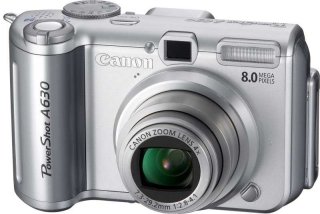
One time I went to a camera shop to get an AC adapter for this baby. The clerk told me to buy more batteries. Screw you, camera store clerk
Here are the reasons for the requirements, presented in detailed rants:
- The most important feature, by far, is that one can manually set the focus on this camera, right up to objects that are pressing against the lens. The fun thing I discovered is that if the image is too focused, the screens on the DS break up into scanlines, and it looks pretty bad. I adjusted the focus to make it juuust a little blurry so that the scanlines mesh together. It took a few test recordings to figure out which focus setting gave the best results.
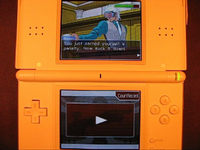
For some reason, it was a lot easier to recreate a noticable focus problem using Phoenix Wright
- The white balance can be set to manual. Cameras have a feature that takes the lighting in its view and adjusts it so that the "true colors" are shown. Since I use low tungsten lights during recording, the normally white DS looks fairly orange. Later, I use LCD lighting which makes the DS look normal, but that's still no excuse to leave automatic white balance on. If I set the white balance to adjust automatically to tungsten light, the DS will appear white, but the DS screens will have a bluish tint to it.
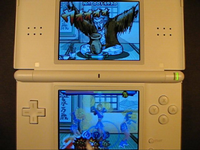
I got the DS recording blues
- It records AVIs with a resolution of 640 x 480 at 30 frames per second, a nice quality that all the video hosting services work with. The only drawback I discovered (during the last stage, of all things) is that the recording cuts off just before 10 minutes on this camera, when the movie reaches 1 GB in size. That was one sucky surprise. (First final stage video attempt deleted) Next, Windows XP can't transfer the video from the camera unless it's well below 1 GB, and as far as I can tell, there's no disk mode on this camera. (Second final stage video attempt deleted)
- Appropriate Lighting -
At first, I didn't cut the holes for the lights because I thought I could get away with recording in complete darkness. A certain pesky camera feature came up: the Powershot's auto-aperture adjustment. Basically it's a feature where the camera automatically adjusts to the amount of light in the room. While this is a good feature while stalking under the cover of night dealing with low light settings, it makes for an unacceptable video:


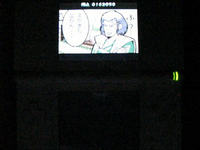
Pausing in the middle of a stage on the hardest setting is not a good idea
The Old School Method - Not Recommended at All
I purchased a couple of battery-powered "moon lighting" orbs at Home Depot and stuck them on top. Note that the lights are positioned so that the camera won't catch the source reflecting off the DS screens. My first problem came up: the weight of the camera and the lights on top were making the top of the box bend down a bit. I had to take a coat hanger, thread it through the inside-top part, and wedge some folded up paper to provide some support.
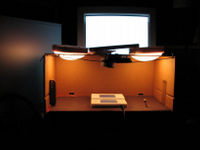
Did you know I first took this with the camera flash on? Ha ha ha please kill me
The New Method
Between the two LPs, I "upgraded" the box in two ways. First, I put a black paper tube on the camera hole and hung some black paper sheets on the sides there. The purpose was to reduce the camera lens reflecting from the shiny DS screens back into the video. The second thing I did was purchase a couple of LCD lights at Home Depot (again). These glowing suckers even have clips on the back for the box handles. Check it out:
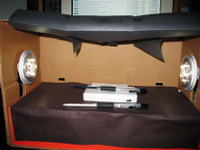
5 LCDs on each side gives a good, true white light level.
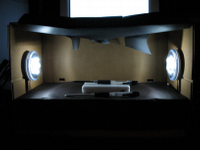
Get out of here orangy DS, this is LCD County!
With either method, the DS lighting level was set to the lowest possible setting (for a DS Lite, anyway.) This is important.
- Audio Capturing -
Your camera may be able to record audio with its own little mic. That's great. It also produces sound with terrible quality, and I bet a lot of people will refuse to listen. Fortunately, recording the audio is really simple, with the right hardware that's very affordable. The first thing you need is a soundcard that supports a line-level input. The card I'm using is a Soundblaster Live! 32-bit card. I bought it for $10 about 5-6 years ago, and it's been used in 3 computers. The other piece of hardware is a male to male stereo jack, easily purchased for $5-10 at Radio Shack. The wire runs from the headphone jack of the DS to the soundcard's line-in (which may also support a microphone.) Don't even think about doing the following steps with a USB headset plugged in.
There's a few settings to check out in Windows. (Sorry Mac users, Imma PC hurr hurr  ) Go to Control Panel > Volume Control:

Make sure that Line-In's Mute is unchecked and set at least a mid-range level. Can't see it? Then go to Properties like so:
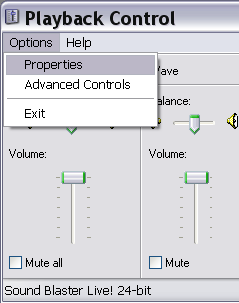
And check Line-In to make it appear. You can check everything here if you want, I don't mind. But Line-In better be checked!
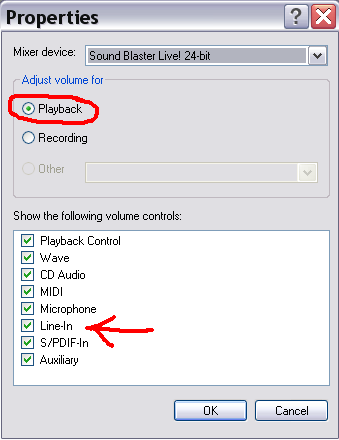
Oh right, press OK. Now, you should be able to hear your DS's audio through your computer speakers/headphones. Now to actually record it, start up Audacity and check only one setting, the audio source on the upper right:

Soundblasters say "What U Hear", others say "Stereo Mix." Then all you do is hit the big ol' RECORD button to do something something and then you hit the big ol' STOP button to do something something... I forgot, but I'm sure you will figure it out. When finished, go to Audacity's File > Export as WAV -- and save the audio file somewhere.
So, once you got your video data from the camera and the audio data from Audacity, all you have to do is put them together in VirtualDub, which is really easy. I won't go into detail here, because all you really have to do is follow Step 3 of the Audio Desyncing Guide that some weirdo wrote (and steps 1 and 2 if the audio desyncs from the video, of course.) With the raw gameplay video on the computer, now I can open up Camtasia (or whatever video editing software you want), do voice commentary, add the subtitles, produce an uncompressed video, and finally compress it with one of the excellent guides you can find here or in the Tech Support Fort. The end result: 1 LP video of a recorded DS. Hooray!
Made a few adjustments based on the suggestions of Hoodi and Psion. Thank you very much!
 Use rechargable batteries to save money!)
 A box?!
 A box?!

 Use rechargable batteries to save money!)


 ) Go to Control Panel > Volume Control:


