How
to make a 2-pass XviD video in VirutalDub- by Static_Fiend
This
is just a short and simple tutorial on how to do 2-pass XviD videos
in vdub.

First
off you'll, obviously, load up VirtualDub and the video in which you
want to encode. I'll be using this 2 second video of KISS.
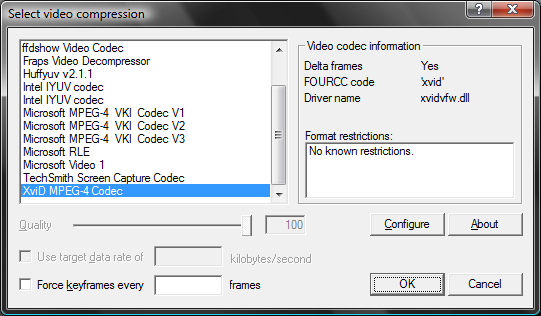
Next
you'll want to go into the video menu and select compression, and
you'll be presented with this screen. Your codec list may look
different from mine, but no matter!
Go
ahead and select XviD MPEG-4 Codec from the list, click configure,
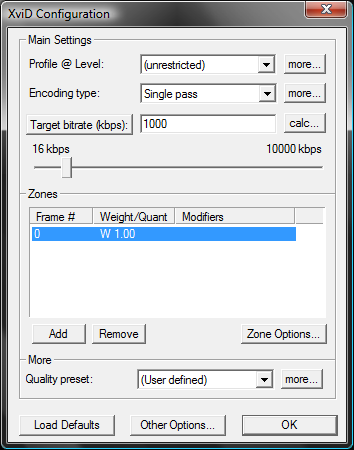
and you should be presented with this.
Next
we'll want to select Twopass - 1st pass from the list. Now select the
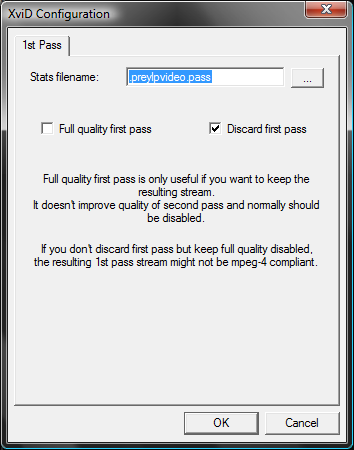
more button right next to the twopass box and you should get this. Of
course your stats file won't be the same name as mine, but go ahead,
click the "..." next to that and save the file, keep
discard on and click okay. Note you'll only need to do this your
first time encoding something and never again.

Now
click okay until you reach the main VirtualDub window again, go ahead
and click File -> Save As AVI.
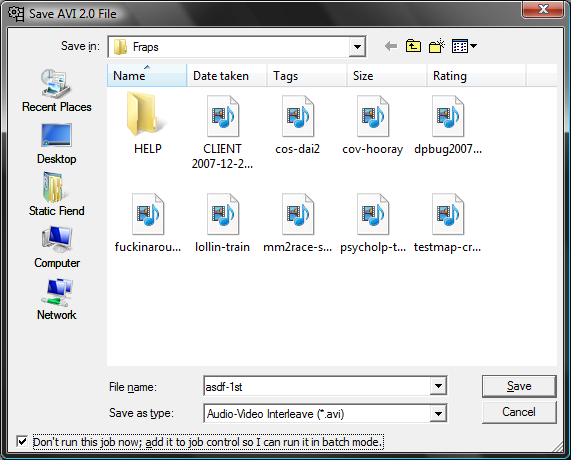
Just
name the file whatever you want, and click the little button that
says "Don't run this job now". I generally add a "-1st"
for the first pass so it can be just discarded later.
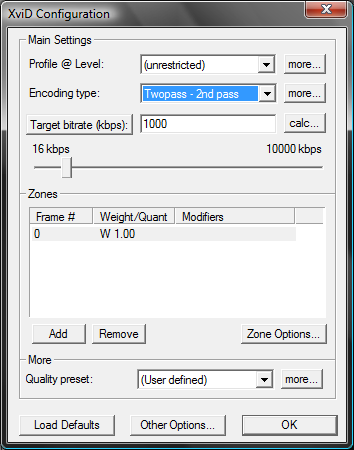
Now
for the second pass, go back to Video -> Compression, and click
Configure on XviD again to bring this back up. This time we'll want
to select Twopass - 2nd pass. Now we have two options here, we can
click that "Target bitrate (kbps)" button to change it to
"Target size (kbytes)" and vise versa, this is largely up
to you. I generally use Target bitrate and keep it at 300 for things
that don't need much (NES/Nethack/anything generally super old), and
1000 for things that have a lot more going on (almost all 3D games).
For target filesize you can use a calculator to figure out the size
by multiplying the number by 1024 to get megabytes. The calc button
next to the field will help you figure out how big the file will be
with audio and overhead added in but this is slightly more
complicated.
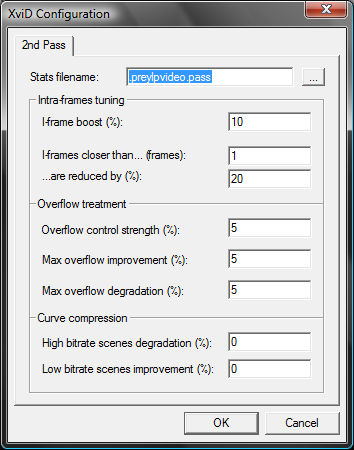
Before
we leave, make sure you click the "more" button right next
to "Twopass - 2nd pass" and make sure it's pointing at the
correct stats file, everything else you can leave alone. Also again
you will only have to do this your first time.
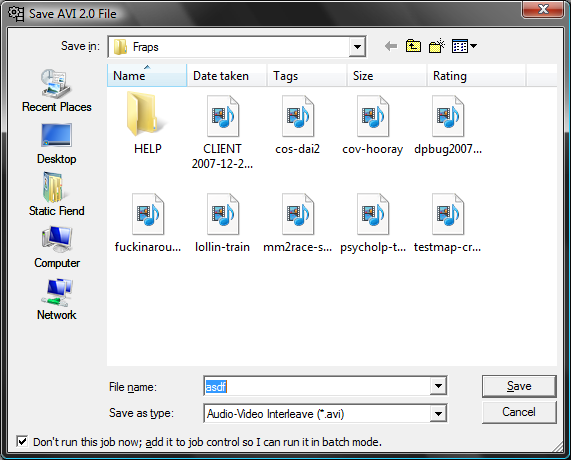
Just
for demonstration sake I'll keep the 1000 kbps on and go back to File
-> Save as AVI, and like the previous pass we enter in a name and
keep the "Don't run this job now" button clicked.
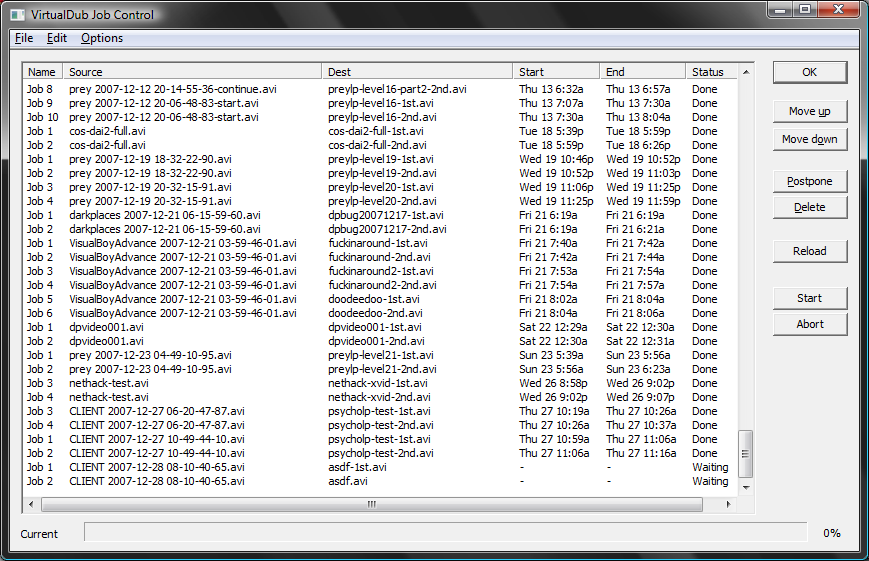
Now
with that all ready to go, hit F4 on your keyboard or go to File ->
Job Control, which will look like this. You'll see at the very bottom
your videos are "waiting", just click start and it'll
encode.
With that, you're done! Now you can delete the first
pass video (asdf-1st.avi in this example), if the second pass video
isn't quite up to snuff for you, you can go back and repeat these
steps. If for some reason you get an error, make sure the dimensions
of the video aren't odd (for instance 641x481 is a no-no, but 640x480
is fine) and that the stats file is being found.
This largely
will be similar with all codecs, but I used XviD as my example.