Part 18: Mission 15: Two-Week Test (or "You're a grade-A top-of-the-line CO, son")
Mission 15: Two-Week Test (or "You're a grade-A top-of-the-line CO, son")

Right, then.

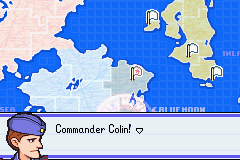
 Grit and I are returning to HQ to plan our continued strategy.
 Yes, sir! Understood, sir! I'll guard these properties for the next 14 days. Mmm. No need to worry. According to our intel division, there's no chance of the enemy striking here. You're one-hundred percent safe.
 But our intel division ain't the most reliable bunch of fellas. Do your best, son. We'll be back to get ya in 14 days. I won't let you down, sir! I'm a Blue Moon CO after all!
Doesn't sound so bad, might be a little boring, but it's nice to have a break sometimes I guess...
 Yes?
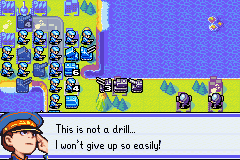
Yes? It's an attack! The Black Hole Army's here! What? Just like that? Stay calm. Stay calm. Must not panic. I... must... be... strong! OK! Tighten the defenses!

 Looks deserted! Guess I'll just capture everything. Not so fast. These properties... are under... my protection.
 Just you? Talk about easy. Uh... Reinforcements are on their way! Yeah, like in 14 days, right? I'll capture everything by then. C'mon, troops! Fire at will! Keep strong, everyone! We just have to protect the HQ for 14 days!
Day 1

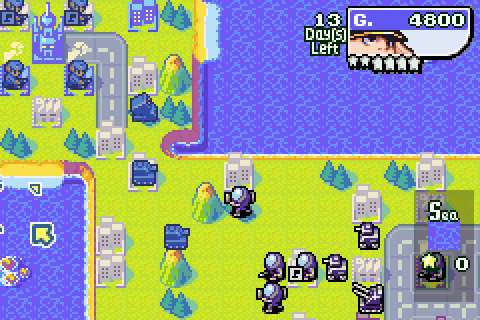
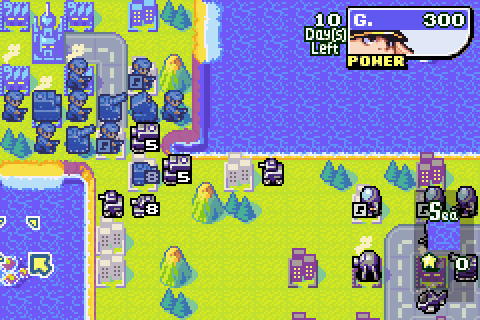
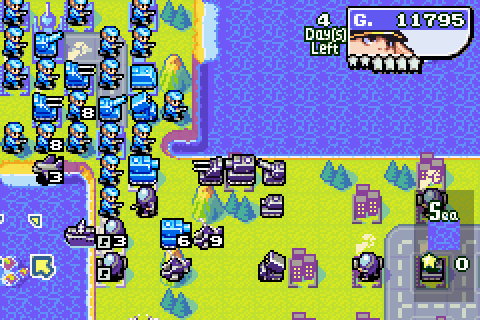
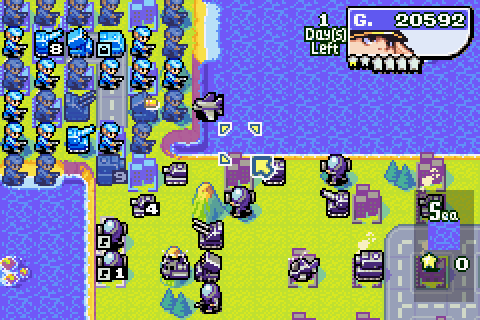
Right, so this is the situation: we have to hold the line for 14 days. No need to try to rout Lash or capture her HQ: it's just a case of surviving. This makes a nice break from all those annoying timed missions we've had to put ourselves through lately.
Then again... Lash has got a serious powerhouse set up here. She's already got four bases and two airports, and a bunch of pre-deployeds including two medium tanks and a battleship. If it wasn't for the time limit, she'd probably win in the end, and I really don't know if it's possible to win this "properly". Still, we can hold out reasonably easily.
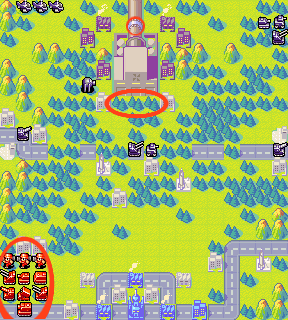
(Aside: hmm, a large, almost perfectly rectangular peninsula... I think this one probably wins the award for Most Ugly Campaign Map)

We get two small tanks and a rocket launcher to start with, so let's move them up.

And churn out some infantry from the bases. We'll need a fair few of them.
Day 2

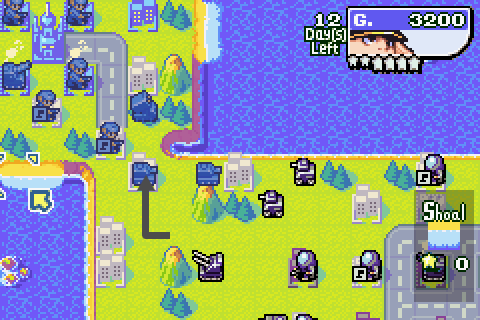
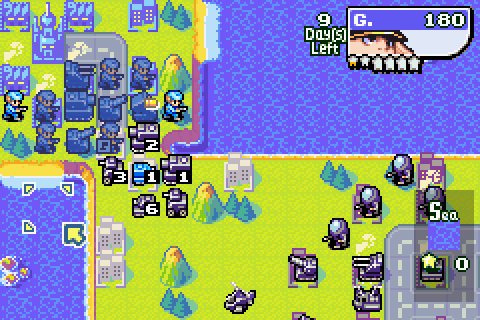
Lash has sent most of her infantry and mechs back to help capture the neutral properties by her stronghold. Only one of her mechs moved towards me, and the other stuff isn't in range yet. So nothing to report yet.

So let's move up a bit more, while also grabbing some more bases. We get five of them, and we're gonna need them all.
And yep, let's have some more infantry.
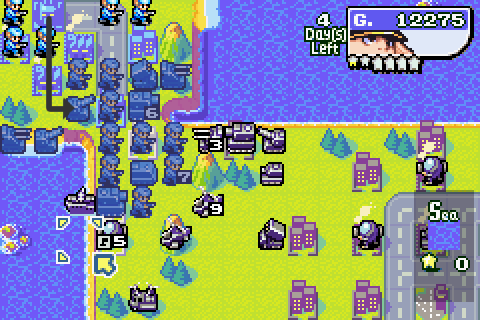
Day 3

Lash keeps moving up.

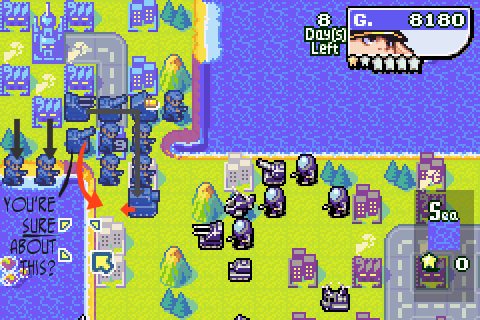
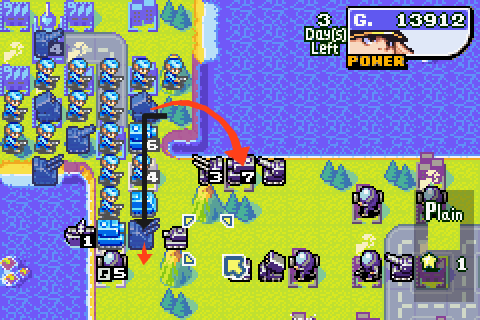
But now one of her mechs in in range of my rocket truck. So let's get this show on the road.

Arrows and silly comments: back by popular demand.
Hmm, my other tank's in range of Lash's middies. I'd better do something about that.
RUN AWAYYY. Meanwhile, I finish off capturing those two bases, start capturing other stuff and crank out another inf and an artillery.
Day 4

Lash's AA wanders up and gives one of my capturing infantry a bit of a headache.

All things considered, yes I would like that city. Time to join infantry together so I can hold it. Meanwhile, I move my new artillery up and finish capturing the fifth base.

Rocket and tank fire take out that pesky AA.

The small tanks go to hold the line, and more infs and artys roll out of the bases.
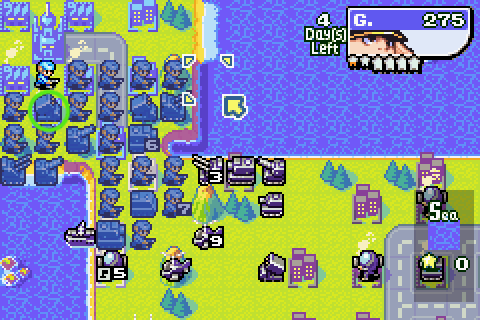
Day 5

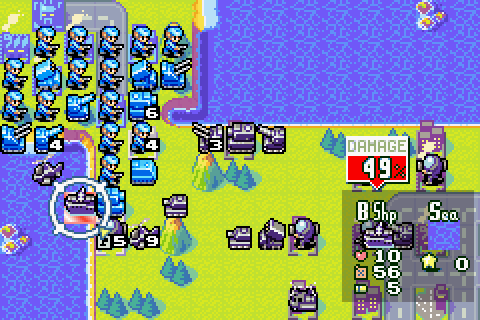
Uhoh. Lash is in my base. Thankfully the Medium Tank decided to prioritise attacking a capturing infantry over marmalising my rocket launcher. Thanks, Lash.

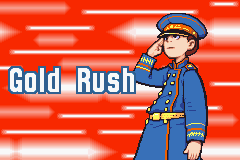
A non-marmalised rocket means I can do this. It's not perfect, but at least it keeps the middies at bay. It also charges up Gold Rush, happily enough.


Fun times.

The extra cash is enough to buy me a medium tank of my own. Soon they'll see. They'll ALL see.
See how pretty my eggs are!
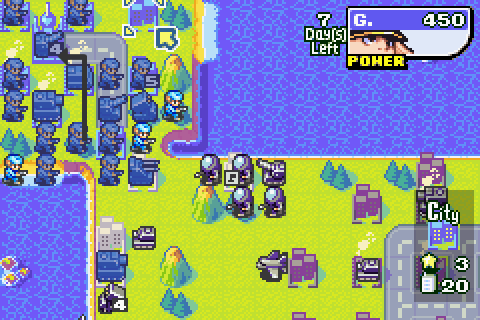
Day 6

All I want is just one city. How many more must die in the battle to capture square (4,5)?

Oh great, as soon as I get a medium tank, Lash one-ups me with a neotank.

The good news is, there's plenty of cannon fodder for my long-range units to shoot at.
Now that a B-Copter's heading towards my lines, it makes sense to build an AA.
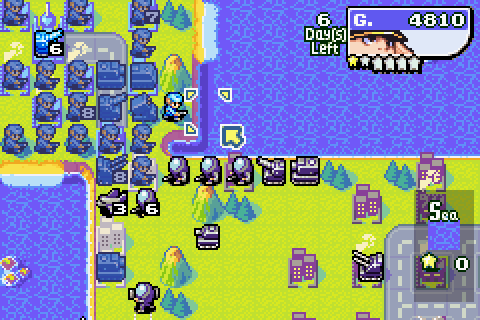
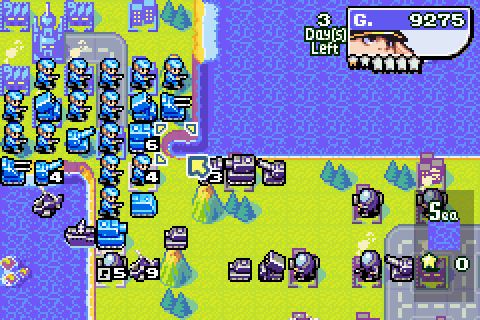
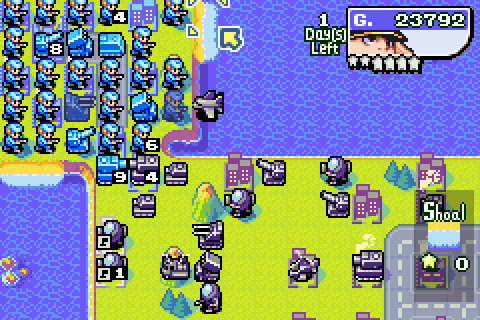
Day 7

Hello, what's this?
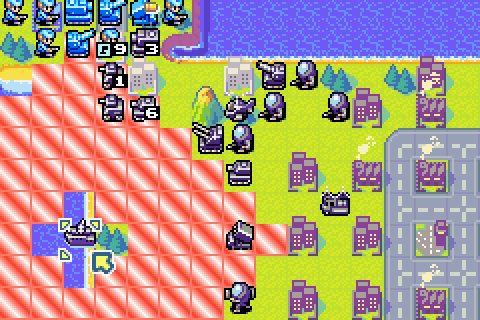
Battleship ahoy. Threatening one of my artillery units, too.

I'll deal with that later, but for now let's finally get this city captured.
The stuff around my base falls in a hail of red arrows.
To finish the job, I end up leaving my artillery in harm's way. Oh well, maybe the battleship will be an idiot and attack one of my infantry instead. Fingers crossed!

Cranking out more infantry. Good ol' infantry.


Oh dear.
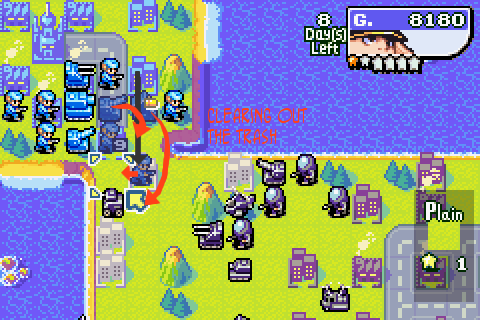
Day 8
 I've got to stay strong! I will hold out for 14 days!
Keep it up, Colin! We believe in you


I guess that could have gone worse (although my arty did get attacked by the battleship).

The wounded infantry unit retreats, and the AA rolls up to blast that B-Copter into the next map.

Bye bye!

Those two stars fill up again, and it's time for another Gold Rush.

Rocket and artillery combine to take out Lash's AA.

Meanwhile my medium tank rolls down to assault Lash's rockets. It's rather operating as a lone agent there right now, while everyone else looks to defend the chokepoint.
The 4HP artillery retreats to the HQ to heal up, safely out of artillery range. From the bases, I make an APC for supply purposes, another medium tank, and yet more infantry. That bomber looks like it's going to be an issue, though... fingers crosssed again!
Day 9

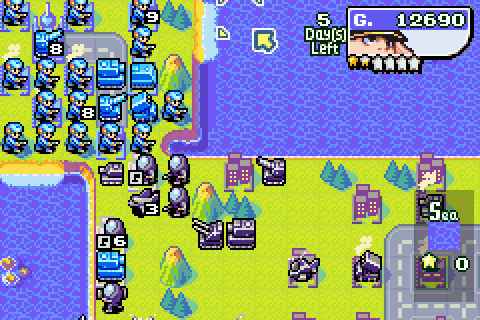
Huh. This time it worked. AI Bomber crews:
 Well, we could heavily damage their AA, the one unit capable of doing serious damage to this bomber if it gets first strike. Or we could heavily damage their main strike tank that's taking out our indirects. Which shall we go for?
 Neither, let's one-hit-kill a random infantry! Sounds good to me!
My rocket launcher's run low on ammo, so here comes an APC to get it up and running again. Following that, Lash's small tank gets pummelled by long-range fire.

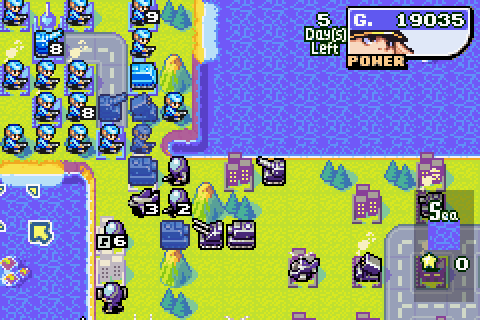
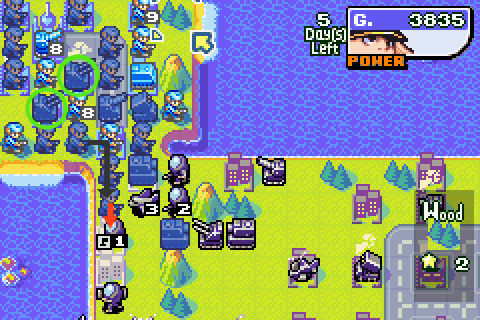
This clears an opening for my AA to damage Lash's bomber heavily, while also finishing off Lash's rockets and enganging in some inf-on-inf combat.

Moving everything else up.
And still the infantry keep coming. If Lash wants to win this, it's going to be over several dozen cold, dead bodies.
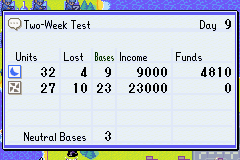
Speaking of which, best to keep an eye on my technique score. So far I've lost a few guys, but my production's made up for it. Still, can't be complacent.
Day 10
Lost my AA
 . With that bomber still just about flying, and a B-Copter approaching, I'm going to need some more fast.
Artillery and infantry fire take out a capturing infantry unit... and for some reason, I decide to use my medium tank to attack another infantry instead of, say, the AA next to it. I got nothin'.

My rocket and medium tank then take down a small tank, and once again, that's Gold Rush charged.


Doot de doo.
Who doesn't love extra money?
I use that cash to buy not one, but two AAs to make up for the loss of that one earlier. And use one of my many infantry to discourage another capturing infantry.

Technique situation still looking rather dodgy - 37 units made means a margin of 7 units for 100% technique, and I've lost 6 so far.
Day 11
Lash moves up her battleship and injured bomber.

One of the new AAs takes care of the bomber...

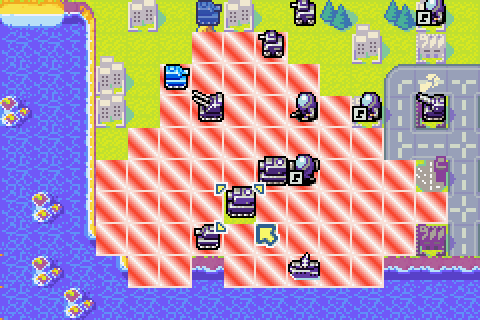
... and an arty moves up so that the battleship in in arty range. Of course, this means the arty is in battleship range as well. But I have a plan...

First, though, a big ol' cluster of arrows. I ended up colouring some green and purple, there were so many. Rocket attacked AA, various infantry attacked various other infantry, and one medium tank attacked a mech while the other (at 6HP) retreated. You said you wanted arrows
") .
.
More infantry move up, and now the clever plan can come to fruition.
A second artillery, the one I sent to heal several turns ago, also moves up so that it can attack the battleship. Now whichever arty the battleship chooses to attack, it'll get struck by the other one. Like some cunning chess move or something. I dunno. I'm not that good at chess: there aren't any magical factories that you can spam extra pawns and pieces from
.
To add to that battleship's woes, I deploy a second rocket launcher that can also attack the battleship next turn. So now the battleship's under pressure from three units. Good times.
Day 12
Lash took out three infantry. Less good times.

Yeah, this is a bit awkward, I've now lost more units than 100% technique can afford. I'll try and spam my way out of it, but a 300's probably out now for this mission.
Well, at least we can take down this battleship.

blam blam blam.

Once more, a 4HP artillery retreats for HQ, and the AA clears up the chopper that damaged it. And we get yet another Gold Rush.

What is that, four now? Colin you broken little finanical genius.
The other AA takes out the other B-Copter, and a rocket gives a medium tank something to think about.

My own medium tanks then give the medium tank further things to think about.

And an infantry attacks a mech.


All of this ends up charging Prime Tactics again.
Day 13

Almost there now.

The battleship is finished off, the medium tank damaged further.

But on the whole, it looks like time to retreat a bit. First, let's save this 4HP infantry using my APC.

Now let's join up the two medium tanks over here, safe from artillery and rocket fire.

And keep on trying to fill our corner of the map entirely with infantry.

Still a little bit behind on the technique front, though.
Day 14

Curses! Lash has a bomber, but my AA is just too far away to reach it this turn.
Oh well, better protect the rocket... even though it's the last turn... or something... oh, whatever. Go, sacrificial infantry, go!

Another Black Hole medium tank falls.
A lot of unit shuffling lets me produce a final batch of infantry.

Although I'd need a whole lot more now to get 100% technique. But we're at the winning line, so eh.

Lash gears up for one last assault, but it's all too late for her.
Aftermath

 Grit!
Grit! Tsk! Time's up. All I'll gain now are more casualties. Guess it's time to disappear! Toodles! Nice work, son. Holding out against a superior force that, I mean. Commander Grit? Does this mean I'm worthy of being a commanding officer now? What're you talkin' about? You are a grade-A certified top-of-the-line CO, son! And you can take that to the bank! Yes, sir!

As predicted, no 300 for me - a little off on technique and also on power as well. It's impossible not to get 100 speed here, given the battle is meant to last 14 days.
Tune in next time for...

Factory number 2. Probably the easiest of the four Hard Campaign factories. Certainly the only one where you can win reasonably easy through brute force rather than fighting a rearguard while a small squad takes down the pipe (then again, you kind of have to control the map to take down the pipe. So in that sense it's harder).
The good news is that we get some allies from Orange Star for this. They get a small predeployed force, but the mechs let them capture a base to make more units. Our ultimate goal is to take out the pipe, but blocking up the factory doors will also help. Lash has some nasty surprises in that factory: I remember her siccing three neotanks on me here last time. But it's much, much nicer than Liberation.
Now, CO votey choice time. You get to choose one CO from Blue Moon (to be the blue team, natch) and one from Orange Star (to be the red/orange team).
Grit - my personal recommendation on Blue Moon. I've beat this mission with Grit before: unlike the lab map you've got all the time in the world to grind out a win, so an artillery spam works wonders here. Colin - might work pretty well, the cheaper units will certainly help. I remember beating this on Normal Campaign with Colin once and it went okay. He'd move faster than Grit in terms of APCs and stuff, and would make better use of the airports. Olaf - not recommended. Mostly because his CO Powers will stuff up your Orange Star ally almost as much as Lash. Still, mass damage and all-rounderyness aren't bad assets. Sami - I normally use her for Orange Star here, although it's not vital. Her cheap mechs can make best use of the limited bases and cities she's going to get, and a mech flood (or at least, a mech trickle) goes well with an artillery flood. She also has the best chance of taking an airport, although she'd then have the worst planes.
 Max - might work out all right, would benefit the tanks and AA but hinder the rockets and artillery. A base would probably be of less use, though. He'd make good use of an airport, though - if he can cap it.
 Andy - again, might work out all right. Difficult to know what to say about Andy here given his averageness.
So, let's have those votes, please!