Part 36: Mission 27: Drake's Dilemma (or "Paul's Dilemma")
Mission 27: Drake's Dilemma (or "Paul's Dilemma")

 They appear to be gathering on a small island on the inland sea.
 And our troops have surrounded the sea? Yes, sir. A complete wall encircles them. All that remains is to destroy them unit by unit with the Black Cannon. It's too early to relax. Much could happen before they are annihilated. Tell the troops to keep on their toes.

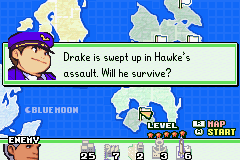
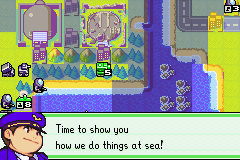
 I've got to find a way to turn the tides, or we'll all be swept away. Should I weather that cannon's fire in the reefs or transport troops to the HQ with landers?
 Commander! Incoming call from Commander Eagle!
 From Eagle? Patch him through.
 Drake, are you OK? Eagle? We've hit a patch of rough sea here. The enemy's surrounded us. We've got to find a way to save the troops...
 Hold on. I've got some good news for you. What is it? I've received a communique from Yellow Comet. They've sent reinforcements! And that's not all. They're being led by the emperor himself, Kanbei!
 That IS good news! OK, I'll launch a counteroffensive timed with Kanbei's attack. You'll be aiming to take out those 2 Black Cannons, right? Yep. We can mop up the rest of the enemy once that's done. Understood. I'll request that Kanbei's troops target the Black Cannons, too. Thanks, Eagle. You have this old sailor's gratitude. Save it for the victory celebration. Good luck to you, Drake.
 What do we know of Green Earth's Commander Drake?
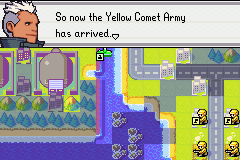
 He's unharmed, sir. Let's establish the field HQ. When that's done, we'll send out the troops. Our mission is to eradicate the 2 Black Cannons. You think you've got Drake where you want him, Black Hole? Prepare to taste steel from both sides!
Day 1
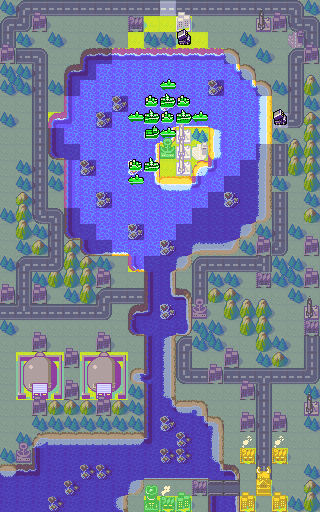
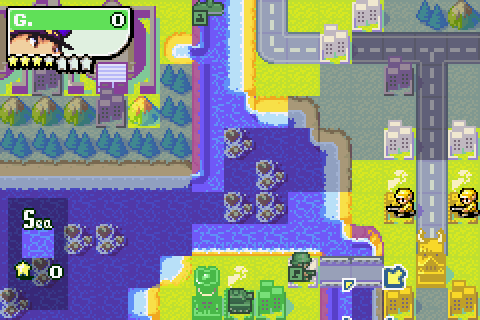
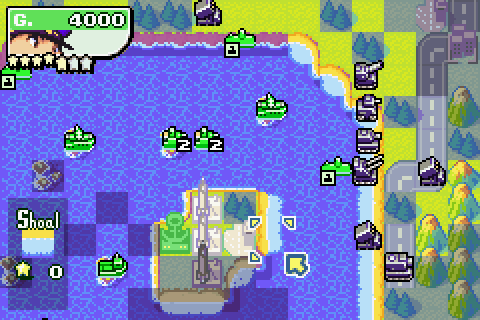
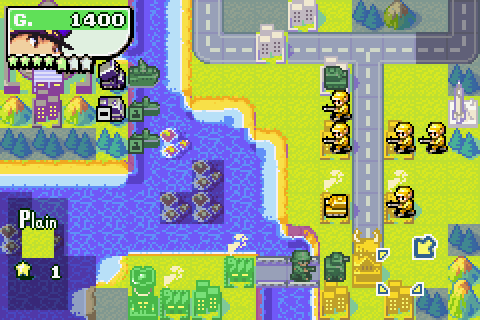
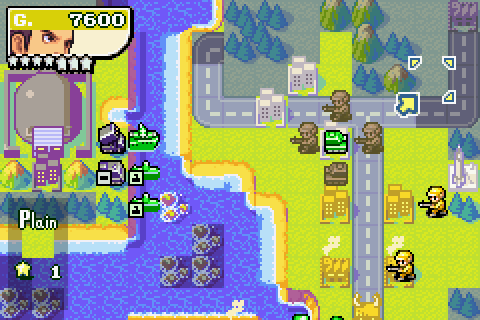
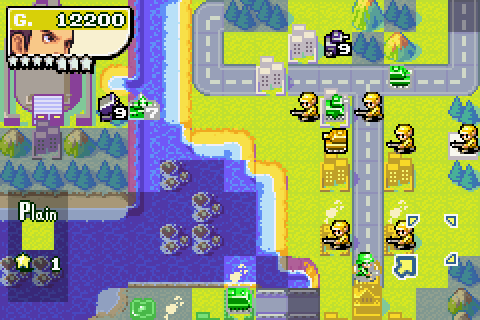
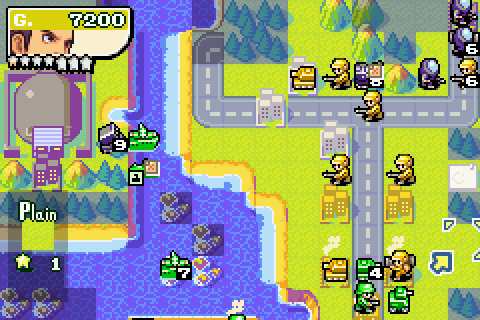
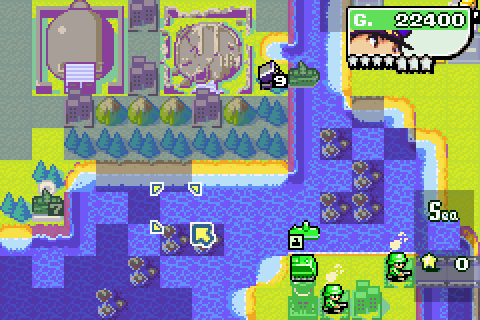
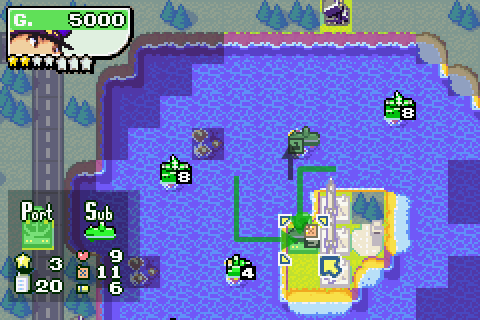
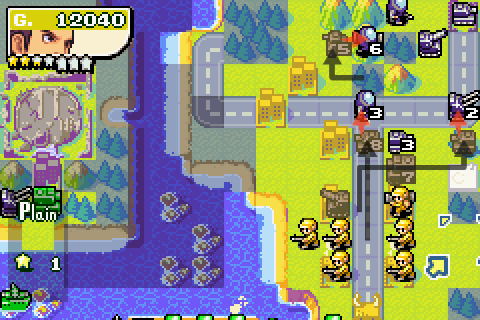
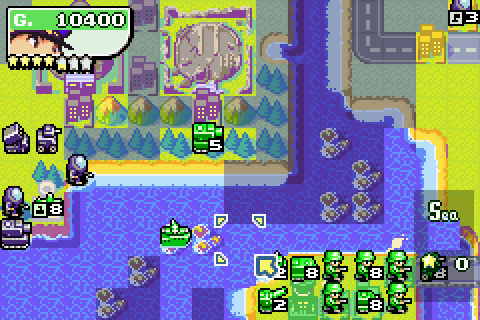
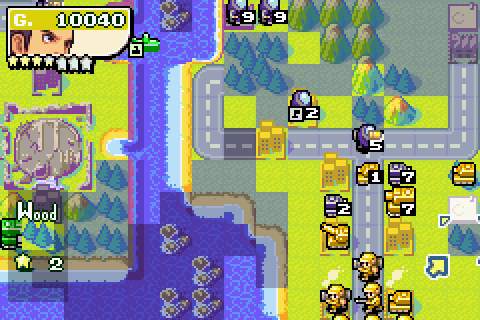
Hey look, another map where the bulk of our forces is some distance away from the HQ! Fortunately, this time we have someone to help defend our HQ area: Kanbei, having driven Black Hole out of his homeland, is here to lend a hand in Green Earth.
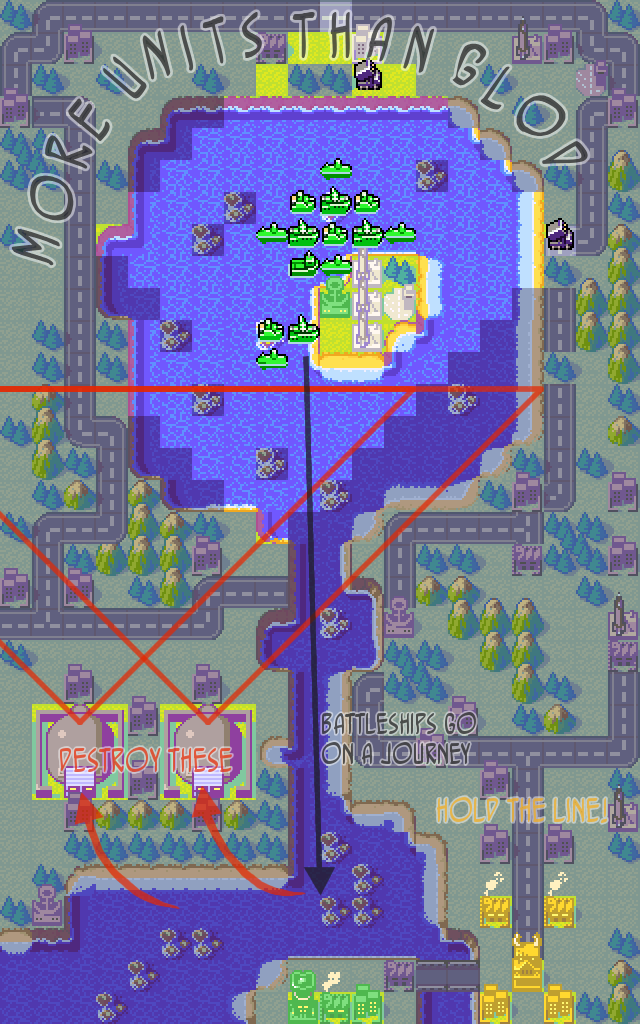
Our goal here is to take down the two black cannons: the easiest way to do that is to reef-hop a couple of battleships with some submarine spotters down to the HQ area, and then take the cannons out that way. Meanwhile, Kanbei's job is to hold the line and prevent Hawke from reaching both his and Drake's HQs. To be honest, I'm not sure what the dilemma is, as this seems like a fairly straightforward plan. It's tricky to get a good power score here though, because Hawke has a very large army coming to pay you a visit, and Drake doesn't have the resources to build a proper land force.
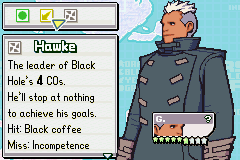
Well, we know he's unharmed, but what else do we know of Green Earth's Commander Drake?
Paul.Power's CO Notes: Drake
 Theme
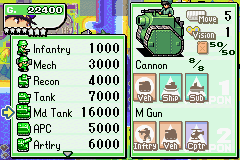
ThemeDrake is the game's naval specialist, but interestingly his ships don't get an attack bonus: instead they get +1 move and +10% defence. That +1 move is very handy, though, and it makes Drake pretty much the only CO whose ships can effectively combat air units (since his cruisers can outpace copters and keep up with bombers). It also puts his landers on a par with Sami and Sensei. His drawback is a massive 30% penalty to air units; his ground units are average. Drake's CO powers are fun: Tsunami calls up a massive wave that deals 1 damage to all enemy units (unless they already have 1HP) and drains half their fuel. Super power Typhoon deals 2 damage, drains half their fuel and makes it start raining: like Olaf with snow, Drake doesn't get movement penalties in the rain.
Background/Personality: My favourite CO personality-wise though not gameplay-wise, Drake is laid-back and self-deprecating, this big-hearted (and big-stomached) former pirate often finds himself mediating disputes between the two big egos of Eagle and Jess. Going on the "each Green Earth CO is a country" theory, Drake is Britain - with a particular reference to Sir Francis Drake, pirate, naval captain, and one of the masterminds behind the sinking of the Spanish Armada in 1588. With the smaller British ships more nimble and easier to defend than their Spanish counterparts, the Spanish were routed before their remaining forces got swept away in a great storm.
As it happens, Drake was the first Advance Wars CO that I wrote a limerick for, and it's still one of my favourites:
Green Earth has a CO named Drake,
Who decimates foes in his wake,
He's sufficiently round,
That tsunamis abound,
When he "cannonballs" into a lake!
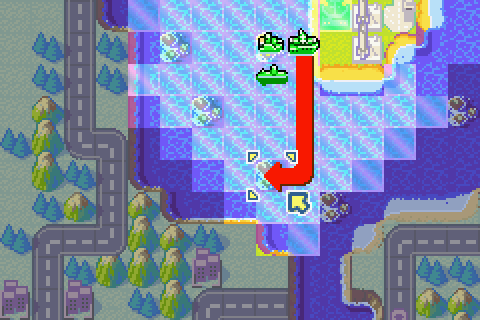
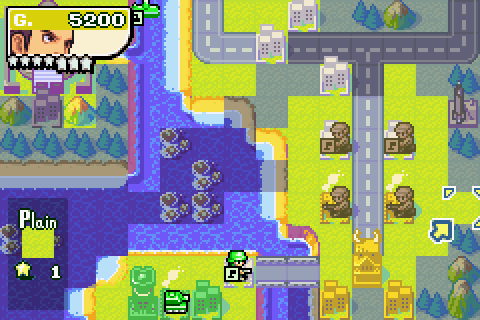
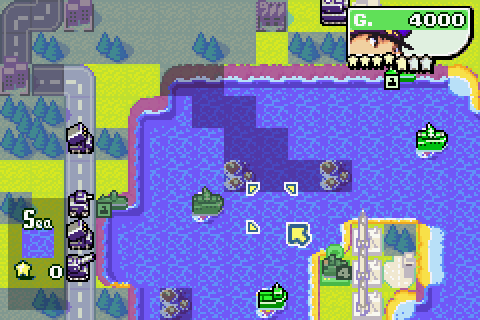
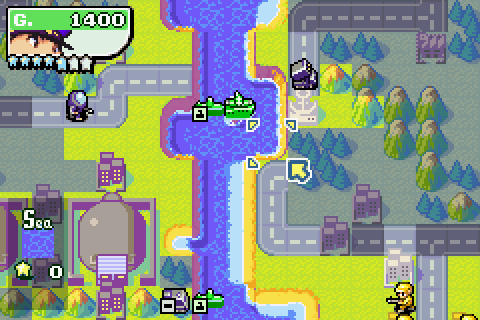
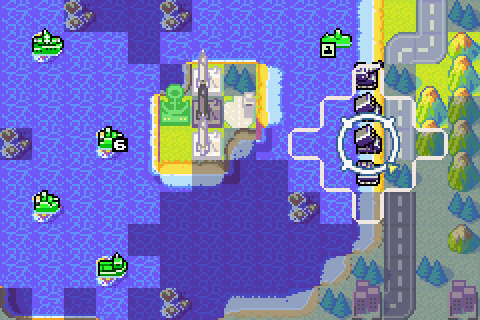
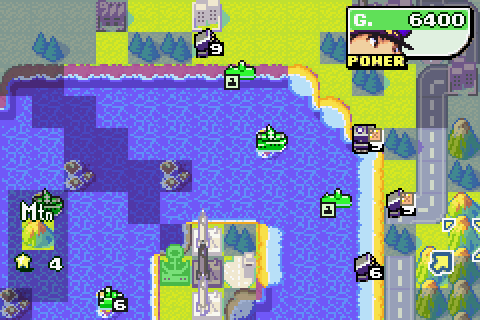
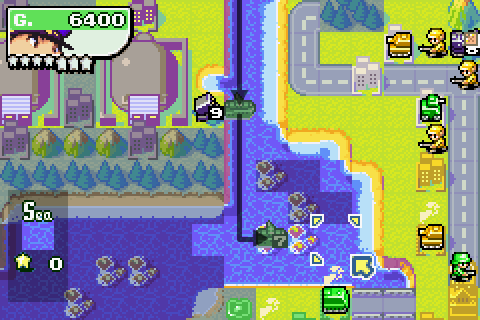
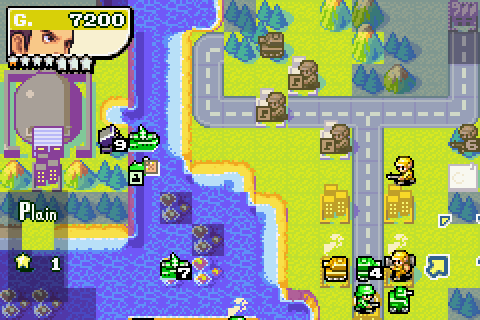
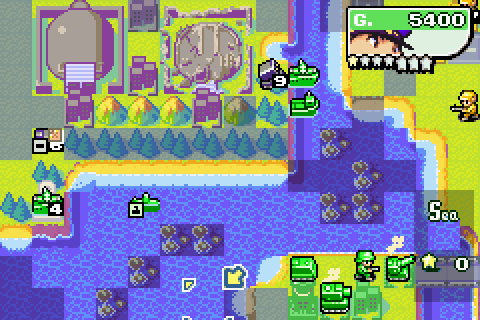
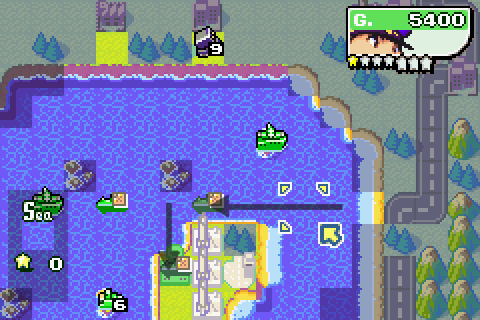
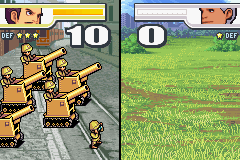
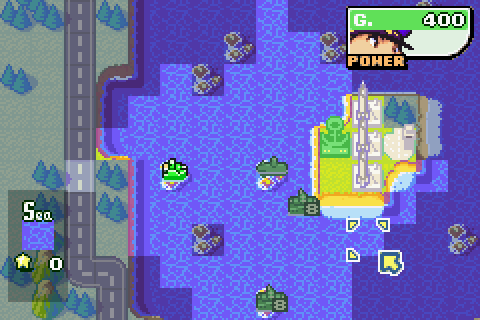
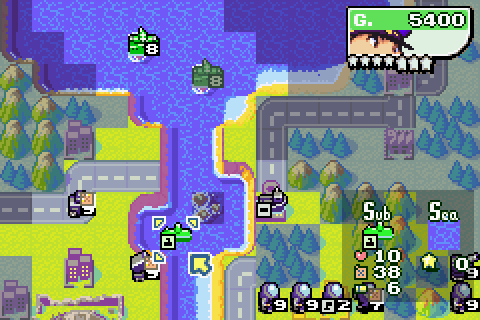
Drake's +1 move comes in handy straight away: moving to this reef square costs six move points (four to cross the four squares of open sea plus two to enter the reef), and most COs' battleships only get five move. Drake gets six, so he can reach this reef. Very handy, because otherwise the ship would be shot at by that Black Cannon.

At least submarines don't have to worry about hiding in reefs. We'll bring a couple with us, the extra vision down here should come in handy.

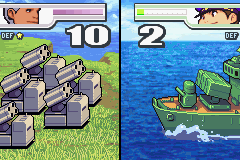
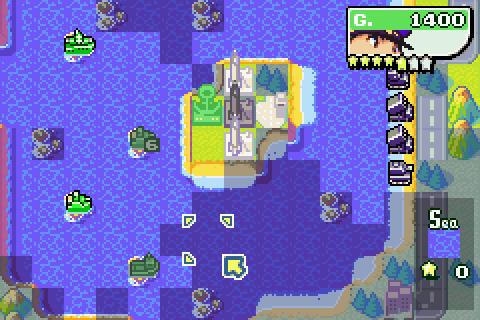
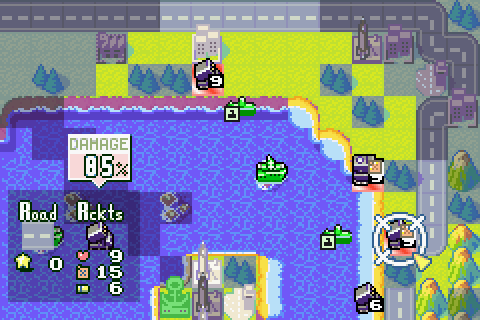
Cruiser moves down into a reef to let a second battleship come forward. The cruiser and battleship may be in Black Cannon range, but you can't hit what you can't see.

Now, as for the rest of Drake's navy... we'll need submarine spotters, and battleships to get ready to help us build at least some sort of power score.

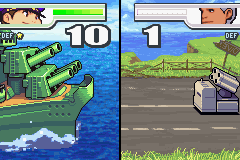
The cruisers will be rather less fortunate, though. I'm going to need to let a couple of units take damage so I can build up Tsunami without building up Hawke's power bar too much. I'll try not to get them destroyed, just damaged: they should survive the fire from Hawke's rockets.

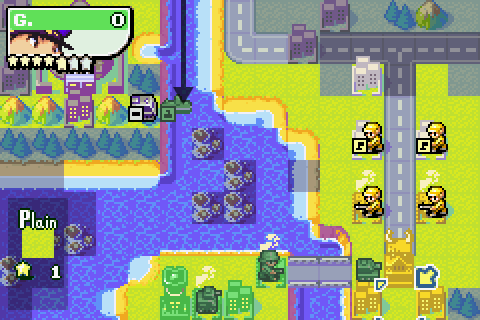
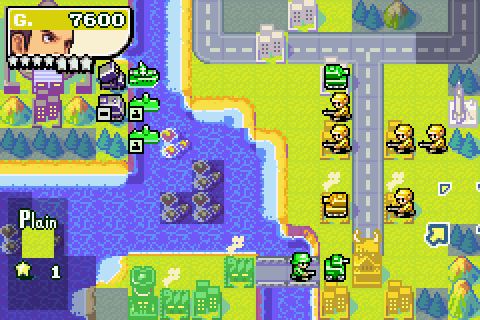
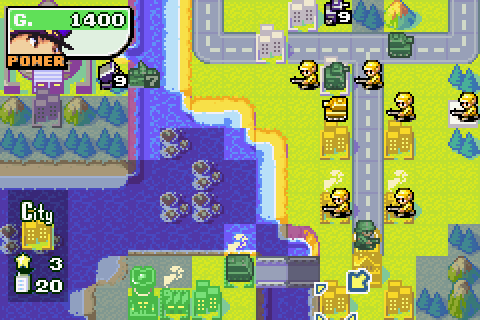
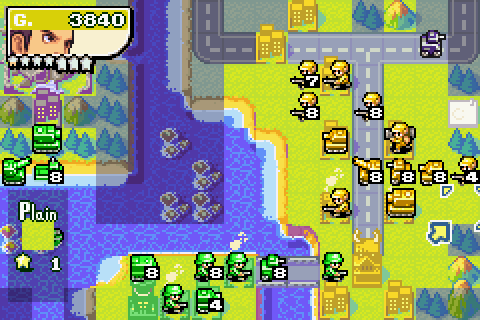
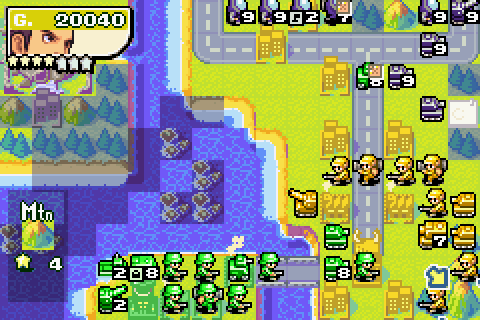
Back at HQ, time to build an infantry so I can grab this other base here.

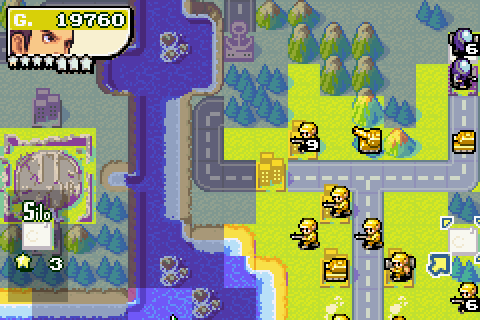
Kanbei's turn. We've got a few nearby cities we can capture, and a missile silo over there.

So let's do the obvious thing and produce a couple of infantry units.

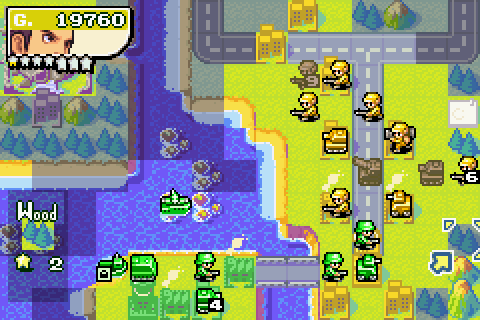
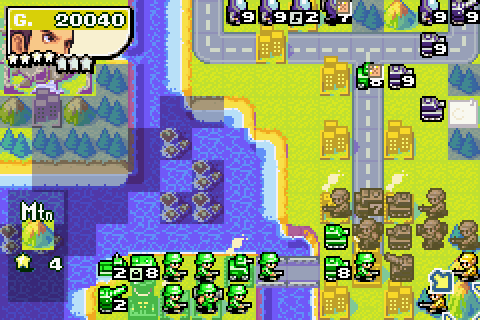
Oh. Wasn't expecting that an artillery in a forest. Oh dear.
Day 2

Oh dear because, between artillery and rocket attacks, it means I've lost a cruiser. Darn. Oh well.

Gotta keep trucking. The subs scout ahead to find out what manner of foe lurks down here, while the battleships continue their reef-hopping journey.

The damaged cruiser hides in a reef, a fresh cruiser takes its place in the line of rocket fire.
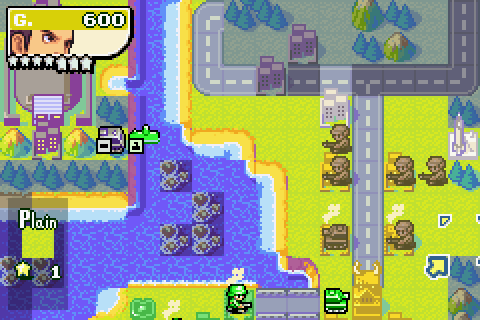
I think we'll have a tank down south.
No prizes for guessing what Kanbei did this turn.
 If they use those missile silos, it may prove problematic. Can the cannons withstand direct missile fire? Yes, sir. Mistress Lash says the missiles won't even leave scratches. If that's true, we're safe. They don't have many troops deployed yet, do they? Attack immediately. An ounce of prevention as they say.
I guess I appreciate the reminder not to waste my missile silos on Black Hole Structures, but really, we were told all this back in Factory Blues...
Okay, this time the cruiser sacrifice worked without any unexpected artillery complications.
Day 3
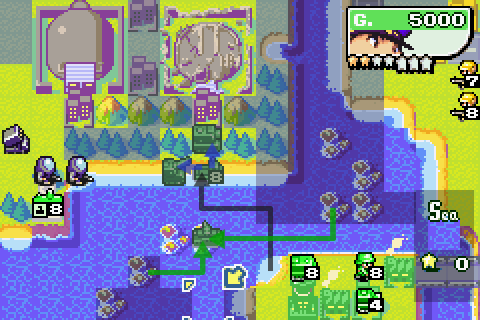
Well, that's Tsunami charged. I want to try and keep my powder dry a little longer here, though. I'm not even going to start attacking Hawke yet.
The cruisers join and head to the safety of that central port, while a sub and battleship head out west to see what they can see.

The battleships continue their journey south...
A sub scouts ahead, finding an APC among the forests. I know there's a rocket in the forests round here somewhere, though...
With Kanbei I capture two cities and crank out a tank.
Day 4
Uh-oh, no reefs ahead. This isn't a major problem because we're now past the Black Cannons, but there could still be rockets lurking about.

Oh well, nothing ventured, nothing gained. The first battleship moves up (conveniently into the range shadow of a rocket launcher), and the second battleship takes its place in the reef.

The subs move up too.
Drake's tank moves out to help Kanbei defend over here, and maybe pick up a few units to help with that power score.
The lander goes off to follow the battleships (short of building another lander from port it's the only way we have to try and transport some ground units to the Black Cannons). Also, the cruiser moves out of port because let's face it, repairs to it are costing us money we don't have. It should be safe in this reef.
Time for the Emperor.
I'm sending out the infantry to try and provide a shield for Drake's tank here. If I can get that tank to kill something it'll help with the power score, so it's a good idea to keep it at full health.
I made a fairly serious tactical error here, launching this missile silo: I went for the largest group of units I could see, when the smart thing to do would be to attack units that are actually in battleship range - or even save up the missile silo for next turn, when I play to launch Tsunami and Drake's power assault. Won't stop me winning, but worsens my power score a bit.

Anyway, let's have more infantry.

During Hawke's turn, he reached a missile silo and fired in on my battleship and subs. Now there's the trouble with not hiding in a reef - even if the indirects can't get me, missiles can.
Recons attack Kanbei's infantry wall...
Day 5

... but the tank is safe.

Right then, enough shilly-shallying about, let's try and build some sort of power score here. As mentioned when I introduced Drake, Tsunami knocks 1HP off all enemy units but can't kill them. It also halves their fuel, which can be a handy extra trick.
Now they're softened up, it should be easier to take down these units.
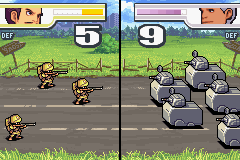
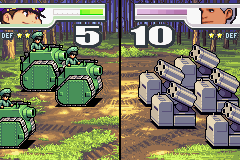
Hmm, a 9HP rocket. 85% damage. Will luck be on my side?
Dammit, that rocket just survived by the skin of its teeth. That probably consigns us to a rubbish power score.

But let's not lose heart just yet. I can take out this recon over here, at least.

And here's another recon that I can take on with that tank I built a couple of turns ago.

Two down. Can this battleship make it three? It's another "85% attack on a 9HP unit" job...

Woo.

And while I'm here, I can start damaging the cannons with this other battleship.
I'd better build an APC down here - when those submarines arrive, they'll be very low on fuel.

The lander keeps following the battleships and subs down to the south.
Black Wave's now charged up, but at least I got my COP in first. And Hawke might want to save for Black Storm.
Anyway, here's Kanbei.

Here's Kanbei taking out a recon with a tank and then spotting an artillery unit with an infantry.

Here's another of Kanbei's infantry attacking said artillery for less-than-massive damage.

And here's all of Kanbei's other units moving up, building a second tank and a mech.

Here's Hawke taking out one of Kanbei's infantry
 .
.Day 6

Right then, back to Drake.
The battleships continue their reef-hopping.

These two subs are now ridiculously low on fuel, so I've joined them together to keep them afloat that little bit longer. Even joined together there's only 13 fuel to go around, but it should be just enough.

The lander keeps following behind, and we can see now that Drake's tank took a fair bit of damage on Hawke's turn: it's down to 4HP.

So let's retreat that tank out of harm's way, and bring the recon down with it. We can't afford Drake losing too many units given it's him that we're relying on for our technique score.
Kanbei's turn.
While we've got the chance, let's get to capturing some of this stuff over here. A little extra funding never hurt.

The rest of the guys can fall back a bit to give Drake's tank and recon some cover.
Day 7

A fairly quiet turn for Hawke there.

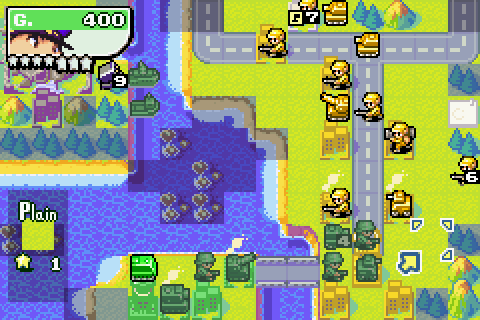
Trouble is though, he's already built 49 units, and that number's only going to get bigger. And Drake's only managed to take out three units in one turn so far.
But the good news is that at least it's not going to stop us continuing with our main objective: taking down these black cannons.

As the full-health battleship knocks the eastern cannon down to just 6HP, I finally get this sub refuelled by my APC.

Y'know, I can't really decide whether I'm supposed to be attacking or retreating over here. Either way, I spot an attack of opportunity on one of Hawke's infantry who's just hanging around over here, and take him out with Drake's recon and 4HP tank.

Kanbei time.

Grabbing some cities, and revealing the artillery that's hiding in this forest.

Oh, whatever, let's take it down before it can destroy Drake's 4HP tank.
And we'll have a recon and another infantry, I think.
Day 8

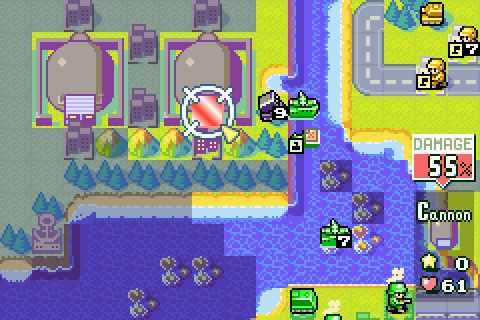
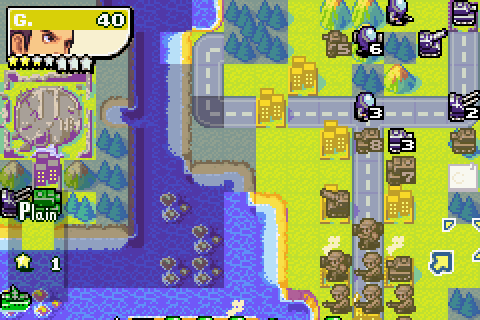
Right then, let's finish off this first cannon.

Ka-BEWM!

One down, one to go, but this second cannon is going to give us a lot more grief. Why's that? Because we've run out of reefs to hide our battleships in, sadly. There are no reefs close enough to the cannon that we can hide in to attack from.
But I do try moving a battleship to this port over here. At least I'll get some extra defence here, right? Well, we'll see about that.

The refuelled sub heads over there too to provide some vision, while the lander keeps heading south.
Thanks to not bothering to build stuff these last few turns, I've got a fair bit of money to spend. Ironically, enough to buy a neotank - if we'd done the lab mission. Oh well, my fault for persuading y'all to come here first


Let's have a medium tank and an artillery in place of that neo. Funnily enough, a middie and an artil probably could beat a neotank, provided the middie and artil had a chokepoint to work with.
Anyway, I've decided to retreat the tank and recon over here again (I bet you're wishing I'd make up my mind here. I know I am. Never mind Drake's Dilemma, what about Paul's Dilemma?).

More low-fuel subs. I'll need to take them out of dive mode to staunch the bleeding. They should be fairly safe here, at least - what with being out of black cannon range and all.

This one still has a bit of fuel left, so it's not in immediate danger.

Right then, time for the Emperor.

On a whim, I decide to scout out what's going on over here by this factory. The answer: not good news for my scouting tank.

Hawke's not far off a full power bar, now.

Oh well, guess I'll do some general moving around or something. Like putting that arty up in a forest. Two can play at the fog of war game, Hawke.

... and this is what I get for deciding to move that battleship to a port: turns out Hawke had a rocket launcher hanging around nearby. As predicted, the port reduced the damage I took: only 3 damage. But it would have been nice to receive no damage at all.
Day 9
So, we're going to need to move that battleship out of harm's way.

So I'll do that, and stick this dived submarine in its place (shoot that, Mr. Rocket Launcher!). I'll also bring the other battleship and the lander down with me, and load the artillery and medium tank into said lander.

Now then, these submarines...
Moving one of the subs into port for refuelling, and then moving and rising the sub in the east... unfortunately, I only spot Hawke's rocket here after I move the sub (literally, since it's the sub that spotted it). Hang on, I've just realised something - I could have attacked that rocket launcher with my battleship and saved my submarine some pain. Okay, it would have charged up Black Storm, but it's going to charge up anyway. Damn. Oh well, sorry Mr. Sub.
Kanbei's turn, and turns out that tank wasn't as doomed as I thought.
So let's retreat it so it becomes even less doomed.

I can afford a Mmedium tank, you say? Well, why not.

That submarine gets hit...


... and it turns out that not only will AI Hawke use Black Storm at the end of his turns sometimes, sometimes he'll use it in the middle of his turns as soon as it's charged (in this case, as soon as he hit my submarine with his rocket launcher). Eesh.

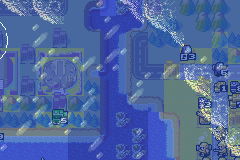
I didn't mention earlier, but Hawke and Drake's (and a few others) CO Powers produce some wacky visual effects. Here's the crazy animation that flashes over the screen with Black Storm. When I use Tsunami a second time a little later on, I'll show that one too.
Day 10

So, all of my units took quite a beating there from Black Storm. But it's not all bad.
For instance, I can join up the 8HP and 2HP battleships to get a nice full-health battleship with no wasting of hit points. And the medium tank and artillery are still in good health (I don't know if I've mentioned this before, but units in transports get "shielded" from the effects of CO Powers, missile silos and so on. Of course, this also means they wouldn't be healed up by Andy or Hawke's powers, but it's a reasonable enough trade-off).
Speaking of joining, let's unite the 8HP and 1HP subs over here and get them refuelled in port, while the newly refuelled sub goes out to scout (dived and in a reef this time, to make doubly sure).
Anyway, time for that Kanbei fellow.
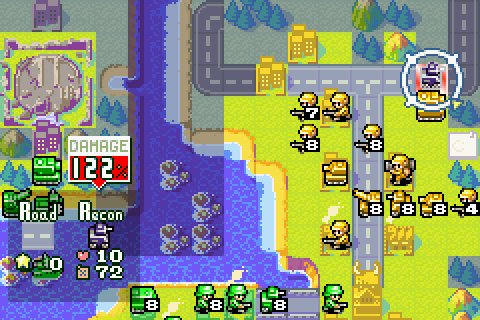
122%? Now that's what I call a tempting target.

However, after scouting with a recon it turns out there's a whole bunch of stuff up here - this might not be great for our medium tank.

And the other units pull back into a defensive formation of sorts. Operation Protect Drake, or something like that.


A montage of Hawke wailing on stuff: first an artillery attacking that medium tank, then a hidden rocket launcher taking on my lander and an AA finding my newly-landed artillery
.Day 11

Looks like the landing party didn't go as well as I might have hoped
.
Time to retreat the artillery and lander to safety by loading and unloading. In the meantime, my medium tank assaults the AA and my battleship advances towards the rockets, looking to trap them in (in hindsight, I should have used the battleship to finish off the anti-air. See if you can guess why)


General ship and sub moving - a battleship starts heading down to provide fire support in the assault on the black cannon, subs hide in reefs, cruisers join, et cetera.
With Kanbei retreating, Hawke's decided to push some units forward here.
So let's counterattack.

As my arty takes out a marauding tank, the 7HP middie starts work on another one.
My smaller tanks head forward to damage stuff, and a recon trundles around attacking mechs. Don't ask me why I didn't leave the recon in the forest for the defence bonus. I don't know either.
Anyway, once more the rest of my units form up into a sort of defensive block.
Did you spot it? Yup, that 2HP anti-air that I didn't kill acted as a spotter so Hawke's rockets could hit my medium tank.

Day 12
Well, this is going to make the invasion quite a bit trickier.

But hey, might as well launch another Tsunami.
Splish splosh splash glub glub (people who like spotting all of the absurdities in the Advance Wars series take note that yes, you can use Tsunami even on maps with no water at all
") ).
).
Unfortunately because I've been messing about retreating Drake's units and stuff, I can't actually take advantage of the damage to try and knock out a few units and beat my current "power record" of 3 kills.

Still, time to start forcing that rocket launcher here to retreat by using my battleship to beat it for range. This has the bonus of getting the battleship into range of the cannon's weak point...

In the North, more naval shenanigans occur as I move my remaining ships southwards.
As for Kanbei...

... well, I sort of have a plan. If I retreat a bit, maybe Hawke will follow. Which'll give Drake a chance to go for a better power score or something.
Day 13

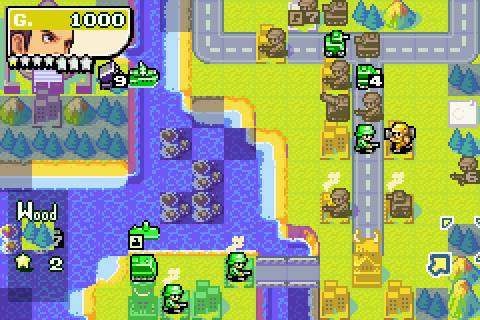
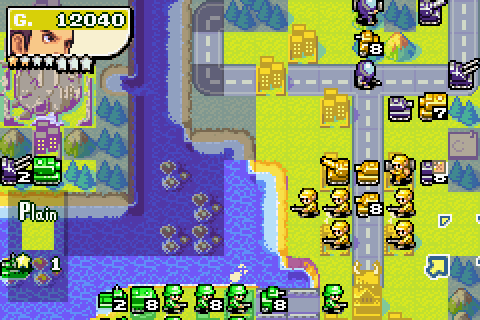
Right then, let's start taking down this second cannon.
Moving battleships down. Although they're probably going to arrive a bit late to help out. I guess I should have done this earlier, really.

I can't even get units in positions to destroy stuff over here: all I can do is send a recon out to attack something, and it'll probably get destroyed next turn too.

But we're closing in on fulfilling the primary objective. Next turn, we win.
As for Kanbei...
... once more, it's time to close ranks.

Yeah, that recon got destroyed. Still, technique is the least of our worries...
Day 14

Okay, let's finish off here.

The medium tank finishes off the AA in revenge for its "spotting" work earlier.

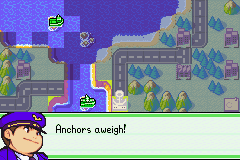
And here we go.

Victory. Not a crushing victory, but victory nonetheless.
Aftermath

 We'll withdraw for the moment. Adjust our preparations.
You know, Hawke, with that army you probably could have won this without the Black Cannons. I mean, it's not like I even ever got hit [/i]by them...[/i]
Commander Kanbei! Ah, Commander Drake. I am pleased to see you unharmed. You have our gratitude for the reinforcements. I believe we might have gone down with our ships if you hadn't come. Nonsense. Even surrounded, I believe you would have turned the tables and emerged victorious. We simply sped the process up a bit. Thanks for the vote of confidence. I would like to battle at your side again someday. The feeling's mutual. Maybe when we're storming Black Hole's fortress... May that day come soon. Until then, good-bye. Good-bye!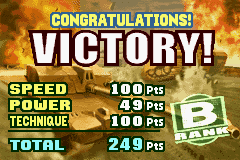

As predicted, power cost us here. The frustrating part is that I was one point short of an A-Rank. If I'd been a little bit more fortunate attacking that rocket launcher (or been a bit cleverer when I launched that missile silo), I could have destroyed one more unit on that turn and got a reasonable score.

And now we're now off to my least favourite mission in the whole of either Campaign: Green Earth's lab map, Danger x 9. I'll post some strategic notes for it in a little bit.