Part 38: Mission 28: Danger x 9 (or "Only a Matter of Time...")
Mission 28: Danger x 9 (or "Only a Matter of Time...")

Roll up, roll up, see me vanquish the mission that's given me so much trouble over the years! And it ends up being a very short-and-sweet mission after all that.

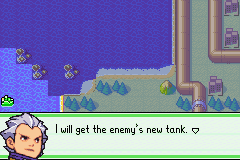
 So the freebooters are working on some sort of new tank?
 Perhaps.
 From what we know, the contingent guarding the place is fairly small.
Yeah, "small", right.
 So if we're going to attack, we should do it now.
 I agree.
 Hmmm... What is it? You two can agree on something. We're both trying to come up with a plan to save Green Earth. It seems to me that sharing some of the same opinions is only natural. That's right. Eagle's exactly right. OK. Say no more.
Oh sure, they're agreeing now, but it's only a matter of time...
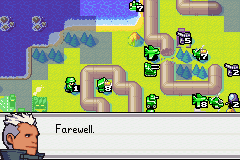
There is one thing that concerns me, though. The enemy has a large force heading this way. When will they arrive? According to our intel, in 10 days. So we must capture the lab by then. It's going to be a hectic 9 days.
As mentioned before, we're going to be using Eagle here.

Funny name, Danger x 9. It sort of implies that the mission would be even more dangerous with a looser time limit (say it was a 13-day mission called Danger x 13...)
"Not you, Red, or you, Drake, me! With my genius strategy! Ahahahaha!"... ahem.
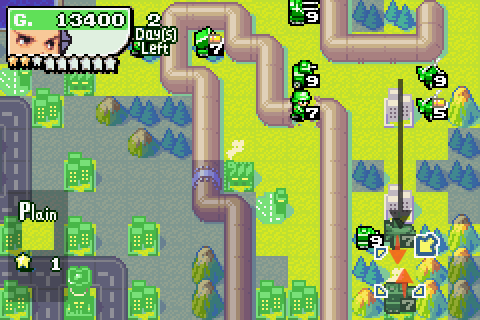
Day 1

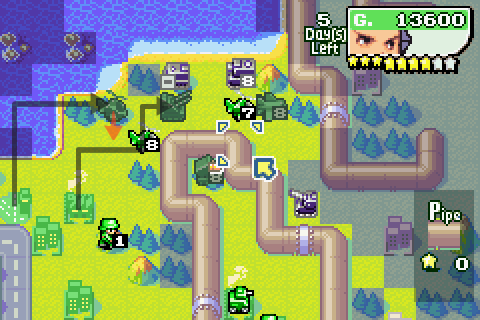
After taking on board people's advice, there are some changes from my "lab notes" plan for this mission - I'm throwing away the "capture" plan in favour of going all-out for rout. And the "distraction" in the south-east will mostly be conducted by the single mech that I already have deployed down there.
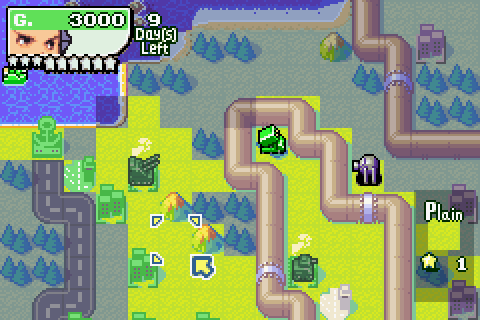
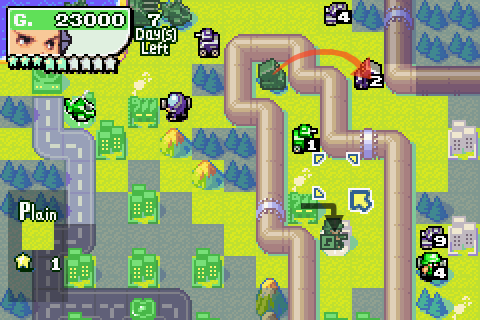
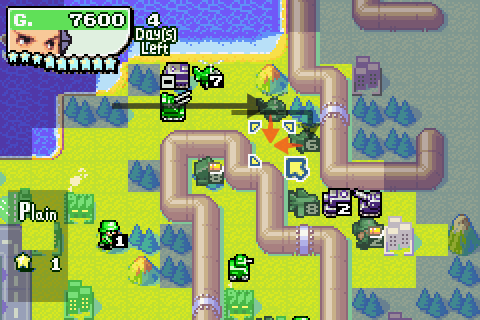
Let's start off, and we're doing things differently from the trainwreck already - I'm going with an anti-air in the west to fend off Hawke's approaching B-Copters, and a recon in the centre to act as a spotter for my "secret rocket launcher". And that recon's already spotted the neotank.
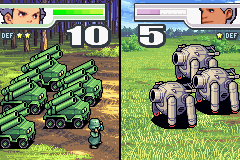
So let's attack it. Why not.

As the rocket attacks, I bring up my two B-Copters and my cruiser, ready to lend their weight to Operation Flyswatter.

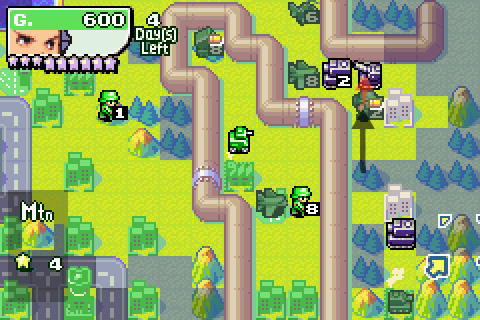
And finally I'll move my southeastern mech north a square - only one square, though, so I stay hidden in the woods.
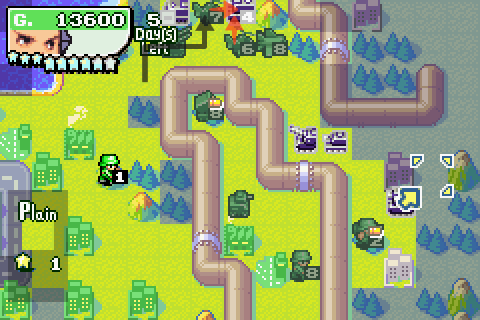
Day 2

Day 2 and Hawke's neotank hasn't even moved.

I finish it off with the rocket launcher, and attack the tank with a B-Copter. Unfortunately, I tried to get too clever with the second B-Copter and end up getting ambushed by a mech (hence the "no entry" symbol). B-Copters ambushed by mechs... shine on Advance Wars, you crazy diamond. But yeah, it's not going to cost us much. I also build a third B-Copter

AA and Cruiser go hide in the woods and a reef respectively, ready to surprise the incoming B-Copters.
I move the recon up to where I think should be a safe spot, provided Hawke's rocket launcher hasn't moved. But guess what? It has! Bother.
Day 3

The recon took a pounding, but it's still alive - just.

We'll get some revenge in a minute but first let's destroy these B-Copters. First up, the anti-air annihilates one copter and the cruiser knocks another down to 2HP (damn you, 30% attack penalty to ships!)

The copters clean up, a full-health one taking out the 8HP one and the 3HP copter finishing off the 2HP one.
Now then, time for that revenge. Rocket attacks rocket, reducing it to 2HP. And I start capturing that central airport with an infantry I built last turn.

Attacking the recon with my final B-Copter, and building a bomber and infantry (the inf to stop that mech from sitting on my base). Trainwreckspotters will note that I managed to get this bomber deployed two days earlier than in the trainwreck. It makes a hell of a difference.

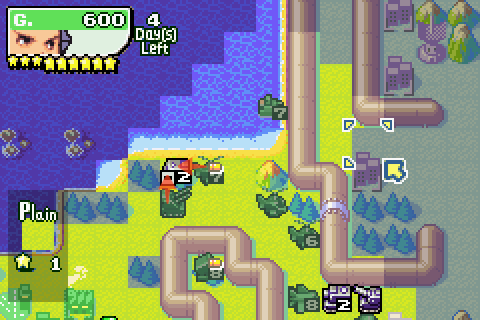
And we'll finish up with some retreating: getting that 1HP recon out of rocket range, and moving my southeastern mech away from a tank that attacked it on Hawke's last turn.
Day 4

The irony is, after retreating that recon I move it back up again this turn. Green rocket needs vision badly.
There's still a few Black Hole units hanging around my base. A battle copter takes out the 4HP tank and my damaged infantry moves off the base. This clears a path for my AA to take out that mech.

3HP B-Copter whittles another hit point off that recon as my shiny new bomber surges ahead. I also produce a B-Copter from the western airport and a second recon to replace the doomed 1HP one in the middle. And I finish off capturing that middle airport with my infantry.
It may seem a bit odd that I'm going to kill the 2HP rocket launcher here rather than attack the full-health artillery, but a) it's a confirmed kill and b) Hawke will unleash Black Storm next turn, so I'd rather like to deny him the opportunity to restore 2HP to that rocket.

Similarly I decide to only move this B-Copter, and not attack the medium tank over here - it'll only get repaired.

In the south-east my mech continues its guerilla campaign, knocking that arty down to 1HP now.
And that's about it for this turn.


Well, we've prepared as much as we can for this.
Day 5

That stung a bit, but it's nothing we can't handle.

Let's start things off by using the bomber and rocket launcher to take out Hawke's AA. With no anti-aircraft units left, Eagle's copters and planes now have the run of the map. At least, once we clear these bloody pipes out of the way.
B-Copter finishes off recon, and the AA moves up as well because well, why not.

My fresh recon moves to give me some vision, and this time, happily, not straight into artillery range. And my 2HP "guerilla" unit limps along to the next forest.
In the north, my other two B-Copters attack a tank. I'm not spending any money this turn so I can get a bomber next turn.
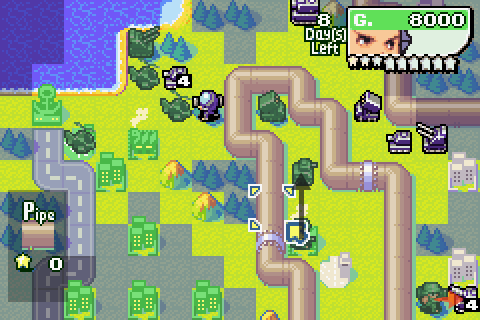
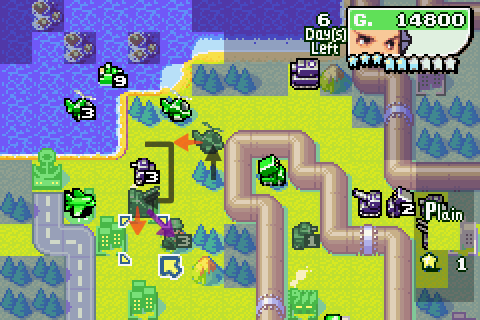
Day 6
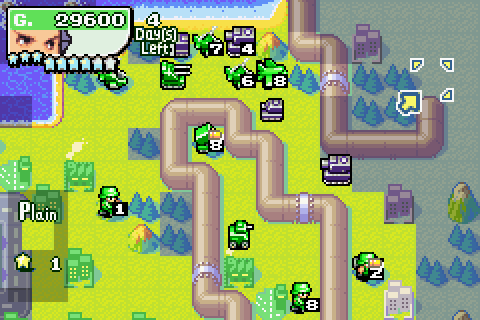
We're looking to launch Lightning Strike today, which means we need to get that last star-and-a-half of Eagle's power meter filled up.
First though let's build a bomber down here so it can break down that pipe seam during the Lightning Strike.
The "secret rocket" attacks and kills the 4HP medium tank that was hanging out by the beach - and those rockets are now out of ammo. As someone noted, one advantage of using Jess here is that you can use her powers to resupply this rocket unit so it can fire every day. On the other hand, if you're still relying on this rocket unit by Day 9 then there's probably something wrong with your plans (like I'm one to criticise how other people play this mission
 )
)
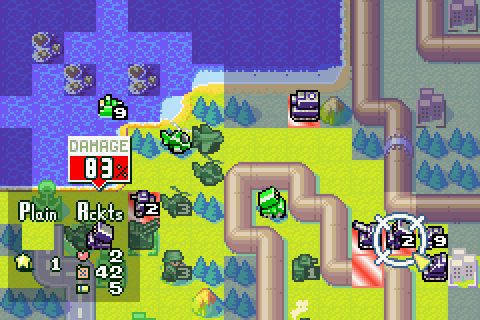
The rockets went for the 4HP medium tank rather than the full health one because this way I can maximise the amount of damage my bomber puts out this turn - important given I need to charge these power stars up. Half a star to go...
Taking out this tank with B-Copters fills the meter.
Before we launch though, I'm going to build a tank down here to take further advantage of the Lightning Strike (I also attacked the artillery with my 2HP mech, without any success).
And I'll just bully this APC a bit with anti-air and battle copter fire.


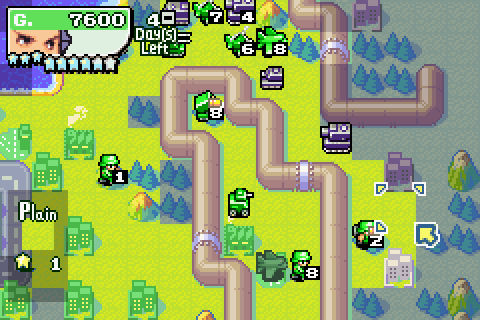
Okay, with that done it's time for lightning to strike twice.

Let's set the ball rolling by taking my newly-minted bomber and blowing through this pipe seam here.

The 8HP bomber then finishes off the medium tank, and a B-Copter swoops in to cripple the artillery behind it.

AA finishes off the APC. It may be harmless, but we are going for rout here so...

With my south-eastern tank now hiding in a forest to escape the wrath of the nearby medium tank, and my two other B-Copters moved up, it's time to end turn.
Day 7

Not much to report - an artillery retreated, the medium tank went looking for my tank.

Okay then, let's blow up this other pipe seam with my full-health bomber. The AA rushes forward to... er... lend moral support?

8HP bomber and 6HP battle copter take out Hawke's rocket launcher, revealing an infantry unit behind it.

The full health B-Copter cripples that infantry unit while then 7HP one goes through the broken pipe seam to see what's going on the other side. Artillery repairs, as it happens. My recon also moves up.

And I'll have a medium tank down here to match Hawke's middie.

Hawke gets a Black Wave but his options are running out rapidly.
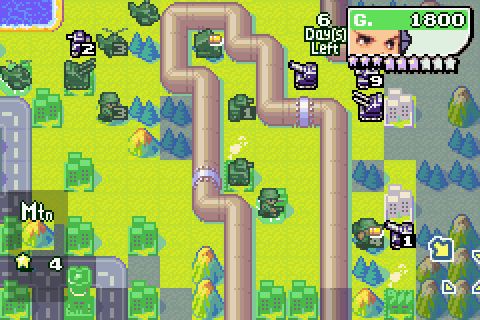
Day 8

So between Black Wave, city repairs and unit joining Hawke's artilleries went from a 3HP one and a 2HP one to a single 9HP arty. Not bad at all - except for the bit where I'm mostly using air units and that arty is pretty useless anyway. With any luck there are no hidden units, and the medium tank, 3HP infantry and 9HP arty are all that's left. If that's the case, then I can finish on this turn.

The 7HP bomber assaults Hawke's medium tank...
That middie falls as my own one finishes it off.

Taking out the 3HP infantry with my 5HP battle copter...


And bomber and B-Copter kill that 9HP artillery. Is that the last unit destroyed?
Aftermath
Turns out it was - we finished with a day to spare!
 I heard that they'd just been found. This brings us one step closer to matching the enemy's strength. Uh-huh. I'm looking forward to trying out those new tanks. At last, a chance to demonstrate my specialty. Excuse me? Eagle, you're just a glorified flyboy, right? Leave those new tanks to the ground-combat expert. That's me! Who's a glorified flyboy?! If we leave these new tanks in your hands, Red, they'll be wasted!
 What did you say?! I dare you say that again, Eagle! Stop it, you two! Whew... And it all comes back to an argument. I wish this were more than just an excuse for you two to fight.
Told you it was only a matter of time...


Well, after all my earlier worrying about this mission, that went as well as could be expected - a 300-pointer here really takes the pressure off me average-score-wise (for those keeping count, I think I now need to average 245 over the last six missions).

Having beaten the lab mission, we can now go back to our choice of missions, one for each of our three Green Earth COs. The good news is that all three maps have bases, so all three offer opportunities for neotank deployment.

Option 1: Rain Of Fire
Jess vs.  Hawke. Hawke sets up his attack near a volcano to disrupt the flying ability of Eagle's air units. Can Jess dodge the eruptions and win the ground war? This was a pretty straightforward mission in Normal Campaign, but to spice it up for HC Hawke gets a pre-deployed mech flood, which makes the opening exchanges more challenging. But it's still a reasonable enough mission.
Option 2: Navy vs Air
Drake vs. Hawke. A much more fun mission than Drake's Dilemma, this mission has Drake doing what he does best: being pretty much the only CO whose navy can take on an air force and win. But saying that, the odd thing about this mission is that it's really won in the ground war... This is probably my favourite mission out of these three, although it can get a bit long and stalematey towards the end.Option 3: To The Rescue
Eagle and  Sami vs.
  Adder. Romantic tension time as Eagle rushes to save his "love interest" Sami from Adder's lasery, lasery trap. Well, except for the bit where the romance developed in Advance Wars 1 isn't even mentioned. Probably my least favourite of these three missions (I think it's an Eagle thing, I've never really got the hang of him... odd when I like Sensei so much, but there y'go), this mission is also the last time we face Adder.
So, time for some voting! Where shall we go next?
Author's Note: Do you like trainwrecks? If so, today's your lucky day - here's a zip file containing the screenshots from my first, failed, attempt at this mission. Enjoy watching me stumble around cluelessly!