Part 41: Mission 31: Navy Vs. Air (or "Navy, Army and Air Vs. Air")
Mission 31: Navy Vs. Air (or "Navy, Army and Air Vs. Air")

Right then, it's a new month so let's get this moving!

 Yep! I built it to your specs, but...
 But what?
 Are you sure you want a standard airport? Lemme add some options! Options? What are you talking about? You know, all kinds of stuff. Like a self-destruct system. Not necessary.
 Tsk! Boooooring! If it's ready, I'd like to use it now. The enemy is close at hand. Go ahead, be my guest.

 They'll finish it shortly, sir.
 You didn't notice this earlier? They must have hidden it somehow. Plus, they built it in such a short amount of time. Amazing speed. I see... Thanks for the intel. Good work. Yes, sir. Thank you, sir. They must've realized I'm the only one who can sail these waters. Planes vs. boats... Air units do have powerful advantages, but... I'm not sunk yet! This sea dog's got a few tricks up his sleeve!
Day 1

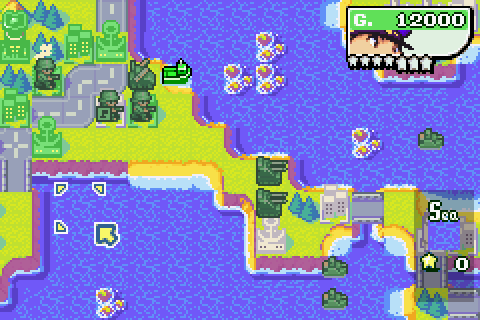
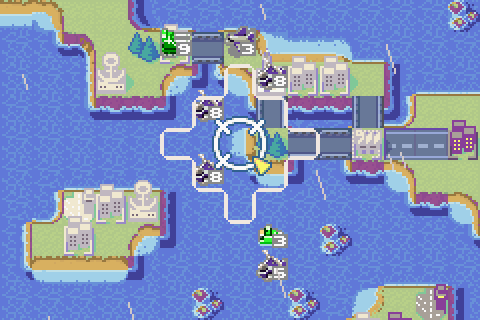
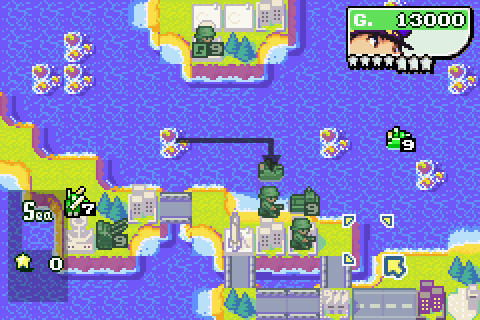
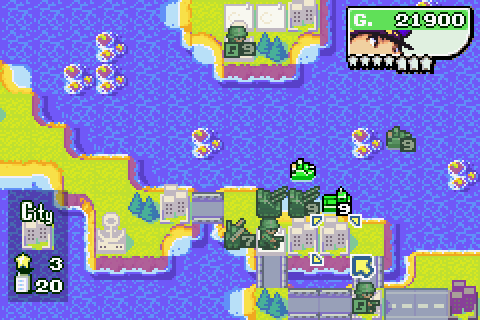
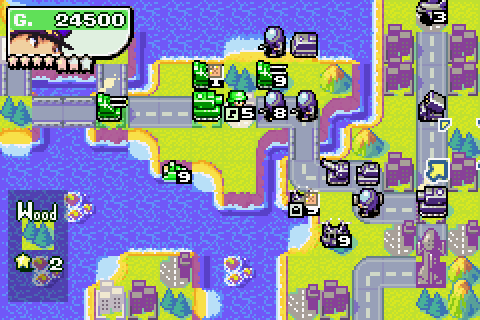
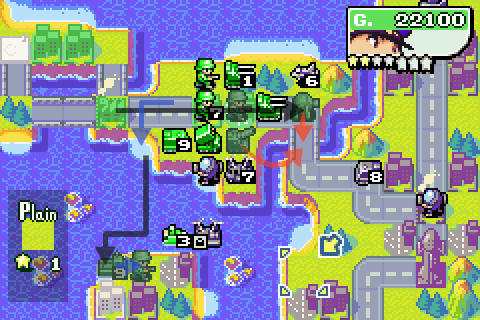
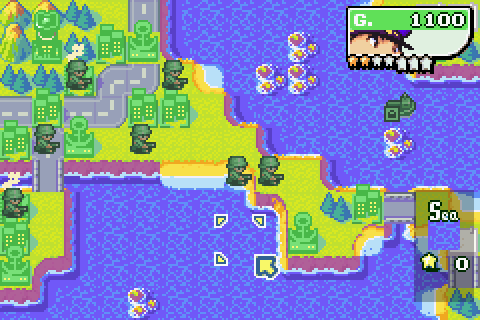
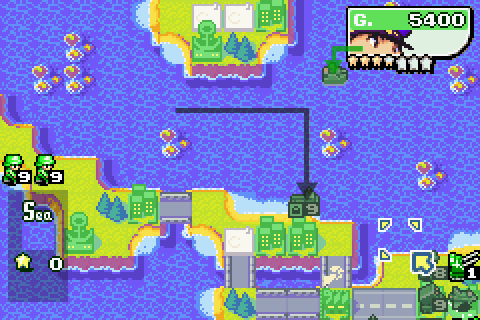
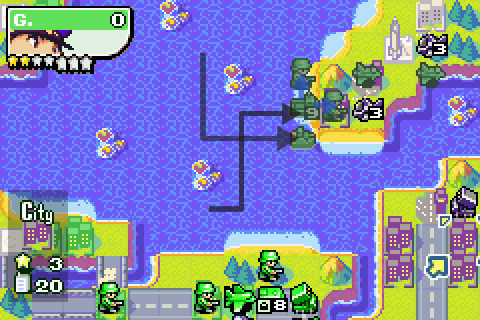
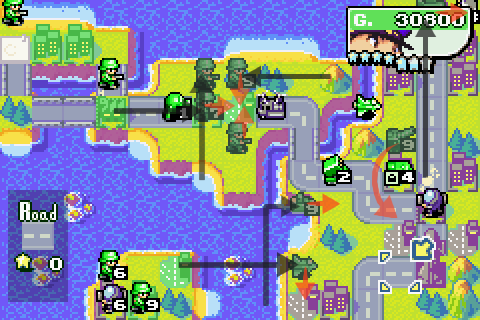
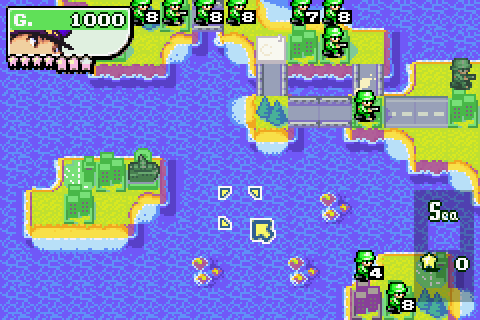
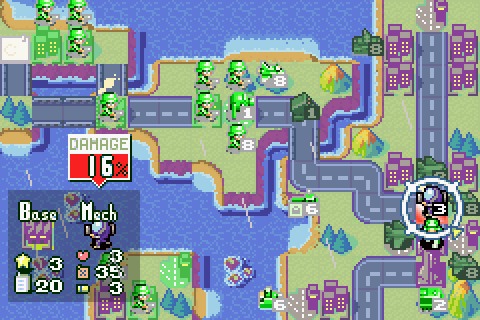
An interesting thing about this mission is that the map's completely different from the Normal Campaign version. Okay, that's true of a few missions, but for this mission the key word is completely: sure, Sea Fortress HC is vertical rather than horizontal, but that mission really does feel like the map was just flipped. Whereas this is just completely new. Anyway, a long, thin land bridge separates Drake and Hawke, dividing the sea in two (and, because ships can't pass under bridges, this means that we can't reinforce one side of the sea from the other side. This gets pretty annoying later on).
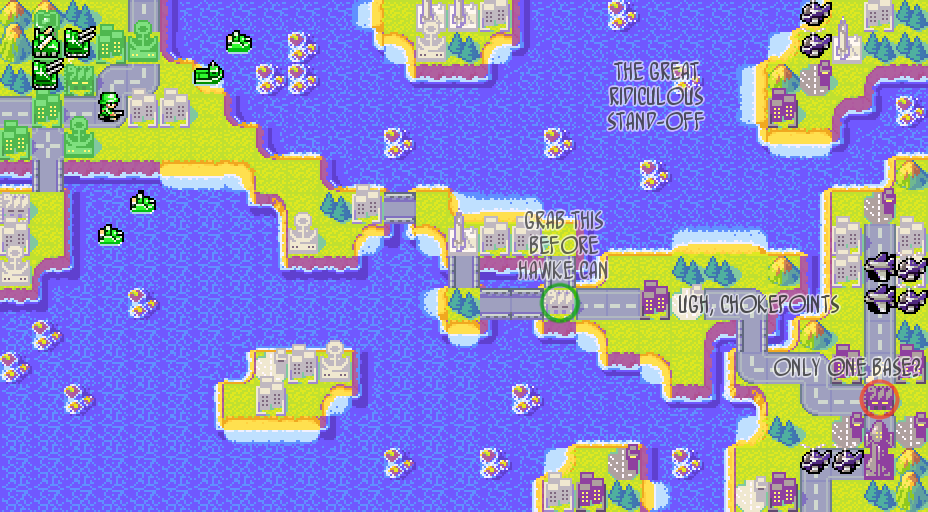
Hawke has a big pre-deployed air force and starts with five airports - with another one in easy access range. However, he only has one base. Okay, we only start with one base too, but there's another one reasonably close to us. Hawke's second base is a bit further away, far enough away (and close enough to us) that we can grab it way before the AI decides to wander its way over there. So the first phase of this battle is to fend off Hawke's initial forces and secure that base. After that it gets tougher, because breaking into Hawke's HQ area requires us to worm our way throguh a nasty-looking chokepoint. There'll also be a Great Ridiculous Standoff in the north as my cruisers square off against Hawke's copters (okay, Drake's cruisers can outrange Hawke's copters, but Hawke can take advantage of the land to block my ships). But we'll break through and wear him down eventually.
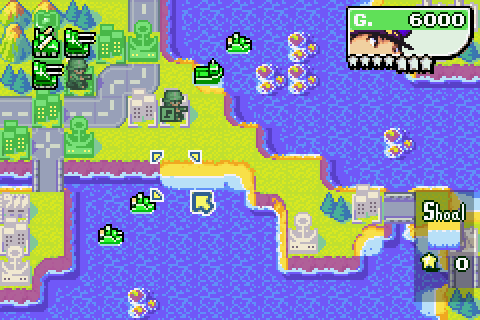
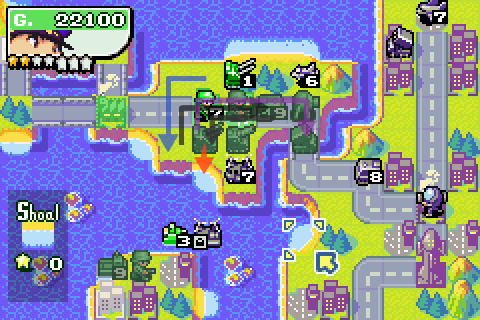
Let's start the ball rolling by using our initial infantry to start capturing and building a second one.
The other ground units move up as well...

... before the cruisers race into the lead, ready to hit Hawke head-on.
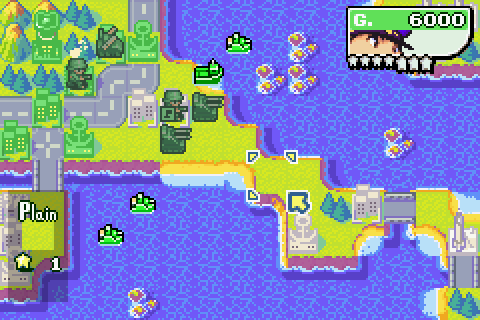
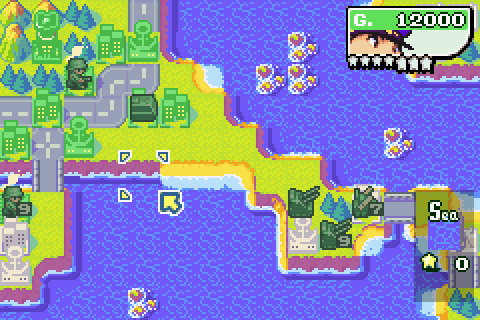
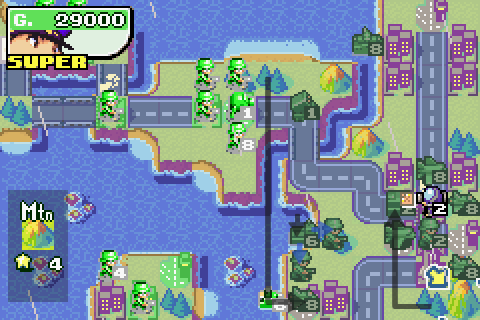
Day 2

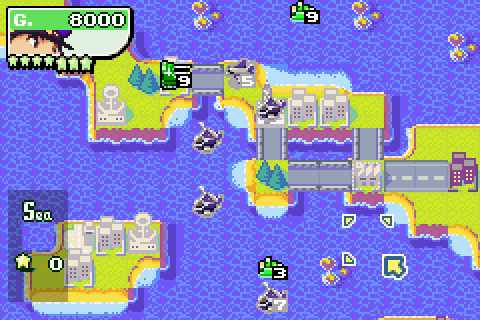
Meanwhile, here comes Hawke's airforce. And he decided to build one infantry... and two T-Copters. This is what having only one base does to you, folks.
Let's check the range on these bombers so we can set up just outside of it.

This works.
The AAs follow the cruisers' lead, and I continue general capturing/building/moving back at base.
Day 3

Hawke's decided to be bold and move his bombers right into cruiser and AA range.

Bad idea, Hawke.

AA assaults one bomber, cruiser attacks the other. Note that, even with Drake, the AA still ends up doing more damage. That's AW2 navies for you. I also take out one of the many B--Copters with the other southern cruiser.

And the northern cruiser takes down a chopper as well, while my AA moves up.

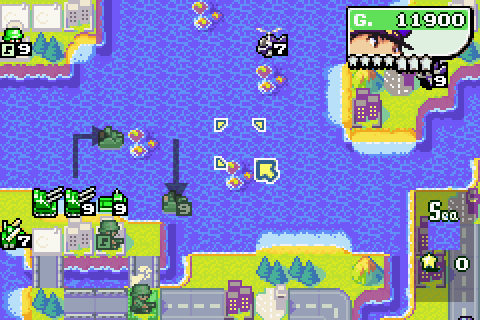
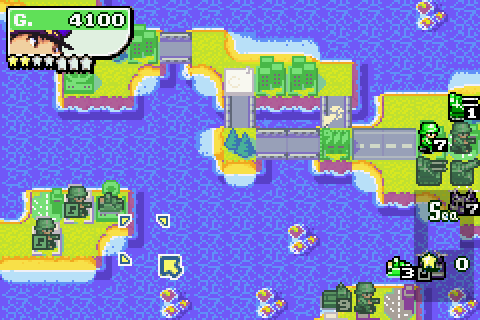
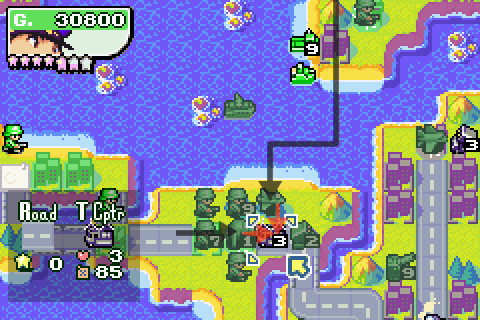
Let's send the lander over here so we can launch these missiles and capture more stuff.

More capping and moving, and building a cruiser so that we now have two cruisers on each sea.

Blimey, that was fast (I forgot to screenshot Hawke's power quote, but I bet it was more of the usual).
Day 4
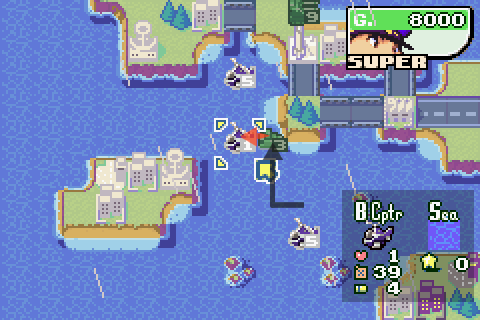
Well that was painful. I lost an AA and a cruiser, and had another cruiser knocked down to 3HP. And, irony of ironies, that new cruiser I just built is now on the "wrong side" of the land bridge.

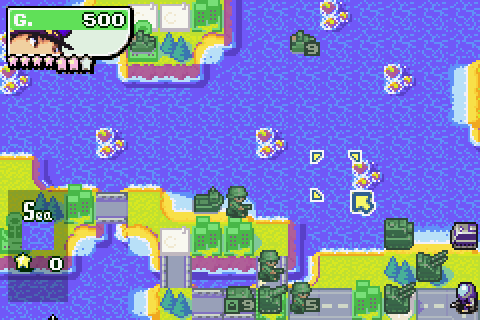
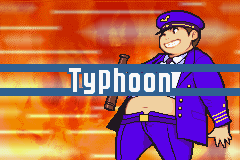
But on the plus side, we can strike right back. And I can show you Typhoon for the first time. Typhoon does 2HP damage to all enemy units and halves their fuel, but it has one other effect...
... it makes it rain. Like Olaf with snow, Drake is immune to rain. Rain isn't as effective at gumming up the works as snow is - it only really affects vehicles that are trying to go across plains or through forests. Although saying that, Olaf is as vulnerable to rain as other COs are to snow. But we aren't fighting against Olaf.
Anyway, while we're in a "dealing unblockable damage" mood, let's use a missile silo on these two B-Copters. Why these two, when we could hit three units if we aimed the missile one square further north?

Well, those units we aren't hitting are going down anyway.

The northern cruiser and the AA work together to take out the two air units that are hanging out on the land bridge...
... while my damaged 3HP cruiser conducts a desperation attack on one of the helicopters. It's doomed next turn, but we may as well get damage in where we can.
More moving, capping and building.

And there goes my 3HP cruiser
 .
.Day 5

"Should we capture that base over there that looks pretty strategic and is likely to be heavily contested by the player if we don't get there soon?"
"Naah, let's grab these four unimportant cities over here that we could always capture later on."
"Okay then."

Meanwhile the remains of Hawke's initial air force hang out in some places that I can't attack them from.

OR SO HE THINKS.

My lander now loads up with a pair of infantry so I can rush ahead and claim that middle base.

And the cruisers move up to protect it and scout out what lies ahead.
Let's finish off by building an APC to help with the troop-ferrying.
Day 6

And Hawke is still focusing on capturing those cities over there.

He attacked my missile launcher with a crippled battle copter, though. Good thing I can strike right back.

The lander drops off its cargo in range of the base and another nice missile silo.
A cruiser moves up with them while my infantry unit on the island gets to work acquiring another port.
Units moving up.

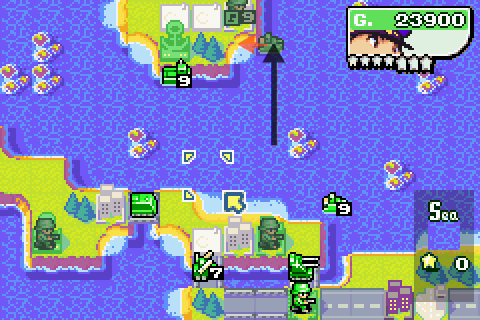
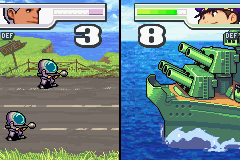
And my other cruiser moves another square closer to Hawke because hey, why not. Cruisers have nothing to fear from fighters...
Day 7
... although they have quite a bit to fear from bombers. Eep.

Good thing we still have a missile silo up our sleeve - although I still need to retreat the cruiser, just in case.
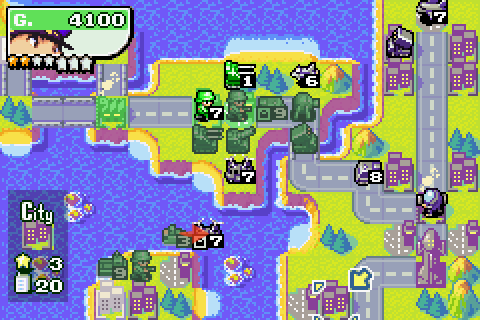
My ground anti-aircraft force meets up with the rear infantry unit as I get to work capturing this forward base.

And APC transportation for one of my infantry, so I can start "filling in the gaps" by capturing the stuff I left behind in my bid to reach that base first.
Day 8

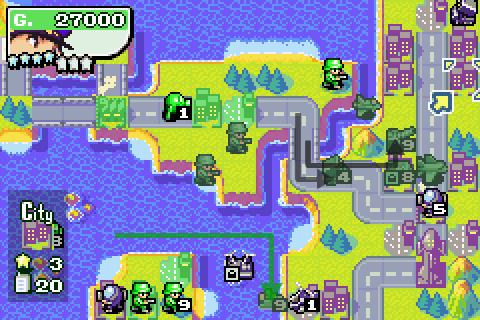
Day 8, and Hawke finally has some offensive power on the ground in the form of an artillery.

Meanwhile, his air units continue to play silly buggers over here.
I'm pretty good at that game too (you can now see why I labelled this area "the great ridiculous stand-off" on the starting map). While my cruisers mess about looking for some kind of leverage, I finish capturing that base. An object lesson for the AI in the importance of getting your infantry to the middle of the map ASAP.

More infantry at work over here, as my new southern cruiser leaves port.

And the AAs move forward to protect my new base, among other things.
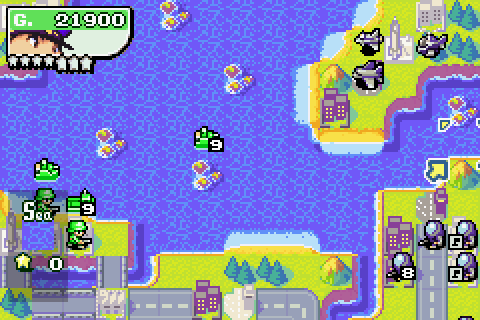
Day 9

Hmm, a rocket launcher. Give Hawke some credit, it's taken him a while to get going but he's starting to deploy some serious firepower now. He also has an infantry unit ready to take that airport. I'd rather he didn't get it, but attacking the infantry would mean sticking one of my AAs into artillery range. Should I, shouldn't I...?

Oh go on then.
I'm not quite sure what happened here, because I forgot to take a "before" screenshot: I think there was a B-Copter here and I killed it with a cruiser. And captured some more stuff.

Building a lander in the south and loading it up with infantry so it can go on an adventure.

The new cruiser strolls along...
While I build a new AA to replace the one that's going to get hammered by artillery fire any moment...
... now.
Day 10

This looks kind of awkward: Hawke now has an arty and a rocket defending the choke over here.

I think I'll pull back a bit for now, to be honest.

And build a medium tank to give me some firepower while I'm at it.
Hawke leaves his bomber in a square that I can attack, and I decide to take advantage.

In hindsight this may not have been the smartest move, given it leaves my cruiser surrounded by B-Copters.

But oh well, got to keep moving. Chokepoint or no chokepoint, if we grab enough properties we should be able to grind this out.

And we'll finish the day with a random shot of a cruiser moving a couple of squares.
Day 11

Well that's not good, my missile truck got taken out. It's not the end of the world, but it did come out of the blue rather.

Oh well, keep calm and carry on. Another city captured, and I start work on this airport. But I still need to do something about these B-Copters. Hmm...

A cruiser takes out one of them, and an AA the other - yes, I've sent another AA into harm's way. We've got to keep these copters down...

The medium tank rumbles forward onto a city, and the other full-health AA gets itself out of rocket range.

Don't you hate it when a lander ends up one square short of the place you want to drop troops off at? Even with Drake (and Sensei and Sami)'s +1 move, it happens annoyingly often.

Another AA to replace the doomed one.
Let's have a status update. I'm a bit behind on technique at the moment, and given I'm guaranteed to lose another unit next turn, that's going to get worse.
So, time to think about infantry spamming.

And once more, a random shot of a cruiser, this time moving just one square.


A wave as black as Hawke's heart... or perhaps his coffee. Or something. I dunno.

Farewell, Mr. AA. Here's hoping your sacrifice is not in vain
 .
.Day 12
Well, there's a whole bunch of infantry incoming, and one of them's just damaged my airport capturer (is that a word?)

We'd better do something about that. AAs take down some infantry why my own infantry unit retreats. I can capture that airport later.

Medium tank finishes off an infantry, while my southern cruiser braves artillery fire by rushing in to take down a T-Copter.
As a lander and an APC bring more infantry forwards to help with the push for that airport, I mess about with cruisers and build another one.

And in the south, my other lander finally gets to drop its cargo off.
And we'll start mustering the infantry over here to help provide us with backup.
Day 13

Things looking kind of awkward here, but the good news is that my power meter's full.

This cheesy one-liner has been with Drake since Advance Wars 1 and I love it.
On more CO Power animation effects, note that typhoon gives us a sort of sea-green colour. So:
Tsunami: Blue, Black Wave: Black
Typhoon: Green, Black Storm: Purple
#I'm siiiinging in the rain, just siiiinging in the rain, what a glooorious feeeeling, I'm...#

... happy again. Or not.
Never mind though, that failure came on the back of a pair of useful victories as we look to drive Hawke's infantry back.

The infantry on this island start grabbing properties while the lander wanders away to see if it can help on the main front.

My land forces start to mount up (I now have a rocket launcher), and my northern cruisers go back to playing silly buggers. I could use something to break this deadlock. Hmm... maybe in a few turns.

For now we'll just crank out a few more infantry...

... and take one last look at the situation here. I got the 3HP cruiser back out of harm's way. My chokepoint's starting to look a bit more organised with a rocket launcher and an arty, but we'll see.
Day 14

#Good day, sunshine#... er, anyway, seems Hawke decided not to move up his medium tank to attack mine this turn, which in turn means that I can't shell that medium tank with artillery fire. Instead I have to come to him, which means putting myself in range of his indirects. Some days you just don't know whether the AI is sillier than you think, or cleverer than you think. I guess the answer is "both" really, since the AI thinks in a very different way to the way a human would think. Mostly this makes it thicker than a human, but occasionally it surprises you by spotting things you didn't.

Anyway, where was I? Err... property capturing or something. Yup. Look at those infantry go.

1HP AA retreats, healthy AA moves forward to take out the 4HP mech. The infantry starts capturing the airport again and the rocket moves up to what seems like a more useful position. But we've got a problem now: Hawke's artillery can attack both my rocket launcher and my full-health AA. I'd rather that didn't happen. There's a simple solution: I can just whack that artillery with my medium tank. But then the middie is in range of Hawke's rocket and medium tank. So it's kind of lose-lose.

In the end, I decide to send the middie in. The rocket's more valuable at a chokepoint. Meanwhile, I retreat the APC a little so that I can move the artillery up to better attack that chokepoint.

And since that medium tank's quite likely to die, let's dial up a replacement. A neotanky replacement.
A little more inf spam with our remaining units...

Once more I forgot to take a "before" screenshot for my northern cruisers, but I think what happened is that a B-Copter attacked one of the cruisers, reducing it to 4HP, and then my other cruiser destroyed it. For all I know I actually planned this out, using one of the cruisers as trap bait. This is what happens when you do a mission, take a hiatus, and then try to write up what happened...

And to finish up, we'll do a little more general unit moving.


There goes my medium tank
. Seriously, screw this chokepoint.Day 15

Oh well, we have the indirects to take that medium tank out. But what's this? A mech has parachuted behind my lines! That's awkward. If I fire the rocket, then I can't send an AA in to kill the mech, which means that the mech will severely damage the rocket.
Time for yet another tank to take one for the rocket (by attacking instead of the rocket and so moving into enemy rocket range). Also time to deliver an infantry unit down to that small island in the south. And I finally grab that "land bridge" airport, too.
A veritable spaghetti junction of arrows here. My rocket, uh, "retreats" by heading towards enemy lines so that the AA can get in and destroy the mech. Bizarrely, despite being totally exposed, that rocket is probably safe: the only unit that can reach it is that 7HP bomber, and the AI doesn't like moving healing units until they're fully repaired. After that, my AA takes out the offending mech. While this is going on, I load up an AA.
We're a bit short of cruisers in the south now, so let's use our newly acquired port to build a new one.
Still, our 3HP cruiser will continue to battle gamely. Or at least, pick on defenceless T-Copters.
Infantry spam starting to gear up a bit more now. As much as it can with only two bases, anyway.

And the cruisers retreat a little. We've got a real no-man's-land here. No-man's-sea, anyway.
Lovely.
Owch, my neotank
.Day 16
Well, time to do something thematically inappropriate.

... build a fighter! Yes, I know Drake has rubbish air units. But a rubbish fighter is still a fighter, and still a unit that copters and bombers can't do anything about. If I'm going to be able to finish this mission off in a timely manner, then combined arms is probably the way to go. Navy, Army and Air vs. Air, if you will. It does mean I have to swallow my pride a bit ("blah blah blah, Drake's navy is so awesome that it can take on an air force"), but ultimately we just need to get this over with.

Of course, in order to claim air superiority we first have to put Hawke's fighter out of commission. I send in an AA to do just that... although given that the AA is now in rocket range, this feels like a suicide mission. In the meantime, my other units (especially the rocket) retreat a little.
My two northern cruisers join following that Black Wave, and once more a lander moves forward.

General infantry building and joining.
Day 17
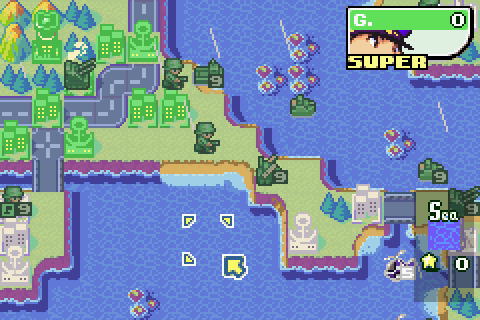
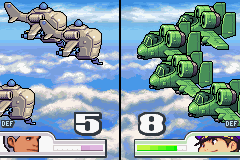
Well, that's all the small stars filled on my power gauge. This looks like a good time to...


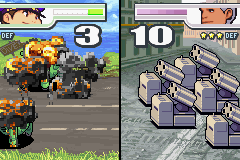
... show you how we do things at sea!
Following that bit of excitement, my shiny new fighter gets to work on Hawke's bomber. Okay, so it can't one-hit-kill like most people's fighters, but damage is damage. Meanwhile my indirects get to work cleaning out the chokepoint.

Dropping off another infantry to help with taking this island. As an aside, notice that enemy mech. It's a good job the AI prioritises capturing over attacking me.
Will this work...?

Sadly, no
.
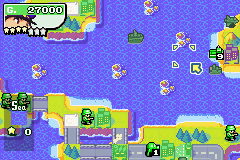
There's a lot of B-Copters massing on that island over there.

I guess we'd better build a second fighter to help deal with them.

We're still behind on technique, but I think I can make that up.

2HP cruiser finishes off 1HP fighter in a thrilling battle!... or not.

Moving some infantry and APCs around.

And other general capturing stuff.
Day 18

I'm starting to feel a bit more in control of things now. Ironic that it's the fighters that have helped with that.

But yes, we've even secured one of Hawke's many, many airports!

The fighters get to work on Hawke's air force, with a cruiser joining in as well. I've now got one fighter blocking up the northermost airport, which is pretty useful.

Cruiser takes out a T-Copter while my land forces push ahead... although that neotank is on its last legs.

Having a bomber will help deal with that annoying rocket launcher, so let's go with that.

Grabbing more cities back here...

And we're good to go.
Day 19

Hoo boy, more mechs being paradropped behind my lines. And what's more, Hawke's built a new bomber.

But first let's deal with the north. There's a couple of B-Copters we need to take out of the picture.

Fortunately, we have the fighters to do just that.
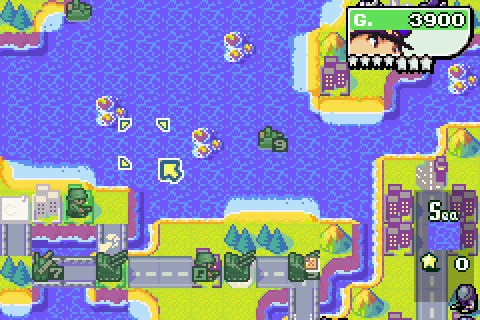
With the copters crippled, I can land some more infantry over here to capture the airport and fire that last missile silo (too bad Hawke never thought to use it...). In case you're wondering where my money went, I built a battleship (Another bomber would probably be more effective, but I've got to put the Navy into Navy Vs. Air somehow...)

Back to the south. I get my 2HP cruiser out of the way so a fresh one can assault Hawke's new bomber, while my indirects mop up the chokepoint.

Neotank retreats, bomber and infantry take down that paradropped mech.

Here come the cavalry. The slow-moving cavalry that I don't actually need to win this, but err...
Day 20

Hmm. That bomber went off and damaged my rocket launcher. Didn't really see that coming.

Oh well, gotta keep going.

With the infantry now in charge up in the north, I can send a fighter down to finish off that annoying bomber.

My own bomber heads in to attack Hawke's mech, and the APC follows. In the south meanwhile, my cruiser takes a shot at Hawke's new B-Copter, and does pretty well.
Let's help it out though by joining the 2HP cruiser up with it (while moving my indirects forward into Hawke's HQ area).

With their capturing duties done, I send off my infantry on the small southern island to attack that mech - and build a third fighter from the airport there. That should nail home my advantage in the air.

A quick montage of images: my battleship leaving port, a lander running back to pick up the two infantry units that I left stranded on that island, and the continuing snake of infantry.

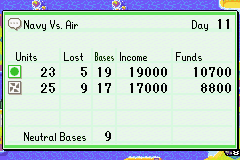
We're now ahead of the game on technique, but I'm a little worried about power now: with Hawke having produced 43 units, I think I'd have to destroy 5 for perfect power, and I'm not sure if I've done that.
Day 21

More paradropping mechs! Jeez, Hawke. Oh well, I can live with it.

Fighter takes down... err, something.

Bomber cripples rocket launcher.
... I'm genuinely confused by this screenshot. Okay, I get most of it: I mobbed the paradropped mech with infantry, my artillery took out the 7HP mech, cruiser downed the 3HP battle copter... but how did Drake's fighter, with its 30% attack penalty, take out a full-health B-Copter? There don't appear to be any other units helping it out...
... oh wait, I think I've got it. I must have used that northern missile silo on it. And forgot to screenshot the event. Panic over.

Anyway, fighter and APC move in to block up some airports and drop off an infantry unit. I'll probably end up routing Hawke, but options are always good.

Southern island infantry finish off the mech there, and my rocket launcher retreats yet again.
Fighter comes down to attack Hawke's T-Copter: the 1HP neotank tries to assist, but it doesn't really help out much.

Let's have another bomber to help finish things off.

Moar infantry, moar!

To be frank, Hawke, you should be asking yourself that question. Then again, maybe you're talking to yourself. I dunno.
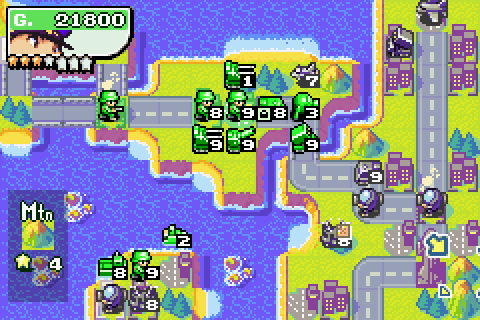
Day 22
Okay, we got Black Stormed. But it's fairly immaterial because we're very close to finishing this off.

Things happen: my northern bomber takes out the rocket launcher, fighter and cruiser combine to take out Hawke's new B-Copter, I park my southern bomber on that airport and my battleship moves into a position that it can attack from next turn.

Fighter finishes T-Copter, lander moves up, infantry starts capturing HQ.
Let's crank out a battleship at this port back here...

... and move on up.
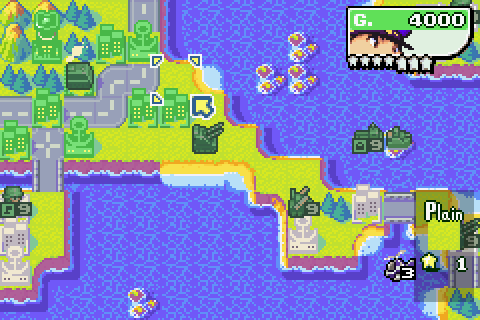
Day 23

No real surprises here.

Battleship attacks mech...
... and what do you know, I've filled up my power meter. I may as well use it.

# Raindrops keep falling on my head... #
Err...
# Can't stand the raaain / 'Gainst my windooow... #
Umm...
# Ooooklahoma where the wind comes sweeping down the plain / And the waving wheat can sure smell sweet, when the wind comes right behind the raaaain... #
... welp.

The extra damage from Typhoon knocked this mech down to 1HP, which means that my 1HP rocket launcher can just about finish it off.

While that's going on, I get a pair of fighters to work together to take out Hawke's new T-Copter

Dammit, I can't quite kill him off.

Hawke has one 3HP mech left. The only think I've got that can attack it is my 4HP infantry.
Fingers crossed...
Darn it. Oh well, let's try and block him in. At least that means he can't produce another mech next turn. We'll block up this airport too.

I think we can say goodbye to 100 power though, although we're fine for speed and technique.

Battleships for all!
And my cruiser sets up to receive whatever might pop up out of this airport.

astfgldjjj
Day 24

All right, we've got a mech, a transport copter and a battle copter to take out.
There goes the B-Copter.

One down, two to go.

Bomber deals with the mech easily enough.

And let's finish off this T-Copter

Victory!
Aftermath
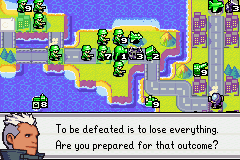
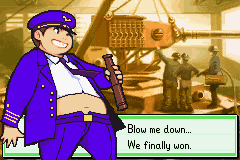
 It seems I underestimated my opponent. This war's far from over, though. The only battle I have to win is the final one.
You see the thing with that is, Hawke, the next battle will be your final one...
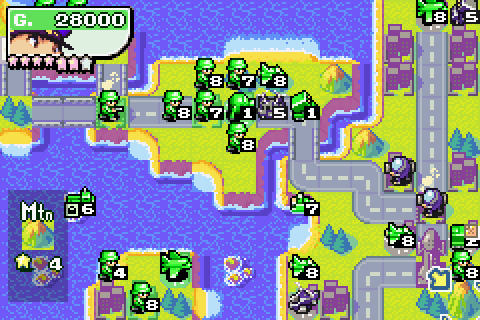
The enemy is retreating on all fronts. It looks like we won. Somehow... So I'm here for no reason, eh? Eagle! You came to lend a hand! I heard the enemy was mainly air units. I left the front under the command of the subcommander, but it looks like I worried for nothing. I got lucky.
 It was more than luck. How so? Drake, you're a gifted tactician. You should give yourself more credit. You do realize you defeated an army comprising mainly air units, right? It's nothing you or Jess couldn't have done. I'm not so... Perhaps it's your humility that people find so appealing...
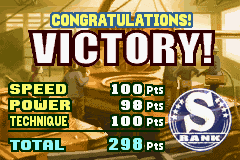
Seems we just missed out on a fourth successive 300-pointer. But it's another good solid S-Rank and as long as I avoid C-Ranks (less than 200 points) on all of the last three missions I should get my Hard Campaign S-Rank.

Next up we face the finale of Green Earth, Great Sea Battle. It's a very long mission and I have a sneaky feeling that I may end up with more screenshots for it than any other mission so far. It's a factory mission where you get to choose your COs, and this time we have to choose COs for not one, not two but three armies. I'll have a "strategic notes" post up in a short while.