Part 53: A Semblance of Stability
Update 53: A Semblance of StabilityLast time, we finally found a copy of Godly Insights, vastly reducing the odds of our getting roasted by a monster whose presence we simply weren't aware of. There's still plenty of things we need (chiefly CON, speed, and levels), but spell-wise we're doing pretty well now.
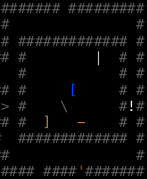
You enter a maze of down staircases. (to 2950')

Hello, Mr. Lernaean Hydra! Still not gonna fight you.
Clairvoyance reveals a pit with items and a "Crown" vault. Could be worth checking out. We down our Potion of Enlightenment to get a closer look.
The pit has four pieces of equipment (one of which is Blue Dragon Scale Mail), and a Wand of Drain Life. Eh. I'm not hugely excite, especially since it's almost certainly either a Graveyard or a Zoo, neither of which are much fun to clear.

The vault has a lot of equipment, 2 Potions of *Healing*, an Amulet of Trickery (could be better than our current one in terms of stat boosts), and most importantly, a Potion of Constitution! We just have to hope that we can kill or teleport away everything in there. The prayer book is yet another copy of Ethereal Openings, incidentally.
Getting closer...hunh, it's not a Graveyard or Zoo.

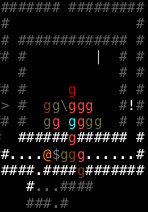
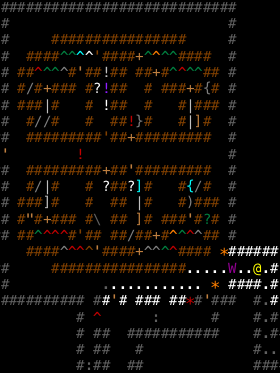
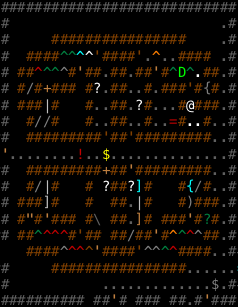
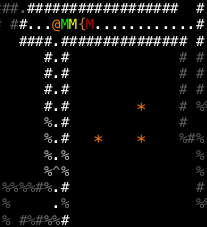
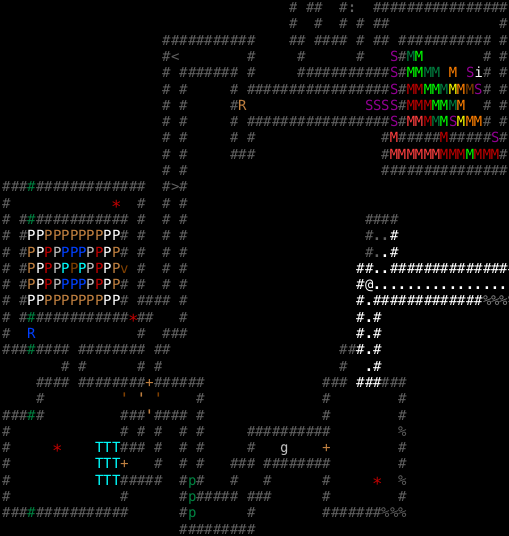
It's a...statuary? What do you call an agglomeration of golems? While the Colbrans (Colbrani?) and the Silent Watcher in the middle could be annoying, none of these golems are all that dangerous, so we shouldn't have any trouble clearing the pit and claiming those items. Awesome.

By color, we have Flesh Golems (pink), Mithril Golems (cyan), Pukelmen (tan), Eog Golems (brown), Colbrans (blue), and a Silent Watcher (red). Colbrans cast Lightning Bolt a bunch, Pukelmen can cast Acid Bolt, and Silent Watchers have a number of spells but can't move. Everything else is just a giant pile of HP. We'll spend a lot of time in melee for this pit -- only the Silent Watcher is evil.
The first Mithril Golem we kill gets us to level 38 (428 HP, 299 SP). We're one level short of learning Holy Word, the last prayer in the town prayerbooks, and at level 40 we can learn Alter Reality; otherwise, all the remaining prayers are in books we haven't found yet.
Incidentally, we have a 59% chance of hitting Pukelmen, or 63% when we bless ourselves. Does that make blessings still worth using? I guess that's a nearly 7% increase in our damage output.
It's slow going, but not dangerous; golems simply don't have the kind of bursty damage-dealing capability that's needed to be threatening at this point in the game. We have semi-arbitrary combat endurance thanks to being able to cast Heal, after all. Things get a bit more interesting when the speed bonus from our Crown runs out and we're dropped to -8 speed, but we just get a Flesh Golem in their front lines and wait the timer out. He can't hurt us faster than we naturally recover HP.
A Pukelman gets a lucky Acid Bolt off and destroys one of our 4 Scrolls of *Destruction*, but I'm not too worried. Finally, it's just down to us and the Silent Watcher.
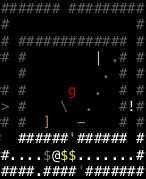
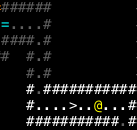
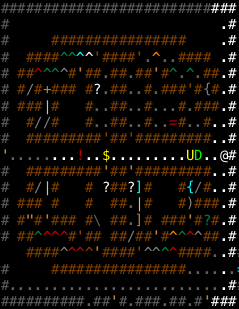
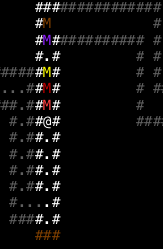
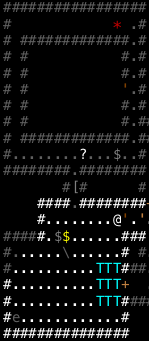
And him, we can kill with Orb. Check this targeting out!

The line of *s is the path any projectile we fire will pass through on its way to the highlighted tile. That is some funky pathing. It takes 22 Orbs (after all, the Silent Watcher is 2 tiles away from the epicenter of the blast), but the Silent Watcher has absolutely no recourse. Serves him right for being unable to move.
Annoyingly, the only non-{magical} item in the pit is a Cutlass of Westernesse. Junk!
As for that Crown vault?
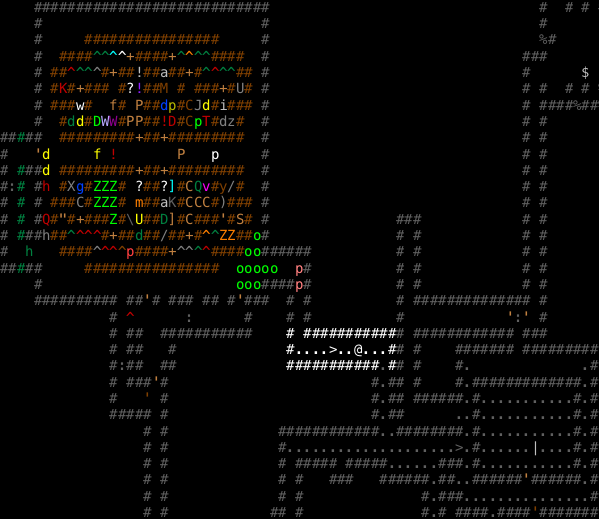
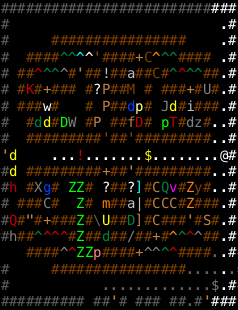
There's a number of nasty customers here:

Dwar, Dog Lord of Waw continues to have the best name out of any of the uniques in the game. We'll want to teleport away Saruman, Ar-Pharazon, and the Nightcrawler; probably Dwar as well just because this is messy terrain for a unique fight. And the Nether Hounds will be a pain. That Wand of Drain Life we picked up in the golem pit will come in handy there.
Saruman and Dwar are awake; the Nightcrawler, Ar-Pharazon, and the Death Drake are asleep. Death Drakes aren't as dangerous as Dracoliches are, fortunately; we can kill this one. Especially since he can't move through these walls, as they're permanent rock.
Dwar, Dog Lord of Waw casts a ball of fire. Some of your Scrolls titled "veter exor" of Phase Door were destroyed!
Whoops, Dwar's out early. Well, I guess we are fighting him now. As you might expect, Dwar can summon hounds; he can also summon undead and generic monsters, as well as cast Blind, Cause Critical Wounds, Paralyze, Frighten, Fire Ball, and Nether Storm. But he tops out at about 200 damage per turn, so we can cope.
We step back around the corner, then activate our Crown for speed and Blink away from the vault.

Blink's range is sufficiently constricted that it basically had to take us in this direction -- any other direction would have landed it in the vault, which isn't allowed.

And now we spam Orb. Dwar has 4000 HP, or about 30 Orbs' worth. Orb is...getting less powerful with respect to our enemies' HP totals. Its base damage is 3d6 + 1.5 * our level; that then gets doubled against evil targets. It's just that monster HP grows faster than Orb's damage output does.
Dwar, Dog Lord of Waw is hit hard. Dwar, Dog Lord of Waw casts a ball of nether. You feel your life force draining away!
And there's his biggest spell. We just heal up the damage. Try harder, Dwar!
Dwar, Dog Lord of Waw is hit hard. Dwar, Dog Lord of Waw conjures up scary horrors. You avoid the effects!
...yes, Dwar, that's very nice.
One of the reasons why Clairvoyance is so nice is that we can see Dwar, even outside of rooms and without having telepathy. Fighting monsters can be a pain when you don't know exactly where they are.
Dwar, Dog Lord of Waw is hit hard. Dwar, Dog Lord of Waw summons hounds.

Hey, not bad, you got a Chaos Hound! Those guys are jerks. However, you made the mistake of putting him in your front line, and of not having any other notable hounds present.
The Chaos hound disappears!
Well, that Blink Dog could be annoying -- they can cast Teleport-To (i.e. summon you to melee range). But...
Dwar, Dog Lord of Waw is hit hard. The Werewolf is hit hard. The Blink dog howls in pain. The Clear hound yelps feebly. The Impact hound snarls with pain. The Blink dog flees in terror! The Clear hound flees in terror! Dwar, Dog Lord of Waw sets off a blinding flash. You avoid the effects!
The Blink Dog dies of splash damage rather quickly. Dwar himself dies shortly afterwards, for that matter. He drops a {magical} Elven Cloak, {magical} Green Dragon Scale Mail, and an Iron Crown of Serenity:

Not bad, but our current crown is a lot better.
Back at the vault, it turns out we aren't getting swarmed chiefly because there's a Knight Templar napping in the halls:


Rather than actually fight his fast, durable, non-evil armored butt, we just teleport him away.
The Knight Templar disappears!
Next problem: Saruman can't get to us because there's a sleeping Baby Green Dragon in the way. Ar-Pharazon can't reach us because there's a sleeping Ancient Red Dragon and an awake, but terrified, Wild Cat blocking his path.
(Saruman is next to the pack of Nether Hounds; Ar-Pharazon is in the northeast section of the vault).
We can kill off the Wild Cat with splash damage from Orb easily enough.
You hear a scream of agony! It grunts with pain. It grunts with pain. It shrugs off the attack. It scuttles about.
This lets Ar-Pharazon slip out.

Ar-Pharazon the Golden disappears!
Still not the time to fight you. Not just yet. We kill off the other monsters our Orb woke up, then retreat to let the cooldown on our Crown run out. Back at the vault, that Nightcrawler has me feeling antsy. It has a lot of nasty attack spells, so we don't want to fight it, but it's not chasing us, either. Lacking better options, we haste up and charge the northeast section of the vault, to get closer and hopefully activate it.

It works!
The Nightcrawler disappears!
Now we slip into the northwest section of the vault, murder a few Hill Giants, and claim the Potion of Constitution they were standing on.
You feel very healthy!
Up from 428 HP to 447!
We start clearing out the north half of the vault, on the assumption that that Baby Green Dragon isn't going to wake up and unleash hell anytime soon. But we do get interrupted:
Hello, Mr. Death Drake! We Orb him once and then Blink out of the vault. His melee drains experience and we'd rather not deal with that. Might as well take the chance to reset our sprint/slow cycle before we head back in.

The Marilith in the southwest section has woken up and broken the door down! We'll deal with her and the Death Drake, and then we'd better prioritize getting rid of Saruman, I think.

Annoyingly we have to take them both out at the same time. But Mariliths aren't all that dangerous, so long as they don't summon anything.
The Death Drake breathes nether at us once, but we just heal up. By this point it and the Marilith are both nearly dead. We cast Remembrance to restore the lost 18k EXP, then kill them both. Then we rest to recover SP, and incidentally hit the slow part of our sprint/slow cycle...

And Saruman's broken out. Well, at least he was kind enough to not cast anything! He could have gotten a quadruple turn on us, I think. Instead, well,
Saruman of Many Colours disappears!
yeah.

We still have some Nether Hounds to kill, and that Draconic Quylthulg in the southwest section could be trouble, but we're nearly done here!
Amazingly, between our Wands of Drain Life, some magical Bolts that the Death Drake dropped, and pure unadulterated luck, the Nether Hounds don't breathe on us at all.
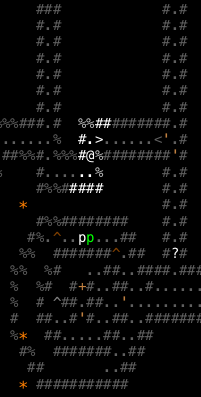
Amazingly, we can just barely clip the Draconic Quylthulg with Orb from here:

That's a radius-3 ball spell for you! It takes 26 Orbs to remove its 420 HP though, which is a pretty sad damage rate.
Our loot:

Meh. Too heavy to be useful.
Pretty impressive damage, especially for a priest, but that doesn't make it worthwhile.
- An Amulet of Trickery that has +4 DEX and +2 infravision instead of +2 DEX and +5 infravision. We don't really need infravision any more, so this is a step up.
- Mithril Bolts of Acid (3d5) (+6,+16) that deal on average 315 damage per shot against non-acid-resistant enemies! There's only 10 bolts in the stack, though.
- 2 Potions of *Healing* and a Potion of Restore Mana.
Not a bad haul, but the standout winner was the Potion of Constitution.
Let's move on.
You enter a maze of down staircases. (to 3000')
3000'! At this point Bryson II said "fuck it" and dove for the endgame. We could theoretically do something similar -- as long as we hit level 40 before we hit the bottom of the dungeon, and thus can cast Alter Reality, we cannot run out of dungeon levels (never mind abusing up staircases). But that's kind of scummy. We'll play this out the way Freude did.

Medusa, and the Lernaean Hydra, are off to our northeast. We can probably kill Medusa as long as she doesn't get too summon-happy; she likes to summon hydras, after all. The Lernaean Hydra remains too much of a nuisance to kill; it's non-evil, has 4500 HP, and has a number of powerful breath weapons, and can also summon hydras.
We do a quick sweep of the area and pick up a Potion of Intelligence (our INT is rapidly catching up to our WIS) and a Wand of Dragon's Breath, which could be good against Medusa. Speaking of which, she's awake.

We head east a few tiles and engage her pathfinding, then pull back to draw her into our corridor, with haste and Resist Heat & Cold up.

Let's try that wand out.
You have 1 charge remaining. Medusa, the Gorgon resists a lot.
Bah. She resists acid and fire, so we only have about a 60% chance of hitting her properly (assuming the wand can access all the basic elements plus poison, that is). Let's just stick to Orb.
Medusa, the Gorgon is hit hard. Medusa, the Gorgon summons hydrae.
"Hydrae?"
 Anyway, she got 20 heads worth of hydra: 9, 7, and 4. Annoyingly, the Nine-Headed Hydra is behind her, so we can't really teleport it away. Oh well; we'll just nuke her through her summons. Fortunately Orb can go over intervening targets.
 We burn through Medusa's 2400 HP pretty quickly (she is evil). She has direct-damage spells, but she couldn't cast them with her summons in the way; her indirect attack spells all could be saved against, and she didn't try summoning again.
We take a couple steps back to protect her drop in case the Nine-Headed Hydra decided to breathe on us. Then we melee the hydras down. We also use the other charge in the Wand of Dragon's Breath, and get poison, which seems to confirm the "can pull any basic + poison element" theory.
Alas, Medusa's drop is just a stack of Arrows of Frost.
We sneak into the checkerboard room she came from, teleport away the Lernaean Hydra, and loot the room; alas, nothing interesting is there, and a Mature White Dragon's breath blows up one of our Potions of *Healing*.
We head south,

then turn right around and head back north again. Time Hounds!
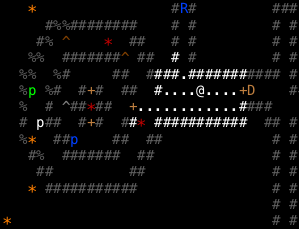
Back in the north, Ar-Pharazon the Golden is back again, and he has a friend.

Ren the Unclean is standing next to him. Ren is a fairly weak Ringwraith; he has some spell attacks but they're all pretty pathetic, and we should be able to wear through his 2700 HP without too much trouble. As for Ar-Pharazon the Golden, the main problem here is his +20 speed. If we could match that then we could almost certainly deal with him by fighting him in melee range (so he can't spam summoning spells). As it is, I don't want to deal with getting double-turned with him, since his melee attacks do hurt a fair bit. So he's getting teleported.

Ar-Pharazon the Golden disappears!
And now you, Ren.
Ren the Unclean is hit hard. Ren the Unclean casts a bolt of fire. One of your Scrolls titled "ago nover" of Recharging was destroyed!
Stupid inventory damage
 He also blows up some Phase Door scrolls and a Scroll of *Destruction*. We only have 2 of those left!
 Ren the Unclean is hit hard. Ren the Unclean summons a companion.

For not having many strong spells, he's sure making good use of the ones he does have. We teleport his Ancient Red Dragon away mostly to keep the local area "clean", then Blink away.
On resumption of the fight, Ren blows up another Scroll of Recharging. Those things aren't easy to replace! Fortunately, that's the last spell he casts; Orb banishes him from this plane shortly thereafter.
His drop: {magical} armor and arrows, and this shield:
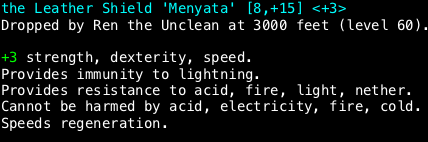
Nice. There's just one problem: none of our other gear is cold resistance, so if we wield this in place of our Shield of Elvenkind, then our basic elemental defense will be incomplete. What we need is Armor of Resistance or Armor of Elvenkind (or, hell, some White Dragon Scale Mail) to pick up the slack. Of course, that would mean losing the CON bonus from our Dwarven body armor, dropping us by 38 HP, but that seems like a worthwhile trade.
I guess for the time being we'll just carry it as a swap.
There's not much left to the level, but hey, we can get some revenge!

Vampire Lords are no longer serious threats to us -- we have the HP to withstand their spells and the saving throw to render most of them harmless anyway. He manages to make the fight as irritating as possible by landing a few Nether Bolts on us, draining our experience, but we still beat him handily. Hooray! We get...2k EXP and some junk drops for our trouble.
While trying to sweep up some remaining items, we run into the Lernaean Hydra again.
The Lernaean Hydra summons hydras.
The 9-headed hydra disappears!
The Lernaean Hydra summons hydras.
This is getting out of hand. Y'know what? You can have those remaining items! It's not worth it! We portal out of there.
Heading back to the stairs, we kill that Ancient Red Dragon from earlier, and hit level 39 (453 HP, 307 SP). And we can learn Holy Word! In case you've forgotten, Holy Word is a 1000 HP heal combined with Dispel Evil. It also costs 32 SP and has a 44% failure rate. But hey, it's cheaper than the 2000 HP heal in Purifications and Healing, so once we get the failure rate down it'll be our go-to spell if we ever need a big heal.
You enter a maze of down staircases. (to 3050')
The new level has a pair of pits to our west:

One of them has items; the other doesn't. Items in pits tend to be there as lures, either because the monsters in the pit don't drop anything themselves (e.g. for Zoos) or because they're so dangerous you'd have to be out of your mind to want to go there (Graveyards). Pits without items tend to be more inherently lucrative.
In our immediate vicinity is a Great Crystal Drake and a pack of high-level adventurers (Patriarch, Knight Templar, and Master Thief).
The Drake is our primary target, since the others lack big attacks. Thanks to our high stealth (and dragons' general lack of awareness of their surroundings), we can haste up, open the door, and back off without it waking up.

Then we hit it with 13 Orbs and it dies. Hooray for anticlimactic fights!
We kill the Master Thief and take his Potion of Healing, then leave the Patriarch and Knight Templar alone and asleep. It's easier that way. Exploring northwest, we get close enough to the first pit to identify it, and...we're not clearing this one, guys.

Hydra pits were bad enough when we actually had a use for cash; Friar Tuck has built up almost 400k AU and has literally no use for it.

The route around the Hydra Pit is problematic too: a Grand Master Mystic and the Phoenix are both waiting for us. Grand Master Mystics are the nastiest non-unique p monsters in the game, with melee attacks that almost always stun you, and summoning and heal-self spells. And they aren't even evil! We wake this one up from afar, and then teleport him away; then we do the same to the Phoenix. Good riddance.
Man, doesn't this area look inhospitable? Fortunately there aren't any titans in the Giant Pit, so we can clear it. I doubt it'll produce all that much in the way of loot though.
We mostly stick to melee against the giants; our Rapier slays evil and does comparable damage to Orb, albeit to only one target at a time. There's enough hitpoints' worth of giants here that it's more efficient to melee them and reserve our SP for casting Heal.
Partway into the fight, we stop to cast Heal, and
You feel very good. The Storm giant commands you to come hither.

Oh yeah, Storm Giants can cast Teleport-To. Having three giants in melee range isn't so hot, but Blinking might land us in the pit itself...ehh, we're at full health. Why not?
Booooring.

Mop-up operations don't take long. Our loot: {magical} Metal Scale Mail and a Potion of Restore Life Levels. On the other hand, in the moat of the room is a new scroll, of Mass Banishment! That will come in handy...assuming it doesn't burn before we get a chance to use it, of course.
We head back the way we came. We've only explored about 50% of the level so far, so it'd be a shame to leave so soon. The Knight Templar and Patriarch from earlier have woken up:
We Orb down the Patriarch, and then melee the Knight Templar to death. Surprisingly straightforward.

A new lantern is welcome, since we somehow have managed to get below 7k turns on our own lantern. Each lantern we find is basically equivalent to finding a Flask of Oil (i.e. 7500 more turns of light), except lanterns are a lot more common than oil now.

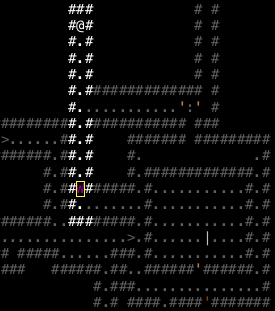
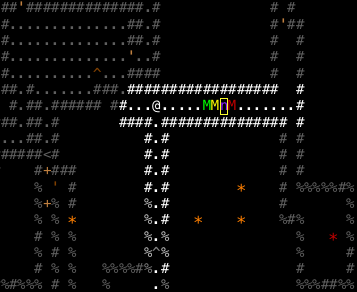
Pictured: the portion of the map we haven't explored. And it has both the Phoenix and the Grand Master Mystic in it. We'll pass, I think. Fortunately, there's some stairs right here.
You enter a maze of down staircases. (to 3100')
Unfortunately, this level is pretty dull. The main thing of interest is this room:

There's a Dracolich here, so we tread carefully until we're able to teleport it away; then it's business as usual. The items in the room are surprisingly generous: a Scroll of Banishment, a Potion of *Healing*, a Potion of Enlightenment, and a Wand of Drain Life. There's also a Potion of Contemplation, which I contemplate drinking to get our WIS up a bit, but it's really not worth risking draining our CON over.
Incidentally, we've found two Tangerine Potions so far that both turned out to be Potion Mimics. At this point, there's only three options for what Tangerine Potions could actually be: Life, *Enlightenment*, or Augmentation. I'd really like to find some Potions of Augmentation

The rest of the level is dull. Next!
You enter a maze of down staircases. (to 3150')
And hey, this level has a vault on it! We drink the Potion of Enlightenment we found last level:

Notable entries on the item list: two new amulet types (these could be just about anything; there's tons of high-level amulet types); two Emerald Rings (might be Rings of Speed!), two new potion types, an unknown scroll type that could possibly be *Acquirement*, and one of the last remaining prayer books:

This seems like a good place to stop. Before we go, let's take a look at Tuck:
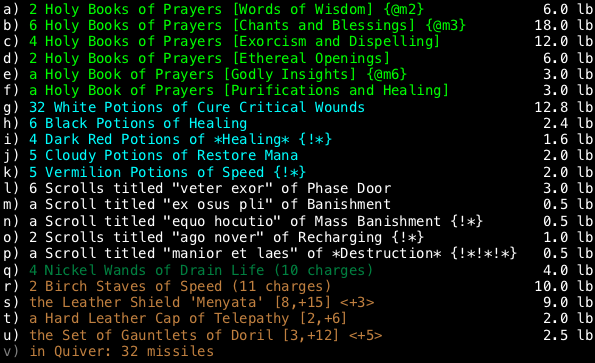
Scrolls keep getting destroyed, but otherwise we're doing fine consumables-wise. We even have a reasonably decent stock of Potions of Speed.

It's kind of shocking that we only have three artifacts equipped at this stage in the game. We could have been using the shield we found if we'd had a home in which to stash Armor of Resistance/Elvenkind; we've found a couple of sets but they were never worth dedicating an inventory slot to.
Our lack of speed is pretty dire at this point.
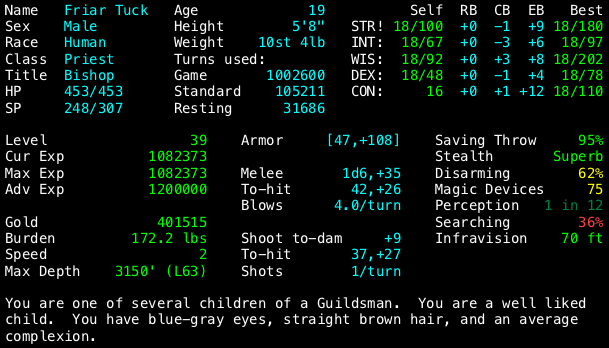
Look at that CON score. Look at it! If it were equal to our DEX score, we'd have 156 more HP right now.

Having only a single source for all these resistances is making our equipment loadout very brittle.
Next time: we tackle the vault.