Part 56: Tuck Bulks Up
Update 56: Tuck Bulks UpLast time, we steamrolled over a number of uniques that we'd encountered previously when we were too slow or distracted to deal with them properly. We also got a CON boost! And it's really sad that that has to be called out as notable, because by all rights our CON should be nearly maxed by now.
You enter a maze of down staircases. (to 3450')

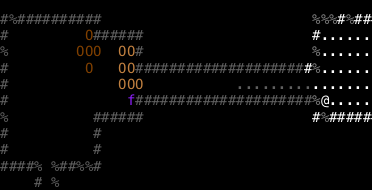
It's been awhile since we were vulnerable to nexus, but a pack of Nexus Hounds is still a disconcerting sight. It takes a fair number of Orbs to kill them, but they're no real threat to us.

More interesting is the Queen Ant. Not by much; she can't really hurt us either. But she'll summon a lot of ants while we kill her.
We tear through Queenie's escorts and an Eleven-Headed Hydra, and then notice a shimmering foe approaching from the north.
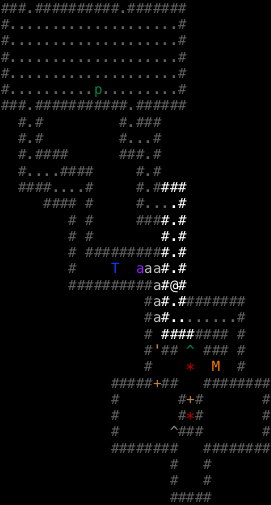
Saruman of Many Colours! It's probably worth fighting him, but he can summon some nasty stuff, so we'd rather stick to an anti-summoning corridor (one liberally strewn with Glyphs of Warding, since his melee disenchants). For the time being, we just teleport him away. He'll be back though; he's bizarrely persistent.
Back to the Queen Ant,
it's really not worth trying to kill off her escorts, since she'll just summon more. Besides, they're ants, the worst they can do is set us on fire a bit (Giant Fire Ants). Queenie herself is limited to 4 2d12 melee attacks per round, which is barely noticeable these days. It takes maybe ten turns' worth of melee to kill her.
She drops another copy of Holy Infusions, a Cap of Seeing, and a Pike that I fully expect was based off of one of the really early artifacts:

Seriously, that's just sad.
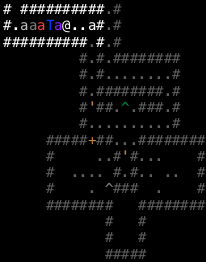
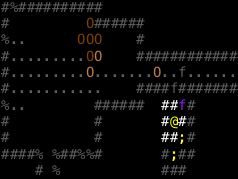
Continuing our explorations, we make certain to dig antisummoning corridors at regular intervals, in case Saruman returns. And sure enough, he's back:

Amazingly, he can't push past the Five-Headed Hydra in the corridor, though, giving us plenty of time to set up our battlefield.
This should do nicely. I consider our weapon options, and opt to go with our Mace of Disruption of Extra Attacks. It deals almost twice as much damage as the Rapier does, at the cost of raising our minimum failure rate to 1% (since we don't get the Rapier's WIS bonus). But Saruman is oddly lacking in powerful direct-damage spells; he's mostly notable for having a lot of summoning spells. So we shouldn't need to cast Heal very often. Worst case, we have 11 Potions of Healing we can use.
You miss Saruman of Many Colours. You hit Saruman of Many Colours (55). You hit Saruman of Many Colours (52). You miss Saruman of Many Colours. You hit Saruman of Many Colours (93). It was a great hit!
We outspeed Saruman; he's only at +10. He has 5000 HP, but we have Heal. We also don't have a broken AI that walks away from Glyphs of Warding half the time.
You hit Saruman of Many Colours (50). You hit Saruman of Many Colours (51). You miss Saruman of Many Colours. You miss Saruman of Many Colours. You hit Saruman of Many Colours (50). Saruman of Many Colours creates a whirlpoof of water. You are confused! You have been stunned.
Bah, we don't have confusion protection up (opting instead for the cloak that gives telepathy). Stupid water-based attacks. We drink a Potion of Healing to clear the confusion and stunning and get back to whacking him in the face.
You hit Saruman of Many Colours (168). It was a *GREAT* hit!
I love Maces of Disruption
 Critical hit quality is determined in part by the weight of your weapon, and Maces of Disruption are the heaviest in the game at 40 pounds. Well, Morgoth's Mighty Iron Hammer is heavier, but that hardly counts.
 In any event, what with the constant turn wasting that Saruman does, the fight doesn't take long at all. In addition to the Whirlpool, he casts a single Frost Ball, and nothing else. He never manages to break the first of the six Glyphs we set up.
His drop? A Ring of Speed <+9>, Mithril Boots of Stability, and a Shield of Elvenkind with nexus as the bonus resist. Meh all around.
Further exploration of the level yields a miracle:
It's a Potion of Constitution!
You feel very healthy! (HP to 544)
We blast through a Lesser Balrog and a pack of adventurers, and again!

You feel very healthy! (HP to 628)
Our internal CON score is finally above 18! After equipment bonuses, we're sitting pretty at 18/172, only three points shy of the effective cap. Things are looking up!
As an added bonus, the chest in this room contains a Staff of Banishment. Bryson II made great use of one of these; we'll see how long Friar Tuck can make it last with his inferior recharging spell.
This was a good level. Nice level. Nice RNG. Now we've looted it for all it's worth, let's move on.
You enter a maze of down staircases. (to 3500')

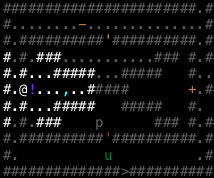
A moderately unpleasant opening, but the Demonic Quylthulg doesn't do anything before we teleport it away. Just west of where we entered, we find another elemental unique:

Quaker, Master of Earth is here, and we may as well kill him. Unlike the others, he's only at normal speed, meaning we have a 3x speed advantage over him. His spells deal acid damage, but he should die too quickly for that to do much harm to our inventory.

His melee also causes earthquakes and deals significant damage, mind, but it's nothing that Heal can't solve. The fight is short and to the point.
That leaves just Vargo, Tyrant of Fire out of the elemental uniques...and he is just southwest of where Quaker made his last stand.

Kind of out-of-the-way as far as dungeon terrain is concerned, so we'll deal with him in a bit.
Up to the north, we run into the Cat Lord and a Great Hell Wyrm.

The Cat Lord is sort of like the Queen Ant, only amped up; his only spells are Teleport-To and Summon Cats, and his melee isn't very strong. On the flipside, he's very fast and has 4800 HP and tons of AC, so killing him will be a bit of a slog.
We set up an antisummoning corridor and fill it with Glyphs; naturally, as we rest up from the exertion, the Great Hell Wyrm wakes up.

Oh well, nothing for it. We knock down the last wall and let them in.
You have finished the tunnel. The Cat Lord commands you to come hither.

This was not the plan! Oh well, backup plan A: Teleport Other. We'll deal with the Cat Lord later. The Great Hell Wyrm is more dangerous. Fewer HP, but nearly as good an AC and his attack options are significantly better. We still kill him nigh-trivially once we get back on our Glyphs, though.
We track down the Cat Lord to the west, stuck behind a pack of Ogres.

Let's try this again, shall we?
3 Ogres are hit hard. The Cat Lord shrugs off the attack. 2 Ogres flee in terror! 4 Ogres die.
Blessing takes our hit rate from 30% to 37%. Not a bad increase, over the life of the fight.
You hit The Cat Lord (44). You miss The Cat Lord. You hit The Cat Lord (48). You hit The Cat Lord (48). You miss The Cat Lord. The Cat Lord summons its kin.
The Cat Lord's melee can also cause confusion, blindness, and paralysis, and drain DEX. But we're protected from all of those effects, so long as we wear the right cloak. His first claw attack (the one that causes confusion) also deals a respectable 12d12 damage -- the same as a Greater Titan would deal, except they get four attacks at that damage.
We have to stop after every 3-4 rounds to cast Heal -- but we still win the damage race handily. And despite the fact that we didn't bother to rest up after casting all those Glyphs, we still have 50 SP left by the time the Cat Lord is desperately trying to flee. But he can't -- he's stuck behind his summons.
You hit The Cat Lord (55). You have slain The Cat Lord.
An easy 47k EXP, nearly as much as the Phoenix gives, for a lot less trouble. Oddly, the Cat Lord, unlike practically every other unique in the game, doesn't drop "guaranteed at least good" items; instead he just drops items, like a normal monster. We get a Rod of Magic Mapping from him, which would have been nice for the 2/3rds of the class that can't cast Sense Surroundings or Clairvoyance.
That done, we make the loop back to Vargo.
Vargo, naturally, sticks to fire and plasma spells and has a burning melee attack that we'd rather not deal with. He's also the most fragile of the elemental uniques, with 2400 HP and a weakness to cold. And we have 21 Mithril Bolts of Frost in our quiver! I trust you can tell where this is going.

First we kill the Dreadmaster. No sense getting interrupted mid-fight. It doesn't take long, especially as all Maces of Disruption naturally slay undead. Ours does nearly 600 damage/round against undead!

Now we cast Resist Heat & Cold, bless up, and open fire!
Your Mithril Bolt of Frost (3d5) (+10,+13) freezes Vargo, Tyrant of Fire (270). The Mithril Bolt of Frost breaks. Vargo, Tyrant of Fire grunts with pain.
Hm, I was expecting more damage than that. Bah. I mean, it's a tenth of his HP, but shouldn't the elemental vulnerability be more dramatic?
Ehh, dramatic or no, it only takes 8 bolts to kill him. He casts a single Plasma Bolt at us, but otherwise limits himself to tromping over some of the bolts that landed on the floor. We entered the fight with 21; at the end we have 16. But that's about as clean a victory as we could possibly hope for. And now all the elemental uniques are all dead!
In the last room on the map, we get into a fight with a pack of top-tier adventurers, including a Ranger Chieftan.

What a difference some levels and speed make! We smack down the Ranger Chieftan in melee without taking a single point of damage. The room has some more consumables (we're up to 7 Potions of Speed now), and a Scroll of Acquirement...that generates a Two-Handed Great Flail of Westernesse. Yawn.
That being the last room, let's move on.
You enter a maze of down staircases. (to 3550')
A pack of Barbazu in the moated room to the south promises to be profitable -- they're worth 4k EXP apiece and aside from draining CON with their melee, they aren't very dangerous. There's also a pit or nest full of items far to the east. We chug a Potion of Enlightenment to get a closer look, mostly because we have 4 of the things clogging up our inventory.
Ehh. It's worth taking a look anyway, after we deal with the immediate environs.
Fighting the Barbazu pays off early, as evidently they've been bottling up the CON they've been draining.

You feel very healthy! (HP to 670!)
Not only that, the last one pushes us over the edge to level 43 (686 HP, 314 SP). And the room they were guarding has...
...has...
aglblblblblblbl

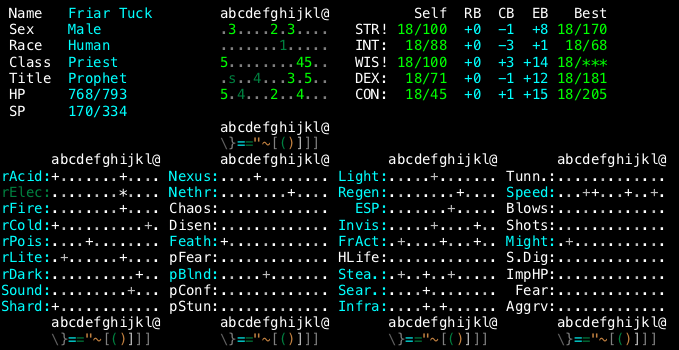
It's...perfect. Oh sure, the damage isn't much to speak of, but hey! +5 CON and +5 WIS on the same weapon, and it's even blunt! Wielding it maxes our CON out trivially, putting us at a whopping 793 HP. We have enough spare room to swap out the Alchemist's Gloves of Quendilwe that we've been relying on for +3 CON most of the game, bringing in the Gauntlets of Doril that we've been lugging around all this time instead. Sure, the +5 WIS/DEX on those gloves doesn't make much difference now (though the DEX is enough to make us theftproof), but we pick up resistance to darkness!
In fact, our resists and stats are looking pretty solid right now:
The only problem now is that our damage output with our new Great Hammer isn't much to speak of, and swapping in the Mace of Disruption hurts our HP pretty badly. But that should be fixable in the long term.
Working our way around, we smack down an Ancient Multihued Dragon and a Greater Maia, then a Troll Priest, who drops...ha!

MORE CONSTITUTION.
You feel very healthy!
No change in our HP this time, of course, but our internal CON stat is now at 18/57, nearly caught up to our DEX. Man, when the RNG decides to rebalance a biased distribution, it is not subtle, is it?
We make it over to the east and discover the nature of that nest:

Yep, it's a Graveyard. Fortunately, the nasty monsters appear to be limited to G and s -- 6 Dreadmasters, a Skull Druj, and 2 Hand Drujs. We use our new Staff of Banishment to remove them. Then we try to cast Recharging...and it works! 3 more charges of "make this non-unique monster type go away." Excellent.
Also, to our south is a pack of Mumakil, a pack of Vrocks (even weaker than the Barbazu), and a Beholder Hive-Mother, who just gets teleported away. Fuck fighting beholders.

The remaining undead are no great threat, especially since our new hammer slays undead. It's not as good at it as the Mace of Disruption is, but it's more than good enough.
All done! Sadly those purple potions to our north are Berserk Strength, not Constitution. And the items we detected in the Graveyard at the outset are all {magical} dross. Oh well; clearing this place didn't cost us anything much.
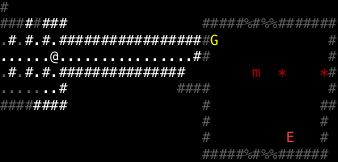
We're about to slaughter another innocent Lesser Balrog. More interestingly, Khamul the Black Easterling is wandering around up there. He shouldn't be too hard to kill now!

Unfortunately our attempts to build an antisummoning corridor go a bit awry. I tried to stick to quartz veins, since they're significantly faster to dig through than granite (important since Khamul was rapidly approaching our position), but they didn't cooperate in terms of blocking LOS. Still better than fighting in an open corridor though.
Swapping in our Mace of Disruption drops us down to an even 600 HP now, but it's worth it to more than double our damage output against undead. We could get most of the HP back by wearing our randart Alchemist's Gloves, but that would cost us the WIS needed to maintain a 0% failure rate...these equipment dances can get tricky sometimes. Anyway, we throw down a Glyph of Warding and wait for Khamul to enter LOS.

He's in LOS now. Would you have guessed that? I wouldn't have. Hitting the '*' key to cycle through valid targets is useful in these weird diagonal situations.
You miss Khamul, the Black Easterling. You smite Khamul, the Black Easterling (122). You smite Khamul, the Black Easterling (113). You smite Khamul, the Black Easterling (68). You smite Khamul, the Black Easterling (56). You smite Khamul, the Black Easterling (107).
Look at that! A single Orb could do, maximum, 164 damage against an evil target like Khamul at our current level. We can almost do that in a single blow with our Mace! In fact...
You smite Khamul, the Black Easterling (243). It was a *GREAT* hit!
Khamul contents himself to sling Frost Balls at us for the first 80% of the fight. Then towards the end he summons greater undead, pulling a Nightwalker.

Nightwalkers have 4 disenchanting melee attacks for colossal amounts of damage, plus a number of nasty spells. But we'll deal with this one later, after Khamul dies.
You smite Khamul, the Black Easterling (107). You smite Khamul, the Black Easterling (107). You smite Khamul, the Black Easterling (199). It was a great hit! You smite Khamul, the Black Easterling (128). You smite Khamul, the Black Easterling (74). Khamul, the Black Easterling flees in terror!
You smite Khamul, the Black Easterling (104). You miss Khamul, the Black Easterling. You miss Khamul, the Black Easterling. You smite Khamul, the Black Easterling (92). You have destroyed Khamul, the Black Easterling.
Speaking of which.
Now, that Nightwalker...

Freude and Bryson II never killed Nightwalkers. But we have a preposterous undead-slaying mace, we can cast more-or-less indefinite healing spells, and we're standing on a Glyph of Warding. Let's rock.
Flavor text:
A huge giant garbed in black, more massive than a titan and stronger than a dragon. With terrible blows, it breaks your armour from your back, leaving you defenseless against its evil wrath. It can smell your fear, and you in turn smell the awful stench of death as this ghastly figure strides towards you menacingly.
Nightwalkers are very fast (+20, compare Khamul's +10), have 2x 10d10 and 2x 8d8 disenchanting melee attacks, and can cast Blind, Brain Smash, Frighten, Nether Storm, Mana Bolt, Nether Bolt, and Summon Undead. However, they only have 1650 HP -- Khamul had 5000.
You miss the Nightwalker. You miss the Nightwalker. You smite the Nightwalker (74). You miss the Nightwalker. You miss the Nightwalker. You miss the Nightwalker.
On the gripping hand, they have a much higher AC. Maybe time for us to bless up.
You feel righteous! The rune of protection is broken! The Nightwalker hits you. Your Set of Gauntlets of Doril was disenchanted! The Nightwalker misses you. The Nightwalker misses you. The Nightwalker misses you.
Ow. One hit, 83 damage. These guys don't mess around! We re-establish the Glyph, and resume whacking him about the knees. While we're lucky to land 2 blows in melee on a given round, that's still better damage than Orb -- and the Nightwalker spends the rest of his life fruitlessly trying to break the Glyph. Soon enough,
You smite the Nightwalker (98). You have destroyed the Nightwalker.
Victory!
 Among the remains: a Scroll of Mass Banishment and a new potion! Cyan Potions turn out to be of Life, and we just drink this one right off the floor. Potions of Life are nearly equivalent to Potions of *Healing* for us -- they also restore stats and experience, but we can cast Restoration and Remembrance so who cares? The main problem with Potions of Life is that they're too rare to build up a good stack of them, which makes them not really worth the inventory space.
 Further exploration of the level nets us a deuce of Potions of Intelligence -- enough to max that stat! Hooray. We also get a couple more Potions of Healing, putting us at 13 such potions overall. Not bad.
Let's move on.
You enter a maze of down staircases. (to 3600')

Hey-ho, it's the Curlicues One vault again! Downing a Potion of Enlightenment, we discover...not very much, honestly, but there's a crapton of equipment in there, and I bet a bunch of 'em are artifacts.
Before we crack the vault open and start teleporting nasties all over the place, let's check out this unusual room to our east:

It has Hoarmurath of Dir in it! We can go say hi!

Hoarmurath of Dir is less powerful than Khamul, but he may decide to be more intelligent when it comes to spellcasting, and we haven't bothered with preparing the terrain this time aside from laying a Glyph down. En garde!
You smite Hoarmurath of Dir (104). You smite Hoarmurath of Dir (83). You miss Hoarmurath of Dir. You smite Hoarmurath of Dir (95). You miss Hoarmurath of Dir. You smite Hoarmurath of Dir (77). The rune of protection is broken! Hoarmurath of Dir hits you. Hoarmurath of Dir misses you. Hoarmurath of Dir touches you. You feel your life draining away!
That didn't last long, and now we're down 48k EXP. We just throw up a new Glyph and resume thwacking him.
As it turns out, besides the one rune-breaking, Hoarmurath limits himself to a single attempt to cast Cause Critical Wounds, and thus dies very quickly.
Naturally his drop is crap, though he does drop a Gold Dragon Scale Mail, which I don't think we've seen before. Naturally, it provides resistance to sound and can be activated to breathe sound. Now, the vault!
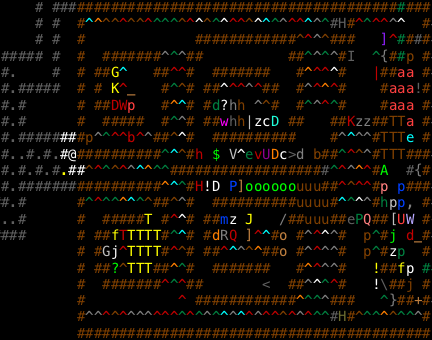
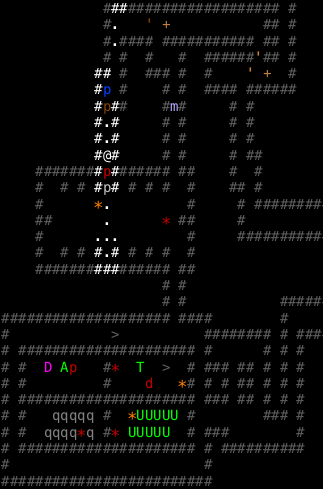
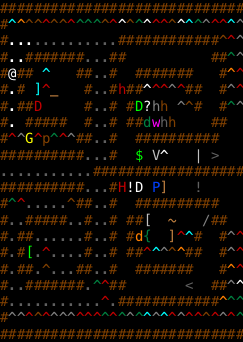
We can't quite detect the entire vault from here, but we're close! Just the last row on the far end remains mysterious for the moment.
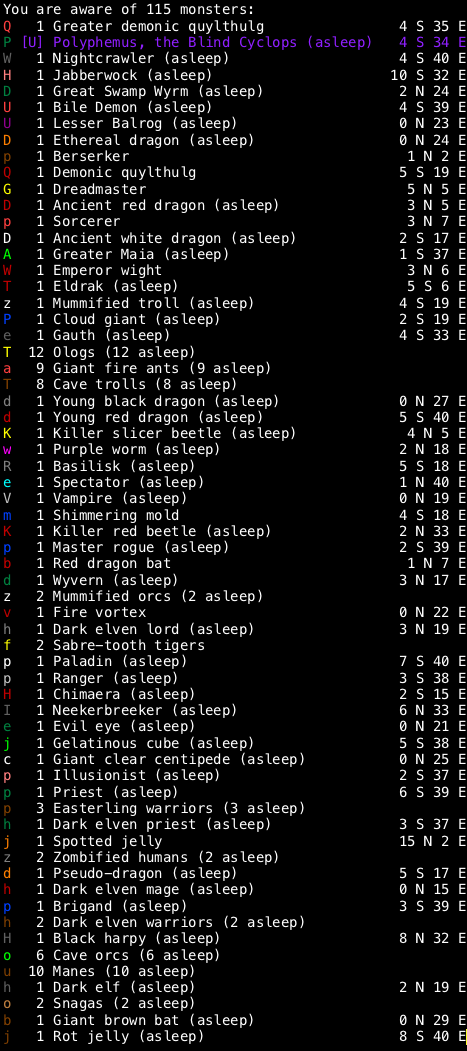
Nothing too terrifying here. We'll probably revert to teleporting everything especially threatening away though, which mostly means the top four monsters.
This time we don't have a Wand of Disarming, but we do have the spell Unbarring Ways, which is almost as good. At the very least we don't have to risk trying to disarm trapdoors or summoning/teleport runes.

The southwest corner is easily cleared -- it had a pack of Ologs with an Eldrak, and a Poltergeist of all things. The "awesome tile" item is Adamantite Plate Armour of Resistance, which is if nothing else impressively big. 42 pounds, and it would increase our AC by 98! Buuuut we'll stick with our Dwarven Chain Mail.
The northwest corner has a Dreadmaster, an Ancient Red Dragon, and a Berserker, all of whom are old hat now. Having over +20 speed and a powerful melee weapon is so nice. The Dreadmaster dies in 3 rounds of melee! We find a Steel Helm of Telepathy, a Potion of *Healing*, a Scroll of Mass Banishment, and a Ring of Speed <+7>. Pretty impressive.
Moving in on the northeast section, we run into an Ethereal Dragon.
Fortunately, we now resist both light and darkness, neutering its two big damage abilities. We Orb it until it's nearly dead, then lure it out away from the traps.


The reason for this is that items can't drop on tiles with traps on them, and if there aren't any "open" spaces within a certain range (3 tiles, I think) of the monster when it dies, then its drop is simply destroyed instead.
Naturally its drop is just items we squelched long ago, but it's the principle of the thing that matters here.

A Lesser Balrog and a Great Swamp Wyrm are making life interesting here. But even between the two of them they can't instakill us now that we have nearly 800 HP. In fact, we kill the Lesser Balrog in melee before the Great Swamp Wyrm even makes it to LOS. The Wyrm is more threatening, having significantly more HP and much stronger melee, but it can't stand up to our Mace of Disruption and our ability to cast Heal.

Annoyingly, a Dark Elven Lord managed to cast Darkness before dying, "un-mapping" the entire vault. A cosmetic annoyance but nothing more. None of the loot in this section is worth mentioning.

The southeast corner barely puts up a fight until this Demonic Quylthulg manages to summon a Barbazu. We walk past the Barbazu to the Quylthulg, hit it once, and it gets the message and teleports itself away.
Back in the corner is one last randart light source, and it's a doozy:

That...is nice. It'd be nicer if we needed more WIS or STR, but we don't, really. Still, protection from confusion plus disenchantment resistance is pretty handy. Unfortunately our Lantern of True Sight is our only source of protection from blindness at the moment. Arguably protection from confusion is more important though. We have a swap cloak that provides it, but this way we can choose 2 out of protection from blindness (lantern), protection from confusion (cloak/palantir), and telepathy (cloak).
We'll use the Palantir for now and keep the Lantern as a swap item.

This cell has a Jabberwock in it. We still don't resist its chaos breath, but hey, it only has 2800 HP; how hard can it be to kill?
You miss the Jabberwock. You miss the Jabberwock. You hit the Jabberwock (140). It was a *GREAT* hit! You hit the Jabberwock (51). You hit the Jabberwock (106). It was a great hit! You miss the Jabberwock. The Jabberwock breathes chaos. *** LOW HITPOINT WARNING! *** You feel drugged! You resist the effect! You feel your life force draining away!

That hard to kill. 181/600 HP left -- it dealt 420 damage to us. Fortunately that means that if we drink a Healing potion (for 300 more HP), we'll be out of instadeath range. But I think maybe we'd better punt on this fight after that.
The Jabberwock disappears!
(Probably we could safely have cast Teleport Other instead -- hallucinating doesn't affect our spell failure rates. But this way we had some leeway in case the Jabberwock moves erratically, which would be hard to detect when we're hallucinating. I don't think it does but it doesn't pay to take chances!)
Mr. Abomination of Nature was standing on this:

Pretty but useless; our current crossbow is almost strictly better.
That does it for the front end of the vault; now for the back end.
Y'know, let's give fighting Polyphemus a shot. We'll just try to stay out of melee range. He moves erratically, so it should be possible if we're careful to kill him with Orb despite not being able to Blink away.
So much for that. If we Blink now, we'll end up next to the Jabberwock out south, and Polyphemus has blocked the retreat with his earthquake-causing melee hits. Oh well.
Polyphemus, the Blind Cyclops disappears!

We teleport away the Greater Demonic Quylthulg. The last remaining serious threat is a Nightcrawler. Flavor text:
This intensely evil creature bears the form of a gargantuan black worm. Its gaping maw is a void of blackness, acid drips from its steely hide. It is like nothing you have ever seen before, and a terrible chill runs down your spine as you face it.
More durable than a Nightwalker, its melee drains CON and causes acid burns instead of disenchanting. It also has a fairly nasty set of attack spells, which it casts more frequently than the Nightwalker does, which makes it odd that it's worth less EXP to kill. Oh well. We throw down a Glyph, open the door, and welcome it into melee range.
You smite the Nightcrawler (88). You smite the Nightcrawler (94). You smite the Nightcrawler (76). You miss the Nightcrawler. You miss the Nightcrawler. You smite the Nightcrawler (91).
Like Nightwalkers, it has a fairly impressive AC, giving us only a 47% chance to hit it. Unlike the Nightwalker we fought earlier, it limits its offense to a single nether breath, which it only performs when it's already 90% dead. It never does manage to break the Glyph down.
We sweep through the rest of the vault, hitting level 44 off of a Giant Fire Ant (812 HP, 342 SP).

Vault clear! That went a lot faster than last time. Our reward:
- Bolts of Slay Undead -- tempting, but our undead damage in melee vastly outperforms them.
- A Potion of Speed, several Potions of Healing, a replacement Potion of Enlightenment, and a Scroll of *Destruction*.
- A Staff of the Magi. Free SP refills! ...except we have 12 Potions of Restore Mana standing by waiting to be used, and inventory space is at a premium. So it's not really worthwhile.
...hm. That was a bit disappointing, aside from the Palantir. Oh well.
Let's call the update here. But before we go, let's take a quick look at Tuck.
We're sitting pretty for consumables, honestly. Now we just have to find that last prayer book...
That hammer is so pretty


812 HP! At the start of the update we only had 523!

Resistance to everything except chaos. I'd like to have protection from blindness and stunning, but you can't always have everything. I'm fairly certain that everything that can blind us can be saved against, though (except light/darkness attacks, which we resist anyway).
Next time: serious property damage!