Part 59: Power Overwhelming
Update 59: Power OverwhelmingLast time, Friar Tuck took out a number of notable unique monsters, maxed his stats, and discarded his old Great Hammer (which I had declared to be "perfect") in favor of something shinier and more decapitate-y.
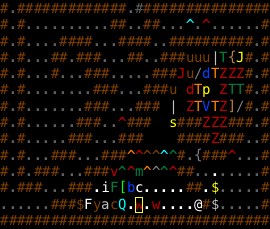
Heading east from our showdown with Pazuzu, we take out a pack of adventurers, discard their Boots of Speed <+8>, and find another unique we need to kill before we can leave: Tselakus the Dreadlord.

Flavor text:
This huge affront to existence twists and tears at the fabric of space. A master of mighty magic, Tselakus hungers for your tender flesh. Darkness itself recoils from the touch of Tselakus as he leaves a trail of death and destruction. Tselakus is a being of sneering contempt, laughing at your pitiful efforts to defy him. Mighty claws rend reality as he annihilates all in his path to your soul!
For all that talk, Tselakus is basically just an up-statted Dreadlord. He can move through walls, he has +20 speed, and he can cast Darkness Storm and Summon Ringwraiths. Handy, that, since we haven't killed all the Ringwraiths yet. At the very least the Witch-King is still "alive".
We have a good bit of distance between him and us, so now's a good time to dig an antisummoning corridor. It'll be of somewhat limited utility given his wallwalking abilities, but still at worst case only him and one other monster can get LOS on us at a time if we stand at the end.
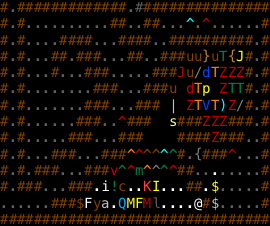
The problem with digging when wallwalkers are around is that you don't stop digging when they wake up, only when they enter LOS. So we haven't had a chance to lay Glyphs down yet. Fortunately Tselakus doesn't do anything while we cast one Glyph and use our Staff of Speed. +40 speed is somewhat overkill, but hey, why not?
You miss Tselakus, the Dreadlord. <2x> You smite Tselakus, the Dreadlord (94). You miss Tselakus, the Dreadlord. You smite Tselakus, the Dreadlord (91). You smite Tselakus, the Dreadlord (130). Tselakus, the Dreadlord invokes a storm of darkness. You resist the effect!
Resistance we may have, but that still dealt 220 damage to us, so we cast Heal in response. There is very little reason to not be above 75% HP at all times when playing as a priest.
You smite Tselakus, the Dreadlord (118). You smite Tselakus, the Dreadlord (231). It was a great hit! You miss Tselakus, the Dreadlord. <4x> The rune of protection is broken! Tselakus, the Dreadlord misses you. Tselakus, the Dreadlord hits you. Tselakus, the Dreadlord misses you. Tselakus, the Dreadlord misses you.
Like all members of the Dread family, Tselakus can drain STR with his melee, but he missed both of those attacks. His other two melee attacks just deal 10d10 damage apiece. We should have roughly 30% damage reduction against such "physical" damage attacks though, thanks to our AC of 184; in any event we only took 39 damage. Naturalley we re-establish the Glyph ASAP.
Tselakus, the Dreadlord summons ringwraiths.

Wait, what the hell? Feagwath the Sorcerer is not a Ringwraith! And yes, the Witch-King of Angmar is still very much alive, or at least animate. How bizarre.
Anyway, we teleport Feagwath away for the moment, and get back to beating Tselakus' face in. He fails to do much in response besides wander around our Glyph impotently.
You smite Tselakus, the Dreadlord (74). You smite Tselakus, the Dreadlord (265). It was a superb hit! You smite Tselakus, the Dreadlord (297). It was a *GREAT* hit! You smite Tselakus, the Dreadlord (107). You smite Tselakus, the Dreadlord (68). You miss Tselakus, the Dreadlord. Tselakus, the Dreadlord flees in terror! Tselakus, the Dreadlord summons its kin.

Just a Dreadlord and a Poltergeist, nothing to be worried about. Tselakus dies two turns later, having failed to actually leave melee range, and the Dreadlord takes 7 turns itself to kill, in which time it casts Paralyze once and does nothing else.
Total damage to us: one Darkness Storm, about 50 points of melee damage, and two points of drained STR, all of which is trivially recovered from. Tselakus' drop includes a Wicker Shield of Preservation, a Beaked Axe of Extra Attacks, Black Dragon Scale Mail, and a Lance (Holy Avenger). The Dreadlord also dropped a Potion of Experience, so hey.
Now let's go track down Feagwath.

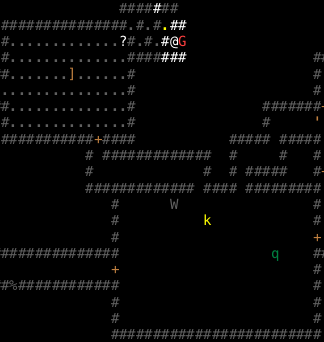
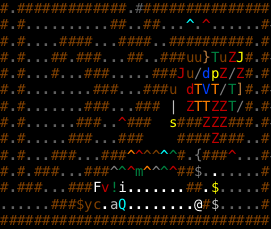
Ahh, excellent, the site of our battle with...uh, who was it again? Radagast? Anyway, there's an antisummoning corridor ready to go (cleverly just off-frame in this horribly-chosen screenshot), pre-filled with Glyphs. How handy!
Feagwath's flavor text:
A stench of corruption and decay surrounds this sorcerer, who has clearly risen from the dead to continue his foul plots and schemes.
Not nearly so much talk as Tselakus got, but Feagwath is leagues more dangerous. In particular, he can cast Mana Storm and Mana Bolt for huge unresistable damage, Nether Storm for huge semi-resistable damage, and Summon Kin, which will naturally pull in more Liches in his case -- likely Archliches, who can move through walls. Yikes. His melee also drains EXP and DEX, and can drain charges from your items, healing him in the process.
Usually he also shows up with an escort of other liches, but because he got summoned, they didn't come along. That's quite convenient!
Our strategy is the same as always -- haste up, stand on a Glyph, whack him in the face with our Mace of Disruption. We'll be dropping our staves a ways back to keep them away from his draining touch in the likely event that he breaks our Glyphs though.
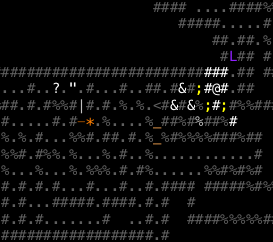
Unfortunately the Glyph to our southeast isn't really optimally-placed: when we stand on it, both the monster to its northeast, and the monster one tile north of there, can see us, due to LOS shenanigans. So we'll just stand where we are and wait for Feagwath to break that one. We can hit him with Orb splash damage in the meantime.
Feagwath, the Undead Sorcerer is hit hard. <3x>
The rune of protection is broken!
That didn't take long

You miss Feagwath, the Undead Sorcerer. <3x> You smite Feagwath, the Undead Sorcerer (285). It was a superb hit! You smite Feagwath, the Undead Sorcerer (118). You smite Feagwath, the Undead Sorcerer (106).

This AI tendency to walk away from Glyphs has got to be a bug. Also, Feagwath, for all his prowess, only has 5000 HP and a comparatively meagre AC of 127 (our hit chance is 68% when blessed), so we should be able to beat him down fairly quickly.
...yeah. Okay, so: Feagwath never attacked us. Never cast a spell, despite his 50% cast chance. 8 rounds of melee, plus a few Orbs when he stepped away, and he's trying to flee already. We wait for him to come back, and
You smite Feagwath, the Undead Sorcerer (106). You have destroyed Feagwath, the Undead Sorcerer.
That was anticlimactic. Cripes.
His drop is Seeker Arrows of Acid (very nice against Sauron if you're using a bow), a Main Gauche of *Slay Evil*, and this cloak:
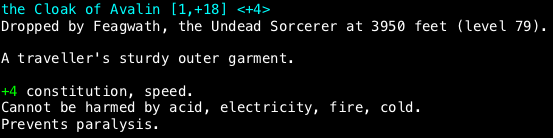
Man, where were you forty levels ago? Swapping out our current cloak would lose us our only source of telepathy. We'll carry this as a swap for now, but odds are it'll never get used.
And now we're done with the level. Onwards!
You enter a maze of down staircases. (to 4000')
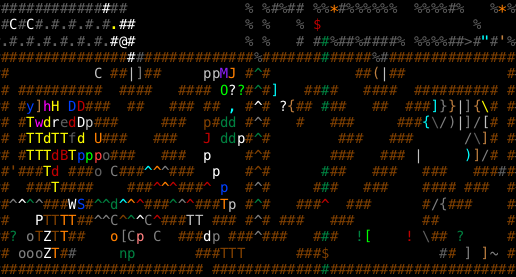
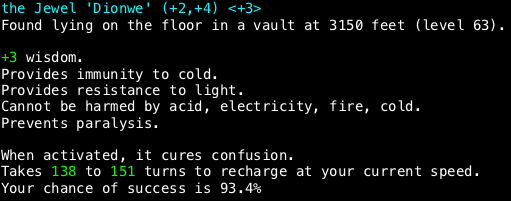
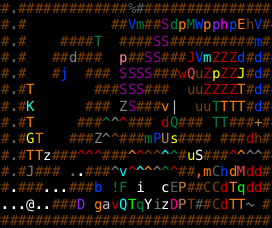
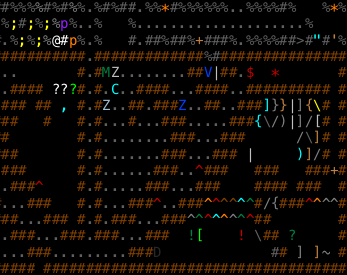
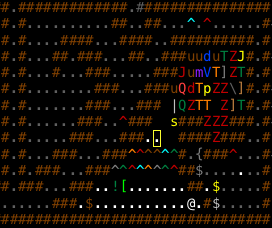
4000'! We're in the endgame now, folks! And the game has a heck of a welcome mat for us:

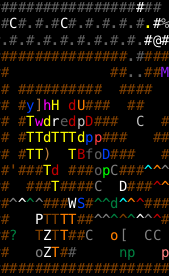
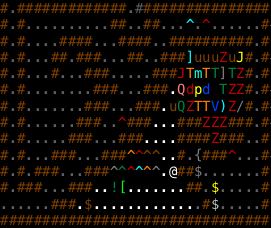
This vault is called "The Reward Is Worth It", and...uh, I kinda beg to differ. Its gimmick is that it has a ton of monsters in it that can all reach you without much in the way of walls to slow them down, but there's also gigantic piles of loot. The southwest and southeast corners aren't anything much, but almost all of those items in the northwest and northeast cul-de-sacs are of the "monster up to 40 levels out-of-depth and guaranteed-at-least-excellent item up to 20 levels out-of-depth".
Should be fun!
 The item list shows an amulet and ring type that we've not yet encountered, and at this point I'm pretty sure that the ring at least must be an artifact. There is also, of course, a crapton of equipment and a few endgame consumables (Mass Banishment and *Destruction* scrolls). Neither of the prayer books is the one we're looking for, alas.
 I rip apart a Great Wyrm of Ice in the moated room we're in, and it drops a Staff of Speed. Good thing too, because I left our old ones on the previous level
 Right, lesson learned: I am never again dropping something on the assumption that I'll pick it up again later.
 Moving closer to the vault, we kill a Dreadlord and get another Potion of Experience. Weird that we keep seeing that combination, but I'm not complaining; we're nearly to level 49 now.
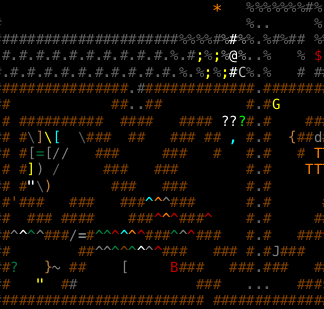
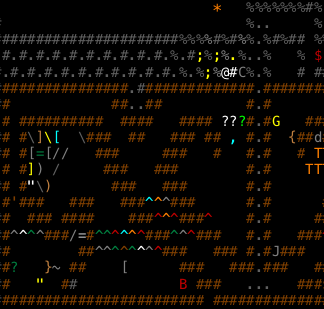
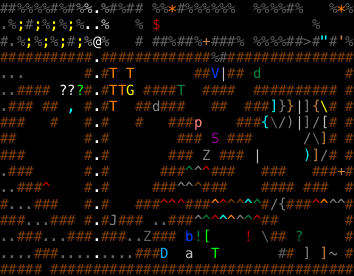
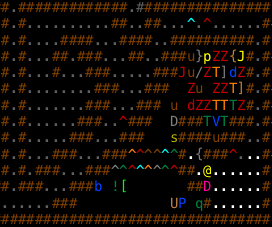
We get close enough to detect about half the vault:


That's a pretty impressive monster list. These are not exactly the circumstances in which I'd like to encounter Huan, but we'll make do somehow. Great Wyrms of Balance are pretty vicious: even if we resist three out of their four breath weapons (sound, shards, and disenchantment are covered; chaos isn't), they can also summon ancient dragons. Pit Fiends are summoner demons, able to summon greater demons and ancient dragons (possibly including more Pit Fiends and/or Great Wyrms). Most of the other guys aren't too bad, but this is about the worst possible terrain to be fighting them in. It's clear we'll need to be luring monsters out and fighting them one-on-one as much as possible.
Though, hey, Huan is loose (in the northwest corner of the vault). We can lure him into stomping a fair number of monsters for us. Indeed, while we dig our way to the entrance, he takes out one of the Pit Fiends for us.
His potential for carnage is somewhat limited because he'll always try to get close to us along a straight line (i.e. stupidest possible pathfinding), so we can't maneuver him into the middle of rooms or around obstructions.
We take a detour to open a cell that's inexplicably open to the outside instead of the rest of the vault, slaughter a Green Icky Thing, and find a Longsword of *Slay Evil*. Eh.

Ooh! Huan is about to squish the Lernaean Hydra! Ironically that means that the Lernaean Hydra is probably going to survive longer than Huan will.

*splat*

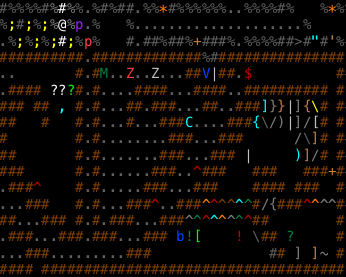
Right, that looks like a nice antisummoning corridor. And now we can detect the entire vault!
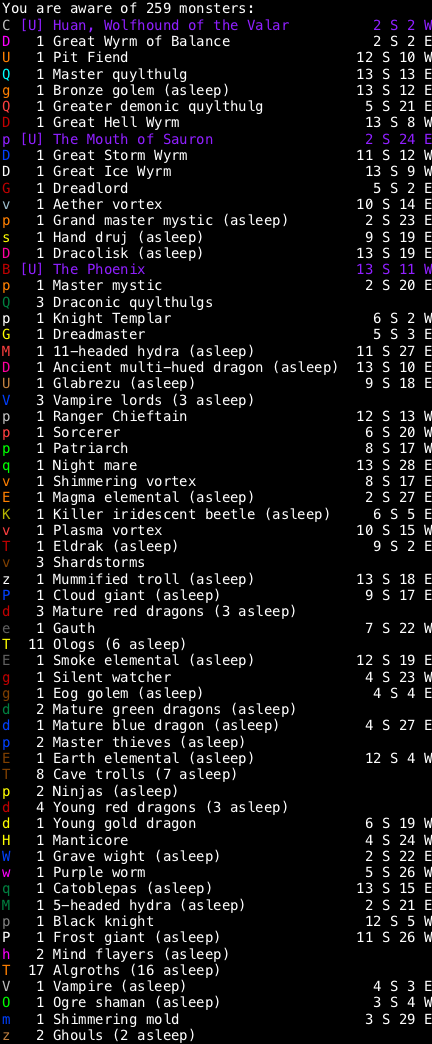
The monster list doesn't show too much new -- just a Bronze Golem (golem demon, as you may recall) and a Master Quylthulg (which can cast all the nasty summoning spells except Summon Uniques). Oh, and the Mouth of Sauron is here, next to a Grand Master Mystic.
Y'know, I've been thinking. If I hadn't stupidly left our Staff of Banishment behind like a moron, we'd be using it to clean up some of the nastier aspects of this vault, wouldn't we? But I was a moron, so we can't. However, we have six Scrolls of Mass Banishment in our inventory. You see where I'm going with this?
Mass Banishment removes all non-unique monsters that are within 20 tiles of the player, dealing 1d3 damage per. Annoyingly, that means that both of the inner sanctums are safe from a single Mass Banishment cast from the center of the vault. But if we stood in that little dugout cell with the Longsword, we could hit pretty much the entire western half in one shot.
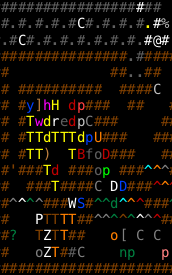
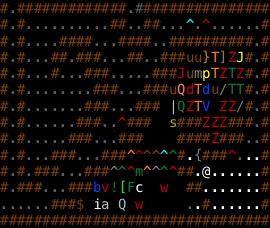
The vault before:
Really read 6 Scrolls titled "equo hocutio" of Mass Banishment? y
You have 5 Scrolls titled "equo hocutio" of Mass Banishment.
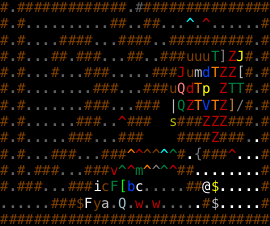
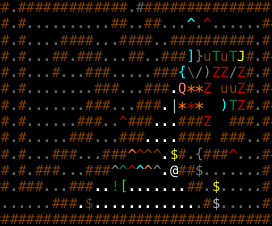
The vault after:

All that's left is Huan and the Phoenix!
Also, ow. We took 235 points of banishment backlash from that. So worth it though.
I'll refrain from banishing the eastern half, to keep things interesting if nothing else. Anyway, let's crack this sucker open!

Nothing's rushing after us. We did clip part of the eastern half, so the welcoming committee (of monsters that woke up while we dug to the entrance, and then managed to find their way to the entry corridor) are kind of banished to limbo. We disarm all of the traps in the corridor manually, except for the trapdoor, where we cast Unbarring Ways instead. No taking chances when it comes to maybe accidentally losing the vault!
Oops, Huan is en route! We should have enough time to walk out and get our Glyphs set up (why didn't I precast Glyph of Warding?
) before he can round the bend and start breathing on us. 
Just barely enough time! We throw down 5 Glyphs, cast Resist Heat & Cold, bless ourselves, and chug a Potion of Restore Mana, because this fight promises to be a grinder.
Huan's flavor text:
The wolfhound of the Valar, Huan has served many masters in his time, from Celegorm son of Feanor to Beren son of Barahir: but now he runs wild and acknowledges no master save himself, as he hunts alone for his nemesis - Carcharoth, the terrible wolf of Angband.
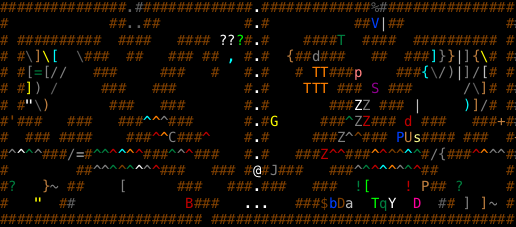
Carcharoth is still alive, so it's a bit odd that he wasn't generated with Huan; they usually show up together. Huan's gimmick is that he has 8000 HP and his only spells are breath attacks: cold, light, sound, and shards. His melee also deals cold damage. Consequently, I'm going to equip our Jewel 'Dionwe' instead of our Amulet of Thievery for this fight. Compare:

Wearing the Jewel loses us some DEX and speed, and resistance to nexus. Up until recently it would also have lost us resistance to poison, which is a big no-no (poison breath can deal up to 800 damage unresisted). Now, however, we get poison resistance from our body armor, and we need cold immunity far more than we need nexus resistance or a couple points of DEX. As for speed, the difference between +40 speed and +38 speed is inconsequential due to diminishing returns.
Here we go!
You miss Huan, Wolfhound of the Valar. <3x> You hit Huan, Wolfhound of the Valar (45). You hit Huan, Wolfhound of the Valar (52). You hit Huan, Wolfhound of the Valar (55).
Huan is immune to all basic elements, so the acid brand on our Broad Axe is useless, making our Mace of Disruption the better weapon.
You miss Huan, Wolfhound of the Valar. <6x> The rune of protection is broken! Huan, Wolfhound of the Valar claws you. You are covered with frost! Huan, Wolfhound of the Valar misses you. <2x> Huan, Wolfhound of the Valar bites you. You are covered with frost!
Ouch, bad round! We took 115 damage despite our elemental immunity. Huan's AC of 192 shouldn't be insurmountable; we just got unlucky. We retreat back to Glyph #2 of 5, and
You hit Huan, Wolfhound of the Valar (52). You hit Huan, Wolfhound of the Valar (54). You miss Huan, Wolfhound of the Valar. You hit Huan, Wolfhound of the Valar (55). You hit Huan, Wolfhound of the Valar (57). You miss Huan, Wolfhound of the Valar.
Yes, that's it! Ignore your breath weapons! Breathing is overrated anyway. Oh, Huan isn't evil, of course, so Orb isn't really worth casting against him. The splash damage is pathetic against non-evil targets, at least for this point in the game.
Huan, Wolfhound of the Valar breathes light. You resist the effect!
By this point Huan is 80% dead -- this after over a dozen rounds of melee. His light breath hits us for 160 damage, even though we have resistance. Nothing we can't heal up, but this should help bring home why I was so reluctant to fight him with characters who didn't have infinite big healing spells.
Huan breaks our second Glyph, lands a few good hits, and breathes light again when we retreat to Glyph #3 of 5. He follows up with a shards breath shortly thereafter, for nearly 300 damage -- despite the fact that we resist shards! Shards breath has a fairly high damage cap, making it a priority resist if you want to fight...uh, Huan, a Great Wyrm of Law or Balance, or a Gelugon. That's pretty much it though.
He breaks Glyph #3, and we retreat to #4. We get him down to 60% dead, and he responds with a sound breath, for 180 damage. We heal, and he breathes sound again, this time for almost 300. This is an example of how unreliable "high" resistances (everything except fire/cold/acid/electricity/poison) can be in Angband -- the resistance you get is anywhere from 1/7th to 6/7ths, selected at random.
Also, even though he's over half dead, Huan's still hitting the damage cap on his breath weapons, which speaks to how durable he is. That said though, he's still wasting most of his turns wandering in and out of melee range, giving us tons of opportunities to bash him in the face.
You miss Huan, Wolfhound of the Valar. You hit Huan, Wolfhound of the Valar (61). You hit Huan, Wolfhound of the Valar (103). It was a great hit! You hit Huan, Wolfhound of the Valar (103). It was a superb hit! You miss Huan, Wolfhound of the Valar. You hit Huan, Wolfhound of the Valar (141). It was a *GREAT* hit! The rune of protection is broken! Huan, Wolfhound of the Valar misses you. Huan, Wolfhound of the Valar claws you. You are covered with frost! Huan, Wolfhound of the Valar bites you. You are covered with frost! Huan, Wolfhound of the Valar bites you. You are covered with frost!
Even though Glyph #4 of 5 is finally destroyed, Huan is nearly dead himself. Let's let him die with a little dignity, and face him sans Glyph. That round dealt 82 damage to us; the following round nearly 150. Huan never runs away from battle, and we have to stop frequently to cast Heal, but soon enough
You hit Huan, Wolfhound of the Valar (107). It was a great hit! You have slain Huan, Wolfhound of the Valar. Welcome to level 49. (829 HP, 375 SP)
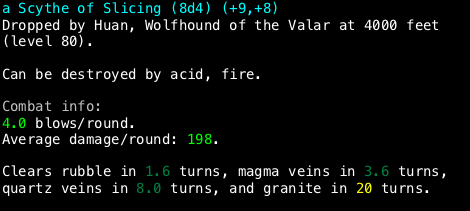
He never did use his cold breath, but we know everything else about him, now:

We get a {magical} Jewel Encrusted Crown, Main Gauche, Scythe of Slicing, Mithril Shield, and Studded Leather Armor. Oh well. I think this is our first-ever Scythe of Slicing; they look like this:
Back to the matter at hand,

While we could go east and take on the populated portion of the vault, what say we loot the western half first? That sounds much more

Here's that Opal Ring we detected earlier. And it is...


Is it worth trading our Ring of Speed <+8> for immunity to fire, patching our chaos and nexus resistance holes, and a crapton of stat boosts? Oh you bet your ass it is.
Look at this.

I have never gotten complete elemental coverage and all four immunities on the same character. This is insane! Literally the only things we could possibly use now are a) more speed (ha! You can always use more speed!), b) better stat sustain coverage, since we do plan to melee Morgoth, and c) protection from stunning.
Holy hell.

The Phoenix isn't gonna know what hit him.
You hit The Phoenix (56). You hit The Phoenix (144). It was a superb hit! You hit The Phoenix (67). You hit The Phoenix (122). It was a great hit! You hit The Phoenix (49). You hit The Phoenix (57). The Phoenix breathes fire. You resist the effect!
Yeah, this fight doesn't take long. He doesn't even scratch us.

It's lootin' time!

Off-weapon brands can be powerful, but cold is a pretty poor brand, and our amulet is serving more important purposes now.

Eh.
We get a Ring of Speed <+9> which can replace the Ring of Speed <+8> that we aren't even wearing because we found a Ring of Power holy shit.
We also get a pair of Boots of Speed <+10>. Our randart boots are just <+8> to speed and resistance to cold, but we have cold resistance thoroughly covered now, so we'll take the extra +2 speed instead.
And there's a ton of pretty-but-useless ego items, like a Crown of the Magi, a Two-Handed Great Flail of Gondolin, a Morningstar (Holy Avenger), etc. Junk, basically.
Back on the eastern side, we need to pull out the Grand Master Mystic and the Mouth of Sauron. But they're currently stuck, which means this is a good time to go renew our Glyphs.
That's better. Now we take careful aim...

The Baby green dragon is hit hard. 9 Cave spiders die.
That Baby Green Dragon is the only thing standing in the way of the Grand Master Mystic. Two more Orbs kill it -- and give a demonstration of how much less splash damage does than a direct hit. Baby Green Dragons only have about 90 HP, which means a direct hit would be guaranteed to overkill one by at least 60 damage right now.
...and it turns out that this guy is just a Master Mystic, not a Grand Master Mystic. Serves me right for not looking closely.

The Grand Master Mystic is stuck behind a few more enemies, and is immediately next to the Mouth of Sauron. Tricky, this. I think we'll need to resort to Blink.

The 5-headed hydra grunts with pain. The Grave wight is hit hard. The Grave wight flees in terror!
A few repetitions, and the two human enemies are en route.
The 5-headed hydra squeals in pain. The Grand master mystic shrugs off the attack. The Mouth of Sauron is hit hard. The Grand master mystic summons hounds. The 5-headed hydra pushes past the Blink dog.

And this is why we need Blink -- this kind of terrain is horrible for fighting summoners in. However, a simple casting of Blink lands us here:

From which position we can traipse over to our antisummoning corridor and wait for our buddies to catch up.
In addition to basically all the nasty attack spells and the better summoning spells, the Mouth of Sauron can drain charges and disenchant with his melee attacks. We'd like to stash our Staff of Speed, but unfortunately items can't coexist with Glyphs of Warding, and there's no non-Glyphed spaces in drop range, so if we drop it it'll simply disappear. Oh well; we'll cope.

...both the Mouth and the Grand Master Mystic seem totally incapable of coping with our Glyphs. Unfortunately we have no way to dispel them, so we'll just have to wait. It takes awhile. We take a catnap.
The rune of protection is broken! The rune of protection is broken!
Oh, you guys finally caught up? Nice to see you. In our first four rounds of melee, the Mouth casts Cause Critical Wounds, Fire Ball, and Whirlpool; only the latter does anything, of course, but it's trivially healed. Five turns later he manages to break the Glyph we're standing on; by this point he's 30% dead. Rather than retreat to another Glyph, we just stand and fight.
You hit The Mouth of Sauron (62). You hit The Mouth of Sauron (72). You hit The Mouth of Sauron (168). It was a superb hit! You hit The Mouth of Sauron (65). You hit The Mouth of Sauron (65). You hit The Mouth of Sauron (141). It was a superb hit! The Mouth of Sauron misses you. The Mouth of Sauron hits you. The Mouth of Sauron hits you. Energy drains from your pack! The Mouth of Sauron misses you.
Unfortunately for him, his melee is not at all dangerous -- two 6d8 hits and two 5d5 hits. Stick to spells, buddy. Of course, if we didn't have disenchantment resistance (and cared about the pluses on our armor), then meleeing him would be less wise.
And he does mostly stick to his spells, casting Paralyze, Darkness Storm, Darkness Storm, and a failed spell in 4 out of 4 turns. Nothing we can't cope with, but the effort is appreciated. Unfortunately for him, we're dishing out damage pretty quickly here.
You miss The Mouth of Sauron. <3x> You hit The Mouth of Sauron (96). It was a great hit! You hit The Mouth of Sauron (54). You hit The Mouth of Sauron (70). The Mouth of Sauron flees in terror! The Mouth of Sauron invokes a storm of raw magic. *** LOW HITPOINT WARNING! ***
Ahh, there we go! Mouth's Mana Storm isn't as strong as Feagwath's, but it can still hit for upwards of 425 damage, and this was towards the upper end. We're now at 356/902 HP, so heck, why not break out the big healing spell?

I mean, it's not like mana is at a premium for us.
You miss The Mouth of Sauron. <3x> You hit The Mouth of Sauron (56). You hit The Mouth of Sauron (69). You hit The Mouth of Sauron (65). You have slain The Mouth of Sauron.
And down he goes. The Grand Master Mystic behind him only takes five rounds and barely manages to scratch us with his melee. I was expecting to get stunned several times -- their melee is notorious for causing heavy stunning and potentially even knocking you out if you don't clear the stunning up quickly -- but it never happened. Oh well.
The Mouth dropped Law Dragon Scale Mail (provides resistance to sound and shards, and a breath activation that randomly picks one of those two), another copy of Holy Infusions, and a few {magical} items. Oh well. We've now killed the second-most-powerful "p" unique in the game! Sauron, of course, is the most powerful.
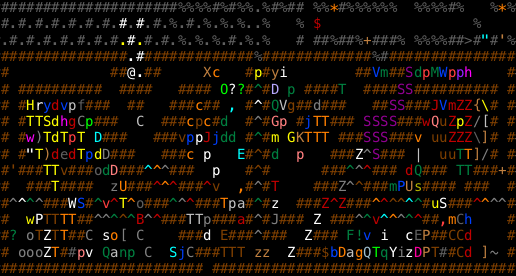
We successfully recharge our Staff of Speed, then bulldoze through a bunch of chump enemies to access the second inner sanctum.

The main things to look out for here are the Master Quylthulg (cyan Q), Bronze Golem (orange g), Greater Demonic Quylthulg (red Q), Hand Druj (yellow s), and Shimmering Vortex (orange v; the other one is an Aether Vortex, which can breathe every element but consequently has a very unfocused offense). Most of these guys aren't dangerous on their own, but can make the situation drastically more painful either by summoning (quylthulgs) or by shrieking for help (Shimmering Vortex). The plan here is to break open the wall to our southwest and kill everything as it comes out. Seems simple enough.
This Dracolisk manages to bust out a nexus breath for 230 damage despite our resistance. Good effort; you get a gold star. An Ancient Multihued Dragon follows up, trying out a couple of its breath weapons against us. Unfortunately we're totally immune to 80% of its arsenal. Too bad!

The Bronze Golem is trickier: it has 4 10d10 melee attacks, nearly as much as a titan, and a colossal AC of 255 that means we only have a 38% chance to hit it in melee. Still, we manage to dismantle it with only two stops to cast Heal.
After that comes a period of waiting, since we need the Vortices to stumble out through this crack, and their movement is almost entirely random. The Aether Vortex comes out first, and dies in two turns; the Shimmering Vortex eats an Orb and two melee hits before dissipating.
Next problem: that Master Quylthulg has to go. They have 2650 HP, and he's situated such that even if there weren't monsters in the way, it'd take us 9 turns in his LOS before we could start hitting him. Much as I'd like to kill him, the smart money is on teleported him away instead.
Also, note that the Draconic Quylthulg has been shifted; something (probably the Bronze Golem) pushed past it, swapping spaces in the process.
We haste up, step into LOS, and
The Master quylthulg summons animals.

Whelp. I can't fault his tactics, nor his summons -- he got a Jabberwock, an Inertia Hound, and an 11-Headed Hydra. We duck back out of LOS to deal with them. The Jabberwock hits us for over 300 damage with a (resisted) chaos breath, and then does it again when we heal, twice. Cripes! I would be peeved if we relied on potions for healing.
Right, let's try this again.
Unfortunately we have to clear out the Red Worm Masses before we can teleport ol' Q away.
The Green mold squelches. The Master quylthulg barely notices. The Stegocentipede rears up in anger. 2 Red worm masses are destroyed. The Blue dragon bat dies. The Giant white centipede dies. The Giant green dragon fly dies. The Master quylthulg summons animals.
 Let me teleport you away already! The new chaff is weaker, though it contains two breeders: a Giant Black Louse and a Hummerhorn. We hit the pack with an Orb before ducking back out of LOS just to make certain the room isn't a mosh pit when we return.
 Mooks disposed of, we return again. Take three!
Alright! Finally!
The Master quylthulg disappears!
Next up is the Hand Druj. Much as I'd like to charge into melee and start swinging, there's two more quylthulgs behind him, so we're going to kill him with splash damage:
The Hand druj is hit hard. <8x>
The Hand druj is destroyed.
And now, likewise, for the quylthugs.
The Draconic Quylthulg drops quickly, but the Greater Demonic Quylthulg is considerably more durable and thus sticks around longer.
On the plus side, that means we can finally charge an enemy and engage in melee!
The Greater demonic quylthulg summons major demons.

Well, that is the problem with charging quylthulgs. He pulled a Greater Balrog. On the plus side, said balrog can't hurt us much since we're immune to his big nuke (fire breath, naturally). On the minus side, he can summon more demons. Well, let's try to take out the quylthulg anyway.
The Greater Balrog wastes his first turn casting Confuse, and we're in melee range!
You hit the Greater demonic quylthulg (53). You hit the Greater demonic quylthulg (65). You hit the Greater demonic quylthulg (57). You hit the Greater demonic quylthulg (62). You hit the Greater demonic quylthulg (63). You hit the Greater demonic quylthulg (159). It was a superb hit! The Greater demonic quylthulg summons major demons. The Greater Balrog misses you. <3x> The Greater Balrog touches you.
All quylthulgs have an AC of 0, which means we have a 95% chance of hitting them. But the Greater varieties still have so many hitpoints that you can't kill them as fast as you'd like. This time he summoned an Osyluth and a Lesser Balrog. They still don't have the werewithal to kill us quickly, so we resume our attack; two turns later the Greater Demonic Quylthulg is dead, and we Blink the hell out of there.

We Blinked not so much because the demons posed an imminent existential threat, as because they posed an imminent threat of summoning more demons, and that just gets unpleasant in a hurry. Never fight demons (or ainu) without LOS mitigation, if you can possibly avoid it.

This will suffice.
You fiercely smite the Greater Balrog (219). You fiercely smite the Greater Balrog (184). You fiercely smite the Greater Balrog (169). You miss the Greater Balrog.
I love our axe
 Annoyingly, he manages to summon another Bronze Golem before getting bisected, but all that does is slow us down a bit. On the plus side, check out this drop!
All of the bows we've found have been fairly impressive stat sticks, and this is no exception. It's not as good as our current bow (which is giving +4 CON and acid immunity), but it's still quite nice.
The Lesser Balrog lasts 2 rounds in melee, and the Osyluth 3. And that about does it for any remotely dangerous monsters in the vault!

Unfortunately, there's only one randart in the pile, though it's a doozy:

Holy hell. You may think these don't look like much, but being able to effectively double your damage output with any bow (assuming you don't have extra shots on the bow itself, and aren't a ranger) is bloody amazing. If archery is remotely tempting for you, you want gloves like these. But we're more of the "up close and personal" type these days.
There's also a bunch of Holy Avengers, Gondolin weapons, Elvenkind armors, etc. but they're all pretty much junk nowadays.
And that's it! Let's call the update here.
At this point, Friar Tuck is more than good to go for the endgame. We have practically everything we could possibly want in a character -- except for the last prayer book, of course. There's 19 more levels between us and Sauron, though, so maybe it'll show up.
Since we switched up our gear a fair bit this level, let's take a good look at the Friar.

With every resistance and elemental immunity, our inventory is totally immune to damage -- those potions and books are completely safe. I only have two copies of the town books because we might possibly have reason to swap out our fire immunity in the future.
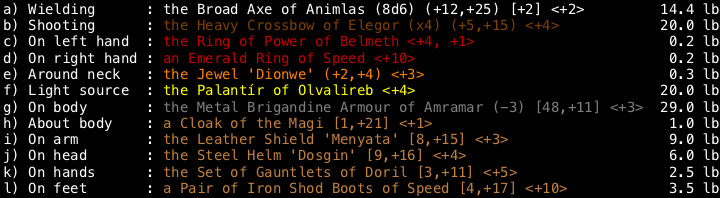
Similarly, having acid immunity and disenchantment resistance means that our equipment cannot be damaged by any means. At this point the only realistic upgrade to look out for is a bigger Ring of Speed; their pluses are potentially unbounded, and a +12 or +13 ring isn't all that uncommon.
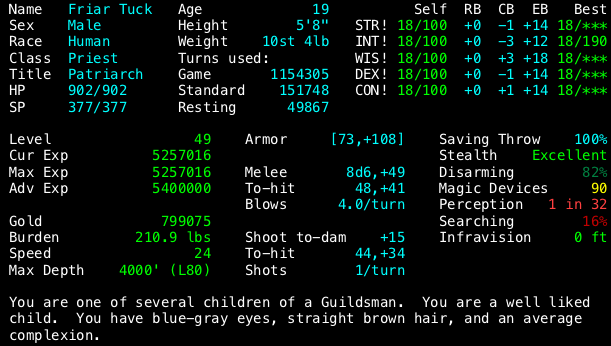
It wasn't all that long ago that our CON was woefully underdeveloped, and now we're a full 5 points over its effective cap! Our WIS score is also patently ridiculous now.
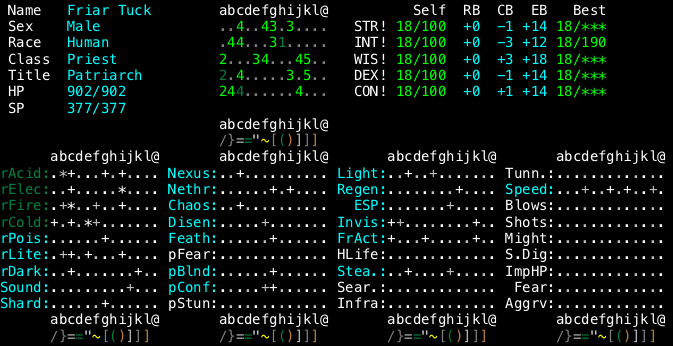
And this is just insane. Again, I have never before had a character with such complete protection. Practically the only thing that can kill us now is hubris.
Next time: a meteoric descent.