Part 48: Recitation Notes 9: Studying For The Final
 Recitation Notes 9: Studying For The Final
This is probably the worst-kept secret of FFXII, but bear with me.
You know that blocked-off east exit from Tchita Uplands? If you head out the north exit of the Phon Coast hunters' camp, you can grab a wayward chocobo and ride it all the way across Tchita, with just enough time left over to clear the blockage and make it to a new area, Cerobi Steppe. If you want to see what this run looks like, there's a video below.
 Click for multimedia content
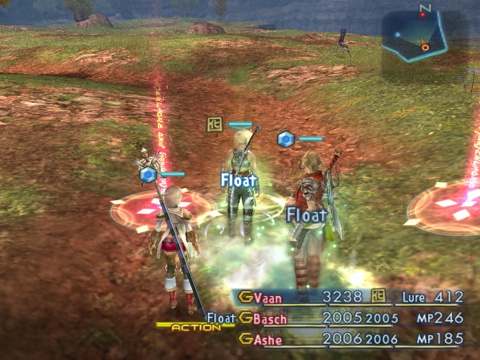
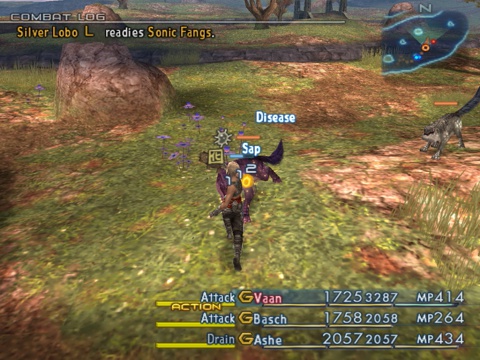
Most of the enemies here will be a little higher level than the party, but many have additional attacks or properties that ramp up their difficulty. Stocking up on restoratives is recommended before coming here. Parties without a Time Mage should also have some Float Motes on hand, as Cerobi likes to put traps in evil places, like in a big row blocking off a zone boundary.


There are also two big enemies to watch out for; the Charybterix, which has an unpleasant tendency to commit suicide and rob the player of experience and loot, and the Shield Wyrm, which is a dangerous wall of beef like the Ring Wyrm mark but appears twice or more in nearly every zone. Parties with a Red Mage can use Death and an Indigo Pendant to deal with these enemies; others may need to resort to a Niho and a Phoenix Down, or summoning Zalera, or grinding up a supply of Warp Motes.

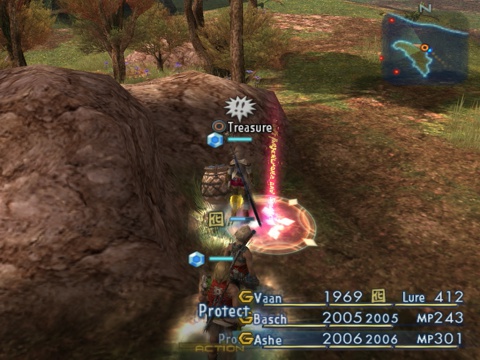
The first order of business after reaching Cerobi is to find this tree. If you equip the Seitengrat in this area, the arrow you have equipped will appear here, floating in midair. Spoooooky! But completely useless, and possibly unintended.
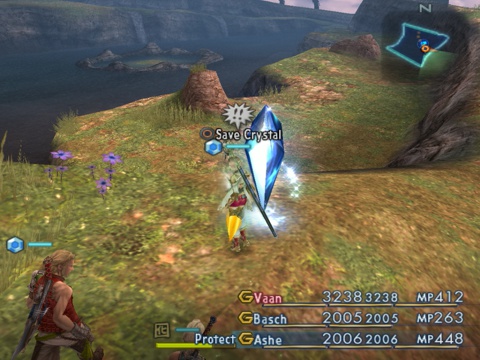
The second thing to do is reach this save point, conveniently located near the center of the area. Sequence breakers get comfortable, because you'll be seeing this save point a lot. Also be careful with your save files here, as there's no particularly easy way back.


Cerobi Steppe is, by any reasonable definition, an optional area. The major purpose it serves is to connect Tchita Uplands with the Port of Balfonheim, but Balfonheim is currently blocked off, has both an airship dock and a teleport crystal, and the party gets automatically transported there as part of the plot anyway. There are also some hunts and sidequests having to do with the moogles repairing the windmills in the area, but that's not available until later either.
So the only point of coming to Cerobi early is to hunt for treasure -- but what a point it is! In vanilla FFXII, the repeatable chests in Cerobi contained the second-best of all armor types, strong weapons, ammunition, and accessories, and even Megalixirs. Not necessarily the best of everything, but a player reaching Cerobi wouldn't need to buy equipment ever again. The catch -- for there always is one -- is that all of those treasures were rare Diamond Armlet drops, and the player had to work a bit to have found a Diamond Armlet by this point of the game.
Well, here in IZJS, we've already got two Diamond Armlets, and Cerobi's treasures are even better. So what's the catch this time? Well, it's not just that all the treasures are rare DA drops, or that IZJS reduced the chance of rare DA drops from 10% to 5%. It's also that every repeatable chest in Cerobi has a very low appearance rate as well, typically either 20% or 10%, and most of the good ones also have a high chance of contaning gil instead of an item. This is enough to turn grinding Cerobi into a time-sink nightmare.
That is, assuming you follow the rules.
Back in Recitation 2, I mentioned that the random number generator of FFXII was fully understood. That understanding is the result of a lot of hard work and pattern recognition from a cooperative team of players around the world. It started from someone realizing that, when the game was started from a cold boot (that is, turning the console on, not just hitting Reset) there were certain patterns one could follow to manipulate the random number generator to ensure a rare DA drop from a chest. This gave birth to the idea that the random number list began from a similar position with every boot, and the player could advance the register in a controlled, deliberate manner. Some educated guesses, reverse engineering, and field testing later, and it is now possible to predict the contents of the random number generator out to any arbitrary length, and, using a couple casts of healing magick (which only use one random number per target) precisely locate the game's current location in that list, thus making the random number generator completely predictable. The only drawback to this technique is that town areas constantly pull random numbers and prevent combat actions, so chests in town areas -- including the Seitengrat -- can't be manipulated this way.
The key to making the most of Cerobi is the realization that treasure spawning uses the same random numbers that treasure contents do -- and, in IZJS, because treasure respawns more quickly, this process happens every time a zone is entered. Entering a zone pulls 0-2 random numbers from the register to check for weather changes, then may pull one or more to test for the appearance of rare monsters or randomly-appearing marks, then starts checking for treasure appearance in a fixed, pre-determined order. Getting a feel for this process is equal parts art and science -- I recommend starting from nice weather if you can, as that seems to keep the number of random numbers used more consistent -- but, once you've got it, it's just as easy to manipulate the appearance of chests as it is to manipulate their contents.
So here's what you need to hack the Gibson:
- A chart of the beginning of the RNG list, as long as you want (here's the one I use)
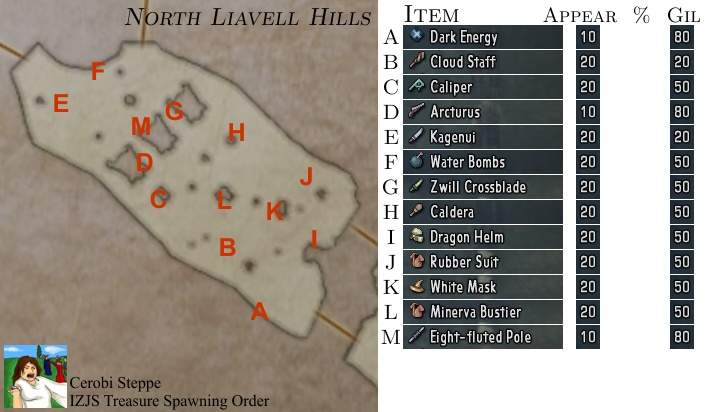
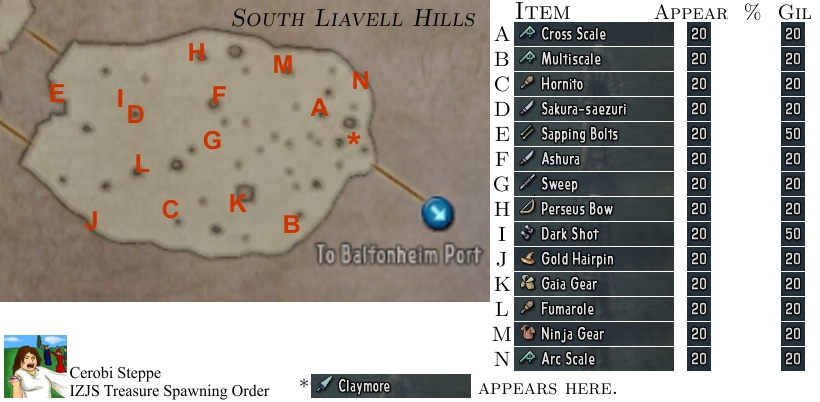
- A treasure map of the zone you want to loot, including the chest appearance rate and spawn order
- A character who can equip the Diamond Armlet
- A character who can cast healing magick
- The damage formula for healing magick
Step 1: Save at the save point in the center of Cerobi (it's just more convenient that way) and power down your console. Then start it up and load your game.
Step 2: Fight your way to the boundary of the zone with the treasure you're looking for. Make sure to turn off things that use random numbers (don't cast Regen, deactivate your Decoy Gambits, etc.).
Step 3: Remove everyone but your healer from your party and have him or her cast Cure, noting the amount of healing it does each time. Do this enough times to identify your exact location in the random number list. The chart I linked has a convenient search algorithm that will do this for you.
Step 4: Look ahead in the list and find a number that will spawn the chest that you want. For 20% appearance chests, the random number has to end with the digits "19" or lower. For 10% appearance chests, it's "09" or lower. Then, using the chest's position in the spawn order and the rough outline of how many numbers will be consumed setting up the zone, count backwards and figure out where you should be in the random number list when you enter the zone to spawn the chest you want.
Step 5: Use unarmed strikes or healing magick to carefully advance the random number list to the correct location. Be careful of combos, as they can jump ahead in the list much faster than you wanted to.
Step 6: Enter the zone and fight your way to the chest. If it isn't there, leave the zone and try again from Step 3. It may take a few tries to get the hang of this. You probably also will want to clear out any nearby enemies.
Step 7: Repeat Step 3 to find your position in the list again.
Step 8: Now you need to look ahead for a combination of random numbers that will drop the item you want. The first number will determine whether the chest contains gil, and it should end with digits equal to or higher the chance of containing gil (if a chest has gil 80% of the time, for example, find a number ending with "80" or higher). The second number will determine what item drops, and it must end with digits between "95" and "99" (because the chance of a rare DA drop is always 5%).
Step 9: Repeat Step 5 to advance the random number list until that combination is next in the queue.
Step 10: Have the character with the Diamond Armlet open the chest.
Step 11: Repeat from Step 2 until you hit the end of your list of random numbers.
Step 12: Return to the save point and repeat from Step 1 until you are satisfied.
Now, here's the final rub -- these treasure maps (spoiler warning) posted earlier in the thread by Fister Roboto show the locations and spawn rates of every chest in IZJS Cerobi. And the international cooperative that figured out the mechanics of the RNG ended up compiling the spawn order of Cerobi's chests in the vanilla game in the course of testing. But, as of the time I started this LP, I could not find any information about the chest spawn order in IZJS Cerobi.
So I ran some tests.


You're welcome.
In summary, the Cerobi Steppe contains the strongest Handaxe, Mace, Rod, Staff, and all classes of armor; the second strongest Hammer, Dagger, Ninja Sword, Pole, Crossbow, Gun, and Hand-Bomb; the third strongest one-handed Sword, Katana, Spear, Bow; every Measure, three Greatswords, new Shields, new ammo, and the game's strongest items. In the paragraphs below, I'll go quickly into some detailed specifics about what all this stuff does and any significant changes from the original game -- if you're not interested, just skip reading until you see sirens.

IZJS reverses the dick move of vanilla in making the strongest armor either limited in quantity or very rare drops from rare monsters, and all the best armor in the game can be found here in infinite supply. On top of that, Light Armor users made out well in the armor stat rebalance, and the Brave Suit now actually increases max HP by a respectable amount and provides more defense than the Mirage Vest. Other useful finds include the Rubber Suit, which blocks lightning damage, the Black and White Masks, which absorb dark and holy respectively, and the Aegis Shield, which blocks 50% of magick attacks, and even enemies with Ignore Evade can't get around that blocking. If you're going to fleece Cerobi, starting with the armor is a good idea, as it really helps you survive to loot the rest of the area.

Next, go for weapons. The Bone of Byblos and the Hunter's Blade, or Shikari no Nagasa, are both new weapons to IZJS, but don't have any otherwise special properties. I think they were probably just included to give Maces and Daggers a little more room to spread out their power curve. Spellcasters in particular benefit from a trip to Cerobi: The Zeus Mace boosts Red Mage's dark-elemental attacks; the Holy Rod boosts White Mage's holy-elemental attacks; the Rod of Faith can apply Faith for free; and the Cloud Staff and Staff of the Magi boost Black Mage's lightning, water, and wind, and ice, wind and holy damage respectively, so it's finally safe to sell everything but the old Flame Staff. Also, with a full set of Measures, the Machinist can freely apply Protect, Shell, Bravery, Invisible, Haste, and Bubble, and boost ice, water, fire, dark, wind, and holy attacks, which may create the opportunity for an offensive role involving Fangs and Motes. Hunter, meanwhile, can walk away with nearly every Ninja Sword, including ones that deal earth, water, and dark damage, which are a little hard to come by. And there's also the Defender, a Greatsword with high attack power and better evasion than a Jade Collar, and White Mage can eventually use one with the right Esper allotment.
This chest protected behind a trap must contain something really special, right? Nope, just a Mythril Sword. Ha, ha.

This warrants special note -- the Cudgel, or Guriguribanban (the Japanese sound effect for being struck over the head with it) is the second of the new IZJS no-License superweapons, although it's more of a gimmick than the other three. It has the least attack power of anything in the game, even less than an unarmed strike, but it inflicts Sap and Disease with a 100% success rate, which makes the first two types of Meteorite effectively obsolete. It's also the only one of the four new no-License weapons to have an actual model, which you may recognize as the club Vaan got beaned with in the Nalbina Dungeons.

As a bonus for ranged attackers; Archer gets ice and earth ammo, Time Mage gets Sap and high attack power ammo, Machinist gets Petrify and dark ammo, and Breaker gets Sap and water ammo.

This is the final, rarest, and strongest variety of Meteorite, which deals a random amount of physical damage up to 9999, but crits half the time and deals 30,000. This is also the first appearance of the Dark Matter, a gimmicky attack item related to the Knots of Rust scattered everywhere. Using a Knot of Rust adds one-third of the damage dealt to Dark Matter's damage, up to a max of 60,000, and using a Dark Matter resets its damage down to zero. On the other hand, the Dark Energy always deals 50,000 damage, no recharging required. All three of these items can be found relatively close to a zone boundary, so a player with a little patience can gather the supplies to utterly trivialize nearly every enemy in the game.
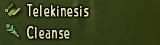
Telekinesis lets melee characters attack flying enemies, while Cleanse cures Disease. Interestingly, the chest with Telekinesis is guaranteed to appear, but the one with Cleanse isn't. Fortunately, the Cleanse chest is at the end of the spawn order for the Terraced Bank, so you won't have to take into account whether you've already picked it up when you're farming in the area.
Now you may have noticed there's no accessories list above, and, if you played the vanilla game, you'll know there's something important we're missing out on. Yes, Cerobi is no longer a source of unlimited Ribbons. Don't worry, we'll have a chance to get some later, and we can even use this RNG manipulation process to get them quickly, sort of -- more on that later.
 Grognard Time Ends
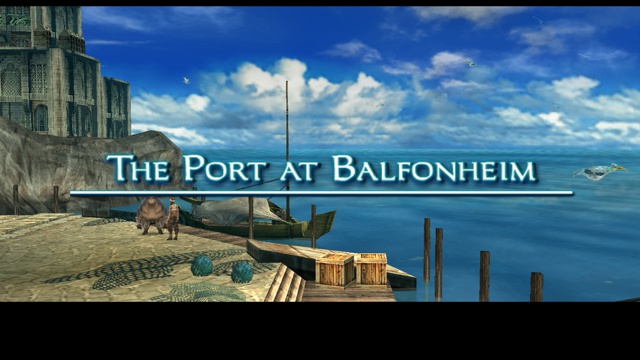

Once the player is satisfied with the party's bling, it is a comfortable matter to walk to Balfonheim. The city itself is closed off, but the Teleport Crystal is accessable to return to the main plot. The roaming chocoback vendor Dyce also stands beside the city entrance as a convenient place to sell loot, although he has not updated his wares since the Tomb of Raithwall.
And there you have it. I hope there was something useful here for newbies, vanilla players, and IZJS veterans alike.