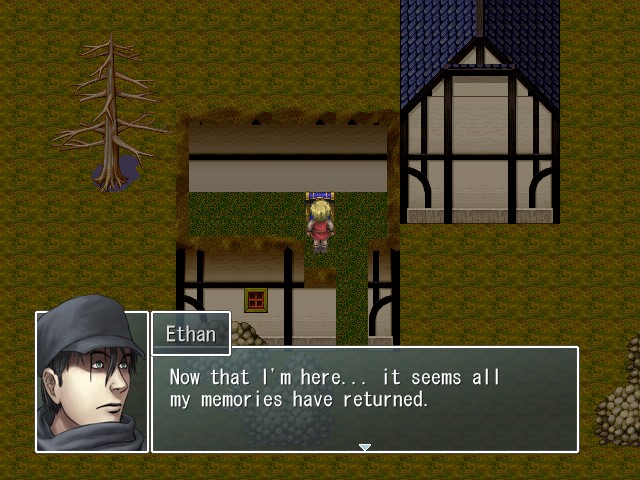
Part 51: The Heart Of The Tiles
Welcome back. Last time on Last Scenario, we started looking into some of the optional content that the game has to offer. After messing around in Condor a bit (and learning that a mild-mannered older man was a combat god) we headed to the Tower of Redemption, where we obtained the fourth and final Key. But since we can't quite yet handle what's behind the door in the Gate to Elysium that the Keys opened, it's time for us to start looking elsewhere for things to do. Let's get to it.


Music:

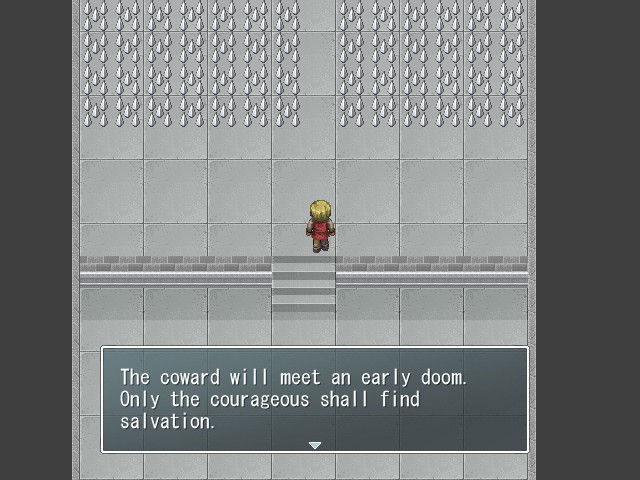
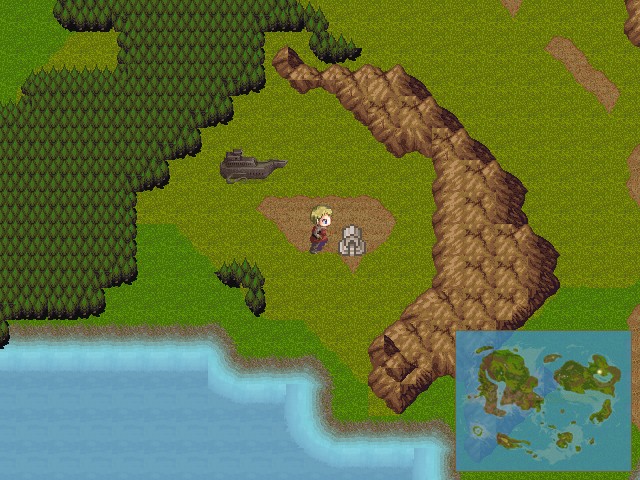
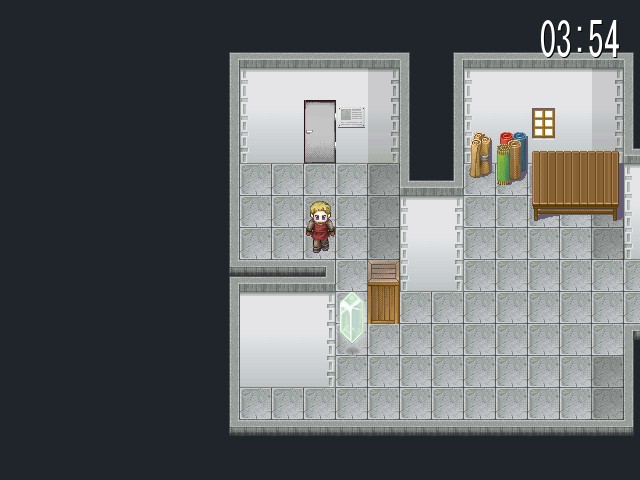
We begin today by heading to the Hall of Judgment. The Hall is a fairly short dungeon with a few nice rewards, and it's the next logical place to go after the Tower of Redemption.


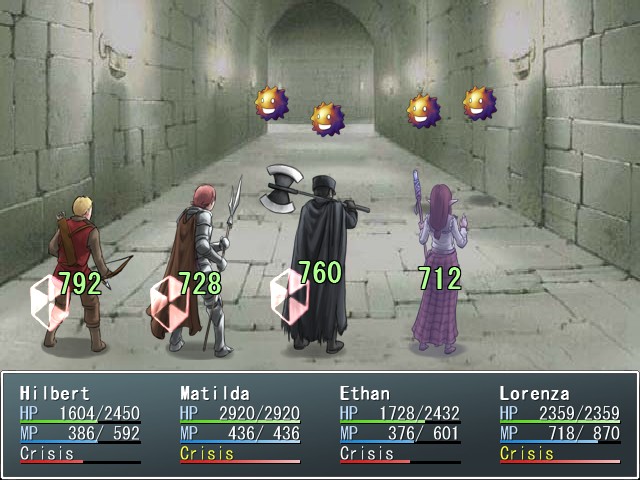
All random encounters in the Hall of Judgment are against one enemy, the White Guardian. There are actually two "variants" of the White Guardian, but they share the same appearance and name and it's impossible to tell which variant you're facing until they start attacking. The difference between the two variants is in the type of attacks they prefer. The first variant uses magical attacks, using Holy Shine to hit the entire party for about 900 light damage, and Pacify, which hits for about 1100 damage and attempts to disable the character with sleep, enfeeble, and blind. They can also P-Shield themselves if they feel like it.
The other variant prefers physical attacks, and will use Light Blade to hit a character for about 1100 light damage, or Holy Smiting to inflict about 950 light damage to the entire party. It can also M-Shield itself. Both variants have a large amount of HP and very high defenses, meaning that even with a spell like Unholy (they're weak to dark, surprise) you're going to be fighting them for awhile. If you can beat them, however, they're worth a whopping 22,500 experience each, making them prime targets if you feel like grinding.
Also, you may have noticed a theme to both variants' attacks: virtually everything they do is light-aligned, so with proper elemental protection the Hall is a cakewalk. Even if you don't feel like grinding up money for four Sun Crests, you can equip the Reflective Jacket from way back when in order to ensure that one character always stays alive in this dungeon.


Aside from the encounters, the Hall of Judgment is a bit of a puzzle dungeon. Upon entering the second room, the game pops up a message as we find ourselves staring at a pit. We can walk forward, but if we step off the floor, we'll fall and end up back at the beginning of the room.

Instead, just as the message states, we must be patient to see the light. If we stand still for several seconds, a winding bridge will appear. It vanishes when we move again, but we can walk on it while it's invisible, and we can just stand still to make it appear once more if we forget where it is. It's a bit tedious, but fortunately it's just a one-off thing.

There's also a spellcard at the end of a narrower section of the bridge:
 Cleanse (65MP): Restores a moderate amount of HP to the caster and clears all detrimental status effects on him or her.
Crisis: Sacrifice (0MP): Kills the caster, but restores full HP and MP to the rest of the party.
Stat changes: +8% max HP, +5% STR, -8% INT
Cleanse would probably be a lot more useful if a) we weren't immune to virtually every status at this point and b) it could be cast on anyone besides the wielder. Sacrifice is definitely a good panic button, though, if you feel like equipping it.


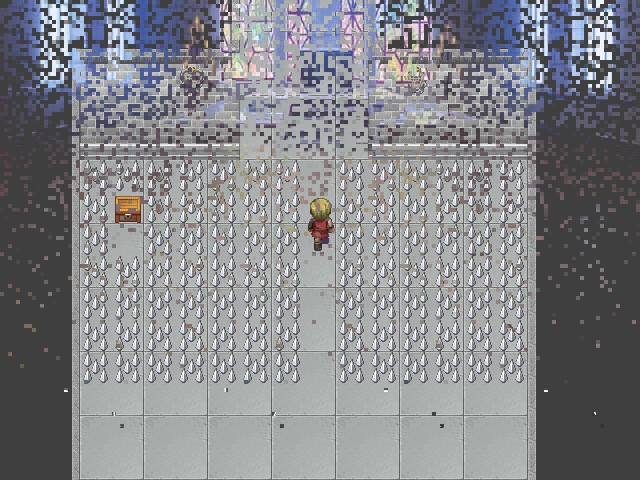
The next room is a fork, and the left path leads to a treasure chest, which contains...


The Party Hat is an interesting little helmet. If someone wears it, any single-target attacks that enemies make will always target the wearer. Always. It doesn't affect full-party attacks, but this is still an extremely powerful effect, to the point where I don't like using it because it almost feels like cheating. But SCF put it in the game, so I certainly wouldn't knock anyone else for taking advantage of it.
You may also recall that awhile back, when we first saw the Barrier spellcard, I mentioned that it had a bug that could be combined with another item to trivialize virtually every fight in the game. The Party Hat is that item, but granting the person who always gets hit resistance to all elements isn't the gamebreaking part. Unfortunately I can't show it off in this area due to the nature of the bug, but I'll explain it all later this update.

The next room is another not-so-difficult puzzle. The floor here is covered in spikes which will damage us if we step on them, but there's a straight path through them that's clear.

Of course, if we try to take the path, the game will force us into a battle with a White Guardian and then throw us back to the beginning of the room. So if we want to advance, we need to walk over the spikes.
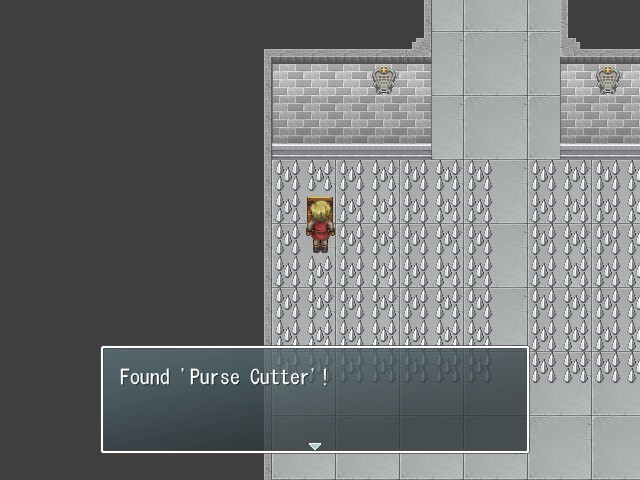
There's a treasure chest sitting in the spikes, but its contents aren't exactly what I'd expect to find in a holy place like this. The Purse Cutter is an accessory that, when worn, causes the gold awarded after battle to double. Useful, but I think at this point we have all the gold we'll ever need.
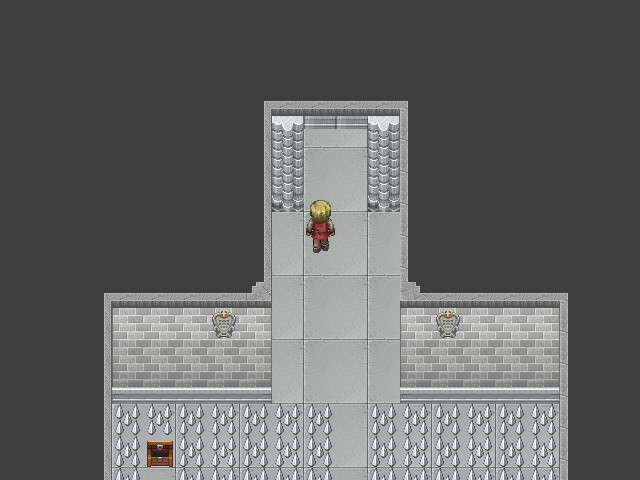

Anyway, as mentioned, the Hall of Judgment is a pretty short dungeon. There's a save point outside the final room.

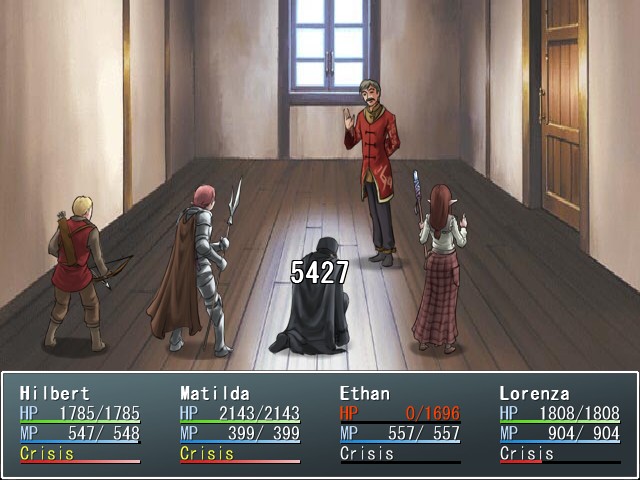
As we step forward, a voice speaks.
Music: None

 Speak now. Have you come to be judged?
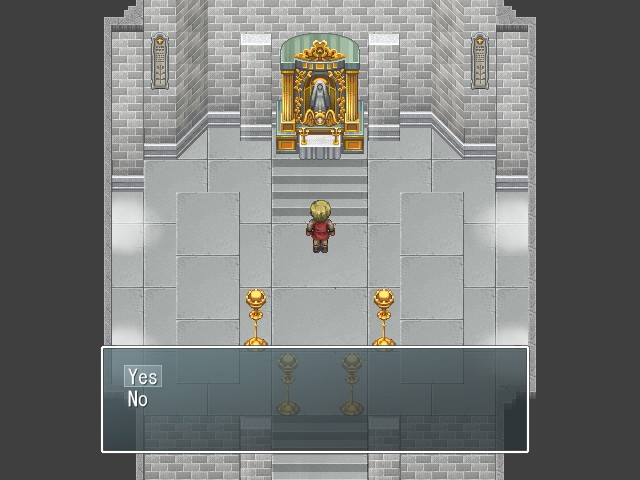
We can say no here, but if we do, the voice just tells us to begone and teleports us out of the room. So we say yes intsead.

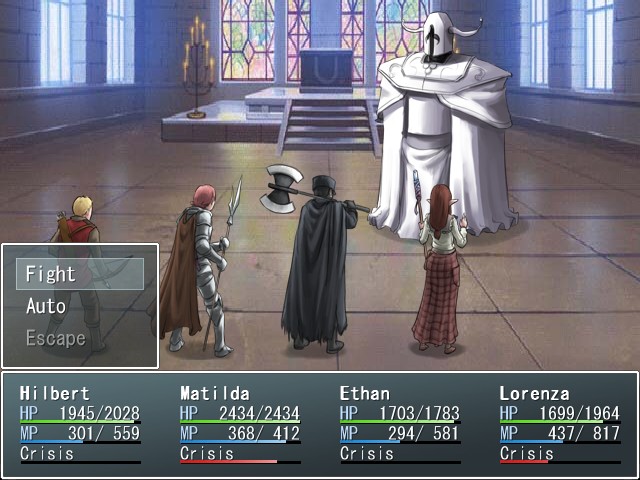
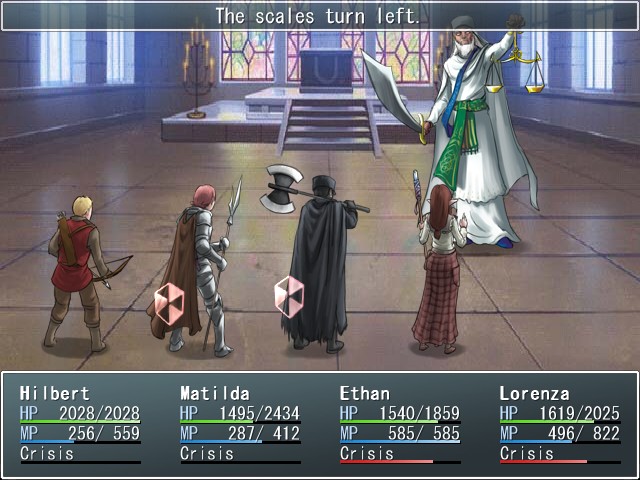
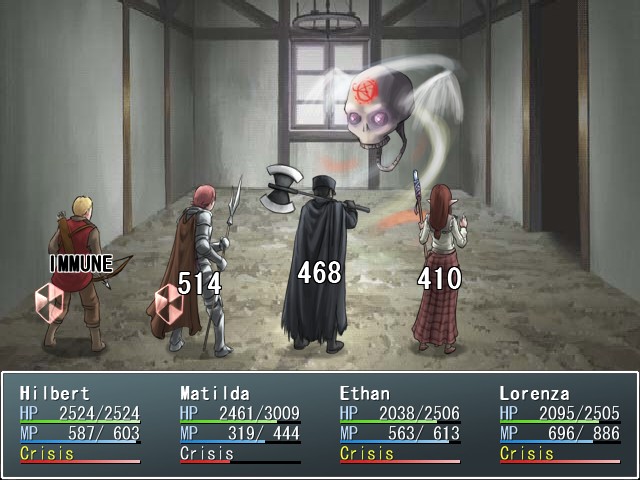
BOSS FIGHT: Rashnu
Music:


Oh hey, it's that one guy from Exit Fate. He's looking decidedly more wrathful this time around, though...

Rashnu is a bit of a gimmick fight, but in practice he's basically just a beefed-up White Guardian. Fortunately his defenses are significantly worse than the Guardians--if they weren't this fight might go on forever.

Before we do anything in this fight, we should make absolutely sure to grab Rashnu's steal. The Grand Vizier's Robe is a very powerful mage armor that grants light absorption to its wearer, as well as immunity to silence and amnesia. Lorenza will be putting it on following the battle.

Anyway, just as in Exit Fate, Rashnu has a gimmick, where he indicates in advance what types of attacks he's going to use. In EF he did this by sheathing and unsheathing his sword, but Last Scenario hasn't heard of the important technological advance of "changing sprites," so here it's just shown via message. Every few rounds, Rashnu will skip his turn and his scales will tilt one way or the other. When they turn right, he will use physical attacks.


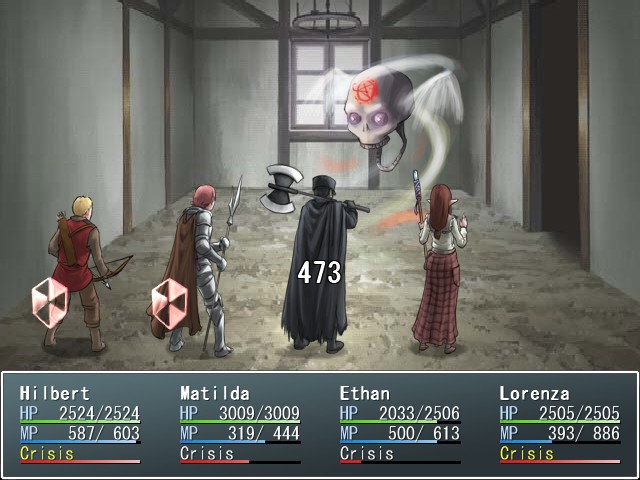
Rashnu's physical attacks are very powerful and can easily KO anyone not at full HP, so Shields are a must in this fight. His first attack, Sword of Judgment, deals a huge amount of damage to a single character.


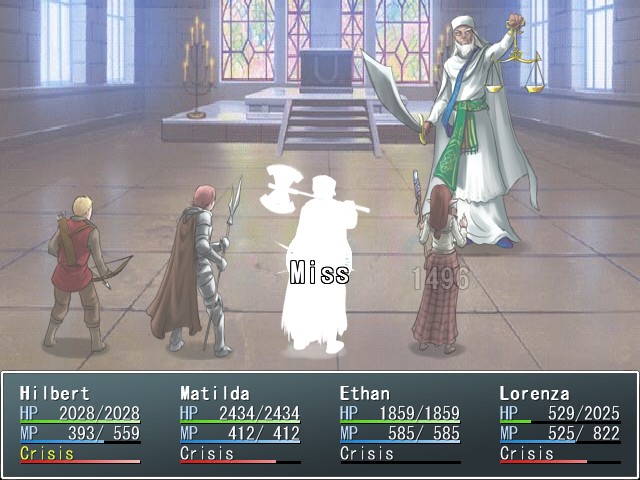
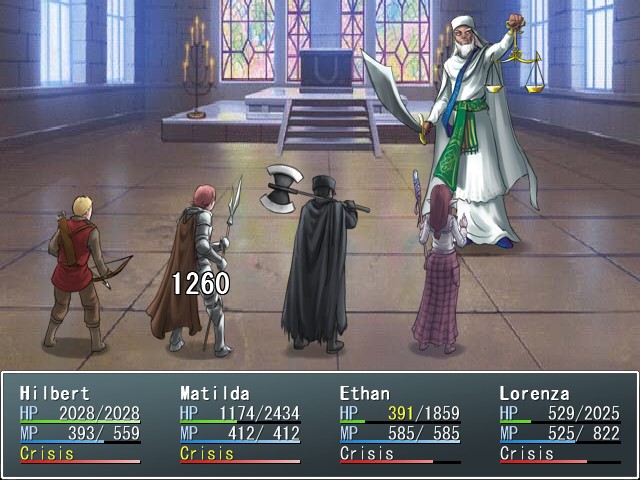
But far more dangerous is Grand Cross, a four-hit combo of physical attacks for big damage. Since it's a combo, it can easily strike a character twice, and without a P-Shield not even Matilda can survive two hits. Ethan got very lucky here.
After another Sword of Justice, the scales turn left, indicating that Rashnu is now focusing on magic.
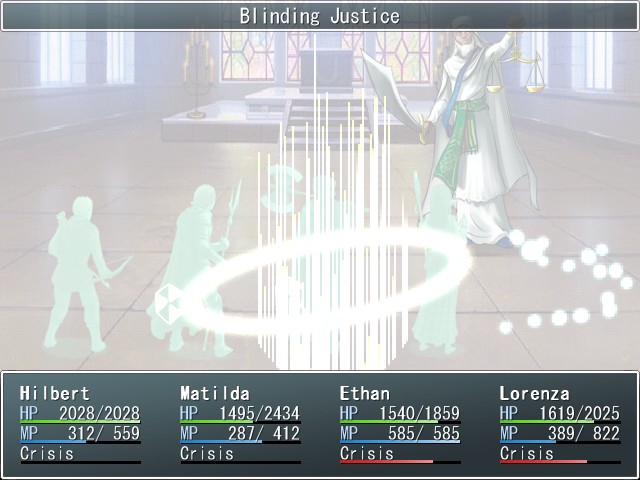
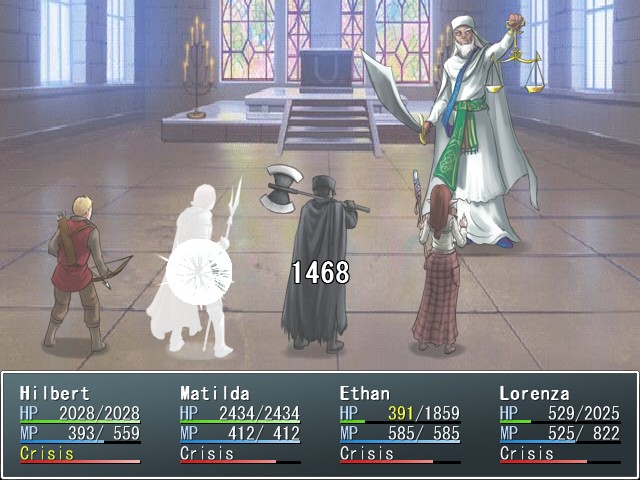
Rashnu's first magical attack is Blinding Justice, which does pretty much what it says, inflicting blindness on anyone not immune.


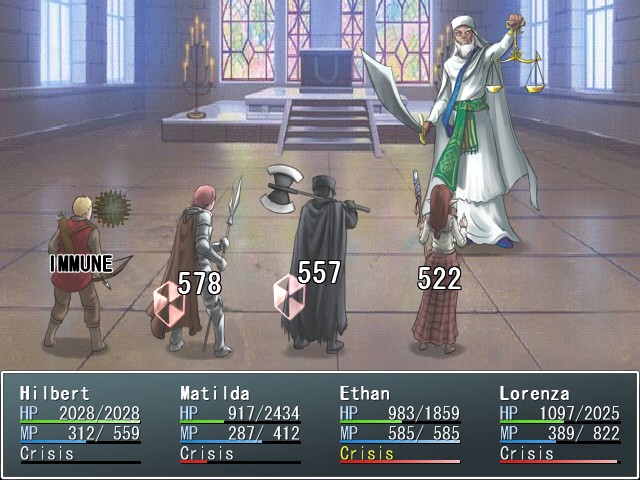
He then gives us a bit of a breather with Repent, which I'm guessing inflicts a whole bunch of statuses in exchange for lower damage, but Ethan is of course immune to all of them so I'm not sure which ones.

It's a short breather, however, since Rashnu follows up Repent with Supreme Vision, a non-elemental attack that does enormous damage to the entire party. The damage you're seeing here is with M-Shields up--without them Hilbert and Ethan would have been one-shot from full health.

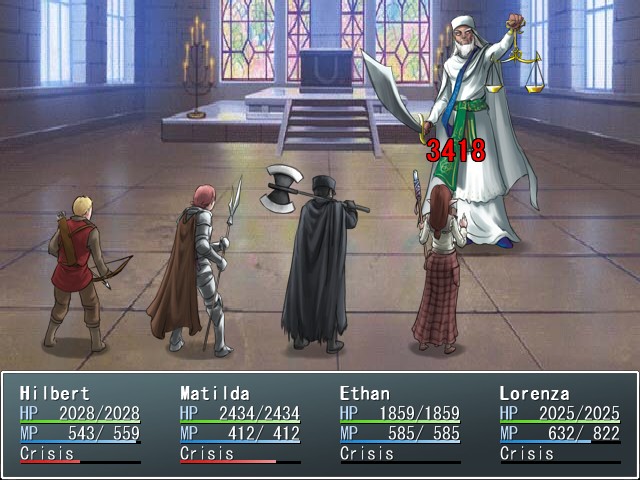
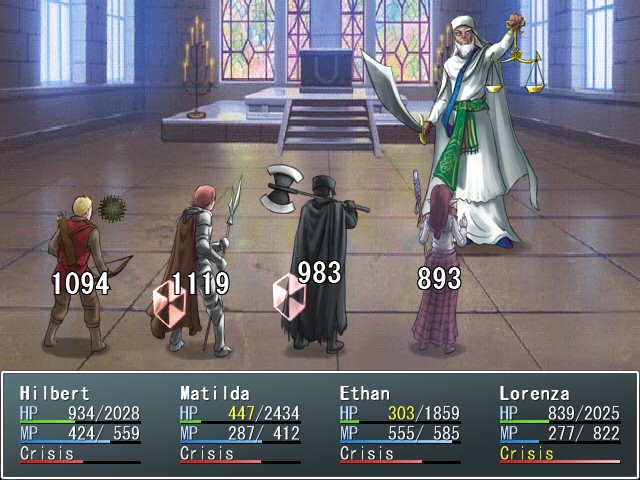
Although he's strong, Rashnu is weak to dark, and we have several ways to take advantage of this. Ethan's Black Cleaver is one, but Lorenza casting Unholy does far more damage than he could ever hope to do.

In the end, the strategy for defeating Rashnu comes down to the same thing as most of the other post-game bosses. Keep your HP high and have Shields up at all times, and you should be able to prevail.
Music:


Apart from a Hex tile with his mug on it and an enormous amount of experience, Rashnu drops the Seraphim Blade,
Music:
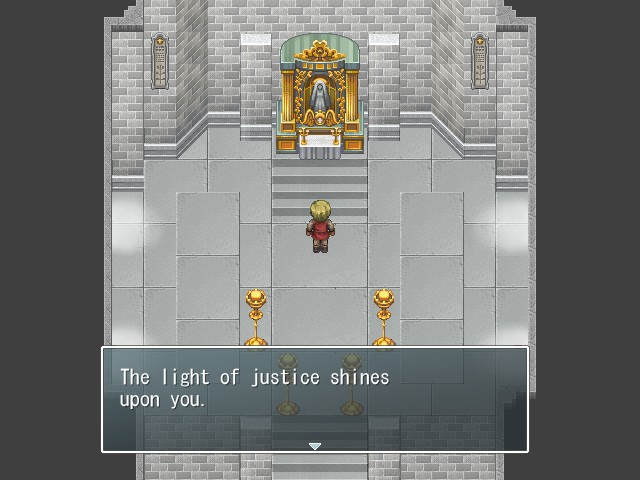
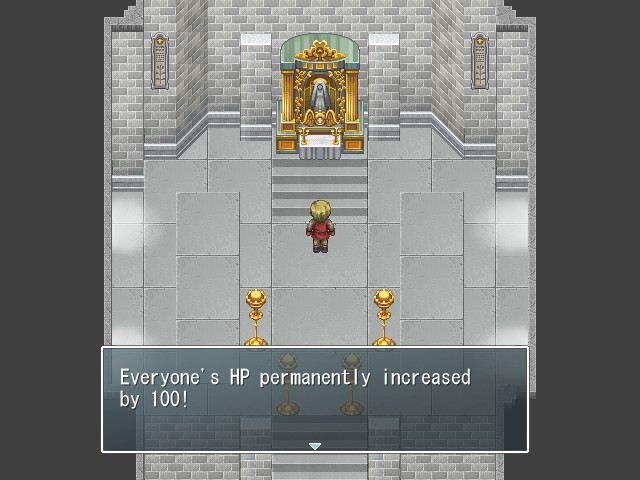
And on top of that, completing the Hall of Judgment also grants everyone a permament +100 bonus to max HP. This isn't actually a huge amount, but it's certainly nice as a sweetener on top of the Seraphim Blade and Grand Vizier's Robe.

Music:

That's about all there is to see in the Hall, so next up we're going to be heading to the third Entalar seal. It's time to figure out what the hell happened here.


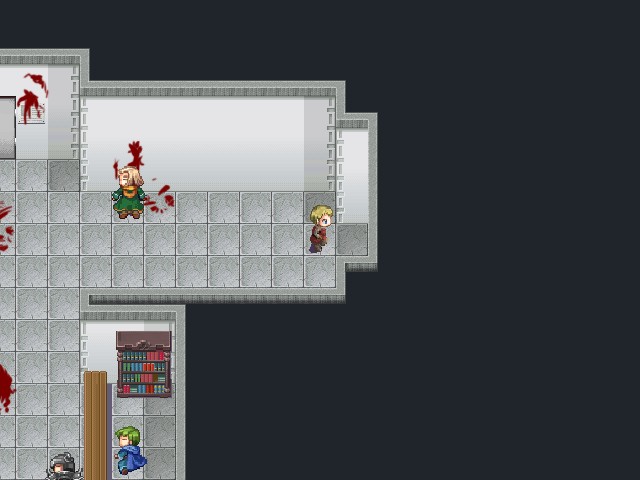
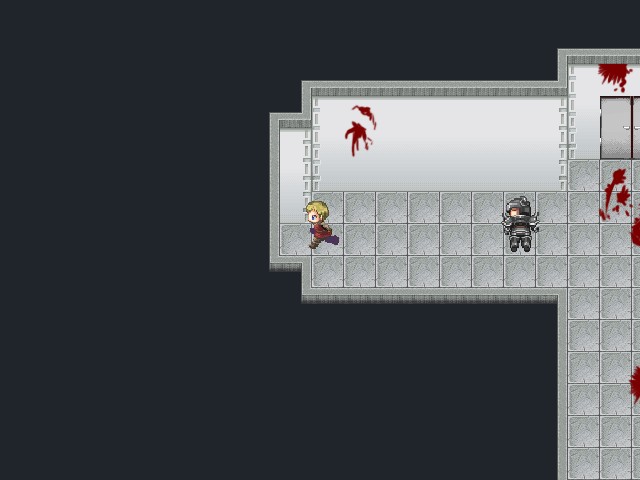
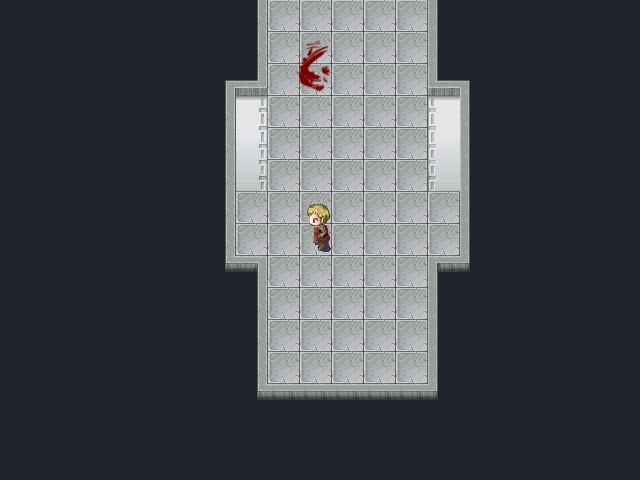
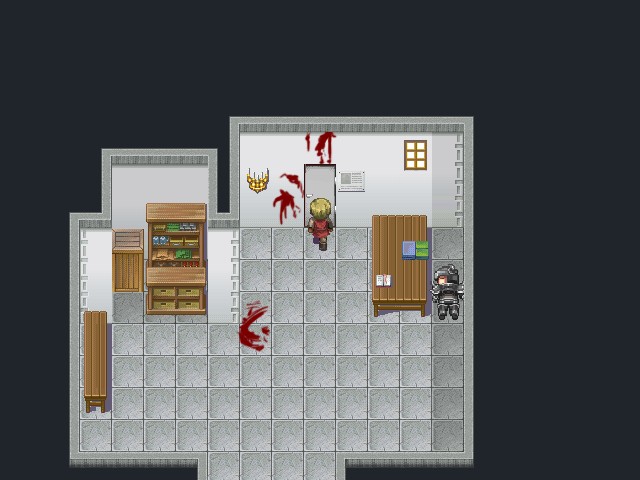
Right in front of the entrance is a locked door, and it only serves to make things more mysterious. Containment breach? What the hell was being contained here? I thought this seal was just to protect Entalar. This locked door is our main goal for this dungeon, but as the message states, we're going to need to find the security post in order to advance.


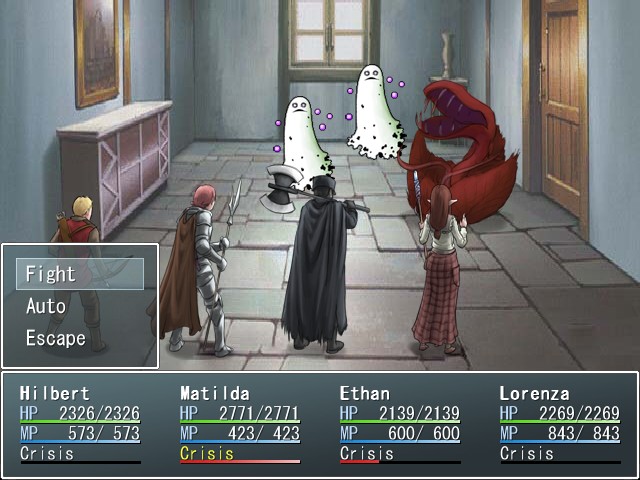
Just a few steps from the door we get a glimpse of what might have been contained here. Now, a couple of people in the thread mentioned after last update that I wasn't really making clear how difficult the enemies in the Tower of Redemption were. That was possible in the Tower, but I can't do that for the enemies here. The monsters in the third Entalar seal are fast, hit hard, have high HP, and worst of all, they almost always show up in large groups. Almost every encounter is going to result in most of our MP being drained, and in fact, I'd recommend hanging around the entrance and gaining a few levels before trying to make any headway in this area, because otherwise the enemies will destroy us.
Our first encounter for this area are two Black Mantises and two Outer Spirits. Black Mantises are probably the most annoying enemies to deal with in this dungeon, because they hit for over 800 damage, are faster than Hilbert, can take quite a beating before dying, and there's never just one. The Outer Spirits are no slouch either, biting us for 650 damage or using Ice Rain to deal 450 ice damage to the entire party. They can also use Freezing Touch to deal around 750 damage to one character.

This is likely what you're going to be seeing the first time you take on this dungeon. Note that we've only killed one of the four enemies and two of our party members are already dead. This is actually a place where I'd condone running from most battles--if you want to get experience here there's a better way to do it, which I'll show off in just a second.
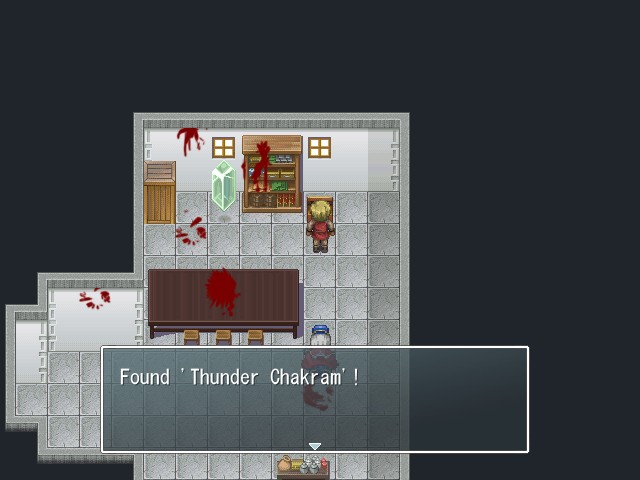
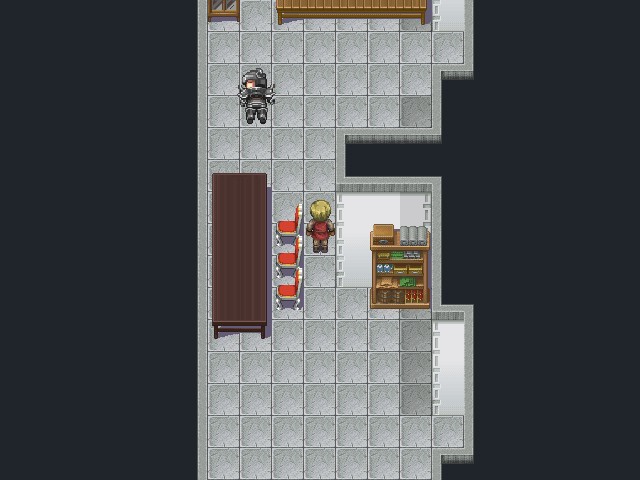
In the room to the right of the entrance we find the Thunder Chakram, a weapon for Randolph which deals lightning damage and also grants him +20 SKL. Also, is that a save point? It's awfully close to the entrance, but I'm already hurting from the battles here, so might as well use a Tent an--

oh fuck you SCF

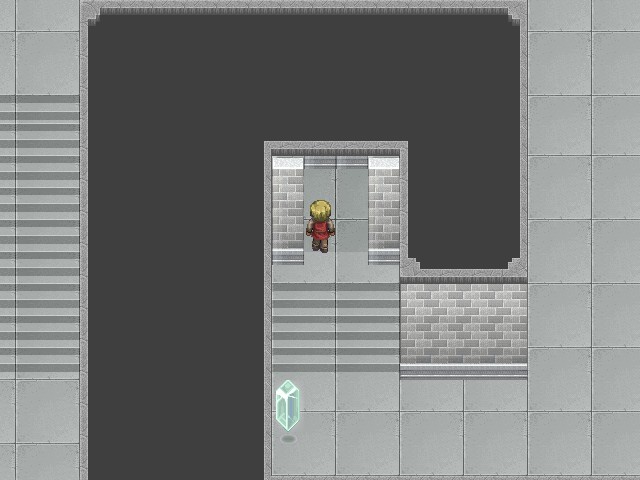
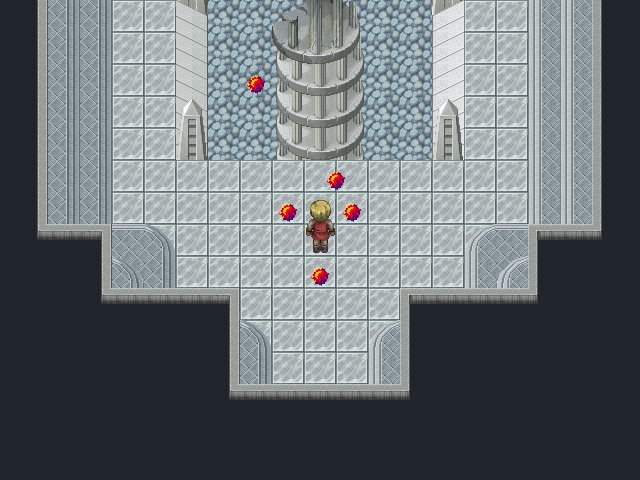
So yeah, there are a number of what appear to be save crystals scattered throughout this area, and interacting with most of them will start an inescapable battle with a Killer Crystal. Killer Crystals only have a regular attack, but it hurts, dealing on the order of 1500 damage to one character. Oddly, though, these guys are actually the easiest enemies to deal with in this area, mostly because they only ever show up alone. And since they only have a regular attack, we can equip a Mental Booster to everyone without having to worry about statuses, making them useful targets for grinding. They respawn when we leave a room, so we can fight as many Killer Crystals as we want.

Also, they're the perfect way to show off the Barrier bug. First we equip the Party Hat to Matilda.
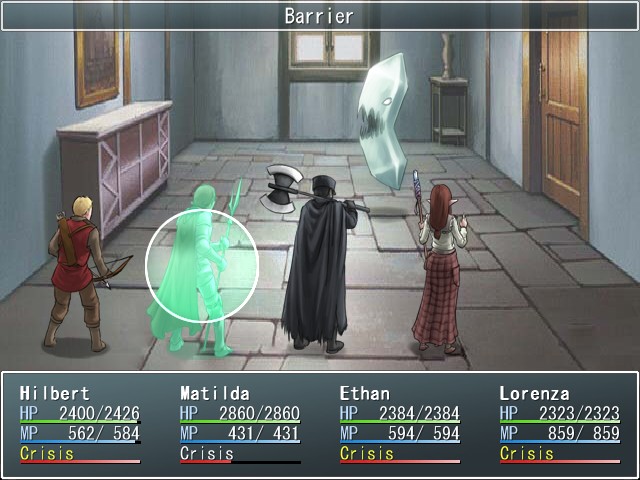
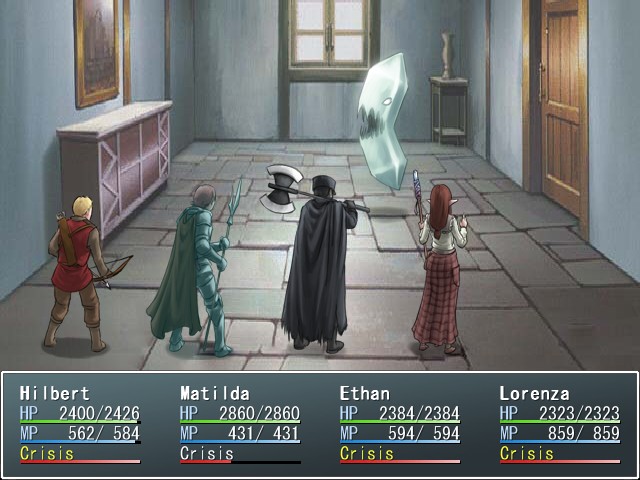
Now, remember how I said that Killer Crystals do around 1500 damage with their regular attack?


Yeah, uh, notice anything wrong with this picture?
What you're seeing here is an extra, undocumented effect of using the Barrier spell. Although Barrier claims to grant the target resistance to all elements (and it does do this), having a Barrier up on a character also decreases all physical damage they take by something like 80%. That's broken enough on its own, but combine it with the Party Hat, and suddenly you have a virtually unkillable tank who will take all of the damage for the rest of the party. And if that's still not enough, you can combine those with a P-Shield (yes, the effects stack!) and the Gold Scepter to make them really unkillable. With that sort of defense and manipulation, nothing in the game poses a threat anymore, and every fight becomes a complete joke. Which is precisely why I won't be using it in this LP. I don't need tricks like that.

I do have to wonder how a bug like this made it into the game, though. SCF, did you know about this? I can at least see how it might pass unnoticed, because a) unlike most spellcards, you never get a free copy of Barrier, and it costs 250,000 gold and b) any time you might want to use Barrier's (stated) effect, you may as well just use an M-Shield.
Now, where were we? Oh right, we were getting mauled by a bunch of really annoying enemies.
And here's a new one right now. This is a Blood Plant, and like the Black Mantises, they can bite us for around 800 damage. They're not as fast as the Mantises are, but they also have much higher HP. There's not too much else to say about them, to be honest.

There's a room off to the left of the hallway we were just in, but there's nothing there.
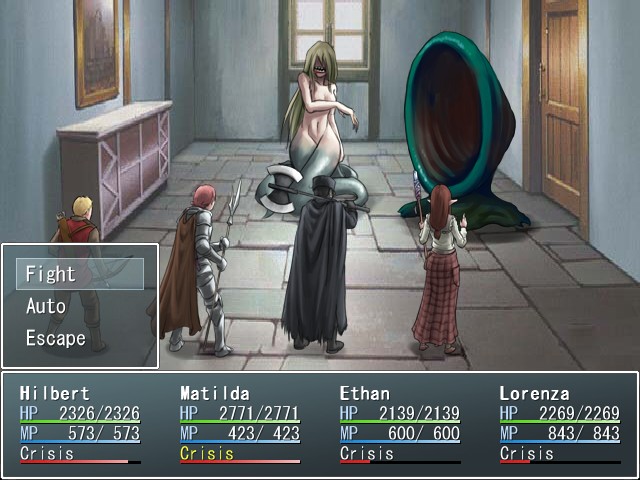
Well, there are some monsters, anyway. These are Scylla and Charybdis. They always show up as a pair, and I'd recommend running from these guys more strongly than any other monsters here. Charybdis is a gimmick monster, spending its turns alternating between Absorbing Current, which deals about 100 damage to the entire party and heals it for 100, and Belching Water, which hits the entire party for about 850 damage. Scylla has a more varied moveset: she can attack regularly for about 1500 damage, use Devour to hit one character for around 1800 damage, or use Ghastly Shriek to attempt to hit the entire party with a status (not sure what though). If you can kill them, they're worth 36,000 experience and can occasionally drop a free Ocean Crest. But I wouldn't bother.

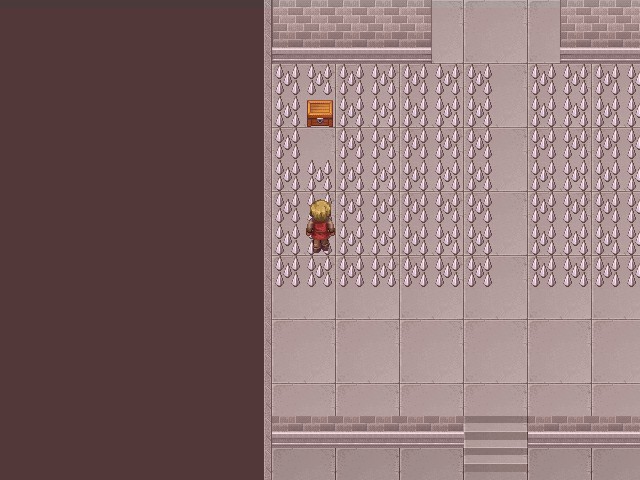
Now then, with all of the difficult monsters here, you might be wondering, is taking this place on really worth it? Well, the answer is yes, and one of the reasons why is behind this doorway.
It's also behind two Killer Crystals, but that doesn't matter. We want that chest.
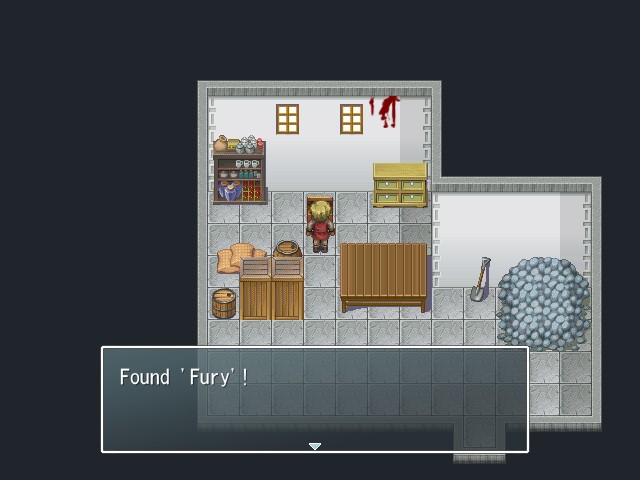
Awwww yeah, baby. This is the good shit right here:
Fury (50MP): Restores a moderate amount of HP to all allies, but also inflicts berserk on them.Crisis: Contract (99MP): Restores a large amount of HP to all allies, but also inflicts chaos on them.
Stat changes: +5% max HP, +8% VIT, -8% RES, -5% SKL
Provided that we give our party full immunity to berserk and chaos, which we have already done, we have just (legitimately) broken the post-game wide open. Fury is the only non-crisis spell in the game that restores HP to all allies, and its MP cost is low enough that when combined with Enlight, we can essentially cast it for free. This means we now have the ability to restore around 750 HP to our entire party for nothing every turn, something that previously required burning a Crisis bar or a Diamond Dust. If you're playing along, this is the only copy of Fury in the game, so make sure to pick it up.

Of course, we still need to find that security post. We head through this doorway in the previous hall, to find...
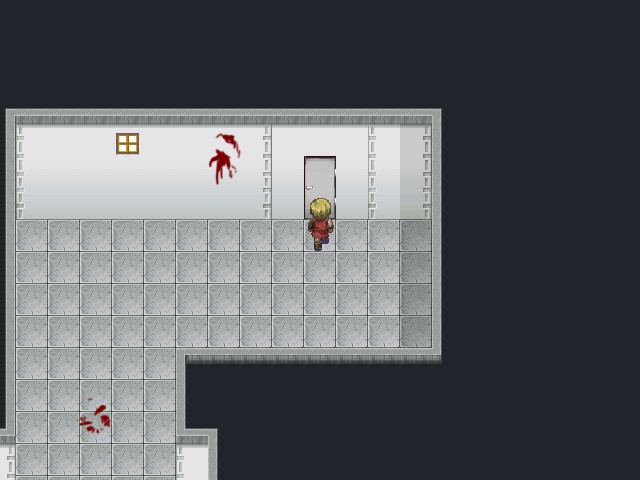
Well, I guess we know what that save crystal room in the Biorite Facility was for now

It's hard to see, but just below the right-side pillar, there's an impassable bucket. So in order to get through this room, we need to fight at least three Killer Crystals.


Oh hey, look who's decided to show up again

This fellow is the Critic, and he's the final variant of the rolleyes enemies. Unlike the others, he doesn't have some whacked-out armor to steal (only a Luck Capsule this time), but he's just as annoying to take down. In addition to being highly evasive and immune to all elements, he has a whopping 25,000 HP, is faster than Hilbert, and attacks with Disapproving Gaze to deal nearly 2000 damage to a single character. There's only one way to deal with this.
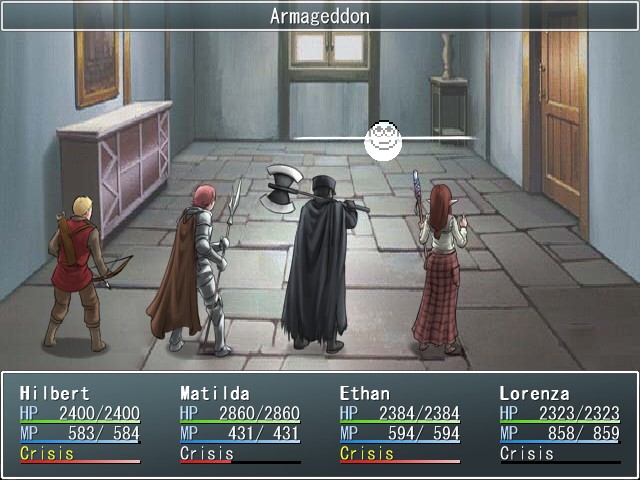

And that is nuking the fuck out of him with Vortex's crisis Armageddon, of course.


It's not enough to kill him, but with a couple more attacks and a few Meteor Shells, he goes down.


There are a couple of chests in a side room here, but nothing major.

Afterwards, there's one more Killer Crystal to plow through...

... and then we reach the security post. The save crystal in this room is fortunately real.

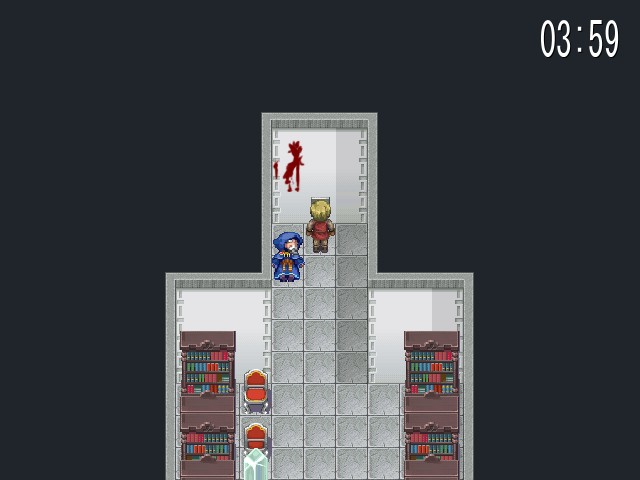
Once we've pulled the switch, we have four minutes to make it back to the formerly locked door at the entrance. This wouldn't be too hard, since we can run from random battles during this time, but...
... the Killer Crystals have all respawned.


Fortunately, we're capable of making it to the door with time to spare. Once we've passed through it, the door remains open permanently, and beyond it we find another real save point.

The next room is the room where we entered when we were escorted here by the Kingdom soldiers. From here it's just a straight shot to the seal room.

And inside, we find...

Music:
... something.

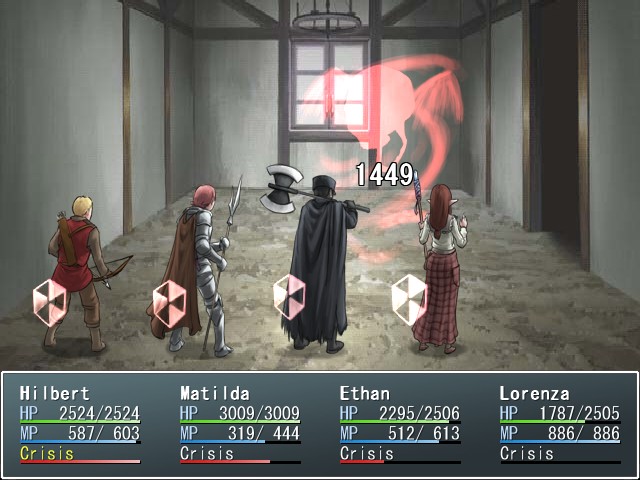
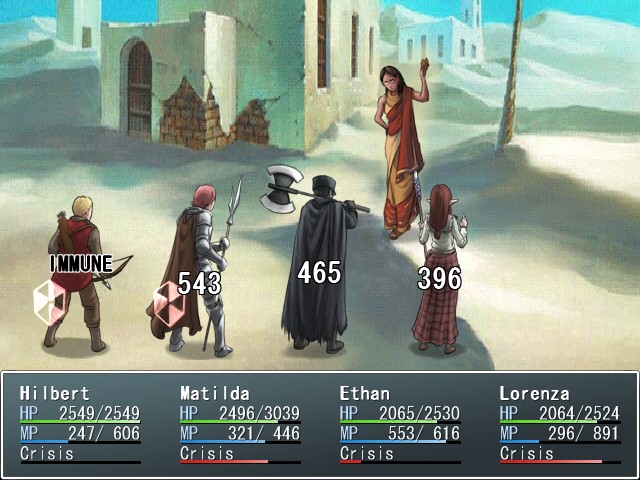
BOSS FIGHT: Strangelets
Music:

Those sure are some happy bosses.


Aside from the fact that only the center one has a drop, all five Strangelets are identical. Despite their high HP, this actually isn't too bad of a battle, since the Strangelets don't have the power that the regular enemies here do.


Most of their time is spent making moderately powerful attacks. First is Life Drain, which isn't too bad.


They can also attack with Terra Beam and Aqua Beam, which do about the same damage.


And they can use Provocation to try to berserk a character, but as always, we're immune.

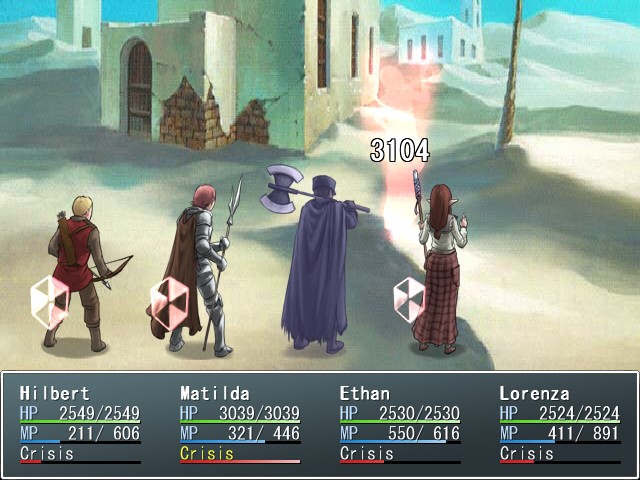
The initial onslaught can be tough, but all the shots you just saw were without P- and M-Shields. Once they go up, the Strangelets' damage potential seriously drops, and there's not much to the fight other than whittling away at their HP.

This is only exacerbated by the fact that we now have Fury, meaning we can easily heal the entire party if we get into any danger.

Once they start falling, the battle only gets easier. The Strangelets don't gain any new power or abilities as the others die, so by the end we're barely breaking a sweat.

It just takes a little while, that's all.
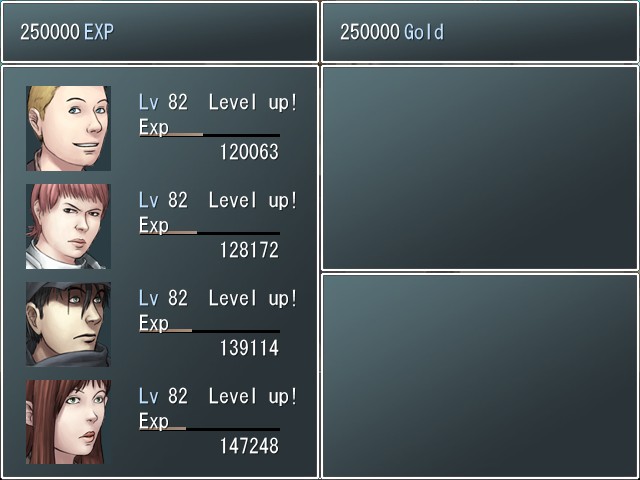
Music:

Our reward for the battle is another metric shitton of experience and the Crystalline Crown, a very strong helmet that grants its wearer a permanent P-Shield. Since Lorenza is wearing the Spring Hat, Ethan will be getting this instead.
Music:

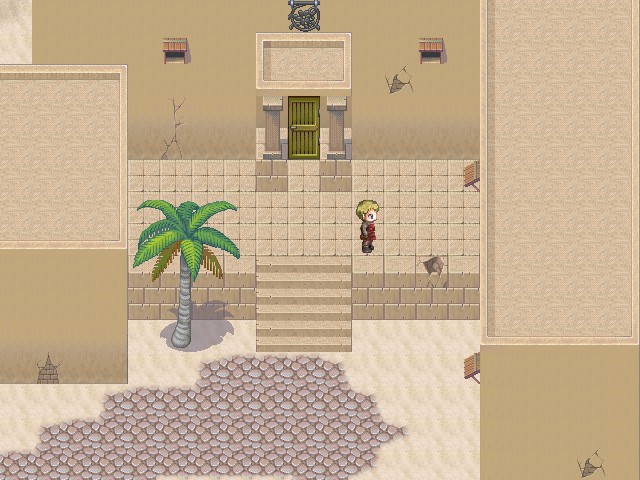
Apart from that, however, nothing happens. There's no explanation as to what happened here, or what was being contained. Oh well, time for the next stop I guess.

Music:

Next on the list is the chest we left behind in the Cromwell ruins. What's in here?
BOSS FIGHT: Demilich
Music:

Oh, you know, just death incarnate. The usual.

That sure is a lot of sixes. One thing that isn't really reflected in the Demilich's stats is that full status protection is basically mandatory for this fight. Without it, things are going to go south in a hurry.


For starters, the Demilich's regular attack inflicts poison. It's not too bad otherwise though.
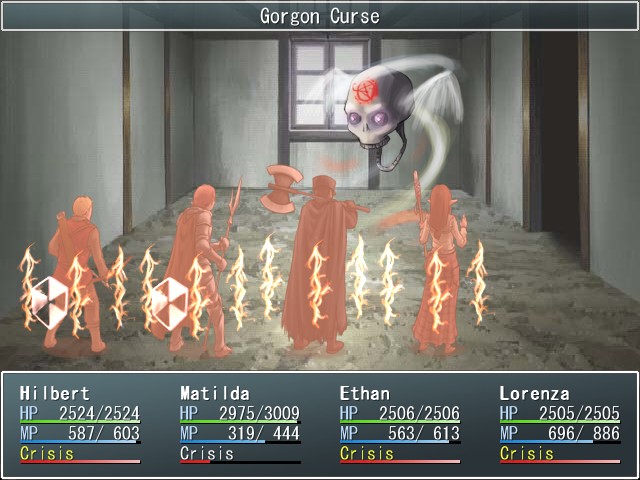
He's also got Gorgon Curse, which inflicts petrification...

... and Sinkhole, which I believe attempts to inflict instant death.
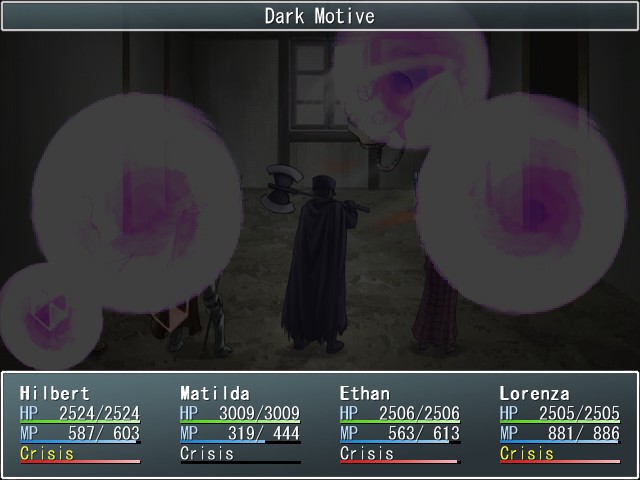

Lastly, the Demilich can use Dark Motive to inflict a bunch of dark damage. But even this isn't too much of a threat. Why?


Well, because we have Fury now. With P- and M-Shields active, nothing the Demilich can do is enough to overcome the free healing we're getting every turn once Ethan is Enlightened. Have I mentioned that Fury breaks the game? Because it kind of does.
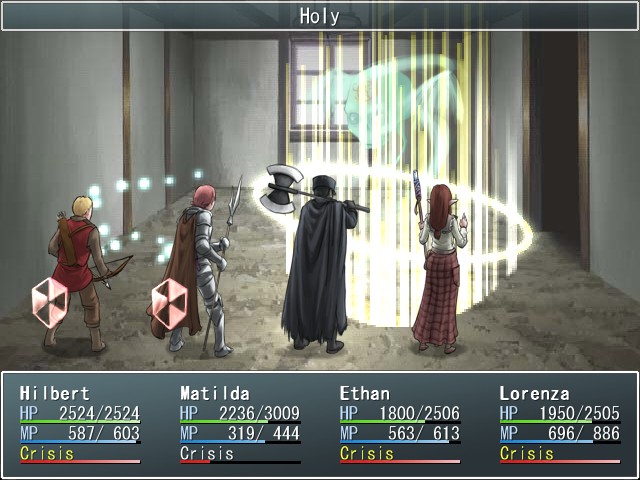

With Ethan casting Fury every turn, we're free to rock the shit out of the Demilich with spells like Holy...
... and it's not too long before he dies. Un-dies? Re-dies? Whatever.
Music:

The Demilich drops another assload of experience and the Thanatos tile, and once we're back on the field...
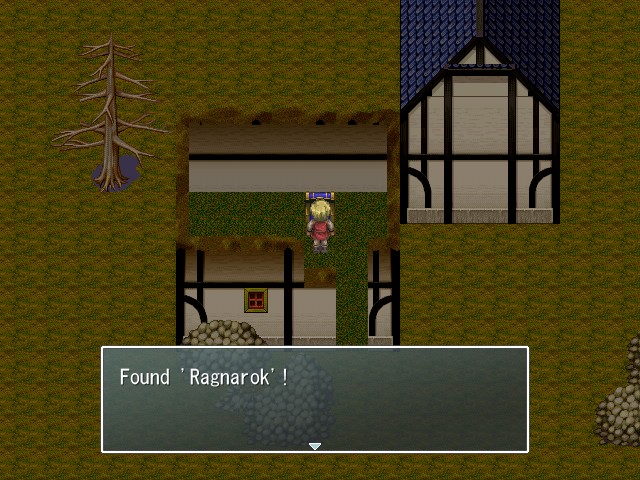
... we also obtain the Ragnarok, Ethan's ultimate weapon.

And after that, everything suddenly fades to white...

Music:

 What do you want to be when you grow up?
 What I want to be? Uhm... I know! I'm going to be a knight! A knight? Yeah! I'll be like, the guardian of this town. I'll become strong, and then I'll protect you, and mom and dad, and everyone else! Then I'll become a knight too! We can protect the town together!
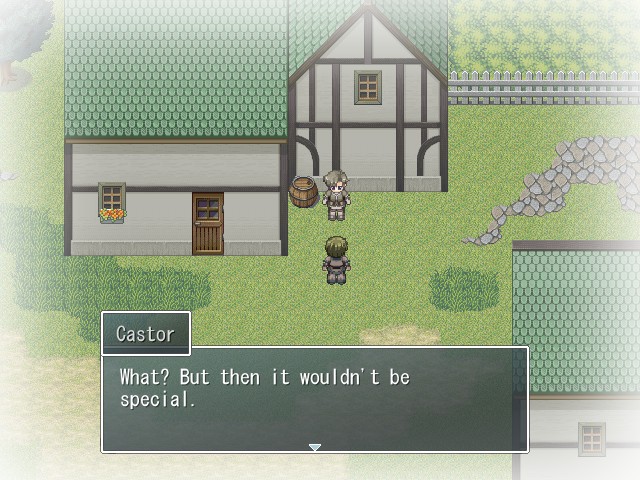 But if we're together, we could beat anyone, even if we couldn't do it alone! If I'm ever in trouble, you come rescue me. And if you're in trouble, I'll come rescue you. All right! It's a promise! We'll do it together! Yeah, it's a promise.
Fade to white...
Music:


All right, I suppose I should probably get to what you guys have all been waiting for: the conclusion of the Hex sidequest. We'll be taking care of that in just a second, but before we do, it seems like the appropriate time for us to collect the last few character tiles that are scattered around the world.

Music:

So to start doing that, we're going to be heading to Herzog. It's been an awfully long time since we were last here, now that I think about it.

Specifically, we're looking for Valentin. I'm not sure exactly what the trigger is here, but we need to talk to him close to the end of the game.

 The battle's almost over, isn't it?
 Yes. It'll all be over soon. Good, good. Are you doing well? You look tired. It's nothing. I just want to get it over with now. I do wish there was something I could do for you, Matilda. I just sit in this luxurious castle all day, worrying about you and thinking about how I could help you.
 Don't be stupid. Worry about your own future. I'll be back soon. You don't have to try to help me.
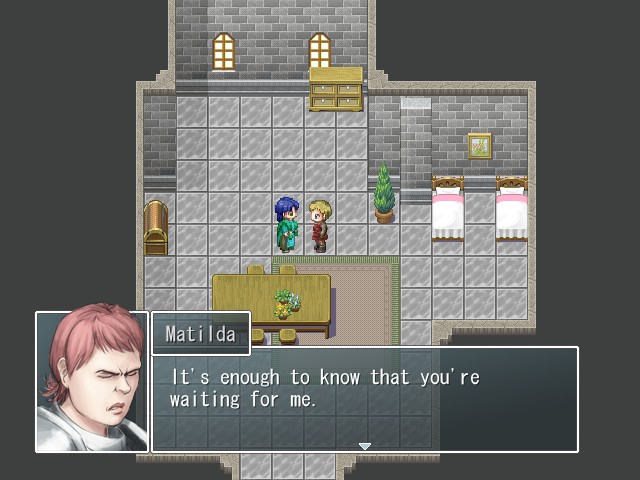
Wow, I think this may be the most
 thing Matilda has ever said. Haha, I don't quite know how to feel about that. But... I have faith in you, Matilda. No matter what happens, I know you can make it through. Don't worry. I'll be back before you know it. Oh, take this. Maybe it'll be of some use to you.
 I'll be waiting here, so... please come back.
Of course Matilda has 9 attack. Of course she does. She trades for fifteen Strength Capsules.
Music:

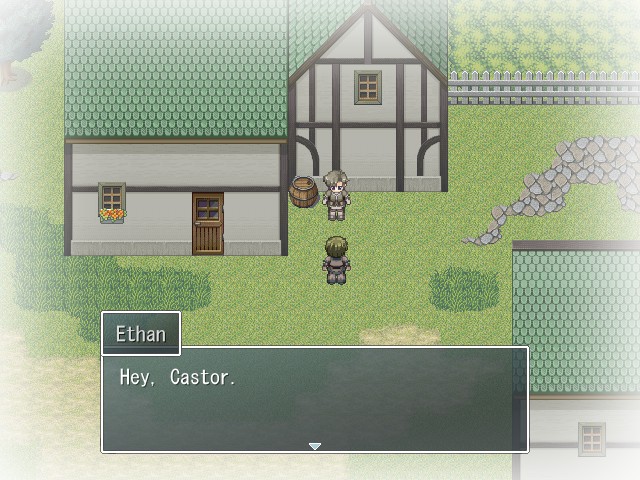
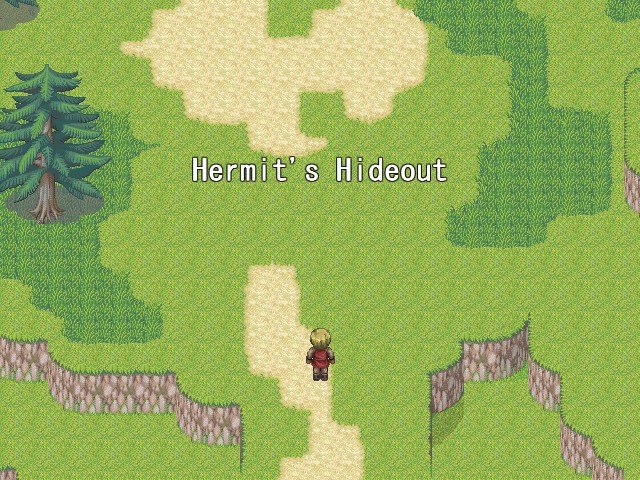
Next up, we're headed to the Hermit's Hideout. Bergheim isn't here anymore, but if you'll recall, he mentioned that he left his assistant in charge at his home.
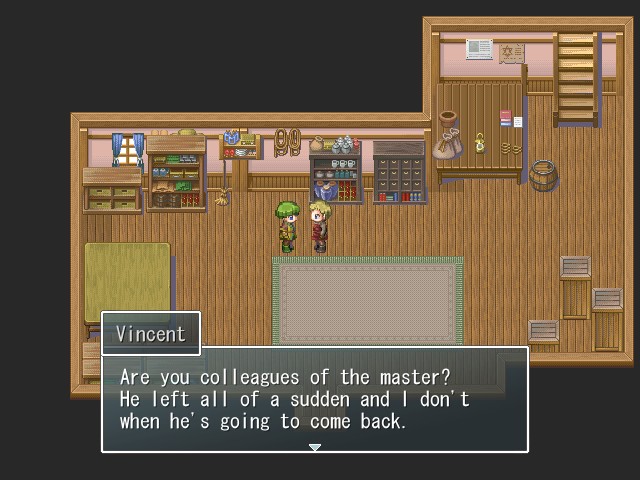
I'm pretty sure this kid wasn't around before, but he's a Hex player, and he carries...
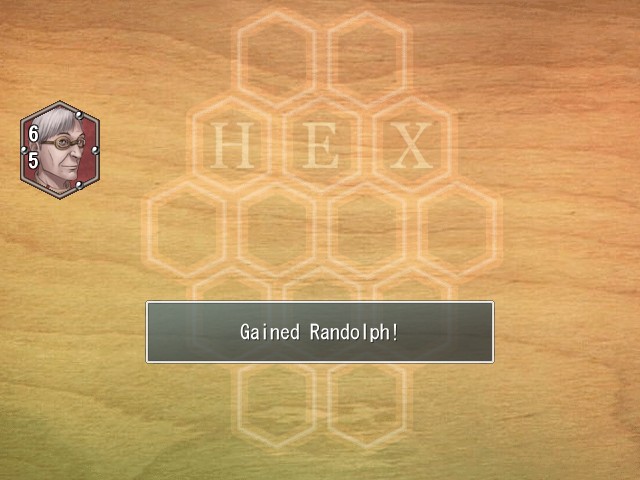
... the Randolph tile. Randolph is a bit odd, in that he trades for his own ultimate weapon, the Rising Sun. Unlike most other trades, there's no way to get the Rising Sun outside of Hex.

Music:

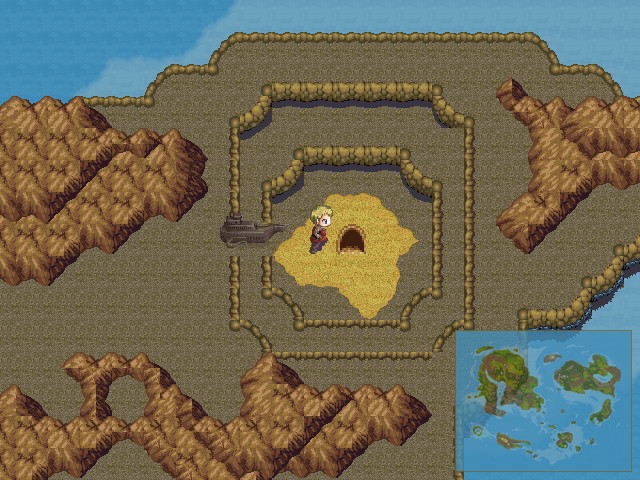
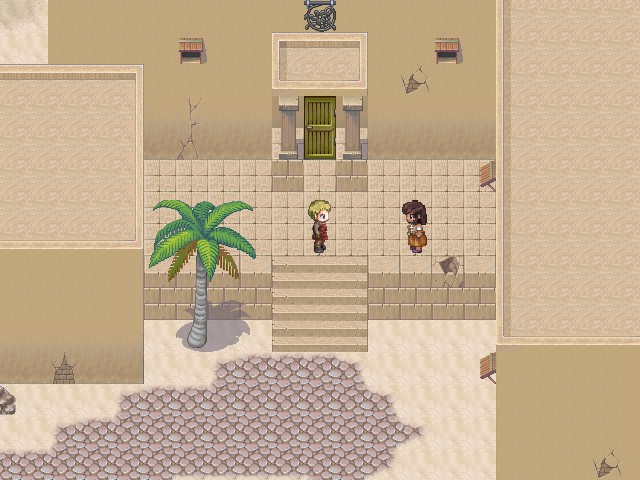
And lastly, we're headed to Entalar.

We can talk to Barasur at any point following Tiamat's death.

 I suppose... I should be happy. Her long suffering is finally over, so I... I... Lorenza. I once again forced you to do something that really should've been my task. I hope you can forgive me for having been a failure as Elder.
 Grandfather... I don't feel that way at all. You had to be Elder for much too long, during a very difficult time. I don't blame you for making mistakes. I'm not confident that I'll do any better. Lorenza... You'll be a great Elder. I'm sure of it. Even if you don't realize it, you've always had it in you. Your father would be proud of you. Here. Take this. I've been holding on to it for far too long. It's time to put it all behind me.

Not bad. Tiamat trades for eight Infernal Ashes. They're attack items that deal heavy dark damage to all enemies, an effect I don't believe any spellcard can replicate.
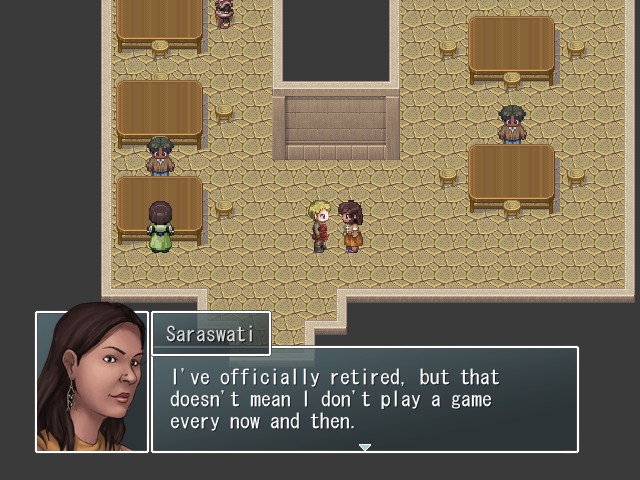
Now then, it's time for the real reason we came to Entalar. Last time we saw Saraswati, she told us that she would seek out a "different kind of people." The Havali certainly fit that bill.
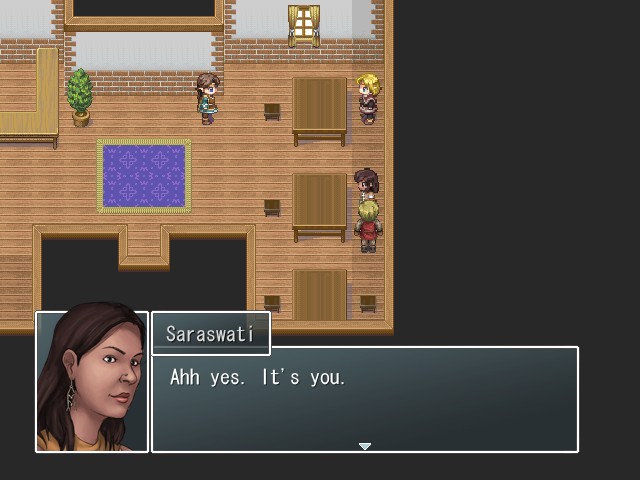
She's not even turning to look at us.
 There is no one here except you and I. No one else matters at all. We've come here for the same thing, haven't we? I'm ready. Yesssss. I can already feel the astral power surging through me. Are you ready?
Far readier than you are, crazy lady.


Music:

And she's off to Randipur, her final stop.
We find her outside the Hex trading post. All right, Saraswati, we've been chasing you around the world for months on end now. Let's just play one last round and get it ov--

Music:
--er...
 Uh...
Uh... Yes, I've been waiting a long, long time. And now, it's finally complete. This woman was the first to break the seal. And now, her mind belongs to me.
 Who... who are you?
 In life, I had overcome every challenge that was thrown at me. All except one. What you see here before you is the result of decades of study--the conquest of death!
...
...
...
Okay I think I'm going to have to stop you there. What did you just say?

... I don't even know where to fucking start with this. This has to be the worst plan for eternal life I've ever heard. And yet it's also one of the best plans I've ever heard, because really, let's face it, who the fuck would ever see this coming?
Over the years, many have played and spread the game, ensuring my survival. But only this woman was able to touch upon the hidden powers within the game, and thus, I was freed. Though my body has long decayed, I shall live on by possessing the bodies of others! But... this woman's body is not powerful enough for my purposes. I need someone stronger. Someone like you.
BOSS FIGHT: Saraswati
Music:

God, can you imagine how fucking smug this sorceror dude must be right now? Just think of all the shit he must have had to put up with from his peers while he was inventing Hex. While they were making phylacteries and transferring their souls into powerful artifacts, this dude was busy making a board game, and I bet they wouldn't let him forget it. But now he's the only one who's still alive, so who's laughing now, huh? WHO'S LAUGHING NOW!?

Anyway, Saraswati is level 87, which is a rather nasty surprise if you were just expecting to play some Hex. She's very fast and hits hard, but at this point we should be able to handle her.
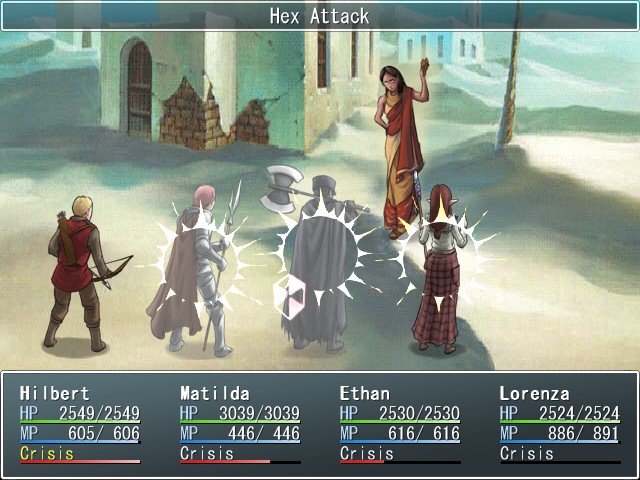

Case in point. Saraswati's main attack is (what else) Hex Attack, and I think it's the only attack in the game that targets a group of party members at random.
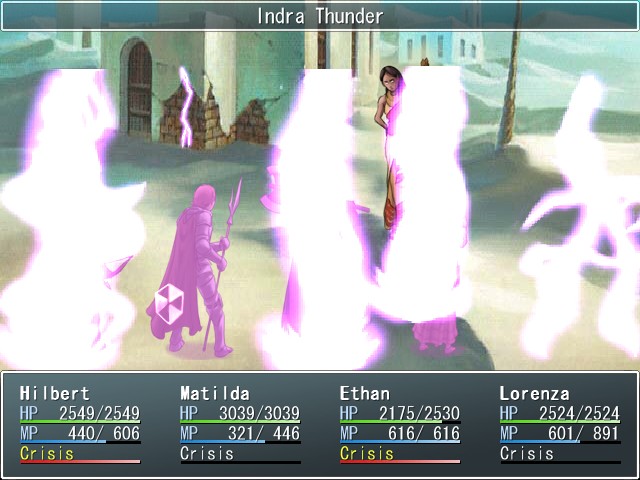

While she will spend most of her turns using Hex attack, Saraswati has a few elemental attacks as well. She has Indra Thunder, which inflicts lightning damage...
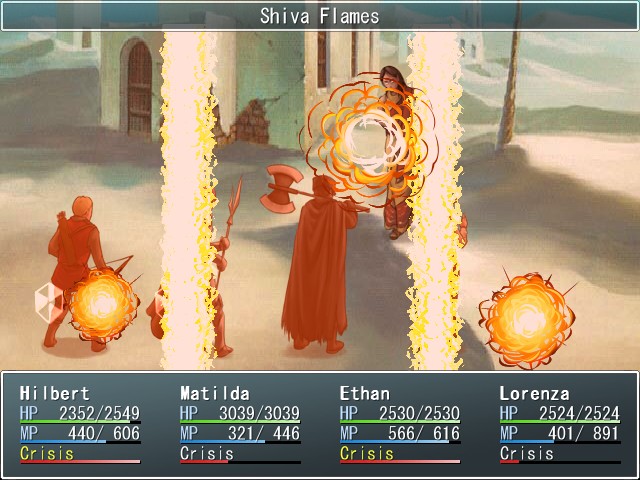

... Shiva Flames for fire damage...

... and Durga Frost for ice damage.

But as so often seems to be the case with post-game bosses, her damage simply can't stand up to Fury spam. Fortunately this is probably the last boss that this will work for, if you were getting bored of me gushing over it all the time.

Also we can apparently steal her clothes, and in fact probably should, because we can't get them anywhere else. The Orange Saree is a light armor that can only be worn by women, providing a very large amount of VIT and RES in addition to +30 DEX and resistance to earth, wind, and water. Curiously, I think this is the only item restricted by gender, while the game doesn't seem to have any problems with men putting on Sacrificial Dresses or White Gowns or whatever.
Anyway we spam Fury a lot and attack with everyone else until she falls.
Music:
We don't get anything for winning the fight, but like a few other sidequests, the real reward comes when we're back on the field.
Music:

 Are you okay now? My head is spinning. It feels like I just woke up from a dream... but I know that it was real. Was I really being tricked all this time? I thought that unlocking the mystery of Hex would bring me closer to enlightenment. I feel so stupid now. For all this time I've just been someone else's pawn. I can't thank you enough. I've caused you a lot of trouble, and you still managed to save me. Please take this. I'm retiring from the professional Hex community.
The Hex Champ Medal is like the Item Magnet, but for Hex tiles. Wearing it increases the rate at which enemies will drop them upon death.

Fade to black...
Music:
And with that, the Hex sidequest comes to an end. But we're not quite done with Saraswati yet, because...
... we can now find her in the trading post and continue playing with her. She carries some of the best tiles in the game, including some that can't be obtained from anyone else, such as...

Well I see someone has a high opinion of themselves.
Saraswati trades for twenty Purple Herbs.

She also has a few boss tiles we haven't picked up yet...
... and this guy. Who the hell is he?

Once we're done playing, we only have three Hex tiles left to find. One is a boss tile, and it's the Vivione. The guide I have claims Saraswati carries it, but I never saw it show up. Fortunately, an enemy in a dungeon we'll see soon can drop it, so I should be able to get it there.

The last two are character tiles. One is obviously Ethan, but who's the last one? We'll just have to see next update.
Next time: What is an appropriate punishment for someone who has helped doom an entire race?