Part 35: Speed Run Strats - 151 Speed Run - Part 2

Yes, somewhere along the way of all that menuing, we generated a Coin Case AND 16,511 Casino Coins! In addition, we also managed to set up Trainer Flies on Routes 6, 16, and 12. Route 6 and 12 are the only ones used in the route, however using the Trainer Fly on Route 16 can come in handy as a backup. So...

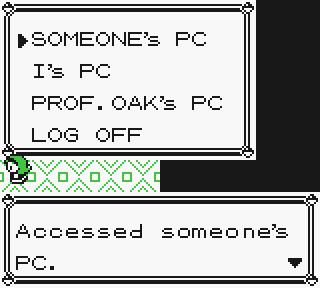
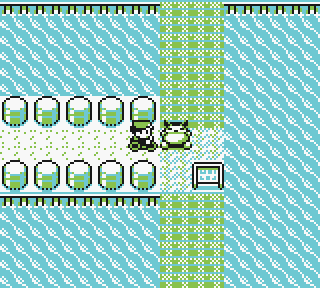
Buy yourself a Porygon and a Pinsir, and then head to the Poke Center for, you guessed it...

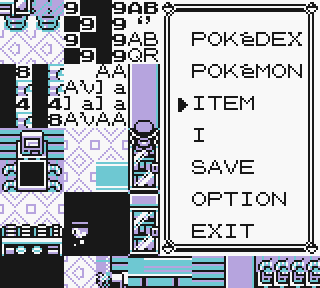
MOAR MENUING!! Again, the reference list...
code:
Slots 1-20, normal inventory
CANCEL after inventory
Money
Rival Name
Rival Name
Rival Name
Rival Name
Rival Name (not really Rival Name, but it's what we'll call it)
Options
Badges
TID 1
TID 2
Brightness
Map ID
???
X Position
Warping Master Ball (may be a []x[] item depending on your X Position)
Next couple slots are Map Data
Text Pointer
Next couple slots are Roaming Data
In the roaming data, there is commonly a stack of TMs that have a 198 quantity.
These will be referred to a lot as the Roaming TMs. For the most part, items will be consistent,
so when I say "look for the v_t_m item in the Map Data", just look for that particular item.
Additionally, if an item has a 0 quantity, the game treats that like 256.
If the route says to toss 250 of an item with 0 quantity,
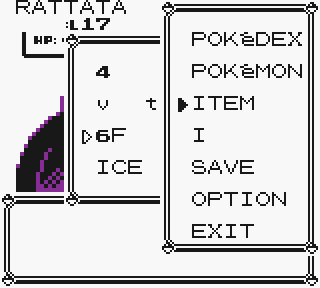
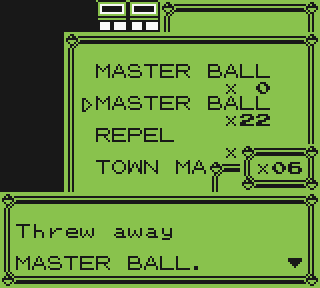
you would want to hit down 7 times until you see x[]0.Toss 0 (all) of one of the stacks of []x[] x0 (this will refill your Casino Coins, and allow us to buy the rest of the Pokemon!)
Close the Toss menu and open the Deposit menu. You don't need to do anything here. Just flash the menu (yeah, I don't get it either. But point is, just open it up).
Close your item PC and open Bill's PC
Withdraw Gengar

Deposit Porygon and Pinsir
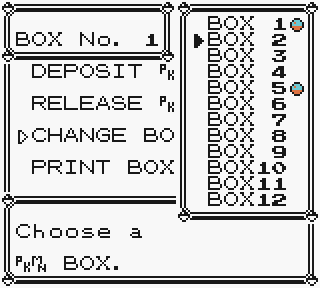
CHANGE BOX TO BOX 5
Deposit Rhydon (Masterball)
CHANGE BOX TO BOX 1

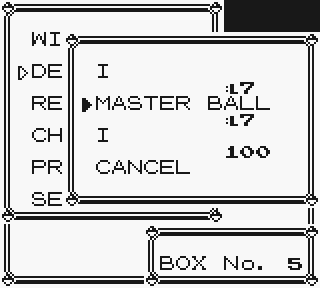
Like I said, our good friend Master Ball is something of a walking time bomb in terms of programming shenanigans, and he takes up valuable party slots. But at the same time, we still need him for a further trick, so for now, all we can do is quarantine "bequeath to him his throne" inside Box 5.
Anyways, with all that done,

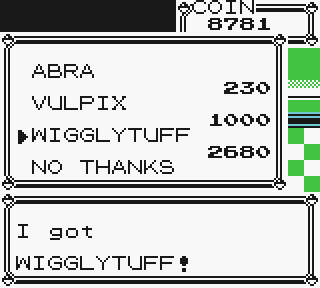
We can buy all four of the remaining Prize Pokemon!

And then off for more menuing.
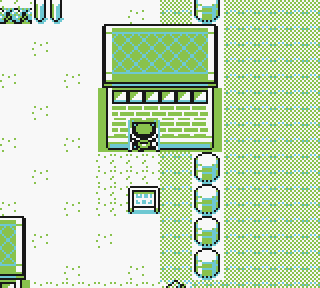
Technically, you can buy these items in any order you want, however the route will assume you purchased the items in this particular order. Walk up to the 2nd floor and talk to the left teller:
Sell []x[] x2
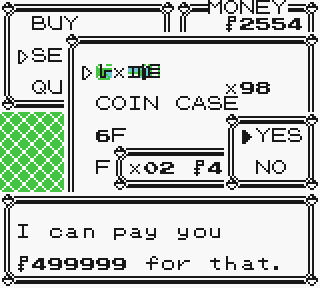

[]x[] x2 (yes, again, the game doesn't allow you to get more than 499999 Zenny for anything)
Buy
Super Repel x93
Super Potion x93
Parlyz Heal x94
Ice Heal x1
Walk up to the 4th floor and talk to the teller:
Buy
Water Stone x5
Fire Stone x4
Leaf Stone x4
Thunder Stone x3
Walk up to the 5th floor and talk to the left teller:
Buy
Guard Spec x1
X Defend x86
Dire Hit x1
Talk to the right teller from below:
Buy
1 HP Up
1 Calcium
1 Iron
If you did everything right, your money will read $757699.
Stand directly below the right teller on the fifth floor. Swap Pikachu with Gengar so Gengar is your lead. Open your item menu.
Swap Coin Case with 6F
Swap 6F with []x[] x[]6
Swap Ultra Ball x[]5 (255) with Coin Case
Toss all of the top item in your inventory 19 times (should be Ultra Ball after two tosses)
Toss all but 2 of the top Ultra Ball
Swap the top Ultra Ball with the Ultra Ball below it twice. Each time, the two stacks will merge, and we will achieve underflow once again...
code:
Slots 1-20, normal inventory
CANCEL after inventory
Money
Rival Name
Rival Name
Rival Name
Rival Name
Rival Name (not really Rival Name, but it's what we'll call it)
Options
Badges
TID 1
TID 2
Brightness
Map ID
 ???
X Position
Warping Master Ball (may be a []x[] item depending on your X Position)
Next couple slots are Map Data
Text Pointer
Next couple slots are Roaming Data

In the roaming data, there is commonly a stack of TMs that have a 198 quantity.
These will be referred to a lot as the Roaming TMs.  For the most part, items will be consistent,
so when I say "look for the v_t_m item in the Map Data", just look for that particular item.
Additionally, if an item has a 0 quantity, the game treats that like 256.
If the route says to toss 250 of an item with 0 quantity,
you would want to hit down 7 times until you see x[]0.
Swap Coin Case with top Master Ball in TID (If the quantity of Master Ball in the top slot is less than 100, swap with the bottom slot)
Swap Bicycle in what we call the "X Position slot" with the Calcium in your inventory. That slot will look like this...
See that item right next to the "X" in PokeDex? That's what we're going to call the "X-Distortion slot", or, the "X-Position slot" from now on. So then...
Swap Bicycle with Full Restore
Swap Bicycle with Ultra Ball
Close your menu and walk 1 right, 1 down

Swap Ultra Ball with Master Ball in your inventory
Swap HP Up with the first Jack item in your Rival Name (right below TM43). "What in the world is a JACK item", you might ask?

That's that item in the picture that looks like a "[]o[][]". This item, so-called due to what it's name was when first discovered, actually allows you to clip through 1-2 tile walls when used the correct way. We'll get into how that works when it comes up, but for now, let's continue with our menuing.
Swap the second Jack item in your Rival Name with the Great Ball in badges (right below the []x[] x2 slot that we used to get faster textspeed)

Swap Rare Candy in the X Position slot with the Ether in Rival Name
Swap Rare Candy with Guard Spec in your inventory
Scroll up and use a Thunder Stone on Pikachu to evolve!!


Yes, I don't know how we did it, but we've actually mucked with the code so thoroughly...that our Pikachu can now evolve! We actually TURNED OFF the game's ban on Thunderstones! Back to the menuing...
Use a Fire Stone on Vulpix to evolve it into Ninetales
Swap Rare Candy with Iron
Use a Rare Candy on Abra to evolve it into Kadabra
Toss 0 (all) Ultra Ball to duplicate the Rare Candy


Close your menu and walk 2 left

Swap Full Restore with Super Rod in the X Position slot
Swap the Soulbadge (2 down) with Great Ball in Rival Name
Swap X Speed in Rival Name with [][][][] x[]3 (hex76 from now on) in the Money slot...
That there is the hex76...
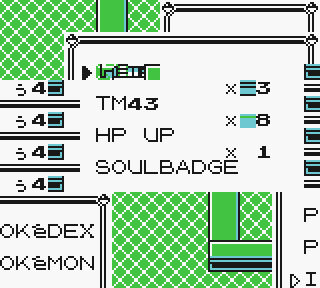
Swap TM43 x[]8 in Rival Name with Super Potion x93 in your inventory
Toss all but 4 TM43's
Swap Super Repel x93 in your inventory with HP Up in Rival Name
Swap Full Restore in the X Position slot with []x[] x[]5 a bit further down
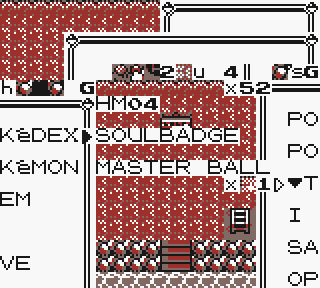
Swap Parlyz Heal x65 just below that with HM04 below a southern CANCEL
Toss 29 Parlyz Heal to have 36 left
Scroll down and find []x[] x[]9 below a CANCEL
Swap []x[] x[]9 with TM48x39 above the CANCEL
Toss all but 19 of the []x[] x[]9 stack, and...
Close your menu and walk 1 up, 1 left. Mash A, and when the map loads, you will start a fight with a trainer.


Hey...

That's the Slowpoke Youngster that Crosspiece got his Mew from! Looks like we're getting one too!
But first, we must escape from this mess.

There we go
 !
!
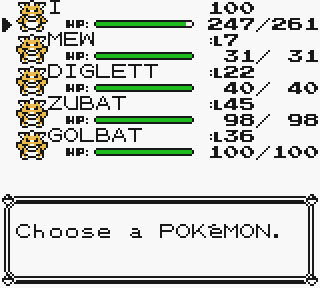
Now then, we're about to get a whole lot of Pokemon, so be sure to deposit everyone in your party into Box 1.
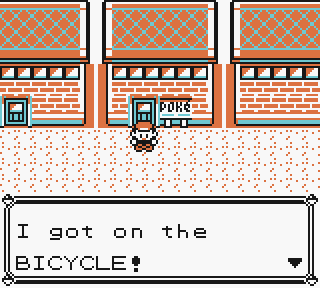
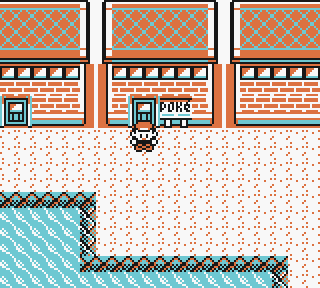
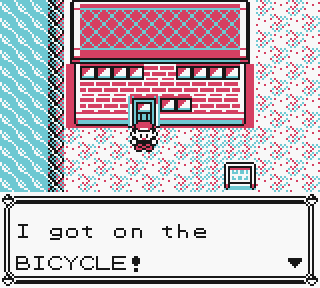
After that, get on your Bicycle (opening the menu is mandatory in order to not crash your game on this next part)


Ride up in order to find Mew...
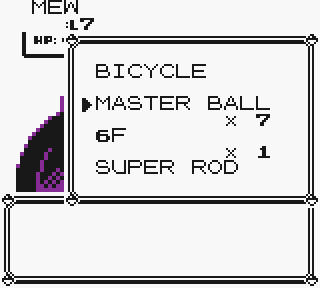
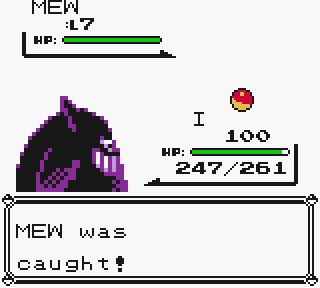
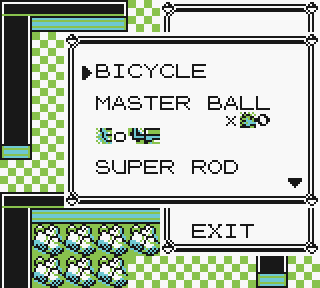
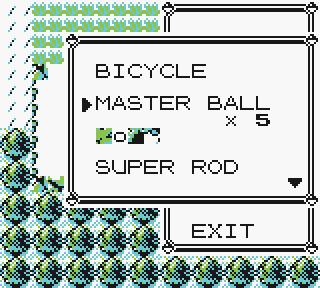
And then make use of your newly generated stack of Master Balls! And yes, that stack actually has much more than just 7, the game's just not displaying it right quite.


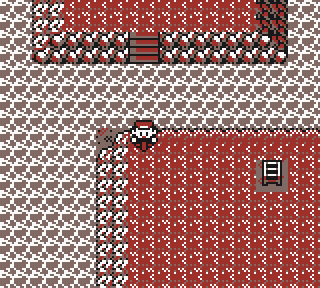
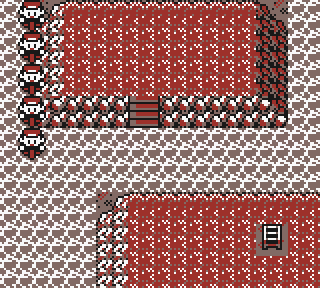
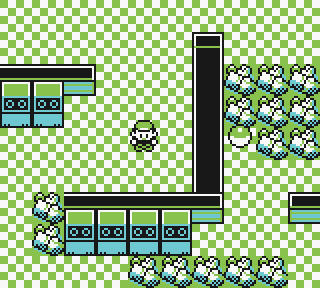
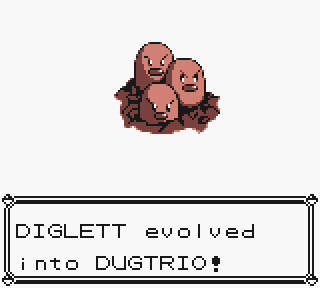
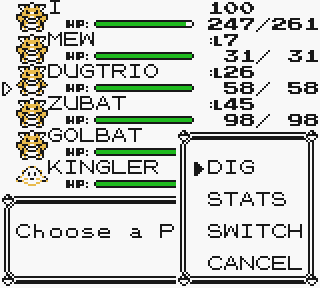
Now then, head to Diglett Cave, and catch Diglett, EVEN IF YOU GET A DUGTRIO FIRST (that point is important). After that, move exactly one tile above the stairs back up...

And get ready for more item menuing...
code:
Slots 1-20, normal inventory
CANCEL after inventory
Money
Rival Name
Rival Name
Rival Name
Rival Name
Rival Name (not really Rival Name, but it's what we'll call it)
Options
Badges
TID 1
TID 2
Brightness
Map ID
 ???
X Position
Warping Master Ball (may be a []x[] item depending on your X Position)
Next couple slots are Map Data
Text Pointer
Next couple slots are Roaming Data

In the roaming data, there is commonly a stack of TMs that have a 198 quantity.
These will be referred to a lot as the Roaming TMs.  For the most part, items will be consistent,
so when I say "look for the v_t_m item in the Map Data", just look for that particular item.
Additionally, if an item has a 0 quantity, the game treats that like 256.
If the route says to toss 250 of an item with 0 quantity,
you would want to hit down 7 times until you see x[]0.If your Diglett is under level 19, use Rare Candies from the top stack until it reaches level 19 and learns Dig. Take note if you do have to do this: Later on, you have to toss to a certain amount of candies, so keep that in mind.
Scroll down to HM02 in the Map ID slot. Teach Fly to Mew
Go up the ladder and bike 1 up

Swap HM03 below a CANCEL (not the one right below your cursor) with whatever is in the Money slot (for me, it was "OAK'S PARCEL")
Swap HM03 with the Guard Spec in Rival Name
Teach Surf to Mew
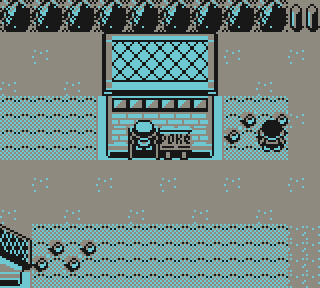
Bike to and enter the PokéMart. Open your item menu.
Swap Roaming TMs with Warping Master Ball and toss 37 of them
Leave the PokéMart to warp to Seafoam Islands.


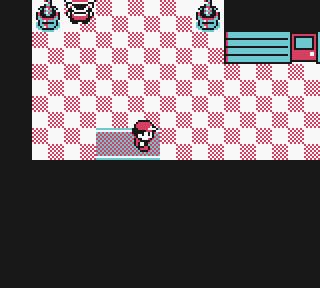
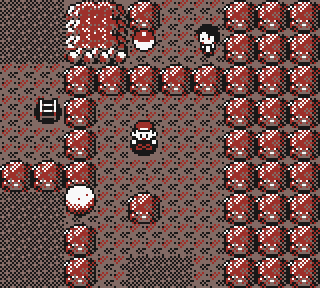
FWA HA HA! TIME TO CATCH ARTICUNO! Head down the stairs you just spawned from...
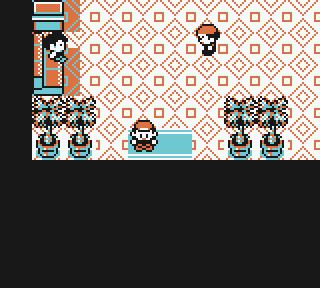
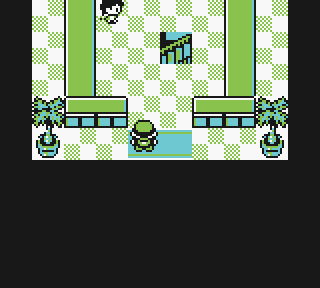
Then go to this spot (capture whoever you come across, especially Krabby). Now then, we're going to be using our JACK item to clip through the water here, so a quick tutorial of how all that works. To quote the "PokemonSpeedruns.Wiki"...
Some glitch items (usually related to default names) have an odd property with them. (It is referred as "JACK" here as that was the name of the first item of this type used in the Blue 151 route)
When you use JACK, it brings up the Pokémon Menu, and it will either act like a potion or show "NOT ABLE" next to each Pokémon (supposed to be acting like an Evolutionary Stone, maybe it's the secret Evo Stone everyone's talking about). [After doing that and exiting, the game will still think that you are in the Pokemon Menu, even as you're running around the overworld. Because of that,] sprites are removed from the screen including yours but the Pokémon sprites will stay on the screen. If you face a direction where there is a non-solid tile, you can clip through solid tiles 1-2 spaces long.


So yeah, see how the screen scrolled up? That's because I just clipped through 2 spaces worth of water. And when I go BACK into the Pokemon menu...

And then back out of it properly this time...

We go right back to normal, allowing us to walk onto dry land and...


Capture Articuno! Now, if you haven't gotten Krabby yet...
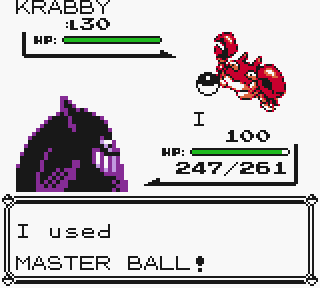
You'll want to snag him real quick, because he's one of the few Pokemon we can't easily get with a future trick. So after getting him and Articuno (along with whoever else you encounter), you can just Dig on outta there!
Ready for more menuing
 ?
?code:
Slots 1-20, normal inventory
CANCEL after inventory
Money
Rival Name
Rival Name
Rival Name
Rival Name
Rival Name (not really Rival Name, but it's what we'll call it)
Options
Badges
TID 1
TID 2
Brightness
Map ID
 ???
X Position
Warping Master Ball (may be a []x[] item depending on your X Position)
Next couple slots are Map Data
Text Pointer
Next couple slots are Roaming Data

In the roaming data, there is commonly a stack of TMs that have a 198 quantity.
These will be referred to a lot as the Roaming TMs.  For the most part, items will be consistent,
so when I say "look for the v_t_m item in the Map Data", just look for that particular item.
Additionally, if an item has a 0 quantity, the game treats that like 256.
If the route says to toss 250 of an item with 0 quantity,
you would want to hit down 7 times until you see x[]0.
Swap Roaming TMs with warping and toss 190 (again, you start off with 198).
Swap Brightness Ultra Ball x0 with Soulbadge in rival name.

Swap hex76 ([][][][] x[]3) in rival name with Parlyz Heal x94 in your main inventory.
Swap HP Up (1 up) with "4" in the Text Pointer slot
Scroll up to Great Ball x1 above Roaming TMs x8
Exit the center to warp to Cinnabar Island.
After warping, open your item menu and use the bike. Bike to 2 tiles below the door to Cinnabar Gym and open your item menu.

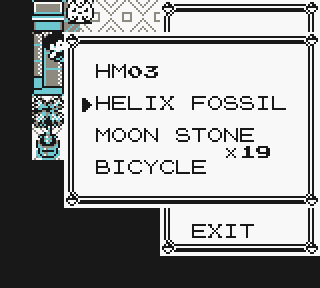
Swap X Defend x86 in your inventory with Helix Fossil in the Text Pointer slot
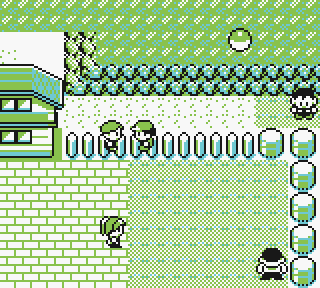
Talk to the PokéMart sign and get 3 Eevees!
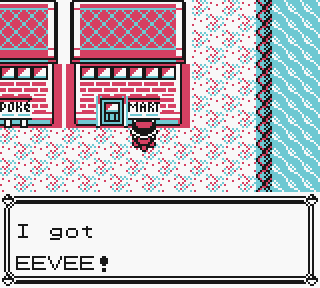


Wahoo! Remember what I was telling you about Map Pointers way back when? Well, now we've mucked with that, and made it so that we get free Eevees every time we talk to this sign! So get three of them, and then...
Walk to the Cinnabar Lab, move 1 right, and open your item menu.
Swap Antidote x84 (below Warping Master Ball) with Warping Master Ball
Toss 1 Antidote
Leave Cinnabar Lab to warp to Power Plant


More wall clipping here. Voltorb is another one of those Pokemon we can't easily get in the future, so it's best to get him now. So after that, walk down to the entrance, go on the right side of the doormat, and get ready for more menuing.

Swap the top stack of Rare Candy with HM03 in Rival Name
Toss 67 Rare Candy to end up with 188. Or, if you happen to have any Pokemon you can evolve right now, use the candies on them, and then toss whatever amount you need to in order to get 188.

Swap Ultra Ball x0 right above with Parlyz Heal x94 (2 down)
Swap Ultra Ball x0 with Moon Stone x22 under Warping Master Ball
Swap Ultra Ball x0 with Warping Master Ball x83
Toss 21 Ultra Balls
Leave the Power Plant to warp to Silph Co. Go inside the teleporter you spawned from and...

GET YOUR FREE LAPRAS! WHEEE, WE DIDN'T HAVE TO FIGHT /UUUUU!!

Well, that was all pretty fun. But, now we gotta take a quick PC break.

Yeah, Box 1 is getting rather crowded, and we're going to be going on another catching spree. Also, we got more menuing, so walk to this spot here...
And open your menu.
Swap Moon Stone x22 in Rival Name with Helix Fossil in your inventory
Toss 3 Moon Stones
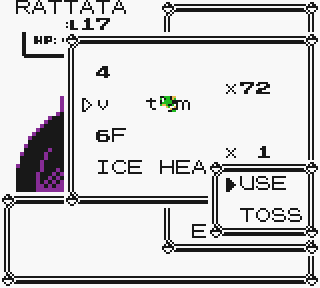
Swap v_t_m with TM43 x4 (The stack you previously tossed 194 out of)
Swap hex76 with 6F
Toss Dire Hit stack to go to the top of your inventory
Exit the center and bike to Route 11.

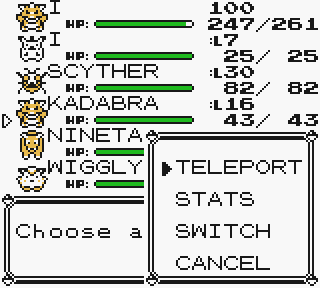
And now for yet another handy trick, a little something we like to call the "LOL glitch". So get into a wild Pokemon battle.

Now, all four of the Pokemon here are new. If you can get Pidgey, Pidgeotto, Drowzee, or Ratatta here, you'll obviously want to catch them. But the moment you run into one of them again? Well then, it's time for you to do THIS!!


Alright...now, here's what just happened (I think). By using the "6F", I was able to go back onto the Overworld without actually leaving the fight. So I think it's kind of like using the JACK item, except this time I'm on both the Overworld AND the Map screen at the same time. But, I didn't actually end up refreshing the map screen, so to do that, I used the v_t_m item. Now, I can walk around Route 11 while still technically being inside a battle with a Ratatta. But, the fun doesn't stop there.

Next, you'll want to move to this exact spot...

Select the "4" item WITHOUT USING IT (otherwise it'll crash the game)...

Go to your Master Balls, and then...

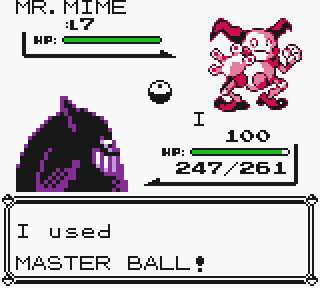
Yeah, you just caught...
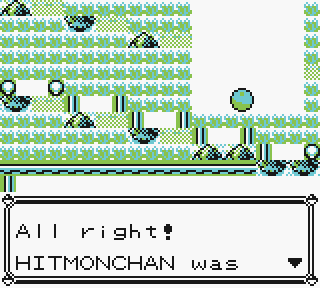
HITMONCHAN!!
...
Wait, what? S-so...
...ergh...ok, so we're back on the item screen. Guess I'll throw another Master Ball and get...

Ditto this time?
...
........
Yeah, I'm...not going to try and pretend that I fully understand what just happened here. But, as far as I can tell, by selecting (BUT NOT USING) the "4", I used a glitched "attack move" call "Cooltrainer". By using this "attack", and standing on a specific tile, I morphed the Ratatta into a Level 82 Hitmonchan that's been inflicted with the Poison status. However, something apparently decrements or something after I do this once, meaning that I can only catch Dittos if I throw any more Master Balls. This is most likely because the "Cooltrainer" move has something to do with Transform, which Ditto knows.
Whatever the case, this game is going to crash if I do much more, so,

We gotta save and reset. After you do that,
Move to this part of the Route...

Do the same thing you did last time with the 6F and the v_t_m...


Flash that "4" once again...

And then...
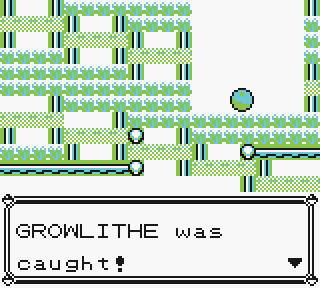
We catch ourselves a Growlithe! After that...
Save and Reset yet again...


And then sweep this guy here, because we actually set up a Trainer-Fly here some time ago.
In you go Mr. Mime!
And don't you be thinking you're safe either Snorlax, because there's now a Poke Flute in the Money slot!


Bwa ha ha!

Just one more thing to do here...just use the Super Rod, fish up a Horsea...

And there we go, now we can move on.

Alright guys, walk to this spot here, cuz we got MOAR menuing!
Swap 6F with hex76
Swap PokéFlute in Money with Brightness Ultra Ball x0
Toss 6 from Warping Master Ball x22
Leave the Guard House to warp to Route 5.

Gettin' close to the end everyone...
Now, for one of the most important set ups in the game...
I don't understand why, but this exact location here has one of the most important glitched items in the entire game. And this particular item is the reason WHY the current WR was able to get all these Pokemon in less than 2 hours. So, here we go once again...
code:
Slots 1-20, normal inventory
CANCEL after inventory
Money
Rival Name
Rival Name
Rival Name
Rival Name
Rival Name (not really Rival Name, but it's what we'll call it)
Options (the one with []x[][] x2)
Badges
TID 1
TID 2
Brightness
Map ID
 ???
X Position
Warping Master Ball (may be a []x[] item depending on your X Position)
Next couple slots are Map Data
Text Pointer
Next couple slots are Roaming Data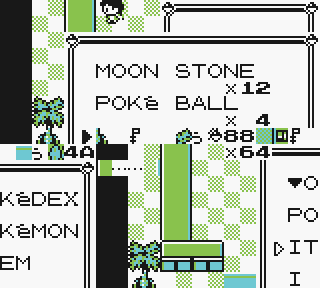
If your Coin Case was in TID slot 1, swap $88$ with Master Ball 1 slot down
Swap $88$ with []x[] x[]2 in Options
Swap Helix Fossil right above with 6F in your inventory
Swap Moon Stone with HM03
Swap top stack of Rare Candy with Bicycle
Swap Rare Candy with Master Ball
Toss 47 Rare Candies to have 208
Swap JACK with Super Rod
Swap Super Rod with Rare Candy at the bottom of your inventory
Close your menu and walk out. JACK through the southern wall to Saffron.

Now, another cool thing about JACK. It ALSO has properties that hide us from Trainers to a certain extent. Or at the very least, it makes it much harder for them to see us. So, use the JACK...

Walk up a bit, go 1 space to the right after about the halfway point, and clip through the Dojo Master (if you just walk straight up, you'll trigger the square that makes him challenge you).

Woohoo, we got Hitmonlee!

Also, that somehow disabled all of the trainers from wanting to talk to you, so we can just walk to this spot in peace. Once you do...
Swap the Helix Fossil in your inventory with the Brightness Ultra Balls x0. Once you do, this'll happen...
This'll happen, and you won't really be able to see your menu properly. I'm not sure if this is the right color, since none of my saves are close to this point, but, you get the picture. So, after you do that, exit the building, re-enter it, and then...


Swap those "Roaming TMs" with the "Warping Masterballs", that way you'll warp too...
Victory Road! So head down the stairs you spawned from...


JACK yourself through a few walls...

And fetch yourself a Moltres!

Oh, and a Geodude if you haven't caught one already, it's essential that we get him before...
Digging out of there as usual.

Alright guys, it's time for...the big one. THE glitch. The one this whole run has been building up to. The technique that single-handedly managed to kill this entire category. The run-stopper. The one glitch that was actually SO insane, that we literally needed a Missingno (er, I mean, "Master Ball"), a glitched $88$, a 6F, a Level 82 Hitmonchan, all kinds of Underflow trickery, AND all sorts of other weird things...just so we could set it all up.
So then, let's walk into Pewter's Pokecenter, and do our final bit of menuing...
code:
Slots 1-20, normal inventory
CANCEL after inventory
Money
Rival Name
Rival Name
Rival Name
Rival Name
Rival Name (not really Rival Name, but it's what we'll call it)
Options (the one with []x[][] x2)
Badges
TID 1
TID 2
Brightness
Map ID
 ???
X Position
Warping Master Ball (may be a []x[] item depending on your X Position)
Next couple slots are Map Data
Text Pointer
Next couple slots are Roaming Data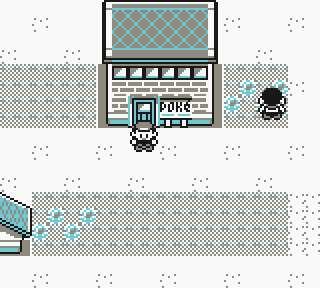
Swap the Potion x0 up with the Ultra Ball x0 stack in the money slot. Then re-enter the center.
Walk in front of the PC and open your item menu (NOT the PC inventory, your regular Item inventory. Just to be clear).
Swap Ice Heal x0 above Warping Master Ball with Brightness Ultra Ball x0
Walk 2 left, 2 down
Swap Ice Heal x0 with Master Ball x2
Swap Ice Heal x0 with []x[] x0
Toss 2 from Dire Hit x34 2 slots above
Swap HM04 with TM43 x4 in your inventory
Swap HM04 with JACK in badges
Swap Master Ball x2 in Brightness with Ultra Ball x0 in your inventory
Open your options menu and set Battle Style to Shift

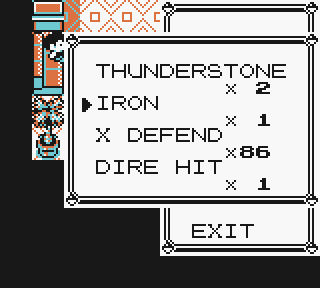
Your items should look like this:
Master Ball x[][]
Rare Candy x208
Rare Candy x255
JACK
Water Stone x5
v_t_m
hex76
Ice Heal x1
4
Fire Stone x3
Leaf Stone x4
Thunderstone x2
JACK
HM03
Master Ball x2
Moon Stone x19
Bicycle
Super Rod
Money Slot. Potion x0
Rival Name 1. Super Potion x93
Rival Name 2. Super Repel x93
Rival Name 3. Parlyz Heal x94
Rival Name 4. Rare Candy x188
Rival Name 5. 6F x1
Rival Name 6/Options. $88$ x64
Badges. HM04
TID1. Master Ball x[any quantity]
TID2. []x[][] x[any quantity]
Brightness. Ultra Ball x0
Map ID. Dire Hit x32
TM43 x4
Ice Heal x0
Warping. []x[][] x0
Note: The items in TID1 and TID2 slots may be in reversed order, since you have the choice to take Master Balls from TID1 or from TID2 while you are in Celadon Mart doing the Underflow Menu.
Be wary. If the inventory menu differs from this is ANY way, this next trick will not work. Not unless you REALLY know what you're doing. So then...the time has come...

We've reached the end of the Rabbit Hole. And all I can tell you from here is that, what happens next will depend on how you manage your Rare Candies in the Rival Name 4 slot. You see, the Pokemon in this game are arranged by their Index numbers, so if you manipulate your Rival Name 4 Rare Candy stash to match their Index numbers, you can rig fights with them. If you manage it right, you will manage to acquire Pokemon from all of these #Index numbers...
code:
Index	Pokemon	Notes
188	Bellsprout
185	Oddish
177	Squirtle
176	Charmander
173	Magnemite	Can catch in Power Plant
171	Aerodactyl
165	Rattata	Can catch on Route 11
163	Ponyta
157	Goldeen
153	Bulbasaur
151	Pidgeot	If Pidgeotto and Pidgey were caught on Route 11
150	Pidgeotto	If Pidgey was caught on Route 11
149	Alakazam
133	Magikarp
131	Mewtwo
126	Machamp
123	Caterpie
112	Weedle
109	Paras
108	Ekans
107	Zubat	Can catch in Seafoam Islands or Victory Road
106	Machop
100	Jigglypuff
98	Omanyte
96	Sandshrew
77	Meowth
72	Jynx
71	Poliwag
70	Doduo
65	Venonat
64	Farfetch'd
60	Tauros
58	Seel	Can catch in Seafoam Islands
57	Mankey
55	Koffing
53	Electabuzz
51	Magmar
49	Golem
48	Drowzee	Can catch on Route 11 (may not be faster to do so)
47	Psyduck
43	Hitmonlee
40	Chansey
37	Slowpoke
36	Pidgey	Can catch on Route 11. If you have a Pidgeotto and not Pidgey,
                it's still faster to evolve Pidgey through Pidgeotto
                into Pidgeot than any of the alternatives
34	Onix	Can catch in Victory Road
30	Tangela
27	Staryu	Can catch in Seafoam Islands
25	Gastly
24	Tentacool	Can catch in Seafoam Islands
23	Shellder
18	Rhyhorn
17	Cubone
15	Nidoran f
13	Grimer	Can catch in Power Plant
12	Exeggcute
11	Lickitung
5	Spearow
4	Clefairy
3	Nidoran m
2 KangaskhanAnd finally, one last word of warning, whenever you use the 6F item, you'll always want to make sure that it is the 3RD item you see in your inventory, with the $88$ glitch item being the 4th. So you NEED it to look this way...

If you aren't careful to make it so that that's exactly what you see...well, I don't know what happens, but the wiki tells me to make sure it looks like that. So with all that said...prepare...for the most awesome thing...you will ever see...in your life...
Enjoy
The Most Glorious Hour of Your Life