Part 30: Clearing the Path, Sirius System, Sol Sector (Gameplay)
Anyway, on with the show.28th December 2668, Sirius System, Sol Sector
Episode 4, Mission 1 - Clearing the Path
The Firekka launches a heavy strike at Kilrathi escort ships guarding a Hakaga supercarrier.
Mission Briefing:

Briefing Video (Youtube)
A frequent complaint about the Wing Commander series is that capital ships don't put out nearly enough defensive fire:

Mission Video (Youtube)
Kills this mission: 17 (the debrief screen says 13, but it is only counting the fighters, not the four frigates that I torpedoed).
Tactics Corner
Friendly forces:
9x Rapier medium fighter
6x Sabre heavy fighter
Enemy forces:
Intercept NAV:
6x Krant medium fighter
6x Drakhri medium fighter
6x Jalekhi heavy fighter
8x Kamekh-class corvette
2x Targu-II class frigate
Deployment:
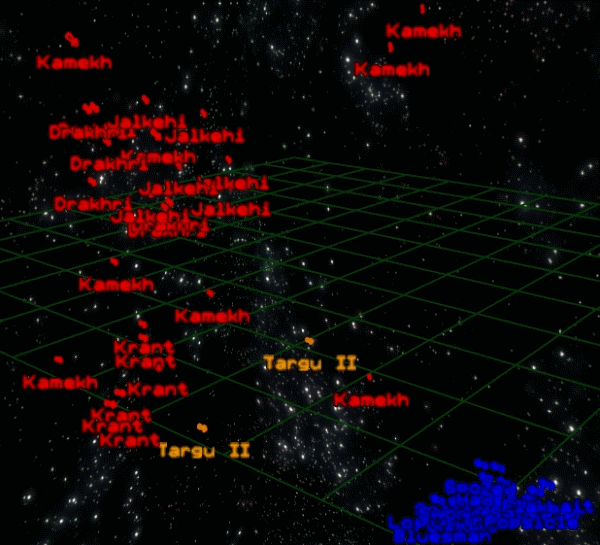
The positioning of friendly and enemy fighters here allows you a torpedo run at the Targu-II frigates before the enemy interceptors get their act together. Charge at one of the nearby TIIs, pulse the afterburners irregularly to throw off any turret or interceptor fire, get in the blind spot directly in front and loose a torpedo to take out the first frigate at this nav point, then head on over and kill the other one before the enemy can react (intermittent afterburners are recommended for shaking turret fire). After that it depends on how the battle is progressing. I recommend killing any relatively nearby corvettes before going into dogfighter mode and trying to take out as many fighters as possible. In the end you've got four torpedoes and this mission needs fourteen, so you've got to maximise wingman efficiency. Wingmen are much better at killing fighters than corvettes, and equally better against destroyers than frigates, so probably put your four torpedoes into frigates and spend some time killing corvettes. However, since there's only two non-corvette capital ships at this nav point, your wingmen are much more likely to launch torpedoes at the one you're going for, so it's best to avoid that if possible - a quick glance at the radar (torps are annoyingly hard-to-see turquoise blips) is a good idea, or order them to attack fighters or corvettes.
Target Area NAV:
Friendly forces:
Everything left over from the previous nav
3x Epee light fighter (reinforcements, arrive after 1m 20 seconds)
4x Morningstar heavy fighter (arrive with the Epees)
None of the Morningstars has the callsign "Maniac", which I find a bit disappointing.
Enemy forces:
8x Krant medium fighter
1x Krant ace "Virahn Bloodclaw"
6x Targu-II class frigate
3x Ralatha class destroyer
6x Sartha light fighter (reinforcements, arrive after 1m 50 seconds)
3x Jalkehi heavy fighter (arrive with Sartha)
(so that's 8 corvettes, 6 frigates, 3 destroyers, for a total of 17 capital ships. So Farwalker got closest to the numbers but invented some Hakagas (next mission for that), and Psion had the right composition but was a bit low on numbers.)
Initial deployment:

Once again, you're clear to make a torpedo run at the point frigate, and that's probably a good idea. In general the plan is to take down as many frigates as you have remaining torpedoes, to decrease the amount of flak around and also to prevent any torpedoes being wasted on them. Look at the tactical map, find a frigate relatively uncovered by enemy fighters, torpedo it, repeat until you're out of torpedoes. Around then your reinforcements ought to arrive, in an area that ought to be relatively quiet so they will probably start making torpedo runs. You should either kill any fighters which might be after the bombers or start going after Targu II turrets if they're all or nearly all down.

About thirty seconds after that the Kilrathi reinforcements arrive, on the right flank of the Kilrathi fleet:

The Sarthas are difficult for a Sabre to keep up with, though if you can taunt them into going head to head with you then they're very easy kills. The Jalkehi are probably simplest to pick off with missiles though they're also slow and lumbering enough you can probably outfly them. In any case you want these fighters killed as fast as possible because your allies are likely busy making torpedo or anti-turret runs which will make them easy targets, so I tend to use most of my missiles here.
Getting all of the enemy capital ships generally requires a bit of luck, but sufficient to get a mission accomplished should occur most of the time provided you concentrate on the frigates.
Ship of the day:
Targu-II class frigate

Class: Frigate
Length: 445.05 m
Mass: 17,500 tonnes (for a Frigate?)
Max Velocity: 250 kps
Cruise Velocity: 150 kps
Maximum Yaw/Pitch/Roll: Not stated
Weapons: 10 turrets, 6x flak, 4x dual laser.
Shields: Phase Shields
Armour: Not stated, but weak - one torpedo hit suffices to destroy the ship.
Game says: The Targu II frigates are fast and carry an impressive array of anti-fighter weaponry. However, they are lightly armoured, and have no fighter hangar. Designed for a wide range of roles: patrol, escort, bomber interdiction, and fast transport duties.
I say: The only ship invented out of whole cloth by the Standoff team (Fleet Action refers to Kilrathi frigates but makes no comments about their capabilities), and perhaps predictably covered in turrets. Everything the e-mail which introduces the Targu-II says is true. Lots of turrets, very dangerous to fly in the general proximity of, can only take one torpedo hit but will shoot down a lot of incoming fire. Much as that e-mail hints the turret coverage has a blind spot though. It's not exactly one most players can miss, because the blind spot is flying right at the front of it (Ok, you also have to make sure you're below the top of the model) which is how you meet the very first Targu II you encounter. The Targu II is clearly the Boulton-Paul Defiant of the Terran-Kilrathi War. Anyway, all of this makes these frigates always a good bet for your torpedoes, given how much the AI sucks at firing torps at the right angle to not get them shot down. A good design, which would probably have been slightly better if the blind spot wasn't in a bit of a silly place.
Total kills (Standoff): 15 missions / 183 kills
Total kills (including previous thread): 128 missions / 1105 kills
Next time on Standoff:
Sink the