Part 34: Moskva's Endgame, Sirius System, Sol Sector (Gameplay)
28th December 2668, Sirius System, Sol SectorEpisode 4, Mission 3 - Moskva's Endgame
The TCS Firekka sends a flight to protect the badly damaged TCS Moskva while it works on repairs, and another one to delay a Kilrathi corvette group so the Concordia's strike flight arrives in time to hit them.
Mission Briefing:
See previously. The vote chose to fly a Rapier which is, again, the correct choice - there's nothing that needs torpedoes in this mission and the Rapier is better at pretty much everything other than torpedo strikes. Since you like Rapiers, here's another one:

Mission Video (Youtube)
Kills this mission: 19
Back in a Rapier, back to ridiculous kill counts. I'm not quite sure how many of those shuttles you have to save in order to succeed at the mission - I lost two, which since there's nine of them doesn't seem too bad.
Tactics Corner
Friendly forces:
1x Concordia-class fleet carrier TCS Moskva (mission objective, must be protected)
7x Rapier medium fighter
3x Sabre heavy fighter
9x Rapier medium fighter (reinforcements, launch from Moskva after first wave)
9x Hermes-class transports (mission objective, must be protected, launch from Moskva after first wave)
Enemy forces:
3x Krant medium fighter
6x Hhriss heavy fighter
2x Gratha light bomber
3x Grikath torpedo bomber
4x Gratha light bomber (reinforcements, arrive after 1 minute)
8x Drakhri medium fighter (reinforcements, arrive after Moskva evacuates)
8x Sartha light fighter (reinforcements, arrive 50 seconds after Drakhri)
3x Gothri heavy bomber (reinforcements, arrive with Sartha)
There's basically two phases to this mission. The first one is the defense of the Moskva against torpedo attack, the second the defense of her shuttles (and to some extent the surviving fighters, which you want to preserve since they join the Firekka.)
The first one is relatively straightforward depending on how many missiles you're willing to use. I think at least the dumbfires have to be fired here, simply because the Moskva can only take one hit and the Bridge can be taken out from anywhere "above" the Moskva so to speak. You need to take out fighters rapidly in both engagements, so it makes a certain amount of sense to split your missiles equally between the two waves. Equally, it would be sensible to deploy FFs against Sartha, HS against Drakhri or Krant, and DFs against bombers as all of those are one hit kills. This may mean mapping the M key onto a joystick button. Or at least it's what I did. Other than that, it's fairly similar to Destroyer Rescue in that you're using the tactical map to find the targets you need to engage - first the Grikaths, then the Gratha, and then in the second wave the Sarthas are the most important things to hit because they go after the shuttles.
The other thing to consider is positioning, because this mission is unfortunately Starlancer-like in that things can happen very fast and you either have to be in more or less the right area to stop them or you will probably use up way too much afterburner fuel getting there in time (burners are at a premium in this mission even if you don't accidentally turn them locked on and not notice for a minute like I did - pulsing the burners to save fuel is definitely smart).
First wave:
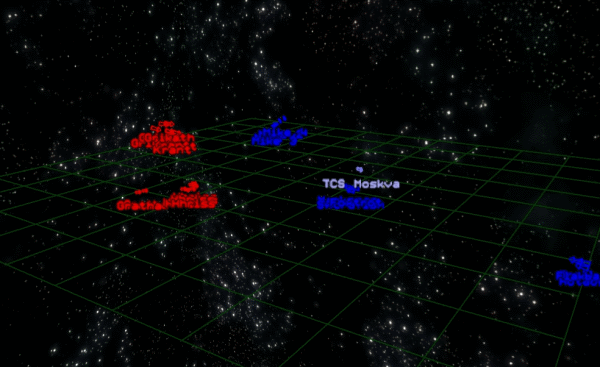
Hopefully this angle suffices to show that the enemy bombers arrive in two groups, above and below the Moskva but both on its port side. Since there are more Grikaths than Gratha (and the WC2 bombers are more dangerous anyway) it's best to be positioned for the top group, which is accomplished by aiming your Rapier just above and to the left of the planet, and pulsing afterburners (hold until you reach max speed then tap).
The next four Gratha will show up hopefully after you've killed the first five bombers, though if one is alive it's probably still worth going for these four since they're in tight formation making them easier to kill rapidly. The other issue is that if the battle has drifted away from the Moskva (and it often will thanks to bombers moving out for torpedo runs) then the Gratha may well arrive away from everyone else:

Second wave:

The Moskva launches evacuation shuttles forwards out of its launch bay (obviously enough), while the first set of Kilrathi, the Drakhri, approach from in front and off to the right. It's very important to be out in front of the Moskva when this happens, you need to be in amongst the cat fighters before they reach the transports and the Moskva's damaged Rapiers or else you're going to lose lots. Fortunately the previous battle sort of peters out, so you can normally ignore the last Krant or Hhriss and get into the right place.
Then the Sartha and Gothri arrive, mercifully on the wrong side of the Moskva, so nothing special required here other than noting the arrival and racing to meet them (which hopefully drags half the surviving Drakhri with you, getting them shot in the back by the other Rapiers):

My final tip for this mission is not to attempt it with a joystick which you've used for so long the fire button only registers about 80% of the time. That doesn't seem to help. Really need to buy a new one. Might be a bit of a delay before the next mission as a result.
Ship of the day:
Concordia-class

Class: Fleet Carrier
Length: 800.05 m
Mass: 65,000 tonnes
Max Velocity: 150 kps
Cruise Velocity: 100 kps
Maximum Yaw/Pitch/Roll: 1 degree/sec
Weapons: Laser Turrets (11x)
Shields: Phase Shields
Armour: Front: 3000 Left: 3000 Right: 3000 Rear: 3000
Game says: The standard Fleet Carrier since the war started, the Concordias are the most numerous capital ships in the Fleet. They carry a full wing of fighters, but have only a light defensive armament.
I say: Wing Commander 4 design, more on that when we get there. Other than that, it's a carrier, you defend them in two missions, has enough turrets to be vaguely threatening and occasionally gets a kill (the Verdun did in my Episode 3, Mission 1 video). It has an annoyingly exposed bridge which makes defending the Moskva in this mission quite hard, because you can't use the approach I used to protect the Sao Paulo in Episode 3.
Total kills (Standoff): 17 missions / 206 kills
Total kills (including previous thread): 130 missions / 1128 kills
Next time on Standoff:
Well, something very bad has happened. Any ideas what? Whatever it is, we can expect Bradshaw to react with his customary professionalism.