Part 2: The Life Fillmore
And lo, Sir GodJesus decided it was time to smite the monsters that had infested his world.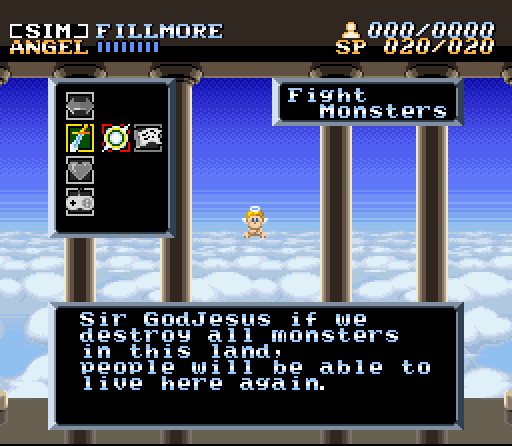
 "All of the monsters? You can't be serious."
 "Well, I suppose you only really need to kill the biggest and meanest looking one. The rest should pretty much fall in line at that point…but you'll still have to get to him." "That's more like it. Let's get this show on the road."
Cool mode seven swirling into the stone circle! I'll be doing a few screenshots of the level, but especially for the sake of the music...
You might just want to watch the video.

All action stages start with your spirit coming down and inhabiting a convenient stone statue to act as your avatar. It's a bit clunky, but you do what you must.

One side effect of godly possession is gaining a color palette. The area is pretty lush and detailed, with a number of enemies running around. These little guys are about as threatening as you'd expect the first enemies in the game to be.

These orbs contain various goodies, from healing items to extra points to extra lives. This particular one has 500 points in it. Points are important, but I'll explain more on that later.
 "What the hell is a mutated orangutang doing here? This isn't a tropical jungle!"
 "Truly Tanzra respects neither the laws of God nor man, my Lord."
This guy is unique in the game, with no color swapped analogues showing up in the future. He's also a gateway enemy, and killing him is necessary to proceed.

A little further exploration brings us a 1 UP, which is worth a cool 1000 points when we finish the level. I mean, sure, it'd be nice if I actually died, but...

Finally we make our way to the boss of the stage, the Centaur. His main mode of attack is that lance, but it's easy enough to avoid. The main thing about dealing with him is that you want to avoid fighting out in this open area.

Instead, you want to hang out by this outcrop. His other attack is a lightning bolt, but hanging out by the wall will let you dodge it. If you kneel by it, he also can't touch you with his lance.

In between attacks you can rush out and attack. Eventually he'll explode, as is the natural fate of all monsters.
 "All that work and just two humans? I feel kinda gipped. Oh well, the damn things breed like rabbits."
 "Wait, whaddya mean 'may become'? I killed the monsters, didn't I?" "Our first duty is to protect our people from any monsters. I will do as you instruct. Please rid the land of these monsters with my arrows." Of course, it couldn't be that simple. "There are several mysterious circles on the ground which represent Monsters' Lairs. If you direct the people correctly, they will be able to seal the lairs.
 This is where points come in. The population of the monsters circles is determined by the points you score in the action sequences. Potential population ties directly into how many monsters are in the monster circles, and sealing them results in large boosts of population.
"At least this time they'll be doing some of the work themselves. Okay Angel, what then?" "You will discover the monster than controls this land. If destroyed, control of this land's destiny will return to her people." Sounds pretty simple. Let's get cracking."Town Music
Fillmore Simulation Demo

Precisely one second lately...
 "What, already? I don't remember them being this demanding last time around."
 "Please burn the bushes and guide us as we begin to build our roads." Weird. Most of the time they're asking Me to NOT use lightning. I'll have to see about putting the fear of Me into them again."
Speaking of lightning, we have a few new options on the menu. First off, we can direct the people on how we want them to build or listen to what they have to say. Most of the time there isn't that much to listen to.

Directing the people looks kind of like this. The pale square is where they should build next. You can't move past an empty square, so this will have to wait until we get some population growth. When the hourglass goes into the bottom you get population growth if the right conditions have been met. Our life for the Angel is the blue bar in the upper left hand corner, which is dependent on our level. Every time the hourglass swaps we'll get a certain amount of missing life back.

Our second new option is the Miracles section, which allows us to perform various Godly actions. The options are Lighting, Rain, Sunshine, Wind Gust, and Earthquake. These abilities are fueled by SP, and the only limitation is whether we have enough SP to use them. Respectively their cost is 10, 20, 30, 80, and 160. Right now we've got about enough power to use Lightning and Rain.

Finally, we have offerings. On certain occasions the townspeople will give us offerings, and these can be collected at our leisure. Once we've got a stock we can also use them using the same menu area.
 "Burning bushes… who ever heard of a God burning bushes down for his followers? Don't they have shovels and axes?" I'm afraid not, Sir GodJesus. They're a bit primitive yet."
 "You're not kidding me… are those straw huts? Wait, what's this now?"
 "Well isn't that nice? As punishment for bothering me, you can walk your happy asses over to the monsters' lair that's further away."
 "Angel, what in My name is that thing?" "A Napper Bat, my Lord. And just to the left is a Blue Dragon." "Hey, let go of my followers Bat! Seriously, if they'd just let go it could only get one of them… there's no helping some people."
 "Where'd they learn to do that, anyway?" "I have no idea, but it seems like humanity has advanced somewhat in our absence." "About that.. isn't this moving a bit fast? I seem to remember them breeding a bit more slowly, with a lot more bodily fluids and such being involved." "Oh no, Master. Monsters are reincarnated humans, and when we kill them their souls are sent to the temple where they're turned into humans. It's much faster this way." "More hygienic, too. I approve. Cleanliness is next to Me-ness, after all."

This is the real reason we went to this area first. Increased civilization levels mean that we get higher population per building, and can have other effects at the highest levels. From now on each building will increase population by 6 while the straw huts only increased it by 4.
 "Yes! Seal them all off, so we can find the real enemy." "And so that I don't have to work so hard. Chasing off three Napper Bats and a Blue Dragon was exhausting."
Half of the Monsters' Circles will provide some kind of offering to improve the ability of our angel or help with dealing with monsters. These are best saved for later.

 "Many of my thoughts actually come to life in the real world." "Angel, did we put that in the design specs for him?" "I'm afraid not. I have no idea where this came from." "If these powers are real, I feel the presence of something holy radiating from the woods east of here."
 "Aren't you a unique, special snowflake. I'll look into it… and as for you, build better houses!" "Master! Why do you make me do these things?"
 "That's why. If they've got old houses, they'll never build new ones!"
Next level - total population 200.

 "Yeah yeah yeah, lightning, I hear ya. Seriously, you'd think destroying some of your houses with it would make you a bit less lightning happy."
 "Seriously, just like rabbits."
Next level - total population 400.

 "Dammit, he was right. Bastard's going to be insufferable over this."
 "I'll be taking that. Very important, wouldn't want it to stay in the wrong hands and all."
 "Oh, for My sake. It's been less than a second. Couldn't you have told me a minute ago?" "Well, a day for you is like a really long time for them." "Whatever. At least they're probably trying to give us something."
 "You're asking for permission for something you just did. Fine. Whatever. Just hold on to it for me until I need it."
And with that, we'll close it for now. Next update: Finishing Fillmore. Fishing, bridges, and taking the role of Theseus.