Part 3: Update III: An Alchemist and her First Adventure
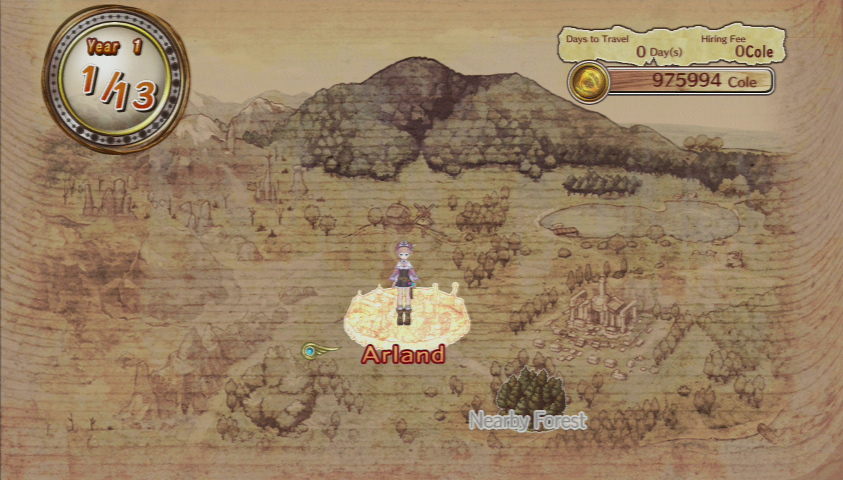
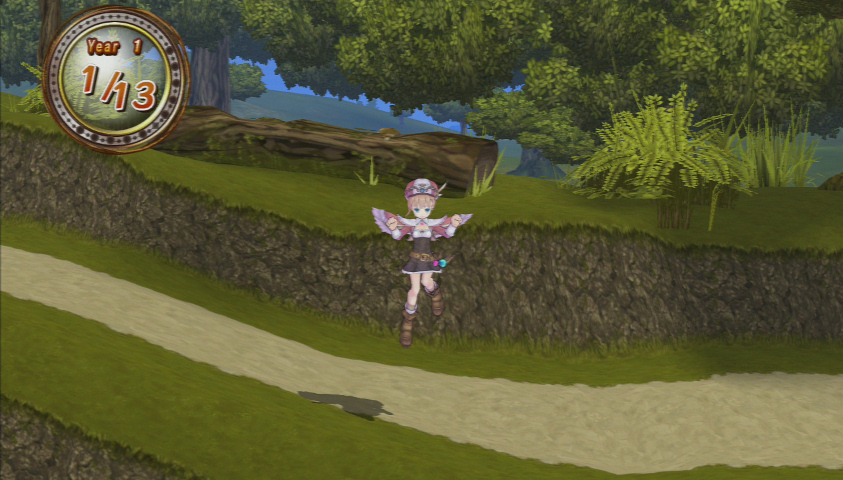
Now that we’re done seeing anything interesting in the city for now, it’s time to head out on our first adventure. To access the world map, all you need is to go to the Gate. The world map is pretty empty for now, but you can probably guess at least a couple of future locations, just by looking at the map. It’ll be the latter half of year 3 before we can go everywhere, however.
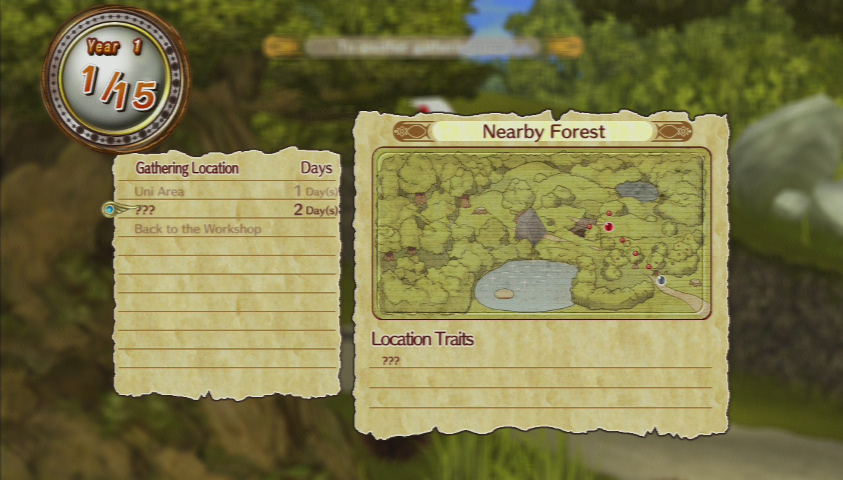
This was taken a little bit after the next few, but it’ll be most helpful to post it first. It’ll allow me to explain how the area maps work. All 9 major areas in the game are divided into a set of series of small maps, and you get a neat little map screen to tell you where you are. Each sub-map in the game exits to that map screen, which allows you to go to a previously-explored location or continue on to a new one. Regardless of what you do in them, each sub-map has a certain value of days attached to it, and you lose that many days when you exit the map. You can see how many exits that lead to new areas by examining the node for the current map (in this example, you can see two exits).

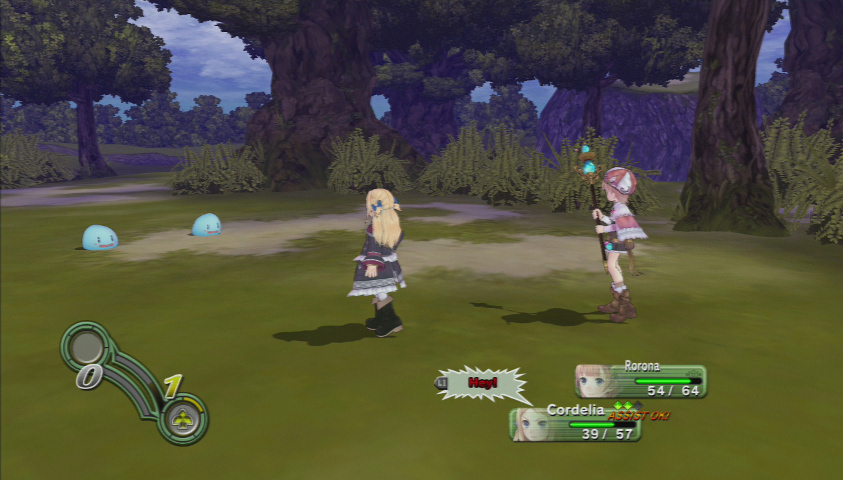
Now, let’s talk gathering. The blue star in front of Rorona indicates where you can gather materials. The base quality, and what you can find, in these gathering spots varies by not only what larger area you’re on, but also what sub-map you’re in. Regardless of area, the gold star there indicates the materials you’ll find there are of considerably higher quality than blue star spots. Gold star areas are also more likely to have better traits, but are also much rarer than blue stars. Although traits eventually become very important, we won’t need to worry very much about them for a while. You can’t harvest indefinitely; once you’ve exhausted all of an area’s gathering spots, you’ll have to return to that area to make them respawn.
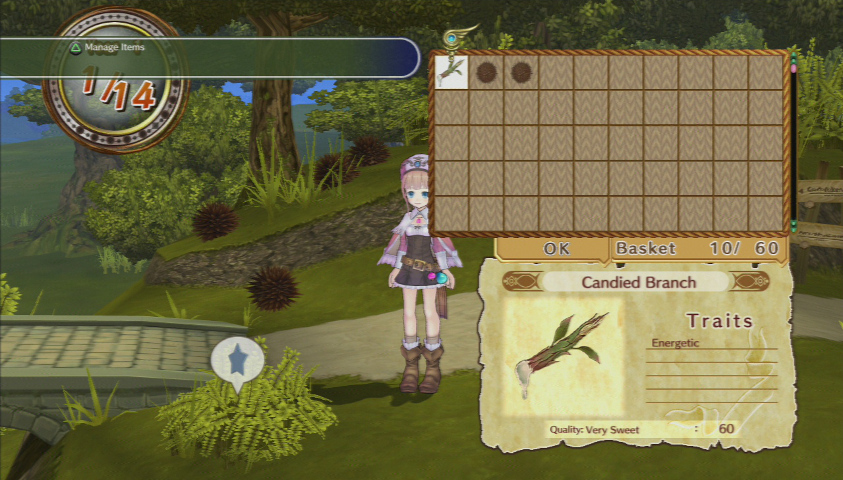
This is what the gathering screen looks like. Most spots you’ll find 2-3 items of generally similar quality. Nearby Forest has the worst quality synthesis items in the game, but it’ll do for now. On your first trip here, just grab as much stuff as you can. You can discriminate later, but there’s no sense at the beginning of the game.
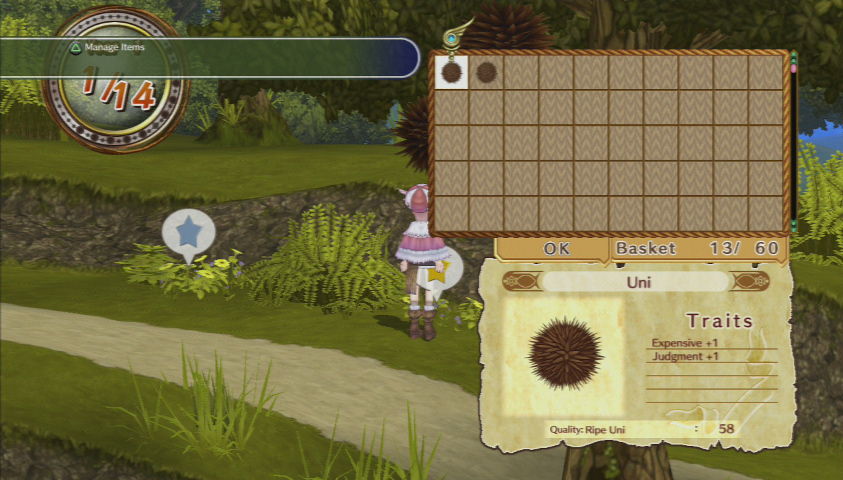
Ironically, you’ll find pretty bad quality Unis (which a little Wiki-fu tells me is a sea urchin eaten as sushi. The more you know) in Uni Area, but the gold star spots will give us fairly high quality stuff anyway. Judgment there in particular is a lucky find, as it increases the chance of synthing items by 10%. Hey, it can help, and it is early in the game.
Although there’s not much point to it, you can jump with circle. In any case, I just like bunny-hopping everywhere, and when I post a runthrough video of each area, you’ll probably see me jumping a lot. Anyway.
Now that we’re done talking about gathering, let’s head into the next area for our first battle. Although I’ll be explaining everything in screenshots, you can watch the battle unfold in the video below.
This video goes until the screenshot of the results screen.
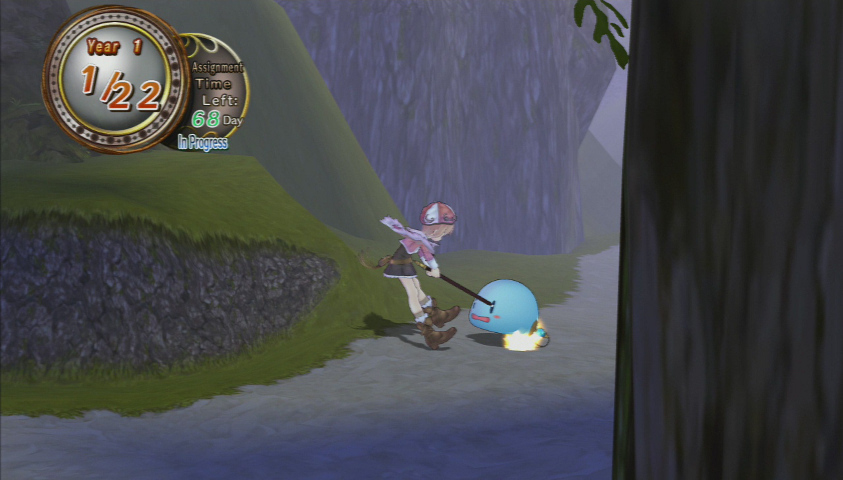
Before we get started, though, one last thing. Outside of town, you can use square to make Rorona bash the ground with her staff. If you can hit an enemy with it before it an enemy makes contact with you, you’ll always get the first turn in the battle. This won’t work against strong enemies, though, as they’ll initiate battle before you can get that close to them.
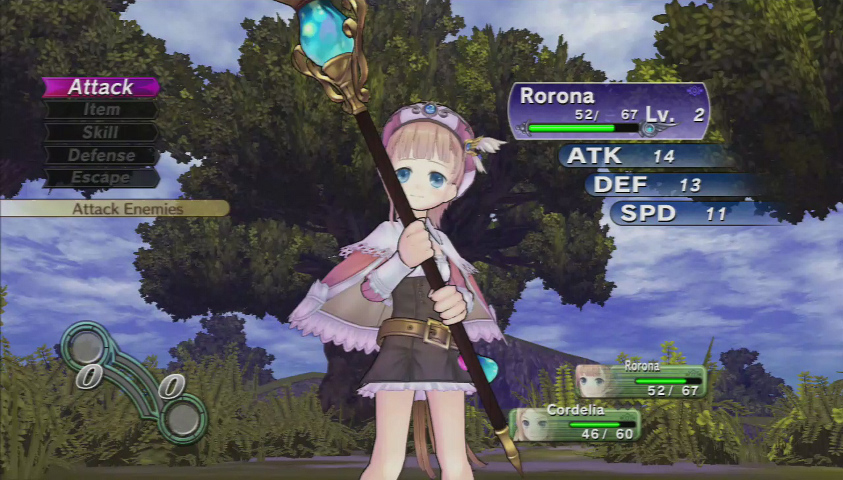
So we have the battle screen. First, I’ll cover the stats on the right. These are all managed by some magical formula, but I can’t find it on the Japanese Wiki for the game, so I have no idea what it is. Anyway, ATK influences how strong a character’s basic attacks are, DEF lessens how much damage you take from enemy attacks, and SPD is how often that character will get turns in relation to your allies and enemies, as well as how much of a chance you’ll have to escape from battle.
On the left, Attack is just a basic physical strike. Item is unique to Rorona, as she is the game’s only playable alchemist. This makes her role late in the game critically important, as the most efficient healing and attacking comes from items only she can use. If Rorona goes down in a difficult battle, you will almost certainly lose unless the enemy is almost dead itself.
Skill refers to what character-specific special attacks can be used. Something to keep in mind is that skills cost HP to use, and you can’t use a skill that will drop the character’s HP to 0. Although it won’t be an issue for a while, there is a rather vicious status effect that causes skill costs to skyrocket. I’m talking somewhere in the neighborhood of 200-250 HP to use even a mid-level skill. Not cool. Defend and Escape should be self-explanatory.
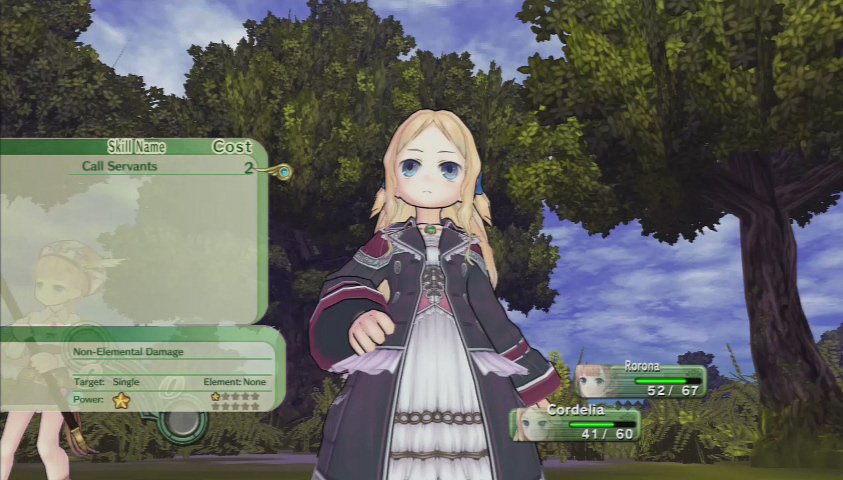
In exchange for Rorona being able to use items, everyone gets more powerful skills than her. Call Servants here will do about twice as much damage as Rorona is normally capable of, for only two HP. Skills are dependent on the character, of course, but in general, Rorona’s skills are the least effective.
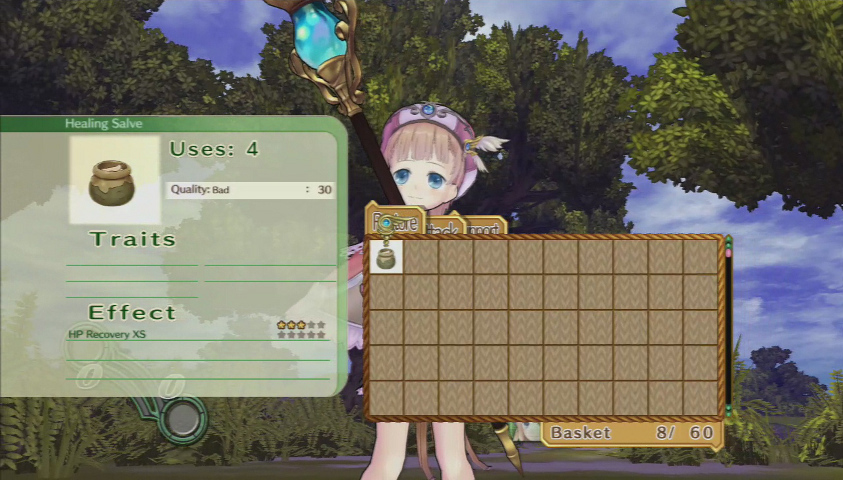
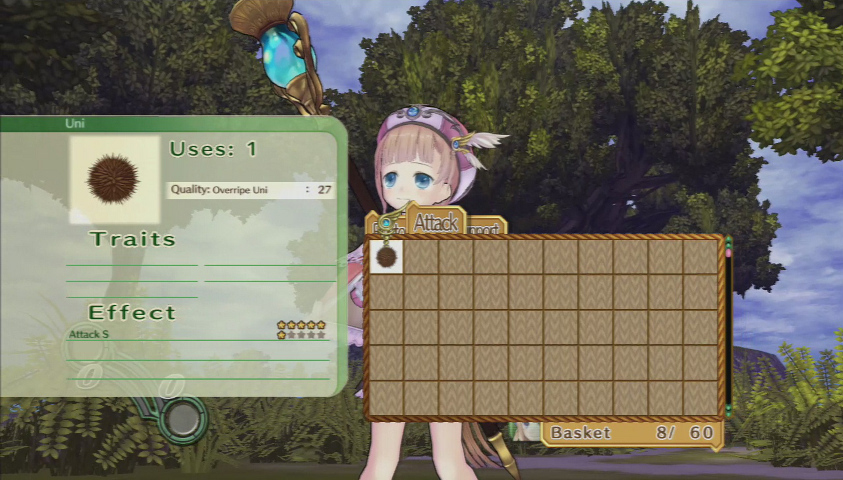
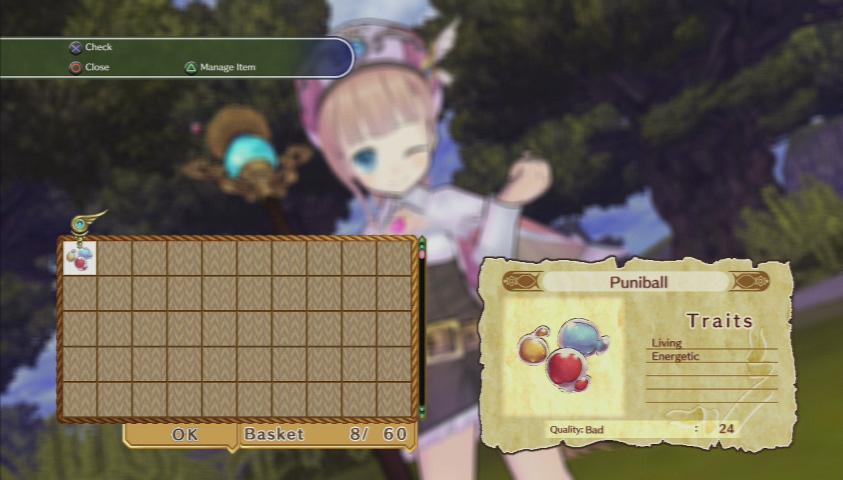
A look at Rorona’s item screen. Items that can be used are divided into Heal, Attack, and Support. Unis are unique items in that they can be gathered normally, but they can also be used as attack items. Just about everything else is something you’ll have to make yourself.
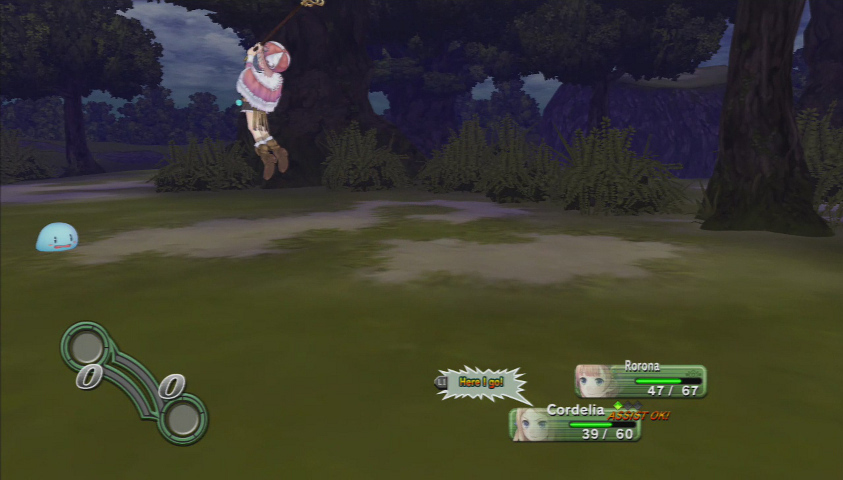
If you were paying particularly close attention to the battle screens so far, you might have noticed three diamonds above Cordelia’s status bar. This is the support system of the game. When a character does an attack, or Rorona gets attacked (the latter charges it up faster), the diamonds gradually turn green. When a diamond is fully green, that character can support Rorona in some way. The first way is if Rorona does a basic attack, like so. If I were to press L1, Cordelia would join in that attack to inflict some extra damage. Note that if Rorona uses an item, you won’t get this option.
And this is Cordelia in defense mode. When a diamond is full, the character is otherwise active (for example, not asleep or KO’d), and Rorona is the target of an attack (even if it’s an AoE attack), she can be protected from damage by character. An important thing to note is that if this option is chosen, the defending character will take damage like he / she is defending normally, so the guardian character will take less damage, and Rorona will take no damage. Very helpful in harder battles, and as a general rule you should only use this option, unless the enemy is very close to death anyway.
Couple other things to mention. Notice on the bottom left the gauge on the right has filled slightly, and the zero has turned yellow. This is the element gauge. There are four in the game: Fire, Lightning, Water, and Earth. The gauge on the right is for Earth and Lightning, and the left gauge is Fire and Water. These gauges operate independently of each other. So in this example, if I used a Lightning-element attack, the gauge would empty, and the 0 would go back to grey, before becoming green (Fire is red, Water is blue, Earth is yellow, and Lightning is green). As the element gauge builds up in a certain direction, the opposite element is weakened, and the dominant element is strengthened. One last note is enemies and allies both contribute to the gauge. There’s more to it, but that’ll do for now as a primer.
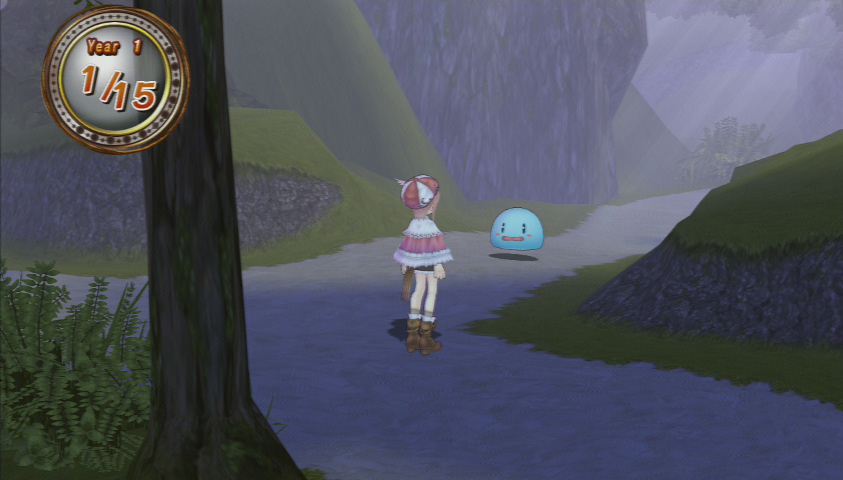
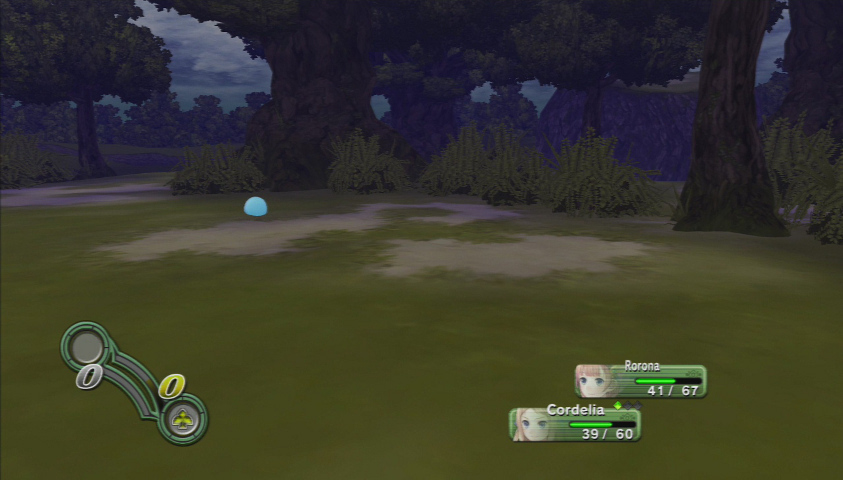
The second thing is that some enemies can run, but not too many can. The Punis here are particularly cowardly, and if an enemy runs, you won’t get the money or experience from defeating them.
So that’s about it for battles. They’re pretty uninteresting for the most part, but once we start running into much harder enemies, they can get legitimately pretty fun. However, Rorona is the weakest game in the trilogy on the whole battle front, where Meruru and Totori both have some pretty great boss fights.
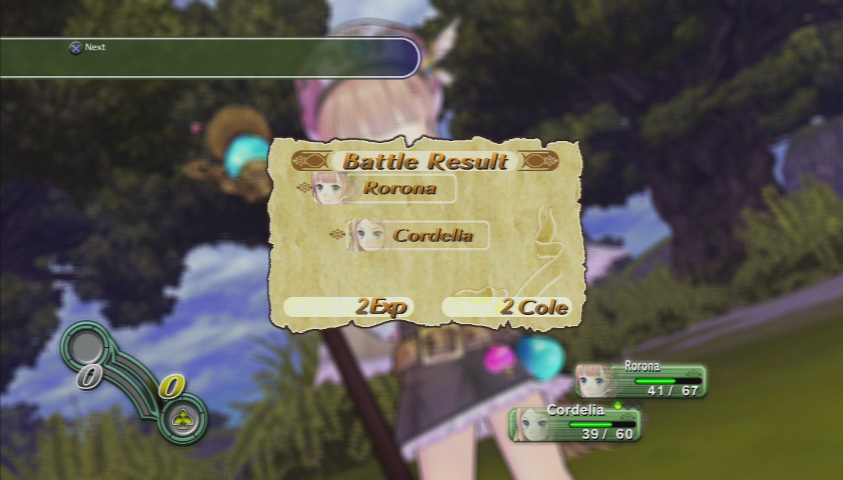
And this is the spoils screen. Some enemies can drop multiple items, but that’s only for the particularly strong enemies, which we won’t be seeing for a while. Punis are pretty much guaranteed to drop Puniballs, which aren’t too valuable now, but will come in handy soon-ish.
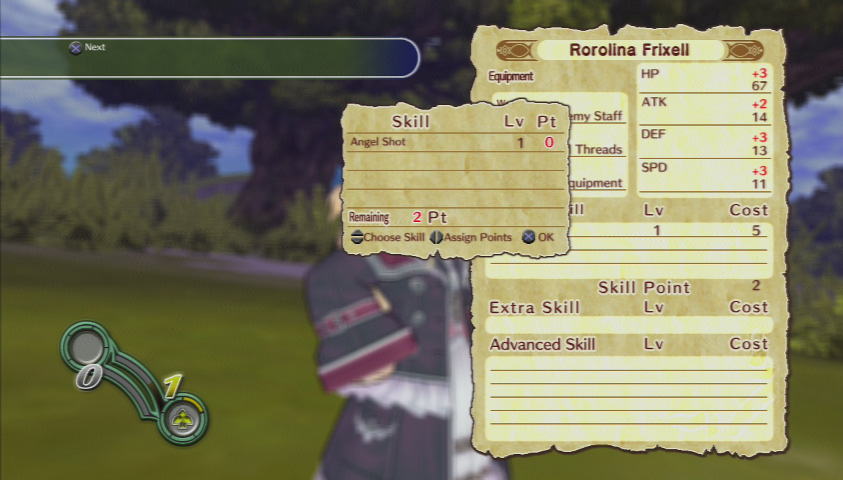
One last battle mechanic is that when you level up, you get a few skill points to put into one of the character’s skill. As the number of skill points goes up, so does the effectiveness of the skill in question. Personally, I’d avoid leveling up either Rorona or Cordelia’s skills for the moment. Skill points carry from one level to the next as long as you don’t spend them.
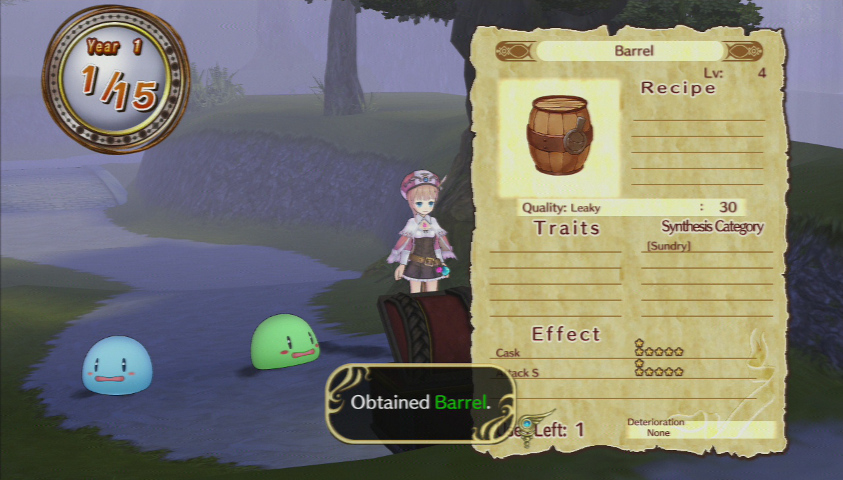
Several maps in the game have treasure chests. A good thing to keep in mind is that if a chest doesn’t contain a unique item (usually a recipe book), you can revisit the area over and over again and the contents of the chest will respawn. Barrels are an attack item, and are quite a bit stronger than Unis.
For now, though, we’re going to jump a few days into the future, and this scene will take place. This scene will happen around 1/21.
 Huh? What’s that noise…? Whoa!
 Koo koo! A pigeon? You scared me… Huh? What’s that on your foot? Is that for me?
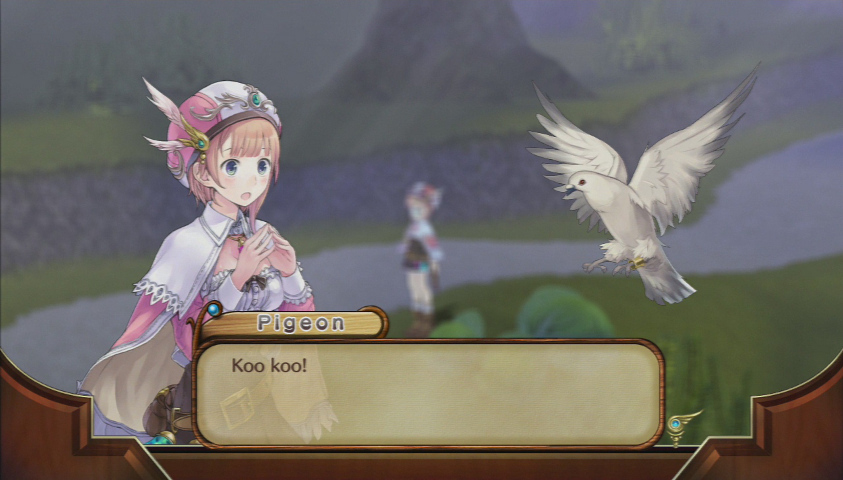

Yep, Sterk’s got a love for pigeons. There’s an alternate version of this scene if you’re back in town around 1/21, but it’s pretty plain, and has no pigeons in it, so I won’t bother with it. Actually, this scene is pretty easy to miss, and leads to a couple extra scenes down the line. Besides, Sterk owning pigeons doesn’t come up again until about mid-way through the sequel. And yes, apparently people talking to pigeons is common in this world. Why else would you own a pigeon?
“Urgent message: We have the first assignment. See below for details.” Uh oh…I’m starting to get nervous…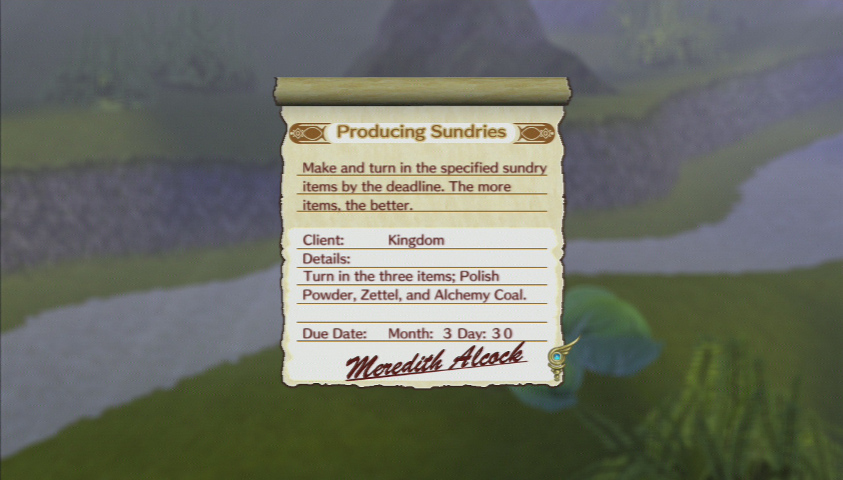
First Assignment is appropriately easy to pass. We can literally buy our way to victory, by purchasing Zettels from Tiffani (fun fact: “Zettel” is German for “piece of paper”). But that’s no fun, and it would cost us money and alchemy experience. Besides, we’re not in this to beat the game as quickly as possible.
One very last thing about endings, now that I’m thinking of it. Bad End does count as an ending, and if you know what to do you can beat this game in about two hours with the Bad End. Another interesting fact is that you only need to fight four battles the entire game. That’s it. However, if you decide to follow that path, that fourth fight is going to be a pain, but it is possible.
Sundries, huh? …I think I can manage that. Koo koo? Oh yeah, thanks little birdy. Can you let Sterk know I’ll do my best? Koo koo!*pigeon flies off*
*sigh* So it’s finally starting… If I fail at this…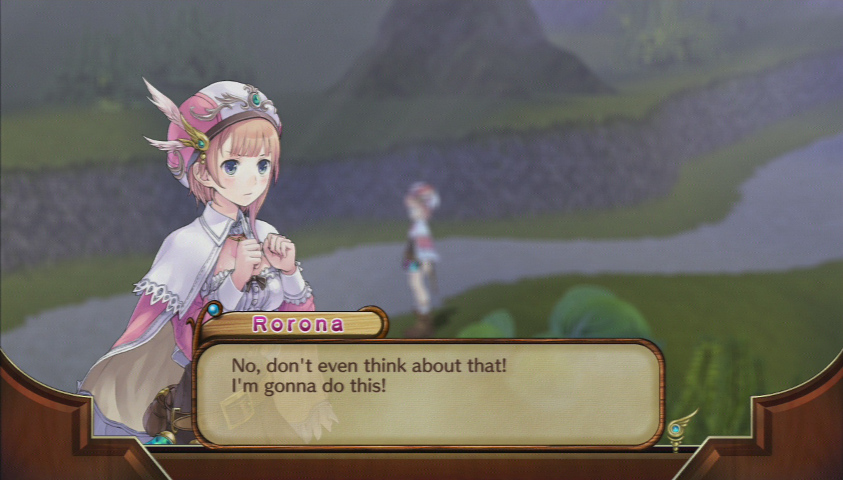
As for now, assume I got beat off-screen. Normally I’d do farther into Nearby Forest, but I want to wrap up all the major game mechanics in this update. Losing a battle in this game actually can be advantageous, because when you do go down, you only lose the amount of time it took for you to go to that area (for example, getting defeated in Nearby Forest means you lose 1 day).
Sorry, Rorona…it won’t happen again…
Anyway, this scene takes place the first time you return to the atelier after the introductory sequence.
 Why? Are you tired of sharing a bed with me? We’ve never shared a bed before… Then are you mad about what I did to you last night while you were sleeping last night?
Another pretty good Astrid scene. She’s got a good enough poker face that there’s an equal chance she’s teasing Rorona or actually did do something.
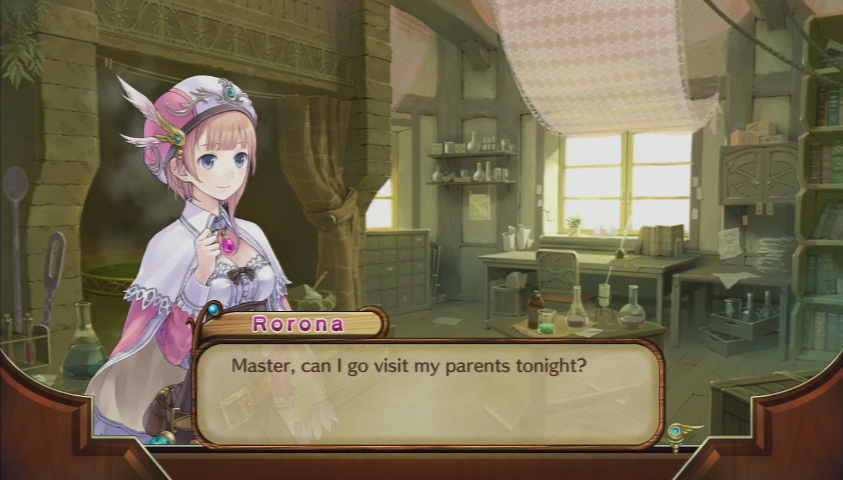
Wh-what did you do!?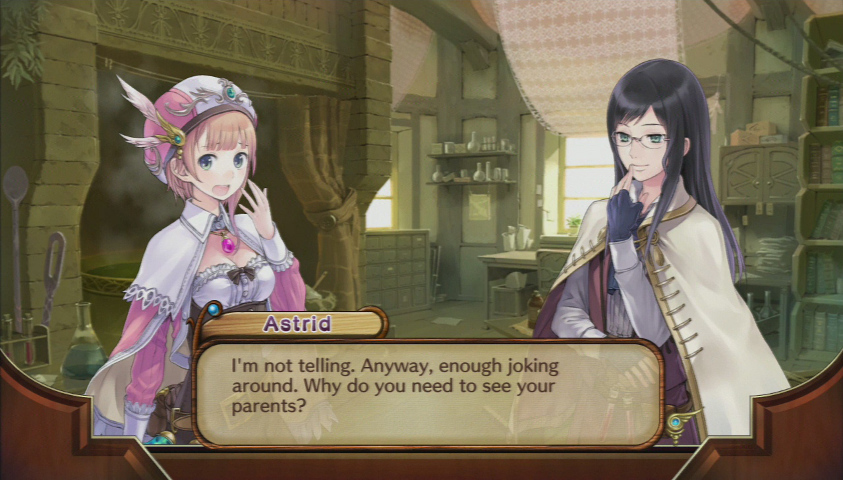 Was she really joking...? Anyway, it’s no big deal, but I just wanted to tell my parents about what’s been going. Oh, I see. Sure, go ahead. Thank you. I’ll be back tomorrow morning.
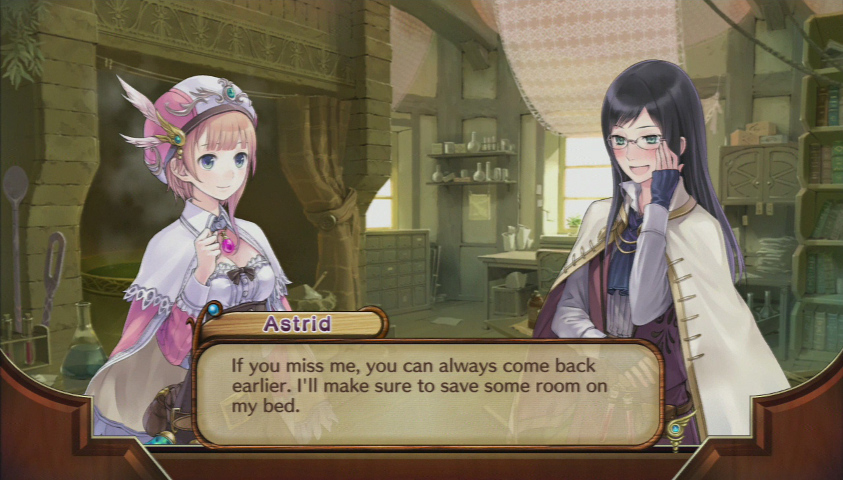 No, thank you!
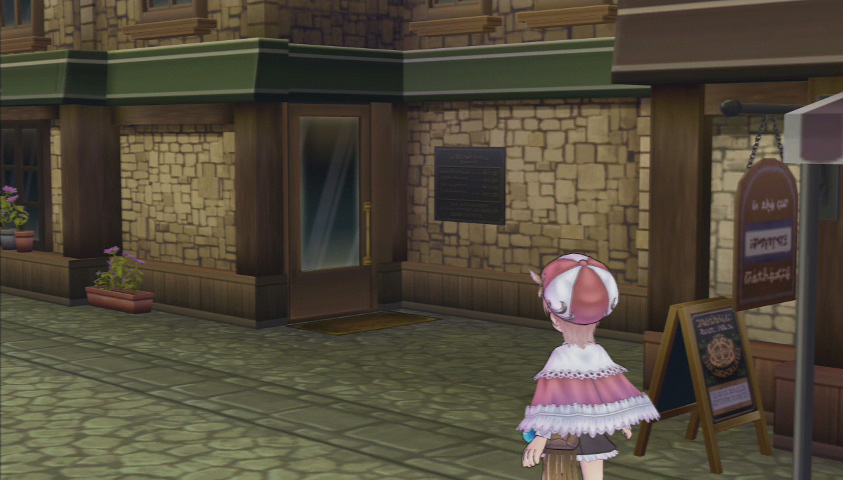
*fade to black, scene fades to Main Street*
 I’m home!
 Hi, Rorona.
 What’s going on? We weren’t expecting you.
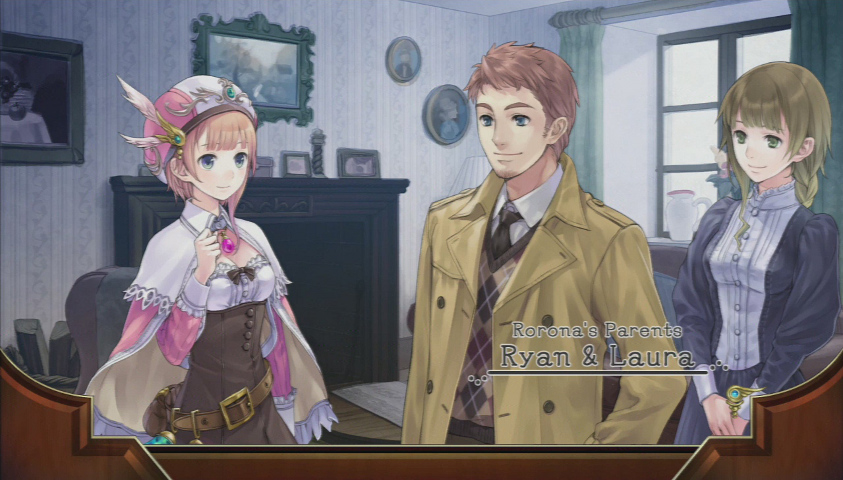
Meet Ryan and Laura, two of the most inattentive parents in video game history. But hey, there’s another RPG cliché this game defies: both of the protagonist’s parents are still alive and well, and not like secretly evil or something.
I have something to tell you…*fade to black*
Oh, uh huh, that’s too bad. You don’t sound very sympathetic… Hmm…well, you shouldn’t worry too much. You’re in good hands with Astrid.Something I just noticed: Ryan and Laura are wearing pretty normal clothes. There’s nothing particularly silly or video game-y about them, so where did Rorona get her current outfit? I’m probably thinking too much about it, but I certainly wouldn’t put it past Astrid to give her some clothes like that.
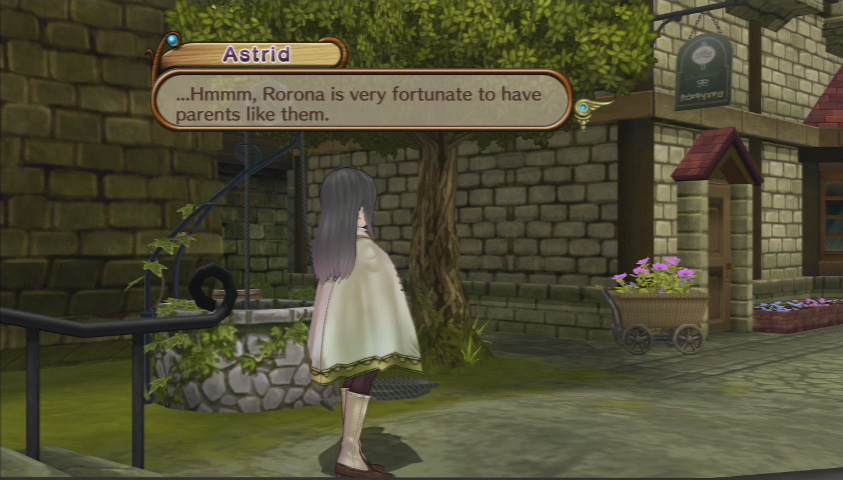
Actually, Master always seems to make things more complicated… Anyway, I’m going to be busy for a while, so I won’t be able to come visit you as often as I used to… It’s good timing, anyway. ...Good timing?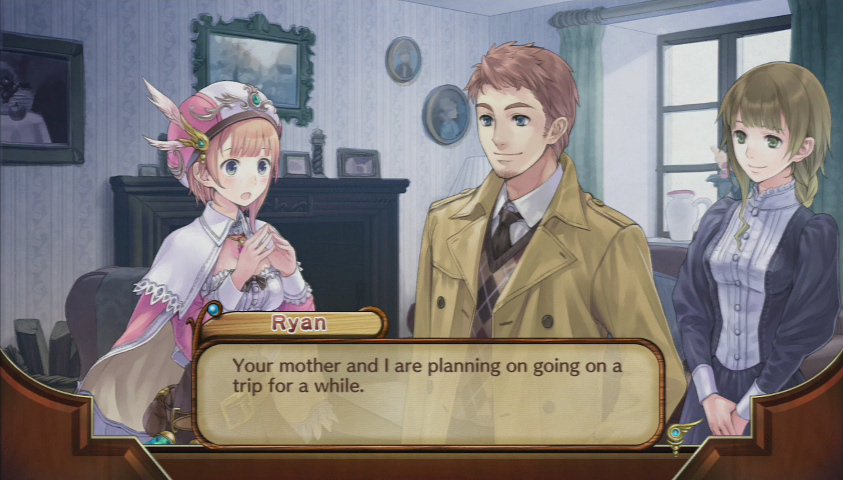 We want to go visit some places by ourselves. Just the two of you? What about me?
This just hasn’t been a great few weeks for Rorona. Though, now you know why Astrid has be Rorona’s mom, basically. Because the real one is nothing if not absent. It’s interesting that Rorona apparently got her eye and hair color from her dad instead of her mom, as you might expect. Pink hair is about the last thing I’d think a video game male would have, but that’s Japan for you.
You’re going to be busy, right? Yeah, but…when are you coming back? Hmmm, in a month or two…? I’m not sure, actually. That’s so long... It’s not fair…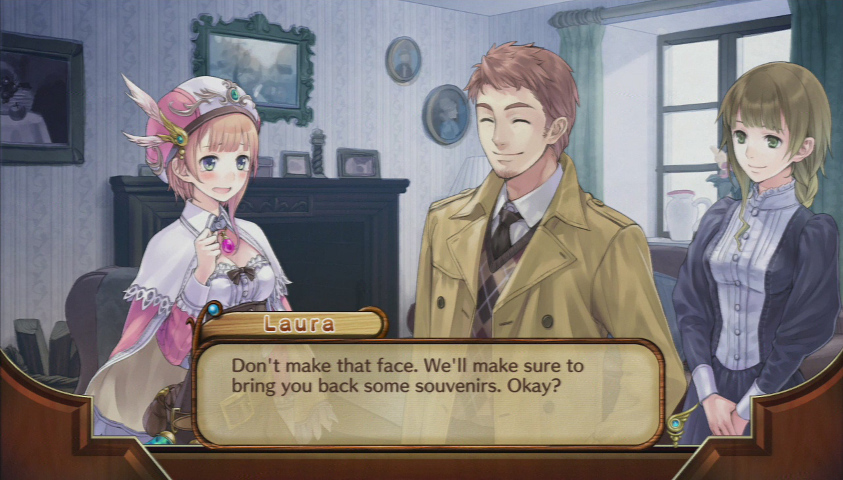
Another new little mechanic. Ryan and Laura will venture all over Arland, and every few months you return to Rorona’s home and see if they’ve left some materials for you to use. Most of the stuff they bring back isn’t particularly valuable, but it gets kinda silly in the last year. I believe the last time you can get stuff, they’ll have a Dragon Tusk for you. Probably better to not ask how or why.
And don’t worry. We’ll make sure to have enough fun for all three of us. Uggh, that’s not fun for me…*fade to black, next scene happens one day later*

I actually didn’t notice Laura’s ponytail until recording this scene. Although it’s there in her portrait, it’s still a fairly easy detail to miss.
Please take good care of our daughter.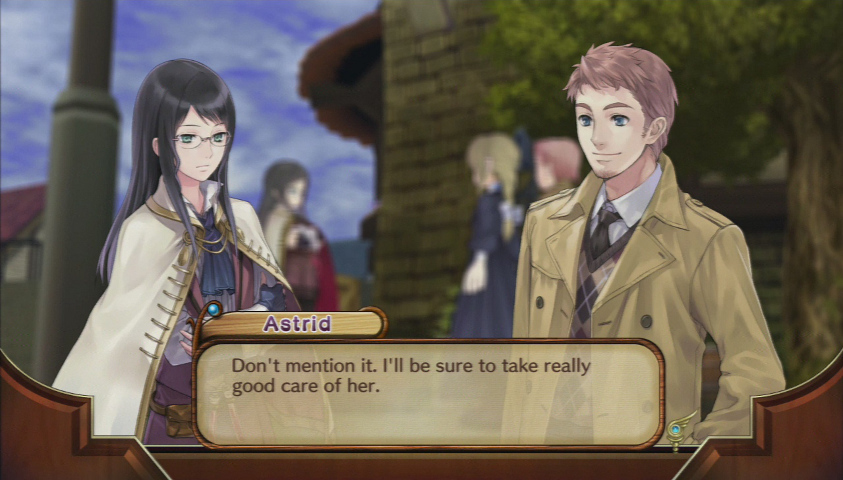
One really has to wonder why Astrid’s definition of “really good care” is…
Thank you. Rorona is so lucky to have such a great master as you. Hmhm, I’m glad you see that in me. But you two don’t need to leave town, you know? ...It’ll be better for her that we won’t be here for her to run into around town. Plus, we really want to go on a trip together alone. ...I see. Then have a safe trip. Thank you. We’ll see you when you get back.*Ryan and Laura leave*
*fade to black*
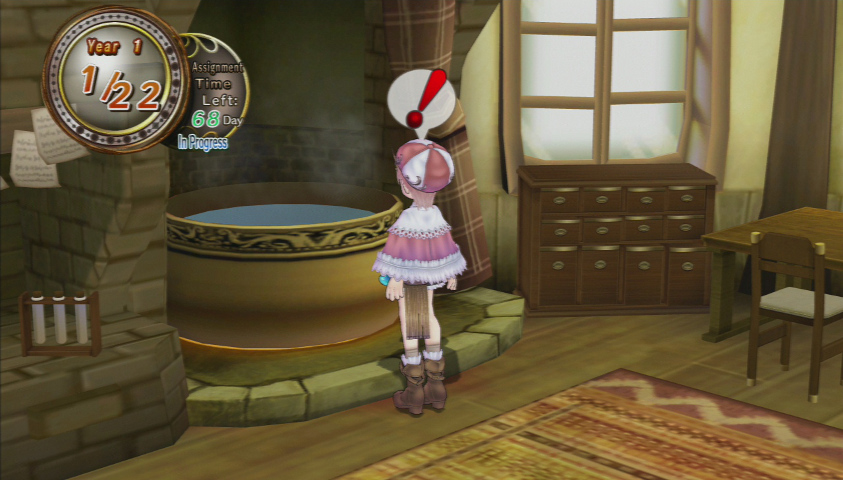
So now that we’re done with that scene, let’s talk about the eponymous alchemy. To start off, approach the cauldron in the back.
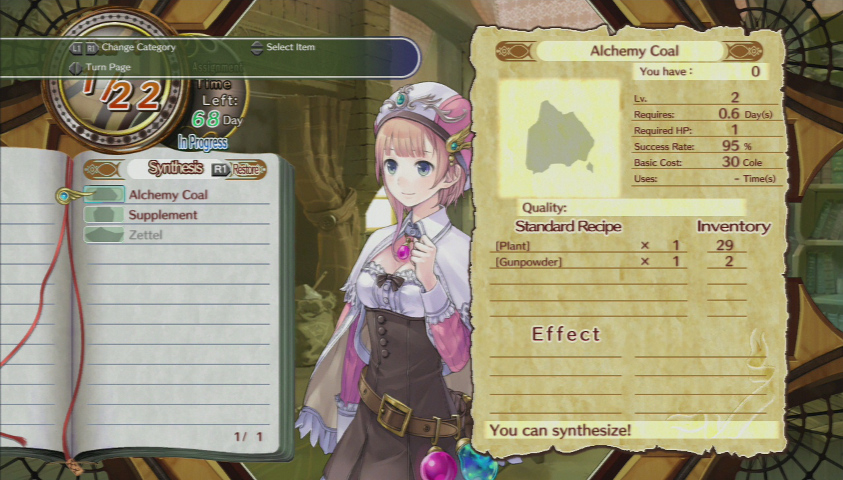
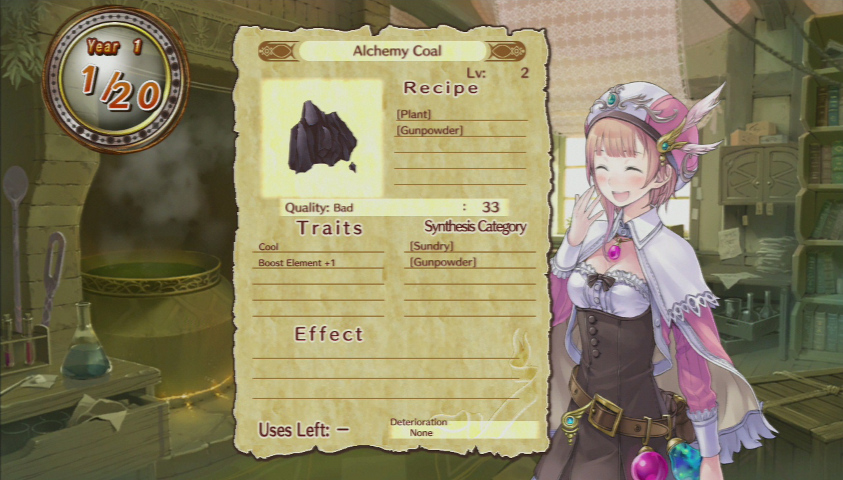
The main alchemy menu. Like with the battle screen, I’ll go down the line and explain everything. Lv. Indicates what alchemy level the item in question is. As the alchemy level goes up, your odds of success lessen. While you could easily save scum alchemy, I’d rather not if I can help it. If Rorona’s alchemy level is equal to or greater than the alchemy level of the item, you’ll have a 100% chance of success, but there are a couple traits that will nosedive your success rate (up to 50%). I’d avoid those like the plague, as the simplest item, the Supplement, can be failed with that trait on the item even at the maximum level, 50.
Requires means the in-game time it takes to make it. For Alchemy Coal, the 0.6 time means that if you synthesize one, you’ll still spend one day, but if you synthesize three at once, you’ll spend only two days.
Required HP means Rorona needs to have a certain amount of HP to make the item. This item needs 1 HP, but Rorona only has one HP currently, so she can only make one.
Success Rate means your odds of making the item. There’s another magic formula that governs how much EXP you gain for synthing an item above Rorona’s alchemy level, on par with her level, or below her level. Makes sense that you get more EXP for making tougher items than easier ones.
Basic Cost is the base selling cost for the item in question, which you can modify by making it more expensive or cheaper to sell. Uses doesn’t apply for this item, but it too can be modified for items that are usage-based. It goes without saying you need at least one of every ingredient to make the item, but there are some items that can be used to make themselves. For example, Alchemy Coal needs a gunpowder item, but it counts as gunpowder itself.
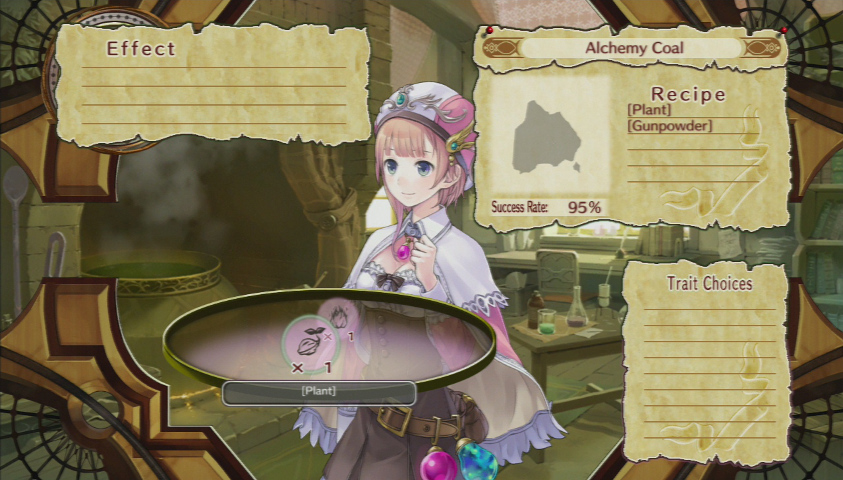
This is the ingredients selection screen. If I was wanting to create better items, then I’d want to watch the Traits screen in the lower right corner closer. Applying traits to basic items like this, then passing on those traits to more advanced items, is a staple of the alchemy system in this game. If you have more than five traits on an item, only the first five that appear will be on the final product. To be honest, this is a bit unwieldy, so if you want powerful items, it would definitely help to pay attention.
The success screen. If we somehow failed with a 95% chance, then we’d get a broken item that had Cool and Boost Element +1 on it, which is only good for recycling into a Supplement, which are your best friends. Supplements are awesome because they can attach virtually any trait, which makes it very useful for passing on traits that would otherwise not be able to be attached to the item directly, assuming it requires a Supplement, of course.
The Quality level there is affected by Rorona’s alchemy level, as well as the average quality of the ingredients used. As with many things, you can boost the quality via traits if you can find materials with those traits, of course. Boosting quality affects how effective the item is, for example a bomb’s power, or a Healing Salve’s healing ability.
It’s a totally nerdy thing, but I really love seeing how I can use the alchemy system to create new items. Totori and Meruru do it better, but the sheer amount of traits there are, combined with the freedom of how you can apply the traits, is really fun to play around with.
But that’s about it for the game’s tutorials. Some small things will come up here and there, but now that we’ve gotten the basics out of the way, we’ll start moving through the game at a much more brisk pace.
Next update, a lot of things will happen, but all you’ll really need to know is what Rorona’s favorite thing in the world is, and just how dedicated she is to it.
Rorona's home background
Castle background
Atelier Rorona background
Hagel's shop background
Rorona's Workshop CG

A Walk Through the Forest
The theme for the Nearby Forest. Living by a forest sucks when you have allergy problems... *sniffle*
Full Bokko
It's been a while since I last created a comical battle song. It's a combination of synthetic and traditional sounds, which makes it very pop-ish.
Today's Victory Pose
This one used to have more of an orchestra theme, but it didn't match that well after the transition from a battle song, so I needed to make a whole new jingle. I'm looking forward to seeing the victory poses of the characters in this game.
Confused Thoughts
I had a different workshop theme during the development, but I tossed that idea afterwards. This song has a little bit of that tossed idea in it.
Father and Mother
I was told that they're more laid-back than Rorona, so I made a very slow, laid-back song.

Since we've just started synthesizing, I thought it'd be fun to do a brief overview of the history of real Alchemy. This is in no way meant to be a comprehensive examination of the subject, as such a thing would be impossible to do justice in end of update bonus content. Alchemy has a long, long history, and it's actually quite entertaining to read about real Alchemy and how it relates to this series. I found, much to my surprise, that these games are actually fairly faithful to the actual field of Alchemy.
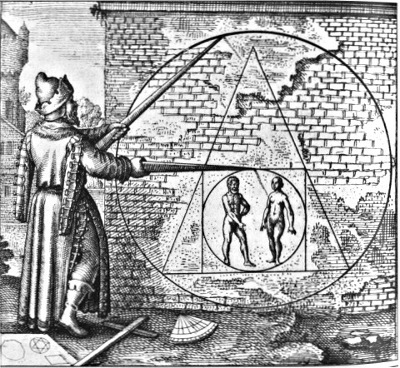
Firstly, what IS Alchemy? This is actually a pretty good question, as it's never had a really comprehensive answer in the way that the modern fields of, say, Biology or Astronomy has. I found this quote on Wikipedia, and honestly it's about as good as you're going to get. Me trying to make my own definition would likely only expose how little I actually know about it.
Wikipedia posted:
Alchemy is the art of liberating parts of the Cosmos from temporal existence and achieving perfection which, for metals is gold, and for man, longevity, then immortality and, finally, redemption. Material perfection was sought through the action of a preparation (Philosopher's Stone for metals; Elixir of Life for humans), while spiritual ennoblement resulted from some form of inner revelation or other enlightenment (Gnosis, for example, in Hellenistic and western practices)
Yeah, so we're looking at some heady stuff already. But to make a really long story short, basically the European branch of Alchemy (as opposed to Chinese or Indian Alchemy. These games seem to borrow from European alchemical tradition rather than Japan's closer neighbors) originates in Hellenic Egypt, where protoscientists began combining elements of philosophy, religion, and the technology of the day to begin to devise the first key aspects of what would later become Alchemy. The Greek god Hermes can be thought of sort of as the patron god of early Alchemy, and indeed, the Hermetica was the first real text we know of that began talking about the subject. These early alchemists also borrowed the ideas of Plato and Aristotle, who supposed the existence of certain natural elements, most prominently Wind, Earth, Fire, and Water, and an overarching element called Aether (which is why Wind, Earth, Fire, and Water are so commonly seen together in fiction. Dates all the way to Ancient Greece). Come the 15th century, and a writer by the name of Paracelsus decided to assign what he called elementals to these elements (Sylph or Sylphid, Gnome, Salamander, and Undine respectively).
It wasn't until the fall of the Roman Empire in Egypt that Arabic writers began taking up the subject, and the word "Alchemy" even comes from Arabic. The difference between Arabic alchemy and Hellenic alchemy was the latter was far more philosophical in nature, but Arabic writers began to treat the subject a bit more seriously, documenting their theories in books and actually running experiments. The most influential text produced was by Jābir ibn Hayyān in the 8th century, whose influence on European alchemists can hardly be overstated. Jābir was the first to formally combine the four Classical elements together into one system, as well as sulphur, mercury, and salt, which all had different roles within his system. As Arabic writings began to float over to Europe via Spain in the 12th century, many curious people decided to look into Alchemy to see if there was any merit to it.
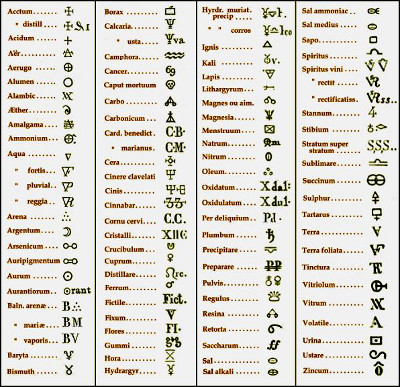
What were these alchemists after? A number of things, but most famously the ability to change "base" metals such as lead into "noble" metals like gold or silver, a panacea (better known as an elixir, which also comes from Arabic), a potion for vastly elongated or perhaps eternal life, and some even dreamed of creating artificial humans called homunculi. Remember all that, as that may not be the last time we hear about those goals...Anyway, the Holy Grail of alchemical research was the "Philosopher's Stone", which was said to be capable of wonders beyond the human imagination. Even in this early period of research, alchemists were the subject of skepticism, especially since ANYONE could be an alchemist, and there were really no rigorous standards for the practice. Any crackpot could claim to be one, and in turn devalued the whole profession. For what it's worth, during its heyday it was taken very seriously by its practitioners, and through their research created the foundations of modern chemistry. They created an entire alphabet that represented concepts related to the study of the field, and even eminent scientists like Roger Bacon and Sir Issac Newton were alchemists. I suppose to sum their research up, they were on the right track, but they were chasing phantoms with what they were trying to accomplish. They certainly weren’t all charlatans as future generations may have labeled them. And actually, I take back that comment I made about Renaissance Germany being a strange place to set a game based around Alchemy, because apparently Germany during that time was a hotbed for alchemical research. I certainly wouldn't have expected that level of detail to go into a cutesy Japanese RPG, and it just seems like way too much of a coincidence for that to be unintentional.
As the Scientific Revolution rolled around, Alchemy gradually began getting phased out. Alchemists couldn't turn in concrete results for what they said was possible, and the introduction of the early scientific method and how a new generation was tackling inquiry into the natural world hopelessly antiquated Alchemy. Alchemy continued getting a very bad rap for the next few centuries, until modern scholars began examining Alchemy and finding important prototypes in Alchemy for chemistry and the like. A late irony in the history of Alchemy is that it actually IS possible to transform elements into gold and the like, but the problem is that it requires a nuclear power plant or a particle accelerator, and the isotopes of gold last only for a few seconds before breaking apart, due to instability. It is possible, but it really boils down to "Why would you do that?"
Hopefully that was at least somewhat interesting to read, but like I said, writing a whole dissertation on the history and study of Alchemy is far beyond the scope of what I wanted to do here. If anyone wants to add anything or correct anything I wrote here, please feel free.