Part 14: Chapter i: "It is there because I decided so."
Chapter i: "It is there because I decided so."(Missed Content)
Demon King Chronicle has a lot of stuff, and that means there's a lot of opportunities to miss material. Some of it's important! And I didn't even know about the existing Japanese documentation stuff when I started, so I didn't do all the planning that I should have. So this update plays catch-up.
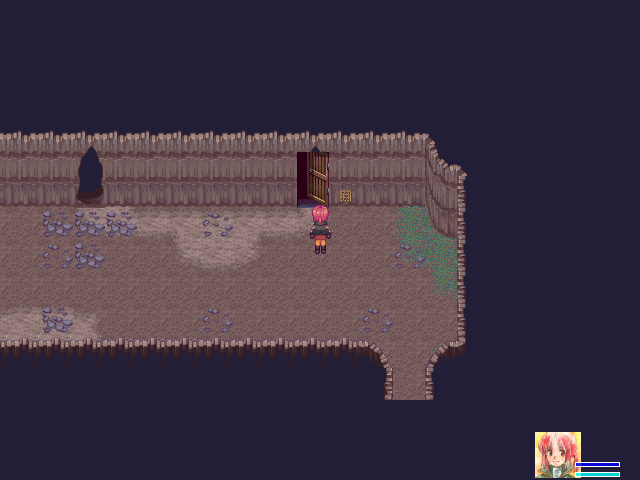
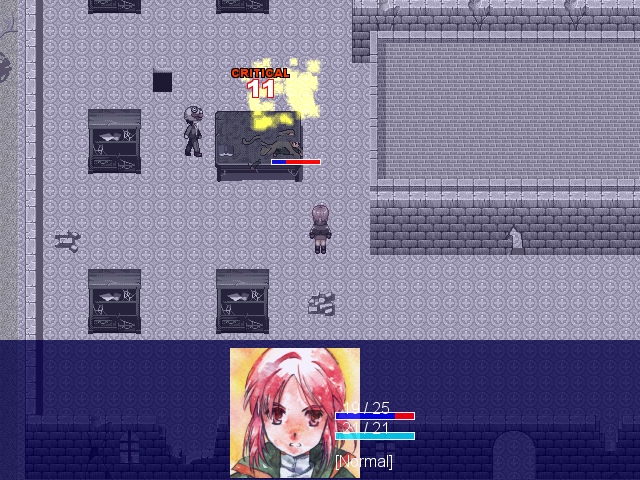
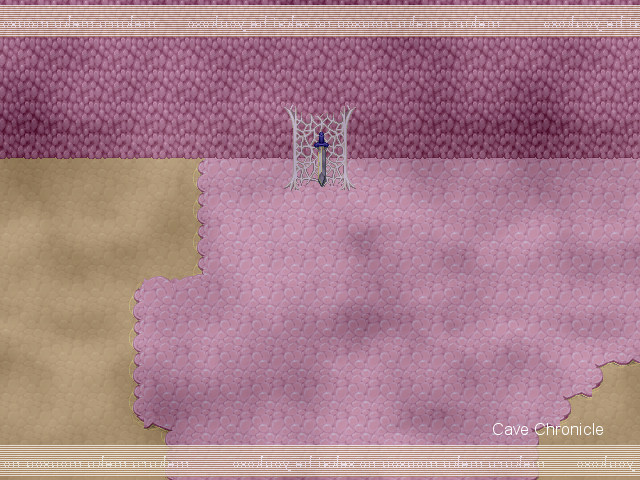
First! As pointed out in the thread, there's a special bonus for playing in a rather unconventional way: instead of talking to Laylaria at the start, just turn right around and head for the Demon King's Castle.
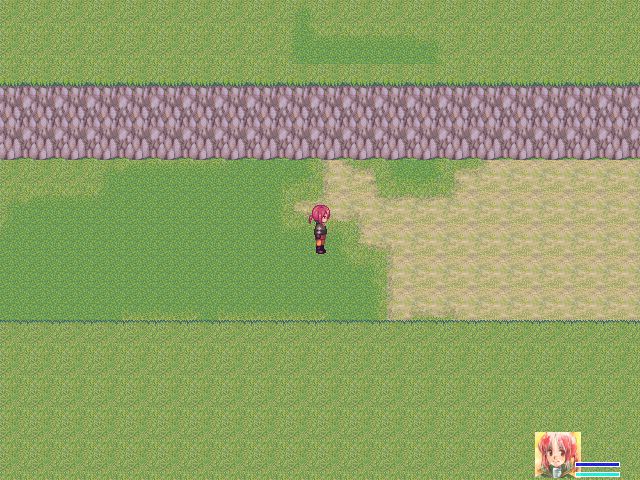

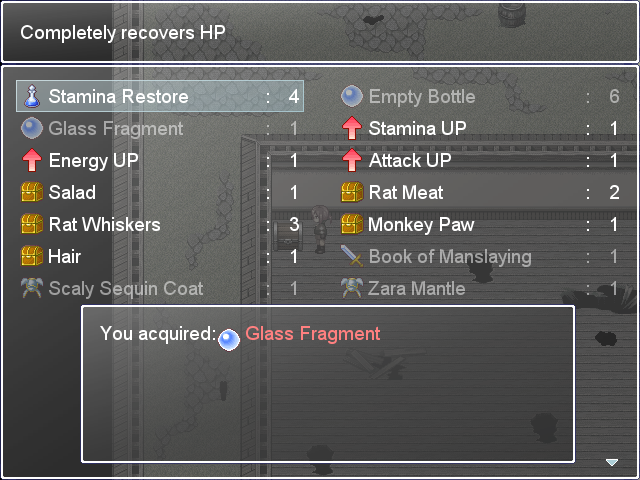
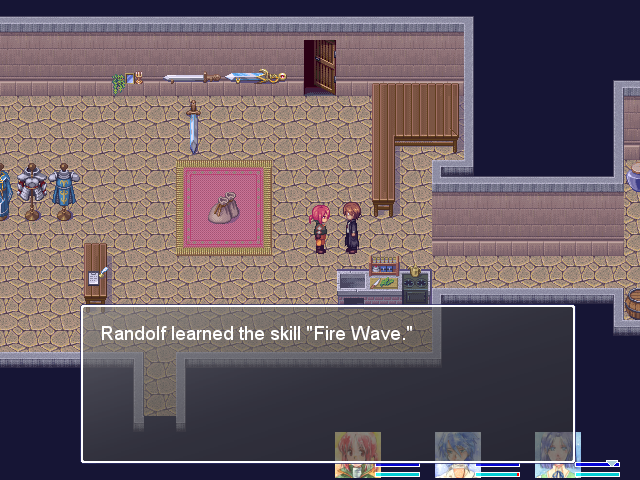
No one shows up until you talk to Laylaria, so you can't get Glass Fragments. Talking to no one means the shop doesn't open, so you can't get Fire Wave. (Though you get something for holding off, so I do.) And no Fire Wave and no Glass Fragments means you can't get the first Empty Bottle near the entrance to the Demon King's Castle.
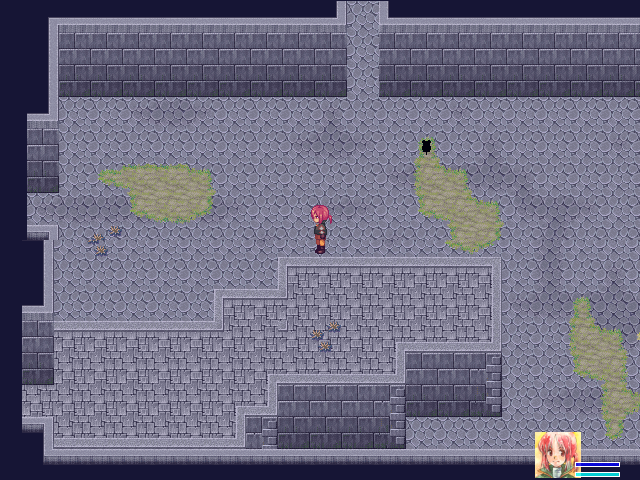
Thankfully...
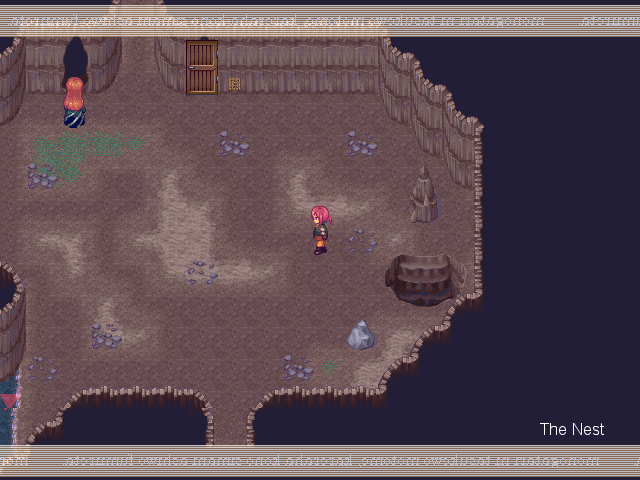
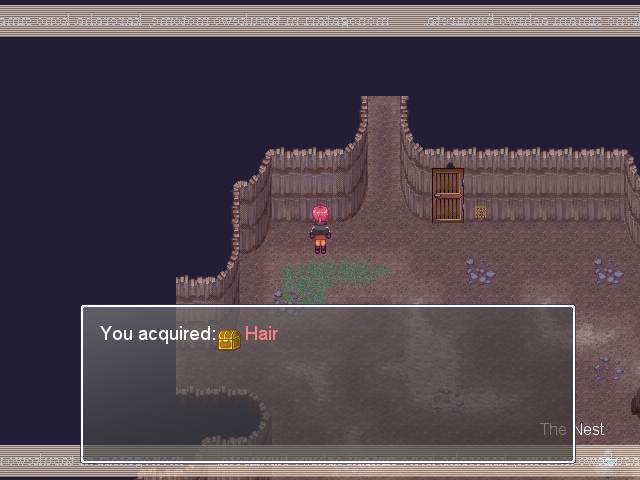
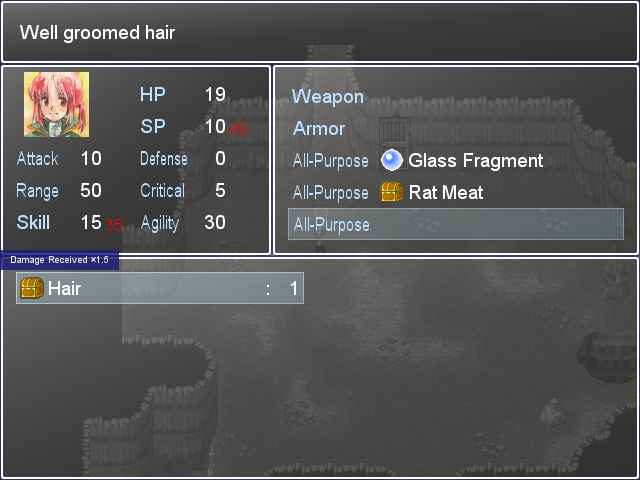
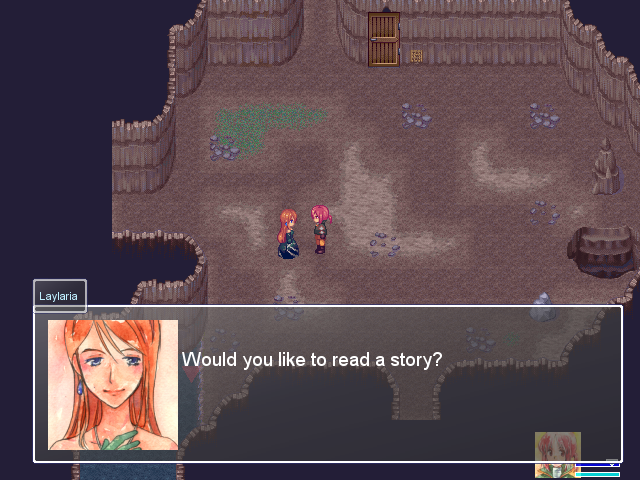
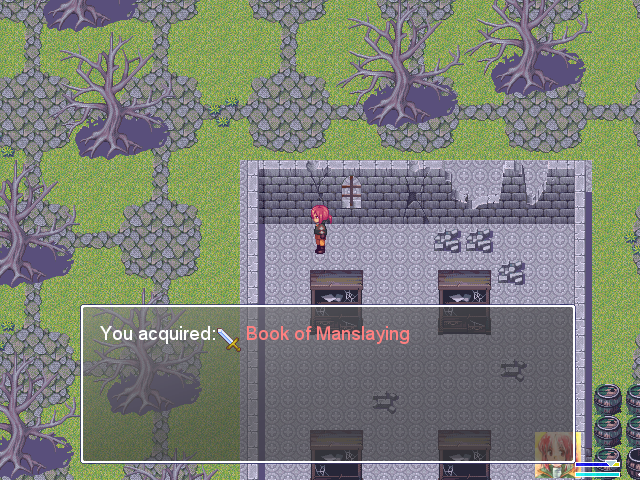
...getting to the Demon King's Castle is enough to trigger the event that you unlock by doing this. The Hair here allows you to get a second Chatty Barber, if you're so inclined.
Camil's room opens up as if you'd talked to Laylaria afterwards; she won't ever do her whole "here's your room" thing if you get the Hair this way.
 Why don't you pick a time when everyone is in and try visiting their rooms?
Instead, she moves right into her "visited the Demon King's Castle" talk, which I missed the first time.
Still no idea as to whether or not the stories on their desks actually exist. Maybe they do but the pictures don't? Demon King Chronicle's whole "everything is half metaphor" makes things like that kind of complicated, and that's before you get into "press x to open the menu" half-fourth-wall stuff.
Anyway, I don't go talk to Randolf. The "why" is a little complicated.
You see, I mentioned before that characters are still around even after they head off to their dungeons. This isn't quite true--rather, it's not always true. Some spots are special, and the characters appear there only if they haven't headed off yet. There's two of these locations for each character.
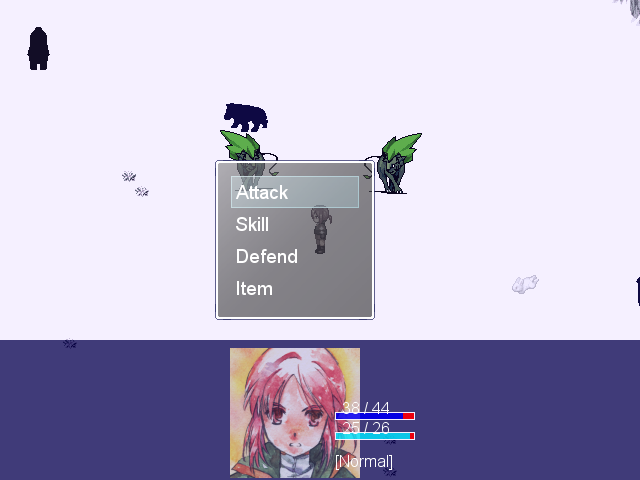
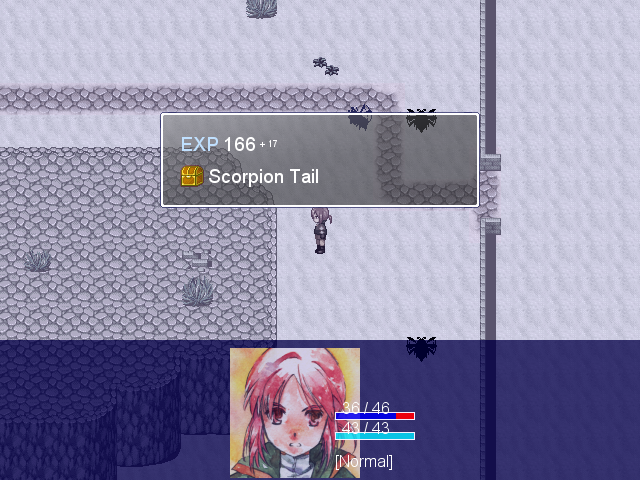
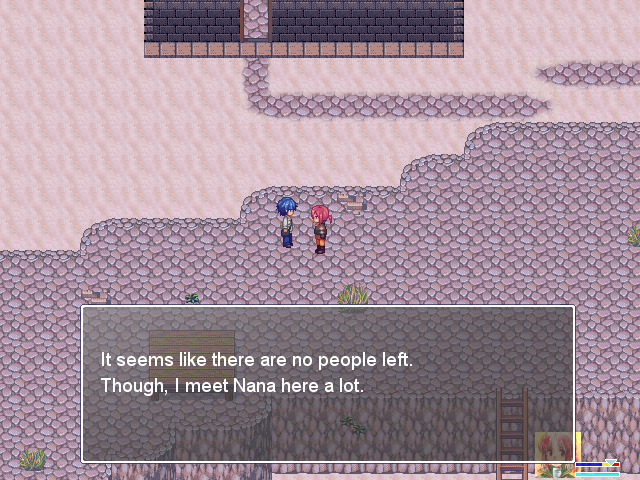
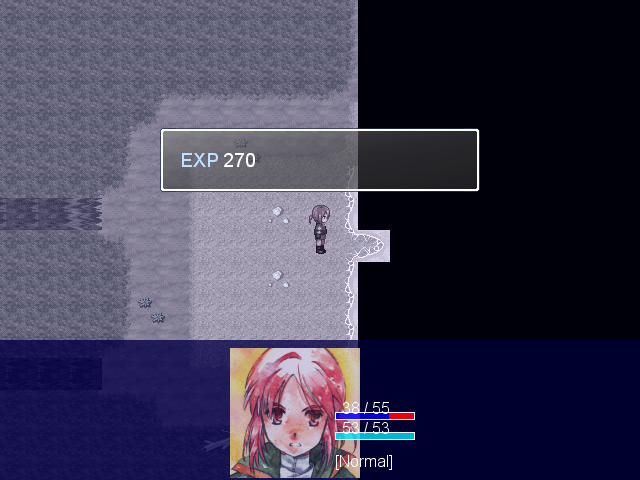
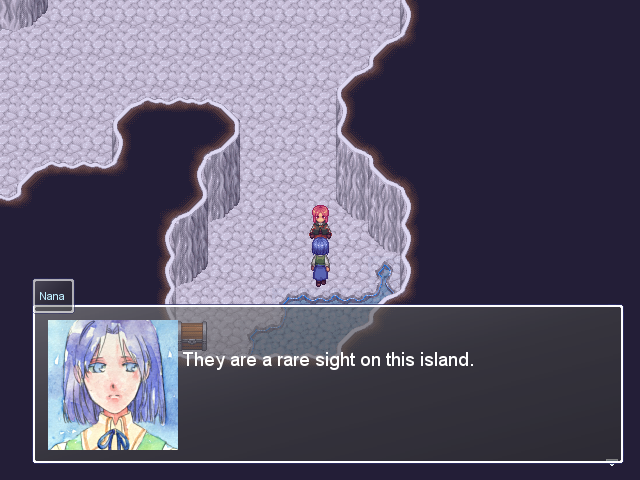
I've already seen both of Nana's missable conversations (at the scorpion house in the Hamlet and in the Sands) so I go talk to her in the Demon King's Castle instead of Randolf. Between there and back, Camil hits level 3 and levels up the Glass Fragments, allowing her to achieve proximate competence, by which I mean "can fight two rats at one time without being horribly mauled." So I go and get the Glass Bottle on the way to the Demon King's Castle.
This is also strong enough to fight one Frog at a time and one red rat if I'm willing to use a Stamina Restore, so I get the 5 gold, Magic Bean, and 5 gold from the area west of the save point. That lets me buy the Fine Pajamas, which get me through the rest of the area without any potion use at all. This includes the boss. (Who I very nearly die on, due to attacking when he seemed near-dead instead of healing. It worked out.)
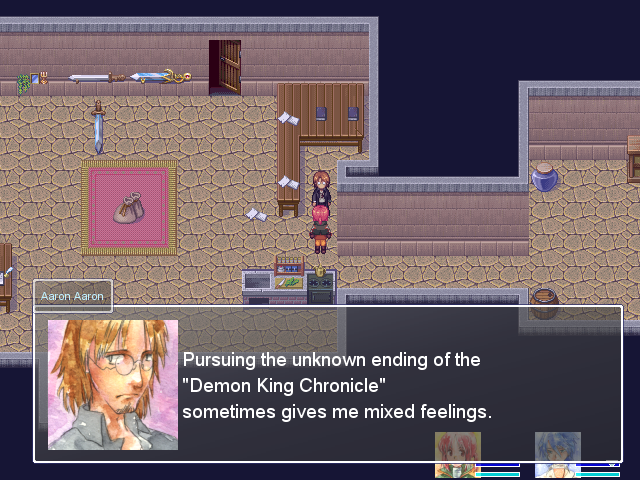
Good thing Aaron Aaron doesn't care if you buy things without talking to him.
Interesting fact: as an All-Purpose, the Fine Pajamas give -20 magic damage taken. Leveled up, that's -32. This is actually the second best magic defense item in the game, despite its poor stats otherwise. Additional random fact: apparently the red frog between The Demon King's Castle and The Hamlet drops 1 gold. Well, that explains that old question from the second update!
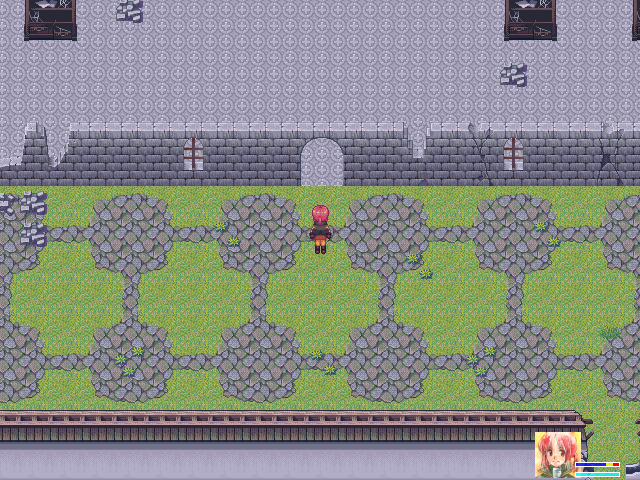
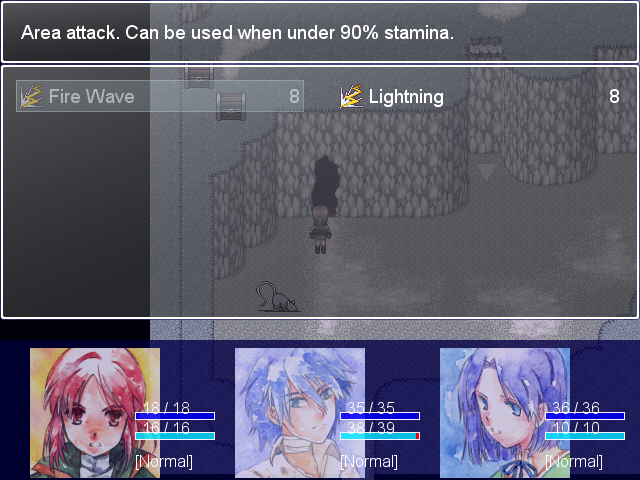
The problem with the Hamlet without Fire Wave:
That's the aftermath of one Monkey. Two would kill me, no question.
If the normal Hamlet is survival horror, The Hamlet without Fire Wave is stealth action and all the guards have real guns.
Fight log. First screen: one Monkey. Second screen: no enemies. Third screen: one Monkey.
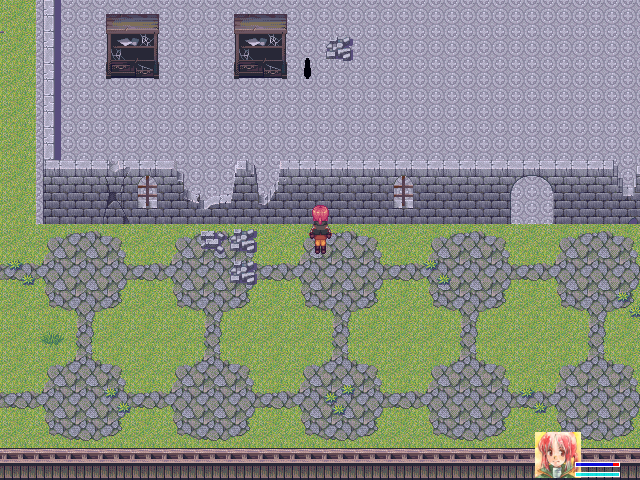
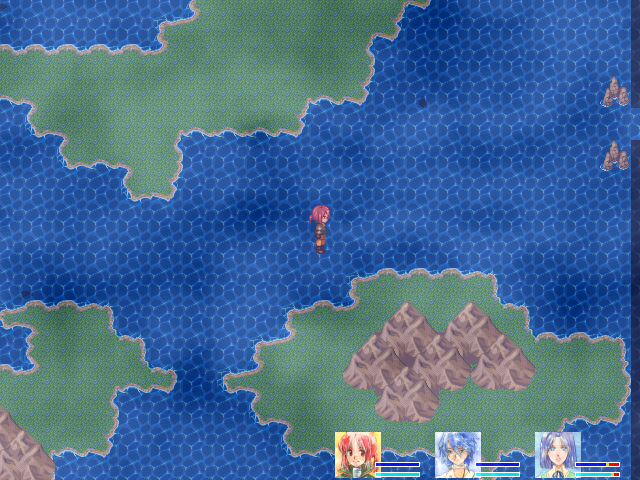
This wide field area makes it easy to avoid enemies. It's a good place to go.
Fourth screen: no enemies.
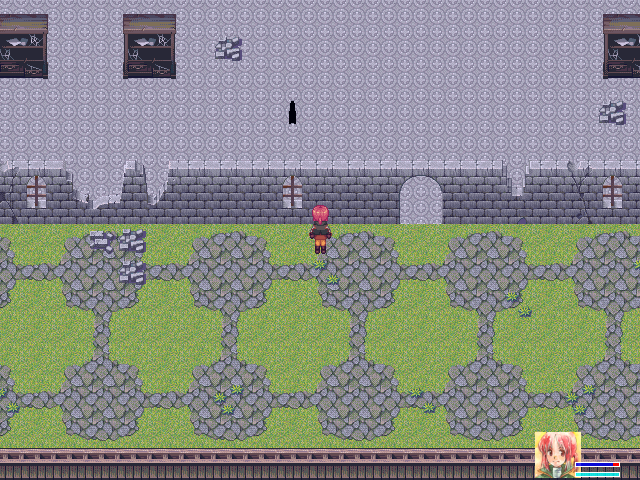
Fifth screen: no enemies.

Sixth screen: this monkey, because it's basically required.
The Coat and the Salad let you breathe a little easier, since Monkeys become much less dangerous. And even with the two Glass Fragments I have equipped, I have enough Fragments to get a third Bottle!
...then I promptly fight a Turtle + Monkey combo by accident, during which I use two Stamina Restores. Seriously, you don't have much margin for error here. Not much at all.
On the way to plant the Magic Bean for the Kelde Laude, I fight one red Turtle. A single one takes a Stamina Restore to kill, even with two Glass Fragments leveled up twice. Without Fire Wave, they are even more ridiculously tough than usual.
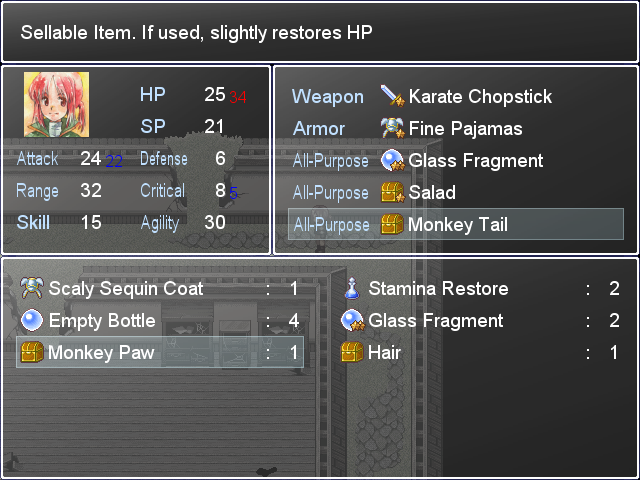
I hunt down a Glass Fragment or two, get a Monkey Tail, and build a fourth Bottle.
...which I need, because red Monkeys are goddamn MEAN without Fire Wave available. Ow.
It drops an item I never mentioned, in hindsight:
+9 HP. Basically no reason to get one when Turtle Blood is in the same area.
This is a little trick that was actually pointed out in the thread.
See this monkey?
Wait for him to wander over this way...
...then engage him and walk right through the trigger in the doorway, preventing the Killer Rats from flooding the house. All tile-based triggers are deactivated when you're preparing to fight--the best example of that is in The Tower, when you're around switches.
I have an inkling that this is probably not intended.
Do you remember what else Death Rat House is connected to?
The answer is, "the Her Memory area that connects The Tower and the Zara Mantle hole."
Camil is now, by the standards of the areas she should be in, a living god.
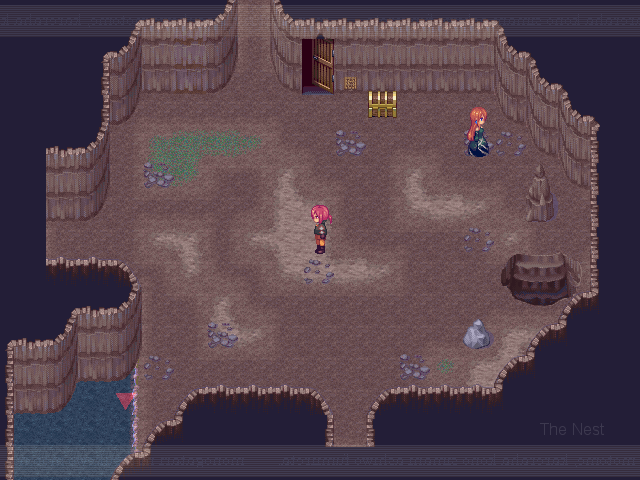
(I do forget to open up the way back to The Nest before dropping down the hole, though. Oops.)
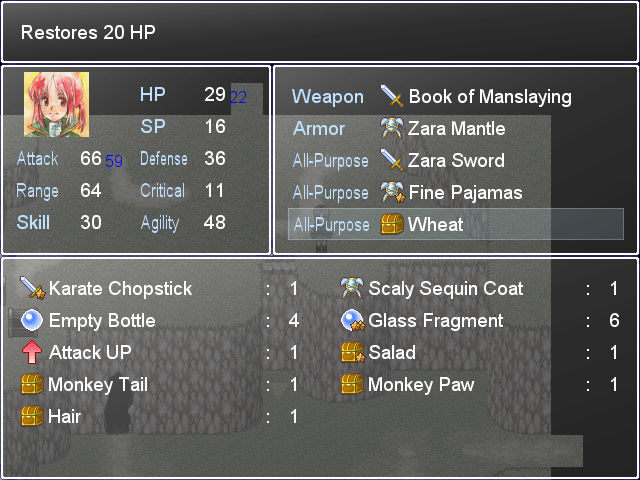
And hey, the Wheat at the top of the cliff is great at this point, too! +7 HP, +7 Attack.
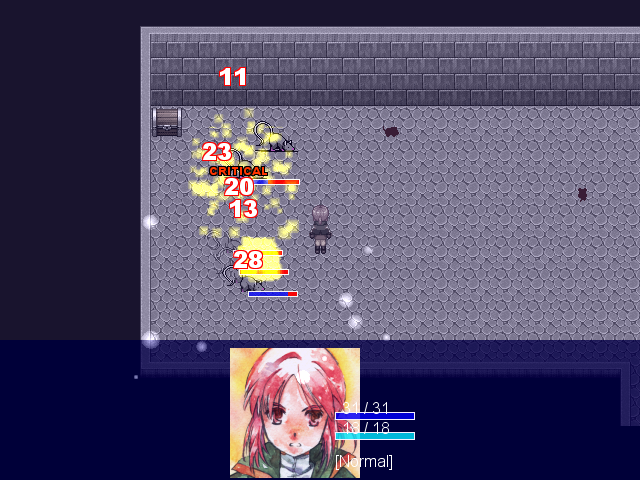
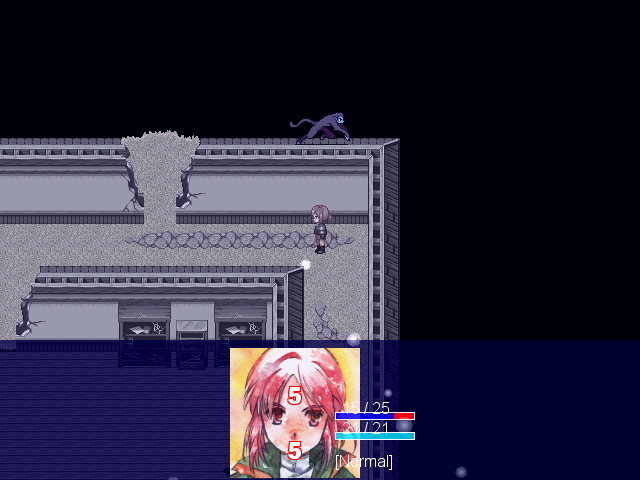
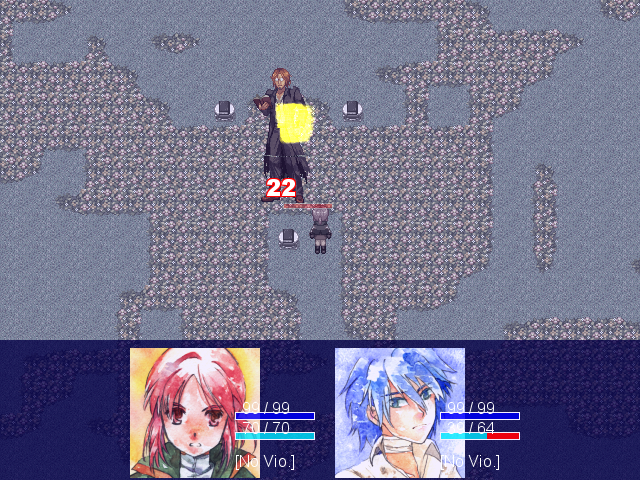
Camil versus a pack of Ferocious Rats, the red enemy of the Castle. Pictured: pretty much what happens with this gear.
Accidental discovery: you can press x just as you open a chest to have the menu up while you do it. It jumps straight to the item menu, for some reason? I'm sure there's some way to exploit this.
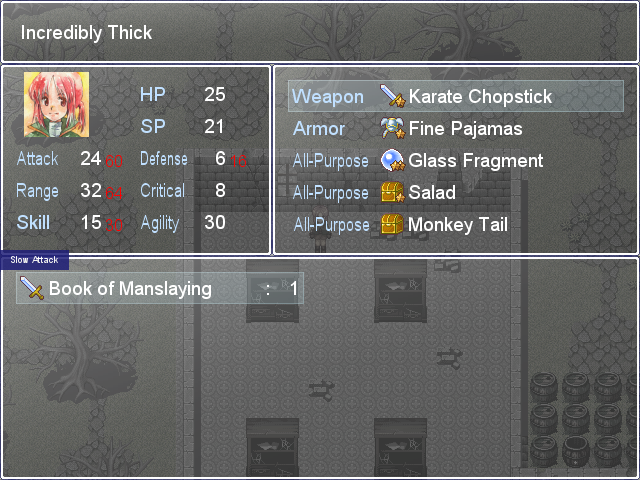
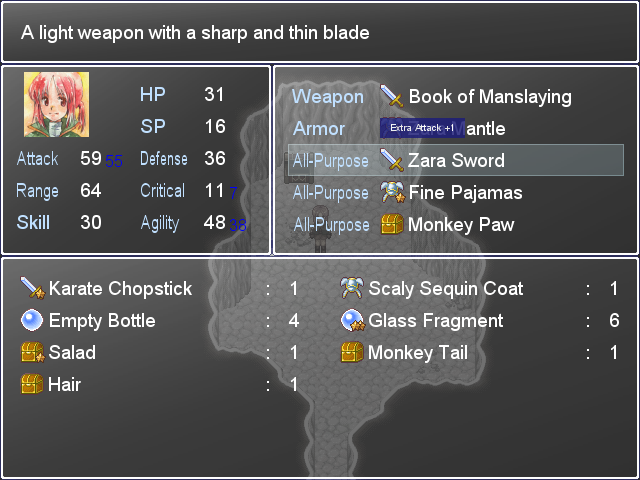
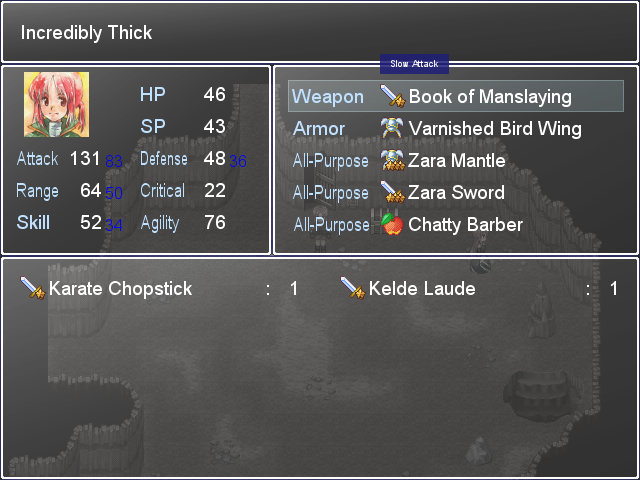
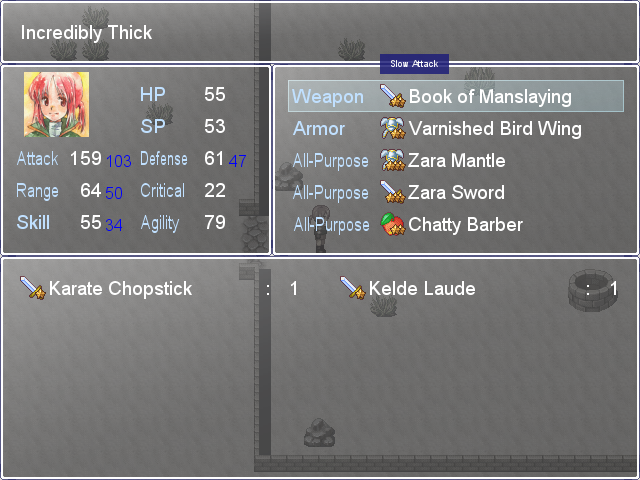
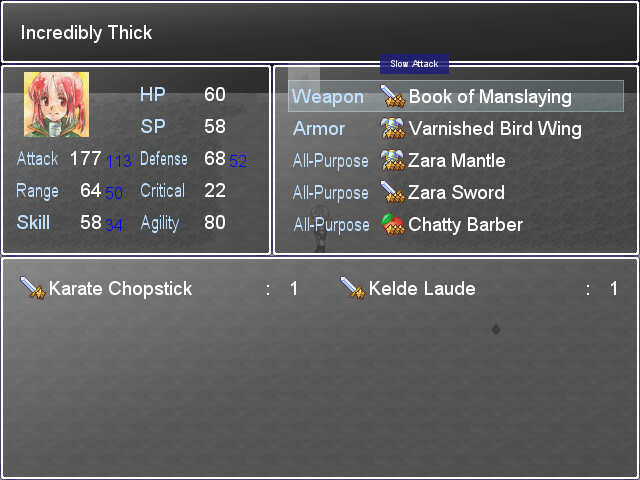
I go back and collect some of the chests I was missing. In the process, while considering what to level on the harmless enemies, I decide to show off the less invincible but even more ridiculous equip option:
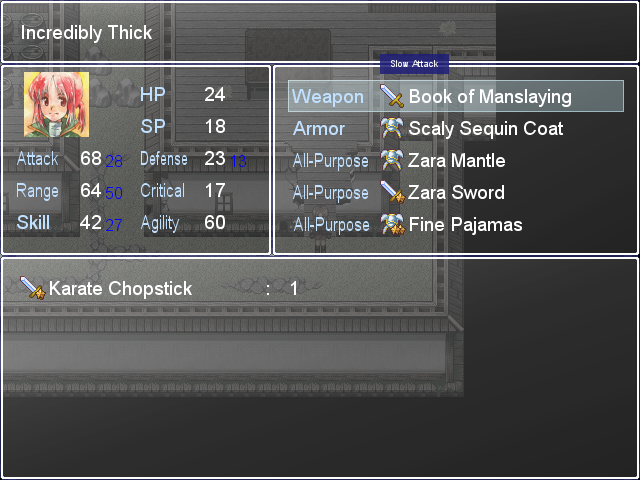
...where the one actual downside of the Book of Manslaying, Slow Attack, gets negated by the Fast Attack on the Zara Mantle. Coupled with the higher Agility and the Extra Attack+1 on the Zara Sword, this is a much more offensively potent set-up.

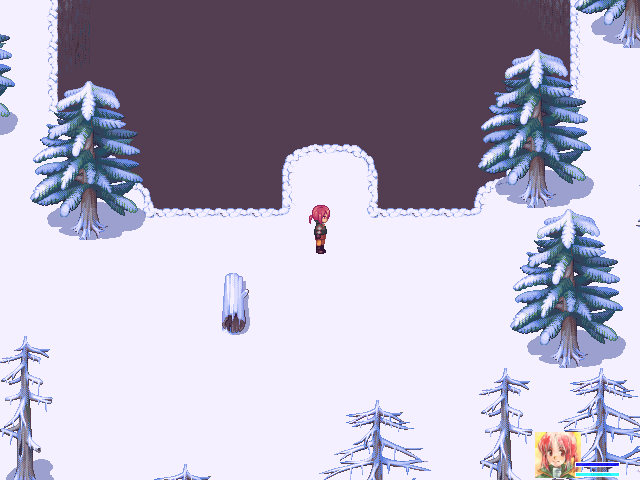
Something I forgot to mention: the first time you move through the passage to The Snow Fields, it's about five screen-lengths long and ends with a fade of several thin horizontal lines, an effect not really used anywhere else. And as mentioned, there's generally not really screen transitions unless you're going in or out of a Story.
I like to think that this means Camil gets annoyed by the length the first time and just edits it out of reality. She's the narrator, she can do that.
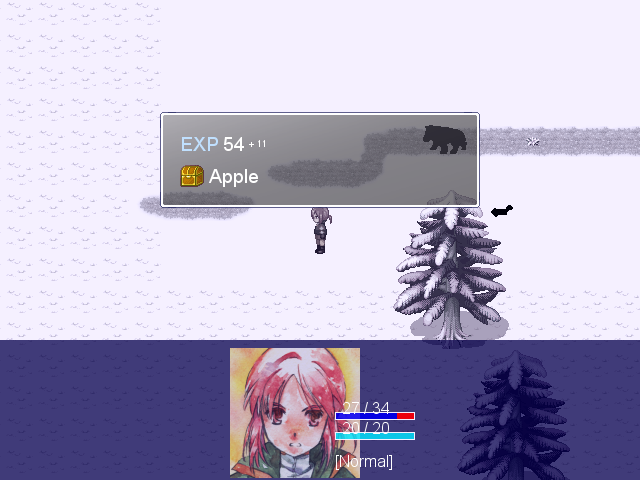
Correction from way back: Apples are actually the Abominable Snow Monkey drop, not a Mutt drop. Mutts drop Bushy Tails.
Red Mutts are actually still a little dangerous--they did that 7 damage to Camil in one hit.
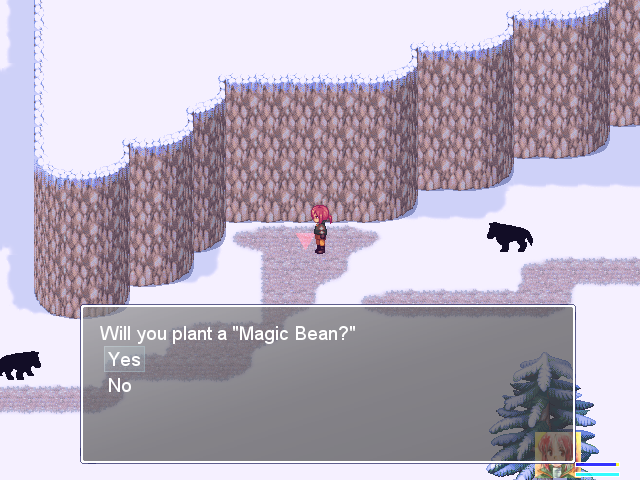
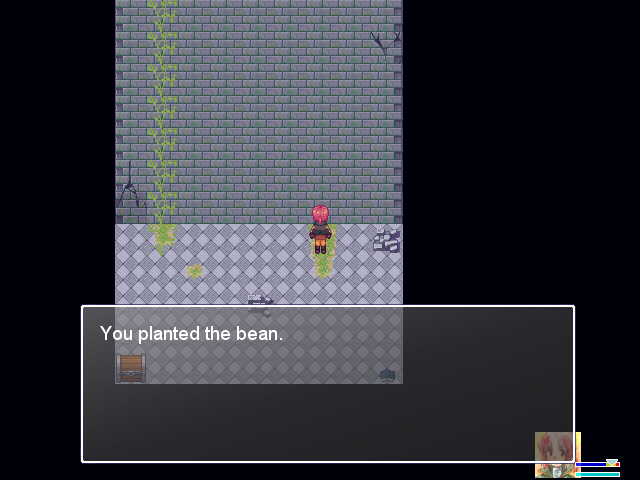
I collect the Magic Bean and plant it. Then I clear the rest of the area, because frankly nothing is a threat.
Along the way, I make a Twin Tail and pick up Critical +3, HP Regen Up, and Agility +4 Crystals for Camil, opening up to the third room. Shout next.
See the Lucky Rabbit? Isn't it cute?
 As I recall, it's the only enemy with a real map sprite instead of the silhouettes you usually see. (Not counting Laylaria or Aaron Aaron.)
The first missable in-dungeon conversation that I missed; Randolf's other missable one is just inside The Snow Fields, two screens before The Dragon Mountain. This one is just outside the entrance to Her Memory that also leads to The Sands (the front door, not The Tower).
It's a shame it's missable, because if you talk to him again, he has one of the most interesting lines in the game:

The way stories warp reality on this island seems to be common knowledge.

I didn't actually show off this exit before.
(Randolf says this, but he doesn't join up and there isn't an entrance to The Dragon Mountain here. It's weird. He does, however, leave that spot once he says this.)
This leads to a hole. It's the deepest one in the game...
...and surviving it is its own kind of challenge.
It is very definitely postgame stuff, especially since getting to the bottom isn't the end of it.
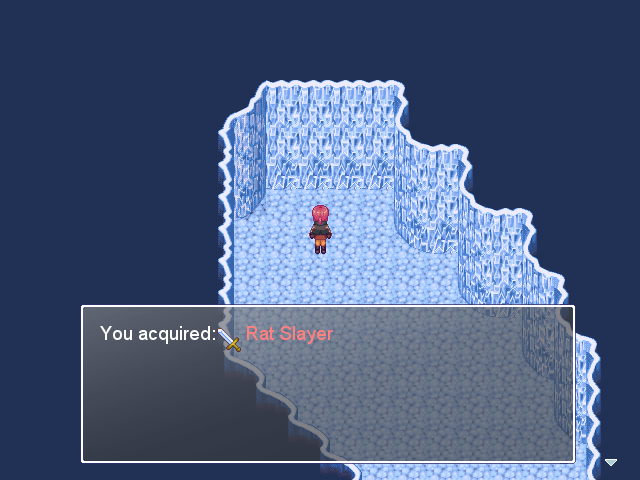
I don't pick up the Rat Slayer, for mentions already mentioned in the thread. I'll grab it once Randolf joins up.
That'll be a while, though. Randolf shows up at the end of The Seashore, so I won't be recruiting him until Camil can get to the end of that area on her own.
The Magic Beans in both The Hamlet and The Snow Field have grown in, so I pick up their items... Including the Lizard Tongue.
So I speak to Randolf a couple more times, triggering him to head to The Dragon Mountain, and head up.

This is the Decoration the White Dragon Knights on the mountain drop. It's a pretty good item for the period, giving +2 HP, +2 SP, and +10 Skill.
Also, note Randolf's stats. It's a shame I won't be keeping the Hair much longer...

...but it's really, really nice to get the Chatty Barber this early.
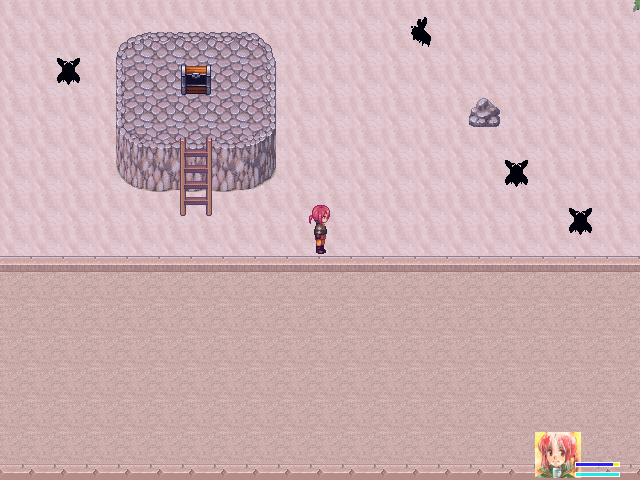
Camil is now strong enough to venture into the Sands on her own... So long as I'm careful. Red scorpions take anywhere from 2-4 turns to kill (Extra Attack +1 and criticals make it pretty variable) and do about 11 damage, but normals go down in one turn and blues in one to two.
That means this area is pretty easy. When you can take down most enemies before you ever get hit, then staying at high HP is a breeze. There aren't enough red scorpions to cause you serious problems.
Mostly this means taking out all the red Scorpions and taking advantage of their respawn timer.
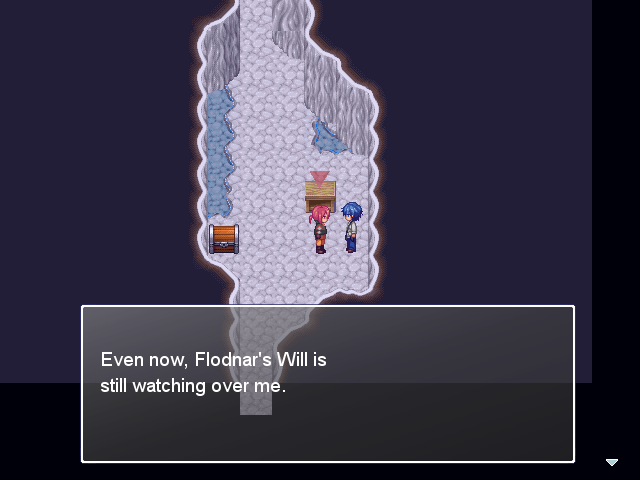
Only instance I know of where a character says the same thing both times (excluding "......", that is).
See? I told you this isn't that hard. If you can clear out Scorpion Island, then you're stronger than the Sands expects you to be.
Alternate playthrough Camil is basically the biggest badass.
Still haven't spoken to Aaron Aaron at all, so Laylaria's still hanging out here. She will be for a while.

Basically, this is just the Sands all over again. Spiny Eels are basically red Scorpions, Pirahna and Slippery Eels are Scorpions and blue Scorpions.
Camil books them to death, same as always. Just about the only difference is that she's already near to maxing out her items, so she won't suddenly jump +15 attack mid-area like she did last time.
That said, pirahna are more aggressive, so they're more likely to be a problem than scorpions. But it's not really any harder.
It's a shame Randolf stops talking once he joins up.
Also, he's definitely going to be horrifyingly underleveled when he joins up. Oh dear.
And again:
Sadly, not all conversations are very interesting.
Maxed out Camil in her current configuration. She's pretty damn impressive.
The next step is to talk to Kumo repeatedly, grab the Mask of Determination and Praying Mantis Axe, and use those. Camil can essentially simulate having the Book's attack range so long as you're judicious about your Inferno useage.
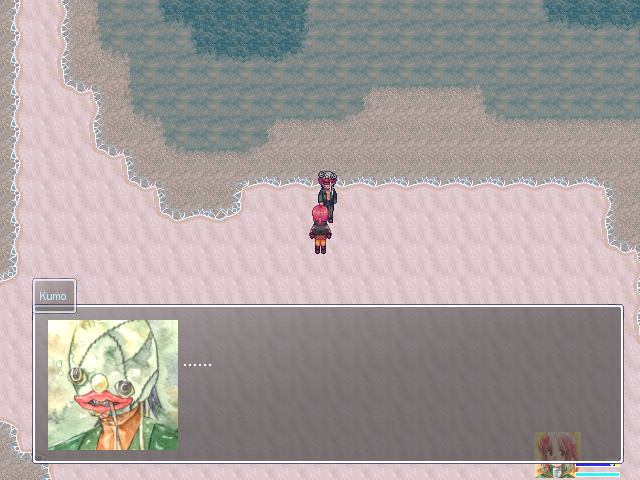
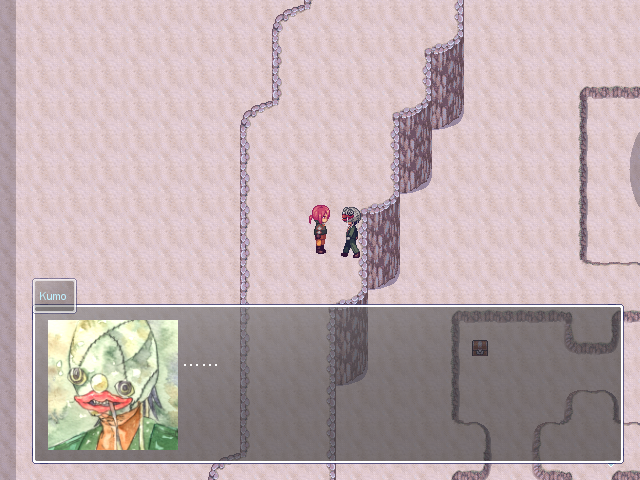
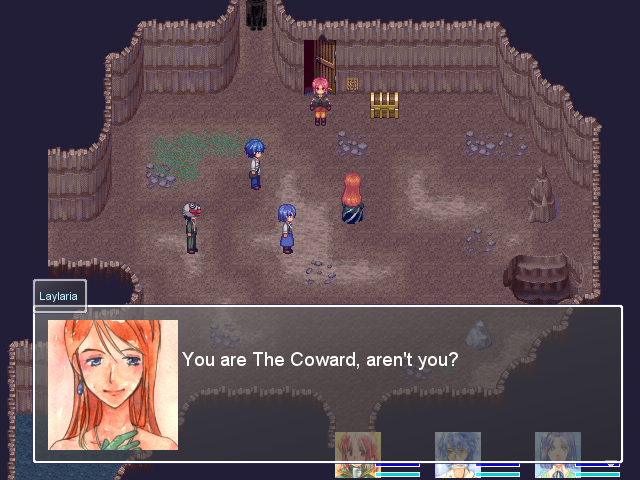
This is missable. Not that there's dialogue to miss, what with the "......" both times, but you won't get the Glass Fragment.
I do the Mole and Coward events. Aaron Aaron doesn't try to teach Camil Fire Wave any more.
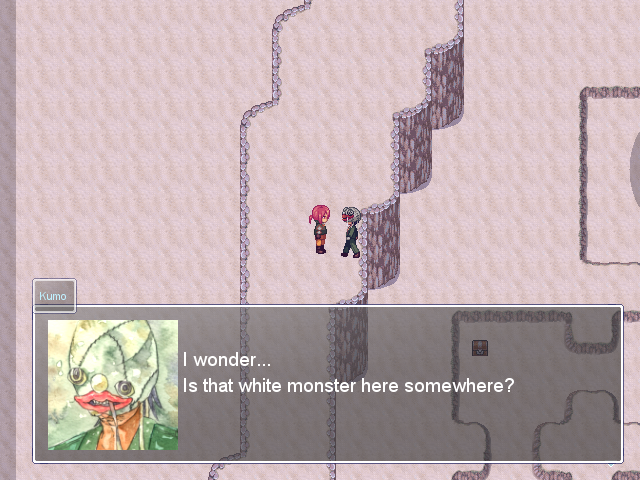
Kumo has a dialogue I missed, accessible if you talk to him after finding him four times.
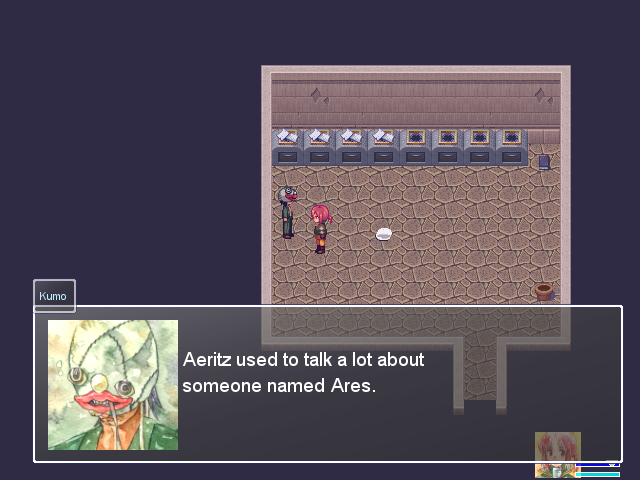
 Sounded like a real fun person to know. When Aeritz talked about Ares, he always had a really happy look on his face. He said Ares used to come and go from the island often. I wonder where they are now? Aeritz promised he would take me to see Aeritz some day. ...but that has nothing to do with you, huh? Forgive me.
Similarly, if you leave the room and talk to Aaron Aaron after the Coward event...
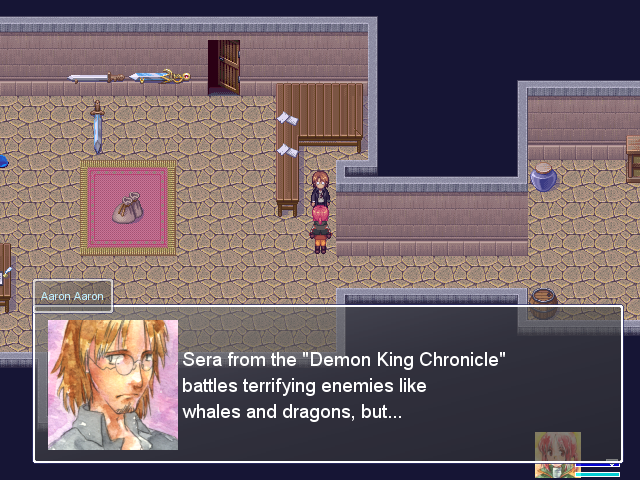
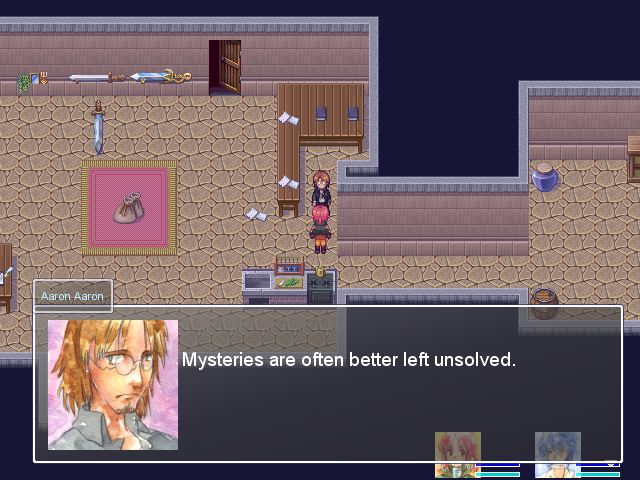
 The only weapon she carried from the start of her journey was just a single Long Sword. That Long Sword was, without a doubt, a magical sword of enormous power.
...man, you are shit at stories, Aaron Aaron. The point of identifying her weapon in the story as a simple Long Sword is to show that the wielder, not the weapon, was the source of her strength. That's really basic! ...which is actually probably the point. Remember Aaron Aaron's Glossary entry from last time? He's a bad writer. He can recognize a quality story, but that doesn't mean he can analyze it or really understand it. The fact that he's bad at it is entirely consistent with his background!
I find it interesting that Kumo doesn't know Ares's gender--"I wonder where they are now?"--when Aeritz apparently talked about Ares a lot. Sera is based on Ares, so Ares was probably female... Which puts Aeritz always happily talking about Ares in kind of a different light, doesn't it? Ares often returned to the island, so she's probably a native, and all of the stuff with Aeritz, Flodnar and Sera took place around twenty years ago. Camil's probably about that old.
In another story, Camil's parents never being mentioned would disqualify anyone as important as Ares and Aeritz. This one isn't really bothered with that sort of thing. She's the storyteller, not the subject... But it certainly does put her quest to complete the Chronicle in a bit of a different light if it's true, doesn't it, though? It'd be a pretty direct connection, and it'd lend a little more weight to Nana's description of Camil as "someone burdened by other people's stories" and Aaron Aaron's statement that "only you can finish this now"--Aeritz and Ares may or may not still be alive, but between Camil and Randolf, all three of the heroes would be represented.
Of course, this is only a theory.
Randolf gets the Book of Manslaying, Camil gets the Kelde Laude, and both get anti-Poison gear. She wipes the Dragon while Randolf plays cheerleader.
Hey, she's like 10 levels higher than him, I'm not expecting miracles here.
Randolf gets Light Axe and +15 Skill in a desperate bid to remain relevant. He does not, however, get Fire Wave.
You see, if you skip talking to Aaron Aaron the first time until after The Dragon Mountain, he's supposed to teach it to Randolf... But talking to five people, which starts his trap for the Coward, means he'll no longer teach you magic. Oops.
This means you actually can't see all of Randolf's conversations if you want Fire Wave on him, and you have to walk right past most of the others. You are incredibly unlikely to get Fire Wave on him without an exact guide to the process.
Randolf: still no conversation portrait. But yeah, as I mentioned back at the very end of Update 13, Flodnar's entry heavily suggests that we're probably in Randolf and Flodnar's old house right now.
And the kid managed to get back to relative civilization by himself while very nearly starving. Randolf: kind of a massive badass.
Another missable Kumo location. I haven't journeyed through the second part of the Demon King's Castle, so I've talked to him six times.
Again:
Back at the Nest...
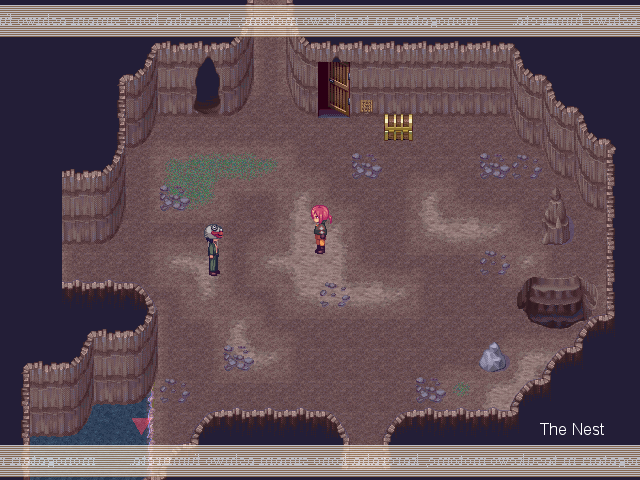
He leaves.
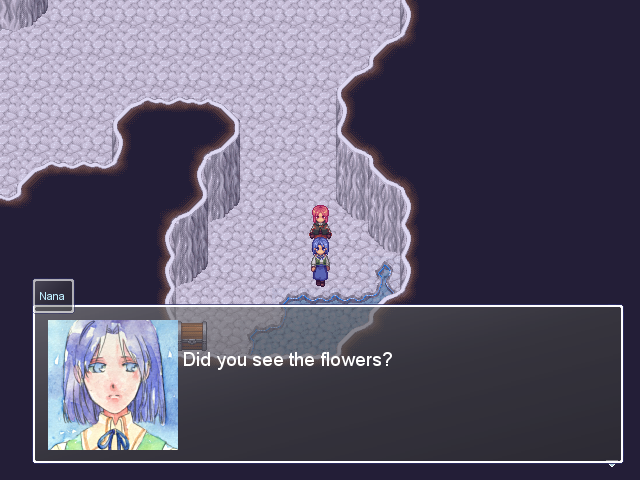
I almost forget to grab the last Nana conversation. Behold, the single most ridiculous replacement of one of these conversations:
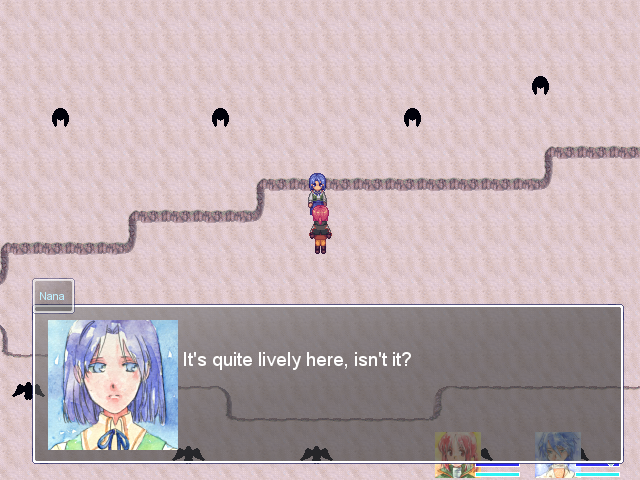
For extra style points, get this conversation while the birds are active and attacking. (Her second conversation is just "....." this time.)
And with that, I've shown off all the in-dungeon character dialogues! That's one thing ticked off the list.
The next step is The Tower. Camil's Ax and Mask are still level 1 and Randolf and Nana are horribly underleveled, so the first couple of floors are a pain in the ass. Then there's a few levels all around and the rest goes smoothly.
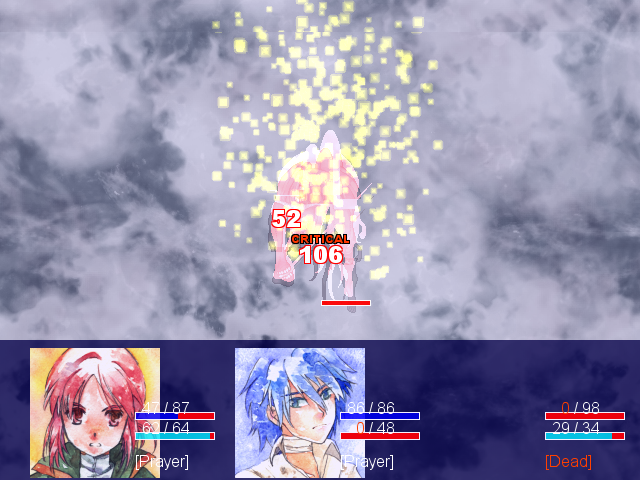
The boss basically just consists of Camil hitting it over and over while the other two play cheerleader and die a lot.
There's an internal counter that governs Creepyglasses Mode. I'll talk about it later.


So I use debug mode and lower it a bit. Thanks for the debug mode improvements and the specific advice on what to change, HenryEx.
There are three more conversations I missed with Aaron Aaron. This is the first.
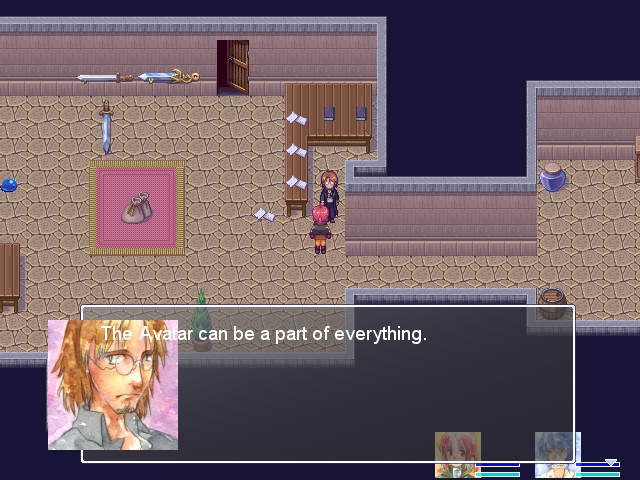
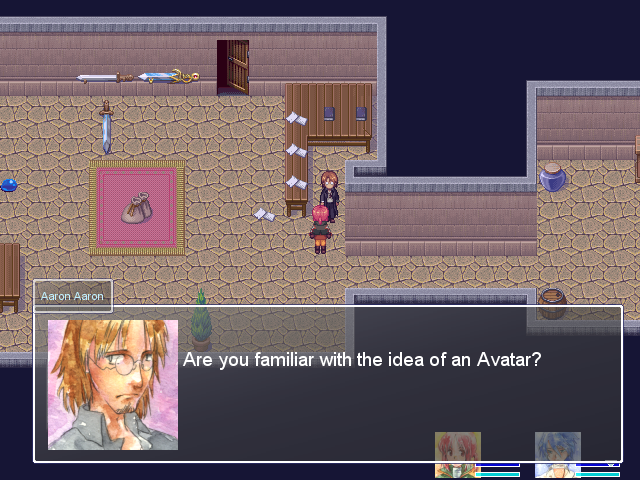 Avatars are a projection of the author allowing them to insert themselves into stories. They exist in every narrative.
 An Avatar doesn't always appear in the form of a character. In the lines and actions of the various characters. In the story's setting and the description of the scenery.
Some of Aaron Aaron's conversations have this minor graphical bug. Apparently some of Laylaria's do as well? It's fixed in HenryEx's localization fix patch, though.
(I'm doing this on my first, pre-LP game folder, which I'm leaving unpatched for something later.)
The Avatar can take on many forms. Even the author's ideal portrayal of the opposite sex, or the opposing morals being played out by the main enemy of the story. Well then, the Avatar of the Demon King Chronicle... Where do you think we will find it? Here's what I think. Harold's Avatar appears in the final unseen chapter. I believe he was supposed to be introduced in the simplest form possible.
The conversation then ends abruptly, but it's continued in a fashion in his notes--remember, Aaron Aaron believes that Harold Dieter intended to finish the series with a sort of revenge-by-proxy, with his in-story doppleganger mercilessly slaughtering Sera, Randolf and Ritzea, all three based on people who had wronged him.
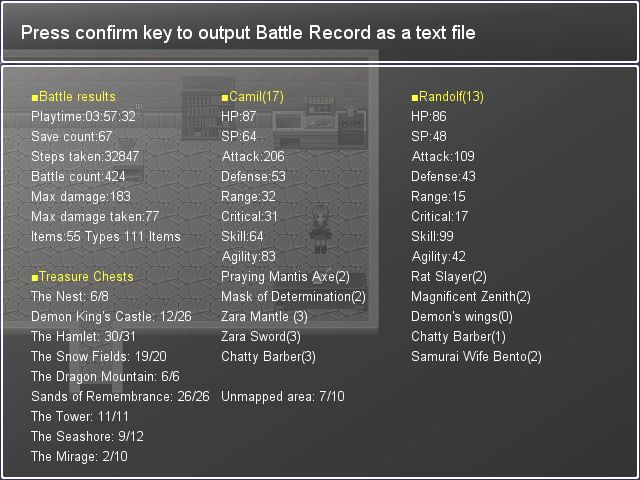
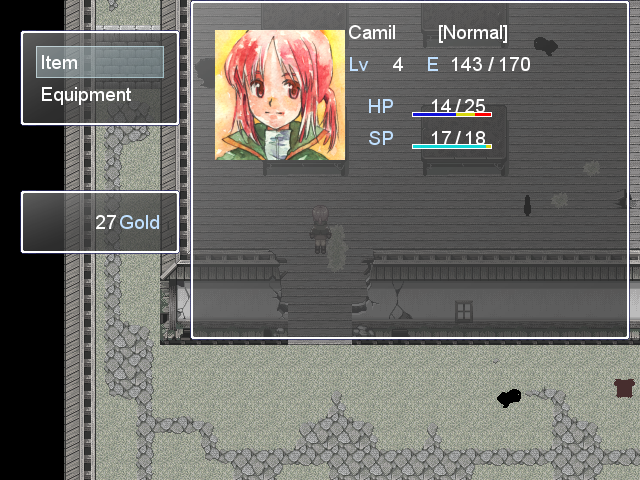
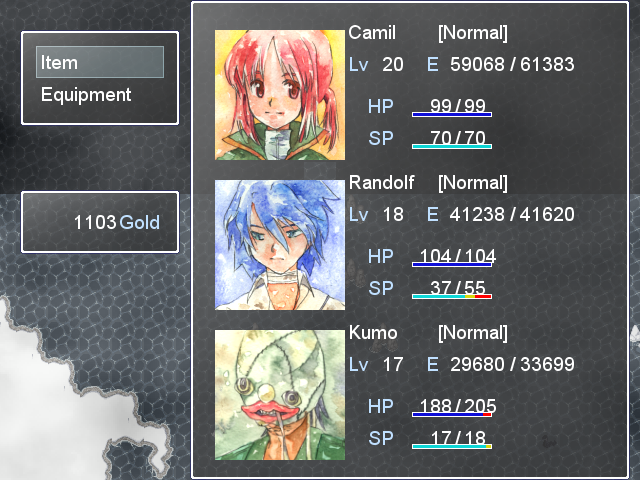
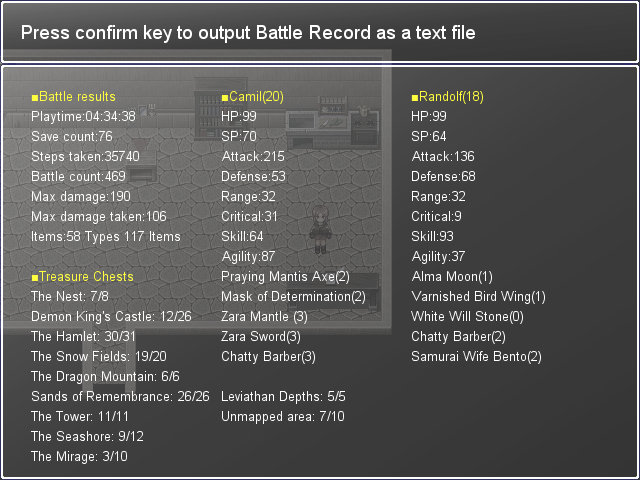
This is my status preparing to enter The Depths. I've got lower item levels, lower levels, fewer skills, less money, and fewer drops.
This is going to end in tears.
I end up needing Light Axe to do much damage to the various Mers; Camil's lower level means that even her great equipment largely just balances out the 40 less attack she's sporting.
Fighting a Leviathan is just not going to happen.
Thankfully, their aggression makes them easy to lure away.

This is a bit of a running theme this time around: since a Leviathan can probably kill both Camil and Randolf in one attack-all skill, I don't fight any. Too risky.
If you were wondering, no, touching the shadow on the map where Geyser Gazer appears in The Depths doesn't do anything. I know, I'm disappointed too.
Fighting this boss at these levels is a bad idea.

DAMN THE TORPEDOES, FULL SPEED AHEAD
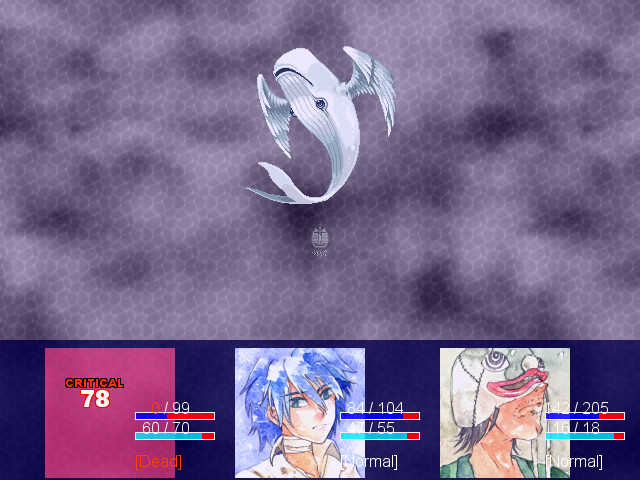
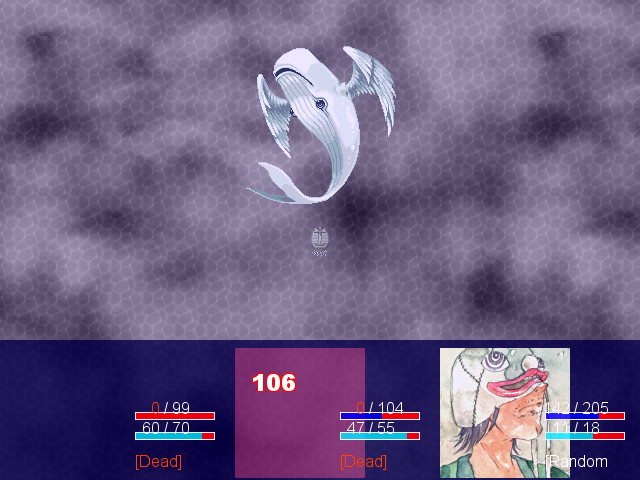
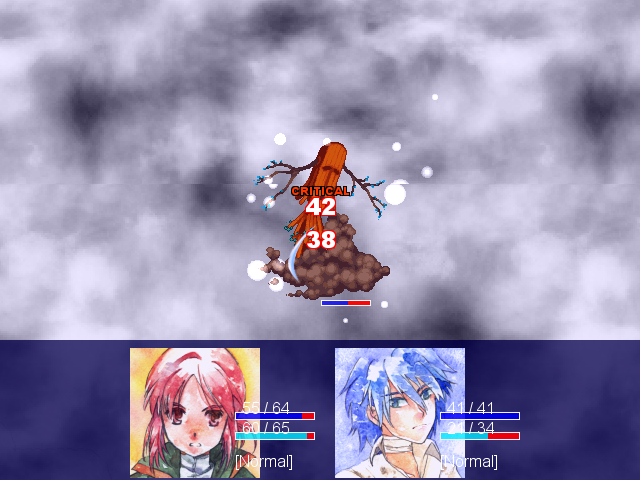
This fight... actually goes sort of badly early on. Its Pitch Polling attack can do quite a bit of damage if you're unlucky, as shown in the second screenshot.
It also has an attack-all skill that does half as much as the other but also Skill Binds. If it hits Kumo, that's a problem.
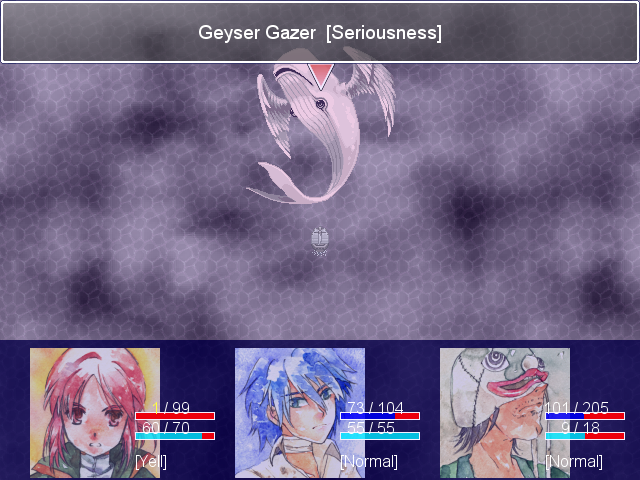
When Geyser Gazer is down to about half-health, it'll self-target with the skill Geyser and give itself the Seriousness buff. Before Seriousness, Camil with Yell was doing about 80 damage. After, she was doing about 10.
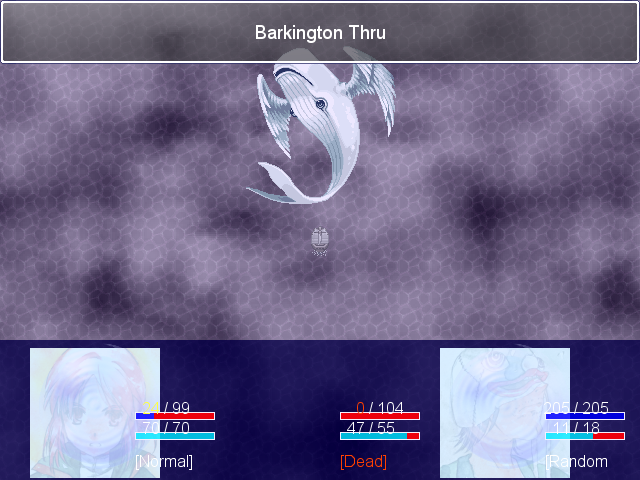
Normally, you can just use Heart of Stone to bring its defense back down, but I got pretty unlucky with Barkington Thru silencing Kumo. Thankfully, Light Axe's ability to partially ignore Defense allows Randolf to keep doing damage, even when it's tanky as hell.
You'll also remember that Wave Cutter ignores 50% of Defense.

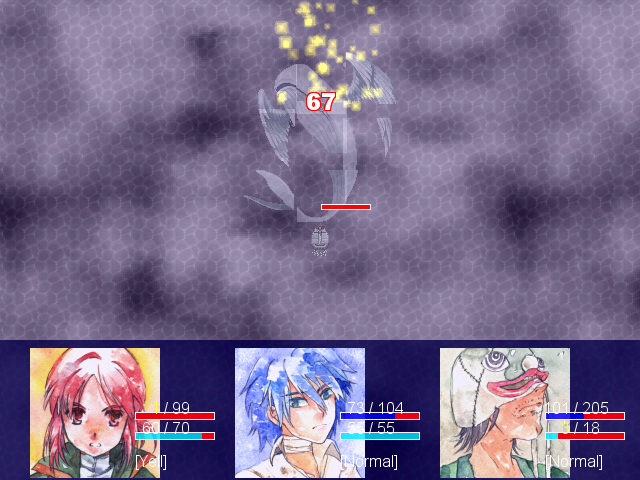
Despite my disparaging remarks about him last time, Kumo is enormously useful here if you're underleveled; he stayed alive through my unlucky early turns, kept Geyser Gazer's defense lowered most of the fight, and managed to land the final blow in fine style even without Poetic Justice.
You did good, Kumo. You did good.

I hack Aaron's Possessed flag back down to zero...
...but, unfortunately, that check has nothing to do with this.
Besides, the Avatar conversation with Aaron Aaron earlier replaces another conversation that he does after you complete The Tower, and it's triggered by the Blue Will Stone showing up. So I'd have to replay the game anyway. Oh well.
Debug mode time.
Yeah, that looks about right.
Hi, other Randolf!
Aaron Aaron's dialogue is exactly the same the first time if you have Randolf in the party. But this time...
This Fire Wave is exactly the same, it's just on Randolf instead. You don't get a choice--if he's in the party, it goes to him. Theoretically he can make use of it, especially since Camil can still pick up Flame Fang and Inferno, but it's really nothing special once you're past The Snow Fields.
Sadly, having Randolf in your party already and then recruiting Randolf does not result in Double Randolf, nor does he fuse with his twin and double all of his magic-related stats.
Camil pastes the White Dragon in a single attack sequence, thanks to two Extra Attack procs and a critical.
Huh. I guess that's The Mole up top? It's either him, the ghooooost~ of Harold Dieter (okay no that's the Blue Will Stone) or a debug-related glitch.

Another correction: there's two Cutters, and therefore two sets of Demon Wings, in The Tower. The first is near the bottom of the stairs past the "kill green slimes" floor, the second is where I said it was in the last update (past the timed floor).
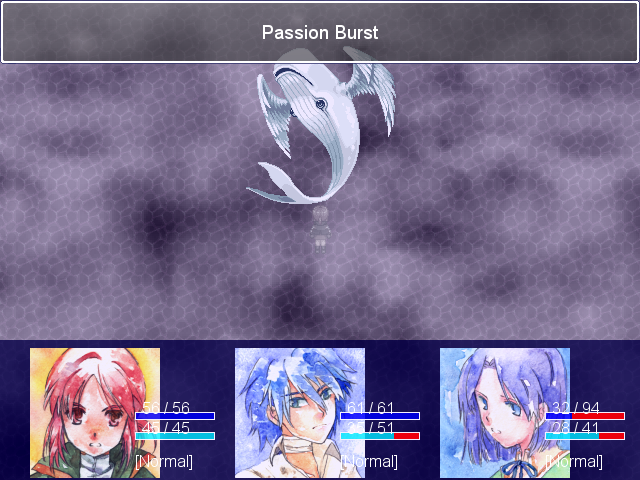
Passion Burst is stupid strong with postgame gear, especially since that's when Nana can actually get +Skill on good armor.
Thank you, Aaron Aaron, for so concisely summarizing how I feel about this last hour spent getting this conversation.
Removing Kumo from the party while in The Depths has interesting side effects. You can't use the D button to swap party leaders in The Depths, probably to prevent this exact situation, or possibly because only Camil can walk on water.
This still got the Cut-In. That's funny.
Thankfully, Kumo's absense doesn't break anything.
I don't remember if a shot of the area above The Nest ever showed the Blue Will Stone just hanging out there.
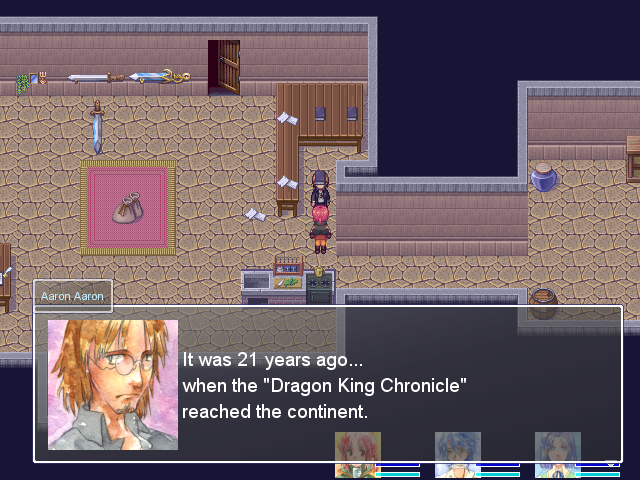
Okay, correction: we've gotten a book lodged in Aaron Aaron's head. Presumably that's the reason for his "Dragon King Chronicle" slip-up.
(I really don't think you're meant to actually SEE this conversation, judging by the effort put into the foreground/background layers here.)

As HenryEx pointed out in the thread, the trigger for the final dungeon is completing each of the three Story dungeons, defeating Laylaria, and sending off The Mole. Despite the Blue Will Stone appearing from Aaron Aaron in this scene, its presence or absence in The Nest doesn't matter.
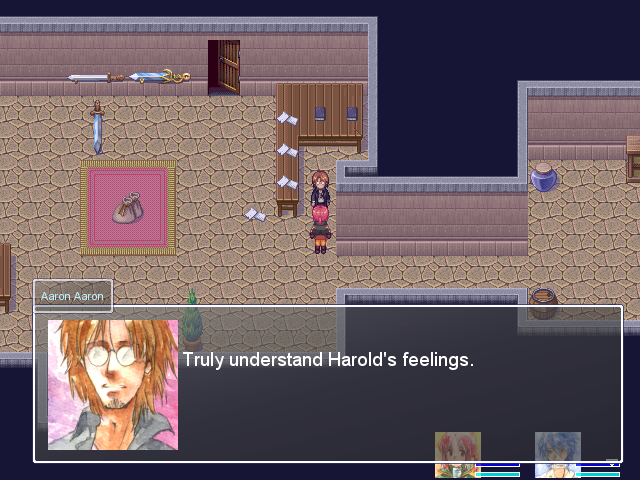
I drop down the Zara Mantle hole and then down the cliff above The Nest, triggering the Blue Will Stone to appear in Aaron Aaron's store. This trips the internal "Possessed Aaron" counter to 1 and replaces his conversations with the one about Avatars from earlier. Each battle makes it iterate once, and the "Avatar" conversation appears when the counter is higher than 0 but lower than 5. At 5, it switches to the Creepyglasses "Only now do I truly understand Harold's feelings" conversation.
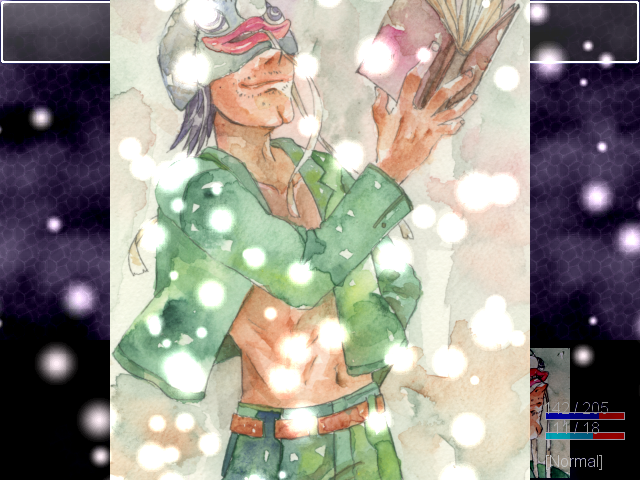
Back in the non-cheaty bonus playthrough. Let's fight Aaron Aaron again.

Rule Enforcement: No Violence gives your party the No Violence status, which drastically reduces your damage output. But, uh, he has like 250 HP.
Randolf's Light Axe may only do 22 damage after this, but he still goes down.
Even at lower levels, Aaron Aaron is not very tough. He doesn't hit that hard, either.
That's everything I can think of that I missed, going through things. There's miscellanea (I forgot to mention a couple of drops, stuff like that), but this is basically everything important.
Next time, The Disease.