Part 22
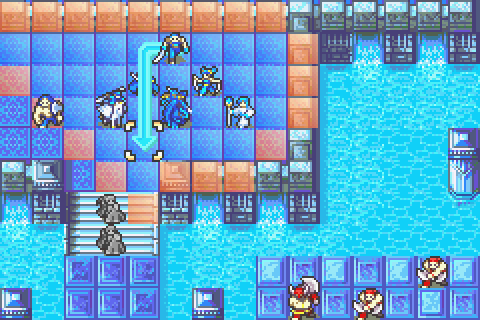
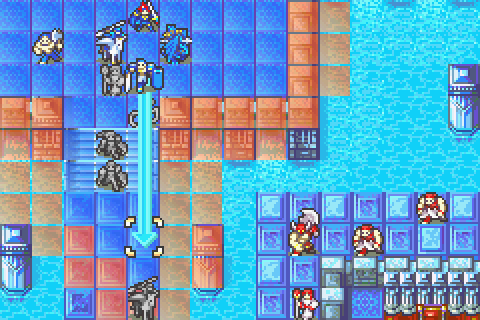
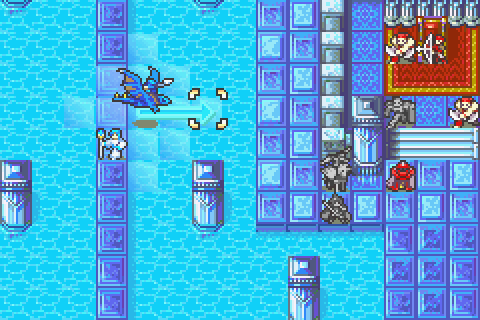
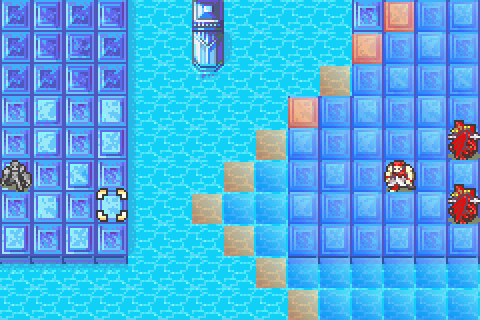
Alright, time for the third legendary weapon chapter. This is the first one to have a trap gimmick that’s actually semi-interesting. Much like in Night of Farewells (Chapter 28x of FE7), this chapter consists of floor tiles forming bridges in a room full of water. And just like in Night of Farewells, these bridges sometimes sink and are replaced by water tiles, while other bridges are created.
Both are unpopular levels, but I liked them. And I actually think the whole water and bridges thing was done better in this chapter.
The two chapters were actually quite different in implementing this “trap”. In NoF, you started with only a few bridges and more were revealed over time. This usually meant that all they did was slow you down. The ENM version had a more interesting progression, but was fundamentally the same as the HHM one.
In this chapter, by contrast, you start off with basically all the bridges you need and then they gradually vanish and are never fully restored. So in NoF, the bridges served to slow you down and hold you back, but in this chapter the threat of the bridges vanishing makes you hurry. Critically, you actually CAN make it to the central island before running into any bridge trouble if you’re quick.
So yeah, I think that aspect of the map is fairly good and lends itself to interesting strategies.
Chapter Summary:
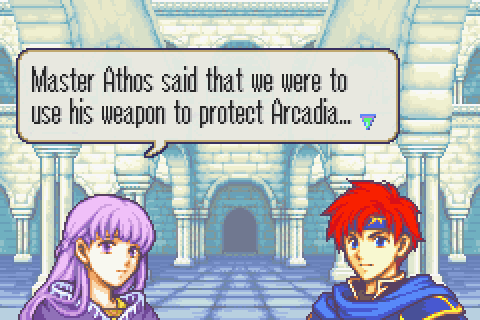
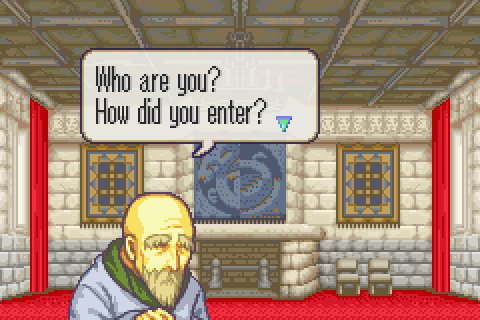
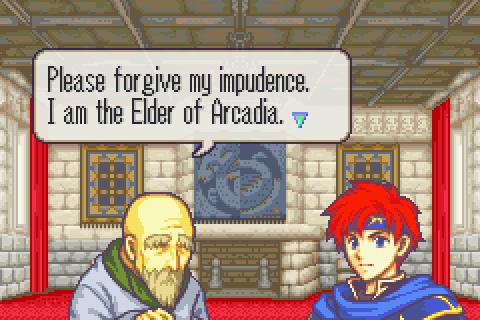
30 seconds after the last chapter ended, Roy and his group charge into the reservoir where the Béarnaise army is trying to destroy Forblaze. After defeating them and acquiring Forblaze, Roy meets the elder of Arcadia (who may have been a dragon in his wilder youth) who is completely useless and knows nothing about anything. Having uncovered 0 clues of any kind about how Bern ended up with dragons from the greatest repository of dragon lore in the world, they get back to the plot.
Dude, you’re the one standing on the altar. How don’t you know?
Maybe you should have had guards to hold them at the door- or better yet walked outside to double the strength of the army fighting Roy.

And that’s gg for Ohtz. If he was thinking straight, he would either have helped Randy crush the attackers or just tried to stall Roy while looking for a way to destroy the altar. Instead, he let Randy and his much stronger forces die and now decides to ignore his own actual objective to send his men to defeat a force that already crushed one more powerful than his own.
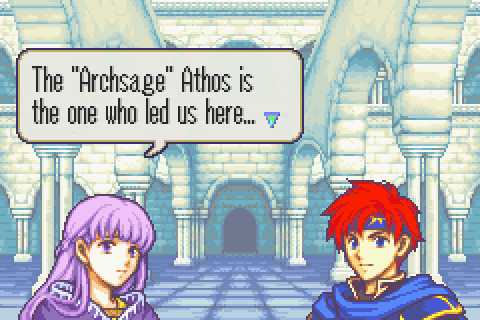
This is retconned in 7 where Athos found the village already here and then created the oasis for them. Apparently in this game they were already living somewhere else and then he led them here? Really the story and characterization of Arcadia are completely different, this is only one example.
Perhaps the only thing unchanged is this: Athos is awesome. Instead of just foolishly sealing his weapon away where no one could ever use it and it could easily be lost forever (as with Durandal and Armads in particular), he just found some people who COULDN’T abuse its power and gave it to them. And even in death, he defeats Bern easily by just making his magic box unopenable by anyone except the people to whom he willed it. Poor Ohtz is in way over his head dealing with the Archsage.
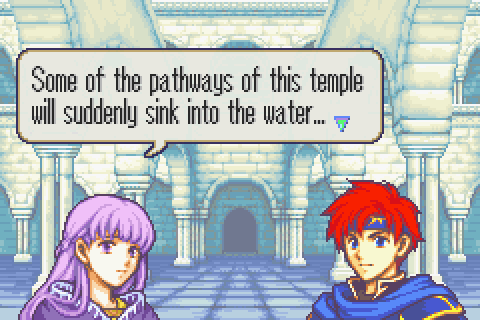
Why? I mean thanks for the tip, but could we have an explanation? This has always been weird. In Night of Farewells at least we’re told that Sonia is creating the bridges.
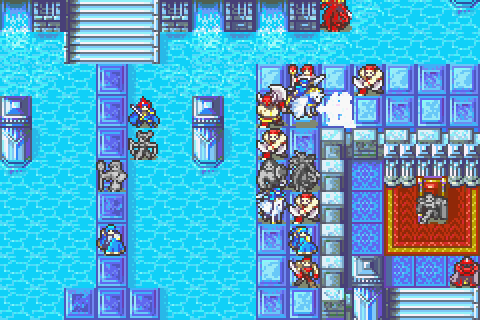
Battle Preparations & the Map:
Again with the absolutely gigantic amounts of pointless empty space. Basically the whole right half of this map could be chopped off with no gameplay loss. Heck, the few enemies who are even there often don’t participate at all. Lousy, badly thought out map design as usual. It’s too bad since I like this chapter’s gimmick and it could be pretty fun if it wasn’t so huge and the enemies were concentrated enough to put up a real fight.
Oh the color scheme is pretty, so that’s nice at least. I’m a sucker for pretty maps, and I tend to dislike games like the Sacred Stones or Radiant Dawn where the colors are ugly.
Secondary Objective None. There is nothing to do. It’s a really boring chapter that way. Just a straightforward, easy fight.
Secondary Objective I don’t know, build some supports or something? I got tired of saying that every chapter. It was worth emphasizing for a while.
Reinforcements: None. One reason these legendary weapon chapters are so easy is the lack of reins. As I’ve said before, this game relies really heavily on giant waves of surprise reinforcements to pretend to be difficult. The chapters without them are quite easy.
Turn limit: 20. No problem. Since there’s nothing else going on that’s worth waiting for though, I’m going to try to beat this level really fast and finally get into a turn surplus. That will make things intense enough to be interesting and challenging.
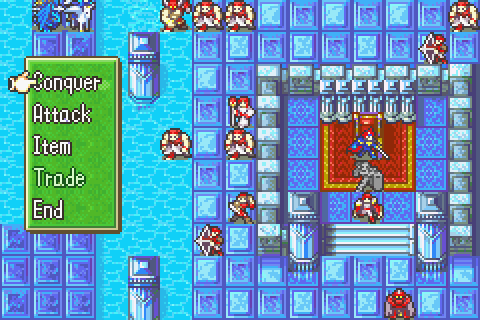
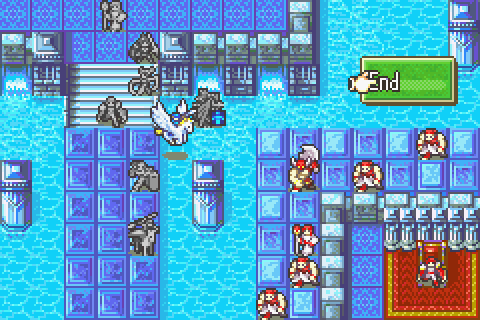
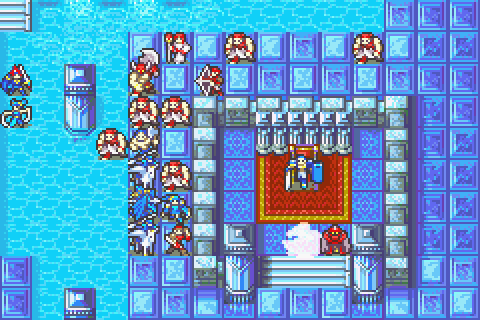
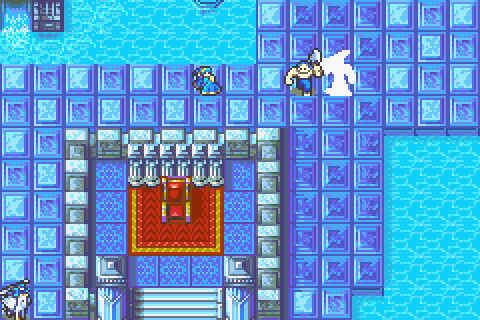
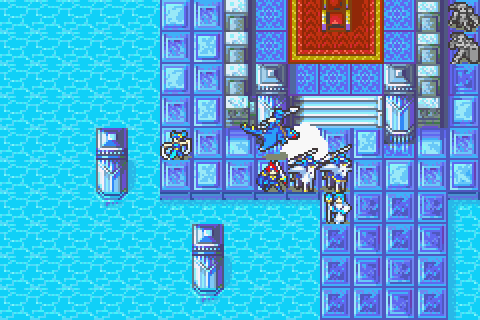
So pretty. And so empty. I mean, the throne is in the middle so there’s basically never any point to going right of there at all. Except for 1-2 guys who don’t get the memo to move unless you go to them. So I guess if you like walking 20 squares to get one kill, this is the map for you.
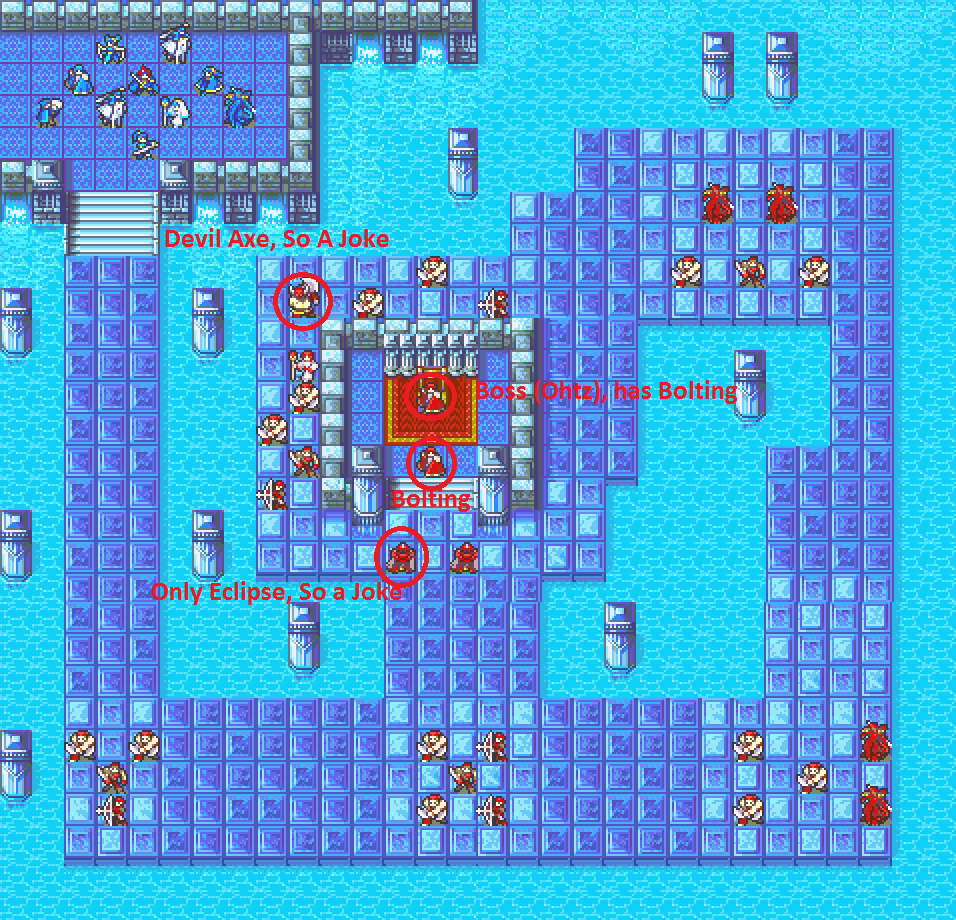
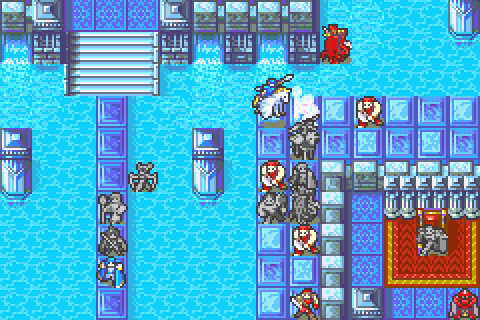
Now it’s a map full of water, but the enemy has very few air units. What’s more, those 4 wyverns don’t even charge your position. Some of them might never go after you at all unless you deliberately seek them out.
They’ve got a lot of pirates though, so that’s a problem, right?
Wrong. That’s LAKE terrain. Pirates can only move one square in it! These enemies are nearly immobile. Combine that with the completely lousy stats pirates have (worse than even brigands due to poor Con) and you have a really easy chapter.
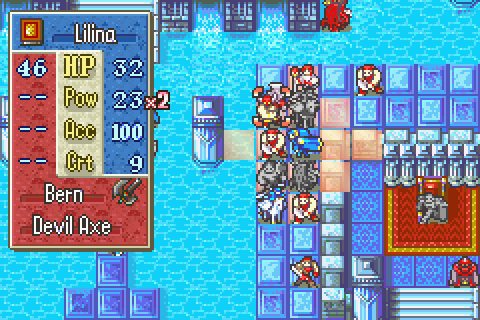
Even the Berserker is no threat because he’s wielding a devil axe. And one of the druids doesn’t have a weapon other than eclipse, so he’s just free XP.
Also many of these enemies will not move unless you get quite close to them, thus they’re never organized and are pretty much always fought in small groups.
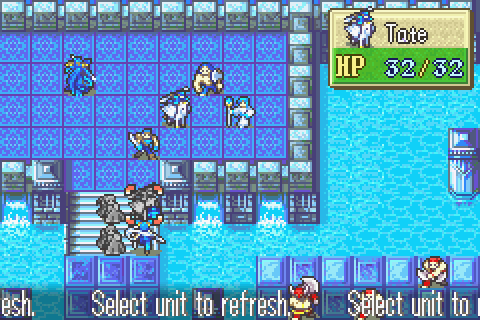
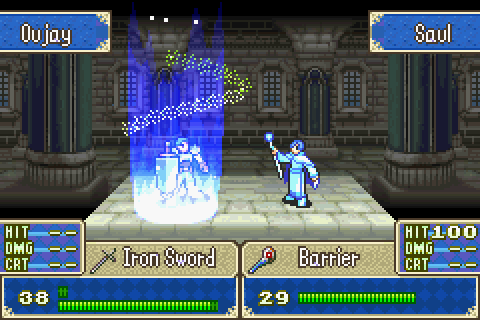
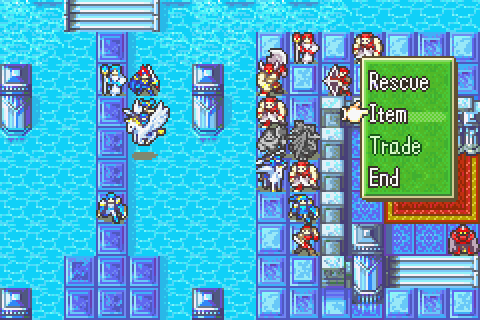
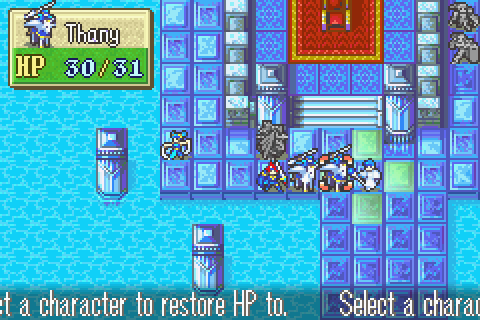
Both the boss and the sage near him have bolting, but that sage doesn’t move (and neither does Ohtz of course). This makes his real threat range fairly small. But the edge of their range is close to your starting area, so you could probably have them both out of charges by turn 6 or so. Tate and Thany paired with just one healer could do it, though the healer would end up swimming.
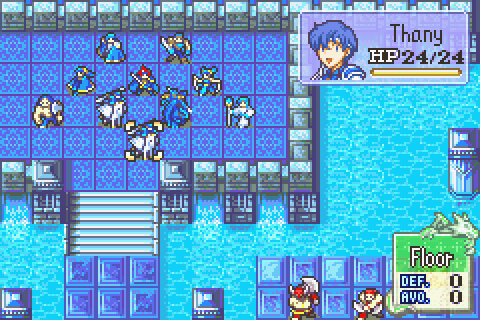
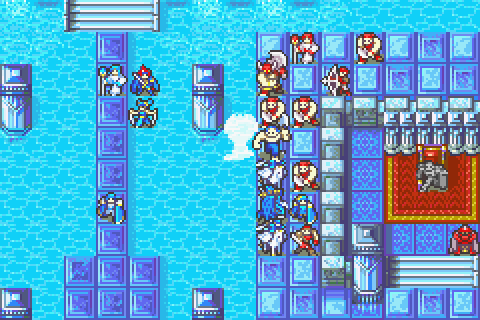
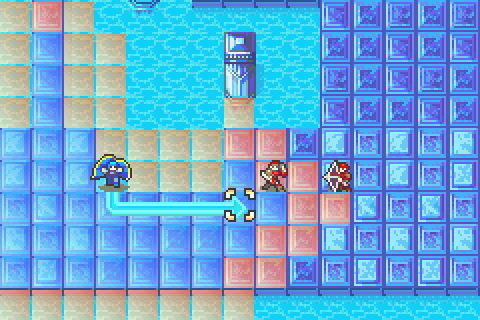
Speaking of which, there isn’t a really clear pattern to the bridge disappearances (and then re-appearances) after the first few turns, but the first few turns are all you need to know about. Basically the left side area is gradually eaten away at until by turn 5 or 6 or so the northern half of it no longer connects to your starting area. Chunks of the bottom leftish-middle bridge begin disappearing around the time the left one finishes. It too remains partly passable as it disappears bit by bit. After that, getting around gets much harder in general. But if you’re got fast units, it’s really easy to already be on the center island by the time the bridge there vanishes.
Or, better yet, just bring air. I have absolutely no idea why so many people running this chapter don’t bring more of their flyers. It is clearly an air map.

Units Allowed: 9 + Roy. That we get so few guys is one of the few things making this chapter’s actual fighting even remotely challenging. However, more people would actually be something of a nuisance when the bridges get narrow anyway.
Units Brought:
1) Roy. Required. On the one hand, slow units like him are punished by this map. On the other, the enemy are almost all axe users. So he balances out to no more or less useless than normal.
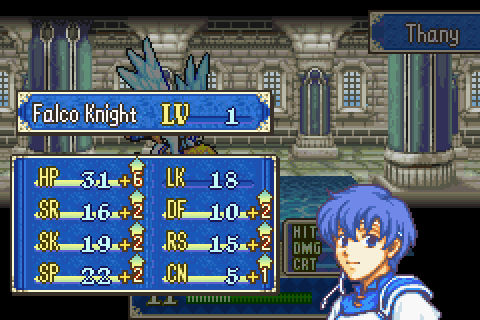
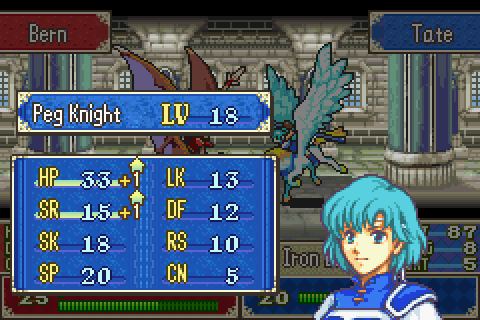
2) Thany. I’ve actually decided to promote her since I realized I already have 3 Elysian Whips and will get another. Also it’s just a great map for air. And if she can keep leveling, I can use Shin and Sue more freely.
3) Tate. Thany but way better.
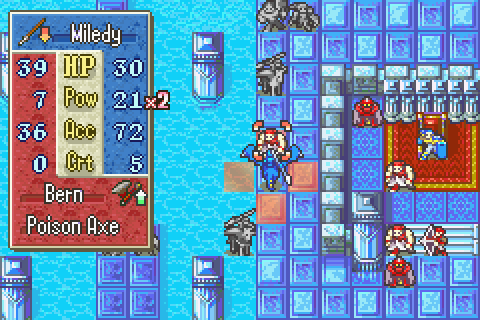
4) Miledy. Tate but way better. The more air units, the better.
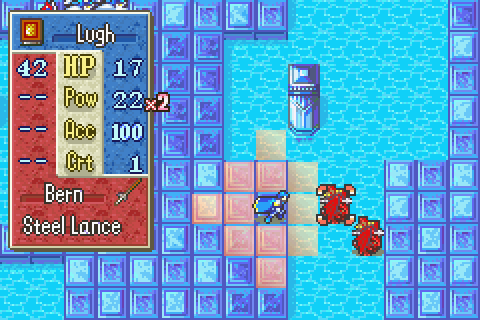
5) Lugh. My best character, arguably. He’s here to instant kill stuff for my combat ranking and to heal people. In that order actually.
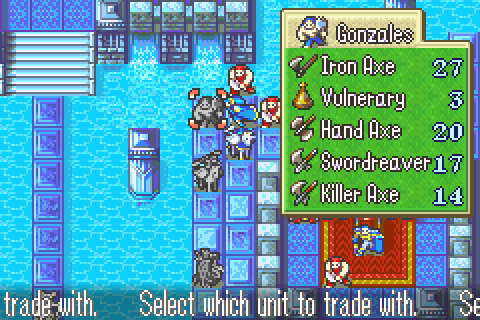
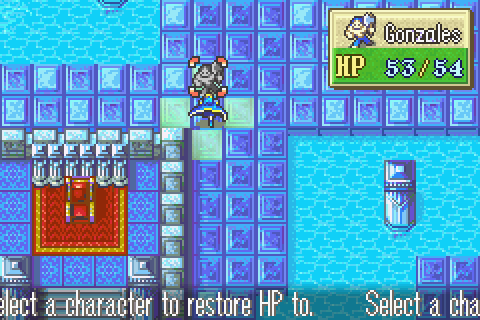
6) Gonzalez. I really want to get him promoted soon. I want to be using Armads by chapter 16 if I can. And of course, he’s Gonzalez so he owns enough that he’s worth carrying around sometimes.
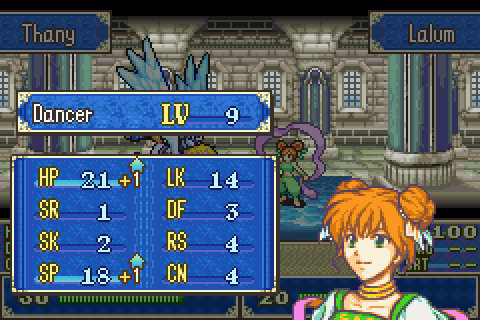
7) Lalum. On a chapter where you need to hustle and keep people from getting bogged down, there is no one better. Also I want to find a turn to have her eat the pair of boots she dug out of the sand last chapter.
8) Saul. He and Ellen are now about the same level (and Clarine is higher). And he’ll be better at surviving Bolting if I need him to.
9) Lilina. She’s getting into the part of the game where she starts paying off big time. She might actually be better than Lugh when I promote her. I’m also getting close to needing to retire my healers, so I’d better have some staff-capable people to replace them.
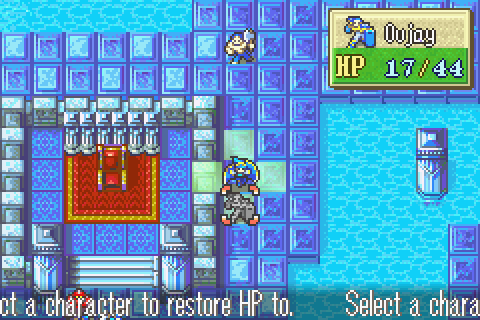
10) Oujay. After that brilliant performance last chapter, I can’t NOT promote him, can I? He’s now pretty much hands down my best swordsman- he definitely will be when I get his supports with Lilina going. His def isn’t the best admittedly, but he’s becoming extremely dodge-y.
Notable Units Rejected:
1) Sophia. This is pretty much THE chapter to train her. However, she’s just too bad at it and slows you down too much. Plus I want to go really, really fast here and can’t afford the delay.
2) Fir. Has reached level 19 with like 75 XP. Her Str cap is terrible, so I’m not promoting her. And that means I’m probably never bringing her again.
3) Rutger. There is very little room for extra people on the team here and there isn’t time to build supports. He can’t do the jobs I need Oujay for and he can’t rescue people over water or fight as effectively as the mages, so he’d be useless.
4) Dieck. Same as Rutger basically.
5) Alan. Could be very handy but I think the 3 flyers will be enough rescuers.
6) Lance. Same as Alan but not as good.
7) Clarine. Still too high level and Rutger and Dieck aren’t coming.
8) Ellen. I don’t need another healer and Saul won’t get doubled by anyone’s bolting if it comes to that, unlike her.
9) Ray. I’d like to bring him to train, but I can’t afford to bring any more people who can’t fight extremely well.
So many people are close to (or at) level 20 that nearly everyone is carrying a promotion item. You don’t want someone to get a bit more XP than you predicted and then get stuck and become unusable.
People are carrying a fair amount of heavy weaponry too to make sure I can get plenty of OHKOs for my combat ranking. And of course Oujay has a handaxe and Lilina has a heal staff for when they promote.
This formation is contrary to my usual advice of flyers out front for when doing rescue dropping, but in the case of this particular map I’d rather have a few infantry units who can fight leading the charge and the flyers carrying the weaker people just behind them. That’s why Lalum is near the front too of course.
Sidenote, I hate this starting area. Your allowed unit positions are really annoyingly far back and spread out.
The Characters:
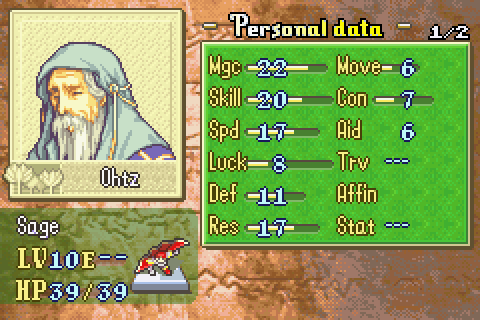
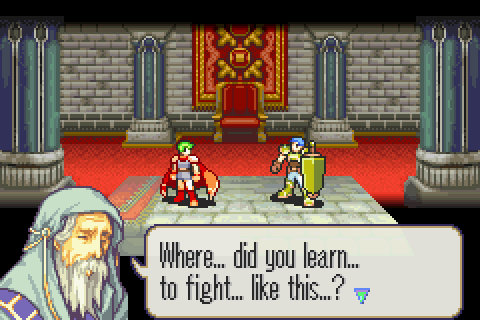
By now you’ve probably noticed that a hero was the boss on the uber-hero Roland’s chapter, a berserker was the boss on the uber-berserker Durban/Armads’s chapter, and the clear pattern continues with Ohtz the sage guarding the uber-sage Athos’s weapon.
In-universe this is weirdly coincidental. That hero was just a random bandit who didn’t even know the cave he’d set up in was special. And the berserker was some random bandit sprung from jail for no adequately explained reason to seal a cave that Bern could totally just have sealed themselves. This is the first time there’s been any reason for the pattern: it makes sense to send a wizard to deal with magical seals and traps. Of course, Ohtz ruins that by apparently paying no attention to the proceedings and not doing anything at all to help his men open the altar.
Oh and at first glance, it seems kind of weird that Bern is trying to destroy or hide these weapons rather than use them. Afterall, they inexplicably believe that no one knows they have dragons. And even if people did know, not everyone apparently knows the legendary weapons are even effective against them- Roy sure didn’t. And even if people did know both of those things, the weapons would still be powerful enough in the hands of Bern’s greatest warriors that it would be worth the risk. I mean, a human wielding one of the things is more deadly than a dragon.
However, when you think about it and know the whole plot; this is actually one of the few things Bern does that make sense. Afterall, Zephiel secretly plans to have the dragons exterminate his own nation along with all other humans everywhere. The last thing he wants is for his former generals to have access to dragonslaying weapons when he turns on them. It IS a little weird that none of his subordinates consider disobeying his orders for the good of the country though.
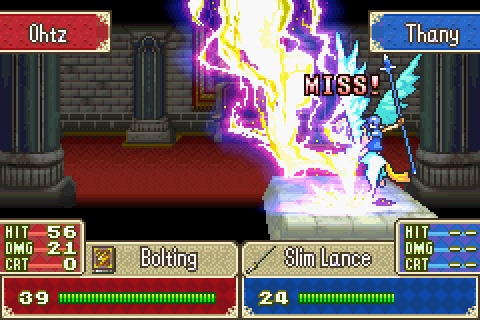
Well to get back on track, Ohtz is another moron officer in Bern’s army with no personality or background. What he does have are stats. This guy is a one-man army who could go toe to toe with either of my very blessed sages and win. He’s a bizarre difficulty increase after this extremely easy chapter but is even problematic before you reach him…
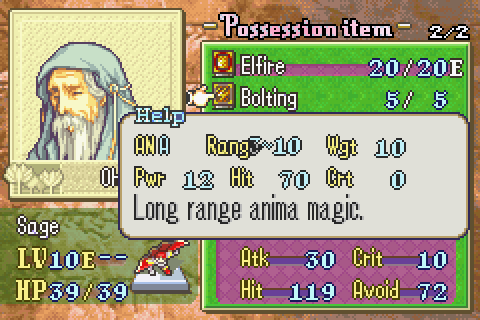
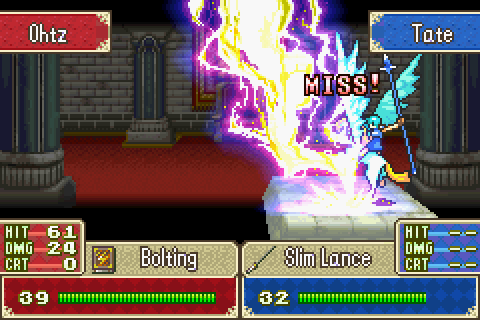
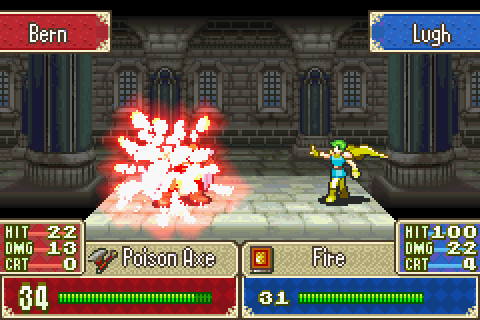
... because he’s wielding the true legendary anima tome. Bolting is WAY better in FE6 than in 7 and that’s saying something. First, it has a small, but significant, accuracy bonus. Combined with enemies having luck to help them aim in this game, that means it’s WAY harder to dodge. I can’t actually get this guy below 50% hit with ANY unit I have.
But more importantly, it now only weighs 10 instead of 20! At 20 weight, no one would ever double with it and their avoid chance often sank into the single digits. Now it does still slow people by a significant amount, but not overwhelmingly. If you bring out the wrong unit (like Ellen, as I alluded to), she WILL be doubled and surely killed. Same if you equip a heavy weapon on the wrong person or rescue someone in his range. With Ohtz’s massive Mag and Speed, he can really slam you with this. It doesn’t help that his buddy has one too, though that guy isless powerful. No unit I have is currently capable of surviving a hit from both of them and their range overlaps a lot.
Playing Through:
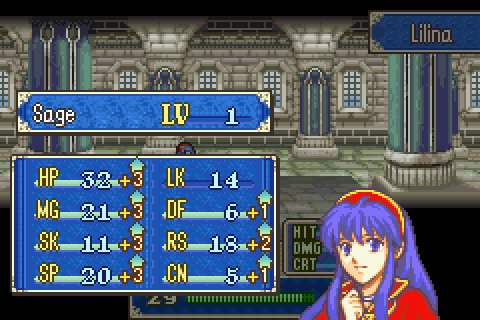
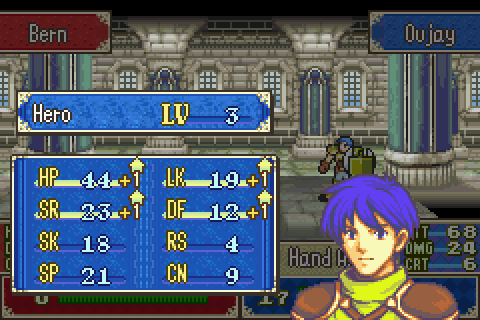
Sweet. Lilina just went from great to amazing. Promotion is a VERY big deal for a lot of this game’s magic users. Even a Lilina that wasn’t incredibly speed-blessed like mine (she’s a very good candidate for speedwings by the way, maybe the best) would quickly get fast enough to double a surprising number of enemies with this bonus.
These two were positioned so Lugh could the run out and heal her promotion wound immediately.
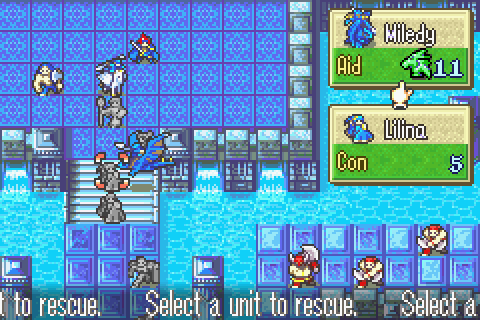
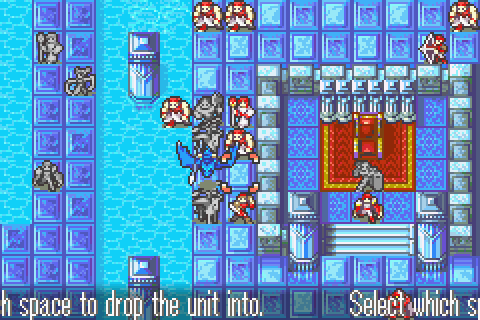
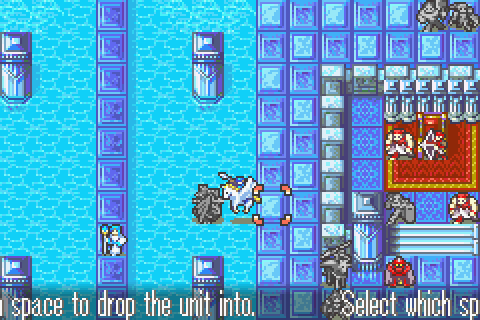
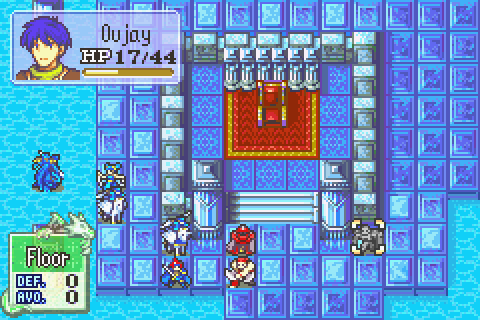
Tate picks up Roy and Lalum helps carry him a long way this turn.
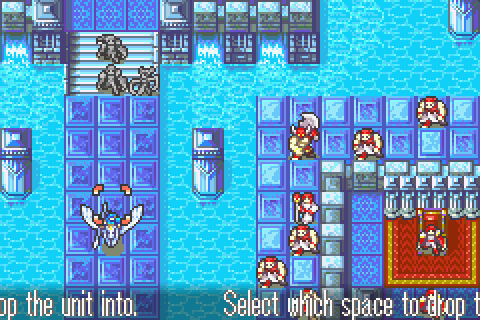
In this spot, she can easily tank Ohtz’s bolting to start running him out of ammo. Meanwhile of course, Roy got to move a lot closer to where he needs to be. Never forget that with a dancer, you can have a single unit rescue and then drop another unit a very long distance in a single turn.
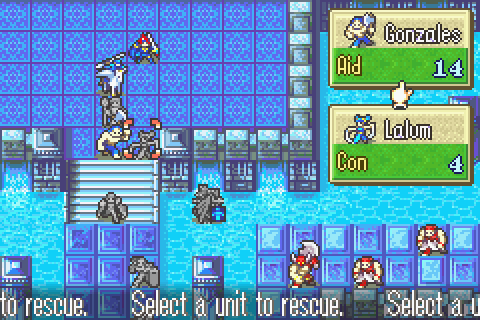
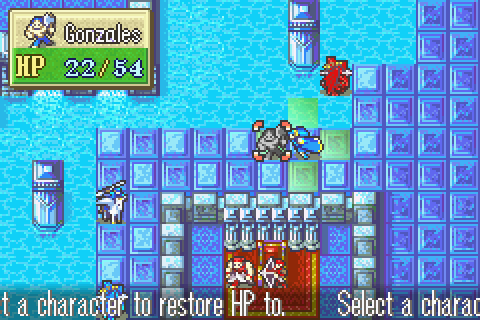
Time to carry Gonzalez out.

Oujay moves up and promotes. Some very nice bonuses there, the defense is particularly nice. He’s become a major dodge tank and is way above average in Str. So like Raven but not as cool.
You can see that even with a slim lance, Tate was very likely to be hit. I had 2 healers standing by for a reason. Alright, my turn.

Turn 2 win!
One moment, I need to put on a pair of sunglasses.
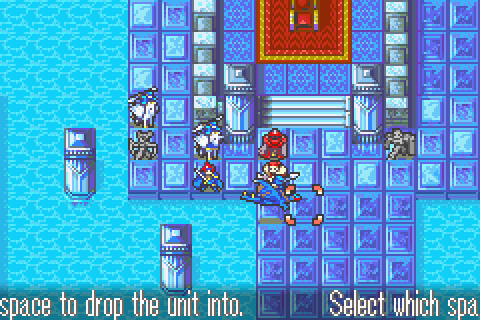
Alright, I’m now sufficiently cool to explain what I did here. As you know, I got the Warp staff last chapter. I explained in the War Room Part 33 (http://forums.somethingawful.com/showthread.php?threadid=3701153&pagenumber=27#post444413617) how that staff works in detail. In this game it’s the same but with +5 range, like all staves here.
Now Warping a unit does NOT end that unit’s turn; it can still move if you didn’t use it already. That means that if you want to turn 2 win, you need someone who can kill Ohtz to already be in warp range of a tile in his room. The real reason I put Oujay in the front is that that square he could barely reach where I promoted him is the maximum distance away I could be (my warp range was 9 squares). That was also the reason for working so hard to drop Roy in particular so far along, rather than someone better. To turn 2 win I obviously need to warp Roy in ready to move too.
Now to figure that out of course, you need to know your warp range. It’s ½ the wielder’s Mag +5 measured from the square of the warped unit. My Saul has average Mag for his level at 9, meaning he has range 4.5 + 5 = 9.5, rounded down to 9. So even a moderately sub-average Saul could do this, and an above average or higher level Saul could do it better. Promoted Sauls or Ellens or Clarines would have a WAY easier time. (If you’re wondering, the amount of Mag you would need to do a 1-turn win is a much less feasible 22). The real reason I brought Saul, rather than Ellen, is that for some reason my Ellen actually still has a B in staves whereas Saul has the needed A. You are basically guaranteed to have at least one staff user capable of using Warp though and probably from further than mine.
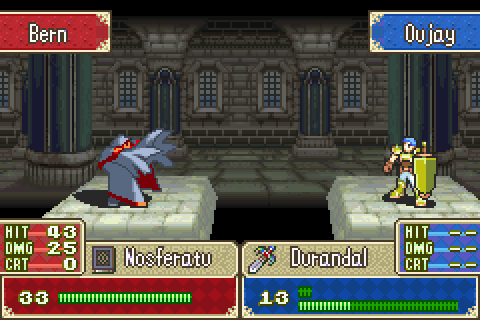
What do you need to kill Ohtz in one fight? Well it pretty much has to be a physical unit; with the throne he’s just too tough to do more than scratch damage with magic. My Ohtz is basically average and with his throne bonus, you need to be capable of dealing 61 damage over 2 hits- so 31 damage per hit unless you want to rely on criticals. That’s quite accessible with serious weapons. Almost trivial for some characters. What’s a bit trickier is getting at least 21 speed (or 22 if he’s lucky with his HM bonuses) to double him. Even a level 1 promoted Rutger is basically guaranteed 21 speed and it’s really easy to have a higher level promoted Rutger by this point, so that’s one unit who can definitely double him.
The tricky thing of course is that some of the weapons that give you enough damage might slow you down. For example, Durandal is the best choice for an average Rutger, but that slows him by 3. Obviously if yours is higher level, that’s no problem (and he might be able to get away with a silver sword- or definitely a killing edge if you count on a crit). My Oujay could double and kill him with the silver sword, but I could get significantly better accuracy with Durandal. However, I couldn’t double with that… when Ohtz had his full 17 speed.
That was the point of flying someone into Bolting range even though I didn’t really intend to play long enough to run him out of ammo; that made him switch to Bolting. And that lowered his speed to a much more double-able 14. And dropped his avoid a bit too. A level 1 average Swordsage Rutger wielding Durandal can double him and easily kill him in 2 hits with high accuracy.
And then of course all you have to do is have Lalum dance for your staff user, have Roy already in range (via rescue-drop on turn 1) and then warp him over to seize the throne. In short, you too can kill Ohtz and win on turn 2. No blessed units required if you play right.
Well that solves my tactics ranking problem.
Total Restarts: 5 (None here, though I thought about redoing it from the beginning in slow motion this time)
Turn Surplus: +9 (Epic)
Things I Regret Missing: A couple of uses of Marcus’s silver lance on Rude, a Chapter 5 nomad Marcus had to kill, two Chapter 12 fighters I couldn’t kill since I needed supports built elsewhere, and that one extra turn I could have saved on Chapter 14x if I’d only had a A level staff user with 22 Mag.
Legendary Weapon Scoreboard: Durandal killed Ohtz using Oujay on chapter 14x, turn 2.
Oh alright, I’ll take these shades off and get serious.

Battle Preparations & the Map:
So here’s my real formation:
Same characters and same gear, but the order is different because I actually need my other units to be doing stuff this time, rather than pretending to do things so people don’t see the surprise coming.
Now the reason I didn’t go into gear much previously has doubtless become clear, but it’s time I actually talked about it.
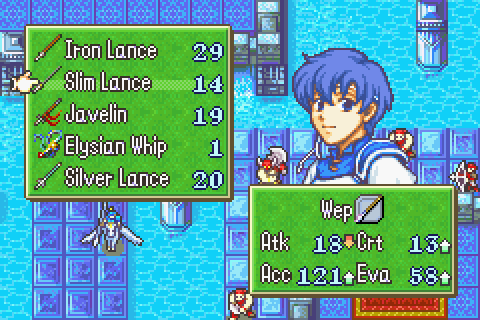
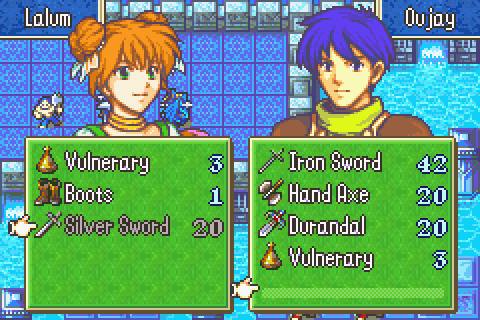
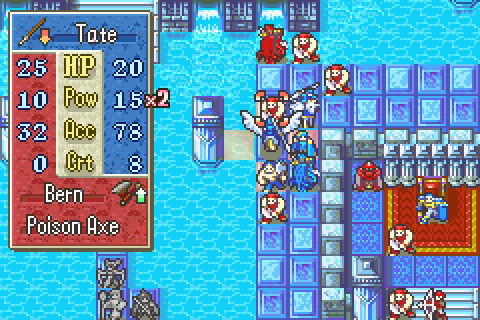
Thany here is at level 19 with about 75 experience, so I want her to do only light fighting before she promotes. She’s got an Elysian Whip for that purpose, and she also has a slim lance ( boosting her avoid up when I need her to dodge a bolting is nice), an iron lance, a javelin, and a silver lance because I need her to instant kill some stuff. No vulnerary since there’s no space.
Tate and Miledy have similar gear, except each has a vulnerary instead of a silver lance and Miledy has an axereaver instead of a slim lance.
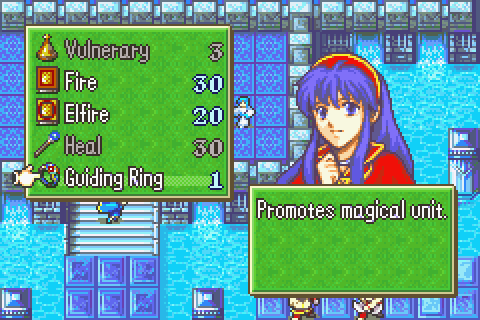
Lilina and Lugh both have fire, elfire (for when they need more damage for the OHKO), a heal staff, and a vulnerary. Standard gear for sages. Lilina also has a Guiding Ring of course.
Gonzalez has his usual wide variety of axes (iron, hand, killer, and swordreaver) and a vulnerary. He’s still 4 levels from promoting.
Oujay has his hero crest, iron sword, handaxe, vulnerary, and Durandal.
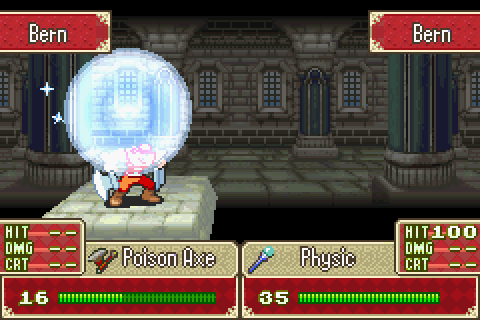
Saul is carrying a heal staff, a physic, a barrier staff (good for dealing with boltings), warp, and a vulnerary.
And Lalum has a vulnerary, a silver sword to trade to Oujay after he eats his hero crest, and a delicious-looking pair of boots for herself.
The reason Thany, rather than Tate or Miledy, is in front is that she has the best chance of dodging Bolting and more Res anyway. And that’s the reason she has the silver lance; the person in the front will need to kill an enemy target on turn 2 while the others will not.
Everyone else’s positions are irrelevant in their details. One thing I dislike about this starting area is that basically all 6 positions not filled by flyers are exactly the same distance from the path you want to take. That’s boring and a tripping hazard.
(Really) Playing Through:
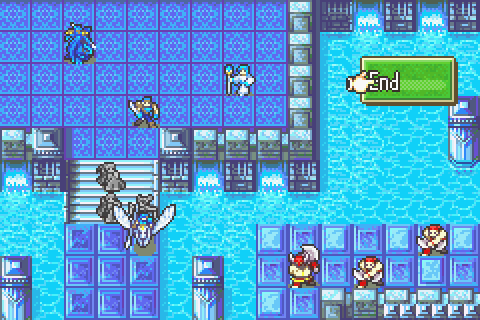
Thany flies maximum forward and equips the slim lance. Putting someone with 7+ move in the very front lets me get her just into Bolting range on turn 1.
Lilina runs forward and promotes.
Lugh heals her of course. Now Oujay actually stops one short on his move and then promotes.
That’s so both Saul and Lalum can reach him while moving full forward themselves. Saul buffs up his Res to respectable levels with the Barrier staff.
And Lalum gives him his silver sword before dancing.
Here’s the ideal spot to walk to now.
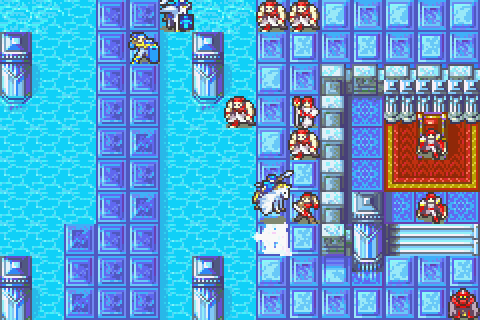
Order of operations is actually critical here. First Miledy picks up Lilina.
Gonzalez doesn’t move full forward, but picks up Lalum.
Then Roy drops her. That’s a square of bonus movement right there for her, which may prove helpful. And since their positions don’t matter much now, there was no real cost to me.
And this is why the order mattered; if Lilina was still standing in what is now the space west of Lalum, Tate could not have moved in there and rescued Gonzalez before moving on. She would have had to waste movement space.

Oh you have no idea how well we can do against you in particular.
Also, he has the generic sage sprite with green hair. A bit lazy there.
Also also, his battle quote here would make a heck of a lot more sense if he said it the first time you attacked him, rather than when he’s attacking you from across the map. Several bosses with long-ranged tomes have that kind of issue.
Convenient. That means Lugh can move full speed ahead instead of stopping to heal her. Alright, my turn.
Here’s where Thany needed that Silver Lance; it lets her kill a problematic archer immediately.
Well she wasn’t hurt, so Lugh can just charge south.

Time to send my favorite hero in again, this time with Barrier.
Bad Saul remains bad and yet only slightly below average.
Oujay wrecks Ohtz again, scoring a pretty respectable level. At the present, it’s more his right side stats that I care about. He’s probably going to cap Str and Speed regardless, but he does need more Def and more Luck would be fun too.
Now it’s time for rescue-drops. I did consider having Tate drop Gonzalez a few squares further north so she could fly back to Lalum, get a dance, and then fly in and attack someone, but it seemed to be more trouble than it was worth when I thought about the possibilities.
Instead Lalum dances for Miledy so that Miledy can just get a position I really want.
I waffled on whether to have Miledy stop here, trade with Thany to switch her away from the Silver Lance, and then drop Lilina right or fly one space further right and drop Lilina left. Ultimately I went left and traded.
Now honestly, what I did here was a slight mistake either way. I was forgetting that that priest had a Physic and foolishly trying to block him from getting to the mercenary for that reason. Why that matters will soon be clear.
Well, that’s the turn.
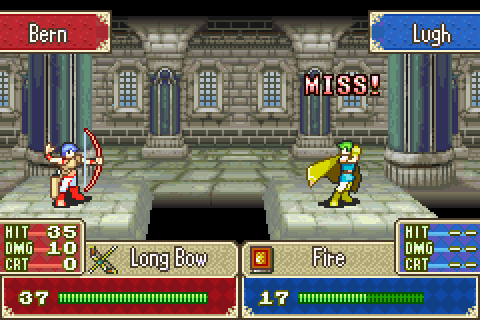
Lugh wrecks the two pirates. Now that I have some promoted people, I bet I can start turning my combat ranking around. You know, it's too bad (and a bit lazy) that this chapter doesn't have a cool unique battle background to go with its unique look.
Thany gets a bad final level.
1) The Eclipse druid, the priest, and the sage all have Physic staves
Ouch, a bit of bad luck I knew was a possibility there. It’s alright because…

2) Enemies who can use staves ALWAYS use staves instead of attacking.
3) QED, victory. That sage with the Bolting could have easily killed someone, but I knew he wouldn’t as long as at least one enemy was injured. He physiced a random pirate instead. That’s the reason I alluded to before that this guy isn’t hard to deal with at all. Just keep at least one guy in his range injured who the priest and druid can’t heal and he’ll never even try to Bolting you.
Well Oujay is on the throne now, so the tables have turned at long last! Let’s see how THEY like +30 avoid, +3 def, +5 res, and healing every turn.
With both Boltingers down on turn 3, I just need to seize control of the situation for 1-2 dangerous turns here and then the map is in the bag. This landing party is huge enough to be able to wipe the enemy out if I play my cards right, starting with this hapless pirate.
Miledy gets a lousy level up.
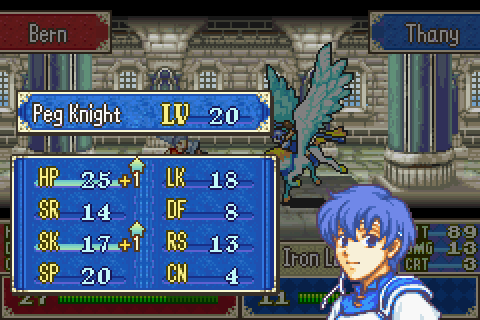
Thany hit 20 so I pull an unusual stunt and have her fly over here and then promote.
Pretty good, pretty good. Could have done with less speed and skill and res and more str and def, but that HP in particular is very nice.
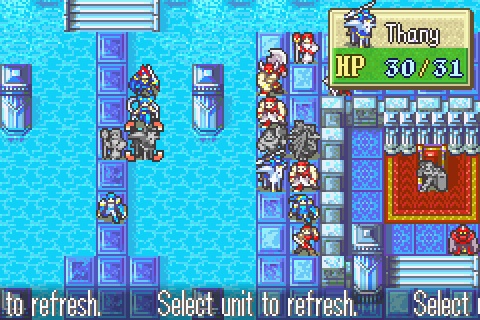
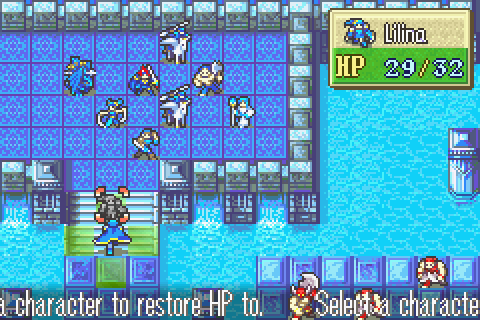
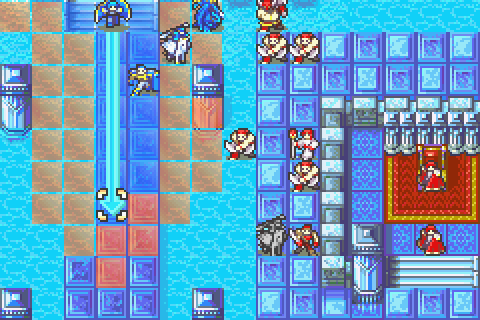
Saul heals her up and then Lalum dances so she can immediately get back in the action. You’ll notice that Lalum (and Roy) are in the water now; the bridge under them disappeared this turn. This really doesn’t affect them much at all. She’s not even trapped. You can move out of any terrain square at all, no matter how impassable, without any difficulty. It’s only moving INTO water that most units can’t do. This is a key part of why this chapter is quite easy to complete even with conventional tactics.
Pretty bad level there.
So the new and improved Thany flies back and cuts down the other archer immediately.
Now Lilina can fell the Berserker with ease.
There’s not a whole lot else to do since the problem enemies have been neutralized. Tate goes for an instant kill.
Meanwhile, Lugh is shredding the few remaining nearby enemies and moving as fast as he can toward the bottom area. That’s the turn.
On just about any other unit it would be a bad level, but it’s pretty nice on Tate.
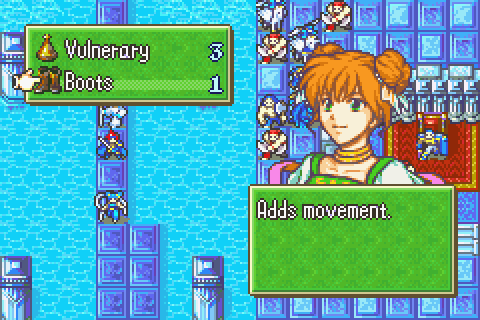
Lalum finally has a moment to digest the boots and get the much-needed movement bonus.

Lugh needs to keep moving to reach all those lazy enemies. It’s important that he stand here in particular this turn rather than make the more efficient full right move.
Well last turn the bulk of the enemy threat was eliminated, so this turn is rapid mop up.
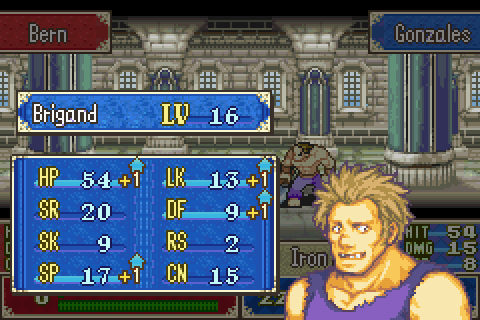
Clearing that enemy let Gonzalez kill the wyvern for a very nice level.
Lilina trades his handaxe back to the top of his inventory and then bakes the one to the right of her, thus ensuring that the one above her dies this round.
The left group and Tate prepare for rescues.
Miledy cleans up the last enemy in the area.
And Oujay has to move off the throne to kill the druid, but should be safe. That’s the turn.
And here’s why it mattered where I moved Lugh. If I had gone with the obvious move, he would have been completely trapped in the middle of the water. This is the only part of the bridge disappearances which is actually obnoxious; the part the smart player will travel through is the first to disappear and it does so in such a way that you may be completely trapped. Unless you have flyers ready to spend their turns getting you out, which you should.
Oujay is doing great as he wipes out a few more enemies.
I need to get Roy over there, so Thany picks him up and then moves so Lalum can dance for her.
Gonzalez and Lilina have little else to do, so they head right to pick off a few stragglers and get some support and heal XP.

Not a bad heal level. I mean, those aren’t good stats, but they’re stats she’s not already doing great in.
Miledy grabs Lalum but can’t quite fly back.
But Tate buzzes in, takes Lalum, drops her, and keeps moving. Smooth. Now everyone except Saul (who has a Physic anyway and thus doesn’t need to be there) has been relocated to the middle isle to quickly take down the last few enemies.
Longbows are annoying. There’s usually no way to kill them in just one round.
The suspense is killing me! Is she going to get hit?!
Pretty good. I want some more Def on this guy.
His string of mediocre levels recently are sinking him back down much closer to average. Oh well, the boost was fun while it lasted.
These 3 guys are just too far off. I’m not going to be able to kill them all quickly because they’ve been so lazy.
Oujay runs away from the remaining foes.
Miledy and Lalum get Saul dropped in so I can get some heal XP without burning a Physic for it.
Gonzalez kills one last enemy.
Another chip heal, another bit of bonus XP.
Well the pirate never moved even with me trying to lure him, but at least one wyvern came in range.
And this turn you see that the reason Oujay ran was so Lilina could heal him.
Miledy kills the druid.
Saul does one last heal.
And Lalum, with her increased range, gets Roy onto the throne.

Turn 7 win! With only 2 enemies left alive and only 1 wound left to heal. That’s about as good as it gets.
That was one of very few chapters in this game where interesting tactics were actually encouraged. Usually I’m just playing straightforward strats which are really boring to me after a lot of my creative ones in FE7. It’s the level design really. And that the tactics requirements are so easy that there’s no reason to find awesome ways to save time.
Sophia opens the altar, explaining why the invaders couldn’t get the tome within, but she can.
Now one thing just struck me. Just after finishing this chapter I thought about how weird and detrimental it was that Sophia doesn’t appear in the following conversation. But then I assumed that the game didn’t want to jump to the conclusion that she was alive after this chapter. However, she IS shown here in this conversation. So… apparently they just decided not to include her in the next one even though she should really be talking.
You know what? Let’s ask you the same questions. And for that matter, where were you during all of this? How did you get in here unguarded before we cleared out all the soldiers? How do you not already know who we are after we cut our way through Bern’s troops outside? Speaking of them, did they or did they not meet heavy resistance here?
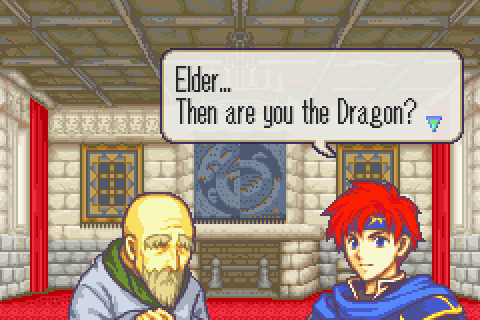
That’s quite a conclusion to jump to.

What?
No seriously, what? Are you a dragon or not? He’s talking like being a dragon was some nickname he had in his college days.
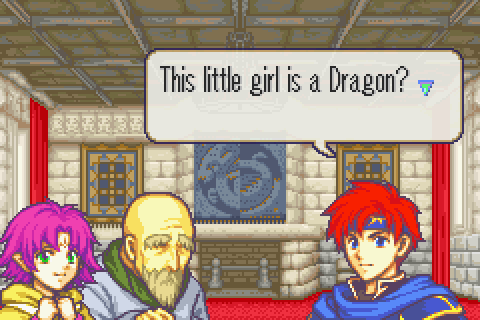
Ugh, nevermind.
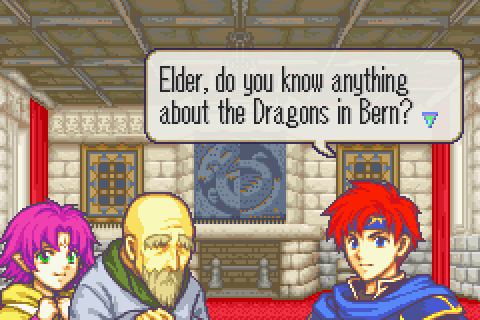
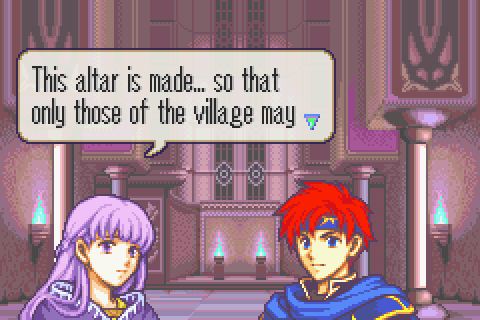
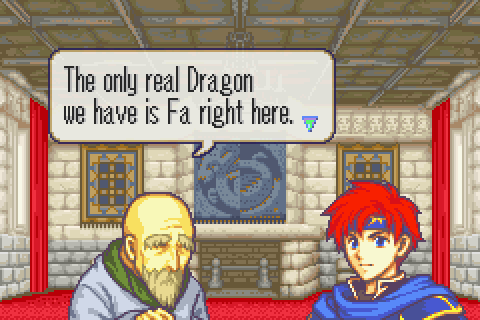
Ah yes, the big question! The central mystery of the game so far. But here we are at last, in a village populated continuously by dragons since the Scouring- if not before. The village where the most knowledgeable human hero of all time settled down. The village of the wisest race of dragons for that matter. And a place with libraries and archives that in the sequel are said to astound even Athos and Nergal.
… … …
They parked right outside your village. Not to mention Sophia reported feeling them, as they will now discuss. And furthermore, the dragons were sent to attack the town. It’s reasonable to assume they did some of that before being redeployed to fight Roy, since Bern was in control of the town.
Anyway, he knows absolutely nothing. Somehow. He really should know just about everything including 95% of the story of how Bern got their dragons. He should know all about Idoun and what she is from the lore of the divine dragons + Athos telling them his story and how Hartmut left her alive. He definitely should know about how the demon dragon’s powers work because the divine dragons understood the proposal to create one and rejected it. Not to mention they know how to cure Idoun later. But he is somehow, inexplicably, not even aware that Bern HAS dragons- like the ones that just attacked his village- let alone anything about how they got him.
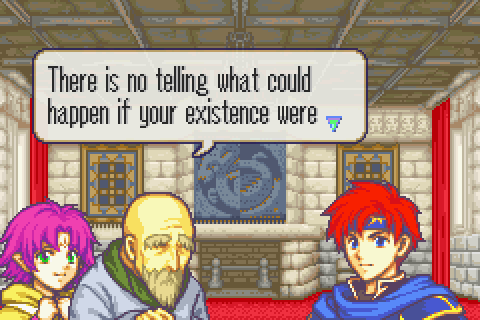
And it can’t be that he’s lying either, because Igrene or Sophia should know. Or at the very least, he would tell Igrene to stay because they don’t need to know more about this non-mystery and the village needs protecting (and Fa needs guarding) now more than ever.
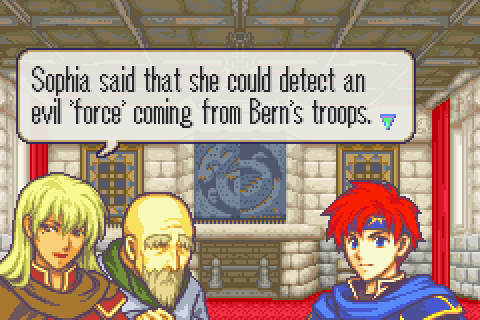
Why doesn’t Sophia step in at any point in this long conversation about her, her abilities, and what exactly she felt and reported?

Sure, we’re always in need of more people to carry junk.
Now YOU’D be welco-
Dude, what? Ok first of all, Bern knows there are divine dragons here. And everyone knows about dragons in general not being myths now. Unless the game is STILL trying to claim they’re secret even as Bern deploys them for menial guard duty in foreign capitals.
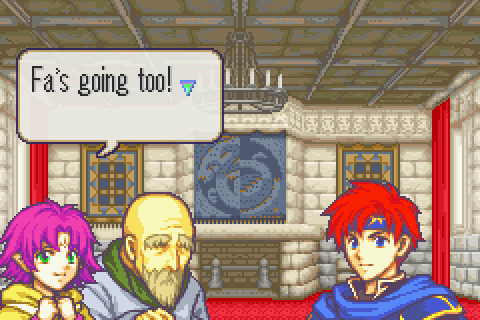
Second of all, what WOULD happen? You just claimed, nonsensically, that Fa is the only dragon here. That means if she leaves, this has become a more or less ordinary village. There are no more dragons who could be persecuted.
Furthermore, the removal of Forblaze will cause the protective sandstorm to cease. These guys WILL be found regardless of whether Fa is here or not. And for that matter, Bern already located them, Sophia tells EVERYONE their location as an icebreaker, this whole army knows about it, etc.
This game’s script is so full of nonsense that even the old man saying people used to call him a dragon but now he isn’t one doesn’t stand out as particularly weird.

Maybe after demanding she stay- and after Igrene heard her talk previously about being willing to be captured by Bern if she got to leave- they should have posted a guard or something?
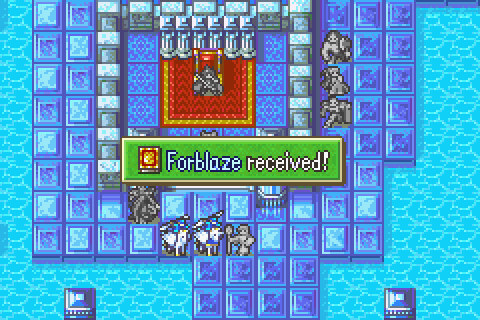
At long last, a legendary weapon I can actually use when I receive it.
Total Restarts: 7 (Once for the 2-turn win thing obviously and then once more when on turn 3 I got a ton of improbable criticals, which meant no enemies were left alive but injured, which meant the bolting sage had no one to heal, which meant he instead used Bolting and killed someone. Have I mentioned I don’t like how criticals work?)
Turn Surplus: +4 (Positive at last! Saving 13 turns in one chapter is pretty awesome)
Things I Regret Missing: A couple of uses of Marcus’s silver lance on Rude, a Chapter 5 nomad Marcus had to kill, two Chapter 12 fighters I couldn’t kill since I needed supports built elsewhere, a pirate and a wyvern rider on 14x who I didn’t have time to go after.
Legendary Weapon Scoreboard: Durandal slew Ohtz using Oujay on chapter 14x, turn 2.