Part 1: Spring 1815 : Welcome to Visisik
Spring, 1815
Announcing the founding of the glorious modern nation of Visisik! I undertake my new duties with both optimism and a strong sense of responsiblity. Our great power will continue to expand under the well-known principle of might makes right. Or not, if goons decide we're better off expanding by the more peaceful and profitable principles of ruthless capitalism. Or we'll end up having to fend off invasions by foreign agressors, and in so doing find ourselves taking control of more territory than expected. I'm sure something interesting will happen.
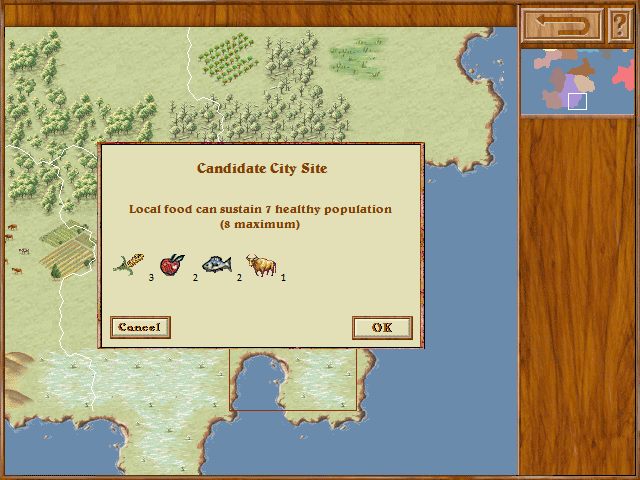
Selection of a capital city is nearly as critical as starting country choice. The capital must be placed with uncontested access to water, which means on a coastline or along a river*. About the only place we can set our capital to support a decent early population is here on the edge of the tundra. Capital cities always have the unoriginal name of <country-name> City, so it is here that Visisik City is founded.
*I think, but haven't confirmed, that there's a bug that hits you if you place your capital on a river. It might not be possible to launch a naval invasion from that port. There's also a bug that I observed for the very first time on this map - the river access overrides the coast access, meaning the northern coast hex is an invalid starting spot (not that we'd want it anyway).
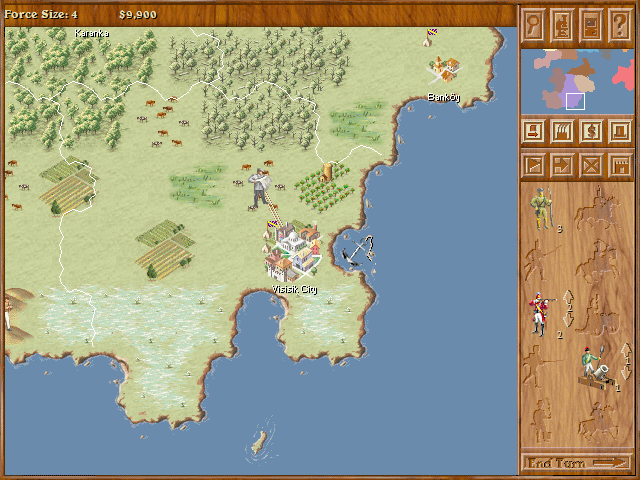
We start with a few units already on the map. We have an engineer here getting started on a beautiful rail line to increase the commerce of our land. Our army is arrayed in full force in Visisik City,
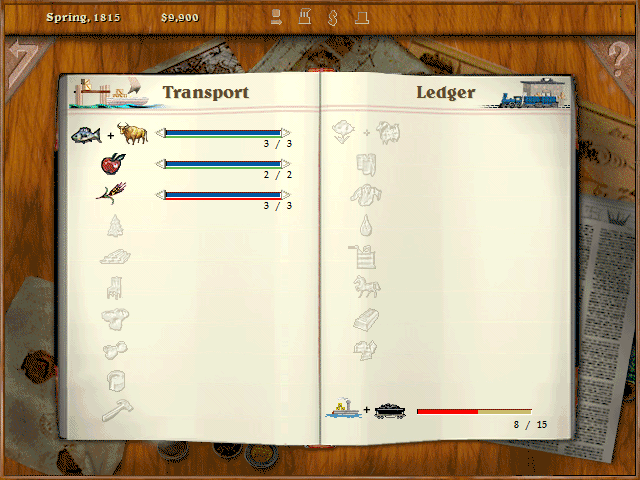
All commodities produced domestically must be freighted to the capital via our transportation network. The rails and ports must be built on the map, but they also require trains [and barges] to operate on them. That's what the transport capacity represents. We can expand the capacity it at the railyard using lumber and steel. At the moment, we don't need to worry about transport, as we start with extra capacity and have just begun to expand our network.
This is our glorious capital city in more detail. It's the only management screen of its kind — we don't have to worry with the details of any of our other cities. Makes for smoother gameplay, although if I had a wish it would be some way to determine what resources are being produced/delivered from a given port or depot. Someone tell me if that's a hidden hotkey or something.)
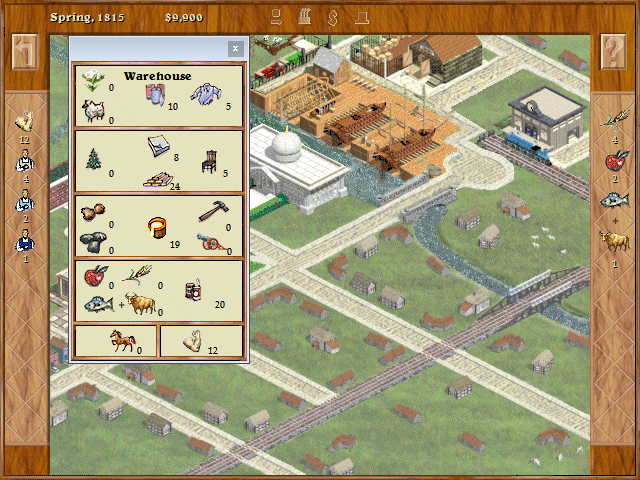
Our warehouse is full of materials ready to use. I'd like to think all those pictures are pretty self-explanatory, but if anyone has questions feel free to ask. (On the screen, the warehouse is the building at the very top center, with all the crates beside it.) We'll be building up our capital right away.
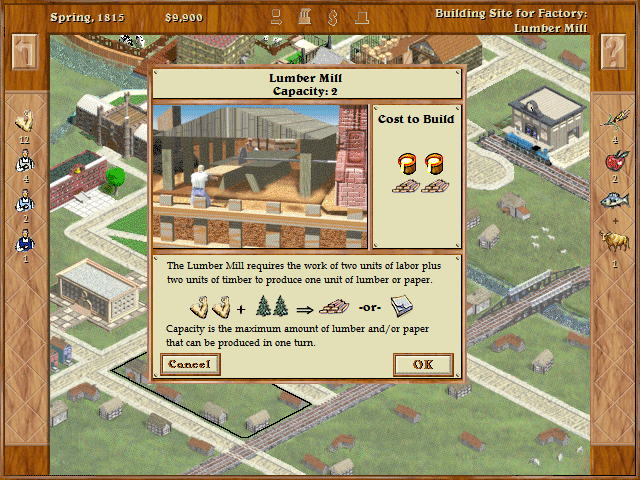
We'll be building mills and factories for now. The mills turn raw resources into industrial materials. Those materials are used in the production of all sorts of items, including the expansion of factories, military units, and, of course, consumer goods. Notably we do not need to spend money to expand these buildings.
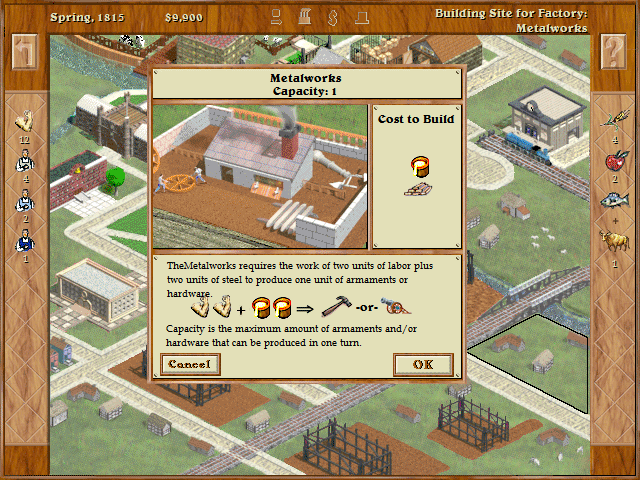
The factories produce the goods which we will sell for profit (or use ourselves, in the case of weaponry). The general rule for how the industrial economy works: It takes 2 resources to produce 1 material, and 2 units of material to produce 1 unit of goods.
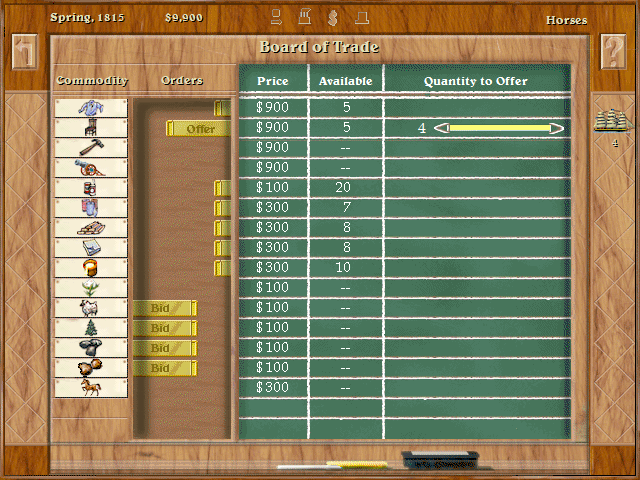
The next thing to take a look at is the trade ledger. It should be fairly clear what's going on. We can put up any amount of our commodities for sale, and also offer to buy what we need more of (although you can't do both at the same time)*. You can only make buy offers for four types of commodities in any given turn, so that can be a pretty important decision. At the moment, we won't actually be selling anything. We do want to start competing for raw resources, so we'll enter the market for wool, wood, coal, and iron.
*This isn't completely crazy in the game's context, since trade can confer a diplomatic benefit, but you almost never want to sell the same commodities that you want to buy.
Something that I think the game pulls off rather well is that all actions in these screens are actually planned actions. Orders are resolved mostly simultaneously for all nations, with some rules determining who acts first when necessary. What it means is that at any time during a turn, you can cancel a unit's current orders, or make changes to resource allocation. This is, for instance, why all the buildings only show as under construction, and why the trade ledger isn't about instant purchase but entering markets.
The last major screen is the diplomacy section.
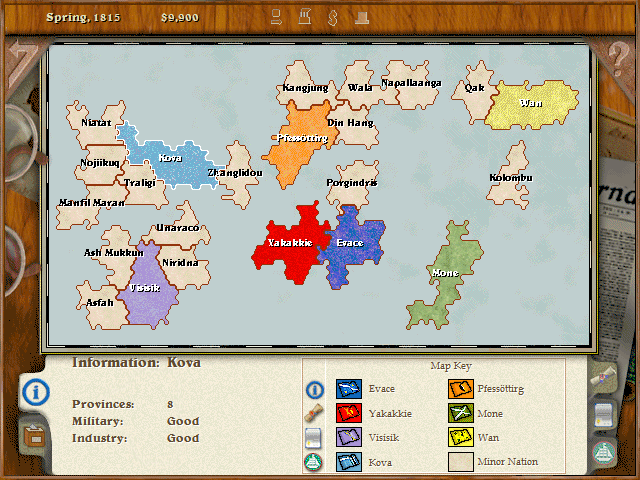
The diplomacty section contains a whole lot of information on the maps. This base 'info' screen just shows the state of all the countries, both Great Powers and Minor Nations, which is mostly there to see who owns what.
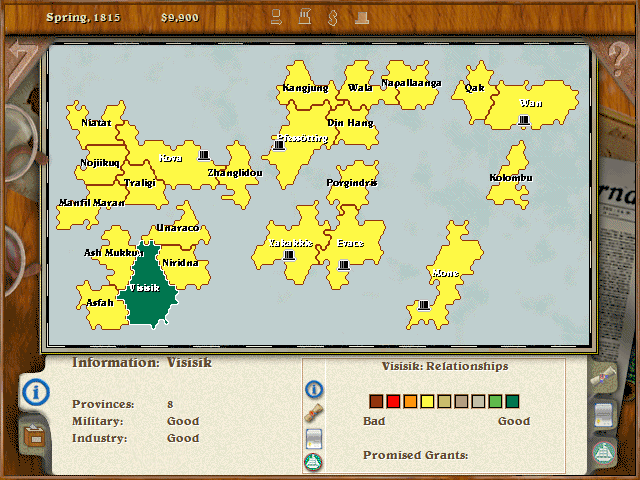
The relationships tab displays the status of a nation relative to all the other nations. Right now Visisik is selected, so it's showing how we're doing (and also that we have
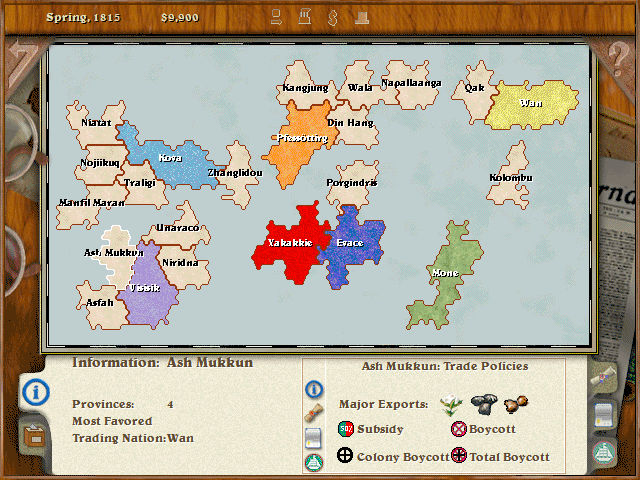
There's even more information to be found here, but for now the most important is the Trade Policies map. Right now, it only shows the legend and what each Minor Nation produces.
This is actually our next crucial decision. We need to decide which Minor Nation[s] we want to improve trade status with. Or who we'll want to keep from becoming cozy with another Great Power.
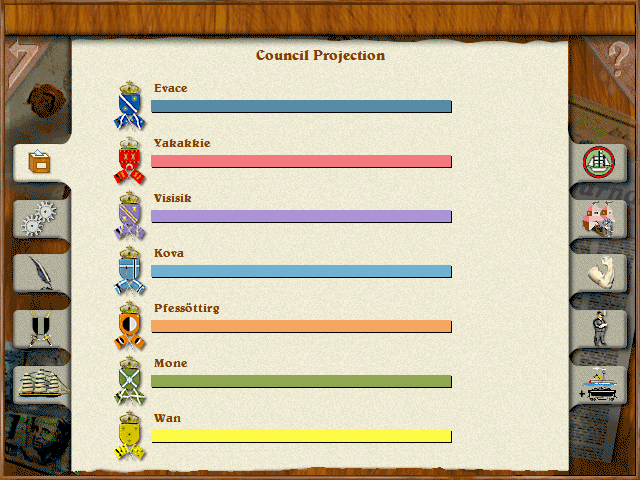
Here's all the opposing Great Powers, in case you're having trouble reading their names off the maps. Bonus points if you can guess the culture from the name. (Also, guess which famous world power gets left out?
 )
)While it's not up for voting yet, our country also needs to consider the question of expansion. We can, if we so choose, attempt to procure our resources solely by developing colonies, either close to us or abroad, that will deliver them cheaply. Or make the call to prepare for conquest and ensure that we control the resources. Attacking any minor nation will cause world opinion of us to drop sharply, and jeopardize our chances of obtaining colonies elsewhere. The current relations of Minor Nations are such that they like most nearby nations slightly more than those farther away from them, so attacking any of our neighbors would affect those relationships a bit more.
We can set up trade with any nation we want. Nations farther from us are slightly harder to protect, should it come to war with another power, but it's not so much of a problem that we should only go for colonies near us. In fact, it's often quite important to get friendly with a minor nation in order to keep another Great Power from gaining control of it.
Of course, the richer minor nations tend to have a lot of competition for their favor, so in some cases we should consider who we're more likely to get close to. It can still be useful to have a trading partner that doesn't provide you with good resources, as they will be someone to sell our goods to.
Finally, we can realistically seriously court only two or three nations at a time if want them to become colonies. The reason is that we'll typically want to purchase every possible commodity from them in order to get them dependent on us. We can always maintain trade relations with other nations, but it's best to stay focused to get what we want, which is also why it's best to start early.
There's no need to show off the map for each one, so I'll provide a list of them, along with what each one produces. We'll eventually need lots of coal and iron, but for now wood and cloth (wool/cotton) are the most useful to us. This is roughly north-to-south.
T = cotton, S = wool, W = wood, C = coal, F = iron
pre:
Country                 Produces                    Nearest GP neighbor

Kangjung                W  CF                       Pfessöttirg
Wala                    W SC                        Pfessöttirg
Din Hang                WT C                        Pfessöttirg
Napallaanga              T                          Wan/Pfessöttirg
Qak                     WTSC                        Wan
Niatat                  W SCF                       Kova
Nojiikuq                W  C                        Kova
Traligi                 WT                          Kova
Zhanglidou              WTS                         Kova
Manfil Maran            WT  F                       Kova
Porgindris              WTSC                        Evace/Yakakkie
Kolombu                 WT                          Mone/Wan
Unaraco                  T CF                       The glorious nation of Visisik
Niridna                  TSCF                       The glorious nation of Visisik
Asfah                      C                        The glorious nation of Visisik
Ash Mukkun               T CF                       The glorious nation of Visisik
Voting will most likely run until some time on Sunday.