Part 16: Episode XVI: Koudelka Rides Alone

Episode XVI: Koudelka Rides Alone
Welcome to Disc 3 of our cautionary tale of venturing to Wales. It’s going to be a spot lonely for a while since Koudelka has gotten separated from the boys and will remain solo for a sizable chunk of this disc’s opening.
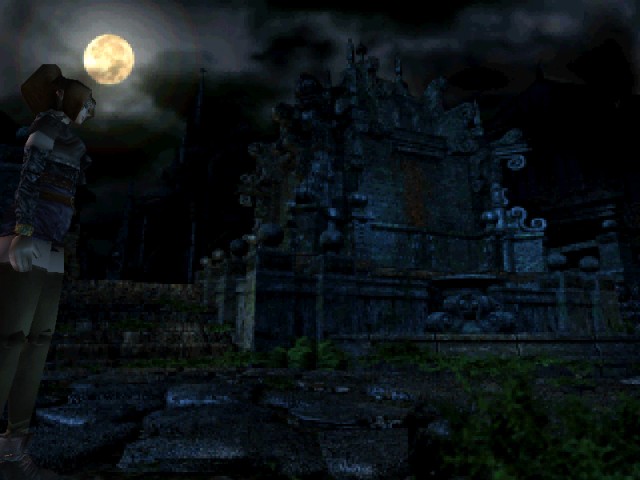
It seems our flight from the Gargoyle’s wrath has landed Koudelka in the central courtyard of Nemeton Monastery. Going back to the church isn’t an option. Koudelka will straight up nope out on going back in there while the Gargoyle is just hanging out. It appears our only options are a door to the north leading to the as of yet unexplored northern half of the monastery. And some sort of central chamber in the middle of the courtyard. Or maybe Koudelka will get lucky and the front gates will be open and she can just forget about helping out any dumb ghosts and skip town.
Having Koudelka as our only party member for a decent clip does make things more difficult. That’s the chief reason I went and trained up all her magic spells to at least Level 2. Koudelka has enough Vitality that she’s fairly durable at this point and enough Agility that she near certainly has initiative in every battle. Her magic stats are enough that she’s easily the most powerful member of our trio. Hopefully that’ll all serve her well on her solo career.
But as a precautionary step, we’re going to slide Koudelka to the back row of the unit formation. They’re kind enough to fill the pool of enemies during this stretch of the game mostly with foes who primarily use physical melee attacks. So pushing our heroine to the back row usually gives us enough breathing room to take two turns before enemies can attack. Usually...
There’s a lot to explore in the courtyard. But we’re going to want to make a beeline to one particular place to get a base of operations. First let’s head in the direction opposite the Gargoyle’s hangout.
Here we come upon that building central on the map. Seems the door into the structure is barred by a fountain. Koudelka is none too fond of getting wet, so we’ll need to shut that off before we can open the way further in and investigate. That aside, there are paths to the right and left of the waterfall room. We’re gonna head to the right first and take the stairs down to the back of the building.
Moody. Seems there’s a much less aggressive fountain in the back. If you’ve been paying attention to this game regarding fountains, then...
This is a Permanent Save Point/Full Heal holy water fountain. I’m kind of shocked it’s gone uncorrupted/they didn’t make Koudelka fight a boss right off the bat by herself in Disc 3 before the player could save the game. Small miracles. Now at least we’ve got a foothold in Disc 3 to begin our exploration of the area.

Music: Waterfall
Most of the enemies found in the courtyard are fellas we’ve come across already primarily of the undead variety -- Wrights, Exploded Corpses, Ghouls, Headless Corpses, and Hands of Glory are all out getting some air. Ravens and Corpse Hounds are also about getting a bite to eat.
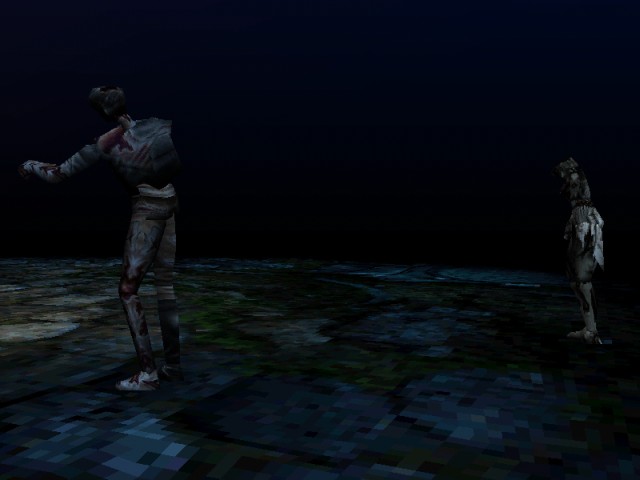
There are, however, a couple new faces in the crowd. Like these giant ass flightless bat creatures, the Brutes. Brutes have very little HP but they usually come in packs of 2-3 which can be a problem for Koudelka running solo. Their only attacks are an ultrasonic screech. You know... being a bat and all. They can also just swipe Koudelka with their claws. The latter attack is way more of an issue because it has a high chance of inflicting Paralysis. Paralysis locks down all actions so... kinda an issue when there’s only a single playable character. Kind of a dick move.
Joining the Brutes are Giants. One legged Giants... They have to hop on one foot to move and can only make it a single grid square per turn. That’s just sad... Giants have a TON of HP. We’re talking 6000+ HP for a single Giant.
Thankfully, their only attack is punching Koudelka and it’ll take about five turns to make it to her to even do attempt throwing a bunch. Conversely, the Giants are Wind elemental so a Level 2 Megalith or two will sort them out in short order. Outside of Giants, Koudelka’s magic is strong enough to one-shot everything else in this area.
That said, despite having a decent stock of Vitality, Koudelka is still quite fragile and a bad run of luck can turn the tide of battle against her fairly quickly. Naturally, if Koudelka is KO’d while flying solo...
New Music: Game Over
...It’s a less than optimal outcome. It’d be really embarrassing for Koudelka to get murked within twenty minutes of being separated from the other two chucklefucks. That seems more of an Edward Plunkett move.
Music: ENDS
We did come across some spoils of war in random battles here. Such as a Saber, a very basic one-handed sword weapon. Would you believe this drop is a Light elemental Saber? Yes. It literally just says Light Saber in the menu. I enjoyed that. Also the fact this is clearly not a curved sword...
One of the Corpse Hounds returning here actually dropped a rare special drop – Galahad’s Sword. This sword only gives a +7 boost to Dex and Strength when equipped. What makes it special is that since it’s already broken, it takes 100-255 uses to break in-game, making it one of the few efficient ways of training someone up with the Sword weapon class if we ever wanted one of our party member to branch out in their weapon proficiency.
We do not. We’re over half-way through the game. We’re not turning James into a swashbuckler bishop at this point...
Our final bit of loot during this stretch is Jewels. This bling offers +9 Intelligence, +13 Mind and +7 PIE. Can’t wait to slap this on James next time we find him. Assuming the boy band hasn’t already horribly died after being away from Koudelka for all of ten minutes.
Let’s get back on task. There’s a path opposite the holy water fountain. The path splits after a couple screen transitions. But let’s just stay the course to the east where we find...
Unfortunately, it’s locked and cannot be opened.
The front gate to Nemeton Monastery where Koudelka initially tried to enter the ground way back in the intro movie. Sadly, Ms. Iasant cannot just pick up and leave. Which is a shame. I hear Llanfairpwllgwyngyllgogerychwyrndrobwllllantysiliogogogoch is lovely this time of year.
To the right of the main gate, we find a rather unusual looking monument. Let’s take a closer look. This seems important...
Try as you might, you cannot take “Sacnoth” from the statue -- it appears to be held in place by something.
The Sacnoth Sword here is the reward for a sidequest we won’t be able to partake in until Disc 4. It’s one of the strongest weapons in the game. For now, we’ll just keep in mind it’s out here being held aloft by this ripped statue dude in a chain bikini.
In case you’ve forgotten or just skipped reading the OP like a degenerate, Sacnoth Digital Entertainment are the creators of this game. Though looking at their splash screen logo now... they seem somewhat unsure about the whole digital part of their enterprise. That’s a strange place to stick a question mark in a company title...
Well that direction was a bust. Let’s return to the other side of the fountain building and see what’s on that path we skipped earlier.
Apparently James’ alchemist friend Patrick’s quarters are in this part of the monastery. Unfortunately, the door into his chambers is locked from this side. Of course it couldn’t be that easy. Let’s check out that statue to the right of the door instead.
It’s a real good thing that apparently the party had Koudelka lugging around their massive collection of trinkets during the exploration of Nemeton. Clearly her fanny-pack was best suited for the task. Edward’s backpack and James’ travel purse just wouldn’t do.
As such, we’ve got access to all the Key Items from earlier. And guess what finally has a goddamn use since we started our collection way back at the first boss of Disc 1? The statues for the Icon’s <Jewelry> are lining the courtyard. Koudelka can clamber up this statue and attach the Icon’s Necklace to it. Not sure how she determined this one needed the Necklace. But I’m not a JRPG protagonist.
Opposite the first statue, we find a second one which we can adorn with the Icon’s Ring. Two down, two to go...
From here we can cross back along the path we began this area and find the third statue...s... standing side-by-side across the way. Turns out each of the Icon’s Earrings went on an ear of both the statues. Again, I’m not going to guess how Koudelka figured that one out. I’m just kind of sad we didn’t get an animation of her awkwardly shimmying up both of 'em to attach an earring.
The final statue’s location is really easy to run right past. Once again, like down in the Acid Pit room, running toward the camera yields way to an unseen critical path and the last of the Icon Statues. It’s highly recommended to make a Permanent Save here before having Koudelka part with the last of the statue bling.
Placing the Icon’s Crown on the last of the courtyard statues doesn’t have any immediate noticeable effect. Indeed, if we’d opted to place the last of the Icon Jewelry on any of the other statues last, it might take a couple minutes to notice the change.
But returning to the prior screen, we can see the Holy Water fountain has stopped flowing. That Permanent Save Point is deactivated for good and with it Koudelka’s free healing while exploring this area. Shucks. Though that does mean the waterfall barring her path on the other side should have stopped as well.
HOWEVER, it’s
 VITALLY FUCKING IMPORTANT Koudelka goes and investigates the now dry Holy Water Fountain.
 Hey, remember that pendant Koudelka lost in the opening cutscene where she nearly ate shit falling off the roof of the monastery while breaking in? Somehow it fell from the roof onto the cobblestone below, bounced roughly 60 meters and over a fence and straight into the middle of this fountain. Yet it has remained perfectly intact.
Koudelka’s Pendant is an Accessory grants +7 Intelligence, +6 PIE, +10 Mind and +15 Luck. More importantly... the game literally cannot be completed without obtaining this pendant. It is 100% mission critical, this accessory that can easily missed or discarded in the trash from the menu and lost forever at any time. The game makes zero effort to mention this has to be collected and is vitally important. So that’s fun! Apparently a late game enemy has a very rare chance of dropping a copy of this pendant if it is discarded for some reason. So at least the game won't be unwinnable. Still... Fucked up!
The Pendant’s use won’t become apparent until near the very end of the game. We’ll just keep in mind that Koudelka retrieved it here and hold onto it for safe keeping.
For now, we have a new path into the central building of the courtyard now that Koudelka is safe from getting wet from that pesky waterfall. Let’s see what adventures await!
Music: Execution Chamber
...O-oh... That umm... is less than a friendly sight...
Koudelka quietly scoots around behind the coated in fresh blood guillotine and discovers a ladder with a blood trail leading below. That’s less than inviting. But it’s not like we’ve got a lot of options. Down we go to...
Ah. A pagan sacrificial chamber. Yeah... yeah that’s about what I’d expect at this point. Before Koudelka can begin investigating the room, we’re whisked away into the realm of CGI cutscenes...
Koudelka Vision: ACTIVATE!
This lady who definitely isn’t a slightly altered Koudelka model with her hair layer removed and her head nearly twisted on backward doesn’t seem to be having a fun time...
Yep... Yep, this a bad scene all around for everyone involved.
 Oh god... OH GOD! Gross... Gross! GROSS! How do I turn the visions off!? Ugh... I’m gonna hurl... I did not need to know guts could stretch that far... HURK! BLAARRRRGHGGHGGH!!! <projectile ralphs all over floor>
Unfortunately, Koudelka is too preoccupied with hurling chunks to notice an overweight sixty year old man climbing down the ladder and creeping up on her.
Gonna be real... Not the best of moves, Koudelka... You’re supposed to run out of the secret murder dungeon if you’ve got to vomit. Sticking around is the worst idea. That’s just asking for an axe-ident. Tune in next time as we see how our heroine gets out of this fix as Koudelka continues.


Video: Episode 16 Highlight Reel

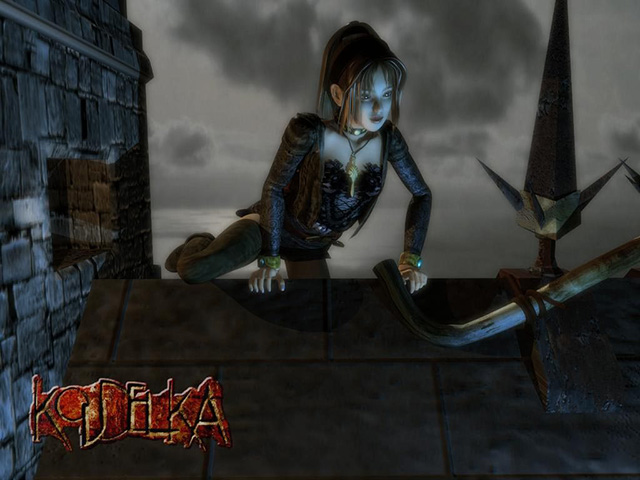
Koudelka High Resolution Render – A better look at that pendant Koudelka lost in the intro while clambering along the roof.