Part 1: Video 1


Stage notes!
100-Pt requirements:
-Clear time: 2:10
-Enemies killed: 37
Hard mode really doesn't add anything to this stage, seeing as you wouldn't have any high-level abilities anyway. It'll be more unique later.
The intro stage begins by summarizing the events of the last game in a prologue that’s much shorter than the one in the first game before thrusting us into the stage itself. It takes place in the sand wilderness, a wasteland far from any settlement, strewn with scrap metal and the broken-down husks of machines, and largely populated with all manner of bizarre Mechaniloids, including tumbleweeds and cacti. Pretty much all of nature and the wide variety of living things it once supported has gone extinct, so all plant and animal life in the game will be either mechanical or bio-mechanical at best. And will likely be trying to kill us.
This level is almost excruciatingly awesome. It has a great theme, pits you against a stream of enemies right off the bat so you can practice your attacks, and contains some really great references to the first game that help to set the tone. After his year of wandering, Zero’s on the verge of breaking down and can no longer use his two sub-weapons from the last game, the shield boomerang and triple rod. This is shown in both the menu screen and the intro music; firstly, have a listen to these.
For endless fight (Zero 1 ending theme)/For endless fight II (Zero 2 prologue theme)
As you can undoubtedly hear, both are variations of the same theme; the kicker, though, is that while the first one has a definite air of triumph and determination, the second is tired and weary, just as broken down as Zero himself.
The boss theme of this stage is a remix of the first game's boss theme, too.
Now, for a menu screen comparison:
Zero 1-
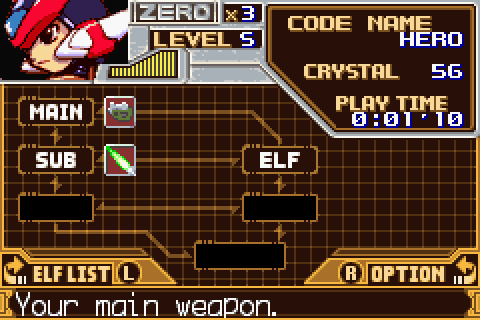
Zero 2-
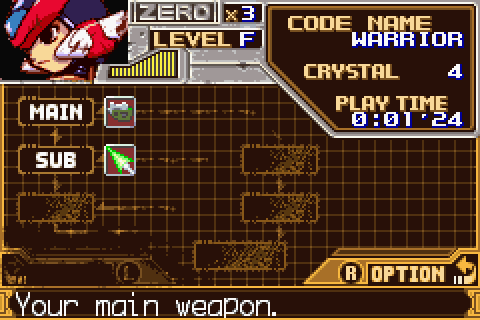
Save for the redesign of the Z-saber icon, they’re obviously the same menu; thing is, though, the second one is covered with pockmarks and static, and the entire toggle to the Cyber-elf screen has been destroyed, meaning we’ve lost access to any Cyber-elves we might’ve picked up in the last game. It’s a glorious bit of attention to detail, and after having been transported back to the Resistance base and repaired we get a shiny new menu to represent our shiny repaired self, as demonstrated in-game.
Just a personal thought on the level, I personally have a huge attachment to this game in general and this stage specifically because it was basically the first Megaman game/stage I ever played, and one of the first games I owned.
Forms!
A new feature in Zero 2 is the ability to acquire different “forms” for Zero, which give different stats, abilities, and color schemes to our numerical hero. With the normal and hard mode videos, we’ve already seen two of them, and I’ll be detailing them here, along with stats and other unique things about them.
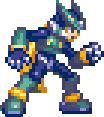
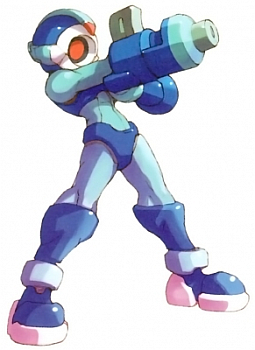
=Normal Form=
The normal form is the most basic of forms, and Zero’s default color scheme. Its stats set the benchmark for comparing all other forms:
Power-**
Defense-**
Speed-**
It has no other special things about it that are worth noting; it can use all charge attacks and triple slash when you’ve gained the weapon levels, but it’s an easy to use, all-purpose form that can easily get you through the game if you so choose.
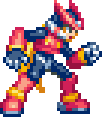
=Proto Form=
The Proto form is usually obtained upon beating the game, but it’s the default for hard mode, and for good reason. Look at its stats:
Power-****
Defense-*
Speed-**
When playing in hard mode, you’ll notice two things: one, that you’re tearing through enemies like butter, and two, that they’re tearing through you just as easily. You’ll be taking ridiculous amounts of damage, and the form’s secondary effects stop you from gaining (or using any earned) weapon levels, meaning that you’re stuck with the most basic of your attacks.
A cool thing about this armor, though, is its color: It’s basically the “Black Zero” special armor from the X series games which is pretty sweet.
Character bios!
~Enemies~
Pantheons
Returning from the first game, Pantheons make up the Rank & file of the Neo Arcadian forces. Mass produced, degraded copies of X, they possess some form of intelligence but, gameplay-wise, serve as standard enemies.
We’ll be encountering a decent amount of different pantheons through the game, like the hunter-model pictured above, and as shown in the video they’re not too hard to take down, although each form has to be dealt with a little differently. Regardless of difficulty, though, their vast numbers have worn Zero down over the last year, and they’re still on his tail as the game starts. I personally like the pantheons quite a bit, so I might name the different models as they crop up. Their overall name, “Pantheon”, comes from the Greek “Pan” and “Theos”, and means “All gods”.
Golem type-E

Moveset:
- Front lasers: Charges the front lasers, then shoots them. Standing away from the Golem will cause them to miss entirely.
- Rear lasers: Charges the rear lasers, then shoots them. Standing next to the Golem will cause them to miss entirely.
The Golem type-E, and his counterparts types F and I, are recurring sub-bosses in this game. The type E especially has numerous appearances.
An upgraded version of the Zero 1 intro boss, the regular Model-A golem, the Type-E incorporates electricity into its attack pattern by shooting it out of its arms as a laser attack. Unlike the intro boss of Z1, it doesn’t go down in one hit but it’s still pretty damn weak to Zero’s weaponry. The annoying thing about them is the way their hitbox works; it extends jussssst far enough down the right arm-thing that you have to be pixel-perfect in your slash, otherwise you get hit and that’s never fun. Not too hard, and later on when we have Elemental chips they’ll be even easier, but they serve as a good intro to more powerful enemies and dodging attacks. And those enormous metal codpieces are great.
Mega Scorpia
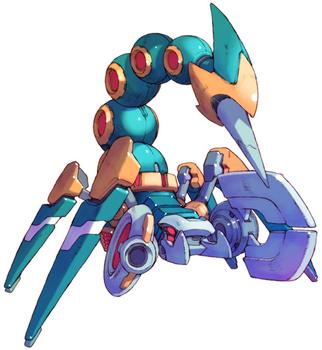
Moveset:
- Tail impale: Uses its spiked tail to stab the ground about ¾ of the way across the screen. Will damage if it hits, and creates a bottomless pit that *cannot* be wall jumped up. Stand a bit to the left or right to dodge, jump over the pit.
- Pincer shield: Moves his remaining pincer slightly in front of his face, protecting it from damage. Pincer can be damaged during this.
- Pincer shoot: Snaps the pincer twice, then shoots it out while it glows red with energy. Dash jump over it, then do it again when it boomerangs back. The rear of the pincer can be damaged during this.
- Triple shot: A generic triple buster pellet shot from what’s left of his right pincer. Jump over to avoid.
- EX skill: N/A; it’s not possible to have an A or S rank at this point in the game.
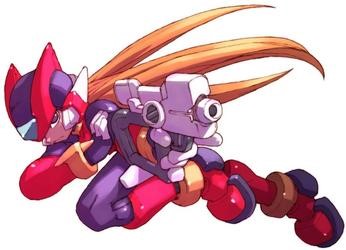
The intro boss of the game, Mega Scorpia is about as difficult as you’d expect. The Pantheons called him in, but he’s not the most loyal of Mechaniloids so he ends up firing one of his pincers at you while you’re standing in front of them, which doesn’t end too well.
Thankfully, this means that he’s short one pincer for the battle. He’ll use the remaining one to attack Zero and shield his head, the only vulnerable part of his body. Funnily enough, that Pincer’s destructible; four hits from the saber will cause it to explode.
Mega Scorpia himself only has one health bar, so he goes down fairly quickly to Zero’s assault. The biggest dangers in the fight revolve around the pits his tail creates and the slightly tricky jump over his pincer. Once you’ve got it down, though, he’s a walk in the park.
~Allies~
Elpizo
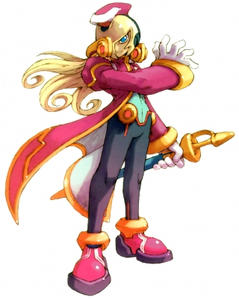
In the year since the last game, the resistance has recruited many new faces. One of these is Elpizo, who, by Ciel’s request, has taken over the leadership of the resistance.
Originally known as TK-31, he was working for Neo Arcadia when he, too, was labeled a Maverick. Some rather interesting things happened in regards to that, but that’s a subject for another day.
Regardless, upon joining the Resistance he dubbed himself “Elpizo” and helped with the move to a new base. He’s assisted in reorganizing and arming them to improve their combat capabilities, which made him stand out and resulted in his promotion. He’s currently planning a large-scale assault against Neo Arcadia, dubbed “Operation: Righteous Strike” to take advantage of Copy X’s absence.
Personality-wise, he’s just as grandiose as his clothes would suggest. He’s a confident and inspiring leader, although he does respect Ciel and is willing to follow her wishes to an extent. His confidence in her project is dubious at best, though, so he continues preparations for the attack. Quite a pretty boy, but he does have a degree of combat prowess and swordsmanship skill, as well as above-average intelligence. Zero doesn’t think much of him, seeing as he’s all for supporting Ciel in her work. His name means "hope" in Greek.
Soldiers, Isosu, Pasosu
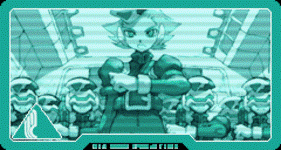
The Resistance soldiers are all outfitted the same, and have little to no personality. This allows them to harbor a rather bad habit, that being getting themselves into all sorts of trouble that results in their untimely demise, or at the very least in them coming a hair’s breadth from biting the bullet. The Zero series’ own personal battalion of Red Shirts.
Two new characters are the soldiers Isosu and Pasosu. They’re the ones that show up with the other soldiers and have prominent blue and yellow hair. Having unique sprites, it can be assumed that they’re sub commanders of the Resistance forces, though we never actually interact with them directly.
I’m not entirely sure if their names mean anything; it’s not French and there’s not much info on them. If anyone happens to know anything, feel free to bring me up to speed.
Rouge and Jaune
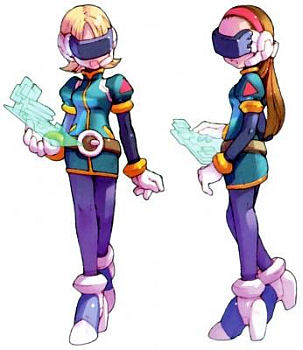
The two operators, they spend the game endlessly tapping away on their keyboards by Elpizo’s side. Their names mean “Red” and “Yellow” in French; it should be obvious which is which. Your only real interaction with them is when asking to be transferred back to previous areas, and as such they don’t have much in the way of personality. A drama track called “Alouette’s good day” shows a bit more of their personality, but that’ll be linked later on at a more opportune time so that’s all for now.
Cerveau

Cerveau’s the resident tech guy, and the one who’s called upon for all the engineering work at the Resistance base. This includes the development of new weapons, which extends to our own weaponry as well. His name means “Brain” in French, and sounds like “Servo”, allowing for a double meaning on his intellectual and mechanical traits. He’s pretty tight with Ciel and rather important as far as resistance members go, so we’ll be seeing him a decent number of times.
Weapon bios!
Unlike the previous game, Zero 2 supplies us with our entire arsenal of weapons right off the bat. 3 are returning ones, but there is one new one, the Chain rod, that replaces the shattered triple rod.
Also returning from Zero 1 are weapon levels; each weapon has a number of RPG-esque “levels” that increase through killing sufficient enemies with that weapon. The number of levels has been greatly reduced, though; only the Z-saber’s slash upgrades, the shield boomerang’s distance upgrades, and general charging upgrades are kept.
Z-saber

The Z-saber has been Zero’s iconic weapon of choice ever since its debut in Megaman X2. It was redesigned in the transition to the Zero series, losing its lightsaber-ish qualities in favor of a more streamlined, triangular weapon, and it's arguably the most useful of Zero’s weapons, playing a role in allowing his other ones to function the way they do.
It can be used to execute combos on the ground (once leveled sufficiently), to attack while in motion, and to attack while in mid-air, and while it definitely has the shortest range of all his weapons it’s capable of dishing out the most damage. And it’s just plain fun to use.
In regards to trivia about it, it’s been embedded with Mega Buster MK. 17 tech (the main weapon of Megaman X), which allows it to be charged and to bestow that ability on other weapons. It requires no external energy, either, which allows us to avoid annoying E-crystal imposed limits on weapon usage. When not in use, it’s stored in the visible holster on Zero’s leg; the kicker here is that there’s two holsters, which implies that Zero might have two sabers. Seeing as he used two different sabers in the X series (A fluid one in X2-5 and a solid one in X6 onwards) this might actually be the case, but unfortunately we don’t get any kickass dual-wielding action - this is one of the biggest shames in the entire series.
Buster shot
Zero picked up this long-ranged weapon from a (now-deceased) soldier named Milan in the first game. It serves to replace the Z-buster that kinda sorta got shoved under the rug ever since Megaman X6, and lets us rapid-fire energy shots at our unsuspecting enemies. In regards to its superiority to the guns used by regular Resistance members, the official explanation is that Zero’s internal reactor allows him to fire pure energy, as opposed to regular ammo.
Thing about it is, even WITH that he’s normally unable to fire charged shots, as he demonstrated in the intro stage of MMZ1. To gain this capability, Zero literally stuffs his Z-saber into the back of it, which apparently bestows its awesome charging powers to absolutely anything. You can see it in the art up there^.
The Buster shot is probably the second most useful of the weapons in the game; it really helps in those situations when you just don’t want to touch whatever slimy enemy the game’s thrown your way, and against enemies with no invincibility time it can really do some damage.
Shield boomerang
Returning from the last game, the Shield boomerang was created by Cerveau from data pertaining to Zero obtained from one of the bosses in MMZ1. It’s actually not a unique weapon itself; it’s a modified version of the Z-saber slapped on Zero’s wrist and made to spin around crazy fast, making it both stupidly dangerous and stupidly cool.
Unfortunately, its usage is rather limited (no, you can’t damage enemies just by walking into them with your chainsaw saber ‘o death). Firstly, using it causes the shield to appear in front of you, and prevents you from dashing. You can still do a dash-jump off the ground with proper timing and off a wall normally, but it really hampers your mobility. Secondly, the only things it shields against are the weak energy shots made by Pantheon hunters and a few specific enemies and bosses; melee and other ranged attacks pass right through. And lastly, it can only be used to attack after charging it for 4 or so seconds, and when you do so it flies in an arc path that can be hard to aim, with it arcing up when on the ground and arcing down when in the air. Leveling it doesn’t reduce the charge time, but rather the distance it’s thrown.
Its one saving grace is that it can be charged in hard mode, meaning it’s the only thing usable with elemental chips in that mode, and the only thing that can deal mass amounts of damage. If you can dodge without dashing, it’s good, but overall it’s pretty limited in usage.
Chain rod
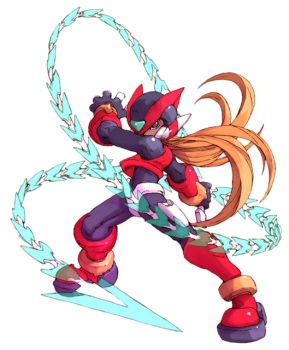
The new weapon introduced in Zero 2, it replaces the Triple rod from the first game. It’s basically a combo whip/grappling hook constructed (by Cerveau) from the smashed remnants of the triple rod (also by Cerveau). And it is much, much better.
It’s a Z-saber tip attacked to an energy chain, and when used extends way out without the need to time button presses like with the triple rod. It can be used to hook onto enemies and pull them around, or pull parts of them off, which can be really fun when you have an enemy right in front of a spike pit and really necessary when there’s an enemy with a shield.
You can also use it to hook onto objects and ceilings; with objects, you can pull pick-ups toward you or stage elements around (which is used occasionally for puzzle solving), and when hooking the ceiling you can go all Indiana Jones and swing across the ceiling to reach far-off places (which is also used for puzzle solving). It opens up a lot of stage design possibilities that are actually explored, whereas the triple rod only ever had the ability to pogo-jump which was almost never needed.
The downsides to this weapon are its pure combat capabilities; while it’s a useful subweapon you’ll want to stick with the Z-saber or Buster seeing as it attacks slowly and does fairly low damage. It’s charge is the same as the Triple rod’s was, too, and while swinging it around like a battle staff LOOKS cool it ends up being fairly useless due to its short range and low damage output.
Extra notes!
- Something to look out for later in the game is an NPC that mentions how the profile shots of the
Music!
There’s buttload of music here, simply because the game unloads a whooole bunch of tracks on you right off the bat. Some of them, like Departure and Labo, are extremely good and highly recommended, and unlike the first game there’s very few tracks that come off as duds. Also, a couple, like imminent storm, only play briefly in-game and go on far longer than you’d think so if you’ve got the time check ‘em out.
Title II
For endless fight II/Comparison For endless fight I
Departure
Guarder room
Crash II/Comparison Crash
Result of mission II
X, the Legend (Bad quality, will be re-uploaded upon reaching a point where there’s no sandstorm)
Resistance force
Imminent storm
Labo (Ciel’s lab)
Momentary peace
Instructions