Part 6: Video 4


Let’s go blow up a level!
Stage notes!
100 pt requirements:
-Clear time: 6:40
-Enemies killed: 51
-Mission: N/A, you have to destroy all reactors to beat the stage.
Hard mode honestly doesn’t change this stage up all that much, seeing as most all enemies are either Tellybombs or destroyable via the same. Phoenix Magnion will take longer without elemental attacks, though, and his already great destructive power gets buffed to almost ridiculous levels.
The stage is set in a general-purpose Neo Arcadian power plant, which also presumably doubles as a factory of some kind given the kilns of molten metal noticeable in certain parts. HMMM, STRANGE.
In stark contrast to the train of Neo Arcadia, this place is about as far from linear as you could possibly get. In fact, it’s one of the few instances in Megaman games in which your path diverges into multiple options, and (I believe?) THE first case in which your final objective doesn’t have a set location.
The goal here is to shut down the entire plant to cut off a significant portion of NA’s power and lower their production output, and to do so Zero has to destroy each of four slightly different power reactors. Depending on which one is destroyed last, the boss will vary in location, and given that each room has different quantities and layouts of molten slag this actually affects how difficult or easy the battle will be.
Moreover, the entire stage is positively RIDDLED with hidden, destructible objects and secrets, many of which can be opened up through strategic use of the Tellybombs. It makes for one of the most enjoyable experiences in the series so far, and if you search every nook and cranny you’ll be rewarded with optional minibosses, e-crystals, lives, and cyber elves, two of which make the game significantly easier by doubling either your life bar or the effectiveness of dropped heath and energy.
The layout can be a bit difficult to figure out, so I made a super-professional map for you to ease the visualization. You’re welcome, click for big.

There’s an easily-navigated path (represented by my numbering of the reactors) that bypasses all the secret stuff and allows you to finish the stage should you so choose, but the optional sections will often test your mettle quite vigorously if you want to reap your rewards. And they’re just plain cool, this stage straight-up rocks in general.
Oh also, remember that whole “limit their number of enemy soldier” line that Elpizo oh-so-casually tossed our way in the mission briefing? Well, he wasn’t kidding; beating this mission actually causes many of the Pantheon enemies throughout the currently available stages to go missing without a trace. This means that areas become significantly easier (all the pantheon hammers disappear from the forest of Dysis!), but doesn’t lower the enemy kill requirement so you have to grind if you want full score. This whole thing harkens back to the days of Megaman X, where your actions might cause an entire facility to lose power, or extinguish the roaring flames in a trash incinerator, and all in all just comes across as a really cool touch.
Forms!
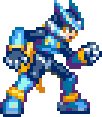
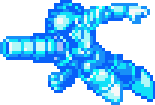
=X form=
The X form is awarded for destroying 50 (!!!) things in a stage with the Z-buster. This rather ridiculous number is uniquely manageable in this stage due to the vast number of Toitanks it throws at you, each of which goes down to a single bullet.
Power-***
Defense-**
Speed-***
The X form is a love letter to the olden days of blue hues and in-arm cannons. While it (tragically) doesn’t transform Zero’s forearm into an instrument of plasma-filled death, it DOES drastically increase the effectiveness of his shots. For one, they do more damage, and for two, it allows him to have four bullets on the screen at once instead of a mere three. In Zero one, this was a standard X-buster upgrade awarded for spamming the hell out of normal pellet shots, but it’s a welcome addition nevertheless. And given the small size of the GBA’s screen, it effectively means we can fire non-stop without a single delay. WOO.
Unfortunately, it also reduces the effectiveness of melee, causing our saber slash to always come out as the second slash in a normal 3-step combo, which drastically reduces its damage output. While this sucks gameplay-wise, it’s actually quite cool as a reference: when X was equipped with Zero’s saber in Megaman X6, his slash was almost identical to the way the X form does it. NOW THAT’S ATTENTION TO DETAIL, KIDS.
I honestly don’t really use this one all that much seeing as the saber’s so beautifully efficient at carving folks up, but it’s cool that they included a way to go back to old-skool playstyles should you wish.
Elemental chips!
=Flame chip=

The flame chip is your guaranteed prize for beating Phoenix Magnion. Whilst its holder in the last game, Guard Orotic, wasn’t exclusively fire-elemental, here it’s given much more sensibly.
I could have SWORN this caused an afterburn effect that sapped enemy’s heath over time if they weren’t killed with the initial attack, but after testing it turns out that apparently it just stuns them, much like the thunder chip. BORING.
Guess I’ve been playing too much TF2~
So the flame chip reduces enemy mobility by…melting their joints together. Until their…nano repair bots fix them up again. THAT’S MY JUSTIFICATION.
It does extra damage to Ice-themed Reploids and Mechaniloids, and is utterly ineffective versus electricity.
EX skills!
=Tenshouzan=


Ten…ten show zahn? Is that how you pronounce this one??
Anyway, this is the first EX skill that is actually widely useful in every situation. The Tenshouzan (Heaven rising, or ascension slash) allows Zero to perform what is essentially an uppercut, but with a sword. It’s executed by holding up and pressing the saber button whilst on the ground, which means you don’t have to sacrifice any standard moves in order to use it. Job well done!
The slash gives you a good amount of vertical range and Zero yells a pretty cool warcry while using it, so I really like it. ADDITIONALLY, if you have the flame chip equipped when you use this, your saber will be wreathed in flames and go a bit higher than usual. It only works with the flame chip, and lets you use fire-elemental attacks without having to charge, so if you haven’t leveled your weapons or are just too lazy to hold a button for 3 seconds, this is a very viable option for bisecting your chillier enemies.
This fire slash is actually a bit of an iconic move for Zero; it first appeared in the form of the Ryuenjin from Megaman X4, and has been recycled in various media, including Marvel vs. Capcom 3. Point is it’s cool and far better than the laser and spark shots, though the latter justifies itself in my eyes due to the toitanks in this stage. SPEAKING OF WHICH…
Character bios!
Toitanks + U4
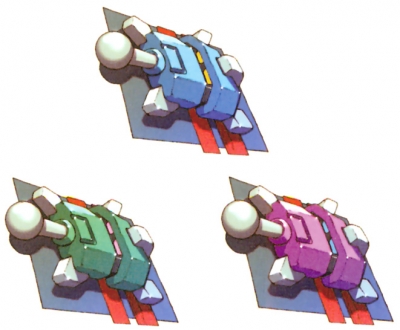
The Toitanks and U4 are a set of related enemies that I consider to be a miniboss in and of themselves.
They kinda play like a sped-up game of space invaders flipped onto its side; upon entering the room, the green variants will begin appearing from the ceiling at a decent clip whilst kilns (crucibles? Unsure of the terminology here) of molten metal rise from the ground to block you. The objective is to destroy all of the tanks, but they don’t go down without a fight: they’ll be shooting bolts of electricity right back at you.
They keep moving up and down until they reach the end of the track, and if any manage to escape the game’s over and you have to leave and come back. If, however, Zero manages to gun them all down, a second set of faster purple tanks take their place.
…Followed by stupidly fast light blue tanks. This is quite the challenge.
If you’ve managed to pick up Panter Flauclaw’s spark shot, the difficulty is greatly lessened, given that all the tanks are arranged vertically and the sparks produced by the shot will carve right through the entire column, but it you don’t have it, I can only wish you good luck.
Upon killing them all, a security bot called a U4 will rush by superquick on its own special track behind the tank’s to assess the situation, and if killed will drop Cyber elf Dable, which doubles the effectiveness of dropped items. Thing is, the U4 doesn’t go down to a single shot, so you’ve got to land an INCREDIBLY well-placed charged shot to take the bastard down. And if you fail, you’ve got to do the WHOLE THING OVER AGAIN. It takes ridiculous amounts of skill and/or patience to get your reward out of this one, but it’s a fun challenge nevertheless.
Incidentally, the kilns can be frozen if you have the ice chip, which allows you to ride them up and pick up your prize. If you don’t have it, prepare to stand still for a minute as the clock ticks by if you want the elf.
Gazamir

Moveset:
- Bubblebeam: Produces a bunch of bubbly foam where his mouth should be, then shoots it out at Zero. Shoot/slash the bubbles, or move to avoid.
- Ladder shuffle: Grabs onto your ladder, then slowly shuffles down. Move along with him and keep firing.
- Ladder slide: Grabs onto your ladder, then turns off his boosters and lets go. Let go of the ladder yourself and pray. Also grab it again when he stops or you’ll get hit and/or fall in the lava and die instantly. Point is don’t let him do this.
Anyway he’s based off of the Gazami crab, there’s a Wikipedia article, go educate yourself. He hovers just out of range of most of your attacks, so your only real way of damaging him is through busterspam™, although if you have the charged saber slash (we don’t) you can hit him with it when he’s doing the ladder shuffle (we can’t).
There’s lava below you which will instantly cook your goose if you fall from the ladder, but if you aren’t stupid that shouldn’t happen. Worse case, you should at least be able to get a grip on the nearby wall and walljump. He’s not a huge threat, but he is a roadblock that eats up precious, precious time.
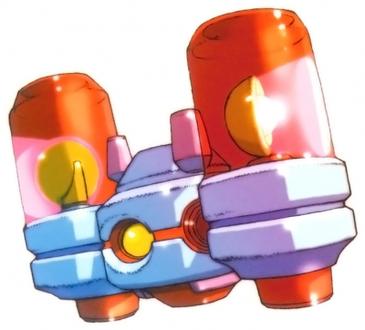
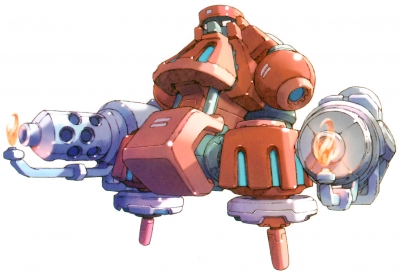
Golem type-F
Moveset:
- Fire wheel: The golem spins its burners in a circle, creating a WHEEL OF FLAMES. It also has the illusion of depth! What impressive visuals!
- Chili breath: Extends its head, then burps out a blob of flame. First time around, it’ll land right in front of him and travel away, and second time around it’ll fly to the opposite side of the room and return to sender. Burning with backspin, ONLY in Megaman Zero 2.
He’s also really oddly placed; the Golem type E (and another one that’ll be showing up very soon) are right smack in the middle of your path and get all up in yo grill, but the Golem type F is sequestered away in a hidden path…IN A HIDDEN PATH. You’ve got to go through two layers of digging just to see his ugly mug! Very odd indeed.
Beyond that though there’s not much to say about him; he shares design similarities to the other golems and I dig the flaming red metal codpiece, but that’s about it as far as this one goes.
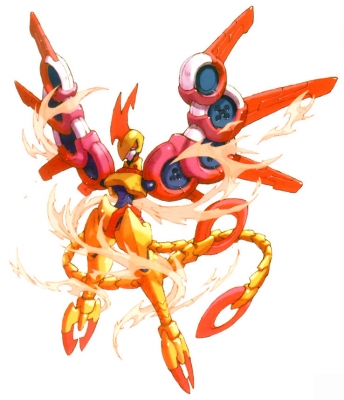
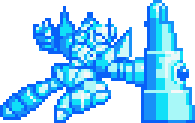
Phoenix Magnion
Moveset:
- Bide: Sits patiently and waits for Zero to make his move. If Zero decides he’d rather just have a staring contest, he’ll get tired of waiting after about a minute or two and go ballistic, attacking non-stop. Use a weak attack to start a pattern.
- Clone enclosure: Creates 3 copies of himself that surround Zero completely. They all proceed to strike towards him with their tails. Only the real one can be damaged, but it’s super hard to tell which is which. Stay stock still and jump just as they strike to get out unscathed.
- Fire dash: Exits stage right, then barrels horizontally towards Zero as a gigantic fireball. Can be damaged during this, but will not stop unless hit with the thunder element. Jump over/stun to avoid.
- Solar ray: Appears in the middle of room, and charges energy within his wings. Fires three volleys of energy spikes at varying angles, but misses directly below him. Can be knocked out of this by any attack, so just hit him.
- Eruption: Builds pressure within the underlying molten slag, periodically causing violent eruptions of fire from whatever pits happen to be present. Stand still between the pits and don’t provoke Magnion until it’s over
- Rise from the scrap: Swoops down and attempts to grab Zero; if successful, will summon images of four past foes (Vile, Agile, Bit, and Colonel) to attack you. This one will get its own section after Magnion’s bio.
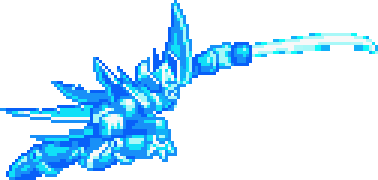
- EX skill: Rising flame: Coats self in golden fire, then charges Zero at high speed. If he makes contact, he’ll do a bunch of damage, and also toss Zero across the room, catch him in midair, and charge straight up through Zero as a huge firebeast, doing even MORE damage. Can’t be escaped from, Phoenix is invincible while using it, RUN.
Phoenix Magnion’s is just about as straightforward as you can get. He’s a Phoenix. And…a Magnion, whatever that is.
That aside, Magnion is one tough cookie. He possesses a multitude of highly damaging attacks and ways to psyche you out. In fact, he has SO MANY trickery-based attacks that he used to be a member of Phantom’s shadowy Zan’ei army…until he blew up. So now he’s been recruited by Fefnir’s Jin’en squad! Because he’s a dual dark/fire type, you see. SCIENCE!

He moves fast and doesn’t leave much room for error with how you dodge, so you’re in for quite a fight when duking it out with this guy. I have no shame in admitting that childGam was totally stymied by this stage back in the day, due to the long length, instant death stuff scattered about, and the incredibly hard boss fight.
Fighting him essentially comes down to making sure you control the pace of the fight: You can’t damage him until he’s started an attack, and he won’t attack unless you attack first, so if need be you can simply stand still and take a breather to collect yourself. In fact, this is actually a little necessary when his eruption attack occurs; if you’re in one of the later reactor rooms, trying to dodge both the lava and Phoenix can be deadly.
His EX skill makes him even more dangerous, as he launches it pretty quickly, is invincible while using it, and hits Zero twice if it connects. On hard mode, this attack is almost capable of one-hit KOing you if it lands; you’ll be left with only 2 health left if you got caught whilst at full. And if he uses it while eruption is happening…well, nice knowing you.
The thunder chip wreks him nicely and can tip the battle a bit more in Zero’s favor, but this guy still isn’t for the faint-hearted.
Maverick cameos!
Phoenix rewards you for putting up with the difficulty with a super-cool referential attack, which you’ll only see if you manage to get yourself grabbed by him. It hits twice, just like his EX skill, which makes this something you don’t want to experience too often, but it’s way too awesome to let it slide without some notes. I’ve ripped each of the sprites for your viewing pleasure, and will be linking to the original artwork for each character, plus supplying a (brief) overview for each one. Click name for OG concept.
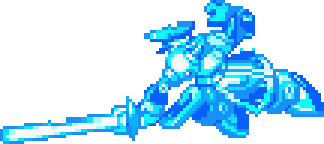
Vile
Vile’s been a thorn in Zero’s side since the latter’s earliest incarnation. Introduced in X1’s intro, Vile was once a trouble member of the Maverick hunters until he went rogue, desiring to live only by his own rules and to sow chaos as far as possible. He’s decked out with heavy weaponry and shares a certain design aesthetic with one Boba Fett, and once managed to facilitate Zero’s first (of many) deaths, making him a force to be reckoned with. He’s appeared in 3 separate games as an antagonist and tends to fight with a large mech known as a “Ride armor”, but his projection here lacks that particular touch. Ah well.
Agile
Agile’s a member of the X-hunters from Megaman X2, and while Zero never actually fought him in-game (due to being dismembered into multiple parts, one of which was ironically HELD by Agile), he was a worthy opponent of X back in the day.
Like Zero, he wielded a beam saber with remarkable proficiency, and specialized in lightning-fast slashes and shockwaves. I’d actually have quite liked to fight this guy again in our current redesign.
Bit
Bit, from Megaman X3, is one-half of Dr. Doppler’s Nightmare Police, alongside his partner Byte. He helped keep the peace in Dopple town up until a Maverick virus outbreak occurred, at which point he squared off against X. Due to the way X3 worked, it wasn’t possible for Zero to fight him back in the day, but it’s not as unlikely as Agile that Zero managed to get a hit in on him somewhere offscreen.
In-game, Bit attacked with energy and an energy saber of his own; here, though, he’s using the shield that was only ever depicted in his concept art. Odd.
Colonel
Colonel was the second-highest ranked member of Repliforce (alongside the General) back in the PSX days of Megaman X4. An erstwhile friend of Zero’s, Colonel got caught up in an unfortunate series of events and let his pride get the better of him, declaring himself and the rest of Repliforce independent from humanity and becoming an enemy of the Maverick hunters. He ferociously dueled against Zero multiple times, once again utilizing his own beam saber, and proved a VERY challenging opponent. Upon his ultimate defeat, he held no grudge against Zero and asked him simply to watch over his little sister, Iris. This...didn’t end up going too well.
He’s almost painfully British and it’s a bit cruel to make him square off against Zero once again, but thankfully we’re an amnesiac so he can’t bring back any painful memories! Just physical pain. Woo.
Music!
Once again, only one new track. It’s called Gravity, and while the name, once again, makes little sense, I’m actually a pretty big fan of this one. It’s more mellow and atmospheric than a lot of the other tracks, and has a good industrial feel to it. Very fitting.
Gravity