Part 36: Bonus 6
RedMagus posted:
Thanks, much appreciated!
I love it! Have an update in exchange.
---------------
Bonus Update!

First and foremost, I'm going to open this update with the two songs that played during the credits sequence that I hadn't posted in the actual update. I didn't post them in the last update because I was worried that the end of the post might get over-saturated with music, which might take away from the impact of the finale. That's a silly and possibly retarded reason, but it's the truth!


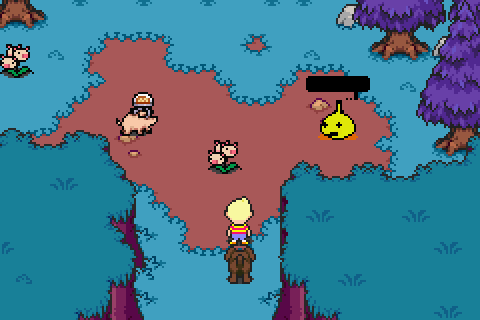
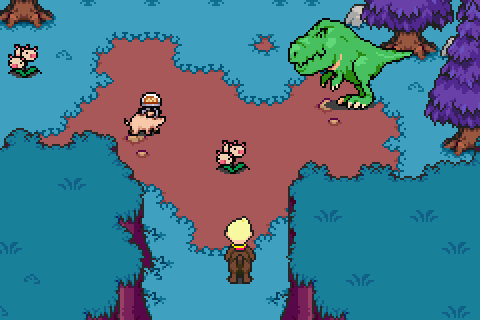
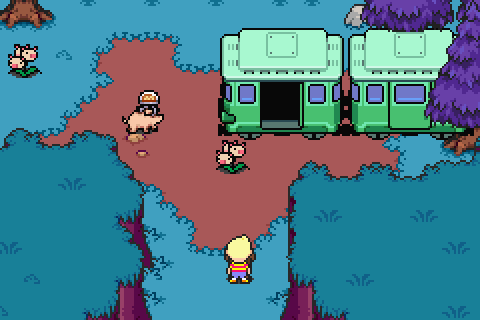
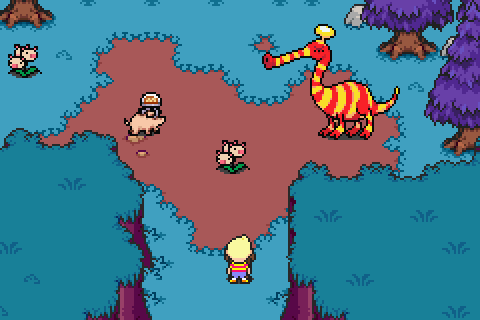
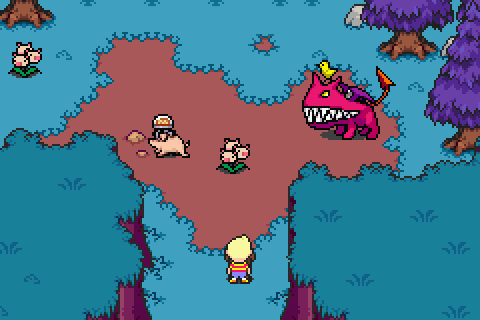
Okay! This update covers nothing you find in-game. There's nothing left to see, after all. So we're going to be talking about all sorts of fun stuff that didn't quite make it into the final release of the game, and we'll include some items from when Earthbound 2 was in development for the Nintendo 64. Understandably this update will be a tad on the short side.
Let's start 'er off with some unused sprites, eh? I'm not a genius hacker or anything of that sort, so I didn't find or rip any of this stuff for myself. Pretty much everything you find here has been pilfered from other areas of the internet, but hey, may as well add them into the LP regardless. Big, special shoutouts to Tomato, the main translator for this game's localization and the genius hacker that found most of this stuff to begin with - if it weren't for him, this LP wouldn't have existed. With that said, though, if you frequent the starman.net forums, chances are none of this will be new to you.
Anywho, here are some sprites that wound up being not used in the game.

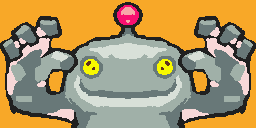
This is perhaps some kind of Pigmask sprite. A beta, maybe? Maybe some kid was playing dress-up? Well, whatever the purpose, he had an awfully large portrait of himself hidden in the depths of the game's data.

Speaking of blown-up portraits, have one of a creepy Clayman.
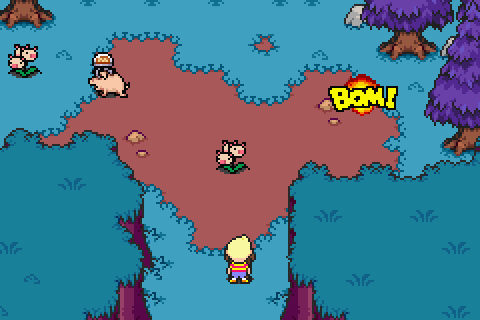
At one point, Duster was apparently supposed to only wear the Pigmask helmet, as opposed to the whole body suit he and Kumatora wore shortly after arriving at the warehouse. Included in this picture is an unused "sprite effect" - there were multiple times when the game used BOM! to emphasise an explosion or something, but the game never uses BOW! Anywhere.

HAPPY END!
(Apparently, the sprite "BOW!" was actually used in a screenshot in the game's instruction manual, on page 9, if my source is correct. I don't have Mother 3's instruction booklet with me, so I can't confirm, though.)
Some colourless unused sprites, pieced together from some jumbled tiles as best as the original hackers could. Looks to be some kind of unused setting in the Chimera Lab, perhaps?
And then there's this thing.
A popular theory is that this is the top of the Pigmask mothership you see several times throughout the game, most notably the very end of chapter 5, atop Thunder Tower. You never seen the top half of the airship they're riding in, and this is what is actually up there.
(I could have sworn I saw the complete sprite of this somewhere else, and it turned out to be some kind of hot-air balloon, if I remember correctly. Can anyone confirm/deny? My Googlefu has failed me.)

M-M-M-MONSTER check.

Likely an early version of the Yado Inn, before it was called the Yado Inn. It was the only building in the entire game that was a hotel, but as for a saloon? I don't know about that. There's also a decent chance it could have been from a different building entirely that got the axe.
More sprites, although now, animations: have a .gif of Butch being fat.

When you defeat the masked man at Chupichupyoi (Kumatora was right, that is kind of easy to remember, actually), he collapses into his own electrical heap shortly after his defeat. But there was actually more to his animation, apparently, followed by him being re-reconstructed later. They probably saw this as being just a tad too dark, given who the masked man turns out to be, so the bigwigs had it removed. Or, that's my guess, anyway.

And also, Hinawa was supposed to make a slightly more physical appearance at the end, with her own climactic entrances and exits. If I had to guess, though, Itoi probably thought it would have been a little over-bearing if she showed up, and that what we have in the final game was enough to tug at our heartstrings without yanking so hard on them. As an author (if I'm even allowed to call myself that), I've come across similar options, and I can definitely see how less could be more.


Moving right along, have some dummied-out enemies.
I'm sure Lucas could suplex it, given some time and effort.
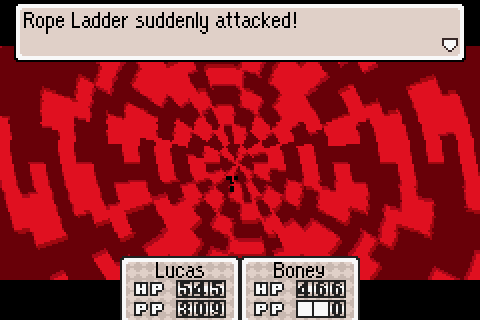
Ignoring the lethality of a rope ladder, this battle background was never technically used in the game. I say "technically" because it's actually the battle background for the Mole Cricket, but with a different palette.
And nearly a hundred more, all in a handy .zip for your viewing pleasure and because I don't have the patience to go through them

Also in the game are back sprites for bosses. At one point they might have been included for completion's sake and to make anybody trying to go for the 100% goal a living hell, but somewhere down the line somebody said "hey, they only have one chance to get these things and Flint/Salsa/Lucas can't actually flip them over, this is bullshit" and somebody else agreed, so they made all the bosses un-flip-able.
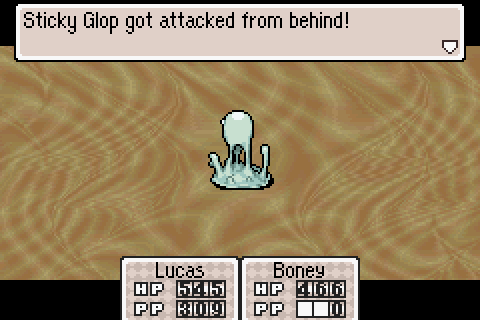
If you've forgotten, you encounter the Sticky Glop once, as Salsa, and they guard the ladder going into Tazmily in the underground tunnel connecting the village to the desert and the highway.
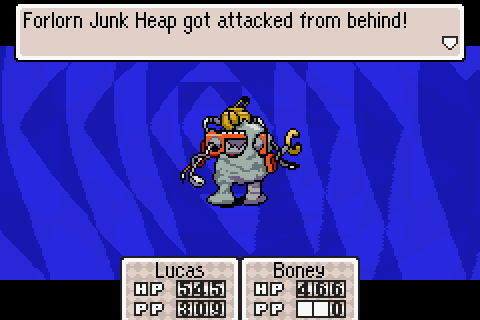
For reasons I can't understand, the fight against the Forlorn Junk Heap is one of the most popular videos in my Mother 3 playlist on Youtube. It's such an obscure fight!

Well. Didn't expect that last one.
So hey! How many of you would have liked to actually fight the Ultimate Chimera at one point? Sounds like a neat idea to you?
It sounded like a neat idea to them, too, but then they decided that having an unstoppable murderbeast being crafted in a lab then being set loose in the wild would have made for some awesome additions to their mythos, so, unkillable it is.
EDIT: While we're still on sprites, Kikka has brought to my attention a set of sprites that I had apparently missed in this update:
Kikka posted:
Also, not to steal any limelight, Maple Leaf, but you forgot to add one huge part of unused content.
Porky was, apparently, supposed to die in Mother 3.
Here's an unused set of sprites that show Porky in some kind of never-before seen machine, which is apparently capable of flight or levitation; one of the animations for the sprite shows the device wobbling side to side, finally crashing down and shattering the glass. The following animation shows Porky feebly twitching his arm before falling limp.
Yeah Mother 3 was gonna be way darker.

EDIT2: I am not very good at internet sleuthing

Bifauxnen posted:
By the way, some other unused sprites are posted in this forum thread:
http://fangamer.com/forum/Games/Mot...3-Unused-Things
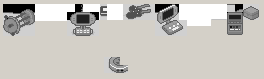
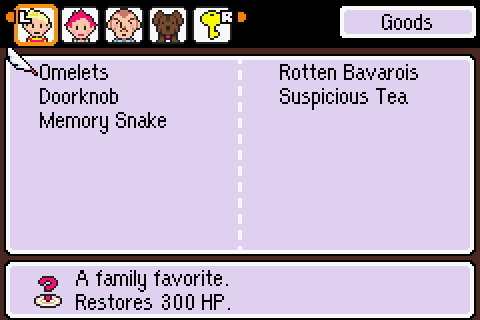
With that out of the way, who wants to talk about gameshark codes? I do! Thanks to the miracles of technology (which will be voraciously exploited at the end of this update), we can access some items within the game that didn't make it into your actual inventory, key items or not. There aren't a lot, but it's still interesting to see their applications and sprites. They even have descriptions to go with them!
And speaking of hidden goodies, here are some quick tunes that were taken out of the game for some reason:
 - Sounds like the simple morning tune you hear in Earthbound just after you wake up from a stay in the hotel, but with the bubbly-wishy-washy sound effects tossed in for flavour. If I had to guess, it might have been for just after you fight Master Eddy, or perhaps just after your horrible crash after leaving Saturn Valley. Or, most likely, it was meant for a whole new scene that was taken out late in production.
 - Complimentary to the Gigyas theories being spouted left and right at the moment, this creepy breathing sounds like it could have been best used once the Dark Dragon was awakened, or for the hidden boss battle that was ultimately taken out in the end.
 - Tazmily village, early in the morning, for Earthbound 2 on the Nintendo 64. It sounds more like Monkey Delivery Service, but either way, the Nintendo 64 shows off its auditory superiority over the Gameboy Advance here.
 - Etude for a Ghost, but Earthbound 2-isized. Again, the theme has managed to survive the test of time and the transformation to the GBA, although this song sounds a bit more bare-bones than the one in Mother 3, with just a simple piano piece.
 - There are multiples of only one Earthbound 2 video floating around on Youtube, and this is the song that plays on all of them. It's King P.s theme that the DCMC play for you in Titiboo!
 - This isn't in any game or promo. It's straight from Shigesato Itoi's personal website.
 - At one point in his adventure, Ness traveled into his own subconscious, going deep inside himself to meet, and conquer, his ultimate fears and nightmares. Perhaps, at one point, Lucas was meant to do the same.
 - Going by this and by the sprite sheet above, Porky was supposed to actually die in the final battle. This touching orchestral piece plays the villain off in the most sympathetic way possible - perhaps too much, causing someone in the production team to be uncomfortable with the scene, resulting in its nixing.
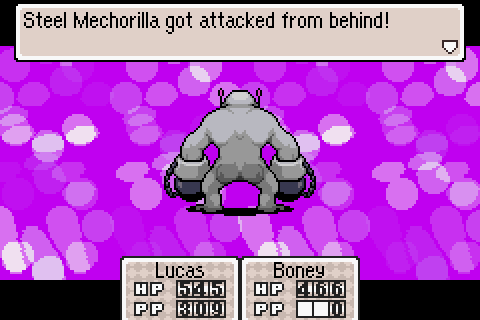
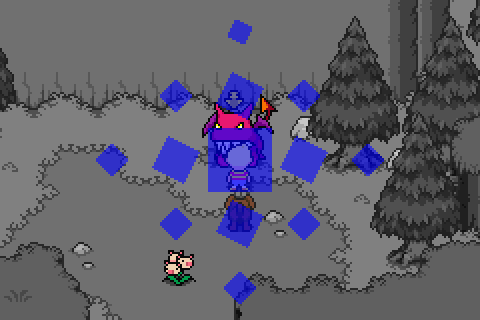
Moving onwards and upwards, let's talk about that boss. Just one boss in particular; a boss you can't encounter via normal means, but you can meet through more gameshark abuse. There are more videos about it on Youtube than you can shake a stick at, all with their own theories and ideas on what it could mean, but here, we're just going to look at some of the screenshots for it.
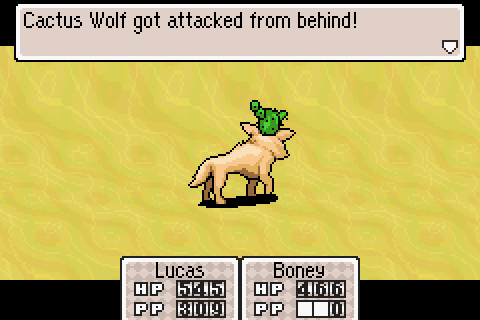
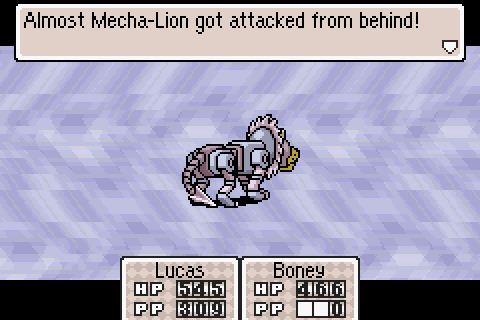
Here we have the first "form" of this boss. To encounter this boss at all, go to Cheats in VisualBoyAdvance, and click on Cheat List. Then select Code (and not Gameshark or Codebreaker), and put in 020047EC:XX. The two X's are variables that determine what happens with the address that precedes it. For this form, put in CB over the X's.
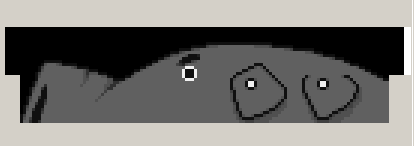
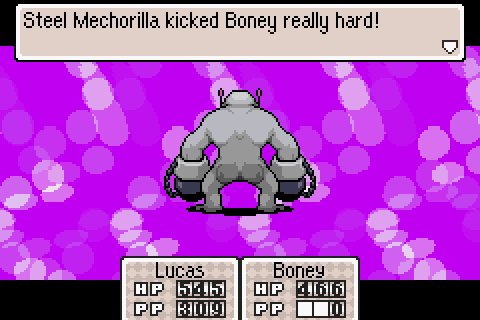
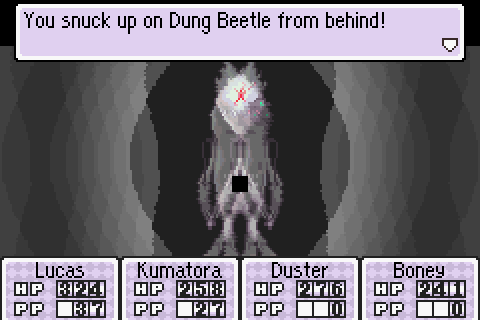
When you put in the code, just encounter any old enemy, and you'll get this. The Dung Beetle is the first form, featuring what appears to be a ghostly white Claus with a red X on his forehead. It has decent HP and maximum defence, but no attacks: it will only ever use an attack simple called "PK". PK Beta, to be exact. This causes no damage, but will poison your characters. The Dung Beetle has a small chance of dropping a Silver Dragonfly upon its defeat along with 46 EXP. Here is a much clearer picture of this form:

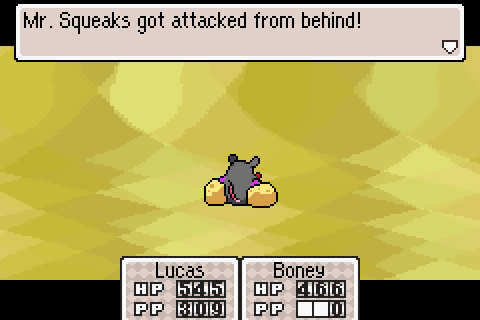
The next form is the Tent Person.
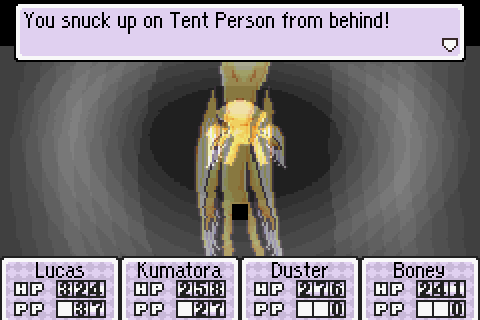
The Tent Person has the same stats as the Dung Beetle. It knows PK Delta, which causes numbness to your entire party. Apparently, it has no drops and does not give you experience upon its defeat. To encounter this, change the variable to CC. Here is a much clearer picture of this form:

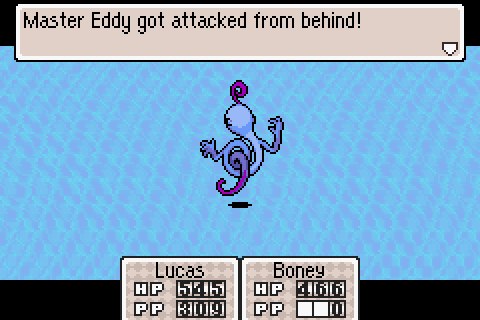
The next form is Snow Bunny.
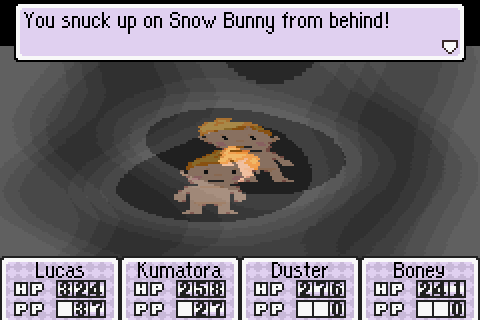
Again, it has the same stat set as the last two iterations, and like the Tent Person, it offers nothing once it is defeated. The attack it knows is PK Omega, which is Hypnosis Omega, causing your entire party to fall asleep. So far, it seems as though this hidden boss was meant to screw with you not by attacking, but by hitting you with so many afflictions that it'd make a cancer patient look clean. To fight the Snow Bunny, change the variable to CD.
Moseying right along there, we got the next form coming up.
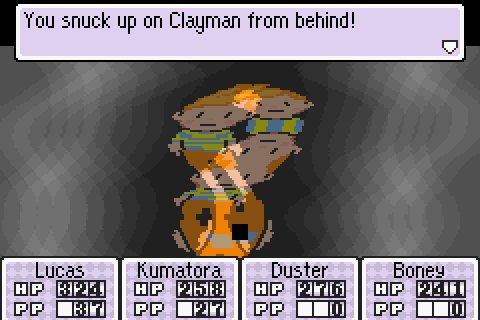
The Clayman has the same stats as the other three (this chain will eventually be broken), but unlike the other forms, it knows no PK attack. It offers 4,828 experience when it is defeated, and whenever comes its turn to attack, it simply strikes a pose.
It was spectacular. So spectacular, that it brings a tear to your eye whenever you see it, causing crying to your entire party. To fight this, change the variable to CE.
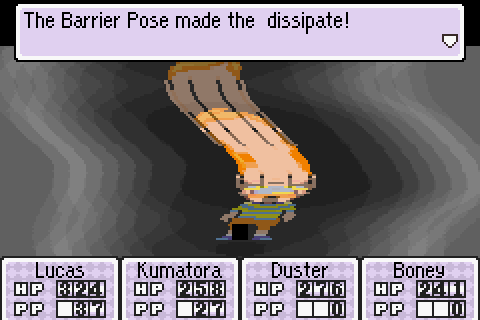
Continuing on fighting this creepy thing that has taken Claus's face...
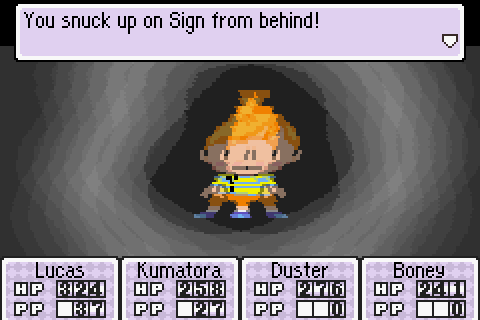
There isn't much different about this new form, other than the background, which has changed its pattern from a more jagged shape to a smoother, circular one. Possibly at this point, the boss would have calmed down a bit, and the easier background has changed to reflect that. You fight Sign by changing the variable to F1.
Sign has no stats at all. It has no offense or defence and cannot attack period. If you choose to guard, it will simply do nothing; no text will come up to say that it threw its turn or anything. A single blow from any character will defeat it, winning you the match, although you won't get any experience.
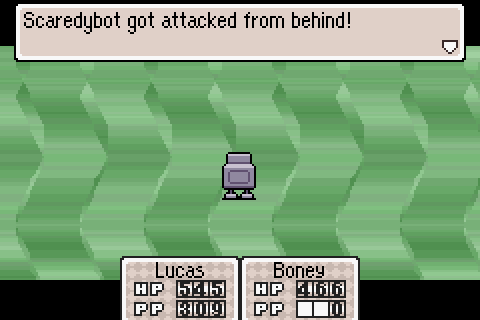
The next form is pretty out-there, so far as out-there forms go:
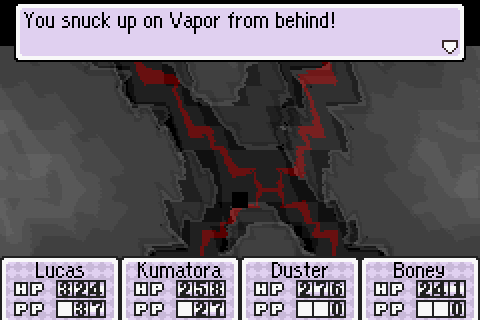
Just a giant X that occasionally flashes red, called Vapor. Fight it by changing the variable to CF. It has the same stats as Dung Beetle and Tent Person and the like. When it attacks, there is no message: the screen simply shakes a bit and you're whacked with Brainshock Omega, forcing everyone in your team with strangeness. Not a very fun attack, if you ask me. It offers nothing when it is defeated.
The next form is OH MY GOD:
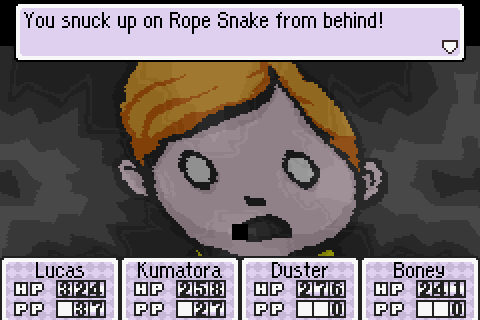
Now, immediately, this form stands out because it forces its own music. I've been fighting the same enemy over and over for this forms, and this is the first time that something new came up (Tragic Security, to be specific). The Rope Snake has the same stats as Dung Beetle and et cetera, with an attack that causes nausea among the group. If you were to fight this opponent in all its forms and attacks in one go, nausea could be particularly devastating if you haven't been careful with your PSI. Rope Snake gives you 3,856 experience when it is defeated, and its variable is D0. Here is a much clearer picture of this form:

The next form is Aeolia's Table. Considering we've been attacked by rhinos surgically attached to rockets and living, moving works of art, being attacked by a table isn't really a stretch.
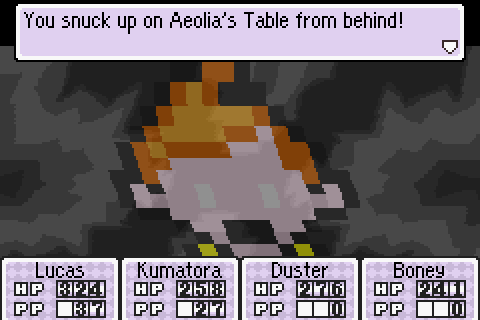
Getting kind of unnerved now.
Again, it has the same stats as Dung Beetle. Its particular attack gives your entire party fleas. It gives you 5,768 experience when it is defeated, and its variable is D2.
Next in this horrifying train wreck oh my god why would Itoi think of doing this this is terrifying:
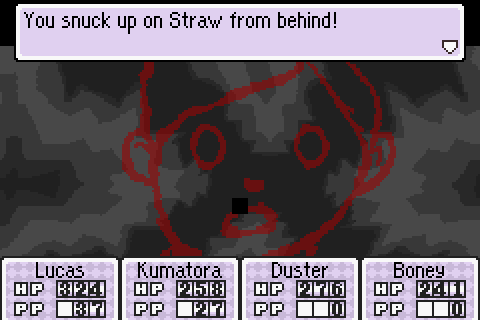
Like the Rope Snake, this form has its own music, using one of the El Mariachi songs. Straw has unique stats: it shares many of the stats from Dung Beetle and its group, but with lower defence and offense. It has no attacks whatsoever, and, tellingly, it will drop 6,666 experience when it is vanquished. The variable to fight this form is D3.
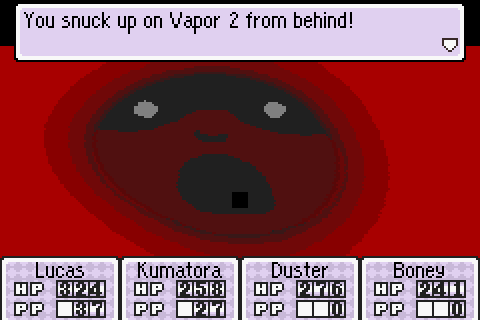
Fun times were had by all. Except for Vapor 2, from the looks of it. He doesn't look like he's enjoying himself at all.
Its variable is D4. It will give you 2,485 experience on its defeat, and it also has a 100% chance of dropping...a Factory Sketch. A map of the factory you worked in pushing broken Claymen around. All maps are given to you as key items, but not this time. This one will drop it as an actual item you can carry in your inventory. Its stats are the lowest of all the forms, but it is not Sign weak in that it actually has stats at all. Its method of attack was to explode, but even if you just defend for everybody, its explosive device will apparently fizzle out and it won't do anything at all.
Moving reluctantly on:

As you can tell from the name, I didn't actually screw up. And it's not totally the same from Vapor 2 anyway: Mini Elevator doesn't have a nose. Compare them yourself.
Anywho, variable is D5, will give you 5,757 experience, will always drop an anti-paralysis...and attacks using a Fish Roe Kick. An attack usually reserved for Fish Roe Man, an enemy we encountered way, way back in the ocean, crossing towards Tanetane island. Mini-elevator has the same stats as Vapor 2, understandably.
Next:
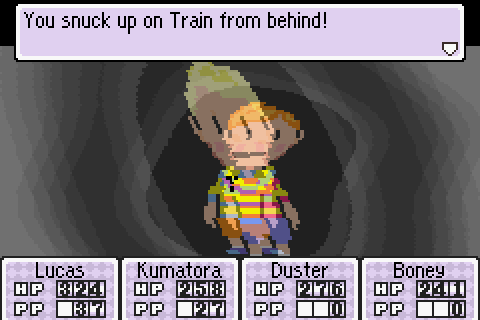
We somehow managed to sneak up on a Train. Variable is F0, and it has the same stats as Sign, as in there are none at all. A stiff breeze will defeat this Train, and likewise, it will give you nothing on its defeat.
The final form of this huge scary boss:
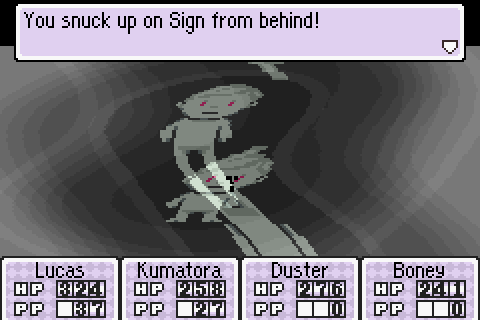
Sign is back, and he's looking better than ever. Unfortunately for him, though, his good looks don't automatically come with any stat changes, and he's still as weak as ever. No stats, no attacks, zero drops. Its variable is F2. And that's that for this hidden boss!
There's just one last thing before finishing this update and, consequently, this LP. I mentioned earlier that I was going to record myself trying to fight the Porky Statue without using the New Years Eve Bomb or PK Flash. We know that ended pretty horrendously, unfortunately, but I still had fifty minutes of video on my hands and damn it, I wanted to use it.
So here. This is 26 minutes (that actually cuts off too early. God forbid I end this LP without any problems, huh?) of video with me and my stuffy, boring, obviously-scripted voice dubbed over it, explaining why I had gotten into LPing Mother 3 in the first place, and what difficulties I had with writing it, my work ethic, and why I wrote the characters and such that I did. If you're interested in hearing some behind-the-scenes thoughts and processes in how I came to write this LP, then this video is for you to watch-and-or-listen-to. Here is a link to that Mother 4 project I mention in it.
And that's it.
I have been your host.
And I hope you've enjoyed this LP.