Part 10: Tech Post 2: The Penultimate Technique
Tech Post 2: The Penultimate TechniqueFor our first trick, let's take a look at the map screen...
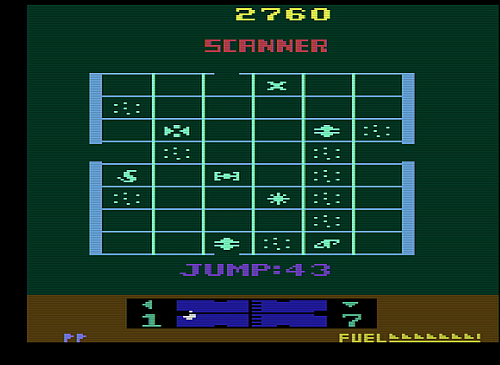
... and very specifically, this.
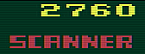
As we covered last time, the Atari only has two sprites, and they're 8 pixels wide. We're not doing anything that's any 16 pixels wide for this score, or for the "SCANNER" header there. We also definitely aren't doing this with the playfield, because the playfield's elements are a minimum of four pixels wide each, which looks like this:
So what's going on? Let's fire up Stella's debugger mode and find out. Stella's debugger mode is awesome:
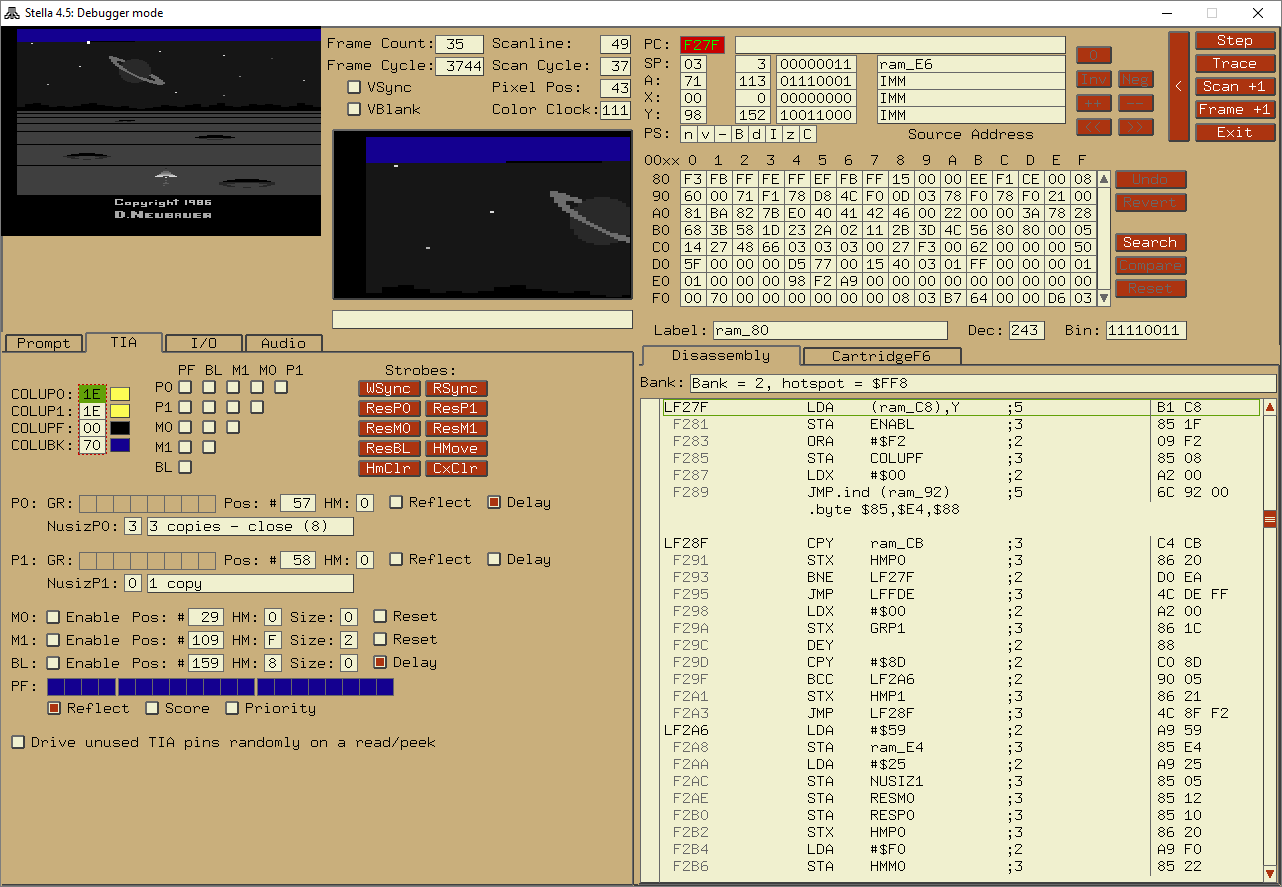
One of the advantages of having such basic hardware is that the debugger can capture pretty much the entire state of the system in a single screen. That's all of RAM there in the upper right, because it's not really all that tough to lay out 128 bytes cleanly. Then we've got the state of the graphics registers in the lower left, and a disassembly in the lower right. We can flip through tabs for a little extra info, but there's rarely cause to change from this configuration.
The part that makes this amazing is the upper left, which shows the screen as we know it. As we advance, we can see a little white dot work its way across the screen. That bright white dot is the simulated CRT beam. The buttons in the upper right next to the RAM let us step forward an instruction at a time, a scanline at a time, or a frame at a time, so we're in good shape for time control. We also see the previous frame in black and white, going color as the next frame is drawn over it, but this isn't consistent and I haven't actually worked out what makes this stick around or not.
Let's flip through to where the SCANNER graphic is being generated.
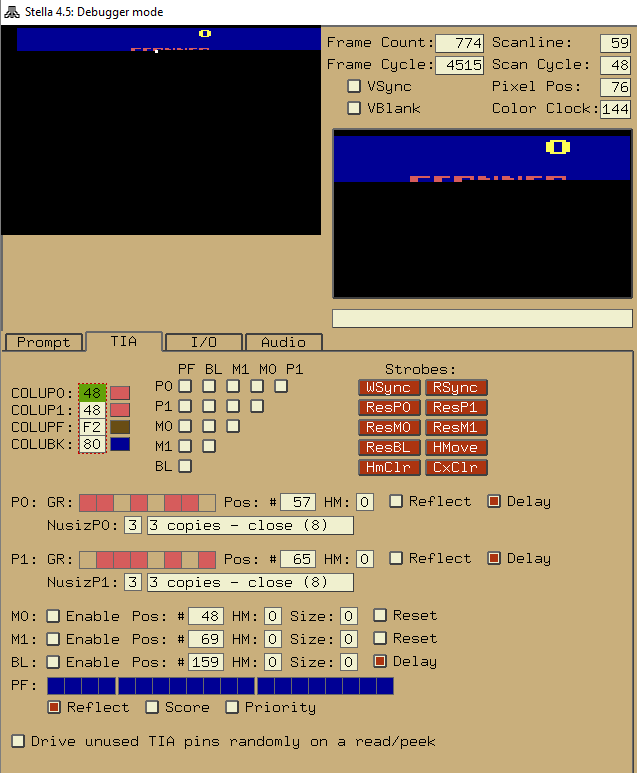
The basics of the trick fall right out of the sprite registers here. You can see the sprites 0 and 1 are set to "three copies, close together", and then they are also 8 pixels apart from one another (57 vs 65). Having the replicated copies "close together" means that there's a sprite's worth of space between each copy of the sprite. We've got the two sprites interleaved 010101, so that there are 48 pixels worth of graphics all in a row.
This does leave the minor issue of how you actually make all those 48 pixels be individually controllable, as opposed to three copies of two. The simple solution would be to reassign each sprite three times a scanline. We have all the time in the world to set up the first 16 pixels, so we'd just have to do four more writes during the draw to make it work. We've got eight pixels worth of time to do the write, too, since they alternate.
This is a pretty good plan, and it almost works. There are two issues we have to deal with. The first is that accessing memory or graphics registers is really slow. Reading or writing a value in RAM costs nine pixels worth of time. Reading a value out of the cartridge ROM costs twelve pixels worth of time. All of these are longer than the length of a sprite unit. That said, nine pixels isn't too bad. If we have four write statements in a row, we've got plenty of buffer space as long as we tune our first write to a decent time.
The other problem is much nastier: We want to write 6 individual values, because we're trying to create a full 48-pixel sprite here. If we want to write 4 different values in a row, we'd need to have four registers pre-loaded with values, ready to write. (The fastest instruction to load a register with a value costs six pixels worth of time; that plus the nine pixels for writing cost us 14 pixels which guarantees at least one missed cue.)
The 6502, alas and alack, only has three registers.
We would ordinarily be out of luck, but we've got one extra trick up our sleeves. If you check that list of TIA registers in the screencap up there, you'll notice that a mode called "Delay" is on. What "Delay" does is enable two extra registers inside the TIA itself. When it's on, the graphics that are displayed for a sprite are not the graphics that you wrote most recently to the graphics register, but instead the graphics that you wrote the time before that. Once Delay is enabled, we can preload not merely the first sixteen pixels worth of graphics, but the first thirty-two.
Then we write the last sixteen pixels to the player 0 and 1 graphics at the time we want to switch from the first 16 to the middle 16, and then simply write garbage to the registers to flip over to the last sixteen as needed. We can then use the rest of the scanline to prepare the next line of graphics and preload what the graphics to repeat the trick the second time around.
The timing's a little bit tight, but it's not too tough to embed this technique in a loop that takes exactly 76 machine cycles per iteration. This results in expending exactly one scanline's worth of time per iteration and lets you just keep repeating the process for as many lines as you need.
And that's this trick! This trick was old when Solaris was written; it was worked out in 1981 or so and was traditionally used to display six-digit scores. Discussions of it I found online even referred to it as "the venerable six-digit score trick." All stuff published during the Atari 2600's lifespan required you to place your 48-pixel graphics at a fixed location on the screen; in 1998 someone put together enough pre-existing techniques to let you actually move a 48-pixel wide supersprite around the screen. It's so inconvenient to do this that it's really more of a curiosity, though.
That just leaves one question, really: why does this Delay mode even exist in the first place?
The basic idea here, I think, was that the original designers didn't really expect you to change the graphics every scanline. You kind of have to if you're doing anything fancy, but they expected you to keep sprite graphics constant for pairs of scanlines. An individual pixel on the 2600 is nearly twice as wide as it is tall, so doubling up pixel rows gives you something that looks a little more square. I think the original idea here as that you could set the Delay mode and then your sprite would move down one scanline without you having to alter the graphics update code to check every scanline. Hence, the documented name of the register here: VDEL (Vertical DELay).
But they decided to implement it as two secret extra graphics registers, and a few years after release one of Atari's developers noticed that he could exploit that within a single scanline. As a result, this control register was used in damn near everything made for the system, but it was used for this 48-pixel sprite trick and not for its intended purpose. By 1986, when Solaris was published, you could be forgiven for thinking this was the intended purpose of the mode all along.