Part 13: Tech Post 5: The Flight Screen
Tech Post 5: The Flight ScreenSo, how about that part of the video game where we are actually playing a video game?
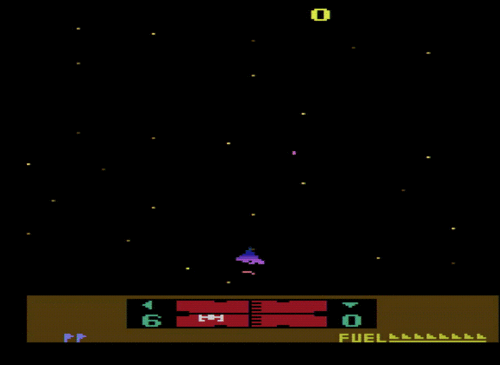
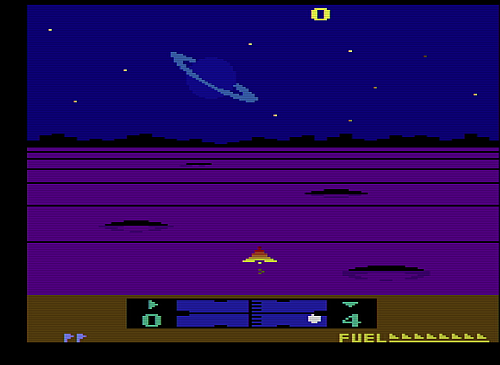
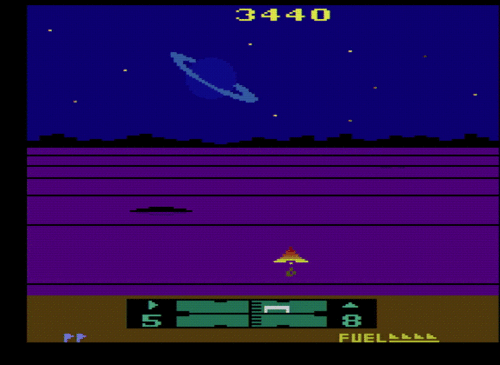
You're at the bottom and shoot up. Your foes are all over the place and shoot down. Shots also stay roughly at the bottom of the screen.
Since we need complete control of the X location of all the game objects, this means that, hilariously, we can cover a major chunk of this update with two observations:
- Your ship, your shots, and any explosions that used to be either are the Player 1 sprite.
- Basically everything else that isn't purely decorative is Player 0.
First off, why are you Player 1? Surely, as you are the only player, and 0 is the first counting number, you should be Player 0.
Well, no, because Player 0 and Missile 0 are drawn on top of Player 1 and Missile 1. And we want to be able to do this:
Second, if you count closely on that image, you will notice that your ship is actually eleven pixels wide. That's too wide to fit in one sprite without expansion, but too precise a result to get with expansion. It turns out that Missile 1's purpose in the flight display is to be the right third or so of your ship. It got passed over for the role of your actual missiles because your missiles have too much detail and thus require a player sprite. And since they have to coexist with any enemy ship you miss, that means all shots are Player 1 and all shootable things are Player 0.
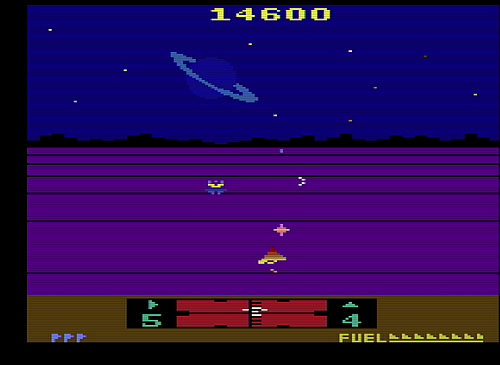
Now then. I did mention some exceptions. Here's one:
When a Cobra Fleet warps in, they kind of phase in from both sides of the screen at once. That effect requires both player sprites to work. Even when I try shooting past it, I think it just makes sure that your shot and the warp effect won't interfere.
The other case is planets with rings. With those, Player 1 is the planet itself. This makes it easier to draw the ring over it without needing special planet graphics that have cutouts for the rings.
A fun side effect of that is that when a ringed planet shows up in space and is headed on a path towards the player...
... only the ring (represented by Player 0) exists.
And that actually covers pretty much everything that involves geometry moving around and crashing into each other, in terms of assigning game entities to sprites. The only thing it really needs is a way to efficiently place the sprites and shift that around a lot.
That, as we covered briefly in the very first tech post, is kind of tricky. The decorative aspects are even trickier in practice, so let's take a quick detour to look at sprite placement in more depth.
SPRITE PLACEMENT
Each sprite has two registers associated with its location—RESET and MOVE. RESET is a "strobe" register—when you read from or write any value to it, the sprite it corresponds with is placed at whatever point on the scanline the CRT's electron gun is pointed at. MOVE is a more normal register, and you write a four-bit signed value (-8 to +7) to it.
There's an additional, global register called HMOVE. You can strobe this reference once per scanline, right at the start. When you do, the leftmost 8 pixels on your scanline turn black, and every sprite is moved left a number of pixels specified by their MOVE register. (Negative values mean you move right.)
Between RESET, MOVE, and HMOVE, you can place sprites at any point fairly simply. You need all three, though. RESET isn't enough. In the best possible case RESET only grants you three-pixel precision, and in more typical cases you're limited to 15-pixel precision.
Why three, and why fifteen? Well, the CPU and the pixel counter are locked together on the 2600, so every CPU cycle is three pixels worth of time. If you write your code with perfectly tuned timing, then that means you can select the exact cycle to write the sprite-placement register, which gives you the 3 pixels of optimum precision. Otherwise, you can imagine using a simple and cheap loop to place it. This is the fastest and simplest non-infinite loop on the 6502 chip:
code:
        LDX     count
loop:   DEX
BNE loopWith fifteen-pixel precision, and an ability to set MOVE to -8 to +7, you can place every sprite into roughly the right position, one per scanline, and then nudge every single sprite into the proper location, with pixel perfection, with a single HMOVE strobe.
That's great, as long as each sprite only appears on your screen once. If you're going to hit HMOVE more than once in a frame—and Solaris hits HMOVE literally every scanline—you'd better make sure that all your MOVE registers are zero.
Except when you want to be sneaky.
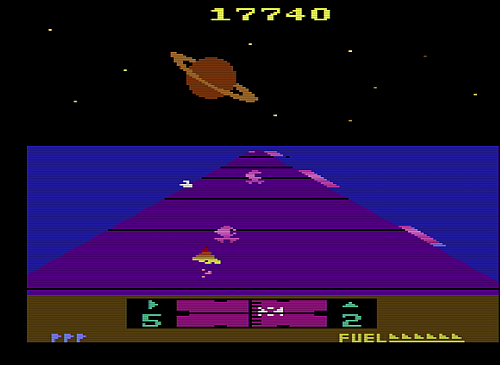
PLANETS
Take a closer look at that image from before:
The ring and the planet up at the top are each clearly detailed at the pixel level, from line to line. But they're also sixteen pixels across—these are double-sized sprites. If you add one pixel to the right side of your double-sized graphic, and then nudge it a single pixel to the left, the end result is to expand the graphic by one pixel on both sides. That works great for these planets. (Hilariously, it doesn't work for the player's ship because the each line of the player's ship has an odd number of pixels.)
That trick isn't restricted to player sprites either:
The big ringed planet in the upper left there has a double-width Player 1 for the planet, and a single-width Player 0 sprite for the ring. The top left and the bottom right ring graphics both do this, and it gets nudged from one side to the other over the course of several scanlines.
But if you look right in the middle, you see a few lines where the ring becomes a 2-pixel-wide diagonal line slashing across the planet. That's actually Missile 0, width-expanded and filling in for Player 0 while Player 0 gets nudged into place, and then while it waits for the ring to get close enough that it can close the gap on its own.
This trick generalizes: with a missile that's multiple pixels wide, and with a MOVE register for the missile set to a value less than its width, you can turn the missile on and hit HMOVE every line and get a clean diagonal line.
That's a good trick. We can push that trick even further.
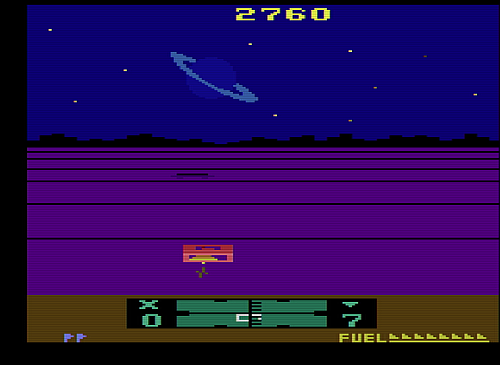
THE CORRIDORS
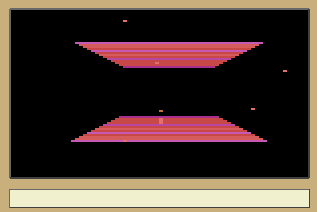
The floor of the corridor is just empty space. The black lines are simply the result of changing the background color from purple to black every few scanlines.
Most of the perspective effect is handled via clever sprite placement and choice of where to put the black lines. As far as the rendering mechanism is concerned, we need to get it to draw us a trapezoid.
The solid blue bits here are mostly a symmetric playfield, starting out with only one unit of emptiness and then pulling back one unit every four scanlines until there's nothing left. To get the smooth slope, the Ball and Missile 0 are configured to be four pixels wide, put on the edges of the playfield, given MOVE values of +1 and -1, and then just left to their own devices. They retreat a pixel every scanline as part of the per-scanline HMOVE strobe, and as long as the playfield retreats in synch, everything works out perfectly.
But you don't have to take my word for this. See those stripey bits going down the right side of the screen? That's Missile 0 and it's not supposed to be there. It's there because the Guardians are Player 0, and each missile always has the color of its corresponding player. If you blow up Guardians, their stripe disappears.
Similarly, there is a yellow stripe for the key, another Player 0 object. I'm pretty sure the way this works is that the Force Field doesn't kill you as long as there's a P0/P1 collision happening, since that means that the ship is flying on top of the key.
Well, actually, blink and you'll miss it, but:
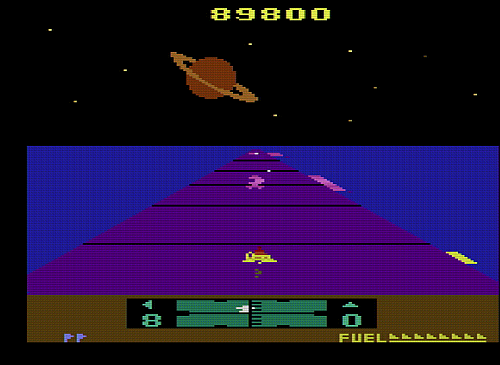
You're actually flying under the key. Player 0 is drawn on top of Player 1, remember?
The last corridor-specific thing is the force field. This is pretty much just short-circuiting the normal corridor draw routine: when the force field is being drawn, the playfield, ball, and missile are pre-placed and the process starts further down than usual.
For the field itself, the playfield and background are switched. I think this is so that it doesn't have to remind itself not to draw the enemies behind it, since it can just make the playfield take precedence.
There's one other trick it allows too. Once you actually need to fly through the force field, the display mechanism changes.
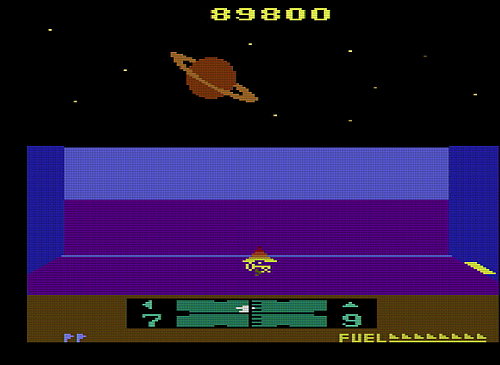
This isn't a glitch of the recording. The bottom half of the force field is missing, but the very last line is there. This is so the game logic can tell if you've crashed.
I haven't reverse-engineered the disassembly to make sure, but I'm almost positive the logic here is that you reset the collision detection just before you start drawing the player ship, and then, if the ship collided with the playfield but not also player zero, then that's a crash. This gap means that once you make it past the the field, you can't crash into it again just because it was overshadowing you.
Not doing something like that can be pretty terrible. You'd fall into pits just because the camera saw you occlude it, not because you had fallen in. (Indeed, those of you who read the Fixing E.T. article linked early on will recognize this problem—it's the same problem, and the same solution.)
That's it for Corridors. While we're at it...
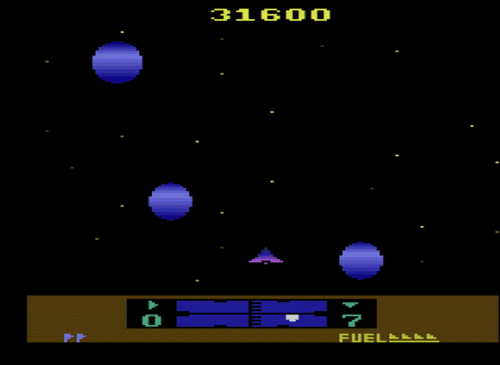
PLANETARY SURFACES
The differences between surfaces and the Corridor is that it isn't doing the diagonal path trick, there's a mountain range on the horizon, and there are occasional craters. That mountain range is just the Playfield sitting there, and the craters are Player 0.
"But wait," you say. "The craters will interfere with enemy shots if they're both Player 0." You're right.
Craters only appear on peaceful worlds.
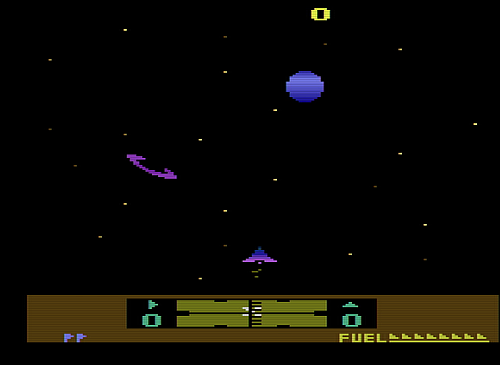
THE STARFIELD
Most screens have a nice starfield in the background. That's actually the Ball. It's placed at a specific location each frame based on where the topmost visible star on the screen is. At that point it sets the ball's MOVE register to -8 and leaves it there for the entire rest of the frame. It turns it on for one scanline every few lines to make a star. It varies the playfield color to make the stars twinkle.
The Ball gets used for other stuff, too, but in all of those cases but one, the stars are on the top of the screen and the effects that use the ball are on the bottom. We only need one spare scanline to do the setup, and that's not tough.
What's the exceptional case, you ask?
THE WARP WAKE
Let's zoom in on that effect in the debugger. It looks kind of familiar...
In fact, this is exactly the corridor trapezoid trick, just done backwards first. Which raises our first question: we need the Ball to make the Trapezoid, so how do we get a nice consistent starfield? The answer turns out to be boring: use Missile 1 instead.
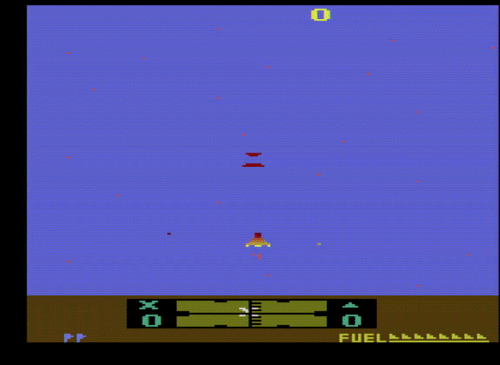
But that raises a new question: don't we need Missile 1 to draw our own ship? The answer here is boring too: by the time the warp effect is extensive enough for that to matter, the ship has blasted far enough into the distance that it no longer requires assistance from Missile 1 to render. It's just a plain 8-pixel-wide sprite.
And that's the last of the effects we see in the flight screens.