Part 33: Behind The Fangs: Part VI - RPG Maker Basics: The Maps
Behind The Fangs, Part VI - RPG Maker Basics: The Maps♪ BGM: Building Mode ♫
Alright, so last time, we finished up looking through the database, and now, it's time to take a look at the maps. But before we can do that, I think we need something we can play with. I had a playground game of my own, with which I made two videos showcasing some things, but I tossed that one and will be starting over with this one. So, let's make a new game! We can either make a new project or open one with the buttons in the top left. We'll make a new one.

The only thing you set when creating a new game is the name that's shown in the game's window, the name of the game's folder and the place it's saved.

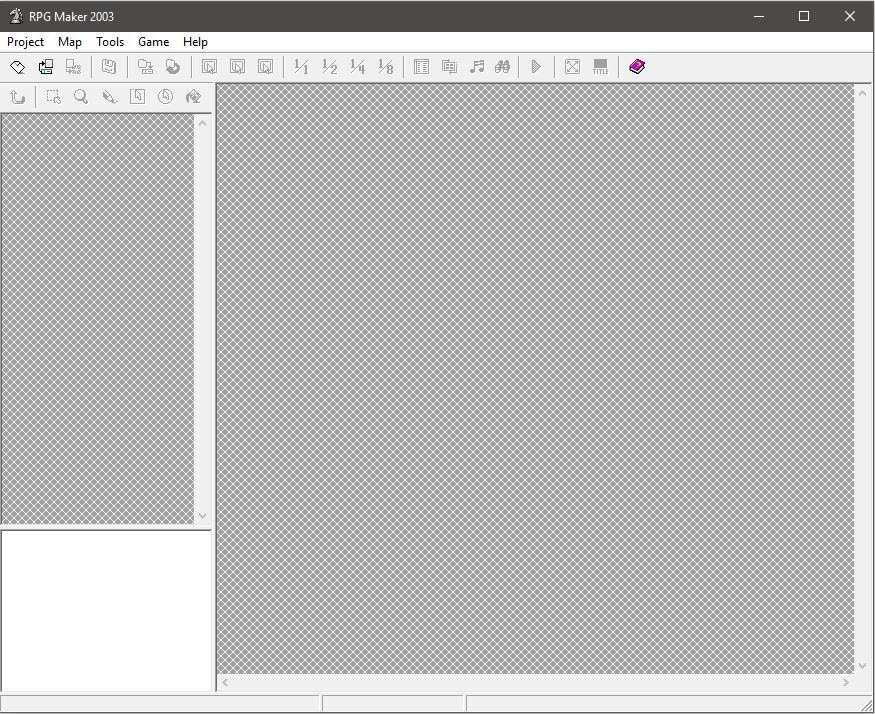
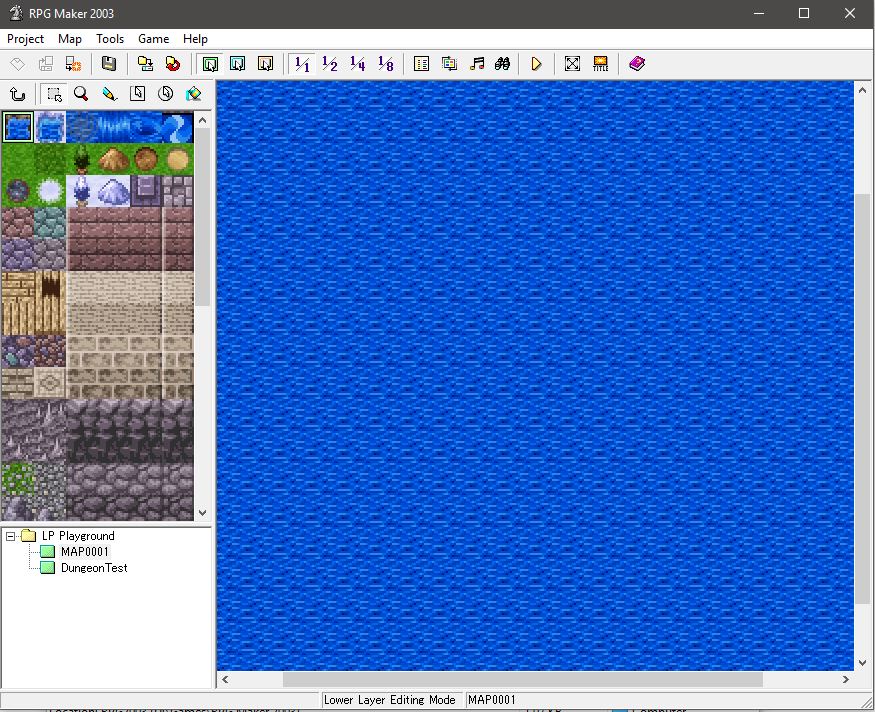
And with that, we're dropped into our new game. It has a basic database setup, and we have one map with a size of 100x100, filled with ocean tiles. We'll be using this as our baseline. But first, we have some menus to go through.
In the Project menu, we can make a new project or open one if we don't already have one open, we can close the currently open project, and we can put our current project into "Gamedisk" format, which basically compacts the entire thing into a setup file and a few auxiliary files. These options are also in the first four icons in the first row of icons.
In the Map menu, we can save the current map, revert to the last save, change the layer we're operating on (more on layers later), and change the zoom for the map between 1:1 size, 1:2 size, 1:4 size and 1:8 size. These options are in the fifth to thirteenth icon in the row of icons.
In the Tools menu, we can access the database, access the resource manager (more on that later), listen to the music you've got in your game, and you can make an event search. With the event search, you can put in a variable, switch or event name and search for events that use them. That can probably come in very handy with larger games. These options are in the fourteenth to seventeenth icon in the row of icons.
In the Game menu, we can test play the project from RPG Maker, turn on and off the full screen mode when testing, and turn on and off the title screen when testing. These options are in the eighteenth to twentieth icon in the row of icons.
Finally, the Help menu lets you open the help file and view the About page. The help file can also be opened with the last icon in the row of icons.
Now, let's actually build a map. When we right click on the folder or a map in the bottom left area which lists our maps, we get some options. With the folder, we can just make a new map, or paste a copied map. With a map, you get more options. You can check the map properties, make a new map, create an area, generate a dungeon and copy, paste, delete and shift a map. Let's check out the more important parts of that, starting with the map properties.
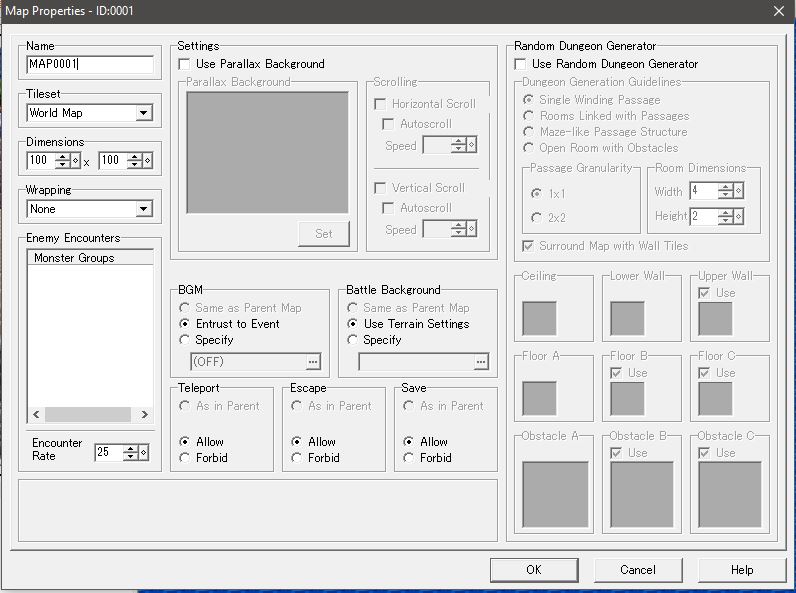
- Name: This is internal only. Probably a good idea to make this descriptive.
- Tileset: This allows you to set one tileset for the map you're making.
- Dimensions: Pretty simple - you set the X and Y size for your map by setting the number of tiles.
- Wrapping: This allows you to set the map to wrap horizontally, vertically, or both ways. This is very much something you want for world maps.
- Enemy Encounters: This lets you pick from all your monster groups and set them up for encounters on this map. You can add a group multiple times to make it more likely for it to be encountered.
- Encounter Rate: Hey, remember how I went on a massive rant in my VD1 LP about encounter rate despite not knowing how the fuck encounter rate even worked and just making a totally scientific wild ass guess? Well, turns out the help file had the answer all along. Quoting: "The minimum number of steps needed to initiate an encounter. For example, if the value was 20, the probability of a battle would increase every step, until you reached 20 steps, when a battle would occur. If this value is set to 0, you will never get into a battle."
Note that that should mean the number is the *maximum* number of steps required to initiate an encounter. VD1 generally seems to have had an encounter rate value of 25. Jury's out on what "probability increases every step" exactly means, by the way.
- Settings: So here we can set a parallax background. If you've seen my video on a rudimentary skill tree or remember the final area of VD1, those used parallax backgrounds.
- - - Parallax Background: You select the graphic for the background here.
- - - Scrolling: Here, you set the scrolling for horizontal and vertical directions. If it's not activated, the background scrolls with the movement of the hero. If it is activated, it will scroll in the opposite direction of the hero's movement, at half his speed. If Autoscroll is set, the background will just scroll period, depending on the speed set. You can set it to any value from -8 to 8, and the scroll is either in one direction or the other depending on whether it's positive or negative.
- BGM: You set the music here. Makes sense, no? You can set it to just be the same as the parent map, making it a lot easier for places that consist of many maps.
- Battle Background: Here you can set the battle background for the map, if you want it to be a fixed background instead of being dependent on the terrain of the tiles.
- Teleport / Escape / Save: You can enable or disable these three specific things per map - so you can disable saving anywhere but on the world map, or teleporting in dungeons, that kind of stuff.
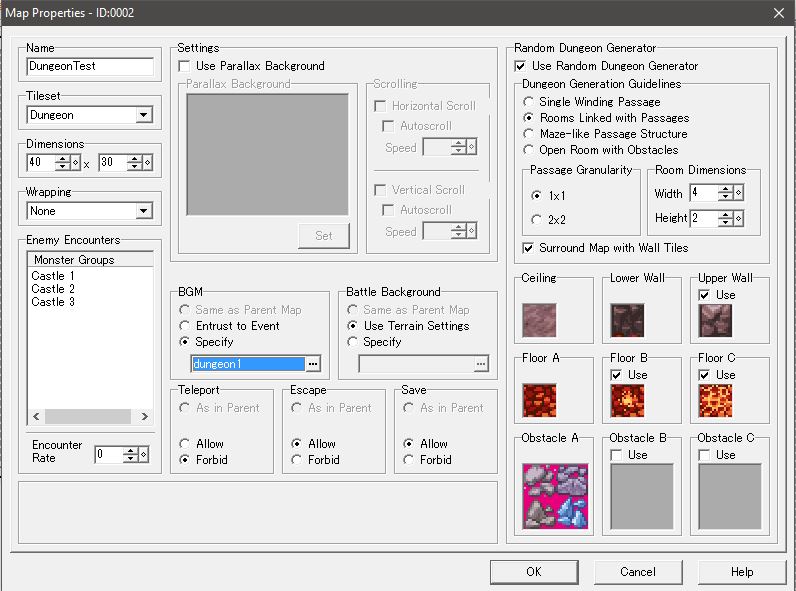
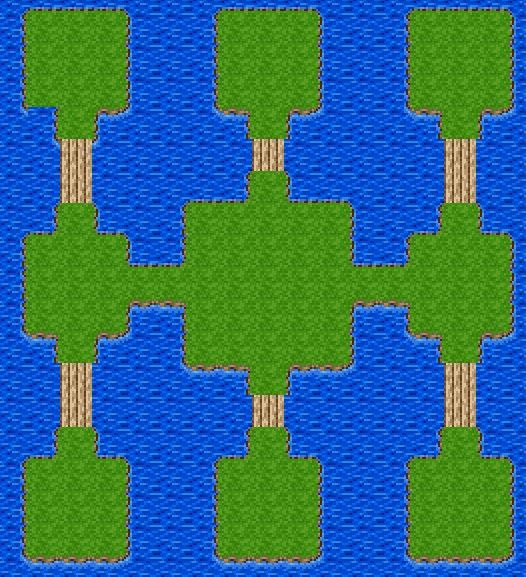
- Random Dungeon Generator: OK, this'll need some explaining. Actually, let's do this with an example. So, let's make a new map! We right-click the "LP Playground" folder icon and add a new map.
Now, I'm not a designer by any means. Graphics stuff is way above my head, so this is probably going to look like shit. Still, let's just output the dungeon, and see what we get!
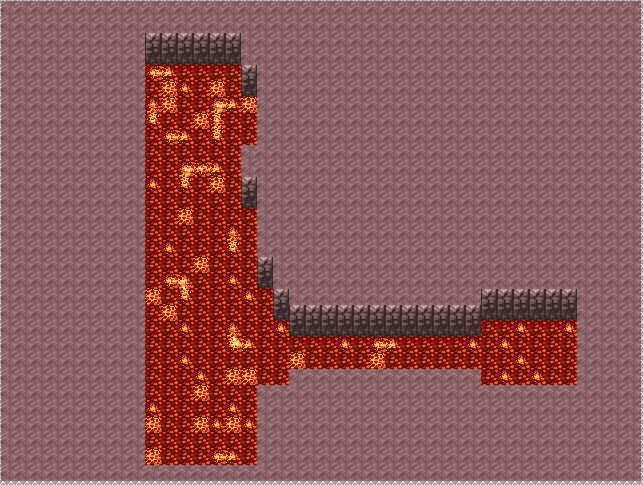
...wow, that looks like a crock of shit. Now, we can right-click the map and have RPG Maker re-generate a dungeon. Let's try that!
OK, that actually kinda-sorta looks like something that might be approaching a base layout for a small, unimpressive dungeon. Did I couch that in enough lessening words? Anyway, let's look at the different settings.
- Dungeon Generation Guidelines: Here, we get to pick some different baselines for the dungeon to be generated:
- - -Single Winding Passage: This one looks like this:
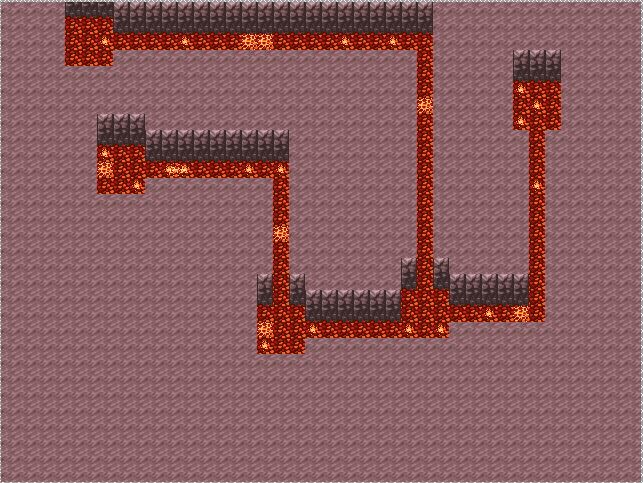
Note that "single winding passage" doesn't preclude loops or forks.
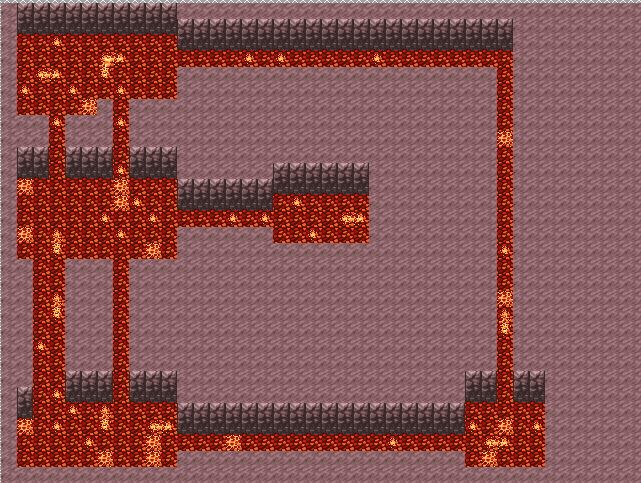
- - -Rooms Linked with Passages: This is the one we originally used, so look back up for two examples of that. Note that just because it says it's one thing doesn't actually mean it's going to approximate that, as shown by the first design.
- - -Maze-like Passage Structure: This looks like this:
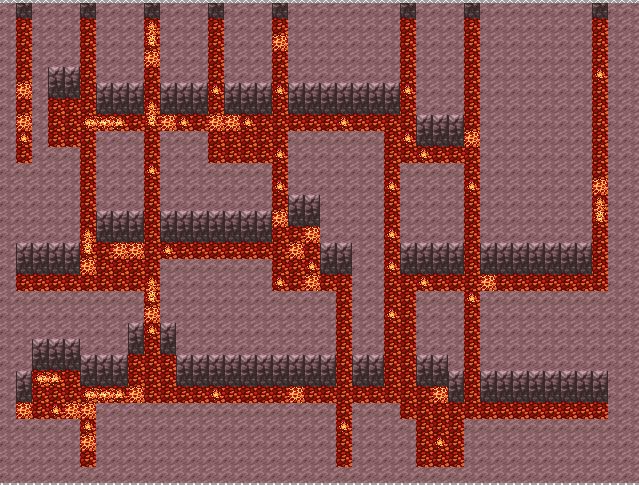
Basically like the single winding passage, but more maze-like! Man, if only all options were this descriptive.
- - -Open Room with Obstacles: I don't get this one. Anyway, it looks like this:
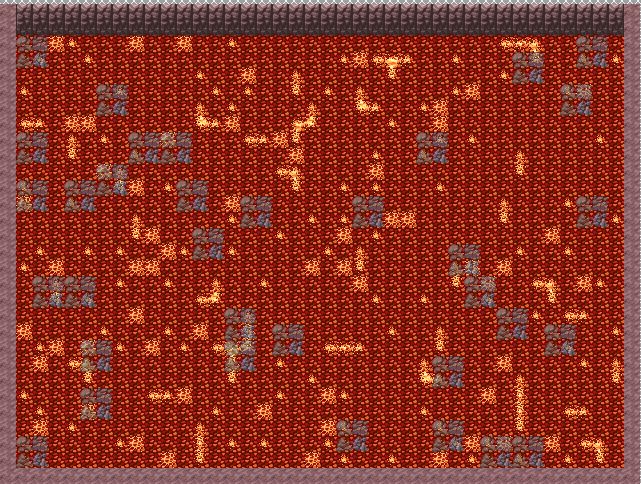
You can use the three "obstacle" options in the menu to set what obstacles appear. Now, the help file says that you can select a 1x1, 1x2, 2x1 and 2x2 configuration for the obstacles, but I have no god damn idea how to do that. I can't work it out.
- - -Passage Granularity: You either get 1x1 size passages, or 2x2 size passages, for when you use a setup that has passages.
- - -Room Dimensions: This lets you set the size for rooms when you use the "rooms linked with passages" setup.
- - -Surround Map with Wall Tiles: This will make it so that the tile you use for the ceiling will surround the map.
- Ceiling / Wall / Floor: These allow you to set the different tiles the generator will use for ceilings, walls and floors, with some variety allowed in the floors and two tile high walls.
That's basically it for the dungeon generator. Let's go back to our other map and see what else we can do.
Alright, so we have some more icons we can play with in the second row of icons. They are, in order:
- Undo
- Select tiles
- Zoom with the mouse
- Place tiles freehand
- Place tiles in a rectangle
- Place tiles in an ellipse
- Flood fill
So, basic stuff for making a map. Now, we'll have to talk about layers, but before that, let's make something.
And there we go. This is all operating on the lower tile layer. This is what we would figure to be base terrain. Ground of some sort. Now, let's place some more things.
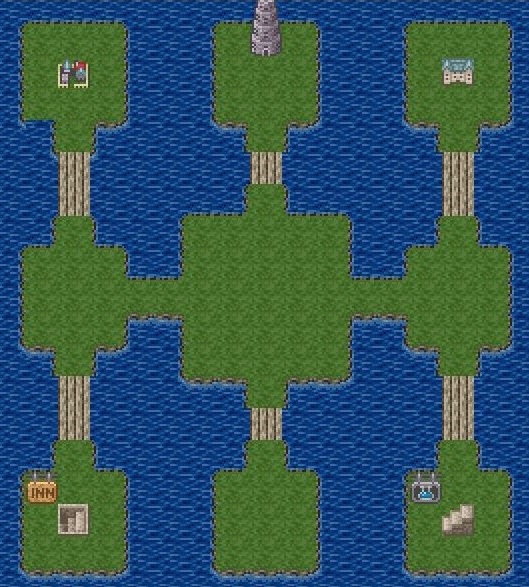
There we go. This is all operating on the upper tile layer. This is what generally makes up the objects on the map. You'll note that the stuff from the lower tile layer is now more faded to allow the stuff from the upper tile layer to stand out. However, these objects don't actually do anything except have collision (which we set back in the tilesets in the database). No, if we want the objects to actually *do* something, we'll need to get into the third layer, the event layer...
...but that'll have to wait until next time, because events are the meat and potatoes of RPG Maker, so we'll start that proper the next time we return.
Now, there's one more thing I might hear you ask: "But TheMcD, how can I make good looking maps? That's the most important part here!" To which I would answer... "I dunno". I have no god damn idea how to actually make things look good. That's generally an issue, and it'll be the biggest issue if I ever decide to actually make a game. Everything I do looks like crap, that's just a fact. You'll need to figure that part out for yourself.
But next time, we'll look at something I can work with a lot more, and that's events.