Part 84: Behind The Fangs, Part XVII - Castle Battles
Behind The Fangs, Part XVII - Castle Battles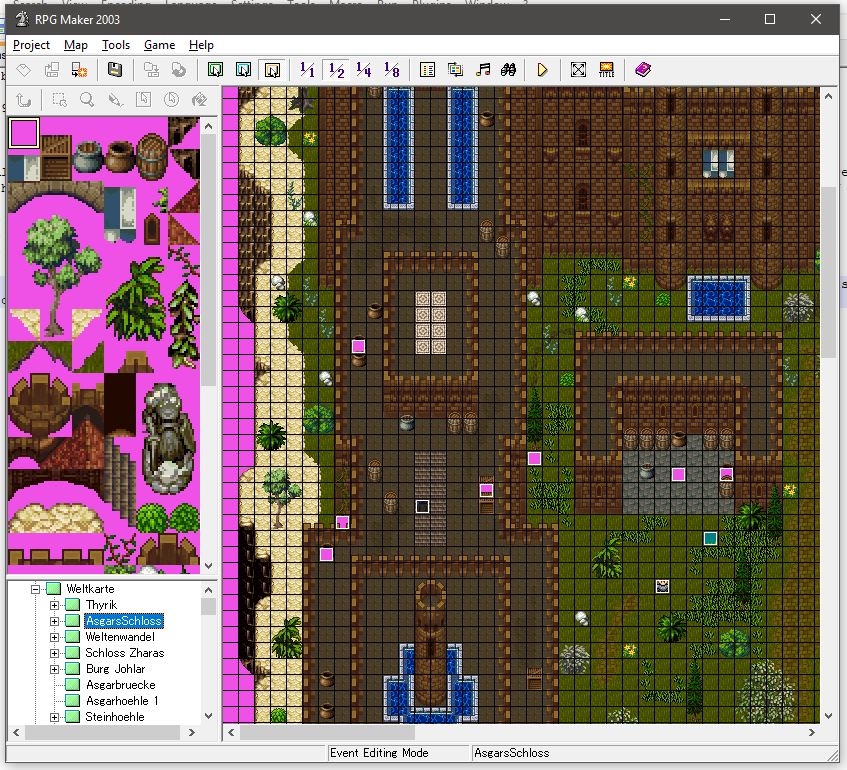
♪ BGM: Road of Enemy #1 ♫
Alright, I assume that 75% or more of the audience has already tuned out at this point, but whatever, we're just going to roll on with this. Let's rock this joint one more time. We have one more thing from VD2 I want to cover here before we start wrapping this up, and that's the castle battle system in all its glory, front to back. Now, this system consists of quite a few bits and pieces, so here's the main parts we're going to hit:
- The common events
- The world map
- The battle maps
I suppose we should start with the baseline, so the first thing we're going with is the common events. This is the backbone of the attacks the Elras and the Clan make on our castles, and I've already gone over this to some degree in the LP proper.
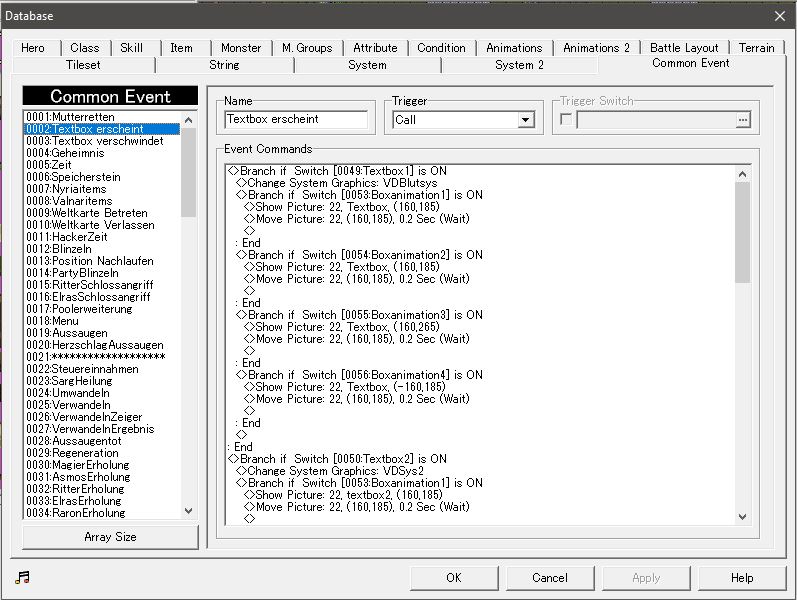
Now that we've beaten the game, I can just be lazy and show the entirety of the common events screen. The core components of the castle battle common events are #15-#17. Let's start with the easiest one.

This is event #17, which deals with "pool expansion". This is small enough I don't have to break it down into pieces, so let's just take it from the top.
First off, we wait one second, then add one to the variable "PoolTimer". This is followed by a check for whether the variable has reached 300 if we're on normal difficulty, or 200 if we're on hard difficulty. Easy mode has the castle attacks disabled, so this entire part has no effect for it. If we haven't reached that point, we start over and keep adding until we reach that point. If we have reached it, we set the variable to zero. After that, we check whether an attack is currently going on or if the castle attack system is currently disabled (not generally disabled, mind, just the minor temporary disabling that happens when you talk to somebody or something like that). If those factors are met, we keep checking until it's not the case anymore.
When it's not the case anymore, we have a particularly fun block - it's a check for whether the player has conquered all the castles! And if the player has indeed conquered all the castles, the castle attacks are supposed to be turned off! However, for us to enter that block, we need to have a certain switch be on. That switch is called "never on". So this part is basically dead code and can never be reached. This is one of the things I asked Marlex about, and I hope I get a response, because it really interests me whether this was a thing back in an earlier version and was at some point turned into dead code to make the game more difficult or something like that.
Finally, after all that, we get to the actual pool expansion part. We pick a random number between 0 and 1. If it's 0, we check whether the Clan's pool size is at the limit (more on the limit later), and if it isn't, we increase it by one. If the number is 1, we do the same for the Elras. Pretty simple.
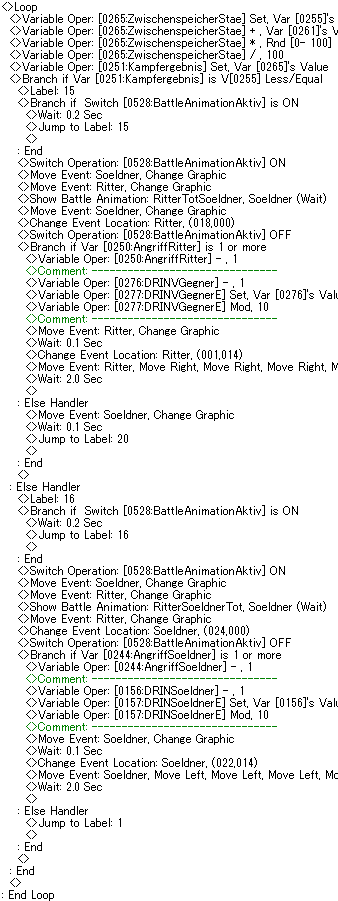
With that done, let's move on to #15. We'll skip #16, because it's the exact same as #15, just for the Elras instead of the Clan. Now, bear with me here, because this image is fucking massive, but I have to do it this way as to show the entirety of the code for those that want to see it. RPG Maker code is unwieldy as fuck.

Alright, so this is event #15, dealing with the "knight castle attacks". And it's a fucking behemoth. Let's break this down, shall we?
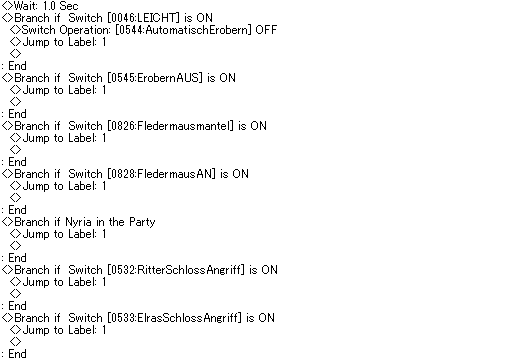
The first check is for all the situations where attacks won't happen, which are, in order:
- Playing on easy (also disables these events from running permanently by turning off the switch that makes them run)
- Having the temporary disable switch on
- Being in bat form (dunno why two switches are checked here, they're both involved when using bat form)
- Having Nyria in your party
- Having an attack that is already going on

Next, we check for certain map IDs. I have zero idea what these are because there's no easy way to check. I think these might be different menus - like the skill menu, the rune synthetisizer, that kind of stuff. If you're on these maps, you're also not going to get attacked.
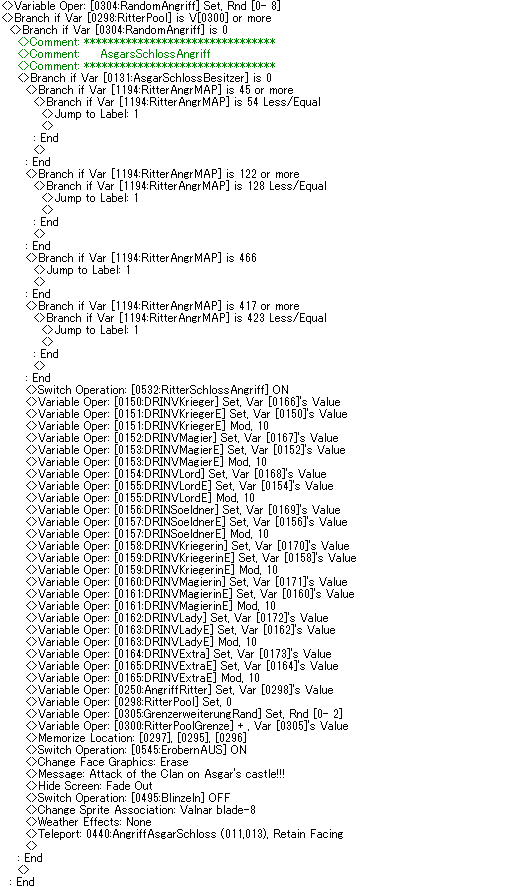
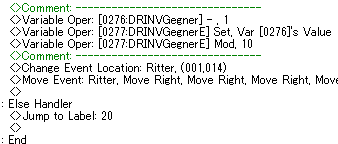
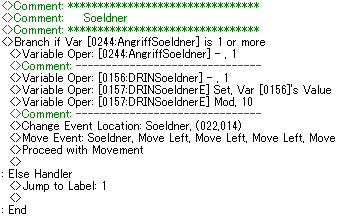
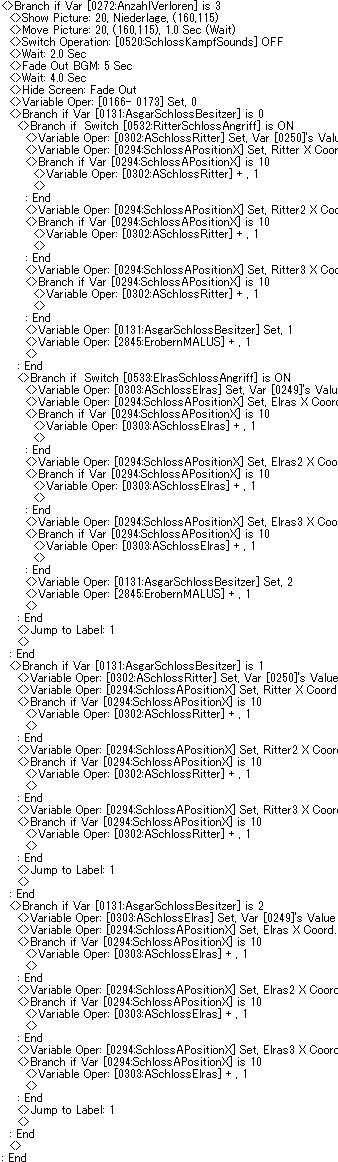
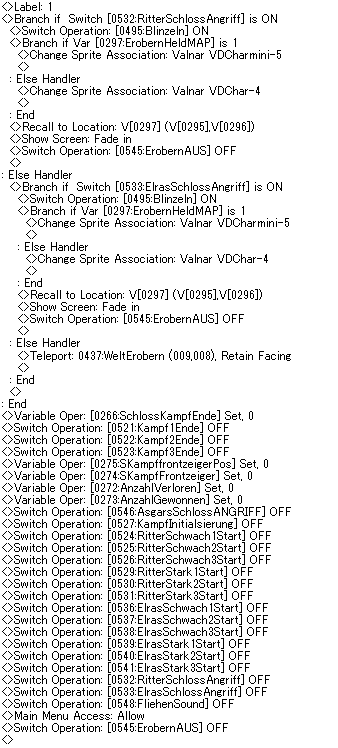
After that, we pick a random number between 0 and 8, which will represent the nine castles. Then we check whether the pool of knights has reached its limit, and if it has reached the limit, then an attack happens. As an example, we have the part where an attack on Asgar's castle happens.
First, we check whether we currently own Asgar's castle, which is kind of redundant, because not owning it is an automatic game over, but whatever. Then, there's some more map ID checks. I can only presume these are the maps inside the castle, so that there will never be an attack on a castle that you're currently in. There's an early game exploit here, but I can't think of it right now.
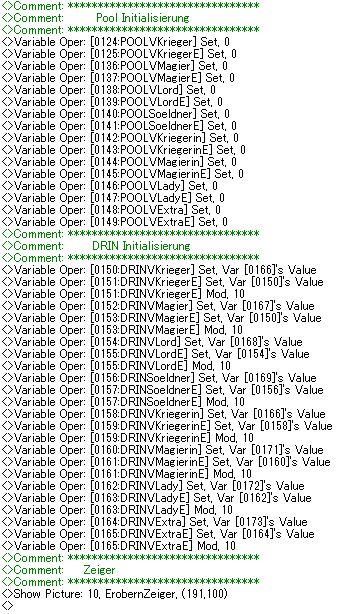
Anyway, once we've made sure that we're not currently in the castle due to be attacked, we do a whole bunch of variable moving. Basically, what this does is take the number of each unit currently in the castle, write that to a variable, then make a new variable out of taking that variable by modulo ten, which gets you the single digit. This will be necessary later to write the number of the units on the screen.
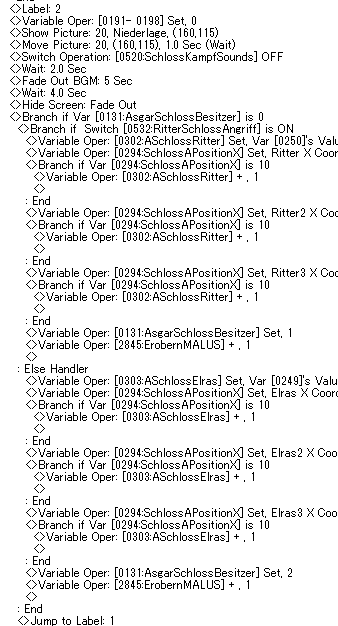
Finally, we set the Clan's pool back to zero, add a random number between 0 and 2 to the pool's limit, memorize the location of our heroes (map ID and X and Y coordinates), tell us the castle being attacked, do a bit of cleanup (disable weather, turn off blinking, make Valnar's sprite invisible, that kind of stuff) and move us to the battle map, where the events of that map take over, so that's for later. Then we just repeat that eight more times, slightly changed to account for the different castles, and that's basically it. So a lot of code, but not that much more complicated than the last time.
And that's it for the common events that control the castle attacks. Next, since it flows so well, let's go to a castle battle map and see how that looks!

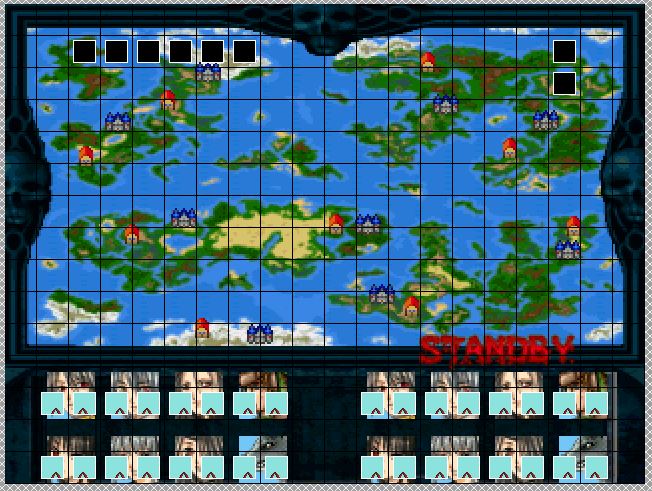
Now, there's a ton going on here, and a ton of events. Let's break this down a bit more.
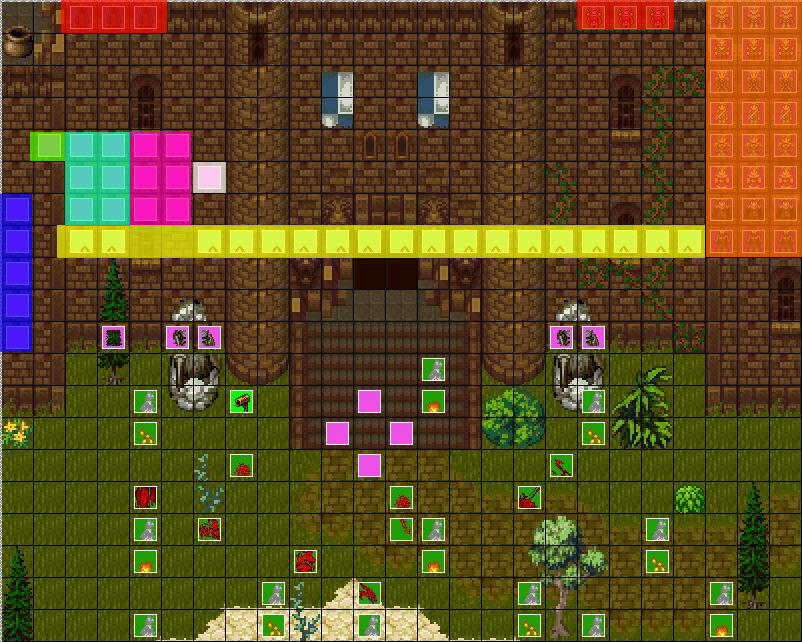
I've split up the events in different groups. First, the ones we don't really need to worry about :
- Orange events are for our units.
- Red events are for the enemy units.
- Dark blue events play sounds of screaming and such to set the scene.
Then, some basic ones:
- The yellow events use the variables that track the number of the units to display them on screen.
Finally, the ones we'll take a closer look at.
- The green event initializes the fight.
- The light blue events run the combat for the Clan attackers, with three events for the three units if we use a weak front, and three events for the three units if we use a strong front.
- The pink events run the combat for the Elras attackers, the same as the Clan events.
- The white event coordinates the end of the combat.
We will be taking a look at three events in particular: The green one, the white one, and one of the light blue ones. Let's start with the green one, since it starts the fight. Warning: These fucking events are positively massive. Like, the last one of these is over 20000 pixels in size in image form.

So, let's break this down again.
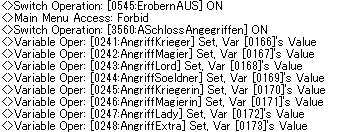
To begin with, we forbid us from opening the main menu and read the attack power of the different units from the variables set up for it.
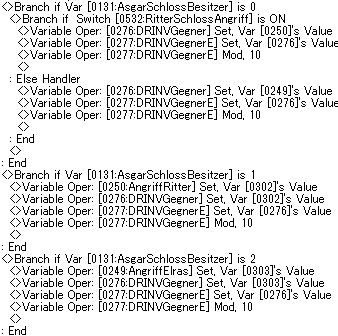
Next, depending on whether we're attacking the castle or defending it, and depending on whether the Elras or the Clan own the castle, the value of the enemy force is taken from the appropriate source.
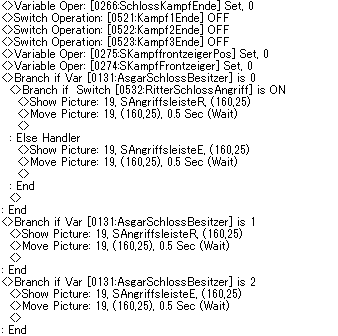
After that, we have some intitialzation. Some counting variables for controlling the combat are set to zero, and depending on whether it's the Clan or the Elras attacking, it'll put the appropriate GUI image at the top.
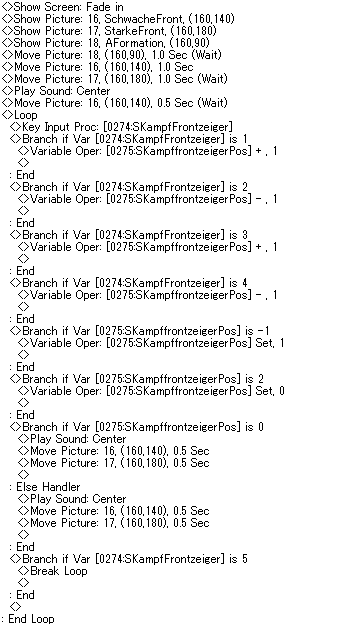
Next stop is the weak or strong front menu. We fade in the images for the menu and run a little key input proc to enable us to go up and down the menu and catching moving up from the top and down from the bottom, and eventually figure out which option was picked.
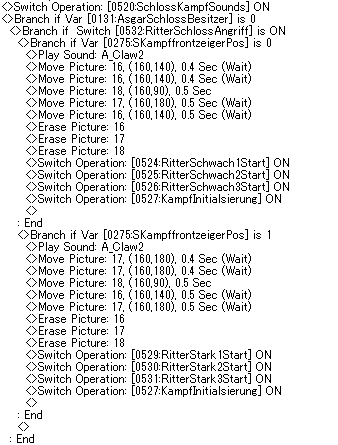
Now, we need to set up the switches accordingly. We start out switching the sounds on, and then depending on the selection, we either set the switch for a strong front or a weak front. Finally, we turn on the switch telling the other events that the initialization is complete. The entire thing is then repeated for a bunch of different cases - the Elras attacking, attacking a castle owned by the Elras, and attacking a castle owned by the Clan. We don't need to see all that again.
The second event we're looking at is one of the light blue events that run this shit. This one will be taking care of the first of the three fighting duos with a weak front setup. And again, this one is long.

Let's break it down.
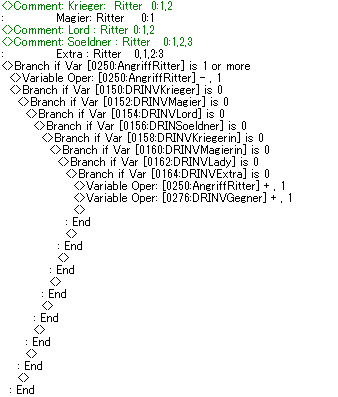
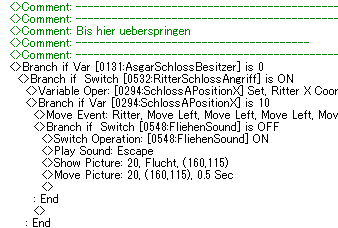
I have no idea what that comment is supposed to say, FYI. In the beginning, we check for whether there is still a knight left to attack and if there are units on our side to fight against them. If not, the knight is returned to the reserve and will not come out.
If there is a unit available to fight the knight, then there's one guy taken off the numbers at the top and the knight event moves into battle position. If not, we jump down to label 20, more on that later.
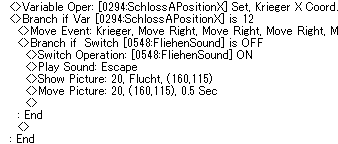
Next, we have the blocks that take care of all our different units. We start with the mercenaries, since they're the weakest of the lot. If we were in the strong front event, the werewolf would be first. Anyway, if we have a mercenary, the number of mercenaries at the top is reduced by one and a mercenary moves into battle position. Otherwise, we jump to label 1, which is the part where we do the same thing with the vampire warrior, the next in the order of units.
Here's the block that deals with the actual combat. To begin with, we have some calculations, which I'll just copy and paste from when I last went over them:
Update XXVIII posted:
The basic gist is this. Every unit has a "strength" value assigned to it. Here's the list:
- Mercenaries: 13
- Vampire warriors: 15
- Vampire mages: 17
- Vampire lords: 25
- Werewolves: 35
- Elras mages: 20
- Clan warriors: 15
What do those values do? They're stuffed into an equation, and the result determines who lives or dies. Let's do it with an example. Currently, we have clan warriors facing off against mercenaries, so that means 13 strength units are facing off against 15 strength units...
...except it's not. We forgot the difficulty malus. On Easy, every unit of ours gets 2 added to their strength. On Hard, every unit of ours gets 4 subtracted from their strength. Furthermore, we have learned the first level of the Leader skill, which gives our units 2 added to their strength again. So we have 11 strength units facing off against 15 strength units. Now, the game does the following.
- It stores the value of the mercenary's strength in a variable. (VAR = 11)
- It adds the value of the warrior's strength to the variable (VAR = 11 + 15 = 26)
- It multiplies the variable with a random value between 0 and 100. (VAR = 26 * 56 = 1456)
- It divides the variable by 100. (VAR = 1456 / 100 = 15) (Note: I think RPG Maker rounds up here. Not sure though).
- It compares the variable to the mercenary's strength. If the variable is greater than the mercenary's strength, the warrior wins.
After the calculations, we check who wins, and get into the correct branch accordingly. There we check whether there's already a battle animation going and loop that check if there is. If not, we begin the battle animation for this duo of combatants. The two sprites are made invisible to be replaced with the animation. The one of the two that gets killed is sent back to its place outside of your view and the other one is made visible again. The number of the killed unit is adjusted downwards. If there's another unit to take the killed one's place, it's moved in, otherwise, this area is either declared to be a victory for us or the event moves on to the next unit.
So that's the basic rundown of how the combat works. We repeat this part of the event several times for all of the different units we have, and then we have one more thing at the end:
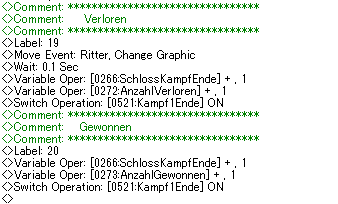
This is where we go when one of the two forces runs out of units to put into battle. If we end up the winners in this particular fight, we get plus one to the victory counter, otherwise it's plus one to the loss counter. Either way, we add one to the fight end counter and flip the switch for this part of the fight to be done.
So basically, three of these events run in a trio until the fight end counter hits three, which means that nobody has units left to fight. After that, we get into the final event, which cleans things up. Now, again, warning: This image is stupidly massive. Be prepared to scroll down a whole bunch. I'm making a point of showing you all of this to prove just how massively unwieldy this code is and how much work it was for Marlex to put this together. It's insane.

Again, let's break it down.
The first block deals with what happens if you lose completely, with all three of the sub-combats ending in a loss for us. Here, we basically just go through cleaning up the units that remain in the castle depending on whether the castle belonged to us, the Clan or the Elras, and who attacked. What we also do is check if there's an enemy unit in the three slots of the sub-combat, adding one to the number displayed up top if they're at the particular X coordinate, and jumping to the end of the event.

This block deals with a total victory. A bunch of code, but it's basically just the game counting up all the different units that it needs to deposit in the castle after the end of the battle, and that's it. But of course, given the large amount of units, it takes a lot of code to make work.

Now, if the number of victories is larger than the number of losses (so basically a 2:1, which is the only possible result), then there's a whole bunch of code that... uh... I don't know. The comment says "skip for other castles", and I don't know what the other castles are. It seems to be checking if there's any situation where an enemy is alive but there's none of our units to fight it, and then jumping to label 2, which is the "you lose" part.
After that, we have a block that says "skip to here" in the comment. This basically checks the situation we're in (which side the enemies are on, which of the enemies is still alive) and then makes the enemy run away.

Then we get a large block that adds our forces to the castle's reserves again. Again, lots of code, not a lot of function.

I don't quite get this part either. It seems like it's checking for if all enemies are dead and one of our units is still alive, and calls that a victory. But I'm not sure how that code is required if we're in the branch where we have two losses and one victory - that should mean two enemies are still alive, right? I guess since it's the "else" part of the block, this could just be a catch-all.
After that, we get the part where our own units flee, so it goes through all the different kinds of unit for all positions and has them run.
Finally, we get the branch that deals with the end of the loss. Here we do some graphics and sound stuff, then calculate the enemy army that will now take up residence in the castle after they have taken it over. There's another block after that that instead calculates the enemy army that will stay in the castle because it defended it successfully.
And to cap things off, some closing actions. If the Clan or the Elras attacked, we're dropped wherever we were, with Valnar getting his sprite back, and if we were the ones attacking, we're dropped back on the map. We reset a whole bunch of variables and switches, and that's it! That's how the battle roughly works. And that brings us relatively nicely to the final part of the whole shebang:
The map. There's not as many events to deal with here, but we can't really skip most of them (well, except the counters at the bottom, which just correspond to the counter variable to display the numbers, same as we've seen on the battle map). Let's go through them.

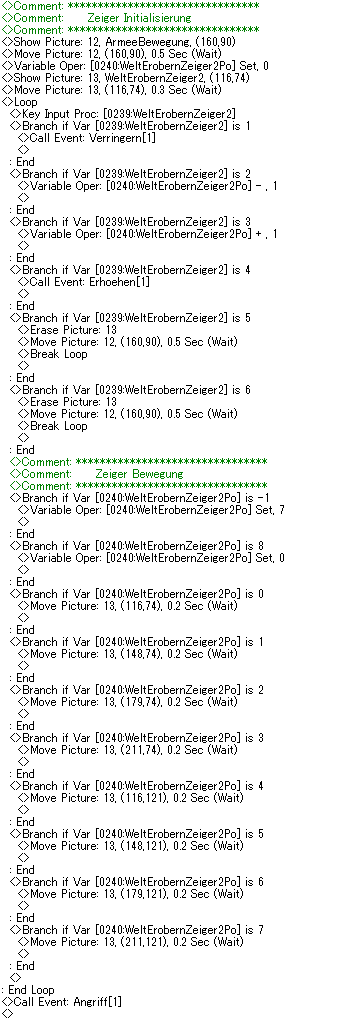
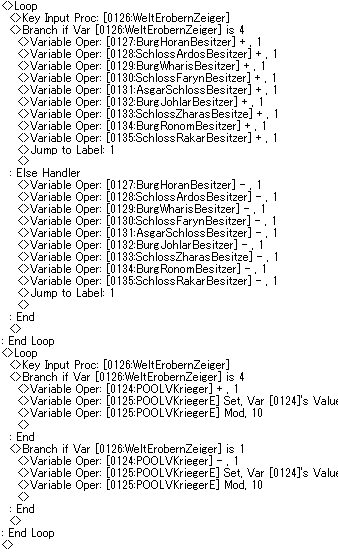
First, we have the initialization of the map. We set the pool of units to be redistributed to zero, initialize the counters at the bottom, show Jinnai's explanation if we're here for the first time, color the different parts of the map the color of the group that owns the castle (there's a tint being applied you can't see in this code, only in the details), and finally we show the pointer and call the event for the movement of the pointer. In the end, we also have some calls that take care of teleporting us to the battle map if we attack something and reset the stuff if we leave the map. Next, we have the event for the movement of the pointer.

This one is fairly simple as well. To start off, we run a key input proc to figure out where the pointer is being moved. There's a bit in there where you can't move any units into castles that aren't the first two if you haven't gotten to the point in the story where you get the bat transformation yet, and otherwise you call the army event if you press enter on a castle. This will come after this event. You also exit the map if you press the cancel button. Finally, we have the actual movement of the pointer, which needs a ton of code because you need to reinitialize all the variables for the counter all over again every time you move, but overall, it's nothing major.
Here, we deal with the smaller menu that allows us to add or remove units at a particular castle. It's really nothing special here because all the meat is in other events - "reduce", "increase" and "attack", they're called. This event just controls the movement of the pointer and calls events according to what we push.

This is the part where we'll be skipping a lot. This is part of the event for increasing. What I will not be showing is this exact same code seven more times for all the other units, and then that entire thing another time with all the addition swapped out for subtraction for the reducing event. So here we can see that depending on the position of our pointer, we have different blocks for the different castles. There, we have three different cases - if the unit type is already at 99, then we can't add any more. If that's not the case and we have units in our pool to be redistributed, then we add one to the castle. In any other case, we do nothing. That whole thing is repeated a ton for the different castles, and that's about it!
Now, the next event is the one for attacking, and I'm not going to put the entirety of it in this update because quite frankly, I'm already breaking several records for update length, I'm sure. Here's the crucial bits.

This part checks whether we have any units in a castle that doesn't belong to us, thus indicating that we're going to start an attack. If it does detect that, it flips the switch for an attack on that castle.
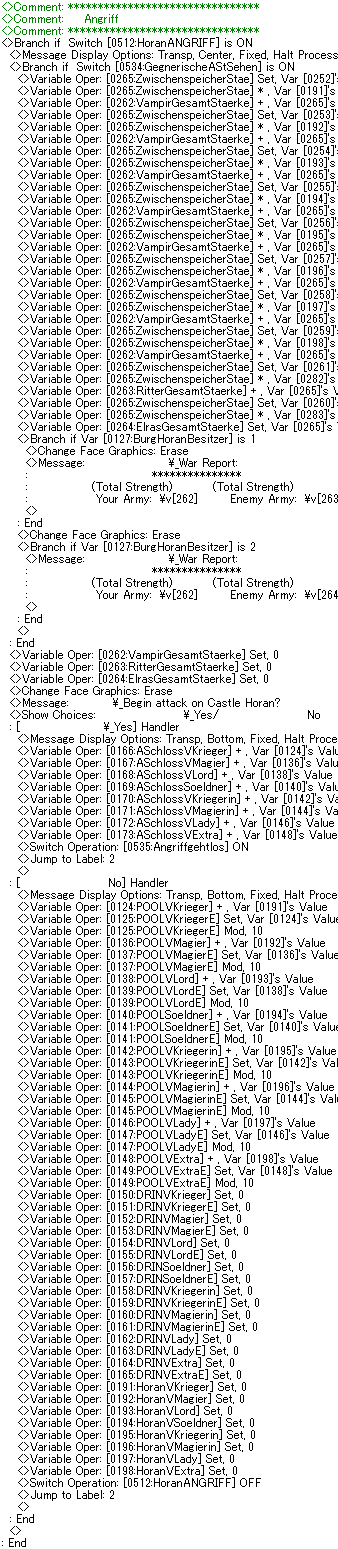
That then initiates the part of the event that deals with attacking. This gives a lot of room to the part that we've actually never seen - the war report. I think I've mentioned this before - on difficulties other than hard, you actually get a calculation of how strong your army is vs. the enemy army and allows you to back out based on that. We, of course, never got that, because players on hard difficulty get to eat shit and just guess how many soldiers are in the enemy castle. Anyway, after the report, we get asked if we want to attack. If yes, the number of attacking units is moved into the attacking variables and the attack begins, which then moves back to the event we had a bit back that teleports us to the attack map, and from there the attack map events take over. If not, the units are just put back into the pool. Again, all of this is repeated for all the castles.
To cap things off, we have two more events. This one just seems to be another initialisation. No idea why this exists, actually.
And I don't get this one at all. It seems to be some sort of debug thing where the owner of all castles can just be changed by a single button press - probably to test the color changes - and can also just add or remove vampire warriors with a press as well - probably to test the counter at the bottom.
And that's it! That's a rundown on how the castle battle system was coded. I hope this made clear how much work all this shit is - RPG Maker 2003 was not even remotely made to make this kind of stuff work, but Marlex did it anyway. And that's why this game will always have a special place in my heart. It's an ambitious project by basically just one guy, and by god, he pulled off what he wanted to. The German RPG Maker Renaissance, to me, is an era of people taking substandard tools and just Making Shit Work with them. And to me, no game exemplifies this era more than Vampires Dawn 2.
With that, I'm officially ready to put a lid on VD2 for now. I've already sent my mail with my questions to Marlex - not sure if I'll get an answer or not, but I'll just deal with that as it comes up - and with that, the only thing left for me to do is show you the VD3 prototype. I'll get to that fairly soon, and then it'll be time for me to finally consider this LP finished. So, next time, it'll be the VD3 prototype. Not sure if I'll have just one update for it or multiple. Depends on how long it actually is. We'll see.