Part 24: Lashing Out, Warsaw System, Vega Sector (Gameplay)
24th December 2668, Warsaw System, Vega SectorEpisode 3, Mission 2 - Lashing Out
The Concordia and the Firekka launch a strike at a Kilrathi carrier and the destroyer flying point for it.
Mission Briefing:
See the previous update. The thread voted to fly escort in a Rapier for a strike on a destroyer and, if the fleet can find it, a carrier. We're being joined by pilots from the TCS Concordia for this mission. Their force is lead by Major Dirk "Stingray" Wright.
Mission Video (Youtube)
(even in the 2660s, the enemy fighters still dive out of the sun, apparently)
Kills this mission: 28
There's no debrief screen for this mission as it goes straight to a cutscene, but 28's my count after reviewing the video. It seems like a reasonable number given quite how many enemies there are.
Tactics Corner
Hoo boy, this mission. Long and very hard in either fighter. Merely surviving in the Gladius is difficult; keeping the bombers alive in the Rapier equally so. I apologise for the lack of pretty shots of capital ships blowing up; unfortunately turning to get them was liable to end up with a dumbfire into my Rapier's rear armour (and also would have required spending too long looking at the radar for torpedoes).
Friendly forces:
3x Rapier medium fighter
3x Gladius fighter-bomber
5x Epee light fighter
5x Broadsword heavy bomber
16 friendlies is never good news. That means LOTS of enemies.
Enemy forces:
Ralatha NAV:
1x Ralatha-class destroyer
6x Drakhri medium fighter
3x Jalekhi heavy fighter
3x Drakhri medium fighter (reinforcements, arrive after 30 seconds though are too distant to be relevant for another 45 or so)
waves of 1x Sartha light fighter (launch from Ralatha, first one after 1 minute)
7x Krant II medium fighter (reinforcements, arrive ~1 minute 10 seconds)
3x Gratha fighter-bomber
5x Jalekhi heavy fighter
1x Jalekhi ace "Kramm Deathfang"
(seriously Standoff? Kramm Deathfang?)
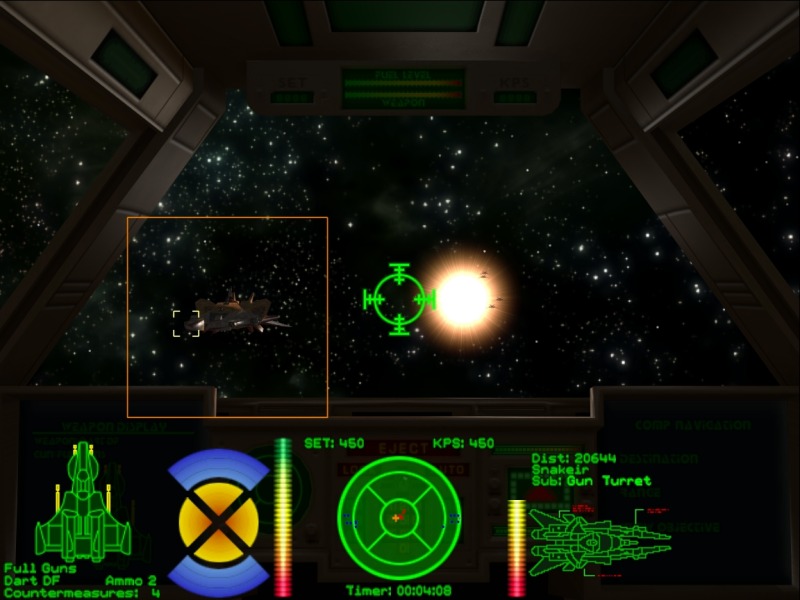
This is the key battle, and how this one goes basically defines the battle at the other nav, because if you preserve your force it'll be fine and if you don't it'll be impossible. The opening situation looks like this:
It's about the only time you have numbers on the enemy (well, sort of, your eight escort fighters are actually outnumbered slightly, but the bombers count for a bit) and it's important to make use of it. Kill these guys fast - probably best to go for the Jalkehi since the Drakhri arrive first so most of the other fighters will target them, also they're more directly between the bombers and the capships.
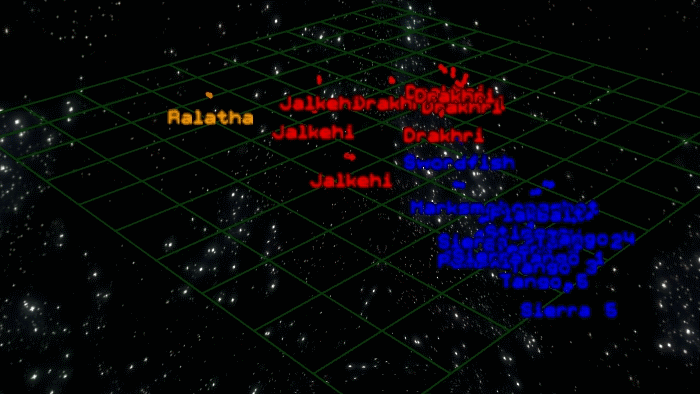
The reinforcements are the big tricky move this mission throws at you:
The Drakhri are closer so either the autotarget function or the target nearest button will pick them out, but what then happens is that all of the escort fighters go charging after three Drakhri and the uncovered bombers are massacred by the wave of reinforcements coming from the carrier. What you need to do is go after the Jalkehi or the Krants, and it's probably smart to order your wingmen in on them as well. It certainly helps, also, as Freyers says, if the Ralatha is dead by the time the reinforcements appear, though in a Rapier there's not much you can do to control that other than maybe using some missiles on the opening wave of fighters, though I prefer to save most of my missiles for the next nav because you really need to kill everything as fast as possible there.
Snakeir NAV:
1x Snakeir-class carrier
4x Krant II medium figthter
5x Jalekhi heavy fighter
3x Sartha light fighter (launch from Snakeir one at a time every 10 seconds after start of engagement)
3x Drakhri medium fighter (launch after the Sarthas, again at 10 second intervals)
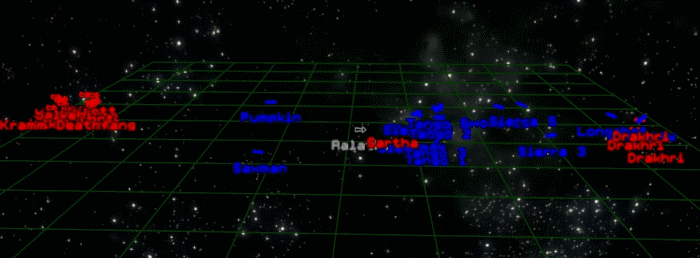
Easier than the previous fight only if you have most of your force left; there's also the fact that the Snakeir needs four torpedoes to put it down so you need bombers to survive. It's worth using whatever missiles you have left right at the start of this fight for that purpose, to try and get the number of interceptors below the number of surviving escorts as soon as possible. Certainly you want at least two or three kills in the first 30 seconds to try and keep pace with the rate at which the Kilrathi carrier is launching - and since they're launches they appear right next to the carrier, in a great position to intercept. I could give you a map here but it wouldn't help too much; there's a carrier and a bunch of enemy fighters, and it's just a case of killing as many of the latter as quickly as possible, there's nothing fancy about their positioning this time.
Yeah, 43 enemy fighters and two capships, that's not good at all. Especially given that half our friendlies are bombers which need some protecting. Oh well, at least they don't all come at once. During the entire fight it's important to use the tactical map heavily, to make sure you're attacking fighters which are going after your bombers. Fighters attacking you are much less of an issue, which is also why liberal deployment of taunting is worthwhle.
Ship of the day:
Sartha
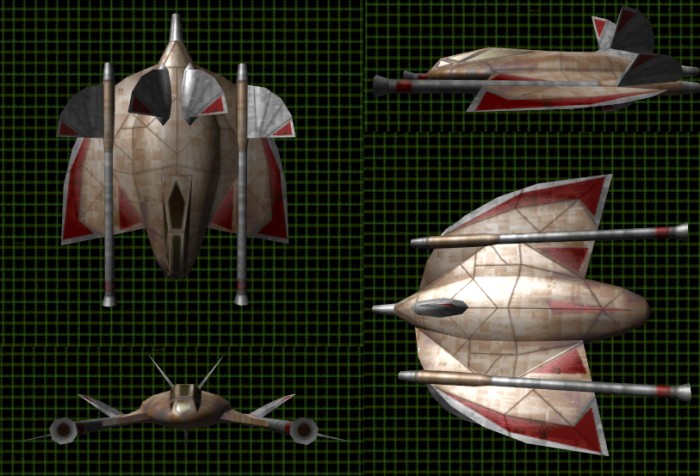
Class: Light Fighter (Kilrathi)
Length: 8.31m
Mass: 12.5 tonnes
Max Velocity: 400 kps
Afterburner Velocity: 1270 kps
Maximum Yaw: 80 degrees/second
Maximum Pitch: 80 degrees/second
Maximum Roll: 80 degrees/second
Weapons: Neutron Guns (2x), Dumbfire Missile (1x)
Shields: Front: 50 Back: 50
Armour: Front: 40 Left: 30 Right: 30 Back: 40
Game says: The Sartha is the primary Kilrathi light fighter. It is inferior in almost all aspects to the Confederation's Stiletto, but can pose a threat when attacking in groups.
I say: The Sartha is made of paper, and often goes down in a single burst from a Rapier's main armament. It's also pretty slow when not at afterburner and doesn't turn quite as tightly as a Rapier, so in general it's terrible (Kilrathi light fighters usually are). However, it's still a threat that shouldn't be neglected, especially in large numbers, because it carries a dumbfire missile. A dumbfire is a one-hit kill on anything lighter than a heavy bomber, and the AI is a pretty good shot with them on Hero and Nightmare, so it's always advisable to kill Sartha first in a mixed wave since they go down fast and have a very powerful single-shot weapon you want to stop them using.
Also, yes, apparently its guns diverge. I do not know what the fuck either.
Total kills (Standoff): 12 missions / 128 kills
Total kills (including previous thread): 125 missions / 1050 kills
Next time on Standoff:
They aren't mine, they're yours