Part 2: Mission 1: Border Skirmish (or "Thanks, Flak, you're a pal")
Mission 1: Border Skirmish (or "Thanks, Flak, you're a pal")
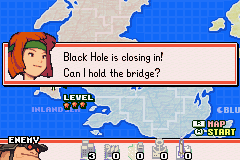
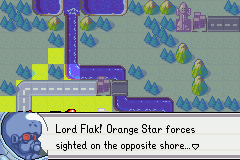
Mission 1 begins with Sami receiving a rather urgent report from one of her soldiers:
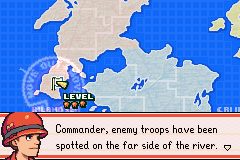
 Are you sure?!? Here? In this rural area?
 What are your orders, ma'am? Should we cease ops and attack? That's affirmative, soldier. We can't allow the enemy a foothold this deep in Orange Star territory.
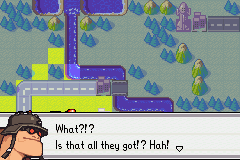
Enter Orange Star's commander-in-chief (and resident Ms. Exposition in Normal Campaign), Nell
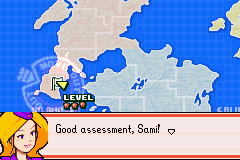
 That's the tactical sense I expect from a special-forces commander! Nell! What are you doing here? Tracking down the CO who's invading Orange Star, of course! Sami, can I trust you to take care of this situation?
 Yes, ma'am! I won't let you down!
Meanwhile, one of Black Hole's alien soldiers is briefing our opponent for this battle... Flak.
 Send out the tanks! Tanks are powerful, and they move far. Tanks are the best! Orange Star COs? HAH! I will crush them! Crush them all!
I appreciate that most of that quote is only from Normal Campaign. But it sums up Flak's personality nicely, so I've left it in. I'll do this occasionally, NC sometimes does have more dialogue than HC and it's nice to see some of the funnier bits.
Day 1
All right, enough small talk, let's get down to business.

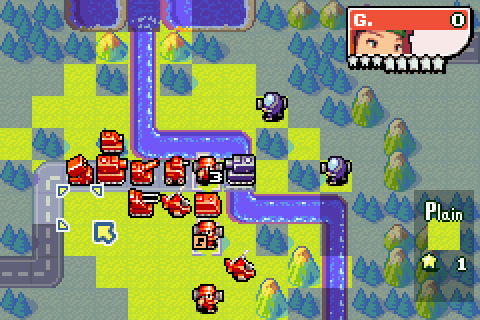
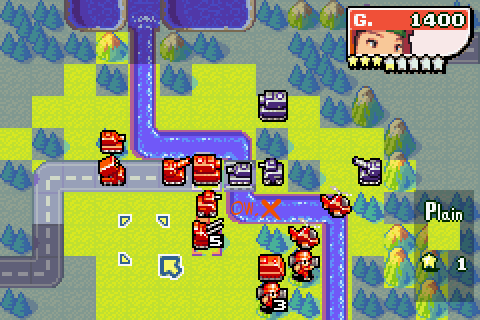
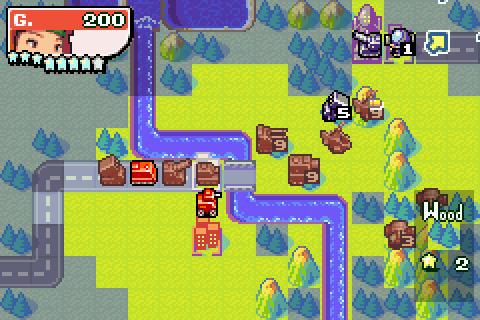
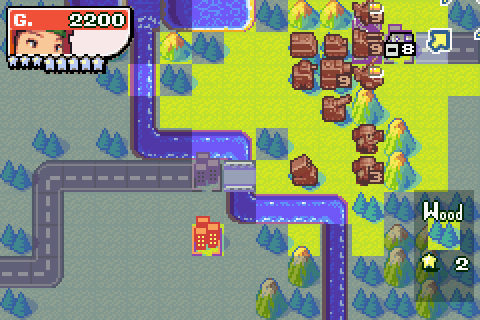
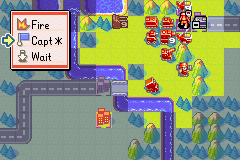
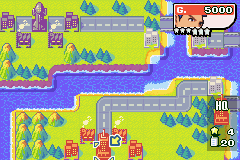
So I guess I'd better say a bit about what's going on. The orange guys here are our units. Let's do some inventory. We have three mechs, one small tank, one medium tank, two battle copters, one AA tank, one artillery, one rocket truck, one recon and one APC (See the OP for a more detailed description of each of these units). This particular mission takes place in Fog of War, so our vision is restricted to a certain range around each of our units. We also can't see into forests in Fog of War unless we're standing right next to them: this means that if we try to drive through a forest while there's an enemy unit in it, we can be ambushed, causing the ambushed unit to grey out and be unable to complete its turn.
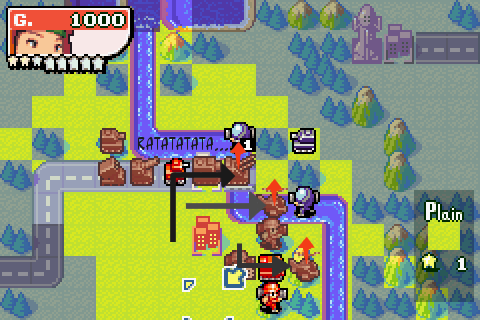
Infantry-type units like our mechs here here have some neat special abilities. The most important of these is the ability to capture properties. Properties provide you with funds (1000G per turn per property), heal your units and most types of them allow you to produce new units as well (cities don't, but they're still vital). Here, let me demonstrate:
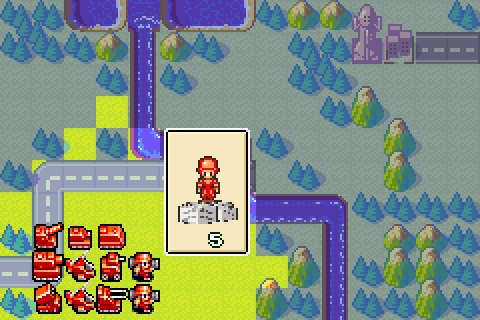
Yep, apparently you capture properties by jumping up and down on them. AW is full of little quirks like this, and it's one of the reasons I love the series so much. All properties have 20 "capture points" that you have to overturn to take over that property. Under most commanding officers, a full-health unit will overturn 10 capture points a day. Sami, however, is a special case.
Paul.Power's CO (Commanding Officer) Notes: Sami (Orange Star)
 Theme A pretty awesome guitar cover
Sami's main strength is in her infantry-class units. They get a 30% boost to firepower and a 50% boost to their rate of property capture. This isn't particularly noticeable will full-health infantry, as they will still capture properties in two days. Damaged units have a reduced capture rate, though, and that's where Sami's strengths come in to play. She also gets a +1 movement bonus to her transport-class units, such as the APC we have in this mission (normal move points 6, Sami's move points 7). Her main weakness is that all of her direct-combat non-infantry units (most of the units in the game) have a 10% firepower penalty. So she can be rather situational. But when she's in her element, watch out.
Beckground/personality: As Orange Star's special forces commander, Sami is one of the more serious-minded COs in the game, often playing straight woman to Andy and Max in Advance Wars 1 and 2. She's fiercely courageous, but she is sometimes insecure about her lack of knowledge outside her speciality of infantry.
And, while we're here, let's talk about our opponent for this battle:
Paul.Power's CO Notes: Flak (Black Hole)
 Theme
ThemeFlak's brute force and lack of finesse means that sometimes his units do more damage than expected, and sometimes less. In other words, his "luck" has a greater spread of values than most commanding officers. He is generally regarded as a low tier CO, not least because there's another CO (Nell, who doesn't actually fight in campaign and simply works to direct Andy, Sami and Max in the field) who is just inherently lucky - i.e. she has Flak's strength without his weakness.
Background/personality: The lowest ranked of Black Hole's five commanding officers, Flak is a thuggish brute who just likes to break things. His stupidity means that he has a habit of coming up with unintentional comedy moments. There is a general theory that each of the new COs is an evil counterpart to one of the existing "good guys" COs: under this theory, Flak is Max's evil counterpart.
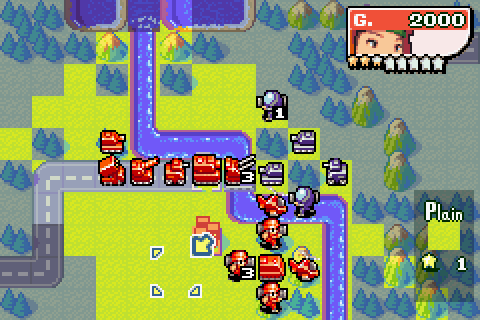
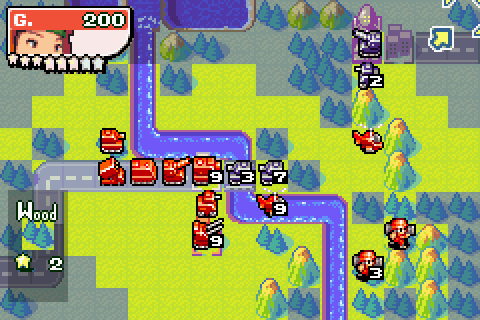
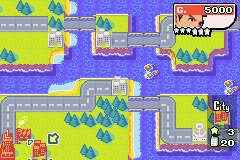
Anyway, let's move everyone forward a bit. I loaded one of the mechs into the APC and dropped it off on the city near the bridge - this is another property of footsoldiers, they can be loaded into APCs and transport helicopters. This is pretty important: infantry and mechs move pretty slowly most of the time compared with tanks and other vehicles, so the APCs help to redress the balance. APCs have no weapons, so they can be vulnerable to enemy fire, but they double as supply trucks for the rest of your army, providing them with the fuel and ammunition to keep moving and firing respectively. Even bombers can be refuelled by APCs. Don't think too hard about that...
Day 2
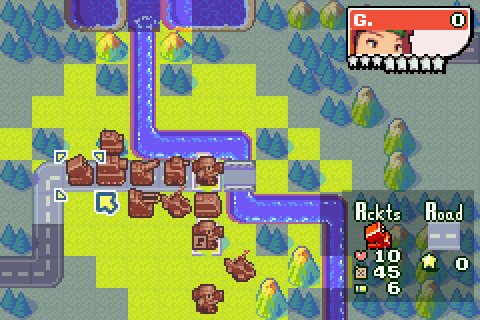
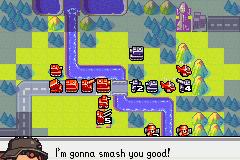
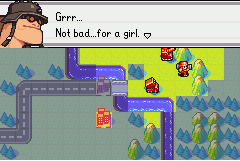
Grrrr! Two women COs! Good country! I must have it!... okay, Flak.
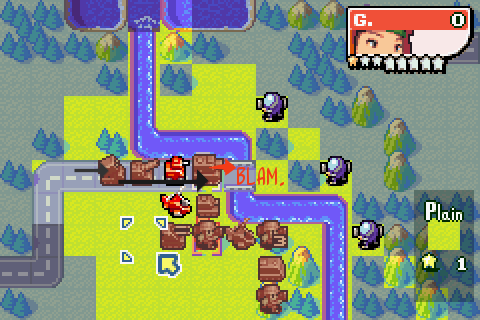
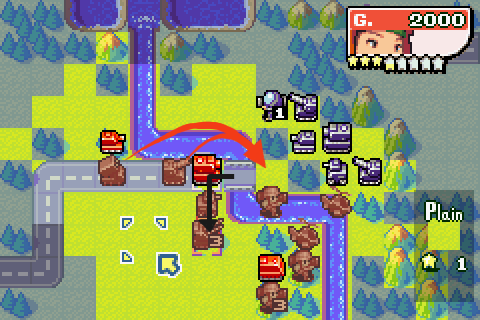
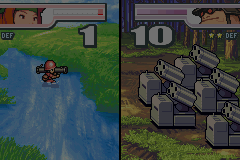
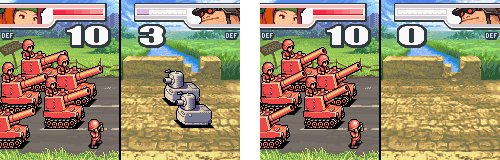
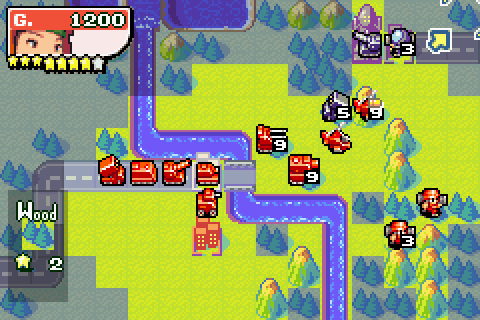
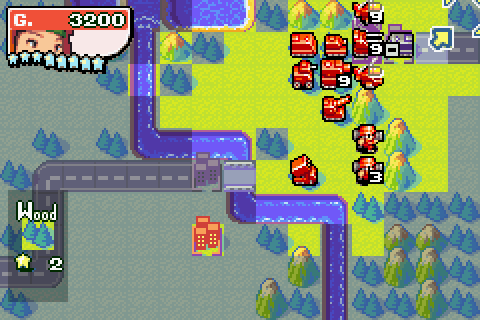
Whoops. One of their medium tanks just rolled up and did a bunch of damage to that mech I just dropped off. Medium tanks pack a hell of a punch, and that mech would probably be dead if it wasn't for the extra defensive cover provided by the city it's standing on (Defensive cover: Roads, bridges and rivers are the worst, then plains, then forests, then cities and other bases, and finally mountains and HQs are the best). The good news, though, is that the Md Tank is standing in range of my artillery. Let's see what it can do about this attempted invasion.

Quite a lot: artillery are a great counter to Md Tanks. The Md Tank is down from 10HP to 5HP - for reference, all units start out on ten hit points - what varies is just the amount of damage that each unit can do to a different unit. There are no stats for firepower or armour, just a [url = http://www.advancewarsnet.com/?g=aw...age%20Chart.htm]whopping great table[/url] for how much base damage one unit type does to another. A number of factors affect this base damage, such as CO abilities, defensive cover and the number of hit points the attacker has - a 1HP medium tank can only do a tenth the damage that a 10HP medium tank can. Also, just a quick note that once a unit has taken its turn, it changes to a much duller colour and can't move again until the next day.
Anyway, time to clean up this Md Tank mess and move everything else into position.
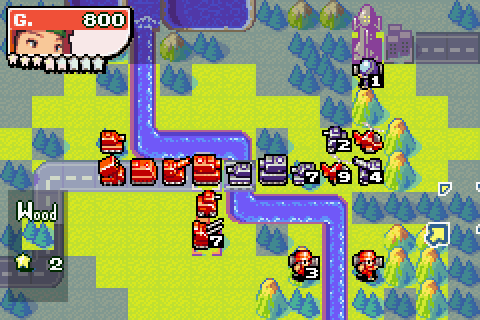
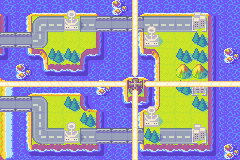
I've basically set my units up defensively at the chokepoint here. First up, I use the APC to get my damaged mech to safety, and then my Md tank rolls up and finishes off Flak's Md Tank. It then gets ready to hold the chokepoint against all-comers. With the best armour of any of my units and the city for extra defensive cover, he's ideal for the job. Back along the road, we have the recon's large vision range cutting through some of this fog of war and telling us something of what's going on on the other side of the bridge (shame we can't see into forests unless we're right next to them, but there you go). Behind the recon are the artillery and the rocket truck (which I moved forward a square to give more attack options), ready to call down the thunder on anything foolish enough to wander up to the chokepoint.
The copters are hanging back a bit right now, in case the enemy's anti-air shows up, but they're ready to fly over the river and take up flanking positions once we've cleared out his AAs. Similarly for the Mechs, although currently one of them's standing on a mountain for the increased vision range. My small tank and anti-air are standing around feeling a bit useless right now, but I'm sure they'll get their chance to shine later on.
Day 3
Oh, this is priceless. Flak decided to move both of his anti-air tanks up to the chokepoint. He didn't attack my medium tank though, so I guess he's got at least some sense. Not that much, though...
My artillery and rockets cripple the two AAs. The great thing about this is that, with Flak's anti-air out of the way, my copters are free to do as they please. Battle Copters are lovely versatile units - no terrain restrictions, good against tanks, can't be hit by cannon rounds - but anti-airs tear them apart. So thanks, Flak, you're a pal
 .
.
Some general clean-up work takes place as the AAs get finished off and my own AAs, B-Copters and mechs get on with taking out Flak's Mechs as he tries to invade my side of the river. My AA's kind of vulnerable, out in front of my medium tank like that, but as Flak doesn't have any air units in this mission, it's not a priority unit. I'm not quite sure why I've hidden my small tank in that forest, mostly so it doesn't get attacked by some random rockets. No sense in putting units in harm's way without due cause.
Day 4
No surprises there, the AA got hit by a small tank and looks quite a bit worse for wear. There are a number of rock-paper-scissors triangles in Advance Wars; B-Copter, Tank, Anti-air is one of them. Still, the anti-air's still hanging in there, let's send it back to that city we captured for repairs. Units heal at 2 hit points per turn on cities you own, provided you can afford it. Which we probably can, not like we were using that 2000G for anything else.
Other than that, one of the choppers has done some scouting, and we've taken down a mech and a small tank. Guess I'll end turn and...
... oh hey. So far this is the first screenie I've taken during the AI's turn. I took it because it tells us something interesting: somewhere around here is a rocket, and it's taking pot shots at one of our mechs. We can't see it, because it's hiding in a forest somewhere. Worth bearing in mind, though: I don't want to do more any suicidal charges. The choppers don't have to worry about rocket fire, so they can still explore given we've taken down the enemy anti-airs, but everyone else can hang back at the chokepoint for now. Well, except the other two mechs, who are going to wade across the river to see if there's anything going on down in the south - plenty of forests to hide in and mountains to get good views from.
Day 5
Yeah, that mech got finished off. My first full unit loss this mission. A sad day when any unit dies, but it's within acceptable operating parameters so far. This is, after all, war. We're doing a hell of a lot more damage to Flak's units than they're doing to us.

As I say, the B-copters are doing some exploring and general flanking (that arty was only hit by one B-Copter, the other one got ambushed by a tank, hence "whoops". Darn fog of war... darn air-units-can't-pass-over-ground-units rule restriction...). The mechs have begun their intrepid journey, and everyone else is just hanging back a bit and pulverising anything stupid enough to wander near the chokepoint. End Turn.
Oho. Flak's CO power meter has built up and he's unleashed his Super CO Power. Your CO power meter is that line of stars underneath your CO picture and cash reserves. The stars fill up depending on the amount of damage you take and dish out - they fill up twice as fast for damage you take, so I guess it functions a little bit like a Limit Break or something. Fill up all the small stars, and you can use your CO Power. Fill up all the stars, large and small, and you get your Super CO Power. Which is what we're going to see now.

Barbaric Blow basically turns up Flak's damage dispersal rate up to ridiculous levels. Sometimes he can kill things in one hit with an infantry. Sometimes his medium tanks might barely scratch something. This is the main reason people don't like playing as Flak: why use a CO whose SCOP has a chance of backfiring dramatically when there are so many better options?
Day 6
And indeed the good news is that Flak pretty much wasted his SCOP. He only attacked one unit (his small tank went gunning for one of my helicopters), but Lady Luck didn't smile on him and he only did 1 damage. Heck, I took off more health in the counterattack.
Ooh, goodie, another medium tank for my long-range units to pepper. Meanwhile, one of my copters finishes off that artillery.

The other copter finishes off the medium tank, my medium tank gives a tank a pounding, and the two mechs in the south continue their intrepid journey.
Day 7
Flak's struggling now. He basically seems to be retreating his other units while his tanks try to hold the bridge. The fool. He can hide, but he can't run.
Haven't shown much of the in-battle screenshots. There's nothing tactical about them, you just watch as the units attack each other. A lot of "pro" players play with them turned off, but personally I like them. They're great in fog of war for working out where long-range units are firing from, and... well... I just really like the pixel art
") .
.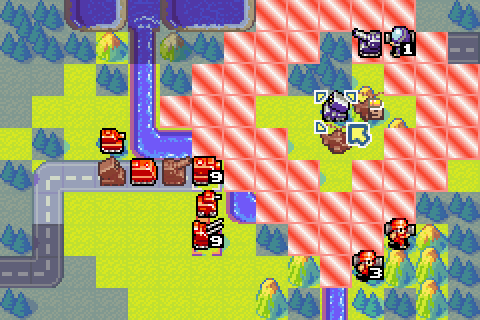
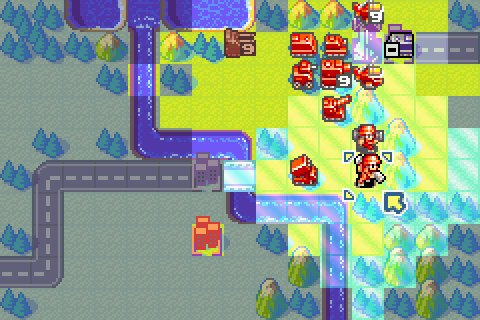
Well, my B-copters have found the enemy rocket launcher. The red diamond is its attack range. If I want to move into that, I'd better take cover where the enemy can't see me.
These two forests will do nicely.
My small tank stops hiding in its forest and moves forward to hold the chokepoint now that my medium tank has moved forward, and the two mechs continue their journey.
Day 8
Flak's running out of ideas.

As a result, there's not much I can say for this turn. We're entering into the end game now, there's still a bit to do, but not much this turn.
Day 9
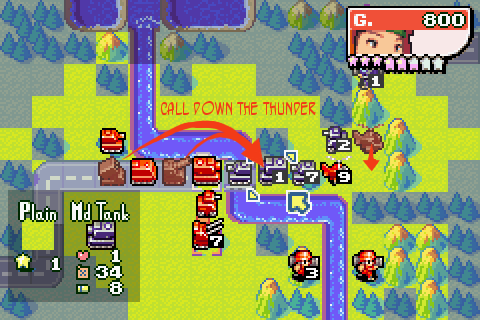
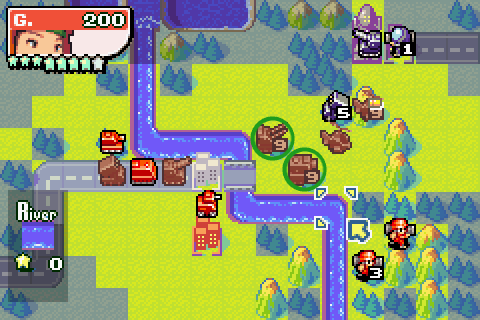
Well, let's take out this artillery sitting on the HQ.
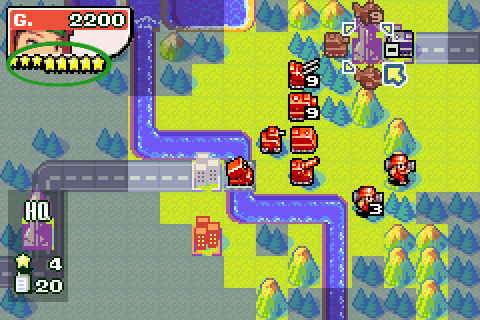
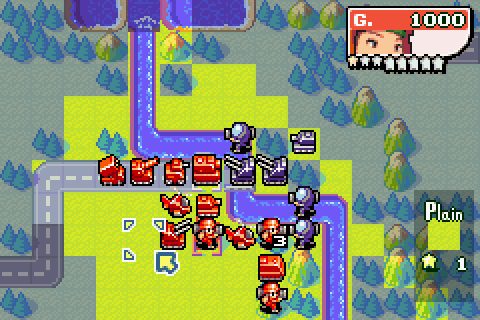
Aha! That's Sami's CO Power meter fully charged up. We won't use her Super CO Power just yet, though. I have a cunning plan.
This cunning plan involves moving my mechs ever closer to Flak's HQ.
Day 10
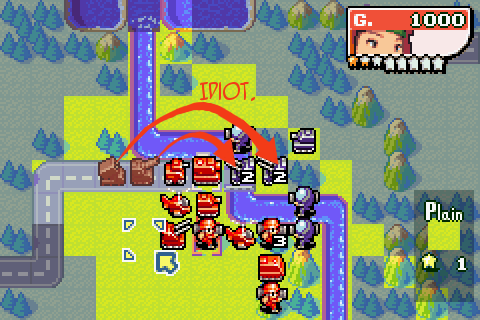
Okay, my mechs are in range, let's do this.
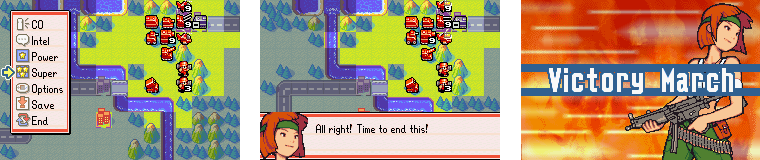
Recall that Sami's strength is with infantry and mechanised infantry, not least in their increased capture rate. Well, Victory March gives Sami's infs and mechs +2 movement, a large boost to attack strength and - the killer - the ability to capture any property in one turn, regardless of the health of the unit doing the capturing. It can be a little situational, and it can be negated by making sure your properties are well defended, but it's a great way to finish off an AI.
To demonstrate the full effect of this, and for added humiliation, let's use that 3HP mech that's been wandering around ever since Turn 2.

And there we go. Victory is ours. There are a few ways to win, but the two most common are Rout (destroy all enemy units) and HQ Capture (successfully capture the enemy's field headquarters - in our case, Flak's HQ). For obvious reasons, Sami tends to specialise in HQ capture victories, and sometimes they can be really rather cheeky ones. The enemy may be completely overwhelming you, but if they aren't protecting their HQ then it can be an open door to victory.
Aftermath
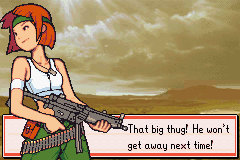
 You're the Black Hole CO!? You're just a thug! Who do you think-- Yap, yap, yap! Shut your trap! I'm leaving for now... Next time, I'll put you in your place. Hey! He escaped... And he was so rude, too! Oooh!! That makes me so angry! If I get the chance, I'm gonna run him down! I'm glad we can depend on you, Sami.
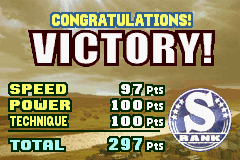
And so, to battle results. I didn't quite get a perfect score - it looks like I took a day too long over it. Oh well, I'm not going to let it bother me too much, an S-Rank is an S Rank. For reference, though:
Speed is related to how many game days you take to finish a mission. The number of days you can take before you start incurring speed penalties varies from mission to mission, obviously depending on such factors as the size and difficulty of the map.
Power is specifically related to your ability to produce a decisive show of force on a single day. To get 100 power points, you need to eliminate 10% of total enemy forces in one day.
Technique is about how many units we lose. I think in campaign you're allowed to lose up to 20% of your forces before you start incurring technique penalties: we lost just one unit out of our initial twelve, so we're fine here.
Each of these is marked out of 100 and you're given an overall score out of 300. The grade boundaries are:
280 - 300: S Rank
250 - 279: A Rank
200 - 249: B Rank
199 or less: C Rank
No, I won't be getting all S Ranks, although obviously I'll try my best. I've only beaten HC once before, so on several missions I won't have a clue how to get the S Rank.
And so we're pretty much done with Border Skirmish. Tune in next time for...
Bases!
Long, winding roads!
A determined attempt not to mention Shoop Da Whoop!... damn.