Part 52: Supplemental Material #1

Banners provided by Pesky Splinter.
Okami is chock full of references to Japanese folklore and Shinto mythology. In my Mythology Dissections, I go over the various mythological allusions found in the game. These are not required reading to fully enjoy the game (I had no idea about this stuff when I first played it), but I think the knowledge does enrich the experience!


The Art of Okami: Official Complete Works
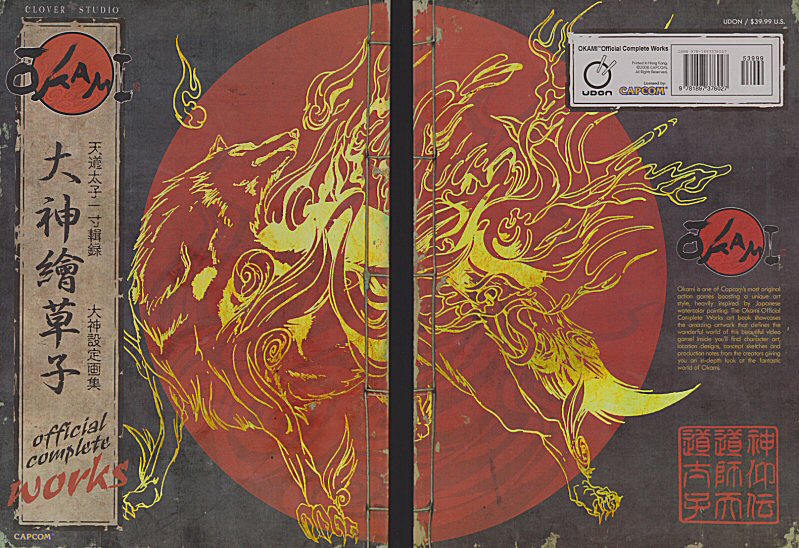
Excerpts from the official artbook, featuring official art, concept art, and lots of nifty info. Graciously provided by Pesky Splinter.
Okami Artbook 1
Okami Artbook 2
Okami Artbook 3
Okami Artbook 4
Okami Artbook 5
Okami Artbook 6
Okami Artbook 7
Okami Artbook 8
Okami Artbook 9
Okami Artbook 10
Okami Artbook 11
Okami Artbook 12
Okami Artbook 13
Okami Artbook 14
Okami Artbook 15
Okami Artbook 16
Okami Artbook 17
Music
The soundtrack in Okami is truly wonderful. I think it's among the best in the video game world! Give ‘em a listen. All tracks are linked from YouTube and Polsy-fied to avoid potential spoilers in the comments and related videos.


Other Discussions


Each of the Brush Gods corresponds to an animal in the Chinese Zodiac. Here are the Brush Gods we’ve met so far, listed in the order you find them in the game.
I have also rated the usefulness of each Brush Technique on a scale of 1 to 5. I judge usefulness in terms of how often you’ll use the Technique. If you only use a Technique to clear an obstacle to advance the game, that one wouldn’t be as useful as one you can use to get treasures. On the other hand, Techniques that are only used to get treasures would be less useful than, say, ones you can use in battle. The utility rating is also affected by how easy it is to control. Some Brush Techniques are much harder to pull off in the Wii version. When a huge discrepancy in utility exists because of control issues, I rate such Techniques for both versions separately. Note: As I have not actually played the PS2 versions, the ratings for it are only my best guess. Anyone who has played the PS2 version, feel free to correct me.
Ratings are as follows:
* = practically useless. You’ll only use it when you’re forced to.
** = situational. Has some utility, but its limitations prevent it from being a standby.
*** = useful. Has fairly widespread applications, either in battle or in the field.
**** = very useful. Widespread applications, both for getting treasure and in battle. You’ll be using these ones a lot.
***** = essential. These are the best of the best Brush Techniques. You’ll be using them all the time
 Yomigami- The Dragon, god of Rejuvenation.
Rejuvenation- used to repair broken or missing things. To use- fill in an area with ink. Utility rating- * Sounds like it could be very useful and fun, but you can only use it in very specific situations. Found in: River of the Heavens
 Tachigami- The Rat, god of Cutting Things.
Power Slash- used to cut things. To use- draw a horizontal line. Utility rating- ***** You can use Power Slash to attack enemies, stun NPCs, cut boulders, chop down trees… really, it’d be easier to list what you can’t use it for! Found in: Cave of Nagi
- Upgrades:
Power Slash 2- allows you to cut iron boulders and increases the Technique’s base power. Found in: North Ryoshima Coast- requires 60,000 Yen.
Power Slash 3- allows you to cut crystal boulders and further increases the damage output of the Technique. Found in: Kamui (Ezofuji)- requires 360,000 Yen.
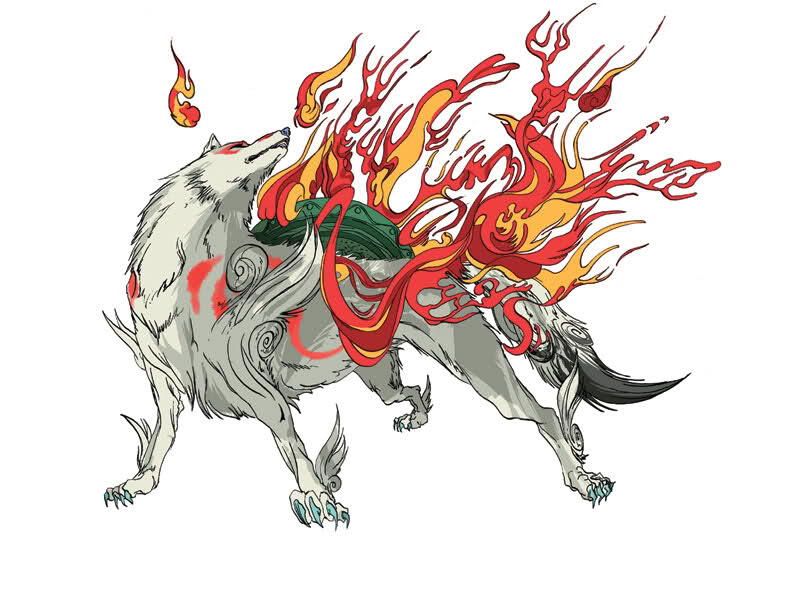 Amaterasu- The Dog, Sun God.
 Sunrise- turns night into day. To use- draw a circle in the sky. Utility rating- *** It’s not so useful on its own, but much more so when paired with Crescent. Found in: Starting technique.
 Hanagami- The Monkey, gods of Flora. This trio of Brush Gods acts as a single unit.
Greensprout:
Bloom (Sakigami)- used to make plants grow and open buds. To use- draw a circle on the target. Utility rating- *** Bloom has some fun effects on NPCs. In most cases, they’ll run up and pet Amaterasu. If you use it on the Oina, they’ll shape-shift! Found in: Hana Valley.
Lily Pad (Hasugami)- makes lily pads on the surface of water to use as stepping stones, prevents drowning. To use- draw a circle on the water. Utility rating- *** Found in: Kamiki Village
Vine (Tsutagami)- allows you to play Indiana Jones, as long as there’s a Konohana Blossom within range! To use- draw a line from a Konohana Blossom to Amaterasu (green Holy Smoke). Utility rating- ** Found in: Tsuta Ruins.
 Bakugami- The Boar (pig), god of Explosions.
Cherry Bomb- used to blow stuff up, such as cracked walls and weakened structures. To use- draw a bomb. Utility rating- **** Extremely fun to use! Feel free to spam this in battle, but just keep in mind, if you kill an enemy with it, you can’t do a Floral Finisher. Found in: Shinshu Field.
- Upgrades:
Cherry Bomb 2- Twice the explosions means twice the fun! This Technique allows you to have two Cherry Bombs on screen at once, rather than one at a time. Found in: North Ryoshima Coast- requires 120,000 Yen.
Cherry Bomb 3- Allows you to have three Cherry Bombs active at once, for triple the explody fun! Found in: Kamui- requires 300,000 Yen.
 Nuregami- The Snake, god of Water.
Waterspout- used to fill things with water and put out fires, requires a water source. To use- draw a line from the water to your target (blue Holy Smoke). Utility rating- ** Found in: Sasa Sanctuary.
Power Spring- allows you to create a platform of water to reach high places. To use- draw a line straight up from a Power Spring. Utility rating- ** Learned along with Waterspout.
Fountain- activates Mermaid Springs without using a Coin. To use- draw a spiral on a Mermaid Spring. Utility rating- *** Free teleportation is nice, but Mermaid Coins aren’t that expensive… Found in: Dragon Palace.
Deluge- summons a rainstorm, allows you to fill areas with water without a nearby water source. When used in battle, damages and temporarily stuns foes. Meh. To use- draw two vertical lines. The larger the lines, the more ink consumed. Utility rating- * I don’t know. I’m just not feeling this Technique. You only have to use it in a couple places, and in battle, there’s no reason to use it over Veil of Mist! Found in: Sei-an City, Aristocratic Quarter (after clearing Oni Island)- use Waterspout on the boulders behind Queen Himiko’s palace.
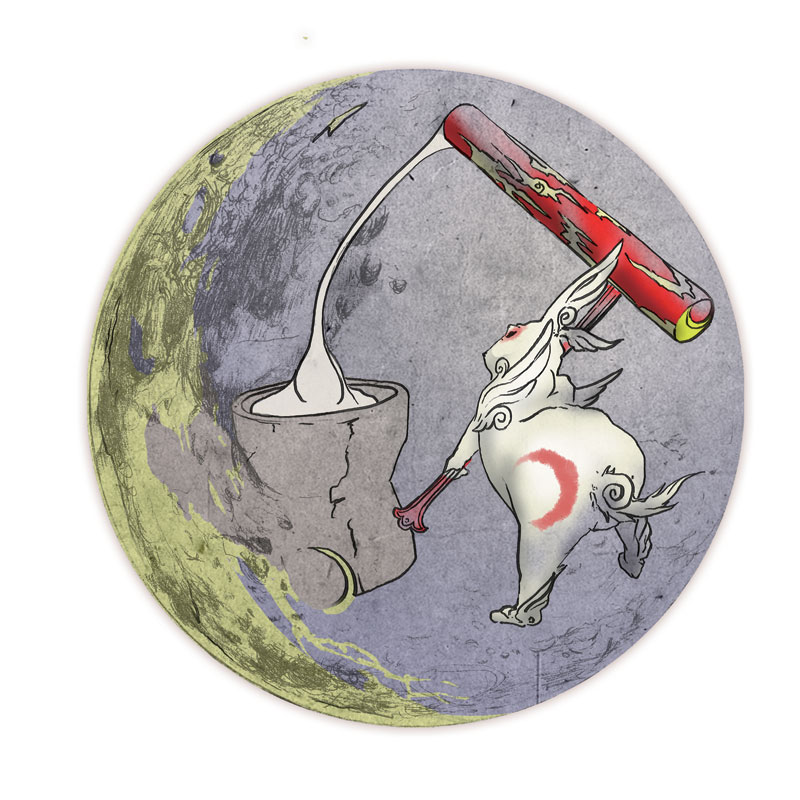 Yumigami- The Rabbit, Moon God.
 Crescent- turns day into night. To use- draw a backward “C” in the sky. Utility rating- ***** This Technique makes your life so much easier! Buried treasures are much easier to find at night, and Wanted Monsters only appear at night. In conjunction with Sunrise, it allows you to control time at will! Found in: Agata Forest.
 Kazegami- The Horse, god of Wind.
 Galestorm- allows you to summon a strong wind, in three directions: left, right, or forward. To use- draw a loop in the desired direction. Utility rating- **** This technique can be used to put out fires, blow away leaves and other obstacles, and raise banners. You can also use it to blow your Lily Pads across water, like a sailboat! Found in: Gale Shrine
Whirlwind- summons a cyclone of razor-sharp air that cuts enemies to ribbons! To use- draw three horizontal lines. Ink consumed is proportional to the size of the lines. Utility rating- * (Wii), *** (PS2) Sounds useful, but it’s very hard to get it to work properly in the Wii version, making it impractical to use in battle. Too bad, it’s pretty cool! Found in: North Ryoshima Coast- catch the Marlin and visit the chef at the seaside restaurant.
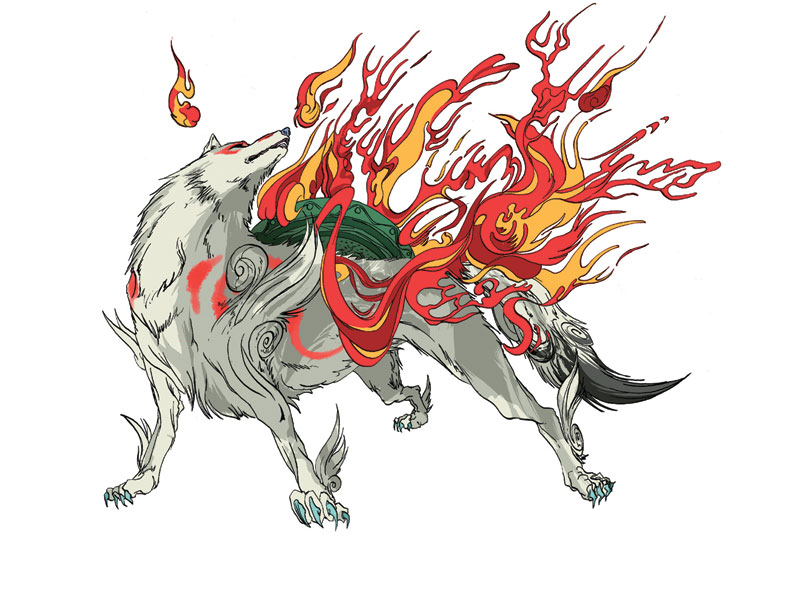
 Moegami- The Rooster, god of Fire
Inferno- allows you to control fire, requires a source of flame. Used to melt ice and burn things. To use- draw a line from the fire to the target (red Holy Smoke). Utility rating- ** Found in: Moon Cave.
Fireburst- summons a fireball: burns foes and lights fires without needing a source of flame. To use- draw an infinity symbol. Utility rating- **** Hell yeah, fire! Fire is always good. Just don’t get too carried away: if you draw the symbol too big, you’ll burn through a lot of ink! Other than that, who cares? FIRE!
 Found in: Sei-an City, Commoner’s Quarter- give the Golden Mushroom to the chef at the inn.
Note: The ultimate Reflector, Solar Flare, acts as a source of flame, rendering Fireburst pretty much obsolete once you have it. It’s still handy up until then, however.
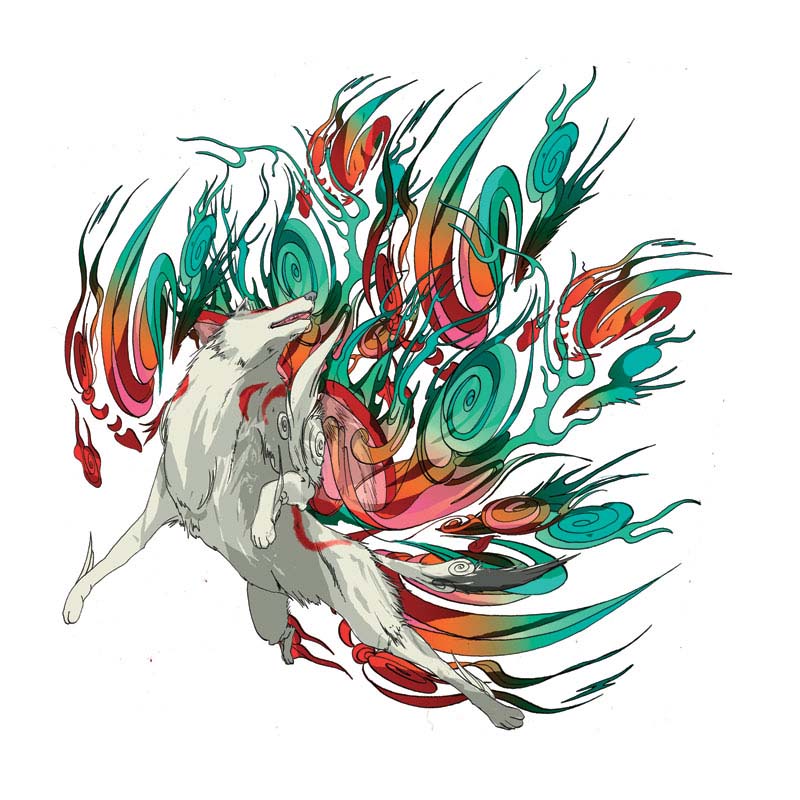
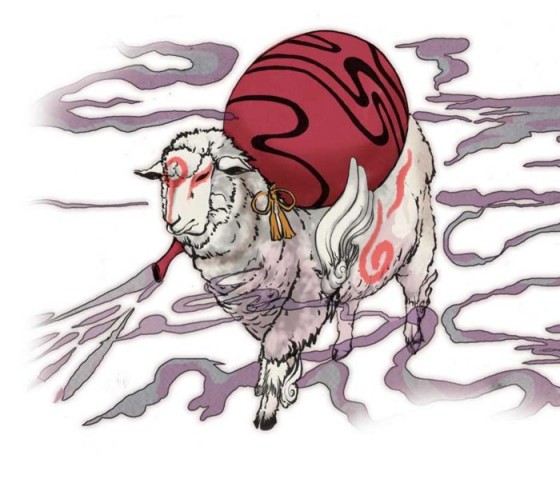 Kasugami- The Sheep, god of Mist.
Veil of Mist- activates Bullet Time, seriously. To use- draw two horizontal lines. Utility rating- ***** Using this in battle is instant cheat-mode! Veil of Mist slows enemy speed almost to a standstill for four whole seconds! And as soon as it wears off, you can spam it again!
 Once you have this Technique you’ll wonder how you ever managed without it. Some enemies require you to slow their movement with Veil of Mist before you can damage them, but most enemies are much easier to deal with when slowed. Found in: Imperial Palace garden.
Mist Warp- warps you between “Ultimate” Origin Mirrors (the ones with the red X on them). To use- draw an “X” on an Ultimate Origin Mirror. Utility rating- **** There are more Ultimate Origin Mirrors than there are Mermaid Springs, plus there are a few treasures you can only reach with this Technique. It can be tough to get the game to recognize when you’ve done it, though (or at least it is for me). Practice and you’ll get a feel for how to do it “properly.” Between this and Fountain, you can warp around however you please. Really cuts down on travel time. Found in: Imperial Palace- trade 80 Demon Fangs for the Emperor’s Fog Pot.
Catwalk- allows you to climb up walls, requires a cat statue. To use- draw a line from a cat statue up a wall (purple Holy Smoke). Utility rating- ** Found in: Catcall Tower.
Note: the cat appears in the Vietnamese Zodiac, replacing the rabbit. In the Chinese zodiac legend, the cat was very excited to run in the race, but she was also a heavy sleeper. She asked her good friend the rat to wake her up early so they could run in the race together. However, the rat, knowing the cat was much faster than she, awoke early and left without waking the cat. Other versions of the story say the rat told the cat the race was on a different day. As a result, the cat slept through The Big Race and didn’t make it into the zodiac. Thereafter, the cat declared the rat to be her enemy. Her descendants chase rats to this day, trying to get revenge.
 Gekigami- The Tiger, Thunder God (
 )
)Thunderstorm- allows you to control lightning, requires a source of electricity. Can be used to activate machinery and shock foes. To use- draw a line from a source of electricity to the target (yellow Holy Smoke). Utility rating- ** Found in: Oni Island.
Thunderbolt- summons a giant bolt of lightning, ex nihilo. To use- draw a lightning bolt. Utility rating- * (Wii), *** (PS2) Free lightning? Sounds good to me! Except the shape is hard to draw in the Wii version. Really really hard! It’s fine if you have time to get it right, but you’ll never be able to get it to work reliably in battle, making this Technique completely useless. If you simply must have lightning handy (and hey, why wouldn’t you?), just equip the Thunder Edge Glaive! You can shock things to your heart’s content, kzzzap! Found in: Sei-an City, Aristocratic Quarter- win the Gimmick Gear from Ida and give it to Gen at the top of the clock tower.
 Itegami- The Ox, god of Ice.
Blizzard- allows you to channel ice, requires a source of ice. Can be used to temporarily freeze enemies and fast-moving things, cool off hot objects, and coalesce diamond dust into platforms. To use- draw a line from the ice to the target (dark blue Holy Smoke). Utility rating- ** This Technique isn’t all that great, because Veil of Mist exists, and doesn’t require a source. Plus, it’s completely useless outside Kamui! For the final Brush Technique, this one is pretty blah. You’ll use it in the dungeon, and nowhere else! Found in: Wawku Shrine.
Icestorm- Allows you to summon ice at will. To use- draw an asterisk. Utility rating- * Well, at least you don’t need ice nearby to use this (meaning you can actually use it outside Kamui), but there’s still no reason to use it over Veil of Mist! If you really, really want to use ice attacks, the Tundra Beads (ultimate Rosary) are ice elemental. Equip them and you can freeze anything your little heart desires. Found in: Learned at the same time as Blizzard. (But you can buy the Tundra Beads right after clearing the dungeon, so, really, what’s the point of this Technique?!)

There are three categories of Divine Instruments (weapons) in this game: Reflectors, Rosaries, and Glaives. All behave very differently, but all are perfectly viable for smacking bitches. Which you use is purely a matter of preference, but keep in mind: some weapon types are easier to use in one version than in they are in the other!
Note: You can equip two weapons at once: a main weapon, and a sub-weapon. For all weapons, shake the Wiimote to attack with the main weapon; the sub-weapon is activated with the Z-button.

All Reflectors can be used as a shield when equipped as a sup-weapon. If you block an enemy attack with the shield, you’ll pile drive the sucker and get a Demon Fang! Reflectors are a solid choice for either version of the game, but somewhat harder to control in the Wii version.
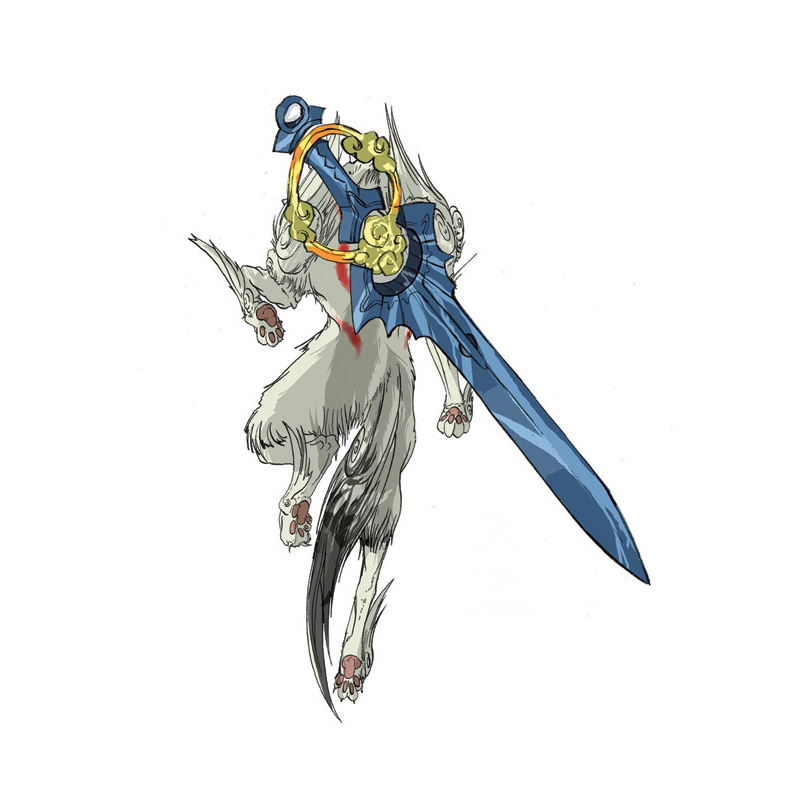
 Divine Retribution- obtained from Sakuya, default equipment. No special powers
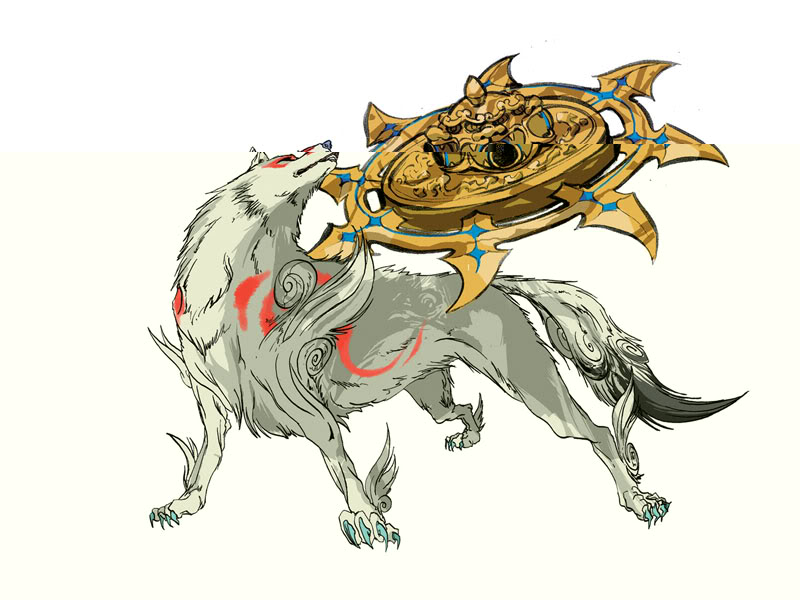 Snarling Beast- obtained from the Spider Queen. Ink Bullet power. To use Ink Bullets, draw dots on an enemy.
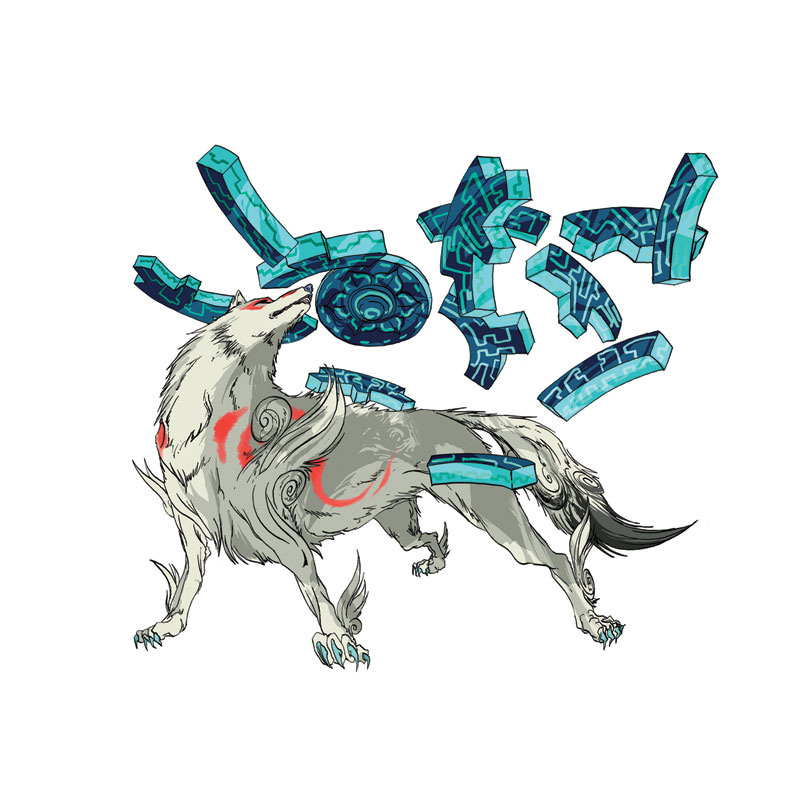 Infinity Judge- purchased from several merchants after entering Kusa Village (50,000 Yen). No special powers.
 NB: The Infinity Judge is very powerful for that stage in the game, considering you can get it as early as Kusa Village. It really makes Snarling Beast look like a chump! If you like Reflectors, you’ll be using this one until the end of the second Act. Plus, it looks really cool!
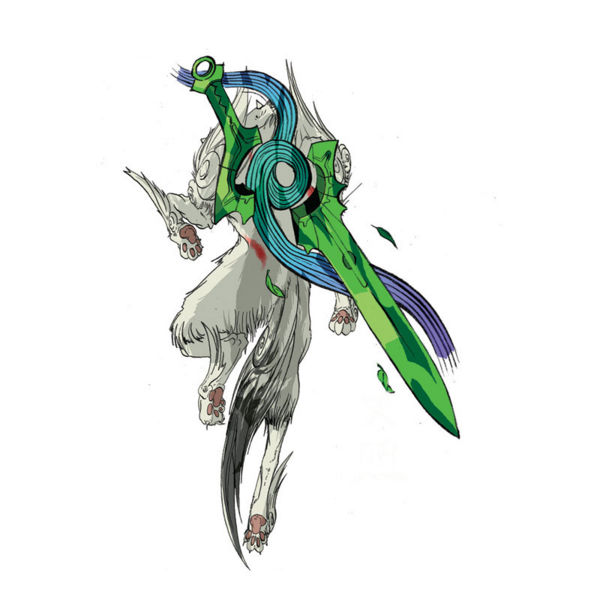
 Trinity Mirror- purchased from the weapon merchant in Sei-an City after defeating Ninetails (150,000 Yen). No special powers. Second most powerful Reflector.
Fun fact- The Trinity Mirror is unique among Reflectors: it’s actually made of three smaller mirrors!
 Solar Flare- obtained after learning the final Brush Technique at Wawku Shrine. Fire element- can be used as a source for Inferno.
Fun fact- Solar Flare is the Reflector used by Shiranui.
Aside: Considering the 13th Brush Technique sucks, this is your real incentive for learning them all!

Rosaries grant you long-range, rapidfire attacks. They’re very handy for building up Godhood. When equipped as a sub weapon, Rosaries can be fired as a projectile attack, which varies between weapons. Recommended for the Wii version, since they’re much easier to control.
 Devout Beads- obtained after restoring Agata Forest. No special properties.
As a sub-weapon: single shot. Push C repeatedly for rapidfire.
 Life Beads- obtained from Crimson Helm. No special properties
As a sub-weapon: scattershot
As a sub-weapon: single shot. Push C repeatedly for rapidfire.
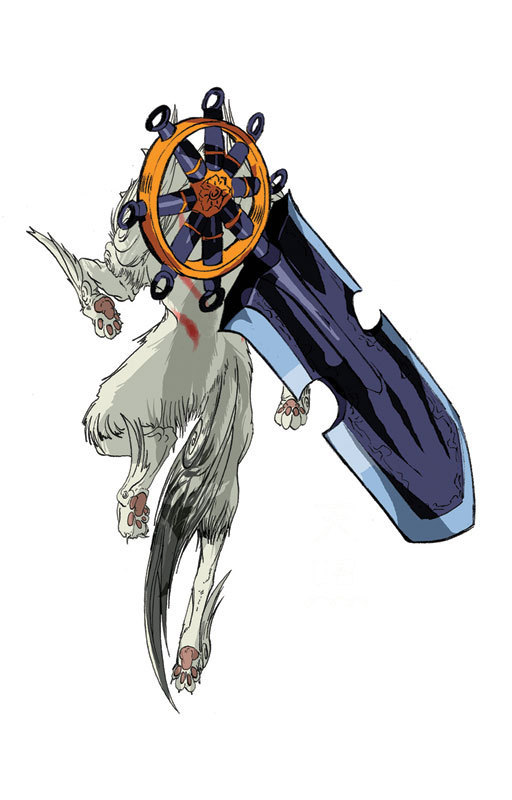
 Resurrection Beads- purchased from the merchant in Wep'keer for 150,000 Yen. Second strongest Rosary
As a sub-weapon: scattershot
 Tundra Beads- purchased from the weapon merchant in Sei-an City after clearing the Wawku Shrine. Ice element- can be used as a source for Blizzard.
As a sub-weapon: single shot. Push C repeatedly for rapidfire.
Fun fact- this is the only ultimate weapon you have to buy. (It’s odd that you don’t get it as a prize for beating Lechku and Nechku, but whatever!) It’s not cheap, running you 500,000 Yen, but if you like Rosaries, it’s totally worth it! Besides, what else are you going to spend your money on at this point?

All Glaives can perform a charged attack, which deals massive damage, but is very hard to pull off in the Wii version. The Glaive sub-weapon attack a powerful wide slash, which can also be charged. Glaive sub weapons also have a very flashy aerial attack which is worth seeing at least once! Recommended for the PS2 version, as they’re very powerful and don’t require much button-mashing.
 Tsumugari- obtained from Orochi. No special powers.
Fun fact- Tsumugari is the reborn form of Tsukuyomi, Nagi’s sword. It is also a reference to the Shinto myth, in which a sword was pulled from Orochi’s corpse.
 Seven Strike- Obtained from the weapon merchant in Sei-an City for 100,000 Yen. Enables Ink Bullets. To use Ink Bullets, draw dots on an enemy.
Fun fact- This weapon looks similar to the sword Ninetails uses, except hers has nine prongs instead of seven.
 Blade of Kusanagi- Obtained after defeating Ninetails. No special properties.
Fun fact- Kusanagi is the name of the sword that was pulled from Orochi in the myth.
Aside: I think Blade of Kusanagi and Seven Strike should have been reversed. Ninetails’ sword, Nine Strike, looks a lot like Seven Strike. It could have been the corrupted form of Seven Strike, and defeating her could have restored the sword back to its normal state, sort of like Tsumugari being reborn from Tsukuyomi after Orochi consumed it. Missed opportunity for some parallels between Orochi and Ninetails, here!

 8th Wonder- purchased from the merchant in Ponc'tan for the low, low price of 200,000 Yen. Penultimate Glaive, grants Ink Bullet power. To use Ink Bullets, draw dots on an enemy.
Fun fact- The name of this Glaive refers to the Seven Wonders of the Ancient World (this sword being the much sought after 8th, apparently). Of the original Seven, only the oldest one, the Great Pyramid of Giza, Egypt is still standing.

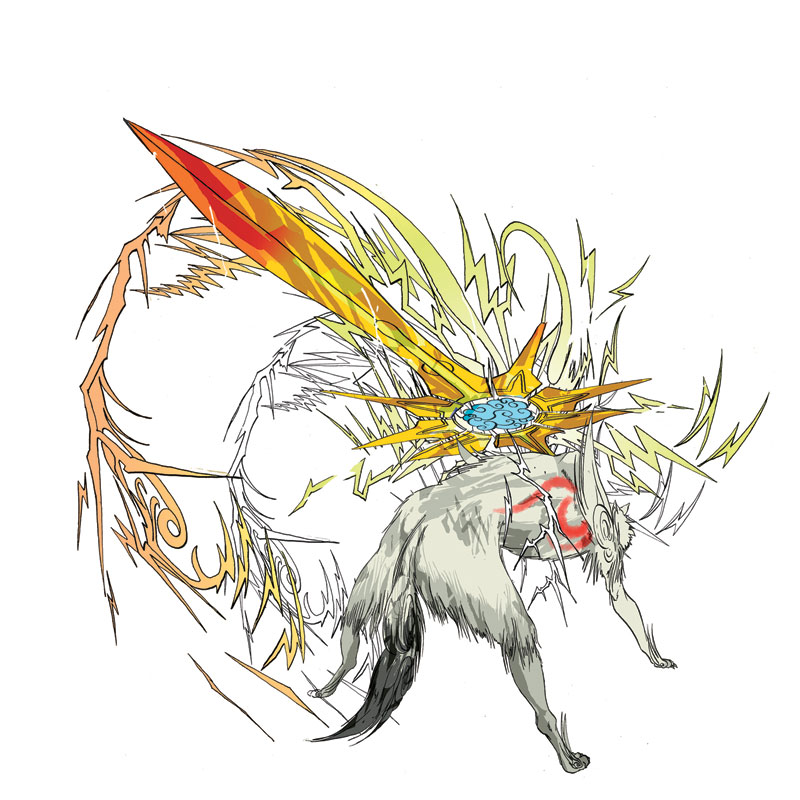 Thunder Edge- obtained after defeating True Orochi. Lightning element- can be used as a source for Thunderstorm.
Fun fact- This Glaive is yet another reference to the sword from the Orochi legend. Specifically, it refers to the sword’s original name: Murakumo-no-Tsurugi, or “Sword of the Gathering Clouds of Heaven.”
Note: In New Game+, all weapons except the ultimate ones carry over. This means, the strongest weapons you’ll have available to you at the beginning of the game are the second most powerful of each type: the Trinity Mirror, Resurrection Beads, and 8th Wonder. Naturally, these will all be stupidly overpowered throughout most of the game. Even without the String of Beads, you’ll still be an unstoppable death god. It’s pretty goddamn fun! Oh, and the Dojo Techniques that boost damage if you have two of the same weapon type equipped? You get to keep those too! Yeah. Have fun!