Part 27: Terse Mode Enabled
Update 27: Terse Mode Enabled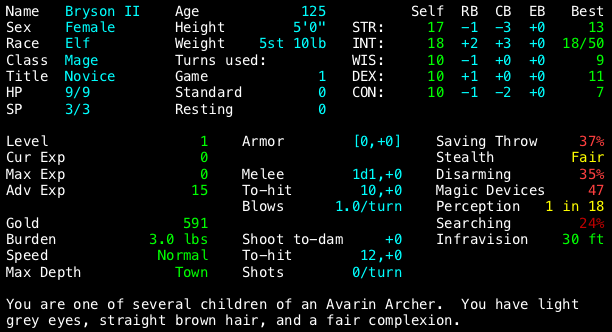
Bryson has failed in her task. It falls to her descendants to continue the attempt.
Since we've already seen most of the early game, I'm not going to repeat it here, aside from a few highlights:
Bryson II almost died at character level 1 when, after killing a Giant White Snake, she was surprised with no mana by a Soldier Ant. She had to flee across the entire dungeon before regaining a point of mana...and failing to cast Magic Missile. More fleeing got her a second point, which killed the ant. A reminder to myself to get some oil flasks next time there's no wand available, I suppose.
Once again, ID-by-use gets us Deep Descent rather earlier than anticipated; we find ourselves at 500' and character level 7. On the flipside, we ID'd Scrolls of Summon Monster (pulling a Tengu, a Gallant, and a Blue Ooze) on the same turn that the Deep Descent kicked in, so we didn't actually have to deal with the summoned monsters

You have 2 Scrolls titled "tas in sevigo" of Summon Monster. The floor opens beneath you!
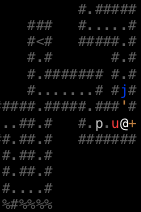
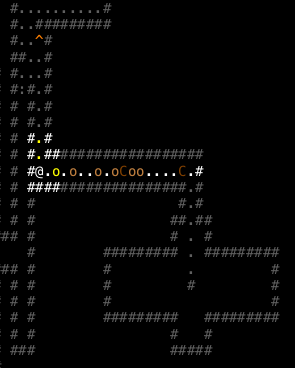
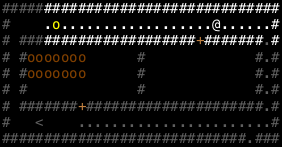
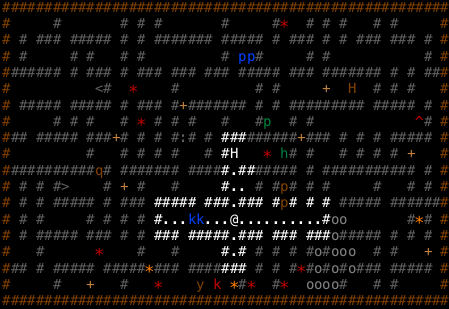
We then find ourselves surrounded by Gnome Mages and Brodda the Easterling -- an unsurvivable encounter even if we were properly-leveled for our depth.
We read our Scroll of Word of Recall, then Phase Door around whenever monsters get too close until the recall kicks in. It's fortunate that we bought lots of Phase Door scrolls early on.
Back in town, we find someone that, bizarrely, neither Freude nor Bryson I ever met:
Meet Farmer Maggot!
You hit Farmer Maggot (3). Farmer Maggot asks if you have seen his dogs. Farmer Maggot wants his mushrooms back.
Uh, couldn't tell you about Grip, buddy, but last I saw Fang he had a rather terminal case of Magic Missile. Sorry for your loss!
You miss Farmer Maggot. Farmer Maggot tells you to get off his land. Farmer Maggot seems sad about something.
You hit Farmer Maggot (1). Farmer Maggot says 'Did you kill my Fang?' Farmer Maggot mumbles something about mushrooms.

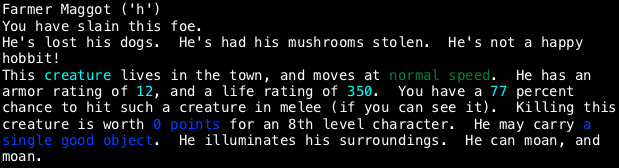
Yeah, Farmer Maggot is just there to dole out an easy good item. We got a Tulwar (2d4) (+3,+3) off of him. It's a bit better than a dagger, but not by much.
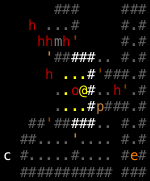
Heading back down to 300' the long way (and hitting level 9 in the process), we run into some ridiculous combination of monsters that forces us to flee again via Word of Recall + Phase Door.
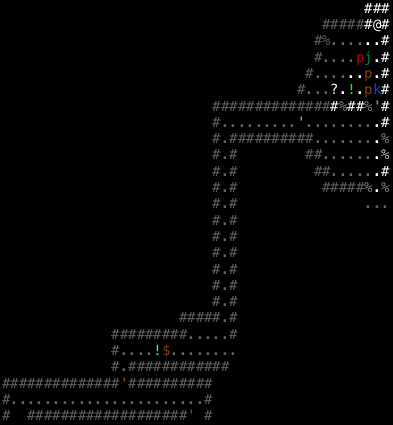
Not pictured: that moated room to the southwest has Hill Orcs, more novice adventurers, and a Skeleton Kobold. And we only have 19 max mana and still no backup wands!
When you recall from a depth that's shallower than your maximum depth, you're given the option to reset your recall depth; we do so. Fortunately, the town finally has a Wand of Magic Missile so we won't be completely at sea when our mana runs out.
Incidentally, all this running away? This is normal. Bryson I had a fantastically good start for a mage. Getting in over your head and having to flee just to get back enough mana to attempt to maybe make your enemy run away (assuming the spell even casts successfully!) is a regular thing for mages.
On our next dive we finally make some proper forward progress, and also get a lucky find: a Rod of Magic Mapping at 400'. Magic Mapping is one spell that mages never get, so this rod will be useful throughout the rest of the game.
Wormtongue dies at 450'; the fight takes longer than it took for Bryson I, but only mostly because our terrain wasn't favorable, being a maze of short corridors, such that Wormtongue often got within 2 spaces before we could even see him, necessitating frequent Phase Doors:
His drop was a Mace of *Slay Dragon*. The *Slay* weapons all provide stat boosts; for *Slay Dragon* you get bonus CON. A *Slay Demon* weapon would give +INT and thus be very useful indeed.
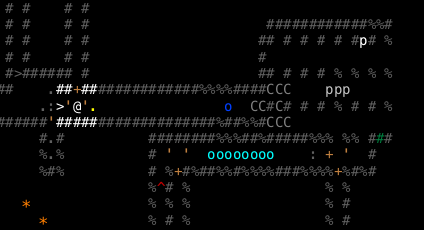
On 500', we encounter Mughash the Kobold Lord:
His formation proves irresistable to Bryson II, who lays in with lightning bolts:
4 Large kobolds cry out in pain. Mughash the Kobold Lord grunts with pain. The Kobold archer screams in agony. The Kobold archer flees in terror! The Giant brown bat dies. 2 Kobold archers die. 4 Kobolds die.
We run out of mana before dropping Mughash himself, but that's what our Wand of Magic Missile is for. He drops a Cutlass (Blessed), which gives +1 WIS and protection from stunning. Eh, better than Farmer Maggot's tulwar.
At 550', we encounter Lagduf the Snaga:
He gets us a Spear of Extra Attacks (1d6) (+7,+5) <+2>. Deja vu. As with Bryson I, I briefly consider using it, but we really ought to be avoiding melee range as much as possible.
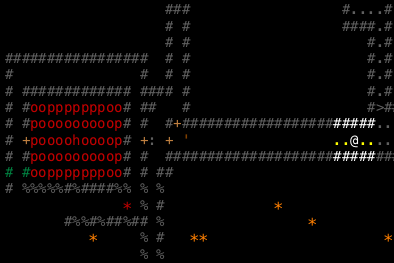
Brodda the Easterling dies ignominously at 700'. Also on this level, we find a lesser demon pit:
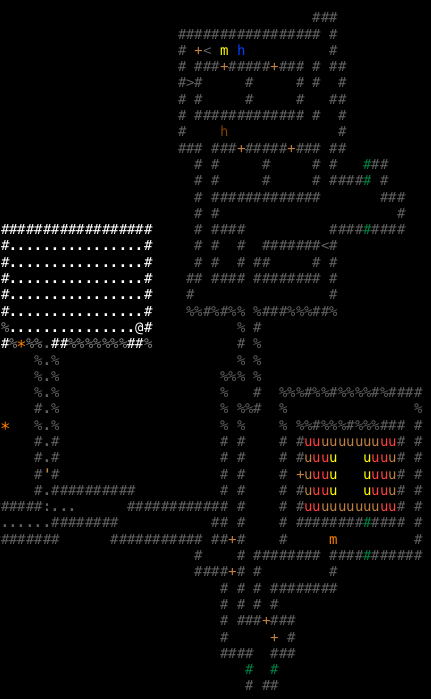
Bryson II stays the hell away from there. The brown lemures have lots of health, the red tengu wreak havoc by teleporting everywhere (and teleporting you away), the yellow homunculi can paralyze with their melee -- and we haven't found Free Action yet -- and the invisible Quasits in the center of the pit are, well, invisible.
Remember, the fight you don't get into is the easiest one to survive!
The following level is a labyrinth:
I don't believe Freude encountered any of these. They're exactly what they appear to be: small and composed entirely of one-tile-wide corridors. Later labyrinths may also be made out of permanent rock, I believe. They aren't nearly so fatal as cavern levels can be, though, being small, they make it hard to avoid monsters that move through walls.
We nearly die to a Wererat:

mostly as it proves unexpectedly durable and we fail to cast Firebolt twice. A Scroll of Phase Door gets us some distance (and fortunately, it does not cast its Frostbolt spell at us, which would have killed us), and we follow up with a more successful Firebolt attempt that does it in. Bryson II has an AC of 17 and only 87 HP at this stage; melee is really, really not recommended.
Incidentally, mages, rogues, and rangers all face a restriction on their handgear -- if they wield gloves that don't give Free Action or a DEX bonus, then they suffer a heinous penalty to their spellpoints (and their spell failure rate, I believe). It's so bad that such gloves are basically unusable -- unlike with the priestly sharp-weapons penalty, which can be worth suffering if you find a good-enough weapon.
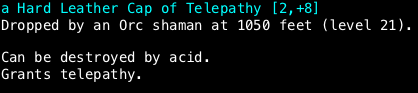
On 800' we kill Orfax, Son of Boldor (the lesser of the two yeek uniques). His escorts, a group of Master Yeeks, put up more of a fight than he does, with their summoning and blinding spells. His drop? A Metal Cap [3,+1]. I'd be more irritated, except we find something awesome elsewhere on the level:
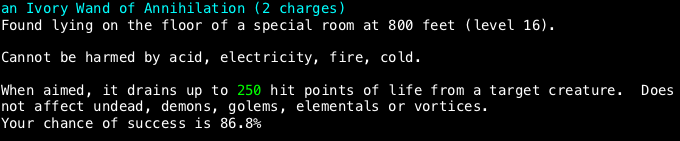
See that damage? That's insane! Wands of Annihilation are competitive with mage endgame spells in terms of damage output -- at least, once you consider the damage bonus that mages get from their high device skill. Unfortunately, these wands are very easy to blow up when recharging them, so we'll have to use this one sparingly, and hope it doesn't get destroyed by an electrical attack (EDIT: it's been brought to my attention that Wands of Annihilation are immune to electricity. It even says so right there in the screenshot
 )
)On 850' we fight Nar the Dwarf again; the fight goes much like last time (we refrain from using our new wand). He drops nothing interesting.
On 900' we find a Pair of Iron Shod Boots of Free Action, freeing us from worrying about paralysis. We also have a hell of a time dealing with a Green Glutton Ghost, who keeps pestering us from the walls. The spell Reveal Monsters shows his position for 1 turn, but when he's standing in a wall, we can't hit him with spells, and Reveal Monsters is expensive to cast. He eats up all of our Mushrooms of Second Sight (grants temporary ESP) and Emergency (200 HP heal plus temporary resistance to fire and cold, but makes you hallucinate for a long time) before we finally manage to catch him with a Magic Missile.
On 950' we have another run-in with Grishnakh, the Hill Orc who indirectly got Bryson I killed:
Foolishly separated from his escort this way, he never manages to make it to melee range before dying. His Morningstar of Slay Troll is junk. What's with all the uniques dropping weapons or terrible armor? On the plus side, the moated room we're in contains a couple of Potions of Restore Mana. These completely top us off on mana when drunk, and don't drain stats like the Mushrooms of Debility do. They'll be a key consumable for us throughout the game.
On 1050' we find Lugdush the Uruk, also foolishly separated from his escorts:
We try to take him down with frostbolts (Firebolt still has too high a failure rate to be as efficient), but he just has too many hitpoints, so we finish him off with our Magic Missile and Lightning Bolt wands. His drop is...a Cutlass of Slay Evil
 Enough with the weapons already!
Also on this level, we find an interesting ring:

It raises the failure rate on Firebolt by 11%, which isn't especially bad considering we get +4 speed out of the deal. If you're going to wear a Ring of Escaping, wear two, since the penalty doesn't stack but the speed does. I'm not really a fan, personally, mostly because these rings are a new addition and I'm an old fuddy-duddy that way

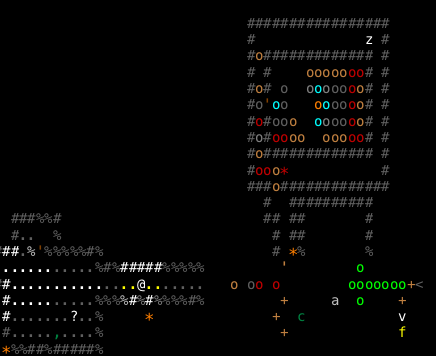
Finally, we run into a Mage Pit:
Full of Apprentices, Orc Shamans, and one Dark Elven Mage. We slaughter our brethren easily, largely as their pathing is too stupid to get them out of the pit if it requires them to go too far out of their way:

As a result, we can easily rest up between "batches".
From the monsters therein, we get astoundingly lucky:
Mages don't need telepathy anywhere near as badly as warriors do, but this will still prove very handy as we won't have to spam detection spells to know where monsters are turn-to-turn. Plus, most invisible monsters we care about are not mindless, so ESP makes an adequate substitution for See Invisible. This was a fantastic find, and as far as I'm concerned has used up all of Bryson II's luck for the next 1500' or so; the RNG has put us on notice.
On 1200' we find a vault, containing Mim, Betrayer of Turin. Remember how badly fighting him went with Freude? We barely survived. He's resistant to all four basic elements and is fast; we aren't even going near that vault, no matter how many items it contains.
1250' is another labyrinth level, and demonstrates one of their more unusual quirks: sometimes they start out fully-lit and you automatically know where all of the items are.
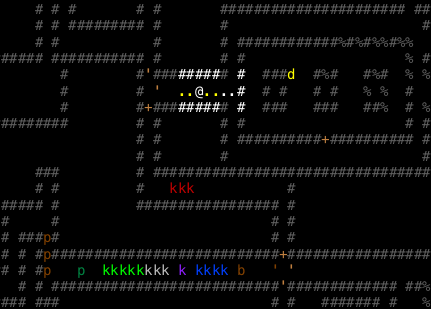
On 1300' we find and clear an orc pit:
During this fight we start abusing Lesser Recharging and our Wand of Light. The spell Spear of Light costs 6 mana to cast; Lesser Recharging costs 7 (albeit with a 23% failure rate), and gives us 4 charges on our wand, each of which does 72% more damage than the spell due to our magic device skill (Wands of Light are level-3 items).
Of course, the recharging fails and blows the wand up early in the fight, but it's the principle of the thing.
On 1350' we kill Shagrat the Orc Captain rather trivially, and loot some White Dragon Scale Mail of Craftsmanship from his body. It puts strain on our carrying capacity, but I expect the activation (for a 100-damage frost ball) will come in handy.
Also on 1350'...whuh.

I don't believe this. Impossible. Boots of Extra Carrying Capacity!
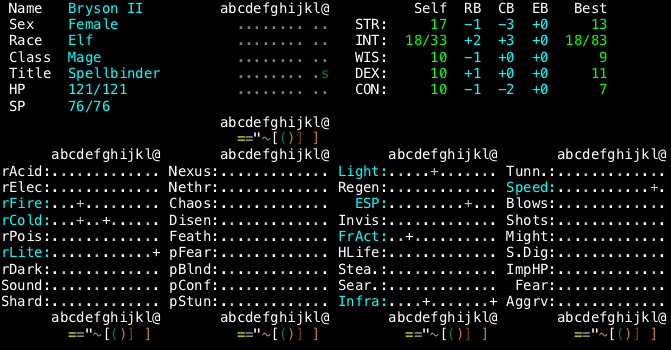
Seriously though, this is really amazing luck. Telepathy, DSM, and some minor speed, all by 1350'? Not to mention the Rod of Magic Mapping and the Wand of Annihilation! We are bucking for a lightning bolt from heaven, here. Most likely by something hitting our resistance holes -- unlike with Bryson I, we still have no resistance to either acid or lightning.
On 1400', we find a Potion of Intellect. Freude junked these as soon as he found them; they're the stat-swap potions for INT. Naturally, when we drink it it drains our STR, a.k.a. the only other stat we care about. But I have trouble being too angry about this. We go from 51 SP to 76, a 50% improvement in our mana supply. Sadly our failure rates don't drop any.
Back in town, the Black Market has a Potion of Strength for sale, so we make back the loss pretty quickly.
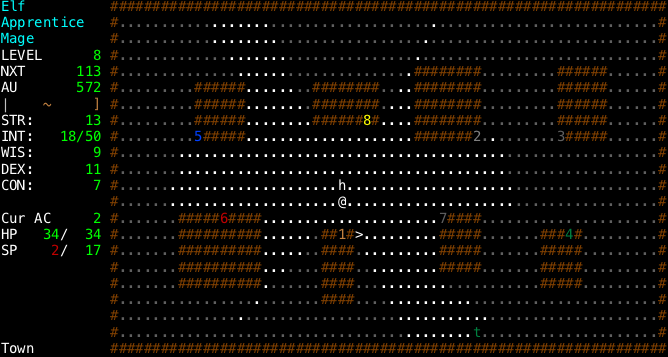
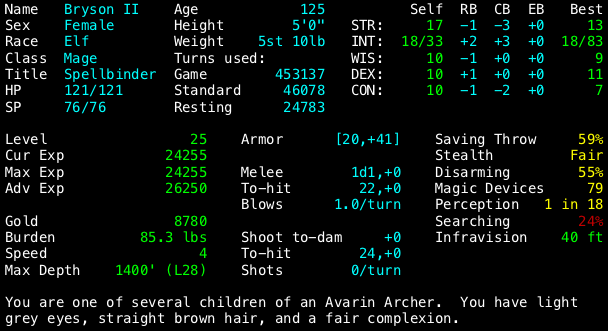
And that gets us pretty-well caught up. We're level 25, at 1400', and we're pretty well-set, aside from that whole lack-of-resistances, could-be-killed-in-one-turn thing. Here's the rundown on Bryson II:
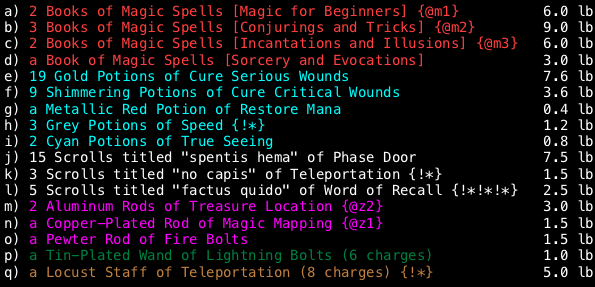
Inventory:
Equipment:
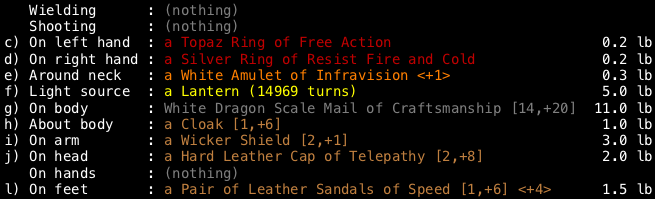
(The Blessed Cutlass got ditched because its 11-pound weight was too extreme for us to deal with)
Character status:
Next time: well, either we get those resistance holes patched, or we're likely to end up dead. Again.