Part 78: Custom: help the rebels
help the rebelshttps://youtu.be/NzgPy7UiYgc
**Likes: 213
**Dislikes: 9
**Average Time: 52:01
help the rebels earns it's spot here by being one of only a handful of mission to break 200 likes. More than that though, it has by far the fewest dislikes of any level to break 150. In the interests of full disclosure, this is actually the second time I played this -- because it didn't record the first time. I probably pressed the wrong hotkey or somesuch tomfoolery. I figured to improve my showing the second time, but some over-aggressive mistakes sidelined a lot of that. I did at least understand what was going on, so the typical 'what in blazes is going on here' stuff isn't present.
This mission is a good example of the kind of level that there seems to be quite a bit of in the custom creations; a linear setup with a series of different rooms, each presenting a unique(at least somewhat challenge). There is some repetitiveness and similarity here, but my guess is that this one is more popular than many of the others made in a similar vein because it's not as much of a grinding, tedious slog. There's some of that, but not an overly oppressive amount.


The editing and proofreading on this briefing is definitely among the low points of this level. Quick now; who can spot all the errors? Those will tendencies like mine towards being grammar nazis will need some serious mental 'held' by the end of it.


A race against time before a Nexus activates? That sounds ... familiar, but still a useful mechanic.
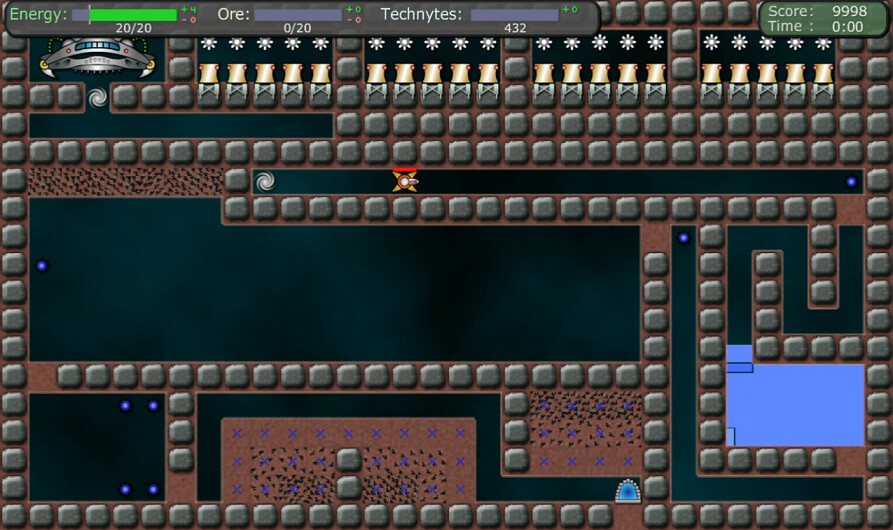
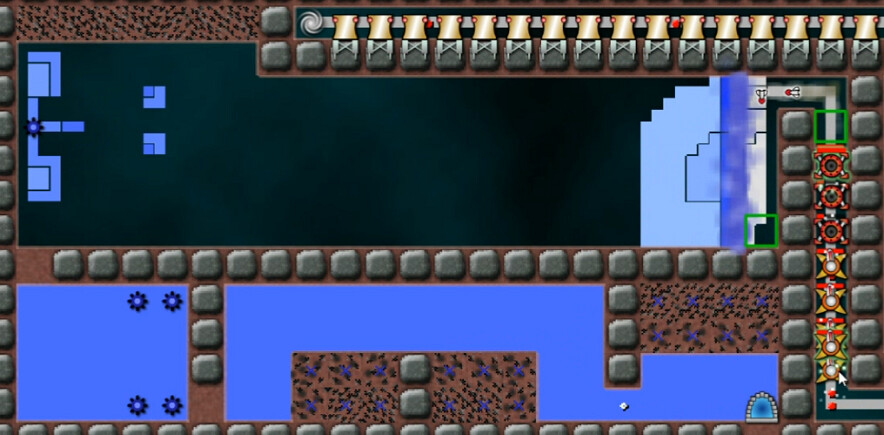
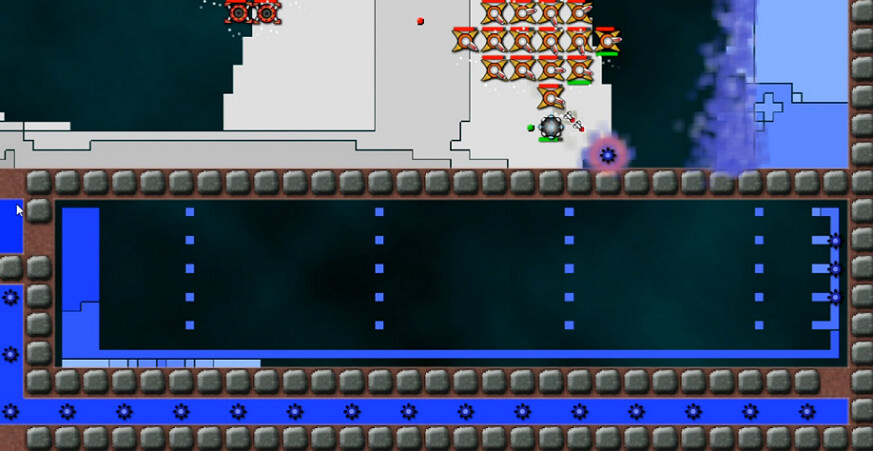
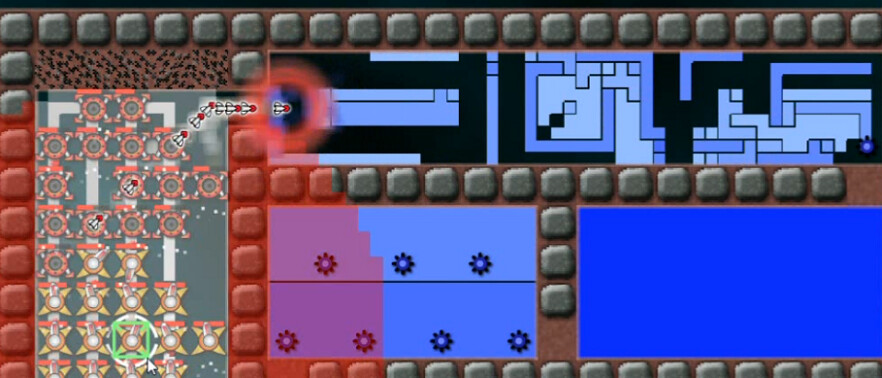
Ok. The maze, as it were, winds left to right, then right to left, and so on. That rarely gets changed up. To be any sort of reasonably quick you need to get from one room to the next efficiently. We've got total security for the Liberation Ship, reactors, and AC emitters along the top. That anti-creeper will, as we'll soon see, follow a pre-determined path and assist us as we work our way through. First obstacle is this pathway the blaster is in. Once we take out that emitter on the right, we can excavate downwards, and on we go. The biggest thing to notice here is the stupid amount of TechNytes.
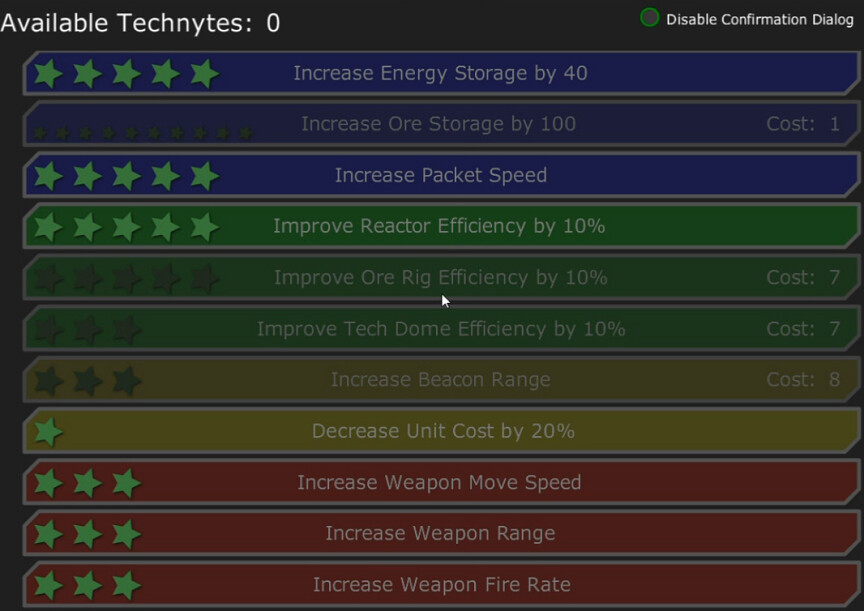
There's exactly enough, no more and no less, to upgrade everything we can use. No FOW for the Beacons, no Ore, and therefore no need for TechDomes.
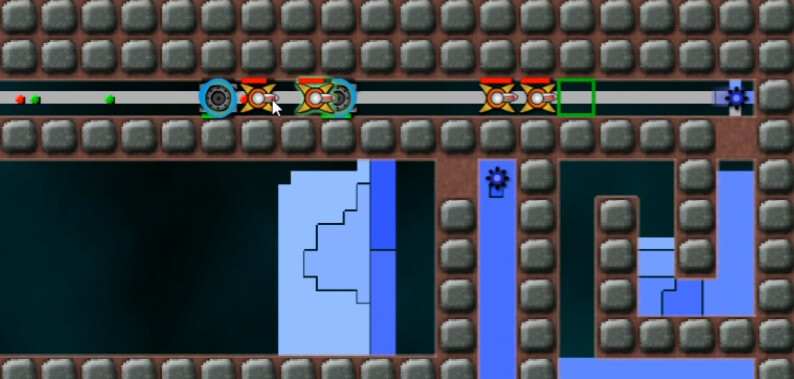
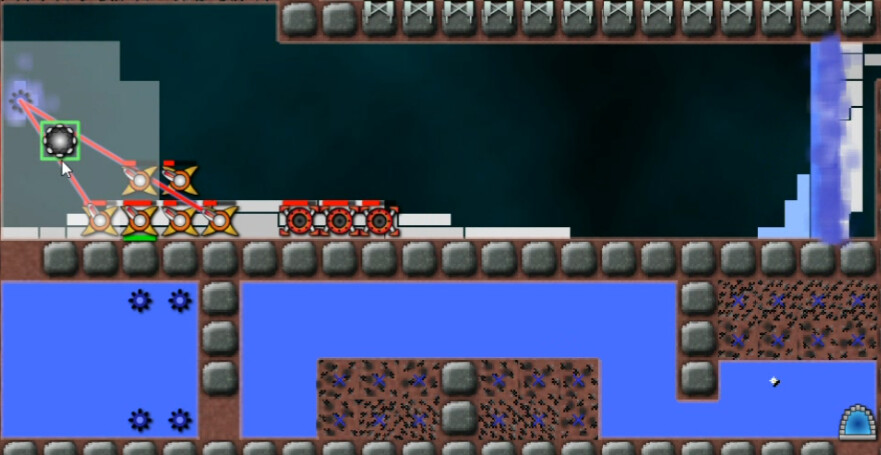
Here's the AC now well in motion, and along with the weapons dominating this first emitter. I've also added more reactors.
The next room snakes around, and you can see there's also weirdness in both the creeper and anti-creeper behavior. This seem to be here just because, since it's really just a case of shove your weapons through, there's not enough for it to be hazardous.
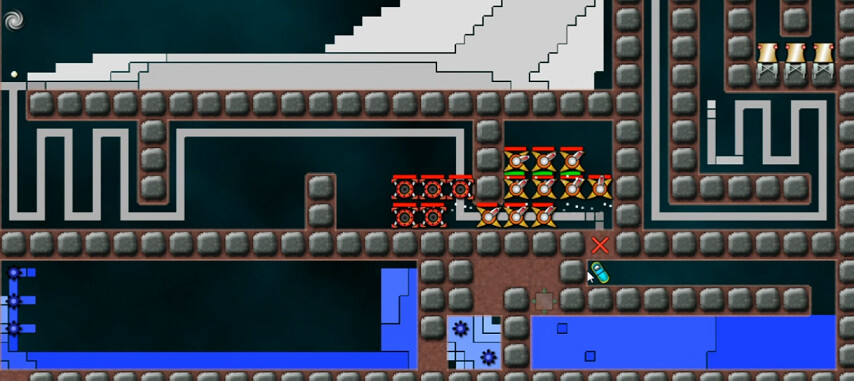
Another tunnel with minimal creeper and a small emitter goes, and then this strangeness. Basic idea at this early stage seems to be multi-tasking; moving forward with your weapons, building more of them, and building reactors. Of course you don't have to do that, you can just do one at a time -- just takes longer. This level also really rewards co-ordinating blasters and launchers well. In this case, we want the launchers in range of that concentrated creeper on the right end, and then blaster coming just into the room soon, using that last column that it won't penetrate.
The pace of this rewards looking ahead. Here I'm about to take out the emitter here. The next room below is just a quartet of unimpressive emitter and a modest amount of creeper. After that, we've got a gateway working on excavating some terrain. Not just any terrain either; each one has 1M creeper infused. That seem to me to be the point where it start ramping up. Worth noting that this is an Obliteration map; the first time I did it, I just took out the Gateway and kept going. Eventually I came back here when victory didn't trigger. You've got to take out all that creeper in the terrain anyway, so the gateway is sort of doing us a favor by working on it.
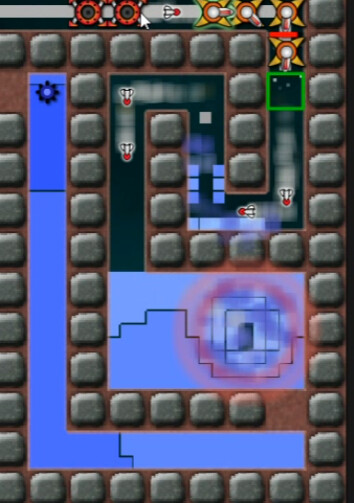
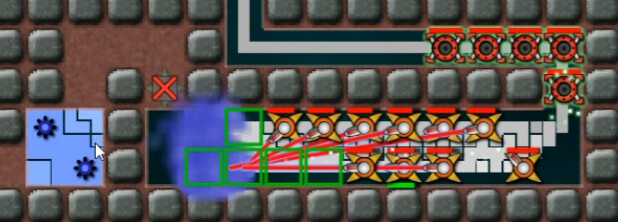
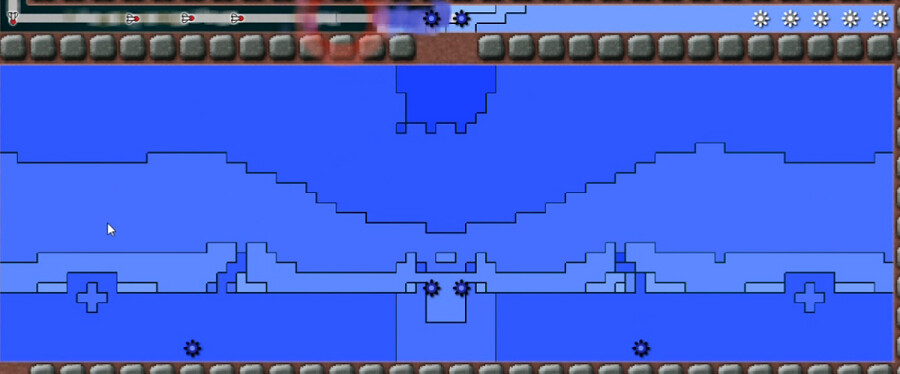
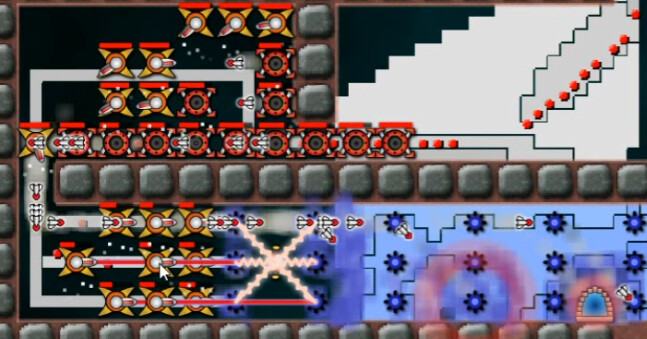
Here's the next section. Important to note the MicroRift in the upper-left. Those need to be placed regularly with the way this map winds back and forth. If you don't, weapons will get starved in a hot hurry. The left-side chamber below us is very similar to the one we just cleared; more fun with creeper and gravity. This one just below with the capsule and the shield schematic is different though. More concentrated creeper in that pool, and a moving block that we'll eventually see in it, generated by those two emitter in the square. Each pumps out 100k every half-second, which is as strong as any emitter we've seen so far, and a strength that's used a lot in this mission. This is really the first part where it makes a significant difference I think, but this is one of those things where starting fast makes it easier later. After almost nine minutes for it to build up, there is several hundred K worth of density here, so it take a bit of launcher fire but not too much to clear it.
I never did figure out a really good way to use the shields. I assume they are here for some particular purpose. Any ideas from you shield supporters?

I think we're just being trolled here.
Once the blasters are in place, they quickly obliterate each new block as it is produced. For some reason, that shield spec takes 200 packets to harvest, so it takes a while to acquire.
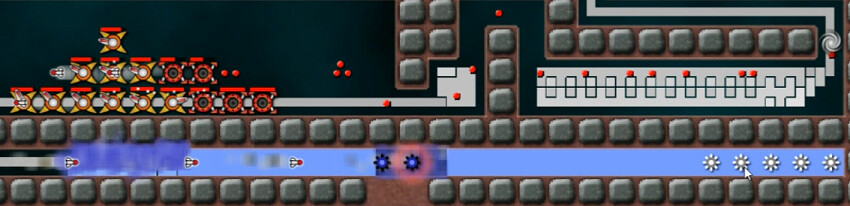
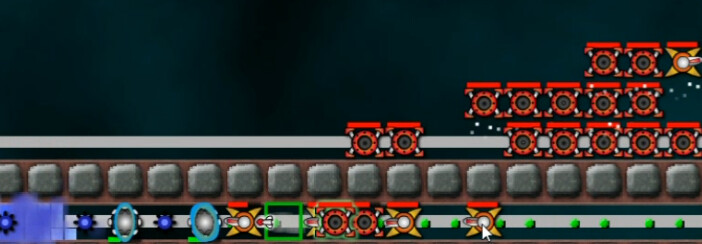
On the right, the five stolen AC emitters that won't activate for 30 minutes. We're not quite halfway that far in yet. This hallway is a piece of cake to clear.
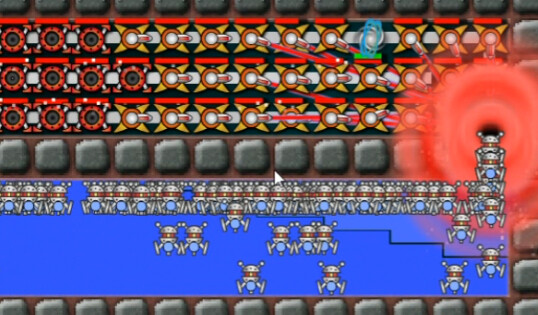
This cavern below is not. Not even a little bit. You can see there's a big concentration of creeper below the way in. I both love and hate that design, which makes it awesome. There's all manner of creeper manipulation going on; it gets pushed towards the way in, geysers get spouted from those plus signs on either side, etc.
Oh, and the emitters create their mess at a rate of 10K every 0.03 seconds. With four of them, for those of you scoring at home, that's 1.3 billion creeper a second. So while a smallish strike force will get you this far, it won't suffice anymore. It's brute-force time.
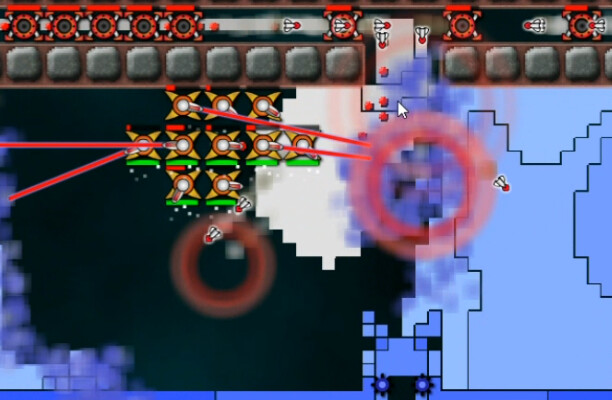
As many launchers as you can along the hallway, blaster in the center. Eventually the anti-creeper starts creating room inside the chamber, and in we go. Problem is, the creeper is still trying to clog up the entry point. I didn't sufficiently account for that, didn't get a rift up in time, and lost a bunch of blasters. Then, just for good measure, I made the same exact mistake a second time. Meanwhile, every single emitter further on used the time to churn out more creeper ...
Once in, it's a small matter to get in range and shut off the fountain.
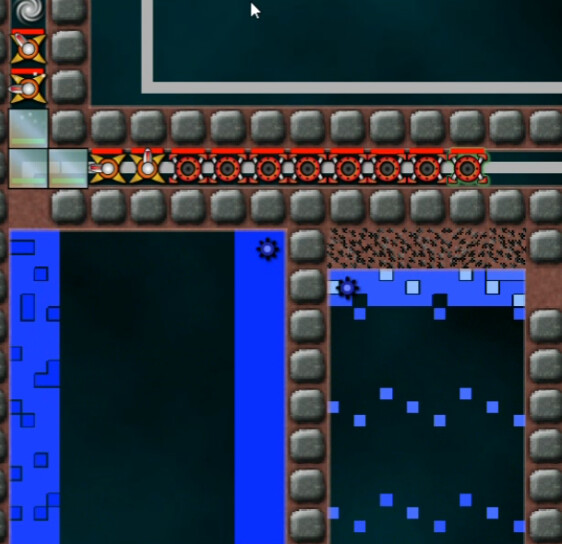
But wait, there's more. A lot more. The next little room is small but fierce, with 50M creeper concentration for our fighting enjoyment. Then another projectile/screw with gravity room, and then the Emitter Hallway of Tediousness(my name for it, which explains its lack of quality). The EHT and the room which follows it are my least favorite part of this level.
There are 17 emitter in this hallway, all of which are one of the weaker varieties(1k every 0.03). Still, 17 of those pumping out 33k a second for more than 20 minute while I work my way down here is a non-trivial amount. At first I flood a lot of the thing with launcher fire from above. Eventually they run out of range though, so I'm constantly moving forward alternating blaster/launchers with usually two nullifiers up at once while I work my down the tunnel.
I didn't have the view moved down far enough to get a good shot of the next section. This next room though is the bane of my existence. It's a true slog room. Here you are punished for every bloody wasted second. And it's one of those thing where I wonder, based on the mechanics of it, if there's a better way than brute-force. If so, I don't know what it is.
The emitter gives us 50k a second. I'm at almost 30 minute right now. It also starts with tens of millions of density on the right side. That feeds over to the left regularly, reinforcing that. Every once in a while, the left will relocate upwards ... right into your entrance way. My approach here was basically this:
** Get as many blasters in position as possible.
** Go make a sandwich, do some laundry, etc.
I put up these shields and whatnot to slow down the creeper pushing up into the EHT, but that's pretty much the size of it.
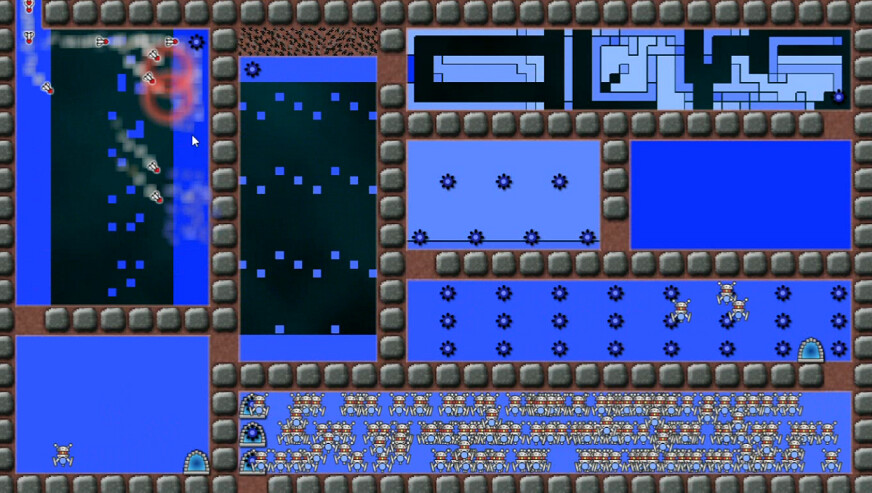
Here you can do what I did while this was going on and look around at other stuff coming up. That's ... a lot of drones. Which have a special surprise. Anyway, it took nearly seven minutes, which felt like a lot more, of constant firing to lower it down enough to get in here.
The next couple of rooms weren't particularly interesting. This one though has something to it. Another 'concentrate at the door' deal, but then we can pretty much ignore all the other strangeness once that's dealt with, since it's thin enough to just move the blasters in and clear it out that way.
Below that, it's a simple matter of 5M density everywhere, so that takes a while to clear out(esp. when you let it destroy your nearby rift), then a handful of weak emitters that really don't do much.
This can be quite satisfying.
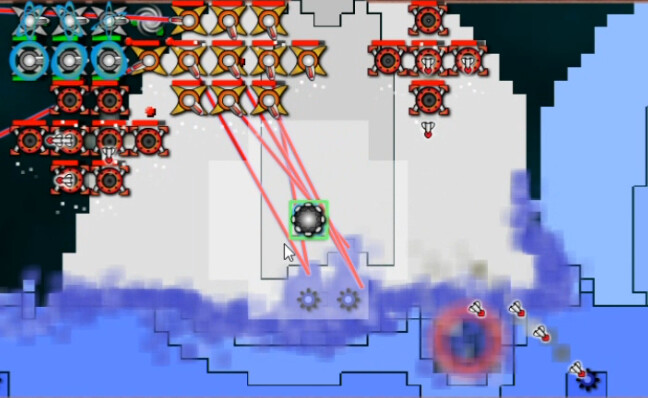
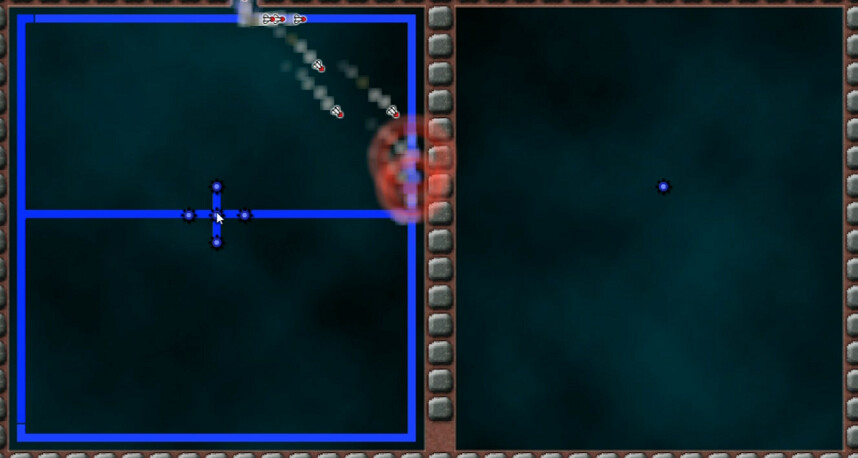
The only room in which the creeper makes a serious attempt at combined arms. These drones are fast, and each carry a 1k creeper payload(good example of that recently-discussed mechanic!). Also about 300k density here. After killing a stupid amount of these fellas, we can move in and take care of business.
But we're STILL not done.
This room on the left is a pain to enter. Nearer the emitter the creeper is at 40M density or so. A mere 3M by the entrance at the top. Once you get a break in the perimeter to get a rift inside, it's no problem. Before then though, anything that comes in will be starved for ammo. The emitters are decent but not huge; 5 more of the 100k per 0.5s variety.
I build a ton more reactors while doing this. Up to over 55 energy income. Massive launcher fire makes reasonably short work of this, much faster than my first go. Then I go in ... and still run out of energy. If you think you have enough reactors, build more.
The last room is a real killjoy. Turn out, only because I took just long enough, that the Nexus that isn't over there activate at exactly one hour. This time it was faster. But it doesn't really matter. It pulses 10M creeper ... but only once every ten minutes. That's nowhere near enough to be scary. If you've got enough to get here, you've got enough to take care of that easily.
One more to go. Best time here is 17:31. I think I could probably do a half-hour if I cared enough. Which I don't at all.