Part 16: Boss Guide: The Crew
Hey guys remember when I was trying to make this LP comprehensive?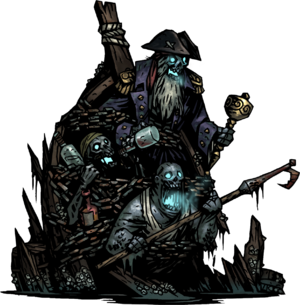
The Crew
The Drowned Crew is the second boss fight of the cove, and operates on a mix of tricks that both the Hag and the Siren employ. You and your team's capacity to adapt will be tested in this fight, since the Crew is really good at taking allies out of place, stacking on stress, and in general being a very durable and hard to whittle down boss.
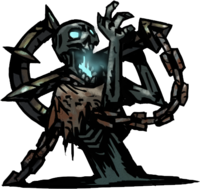
The Crew's main gimmick is that, so long as its alone, the captain will take a free action to use All Hands on Deck which will summon a Drowned Anchorman and pull a random unit of yours to the forefront. This Anchorman will also come spawned with his own action, which will be used to bind a hero in place with Heave To!. Now an important thing to note: When an Anchorman is spawned, he starts with >50% PROT and when he uses Heave to it will impart this PROT to the Crew. Along with that caveat, the idle and towing Anchorman are two totally different enemy spawns, so Marks and Hexes will drop once he uses Heave To. Now with further complications, once the front-line unit is anchored down, he will begin taking stress damage every turn along with the main Crew regenerating HP from this stress, giving the boss a remarkable form of durability.
Alongside the main gimmick of the fight, the Crew also gets two actions each turn. Amusingly enough, each dead boy on the crew represents these attacks. The captain's attack is Mutiny, a one-damage attack that will reduce one of your heroes' attack power and crit rates. The large zombie will use Boarding Clutch, which does a decent amount of damage alongside with a two-damage bleed DoT. Finally, Tequila zombie will use Drink with the Dead to further add Stress damage to the people on your team.
In order to prepare for this fight, you really want a team that combines high damage and stress management. With the crew taking up three spaces during the fight, you want a front-line that does heavy damage along with a support team that can remove stress and still deal damage. Lepers and Crusaders are great front-line fighters; Lepers are tornadoes of damage, while Crusaders have anti-unholy traits to fight off the Crew along with his own stress removing skill to provide backup. A jester is highly recommended since he can keep the hooked person within manageable stress levels, buff your team's speed & crit rates, and provide stress resist with some of his camping skills. Healing isn't absolutely required here, so an Arbalest is also a great back-row character for her damage and backup healing. Both the Jester & Arbalest are also really good at running away if they ever get hooked, so formation rarely becomes a problem. While its useless for the gimmick, Holy Waters are pretty good for the fight for resisting the Crew's debuff and bleed stack as well.
The fight itself is going to be a dance of knowing when and who to attack. Once the Anchorman is summoned, he has the 50% prot until he hooks someone which then goes to the crew until the anchorman's death. With that in mind, you need to attack the crew itself until someone gets anchored, then take out the anchorman ASAP in order to reduce the Crew's healing. One important thing to mention is that a hooked hero is not entirely out of the fight, so he can still attack the anchorman when the time comes. It wasn't demonstrated well in the first fight, but this fight requires good management of damage mainly due to that healing factor. This fight is mainly a drawn-out slug fest more than being an overtly lethal fight, so you really want to make a durable team that can take many small hits rather than a glass cannon that breaks after one mistake.
An interesting thing about this boss is that it also has many great ways to lame it out. The first one, if you're lucky, is that anyone who has a Virtue affliction will 100% block the anchor, keeping the anchorman alive but not buffing the Crew, and completely negating the boss' gimmick. Another way to lame out the boss is to use a high-proc Move skill in order to pull the crew forward before the Anchorman can act, and since the anchorman cannot act in rank 4 he then becomes a non-issue. Heave To also counts as a physical attack, so if you're willing to gamble then an extremely high-dodge hero can stave off the anchor for a while.