Part 1: Game Information
FeaturesDescent can be played in one of five difficulty modes: Trainee (easy), Rookie (normal), Hotshot (medium-hard), Ace (hard), and Insane (very hard). As the difficulty increases, robot AI becomes more intelligent and they will fire more projectiles and more rapidly and have better evasion. With increasing difficulty, your starting count of concussion missiles will decrease (seven missiles on Trainee, three missiles on Insane). Energy and shield boosts have diminishing yields with higher difficulties. Meltdown countdowns decrease with incresing difficulty. Beginning with Hotshot, a skill bonus is granted at the end of each mine.
Display
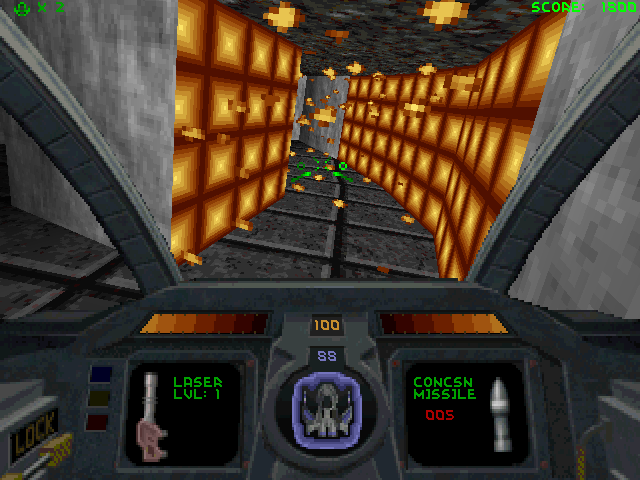
This is what the default Heads Up Display (HUD) looks like:
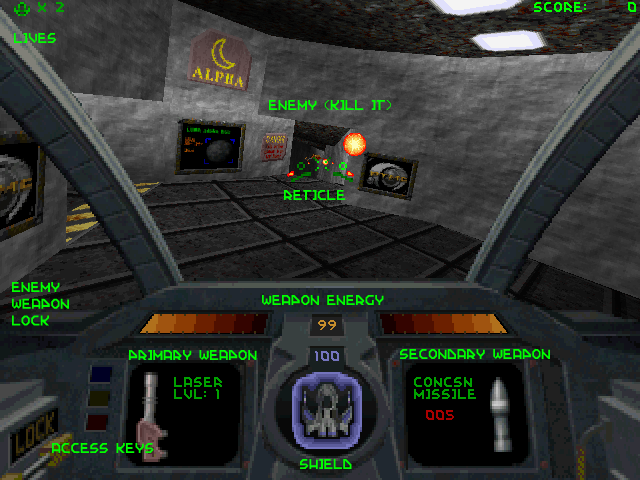
Lives - You begin the game with two lives to start with. If you die, you will lose all of your rescued hostages and all of your weapons and accesories will be dropped, but you will retain your access keys. After you die, you will respawn with your laser level reset to level one and the default number of concussion missiles for your difficulty level. Losing all lives will result in a game over and will take you to the high score screen.
Score - Whenever you destroy a robot, pick up a hostage, or blow the reactor, a number will appear below your score. This indicates that you've earned points. This is a great way to tell if you've destroyed a robot from a distance. Extra lives are granted for every 50,000 points.
Reticle - The circles on the left and right indicate which bank your missile will fire from. In this screenshot, the right circle is glowing, so the missile will launch from the right side of the Pyro-GX. Some missiles fire from the center of the ship, and will be indicated with a circle belot the crosshairs.
Weapon Energy - Your primary weapons (except for the Vulcan Cannon) will deplete weapon energy. You may have a maximum of 200 energy. Entering an energy center will recharge your energy to a maximum of 100.
Shield - Your hit points. Shields can be maxed out to 200. You can have a reading of zero shields and still survive, but this isn't likely.
Primary Weappon - Indicates your current primary weapon. Will display your current laser cannon level and remaining Vulcan ammunition. Number keys 1-5 select your primary weapon.
Secondary weapon - Indicates your current secondary weapon and how many missiles of that type remain. In Descent Rebirth, a counter will be displayed if you have any Proximity Bombs as the number B:XX.
Enemy Weapon Lock - This will alarm if you are being targeted by any seeking weapons. Homing missiles, smart missile pellets, and mega missiles will sound this alarm.
Access Keys - Indicates which access keys you have.
In Descent, you may toggle your HUD by pressing F3 between three different modes:
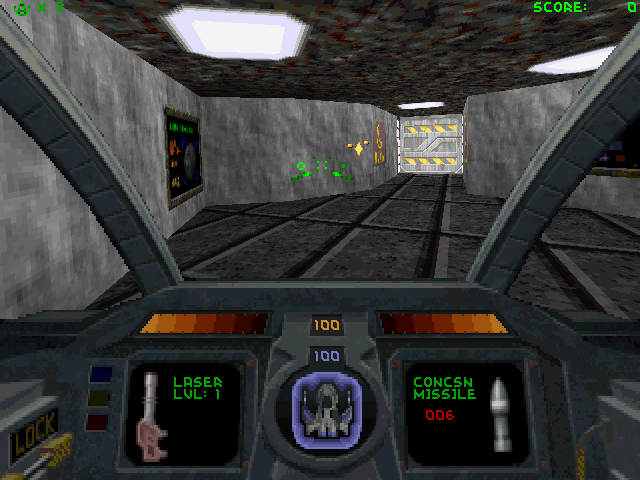
Mode 1
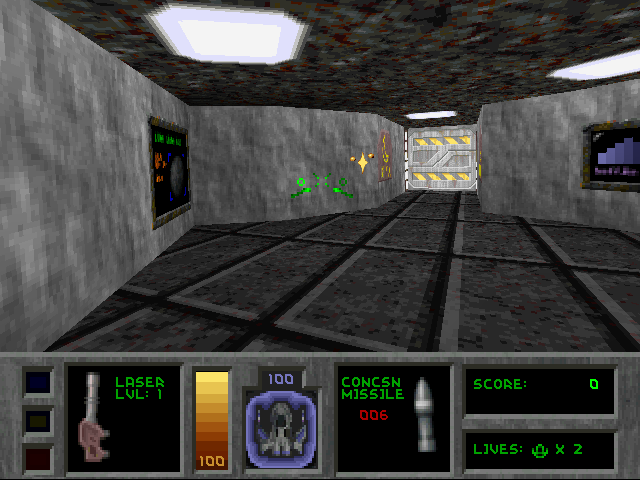
Mode 2
Mode 3
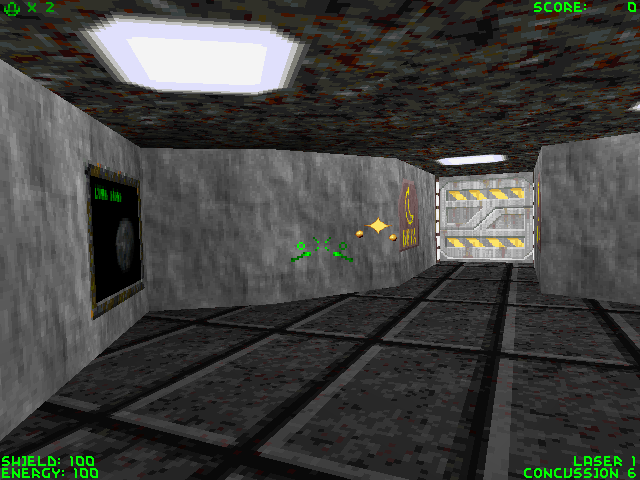
From what I've heard, Mode 2 will provide you with the most complete view of the game. I don't know if I buy that or not. Remember that when using Modes 2 or 3, your LOCK indicator will flash text on screen for the alarm instead of usind the icon in Mode 1.
Automap
The automap will help you navigate the mines, but don't be surprised if you find it still confusing once you have a lot of the mine explored.
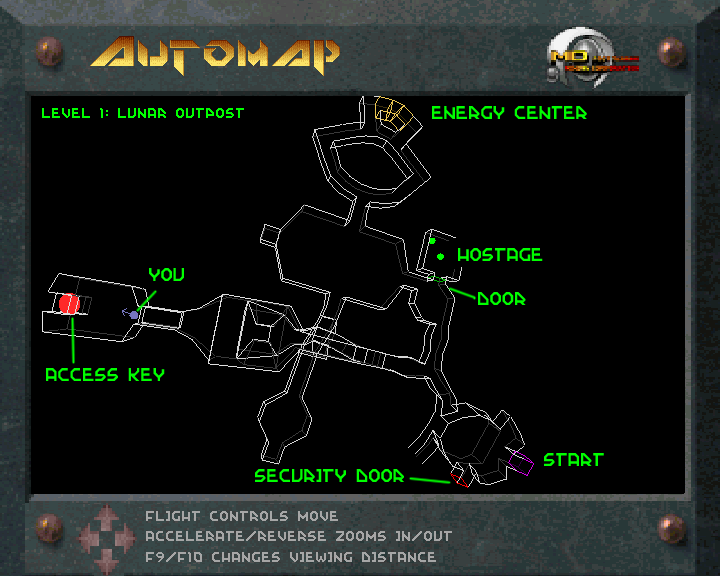
Key locations
Energy Centers will replenish your energy to 100 if your reading is below 100. There is at least one in every mine, so don't panic if you drain your energy completely.
Robot generators first appear in level three. Robot generators spawn robots upon entrance into a room and will continue to for a certain amount of time. Higher difficulty levels spawn more robots, and they will spawn indefinitely on Insane difficulty. It is possible to farm these for energy and shields, but be very careful when you do.
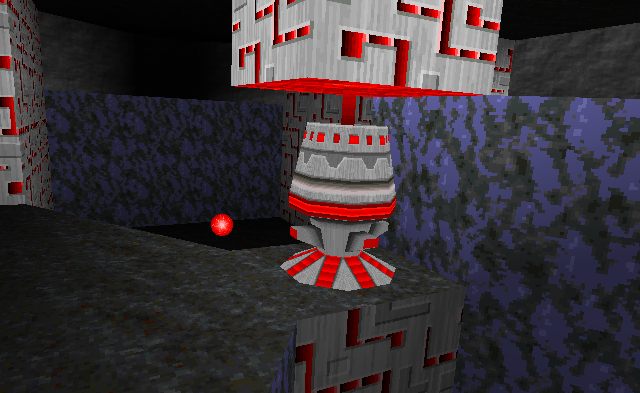
Destroying the reactor is the ultimate objective of every mine. Be carefull because it will fire at you in an effort to defend itself. Reactors are always within rooms that can only be reached with red access keys.
Once you destroy the reactor, you will have 20 to 60 seconds to find the exit. The door will only open when the reactor is destroyed and the countdown begins. Make sure to locate these before you blow the reactor. If you do not reach the exit in time, you will be incinerated with the mine and begin the next mine with only your laser at level one and a few concussion missiles and you will receive no bonus scores.
Weapons and Items

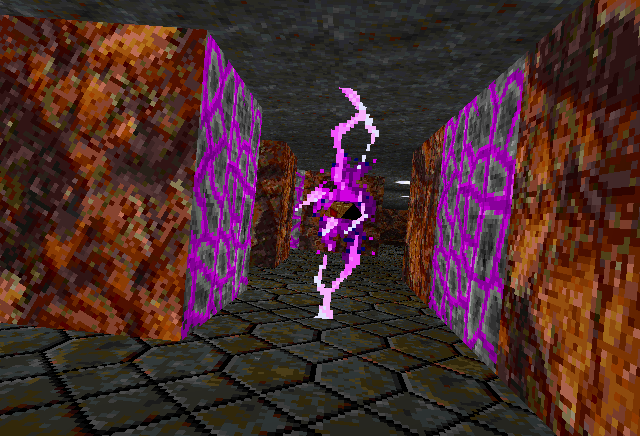
Laser Cannon - Standard primary weapon. This weapon can be upgraded to a maximum of four levels. Each level is color coded, starting with red (level one), violet (level two), blue (level three), and green (level four).

Quad Laser - This power-up will increase your number of laser cannon shots from two shots to four shots.


Vulcan Cannon - Rapid fire machine gun that uses a separate supply of ammunition. The projectiles will hit their target at a near-instant speed. Vulcan Ammo packs replenish 1,250 rounds.

Spreadfire Cannon - Multi-shot weapon with a large area of coverage. Shots rotate vertically and horizontally.

Plasma Cannon - Rapid fire energy weapon. Only available in the retail version.

Fusion Cannon - High damage weapon with low rate of fire. The fusion cannon has a kick when fired, so don't expect any precise shots from it. This weapon can be charged up for more damage by holding down the primary weapon button. Charging up the fusion cannon is noisy and powering it up for too long will cause damage to you. Only available in the retail version.


Concussion Missile - Standard secondary weapon. Just point and shoot. Found in singles or in packs of four. Maximum capacity of 20.


Homing Missile - Seeks out targets and deals more damage than concussion missiles. Found in singles or in packs of four. Maximum capacity of 10.


Proximity Bomb - Pressing the drop bomb key (default key is B) or by selecting it as a secondary weapon will drop a mine directly behind you. You can shoot them to make them explode or wait for an enemy to run into one. Proximity bombs have a very large blast radius, so keep your distance when they detonate. Found in packs of four. Maximum capacity of 10.

Smart Missile - Dumbfire missile that will release six plasma bolts that will seek out enemy targets nearby. Found only in singles. Maximum capacity of five. Only available in the retail version.

Mega Missile - Very powerful, but does not track enemies as well as homing missiles. One mega missile is usually enough to finish off any player or robot. Found only in singles. Maximum capacity of five. Only available in the retail version.

Energy - Refills your weapon energy meter. Picking up weapons that you already have will refill weapon energy instead. Energy power-ups yield 27 points in Trainee, 15 in Rookie, 12 in Hotshot, nine in Ace, and six in Insane.

Shield - Refills your shield meter. Shield power-ups yield 27 points in Trainee, 15 in Rookie, 12 in Hotshot, nine in Ace, and six in Insane.

Cloaking Device - Renders the Pyro-GX invisible for 30 seconds. The robots can still hear you, however.

Invulnerability - Renders the Pyro-GX immune to all damage for 30 seconds.


Access Keys - Found in the order of blue, yellow, and red, these keys will open doors of the corresponding colors.

Extra Life - You get another life. Extra lives are also granted for every 50,000 points.

Hostage - Found behind doors that you can destroy. Grant 1,000 points when picked up and you get a bonus after blowing the mine for however many hostages you rescue and an additional bonus if you rescue them all. If you get killed with any hostages on board, they will be lost.