Part 52: Blue Moon Speed Run
Part 52: Blue Moon Speed Run
What happens if Blue Moon wins? Let's find out!
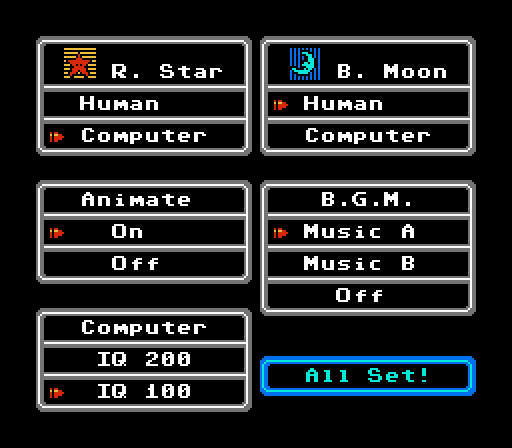
We'll play on normal mode without any challenges on each map. I'm taking a personal challenge to go through all 15 maps as quickly as I can though (both in total runtime and in total turns spent). Here's how it went!
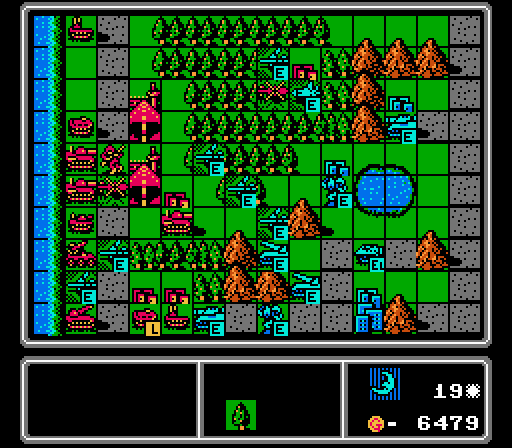
Map 1 - Bean

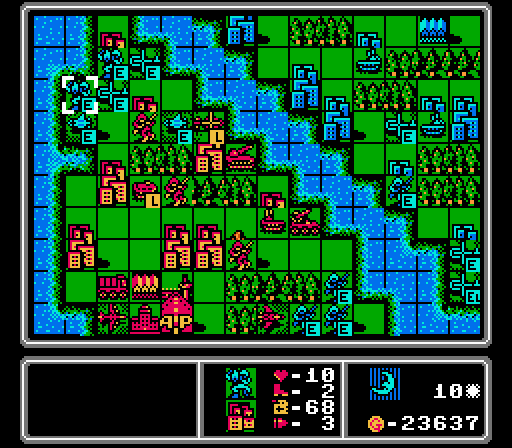
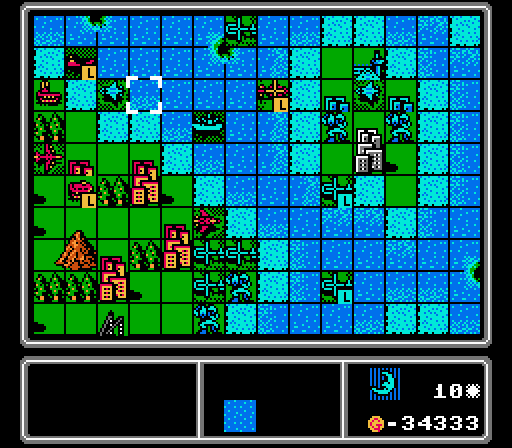
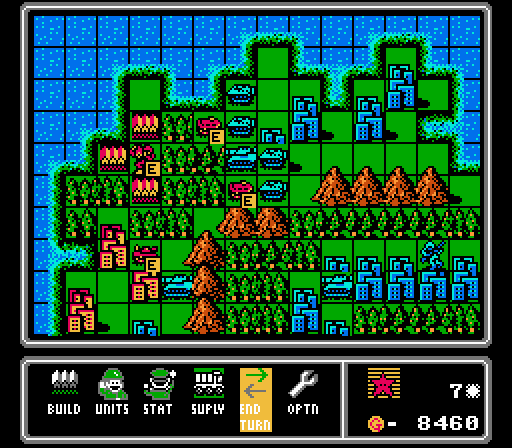
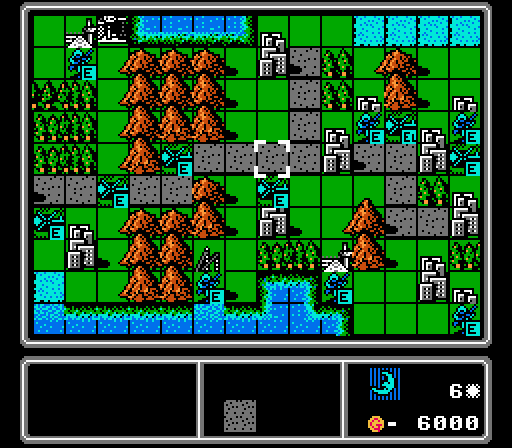
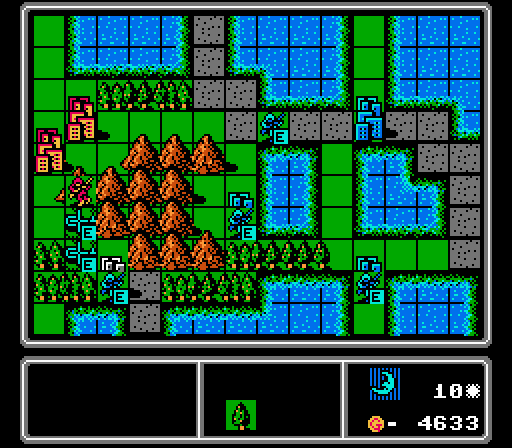
The first map is fairly symmetric, so the only real difference in playing as Blue is that we don't go first. Here you can see we've already formed a cluster in the middle of the map, and taken half of the six-group of cities in the center, pretty much just like in the original run. Red here has more vehicles in the area, but we're the first to build both an artillery and a rocket so between those and our tanks we'll be able to take control here pretty quickly.
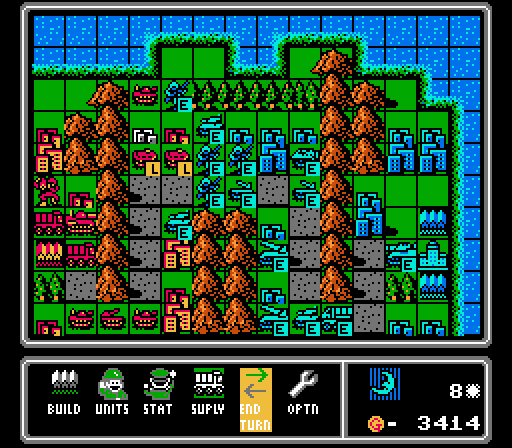
Indeed, a couple of turns later we've thinned out the opposition in the center and deployed another rocket and a medium tank. We prevented Red from capturing more than one city in the center and eventually marched down the road and wiped them out in 17 turns and 1.25 hours. Our original run took 19 turns with hard mode and a mild challenge of only building a unit after the AI had built one of that type.
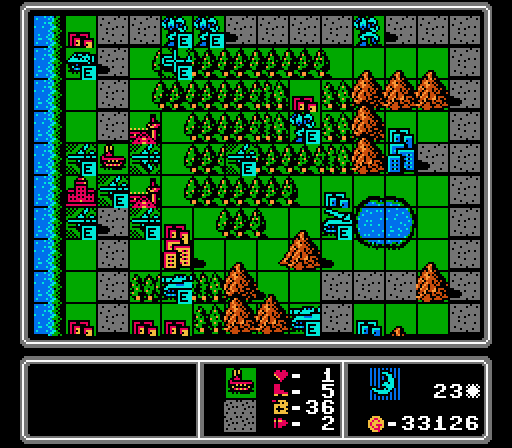
Map 2 - Crater
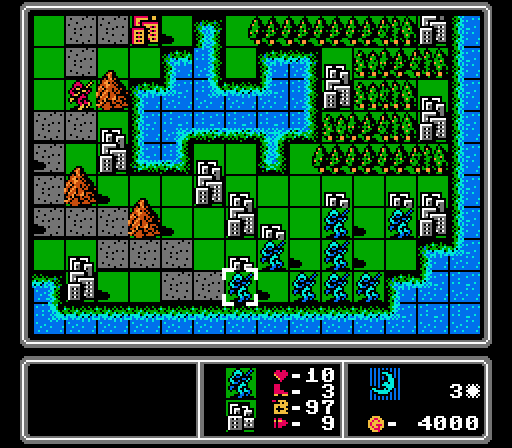
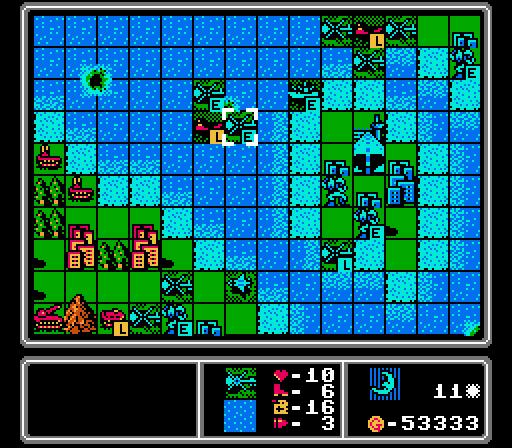
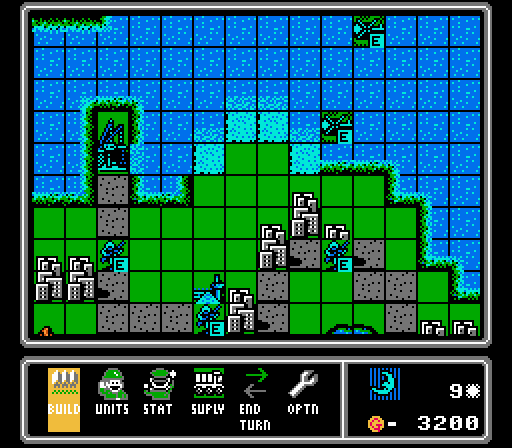
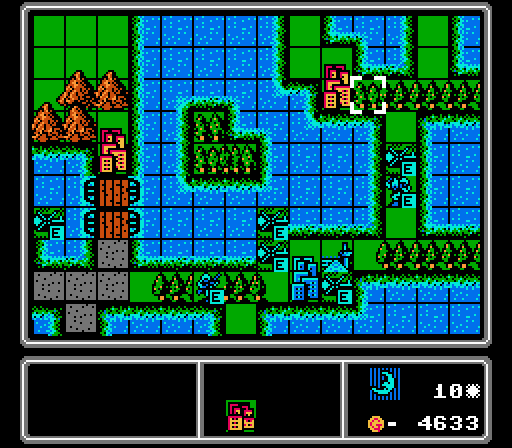
This map is more challenging as Blue, since Red starts with seven cities already under their control while we have none. We have to spam a lot of infantry at first to grab everything we can and try to break even in capturing the remaining cities.
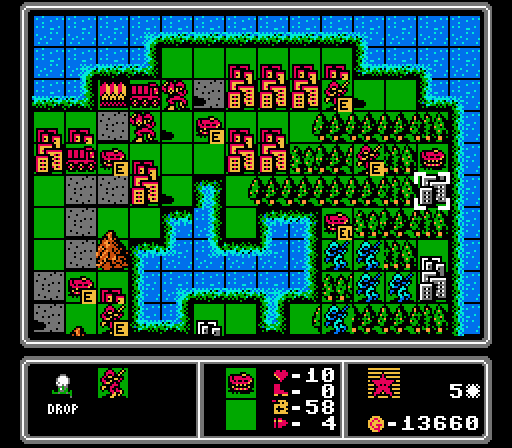
Red puts out a ton of APCs to counter our infantry spam, and the map eventually turns on the cities in the corners and who can grab them first. Here an enemy infantry is dropped off on a city that we really want for ourselves, so I'll actually use our spare infantry to keep it free for a little longer.
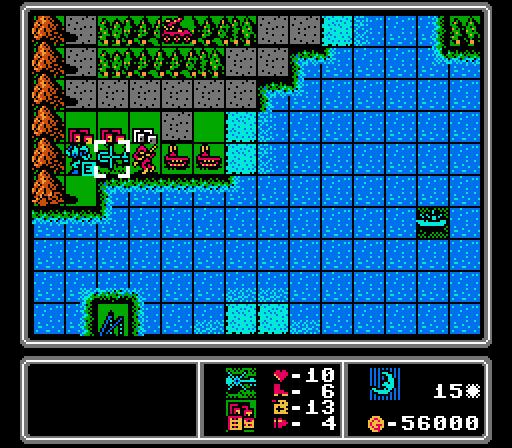
Once we're able to get some vehicles out and stall the enemy advance on both approaches, the map plays out pretty much the same as last time. We end up barely losing the capture race, but we have a tank on a red city that we'll be taking shortly.
Here's the turning point where we grab the last neutral city while also taking the key lakeside city from Red. Overcoming the enemy's initial income advantage took some time but we eventually won this map after 19 turns and 1.5 hours. In the original run, we were slowed down by only having mechs for capturing and took 22 turns to win. Being able to beat that score as Blue in this map is a nice accomplishment.
Map 3 - Triangle
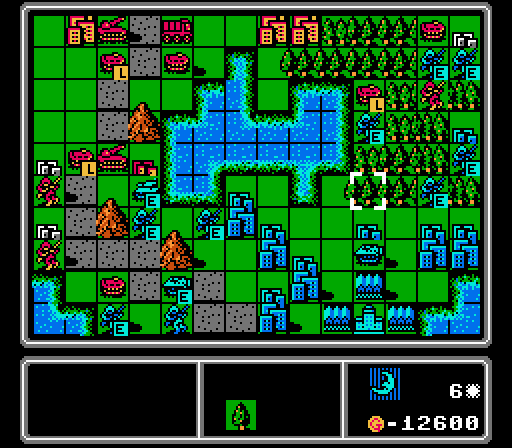
Triangle was slow torture in the original run thanks to a poorly-chosen challenge. In a regular playthrough, the map is pretty symmetrical with 11 cities on each island. Here we're able to get some copters down to prevent a city capture and maintain a slight income edge that will eventually carry the map. We also built an early scout to deal with enemy copters, after initially sending out infantry and copters in the early turns to grab everything on our island.
A few turns later we've landed a handful of footsoldiers. The infantry group is mostly a distraction to keep some enemy units occupied and use up units that had nothing to do after we'd finished capturing everything on our island. The real threat here are the mechs that are capturing Red's cities already and protected by an air screen.
With a growing income advantage we keep throwing out more mech+copter combos to keep stealing Red cities, joined later on by occasional bombers and fighters to claw back air superiority. Mechs are a pain to remove from cities and the mostly air units that the AI has out here aren't well suited to it. The map was still a long one but we completed it on the 23rd turn after 2.5 hours, a vast improvement over the original run. There an initial challenge of only building one unit of each type was too limiting, and even relaxing the challenge after taking control of our island to allow for building two units of each type proved to be more trouble than it was worth, resulting in an excruciating 83-turn victory.
Map 4 - Ball
The fourth map gave us a larger space to play in and our first exposure to the expensive naval units. We start this map with 99,999 gold in order to immediately play with said naval units, and this time in addition to getting two battleships right away I also put out a scout to go harass the enemy copters. Red has a slight advantage here with an extra port and city on its island, so we need to be extra sure we can grab the islands in the middle without taking hits from any enemies.
After building a set of infantry to grab the cities on our island, the next few turns are all about sending out copters and mechs for taking the central islands and advancing the battleships to claim the central sea. Really, the same as the first run.
By the start of the 10th turn we're already landing mechs on the enemy island again. We were able to keep Red from capturing one of the cities on its island, while taking over all of the central islands unopposed.
Our biggest challenge was keeping the landers away; eventually I boxed them in with copters to that our battleship could pin them down and sink them. One lander had a medium tank and a rocket aboard (a total of almost 50,000 G down the drain without firing a shot). From here we had enough of an income edge to start putting out more battleships and then the usual waves of bombers to finish the map. We were victorious after 20 turns and 2.75 hours here, another large improvement over our 33-turn original score. Our original challenge limited what we could build to what the enemy could afford. I eventually abandoned that challenge when it became clear that we were going to win anyway after taking the central islands, with the challenge just slowing us down at that point.
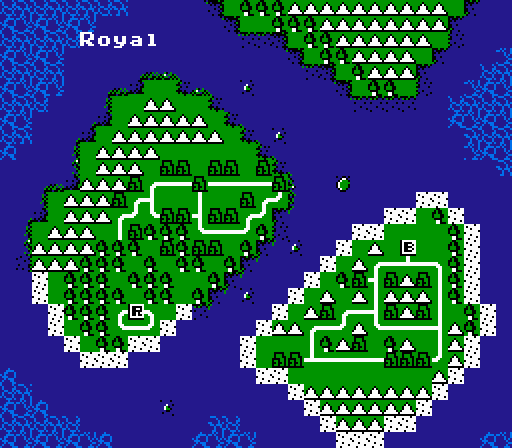
Map 5 - Coral
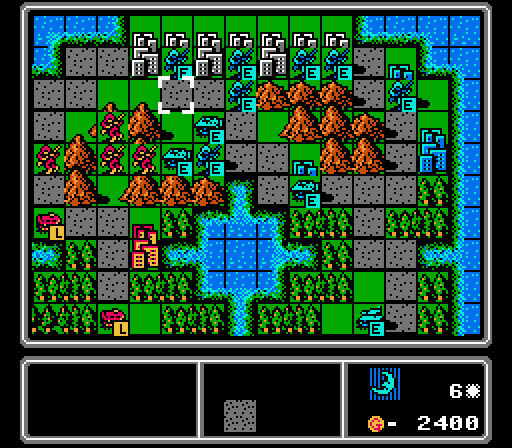
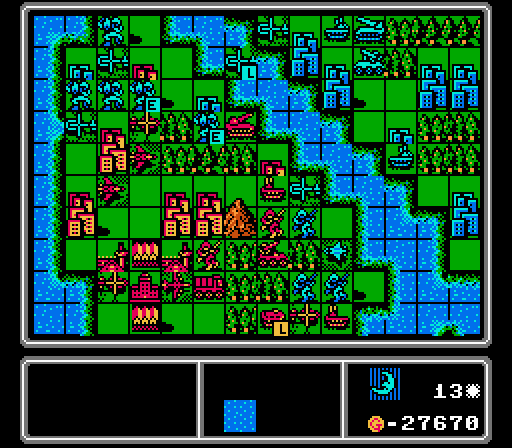
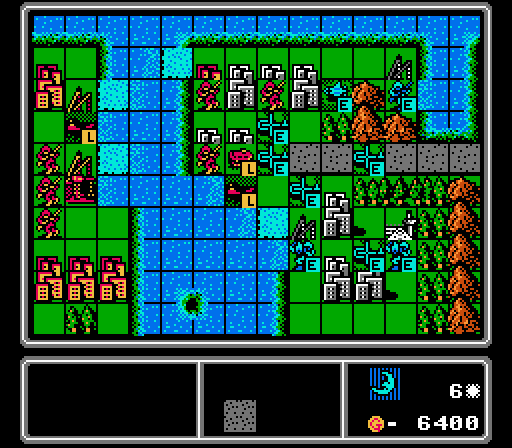
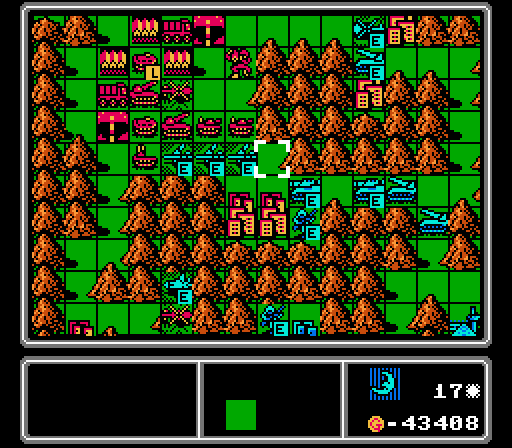
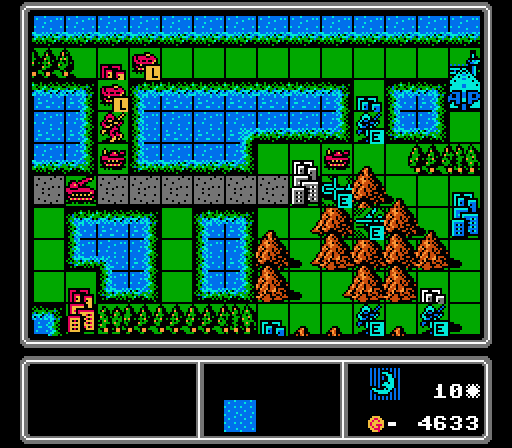
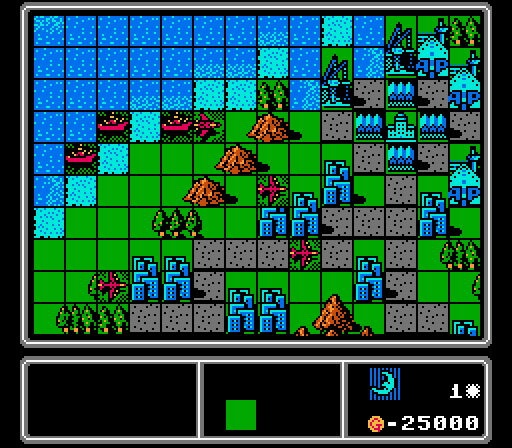
Coral on the surface looked pretty symmetric but a spur of mountains jutting out on Red's side actually gives Blue quite an advantage in the initial capturing phase just from accessibility. We're actually able to take the central lakeside city as well as most of the upper group before Red can even get any vehicles near us.
We end up taking every city in the upper group, with Red only able to capture a single city near its HQ. At this point we had enough income for a medium tank every turn while Red was stuck with just 5,000 G each turn, so the result was inevitable from here. We won in the 16th turn after just 0.75 hours, again a massive improvement on our original score of 35 turns. Our challenge for the original run forbid us from using repairs, and subtly slowed down our advance as we kept having to wait for new vehicles to get all the way around those mountains.
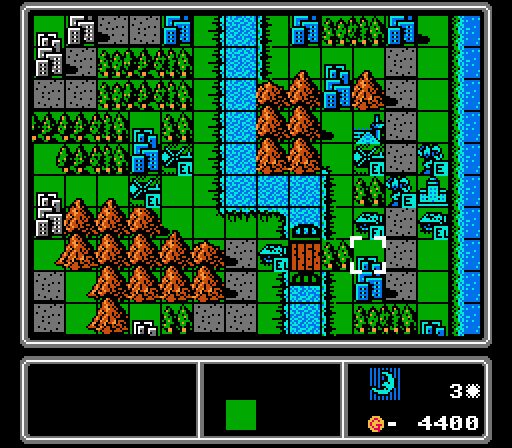
Map 6 - Puzzle
This map was laid out like puzzle pieces, with both sides having the same layout on the end pieces. The central piece had more properties on Red's side, but Blue started with five of the cities on its side. We were able to use that income advantage to quickly send a scout and waves of copters out to contest Red's entrance to the central island.
The AI was only ever able to take two cities here, leaving us to gobble up the rest and send out another squad of battleships followed by more bomber waves. We cleared the central island after just a couple more turns and pressed on to victory after 16 turns and 1.5 hours. Our original run took 26 turns with a rather trivial challenge of not letting air units stay on our starting island after they were built, though we also satisfied a hidden extra challenge by not letting the AI capture any properties in that run.
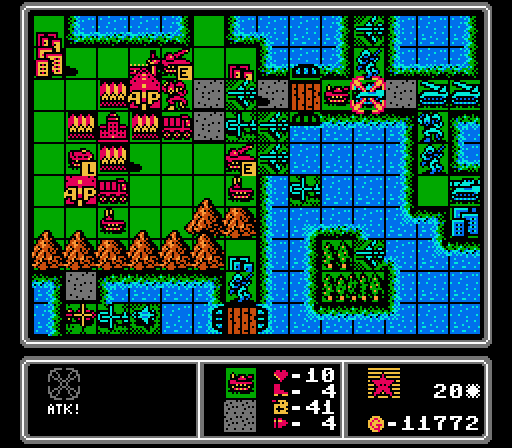
Map 7 - Mist
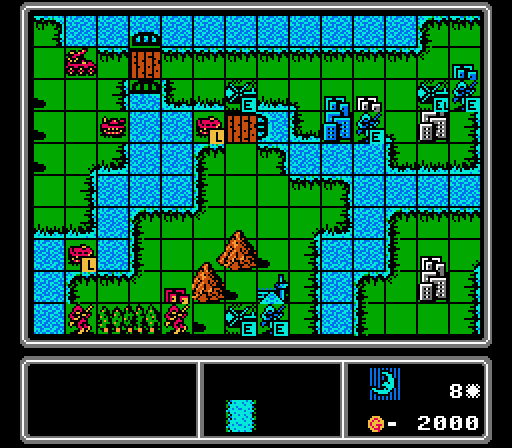
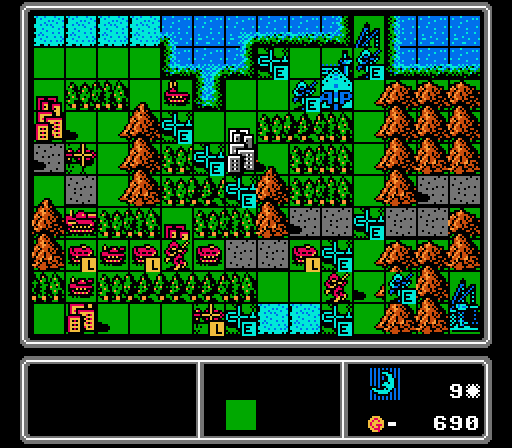
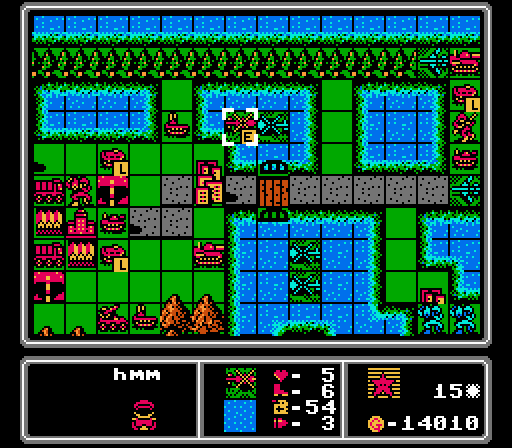
Some of you were asking for this one after we first played it, and here it is. This map is one of the most asymmetric in the game, as Blue starts off owning every city but is hemmed in by forests and mountains so can't stop Red from taking back several cities in the beginning. We start off by rushing out eight APCs (which have great movement even through forests, tear up infantry, and are cheap enough for us to max out production on them here).
An "even" result would be holding on to just two of the outer cities, but you can see we're protecting to three on the lower-left corner and we're holding on to another four in the upper-right region. We have enough APCs so it's all medium tanks from here.
Once the medium tanks are in play, the map doesn't take much longer. We actually won by wipeout on this 7th turn with three medium tanks and seven APCs here all working to take out the remaining enemies. Total runtime was just over 15 minutes! When we played as Red, it took us 28 turns and our challenge of preventing any enemy capture attempts failed halfway through.
Map 8 - Deer
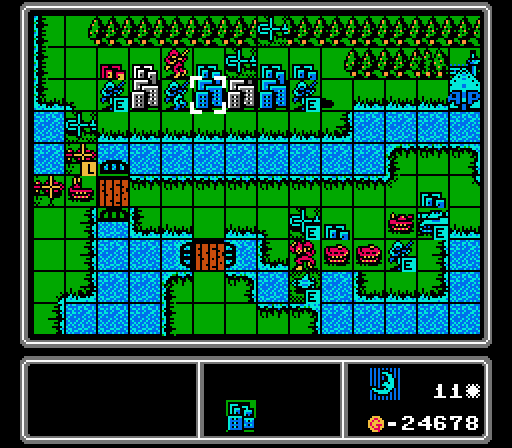
The Deer map is the first jumbo-sized map, both wide and tall. It plays out pretty much the same for both sides, but in this case Red is content to stay on its own island so we're able to grab all the neutral ports and airports and then all of the cities on every other island as well.
We're even able to use our copters to keep Red from taking all of the cities on its own island right away, building up even more of an income edge. That lander is loaded up with a medium tank and a tank, so I also play around with using copters to block the beaches so it can't unload anywhere.
We keep putting out more mech+copter combos to keep Red distracted while we start to roll out our battleships and bombers and get them all the way across the map.
The battleships come out first since they're slower, and once we get more stuff captured we'll start throwing in bombers.
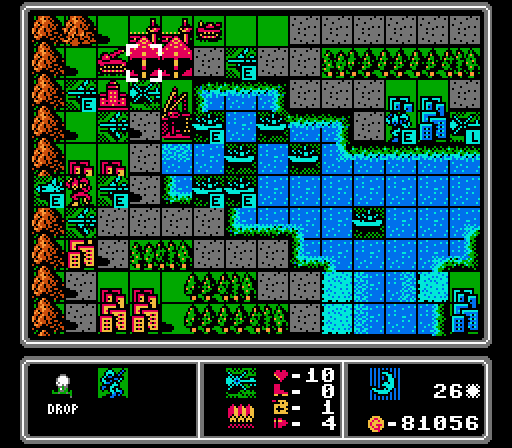
A long time later we finally have enough heavy hitters at the enemy HQ to wipe them out on turn 27 after 3.25 hours. Our original run took 28 turns with a challenge of spending as much cash as possible, that ended up mostly resulting in the same stuff getting built anyway. Just not much to be done to speed that one up. Pictured here though is another game quirk I discovered - copters can't unload directly onto the enemy HQ, making an HQ capture victory even more unlikely to happen naturally.
Map 9 - Alara
Another map that is mostly symmetric so plays out pretty much the same as last time. We rush copters to grab the neutral airports first, then use the same copters to block off the mountain passes and pin Red close to their HQ.
Eventually we start putting out a couple medium tanks and rockets to hold the passes, followed shortly thereafter by the typical bomber train.
Soon after Red is pushed back even farther and we start taking the rest of its cities, cutting off its income and sealing the map. It took a few more turns to finally get the wipeout victory here, but we won after 21 turns and 2.25 hours. The first time through we had two challenges - always moving towards an enemy unit, and not using any ground vehicles - and won in 26 turns.
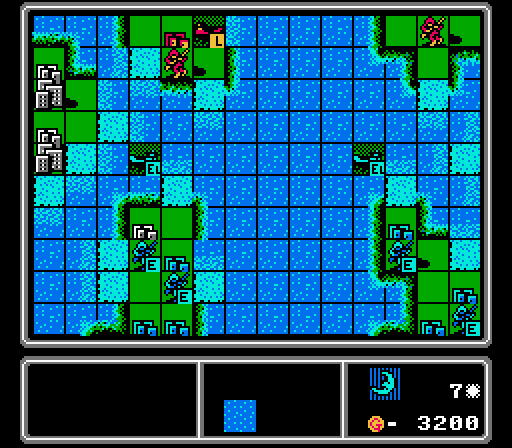
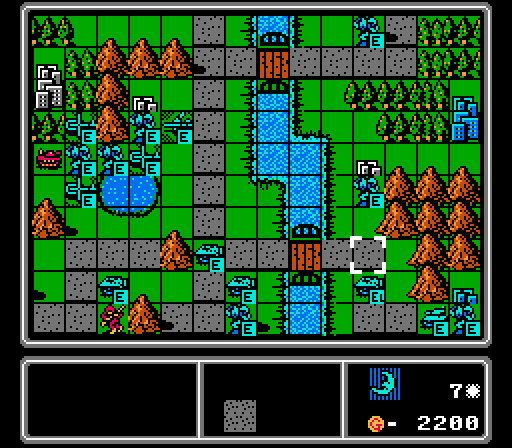
Map 10 - Lost
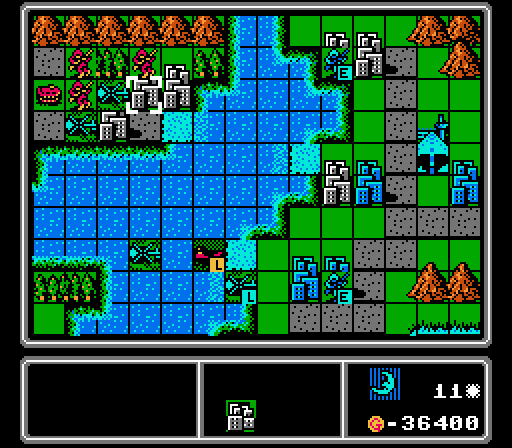
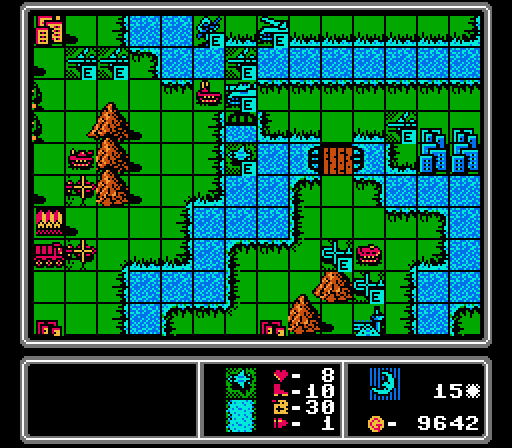
Lost is an interesting map with a lot of rivers separating the two HQs. We start off the same way with copters headed first for the neutral airports and then grabbing as many cities in the center of the map as we can.
This cluster of cities is still key, and we're able to grab most of them. Red does get one city here and one down by the airport in the previous shot. However we have a medium tank much sooner than last time, now that I know they can cross rivers.
Anyway we soon gain full control over the center of the map and start the bomber train up again. We cleared this map in just 20 turns and 1.75 hours. Last time it was 35 turns with a challenge of only building units up to the number that the enemy had deployed, slowing down the snowball effect.
Map 11 - Volcano
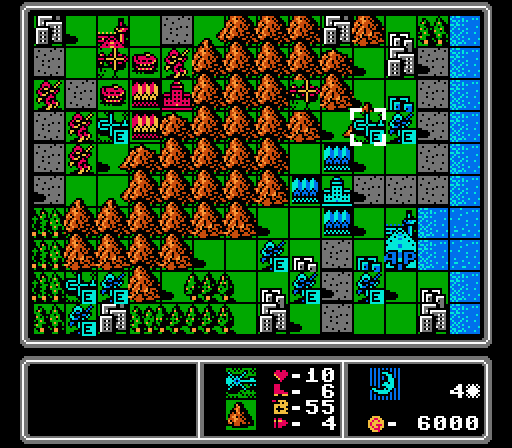
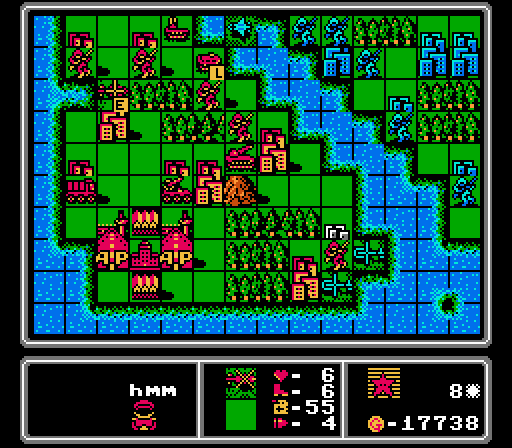
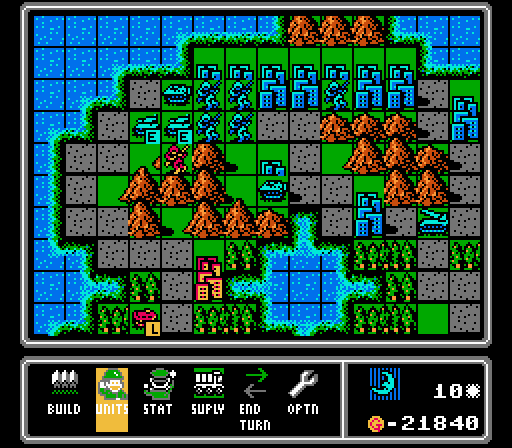
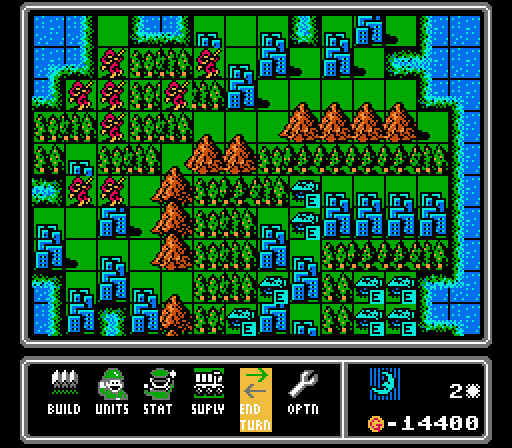
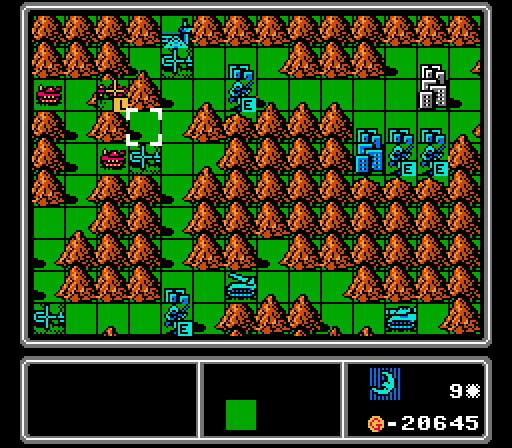
This map is another even one. We spread out infantry to grab the corners before Red can get there; doing so eventually gets us a 16k-to-12k income edge, that we then have to exploit over the next several turns. Our one advantage here is the city we just took in this shot is really a base, so we can build our heavy vehicles a little closer to that upper pass.

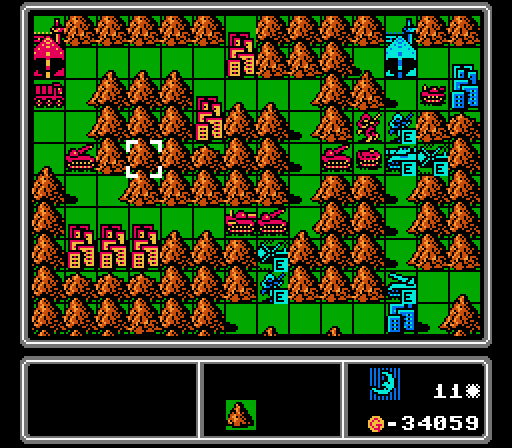
Ever so slowly we pile up heavy vehicles through the upper pass, drawing in the enemy units and then finishing them off with an artillery and a rocket. The lower pass I hold with a handful of infantry getting defensive bonuses on forests and cities until we can get another set of vehicles down there. By that time we're able to afford bombers every couple of turns, and use them to bust the lower pass open and surround the HQ. We win this map just a couple of turns later on turn 19 with a runtime of just 1.5 hours. The first time around our challenge was to avoid using copters or bombers, a pretty severe limitation for my usual strategies. Instead I one-upped myself and won the map in 22 turns using just a handful of infantry and then around 72 mechs to meet an additional challenge of using no ground vehicles or air units at all.
Map 12 - Turtle
The Turtle map is a little easier as Blue. We start off with an extra city, and there are two additional neutral cities on our starting island. We're able to grab the two small islands first and secure a solid income edge early on.
From there we start throwing out battleships and a ground invasion force. No airports, so no bomber waves in this one.
It doesn't take long to snowball from there. Our biggest holdup was running out of ammo on the battleships; we eventually had 13 of them out there and wiped out Red's forces on turn 24 after 2.0 hours. Our original victory was on the 35th turn, with a tricky challenge that required us to score a kill with every unit type.
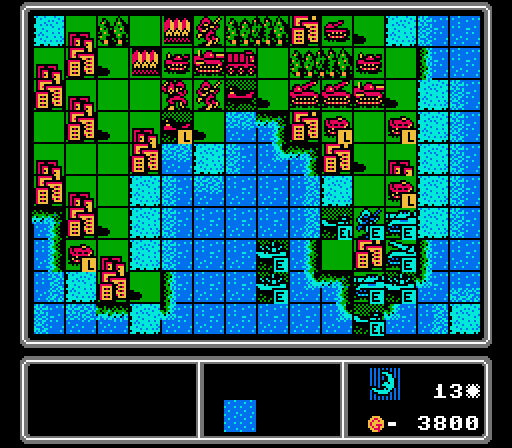
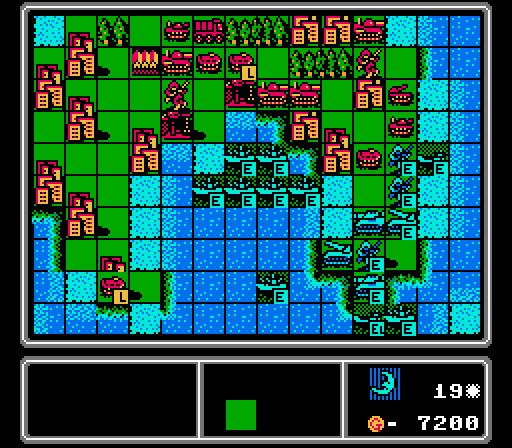
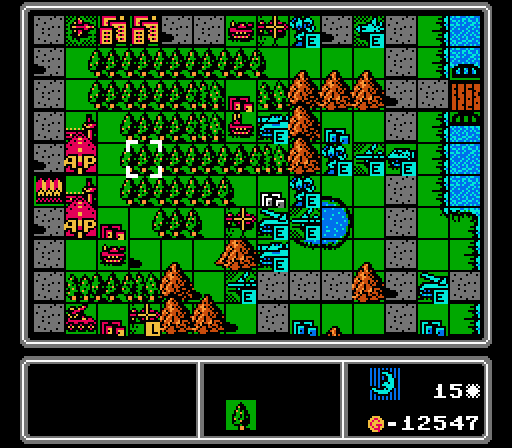
Map 13 - Squash
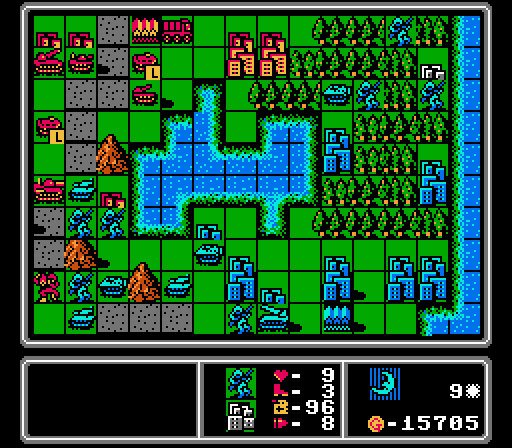
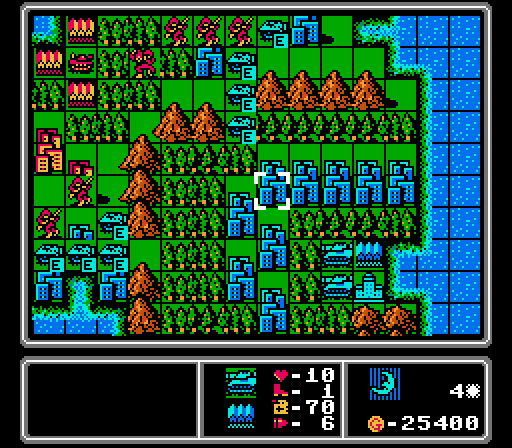
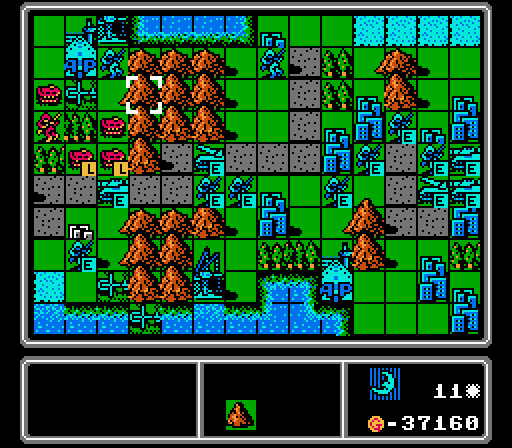
This map is another Blue-advantage one. It's a super-wide map with a thick mountain range splitting it in half, and Blue has four extra cities in its half. Pictured here is us grabbing everything in our half, plus the airport and port just on the other side of the mountains.
A few turns later we have spare copters trying to hold off the Red horde until we can get turn our cash advantage into solid reinforcements.
It's a long road but eventually the medium tanks and rockets make it to the central pass, at which point we start picking off enemy vehicles and sending forth bombers to wrap things up.
It takes a bit longer to drive Red back and dislodge their heavy units from the HQ area, but eventually we just overwhelm them with numbers as usual. We are victorious after 23 turns and a sporty 2.5 hour run. The first time through we won in 30 turns while meeting a challenge to produce as many units as possible while spending as much as possible. Lots of mechs again in that one.
Map 14 - Cube
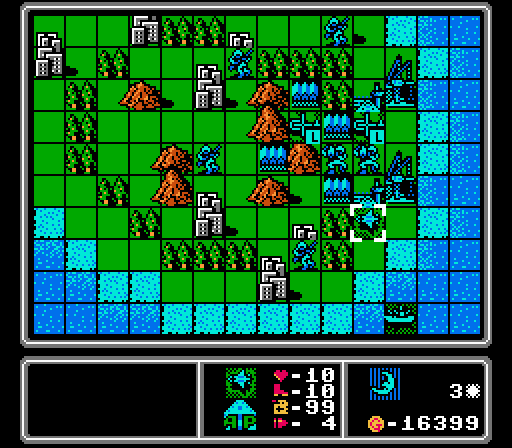
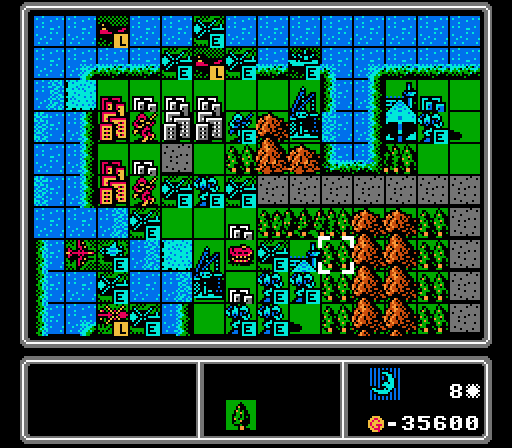
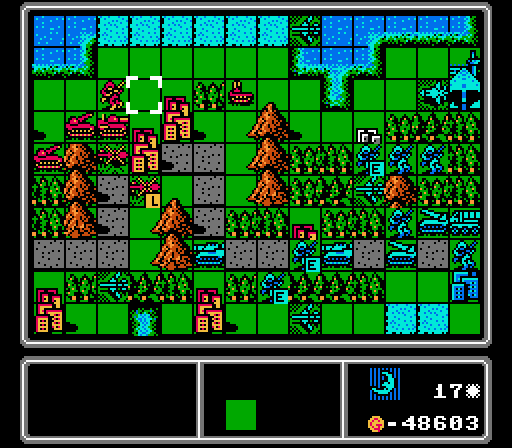
Now here's an interesting map where the cities are so spread out along narrow land paths, that our usual copter-swarm capturing strategy is even more effective than normal. Here we've got the lower-left corner locked down, grabbing the airport and several cities for our own while Red was only able to take two itself.
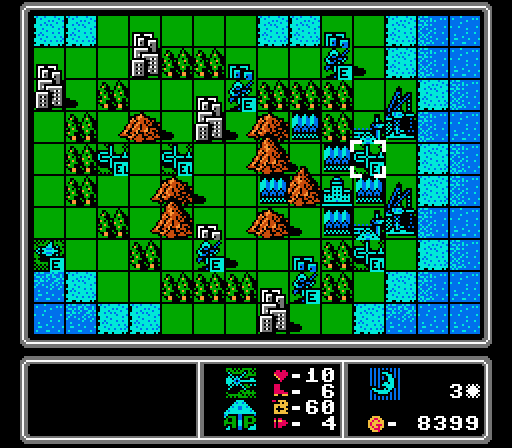
The center region looks a lot like last time, with even more copters.
The upper-right corner is where Red sends all its vehicles, due to an inconvenient mountain range separating its HQ from the lower half of the map. Still we're able to stall the enemy AI enough to capture most of the properties in this area and keep Red mostly bottled up until we can get some bombers deployed.
A few turns later and we have an advance squad of Red units trapped on a land bridge with the remaining forces stuck in the HQ area, as we close in with an air force of bombers, scouts, and copters and a newly-built ground force of medium tanks and rockets making their way slowly across the map.
With enough ground forces in play to handle the anti-air units, enough scouts and copters to take out the enemy copters, and enough bombers around to wipe out everything else, the end of the map just turns into a shooting gallery. We actually win this one just a couple of turns later on the 22nd turn with another 2.5-hour runtime. Our original run had us winning in 29 turns, with a challenge requiring every unit type to get two kills and really slowing us down waiting for anti-air tanks and missiles to get all the way over to the enemy HQ and shoot down some copters. We also got to play a fun bingo game with squares called based on what units got kills in which turns.
Map 15 - Mirror
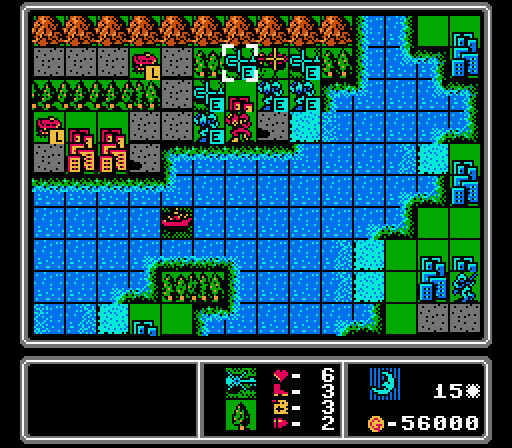
I haven't shown the early turns much in this run since they're usually all the same, but the Mirror map is a bit different. Blue starts off with nine additional owned cities, but only four neutral cities in the center area to take. We also only have a single airport, so can't flood with copters very effectively. So for probably the only time in this run, I put out an APC every turn to carry our footsoldiers forward for capturing duty. We also go with mechs instead of infantry, since we have the extra cash and they're better able to hold any captured cities in enemy territory.
You can see it doesn't take long for us to not only have captured what's left on our side of the map, but also land a sizeable force on Red's island to start taking a couple of cities there. We even have a bomber out at the front already.

Soon we've got a couple more of Red's cities and our heavy ground vehicles making their way to the enemy island.
Another few turns later and we haven't made a lot more progress but we've gotten more reinforcements to form a pretty solid entrenched line and thinned out Red's forces a fair bit.
Then the bomber train starts rolling and Red is forced back further and further.
Of course in keeping with this LP, we fall just one attack short of finishing the map on this turn. That bomber that hasn't moved yet has no ammo. Instead we win on turn 24 with another 2.5 hours gone by. The first time around we challenged ourselves to only build up to match what the AI had built (not difficult with Blue having the income advantage early on) and took 35 turns to overcome Blue's early advantages and claim victory.
And with that, we've steamrolled through every map and claimed a Blue victory on each! With a grand total of 298 turns and 28.75 hours, it was actually a fun campaign for me that made this game actually feel like playing a game again.
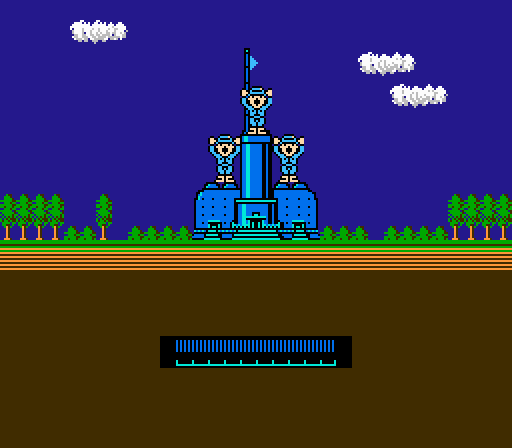
Of course, we're not done quite yet. Winning every map as Blue unlocks the second bonus map! After the slog the last one turned into, I have to admit I'm a bit nervous now....
Oh good, a naval invasion map....
Holy shit, look at that start. This one may actually be impossible!