Part 53: Royal (1 of 2)
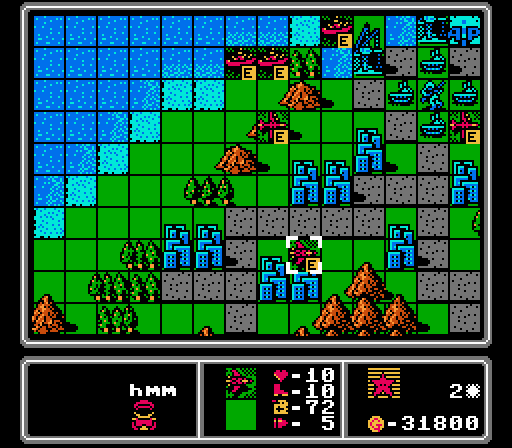
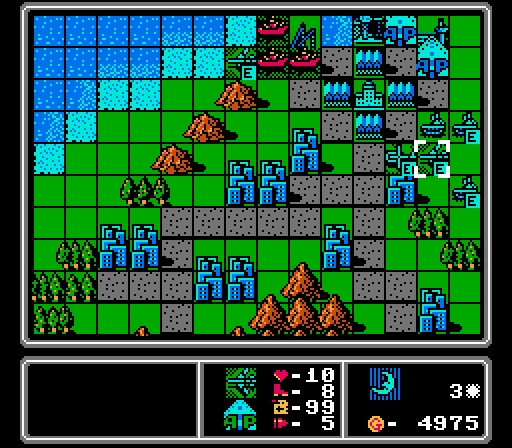
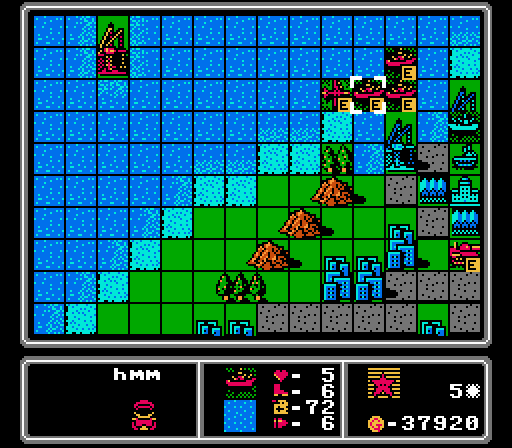
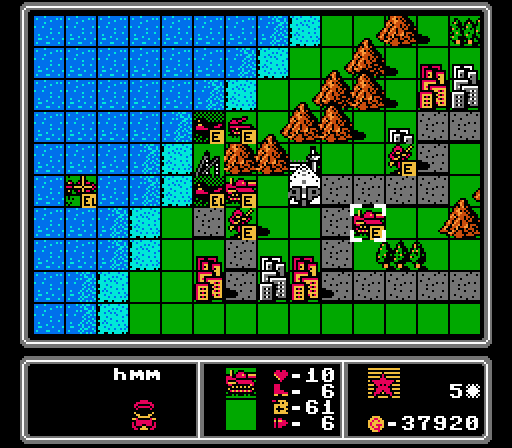
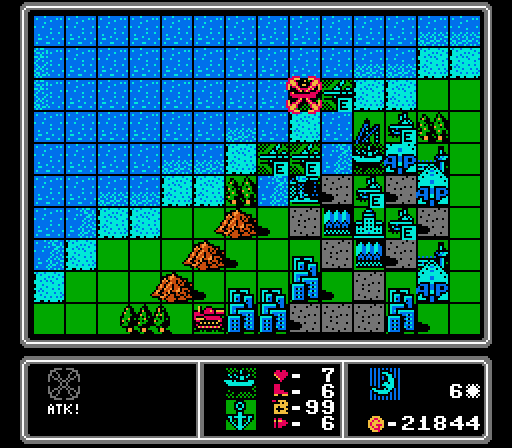
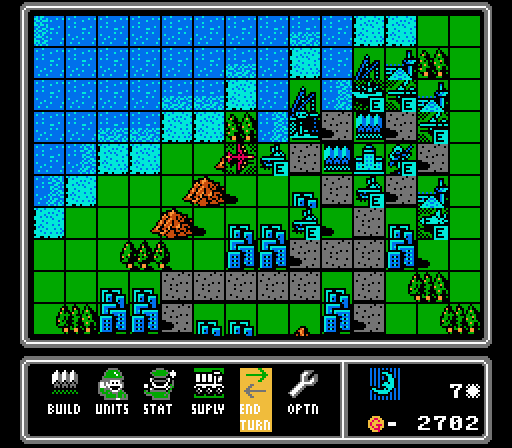
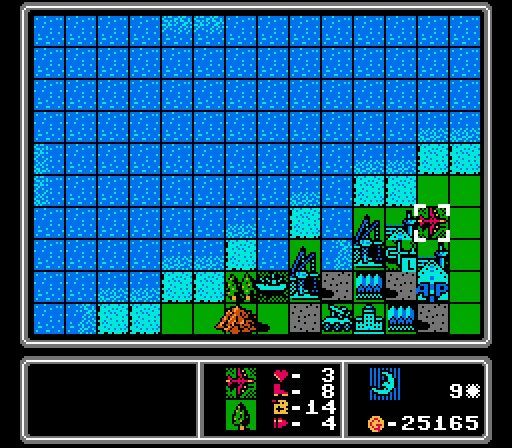
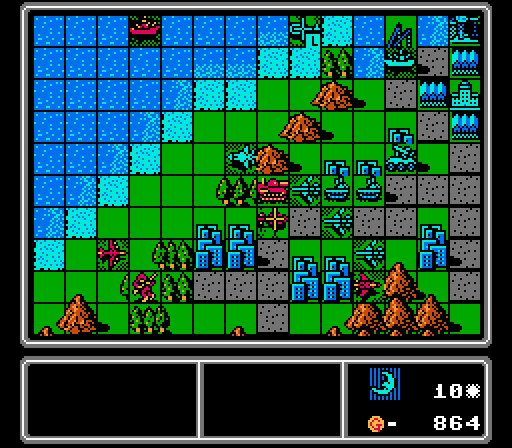
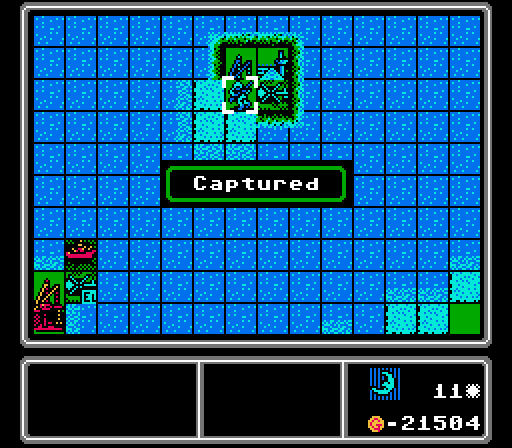
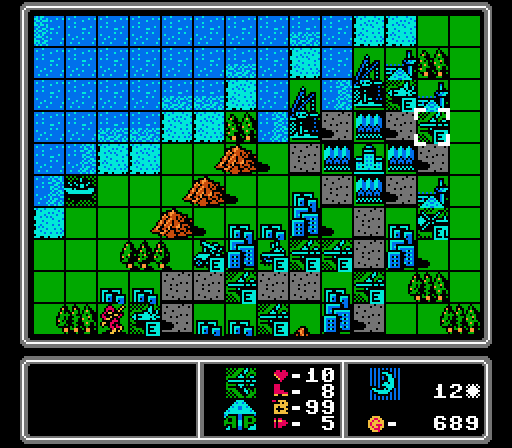
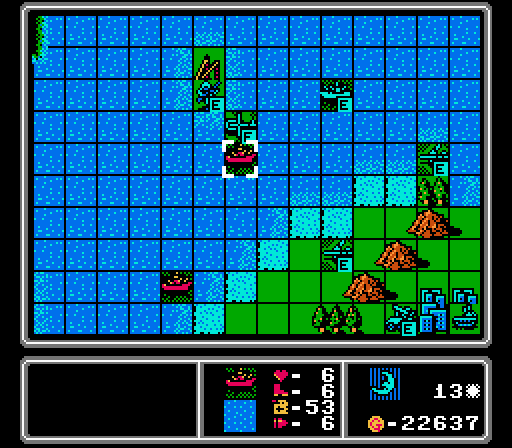
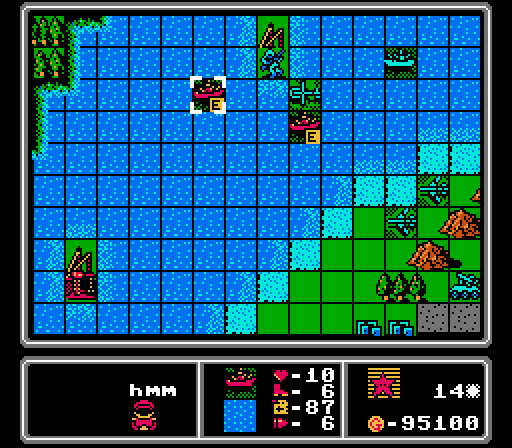
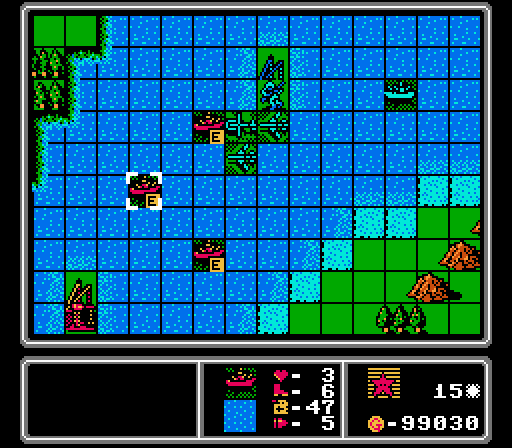
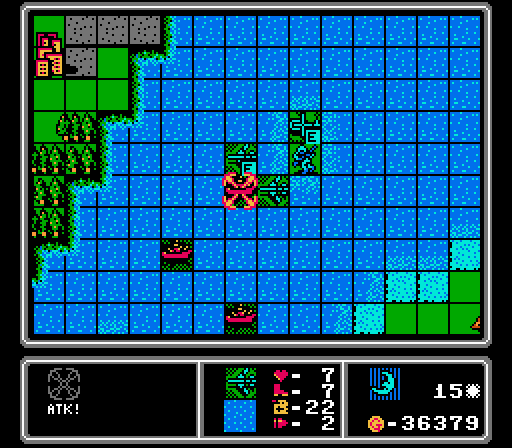
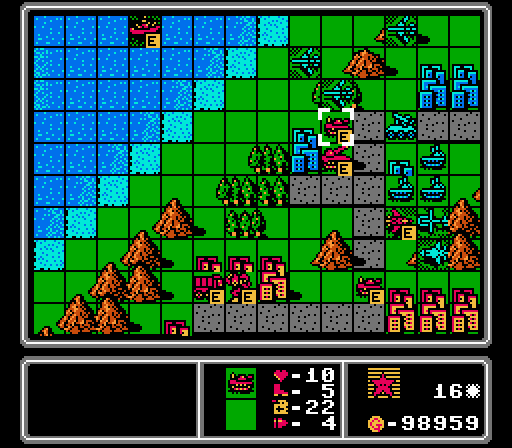
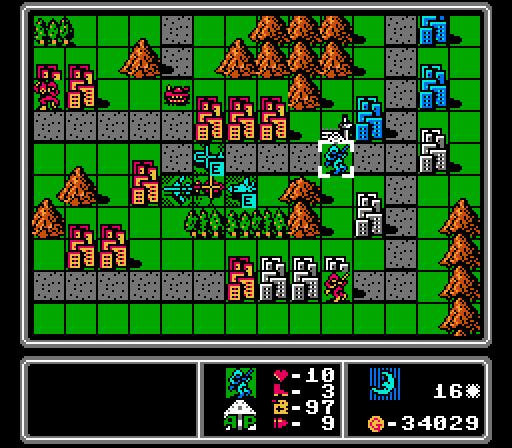
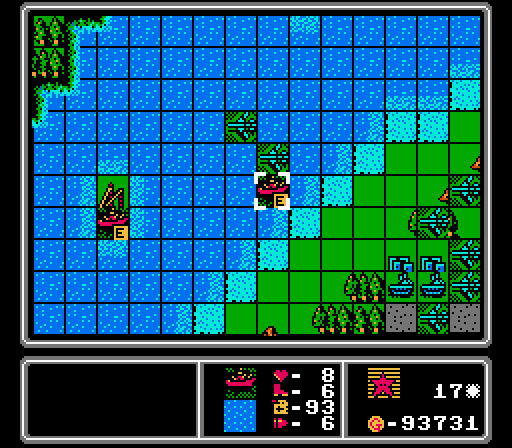
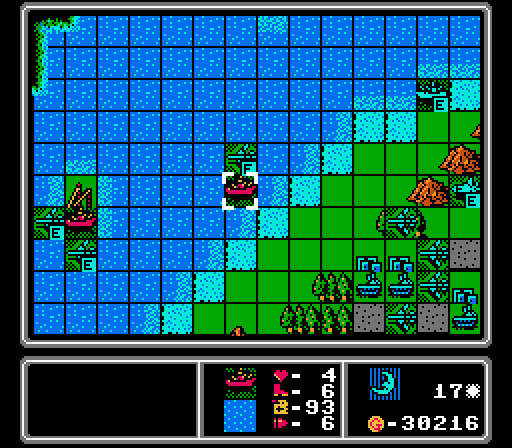
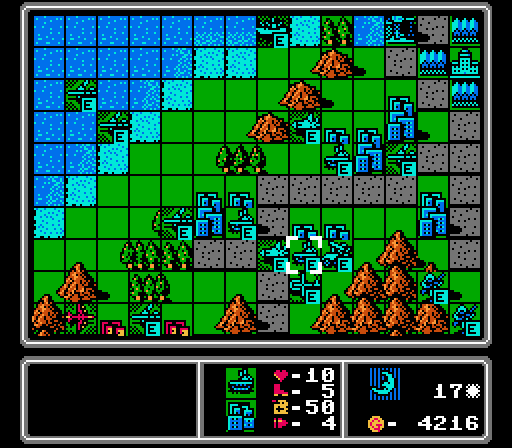
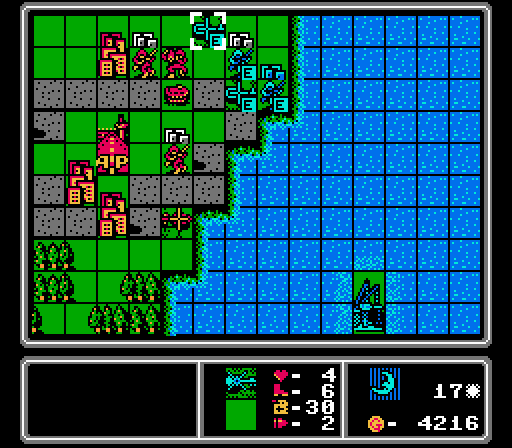
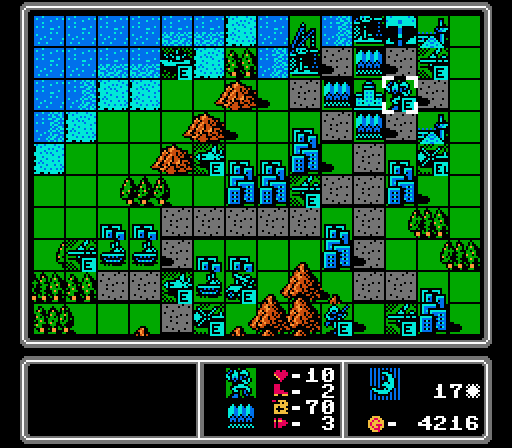
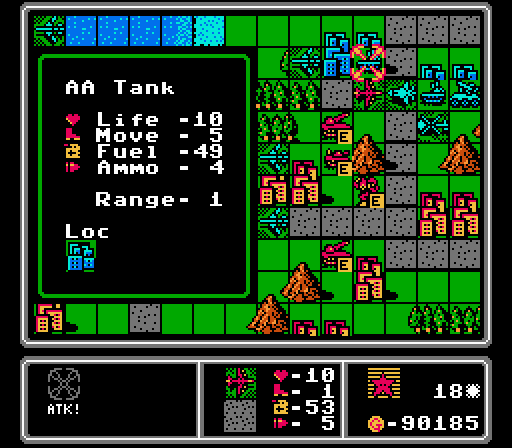
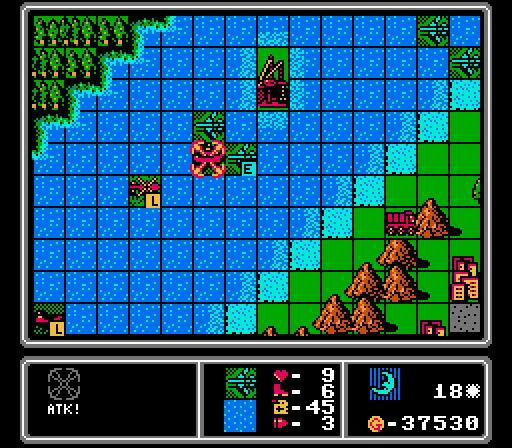
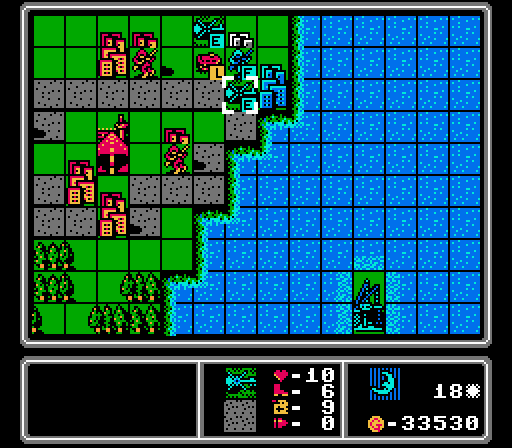
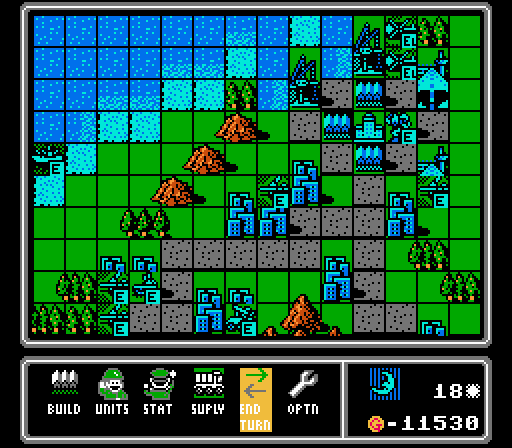
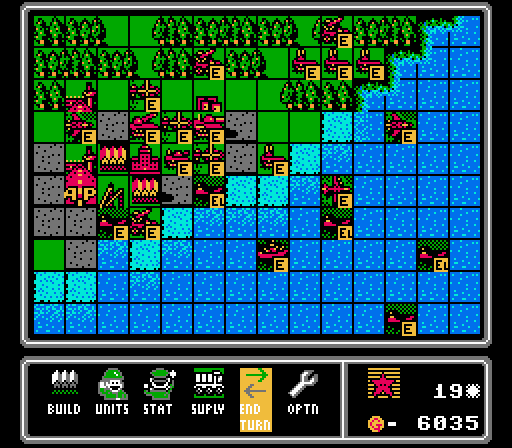
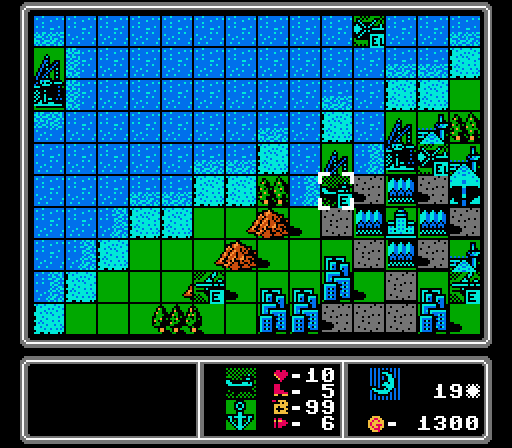
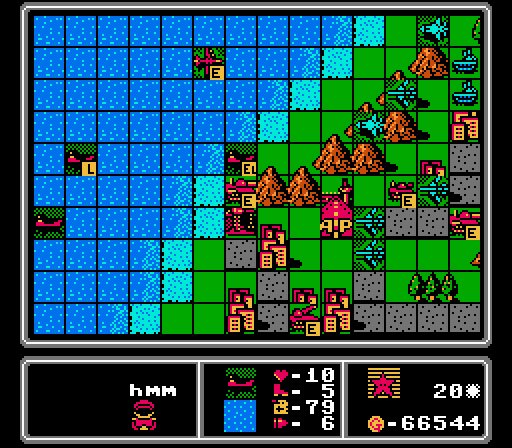
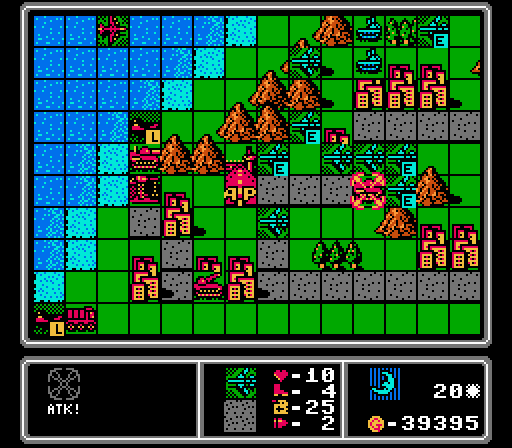
Part 53: Royal (1 of 2)I spoiled the surprise last time, so here's the full map now:
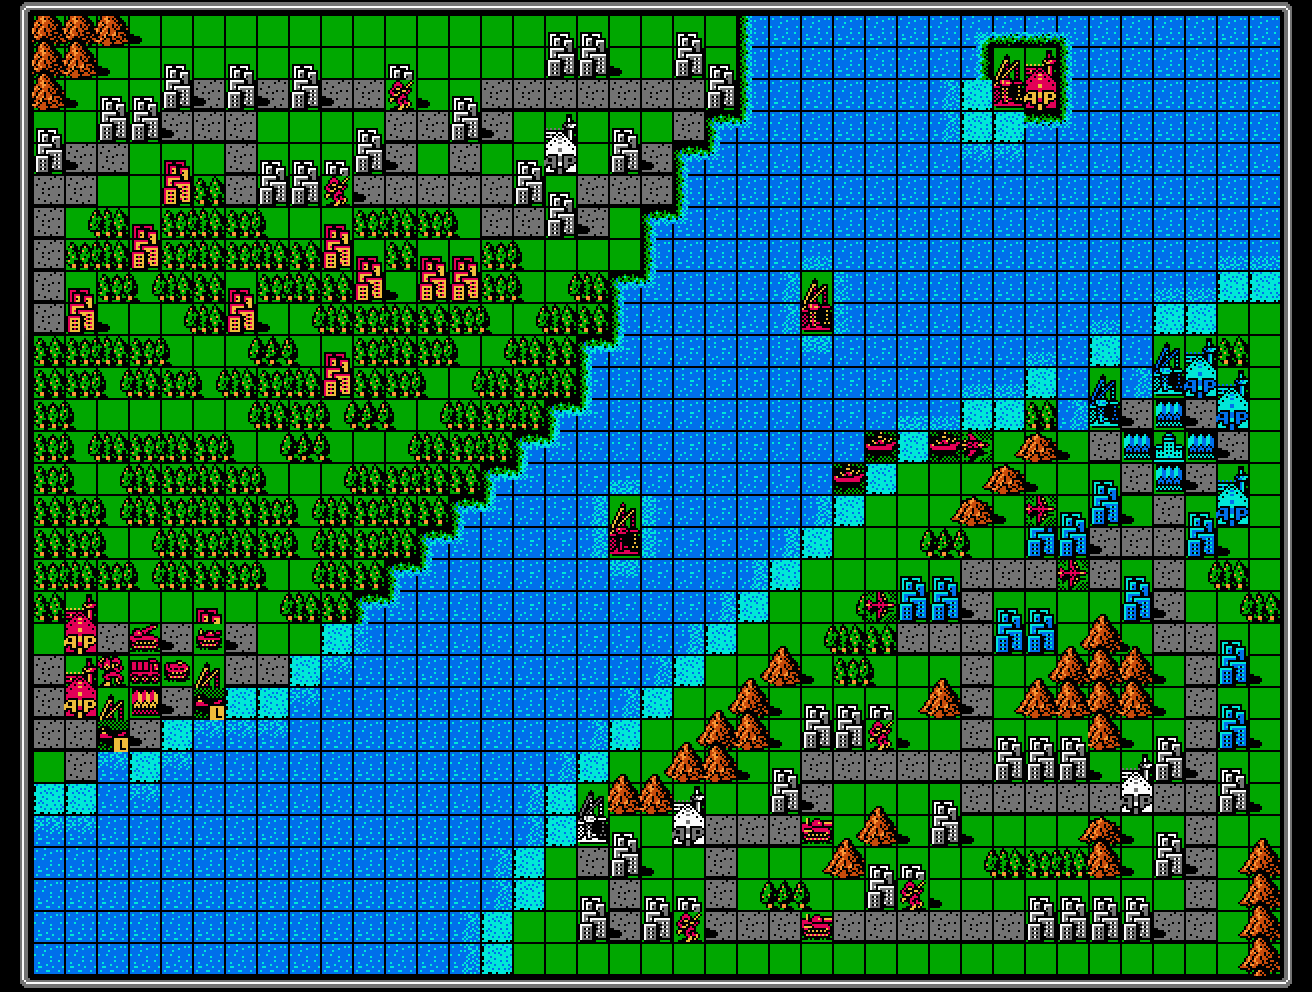
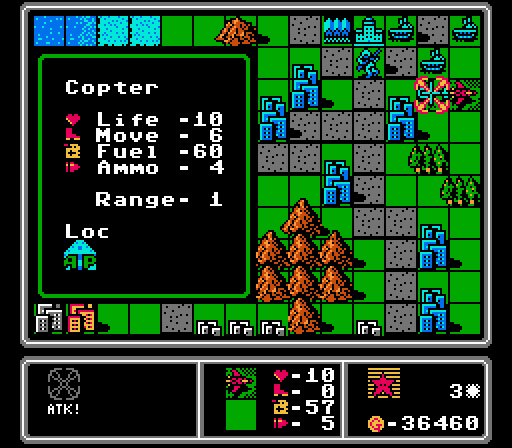
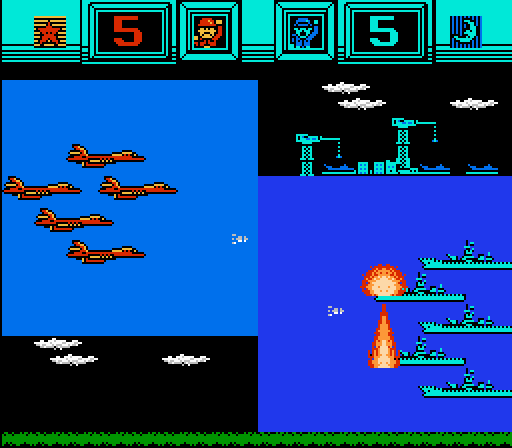
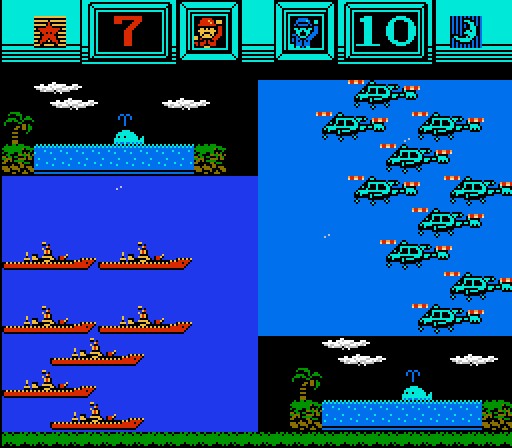
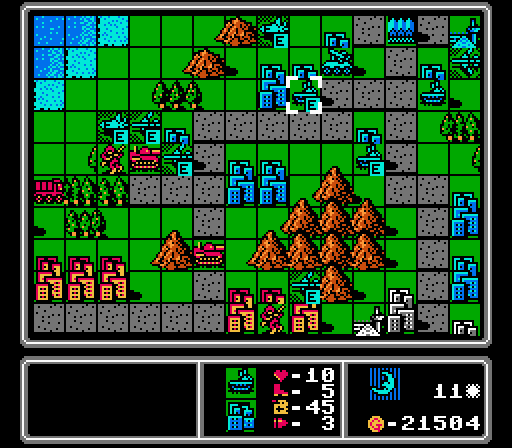
Here we have the larget map of the game, just edging out Shark (Red's bonus map) by being two tiles wider. It's also a whole new level of unfair, since Red still goes first so gets to move all its pre-deployed units before we can even build anything to stop them. So we start our first turn with four planes and three battleships already in view of our HQ! Elsewhere on our island we have two medium tanks and three infantry to capture all our stuff. Meanwhile Red also starts with two more infantry for capturing on its own island, plus two landers that are each loaded with a medium tank and an artillery. (Plus the random things that Red built on its first turn, still sitting around its HQ area.)
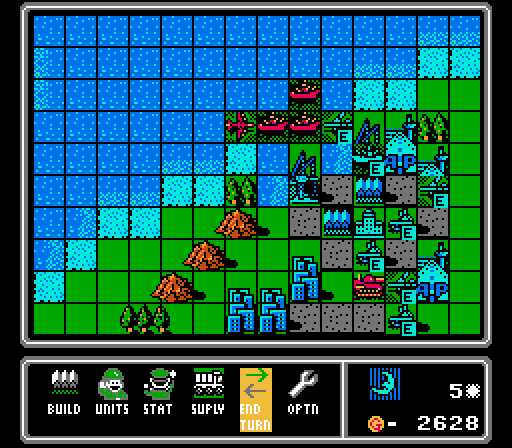
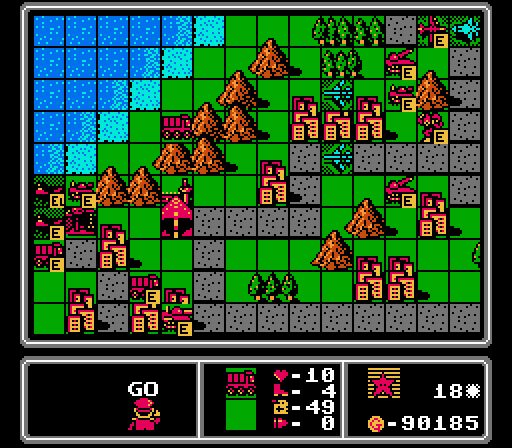
Turn 1

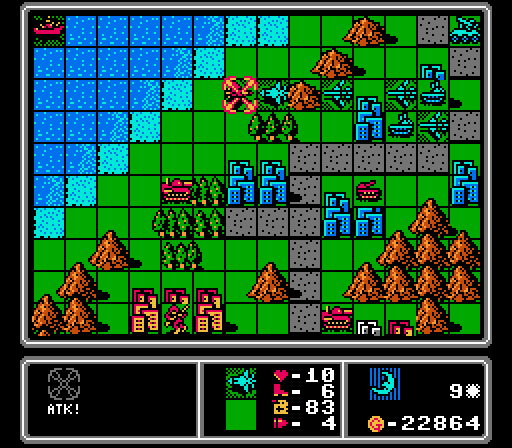
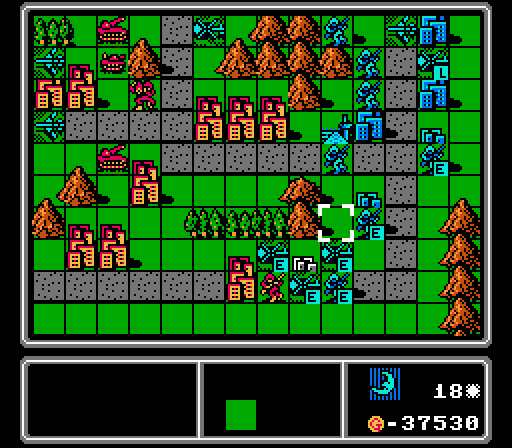
I missed Red's part of the turn but you saw where all their stuff ended up. Three of the planes will be on us next turn so we need some AA tanks right away to fend them off. We can worry about the battleships next turn. We also put out an infantry in the center just to tempt the fighter in closer, but it doesn't end up working.
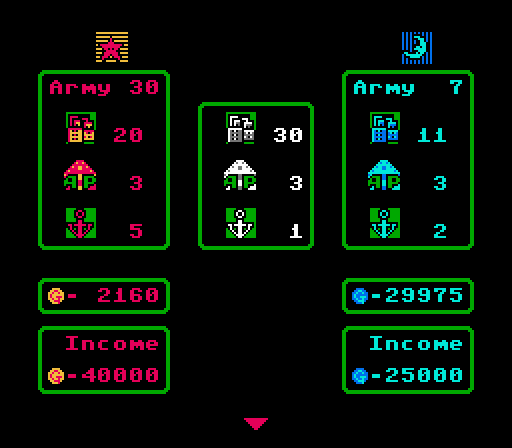
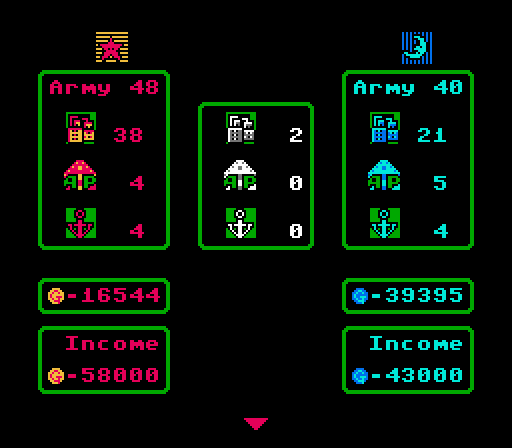
All told Red starts off with 248,400 G in pre-deployed units, a 17% increase over Blue's advantage in Red's bonus map. With so many forces arrayed against us, and us not even having the first turn advantage, we must be pretty screwed, right?
Not quite; we actually have several factors that make this map even easier than Red's bonus map:
- We start out with a little bit more income, though Red ends up with even more. But Red's extra income won't come into play for 6-7 turns, while our extra income can be used to fight off the immediate problem now. For instance, we got four AA tanks on the first turn this time instead of just three.
- The large separation between the two islands allows us to pretty easily focus on one island at a time, and we have the supply line advantage on our island.
- The AI is flat-out terrible at naval maps, particularly when trying to manage moving ground units over in landers.
- There are no AA tanks on our island (or AA missiles), and the AI is never going to bring over any. So we only have to worry about the battleships (which can't move and fire or counterattack) and the occasional fighter. Combined with our extra income, we can just put out bomber after bomber right away to sweep our island clear of enemies.
- The tiny isolated islands in the middle are easy for us to reach and grab once we can spare a copter and infantry.
- We actually have an extra airport near our HQ, and it has a very special purpose with its positioning....
Anyway, let's see how badly my analysis turns out....
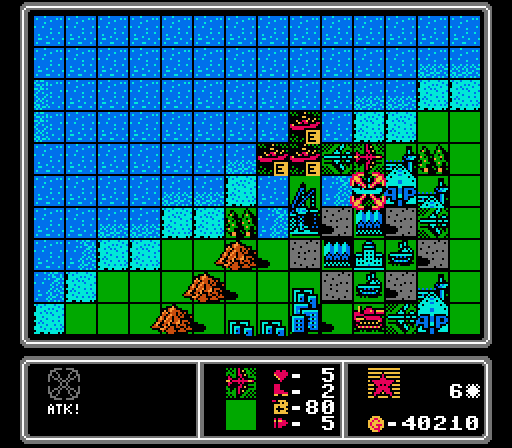
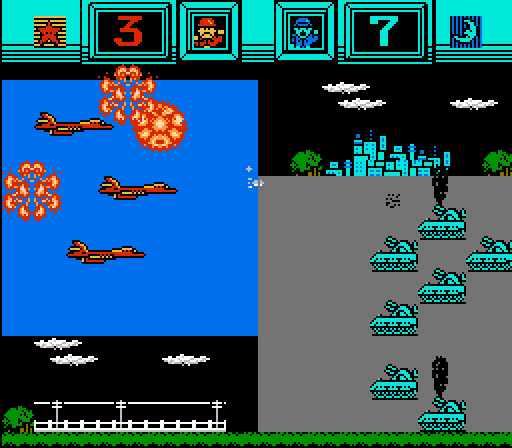
Turn 2
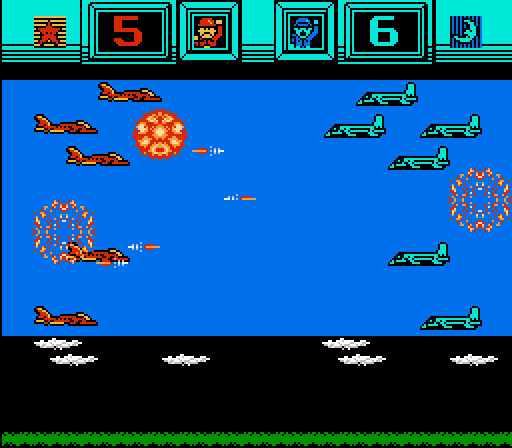
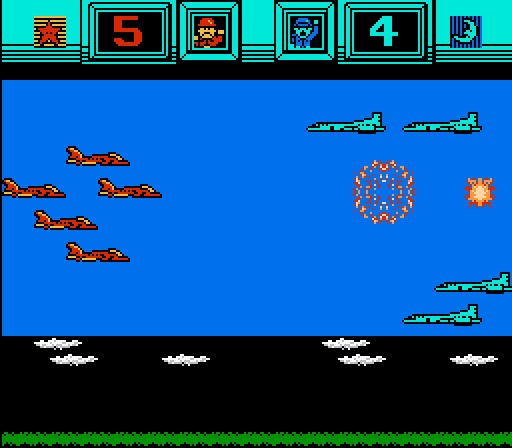
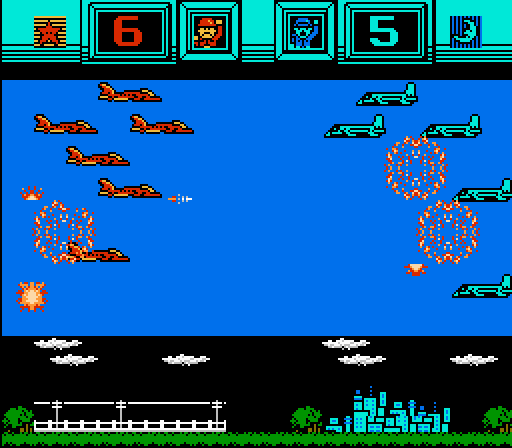
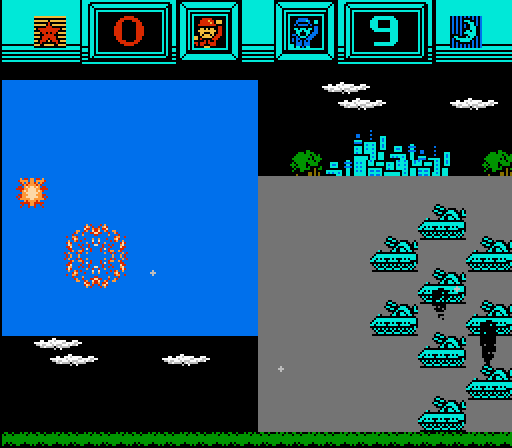
Picture five of these happening every two turns for the next ten turns.
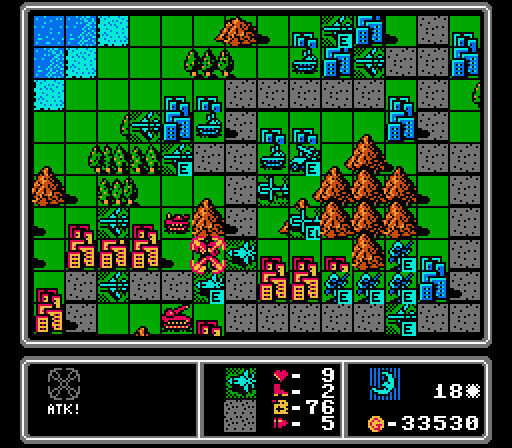
Two bombers lose half their life on our fortified AA tank, while the other bomber and the three battleships creep closer. The fighter unfortunately stays away, ruining my initial strategy.
Red's income starts high and keeps climbing for the first 20 turns or so, so just imagine lots of stuff getting built every turn. I'll let you know when dangerous units are headed our way.
Our AA tanks finish off the two bombers that came after us and heavily damage the other that thought it could hide in the mountains. We can't reach the fighter so our new bomber is built with a screen of AA tanks protecting it. Note how our units have to pull away from the HQ due to the approaching battleships.
Turn 3
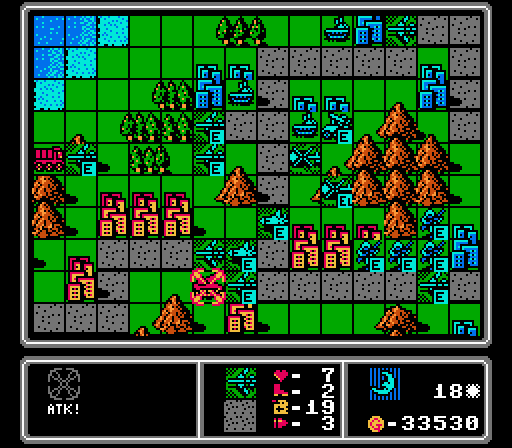
We do lose this AA tank to one of the battleships, but crippling the bomber was worth it. That bomber ends up retreating to the tiny island with the airport on it.
This copter is much better bait for the enemy fighter. Better still, a damaged copter is just as capable of carrying our infantry around, so I don't even care that it takes a hit here.
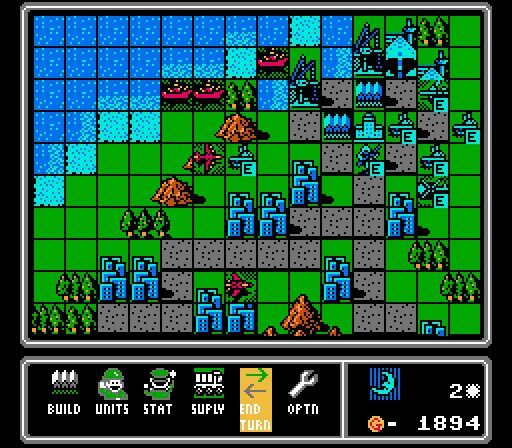
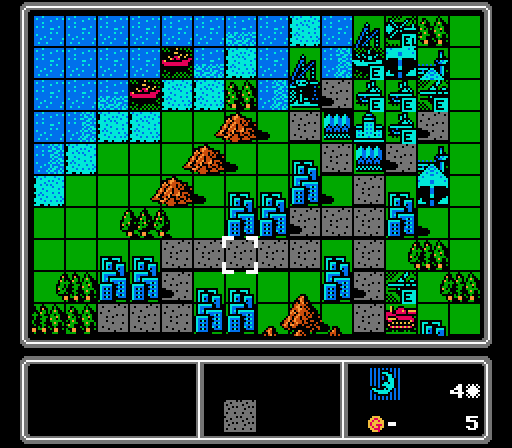
The battleships helpfully bunch up, allowing our first bomber to get in a risk-free shot on it. Bombers are the only way to reliably hurt battleships, so we're just going to keep pumping them out here. Elsewhere two AA tanks finished off the enemy fighter, allowing us to keep building more bombers risk-free. Highlighted is our special third airport. You may notice that the lead enemy battleship is able to fire on all of our bases, both of our ports, and two of our airports. This special airport is literally the only place we can build right now without eating one or more battleship strikes right away. Without this airport, I'm not sure we could fight our way out of this starting position.
Turn 4

Man not going first really messes with my writing flow. Anyway the battleships spread out and cover each other so we can't get in another free hit. However they also pulled back far enough that I can afford to leave them alone this turn.

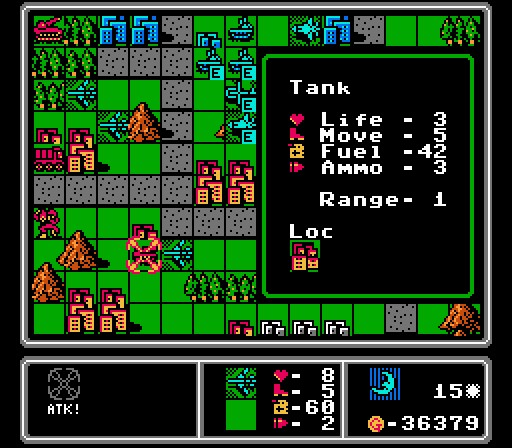
The two medium tanks that started out on our island are almost to our HQ, so we'll have to deal with them soon. Luckily the bombers serve well against both battleships and medium tanks.
Rule of thumb for the first half of this map is the same as for Red's bonus map - we want to keep Red at no more than double our income.
We don't have to worry about capturing too much early on, but there is an opportunity for a quick gain by grabbing the airport and port on the small island above us, so our loaded copter heads up there. One bomber strikes the lead medium tank, while the other waits in reserve. I had just the right amount of cash on hand for a battleship and couldn't resist getting one, even though another bomber probably would've been more useful. However our battleship makes for better bait, and will get defensive bonuses in the port.
Turn 5
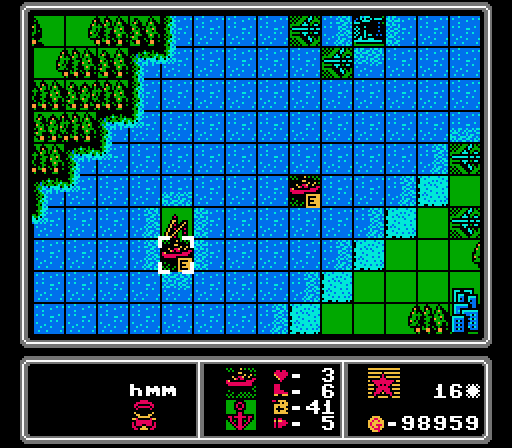
Notice how the enemy battleships are clustered together again, each angling for a shot at our battleship. They're once again sitting ducks for our bombers. Even that fresh medium tank wandered right into range of our battleship. The enemy bomber there isn't new, it got one turn of repairs and headed back for us but won't be much of a problem - the only thing it can hit is our fortified battleship and AA tanks.
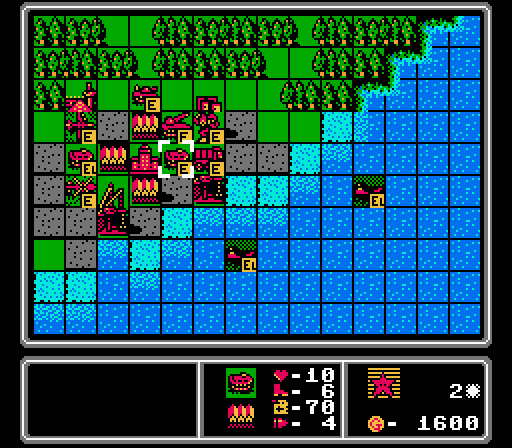
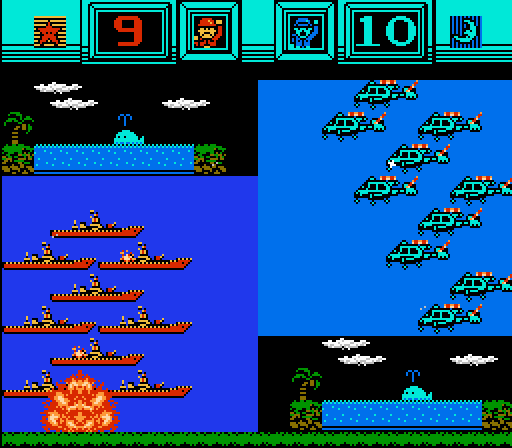
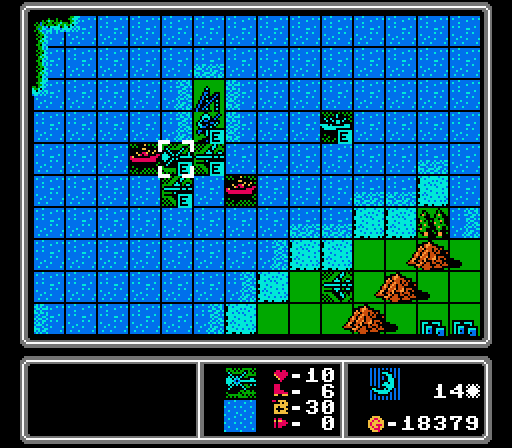
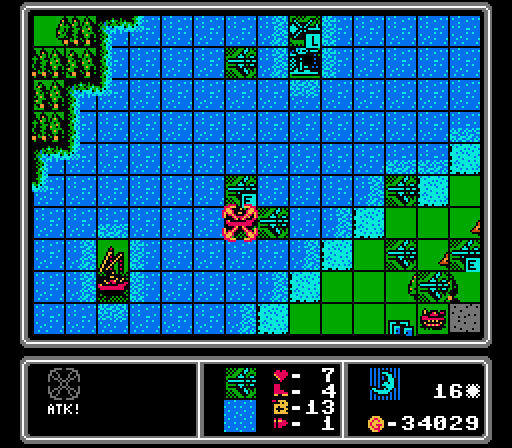
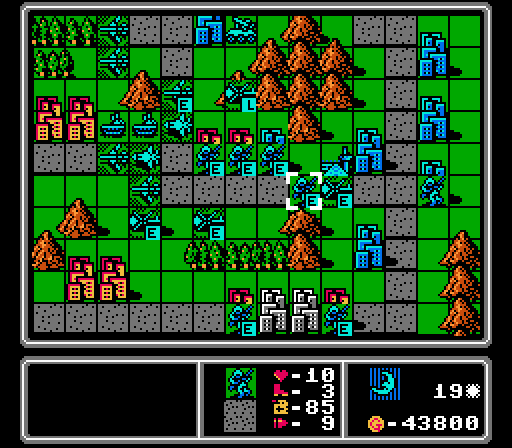
Here's why the AI is just no good at handling naval invasions. It only has at most two landers unloading at a time, and each one can only unload one unit at a time. The AI then sprints each ground unit ahead as soon as it can, instead of building up an overwhelming force that moves more slowly but is harder to defend against. Anyway, other than the loaded copter still over the ocean, every unit pictured here is still one of the pre-deployed ones.
We hit the medium tank and two of the battleships, then build another bomber. Now we just have to survive a turn with three battlships, a bomber, and a medium tank all hitting us. Fortunately they're all at 4-6 Life now so will only hit at half-strength.
Turn 6
All three battleships and this bomber go after our battleship, but thanks to the damage they'd already taken and the defensive bonus from the port, we easily survive. Those will be some expensive repairs, but all four of our attackers are vulnerable this turn now. The medium tank down there ended up running away, so our AA tanks didn't even take a hit.
An AA tank destroys the enemy bomber, and our bombers and battleship are able to finish off all three enemy battleships. It took six turns but all seven heavy units from that first image are now destroyed.
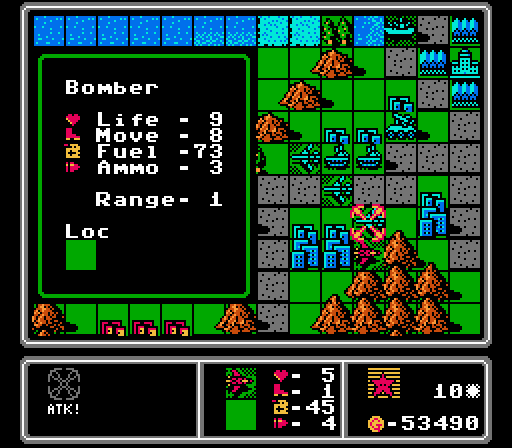
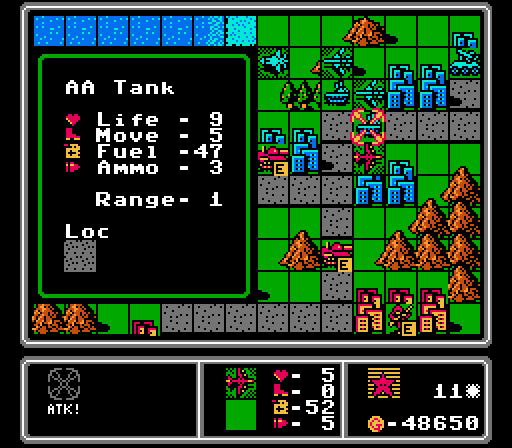
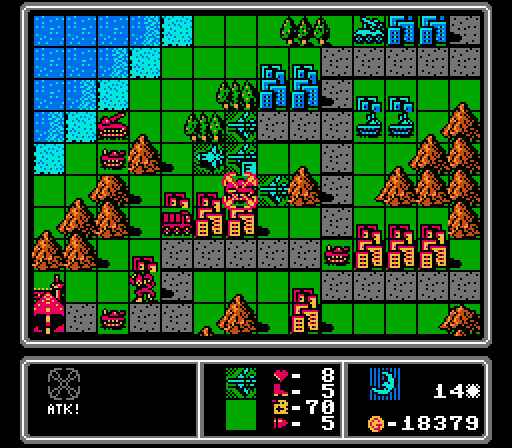
The first ground wave is just four medium tanks (two already damaged) and two artillery, most of which are still at the far end of the island. There's also a bomber here that got built early on and just arrived, but it can only hit our AA tanks. Anyway, there's nothing nearby that we can't handle with what we already have here, and we've got the cash for another bomber as well.
Turn 7
More from Red's disjointed advance. The two artillery are nowhere near each other or the medium tanks. We can easily pick them off one by one. There's a new battleship on the way over though.
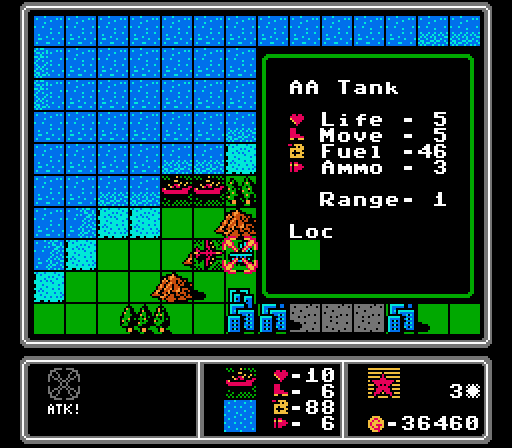
That enemy bomber didn't actually attack us, so we send an AA tank out after it ourselves. It's time to start spreading out a bit from the immediate HQ area, and we also get a fighter instead of a bomber; there's an enemy fighter on the way and they travel fast. Really enemy fighters are about the only concern we have right now.
Turn 8
The enemy phase was dull with just units moving slowly towards us, so I didn't show it. Once we take back control, we have one bomber hit the medium tank pictured here, while the other goes after one just off the bottom of the screen. Our other units get ready for the approaching fighter. I spent some of our cash repairing our battleship this turn, so we don't have enough for another bomber. Instead I put out an AA missile since the enemy fighters are the biggest threat right now.
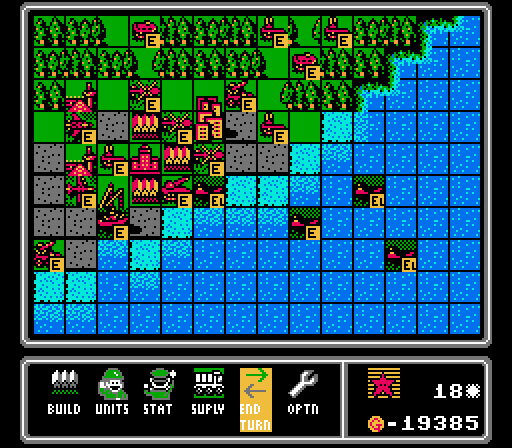
Turn 9
Another enemy phase without much to show, as the damaged medium tanks retreated and the fighter crept closer but stayed away from our AA tanks. Back at the Red HQ, the AI keeps building more ground units than it can ferry over in its landers. Hey, at least there's not another fighter yet!
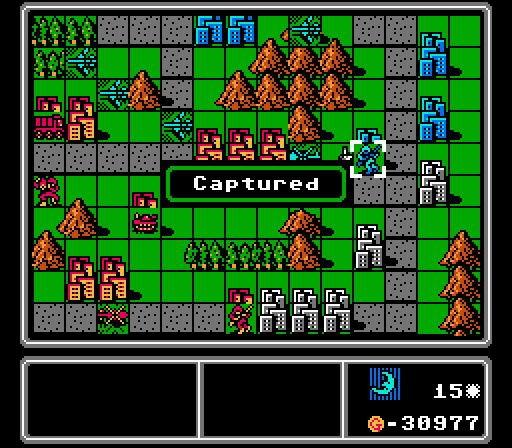
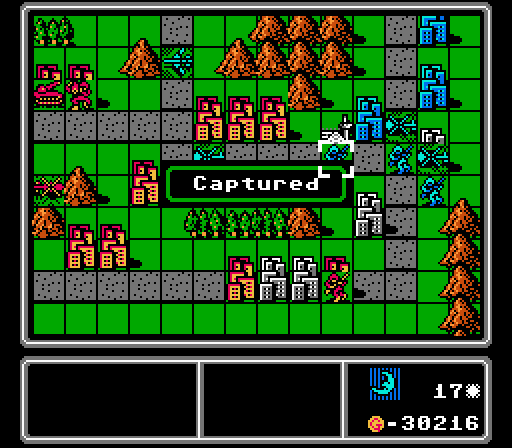
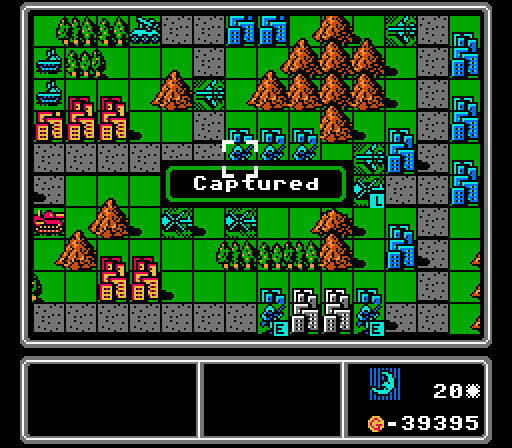
We get our first capture, taking away the airport! That port will be ours in a couple turns, too!
Taking that airport ruined this bomber's retreat plans. Assuming I don't drag an AA tank back there to shoot it down eventually, we might actually see an AI-controlled plane crash from running out of fuel.
Anyway, our first order of business here is limiting the damage that the enemy fighter can do to us next turn. I don't want to retreat all of our bombers, preferring to keep attacking the vehicles coming at us, so one of them is going to take a hit here but at least it won't be a full one.
I don't think I've mentioned it yet, but it is such a relief to be playing on normal mode and not taking the short end of every single neutral engagement. We actually came out ahead here!

Two bombers take out the artillery that got too close to us, the third lines up with it under the AA missile's protection, and a fourth flies out of range off-screen to finish off a medium tank. Meanwhile we have another copter loaded up and if the fighter gets any ideas about it, our battleship is waiting to take it out. Oh and we build a second fighter just because our first one took some damage. That's three turns in a row without building a bomber, after I initially said we'd only be building bombers. Oh well.
Turn 10
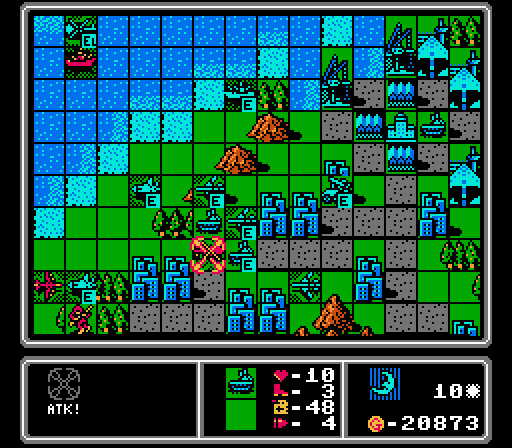
We take the expected hit from the fighter, but it'll fall to the AA missile now.
I'm not sure what that enemy copter thinks it's doing, but our AA tanks can make short work of it. That new medium tank ran straight until our bomber wall as well. The concerning parts of this image are the enemy infantry about to start taking our cities, and the enemy battleship that has snuck its way almost to our HQ area and out of bomber range.
Did you know copters can slightly damage battleships? It's not much and it feels a little petty, but we were moving towards it anyway and don't take any damage in return, so might as well.
Anyway we take out the fighter, medium tank, and copter as planned. Our damaged fighter also hurts the enemy bomber, so that it can't hit our exposed AA tanks too badly. Our battleship sails forth to get in on some action as well. Our fourth bomber is still running loose in the lower half of the island, hitting the second artillery this time. We also fly our damaged bomber back for repairs and use our funds to get a fifth bomber out there.
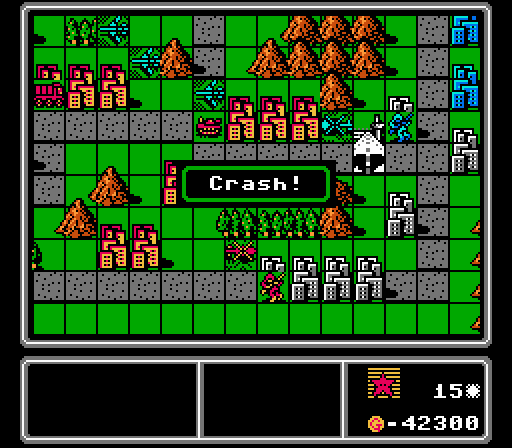
Turn 11
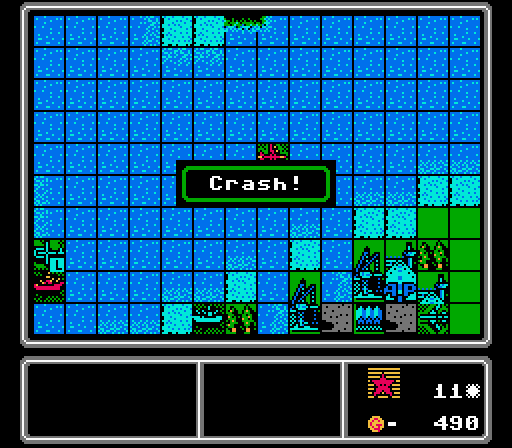
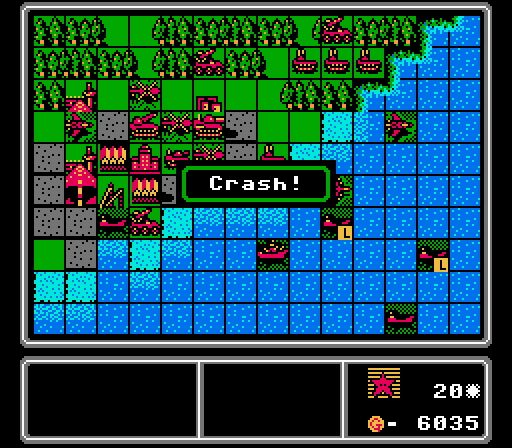
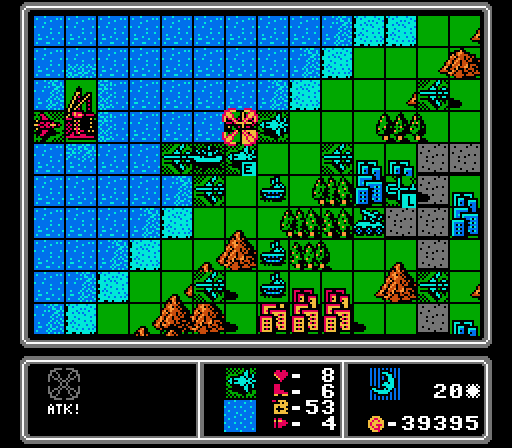
It's pretty satisfying to watch an expensive enemy plane crash and burn, even if we'd already damaged it pretty heavily.
Anyway, the enemy bomber kills itself on our AA tank. A couple more medium tanks are coming after us again, but that's what our bombers are for. One of those medium tanks also helpfully blocked our city, so the enemy infantry couldn't start taking it this turn.
This enemy battleship continues to be annoying, preventing our copter from unloading to take that port. So I'm going to keep attacking it with the copter until it goes away.
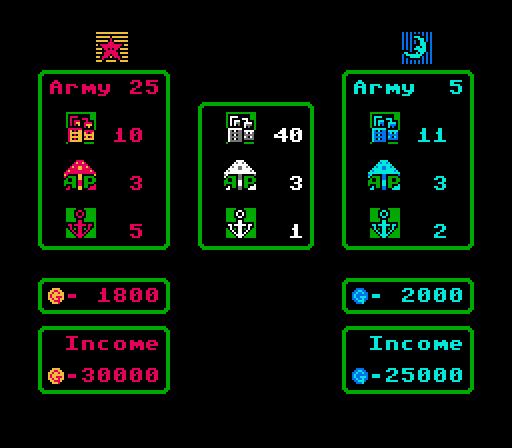
We take the second property on this tiny island. Our income is now up to a healthy 29,000 G, meaning we can get in some expensive repairs while still putting out bombers.
Two of our bombers go after the nearest medium tank for a lot of damage, while our fresh fighter starts in on the infantry. Once this area has settled down a bit, our next priority will be clearing the enemy footsoldiers from our island and getting our own out there to start capturing everything. The second medium tank pictured here took a few hits in earlier turns and only got in one turn of repairs, so isn't really a threat, but I pull our AA tanks back anyway. We also send our damaged fighter back for repairs, and pick up bomber #6.
Turn 12
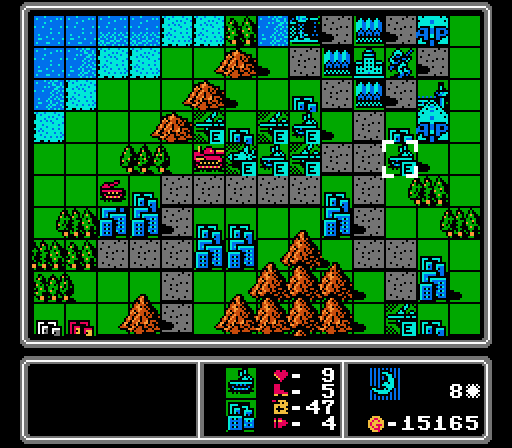
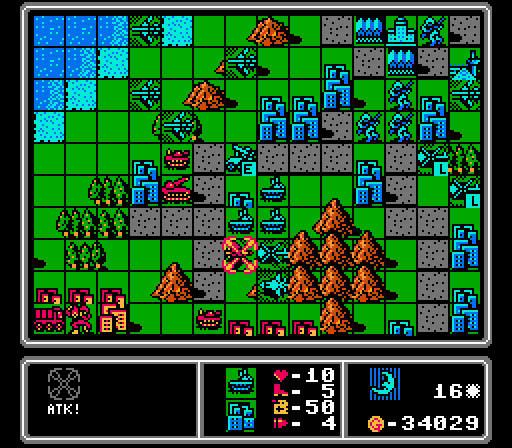
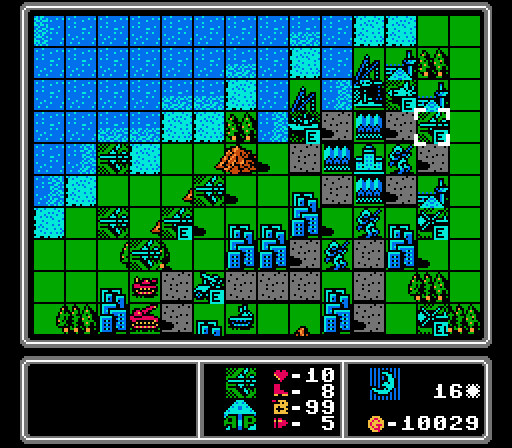
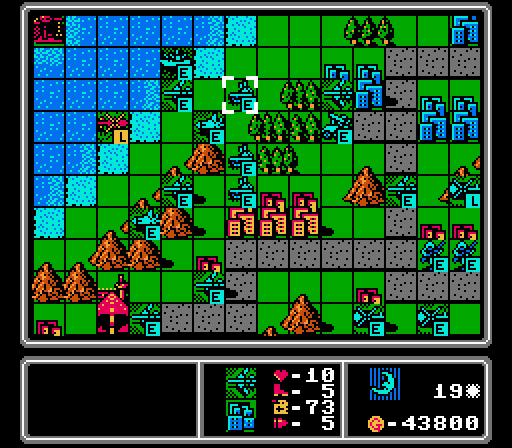
The two damaged medium tanks merged together, and you can see from this shot that Red doesn't really have much else left in the area anymore. It's time to expand, but first we have to deal with a second enemy fighter that has almost reached us.
Here is said fighter, plus some ground reinforcements that are a bit better positioned this time. Still, they're no threat to our current army.

The enemy battleship kindly moved, allowing us to drop off an infantry right on top of it.

One bomber finishes off this medium tank, while our fighter continues to harass the infantry that had the nerve to try and take one of our precious cities.
The rest of our bombers stay away from the enemy fighter, while our AA missile sneaks up to cover our fighter. Also, say hello to bomber #7.
Turn 13
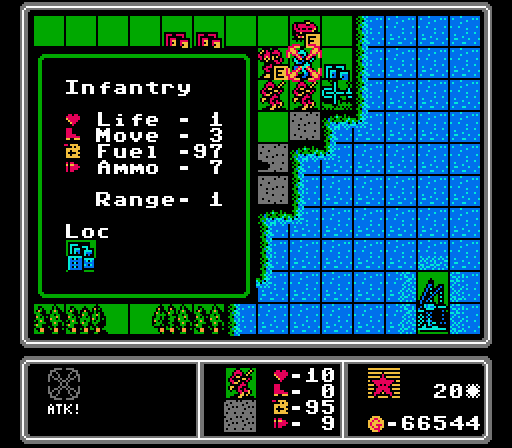
The two fighters clash, and while we slightly lose this battle (thanks to attacking the infantry a couple times earlier), our AA missile will get revenge for us.

Two of the three infantry that started already on our island are now effectively neutralized.
Our copter hits this battleship for the third time and has now done almost as much damage as a single bomber strike. That's not normal. This unit is like a super copter or something. Anyway I put our battleship out as bait, to protect our capturing infantry, and position a couple of bombers for next turn. I've ignored these enemy battleships for too long, however, and they're going to be in position to cover each other next turn.
It's not often safe enough to send a fighter alone behind enemy lines, but there are still no anti-air units anywhere near us, and I want to weaken that bomber so it kills itself on an AA tank again next turn. I also later fly a bomber up to finish off the nearby infantry.
I intentionally built bomber #8 before clicking the "Supply" command this turn, because otherwise this fighter repair would've taken up too much of our cash. Instead it sits on the airport for another turn.
Turn 14
Another suicide bomber barely hurts our AA tank. That 20,000 G in enemy funds caused us just 550 G in damage.
While one enemy battleship attacked our battleship, another moved up to cover it while both staying out of range of our bombers and threatening our infantry.
We can partially resolve this problem by having our battleship return fire (the enemy battleship in the middle is now down to 3 Life) while our copter uses its last shot to chip away at the other battleship. We then park a couple of bombers in between the two battleships to be able to strike at either one next turn.

Meanwhile our original copter+infantry duo are off to cause trouble on the upper corner of Red's island. There are not many enemy units up here right now, just some footsoldiers, an APC, and a copter.
Another medium tank falls to coordinated bomber fire, with a third bomber later hitting the tank that's getting a little too close to our AA tanks.

Down in the lower corner, a copter finishes off an enemy infantry and we finally start our first city capture on our own island. The highlighted bomber has been wreaking havoc down here but finally ran out of ammo so will head back up to our airports for a reload.

With a lot of repairs needed this turn, we don't have enough funds left over for another bomber, but I wanted to get some copters to go start some more captures anyway. With the remaining cash we trigger an infantry swarm.
Turn 15
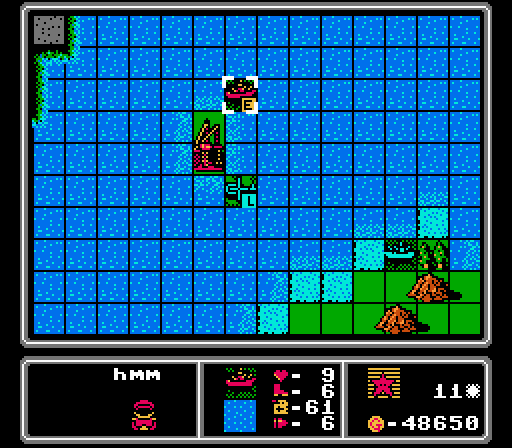
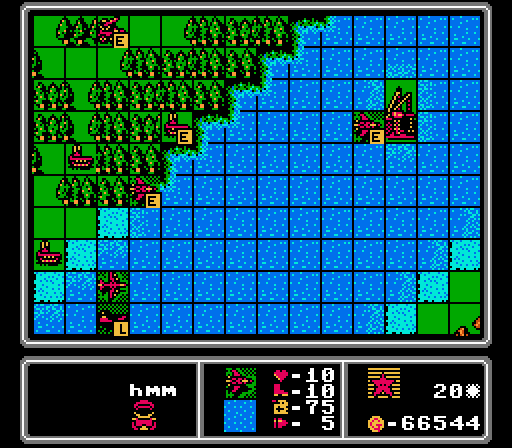
We get to see another crash, though this time it's just a copter. This map is actually too big for copters generally; there are 39 tiles between the two HQs, and a copter has a max range of 42 tiles without refueling. By the time they get across the map, they don't have enough fuel left for maneuvering to get in multiple shots. Still, Red has an airport on our island, you'd think they'd use it for refueling once in awhile.
This battleship formation is trouble. I've neglected them for so long that a third one joined the group, and they've formed up into a triangle with each battleship protected by two others. Worse, there is a fighter nearby protecting the lower battleship, so I can't just try and hit all of them. We're going to have to have a bomber take a hit here. Our infantry also took a hit from a battleship and lost half its Life, and it can't heal up on ports, so we need to just get out of there if we ever want that infantry to capture anything again.

A fresh tank and rocket threaten our anti-air units, while that fighter prevents us from just bombing them into oblivion. Time for a tactical retreat.
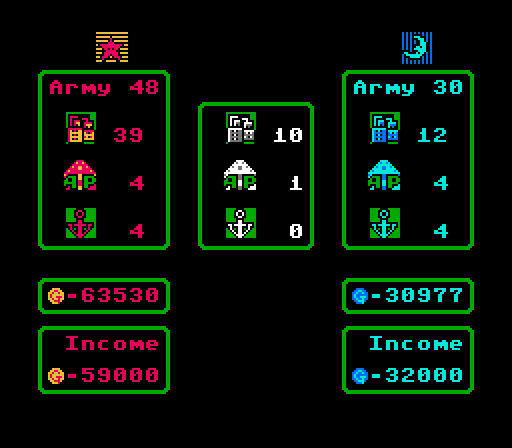
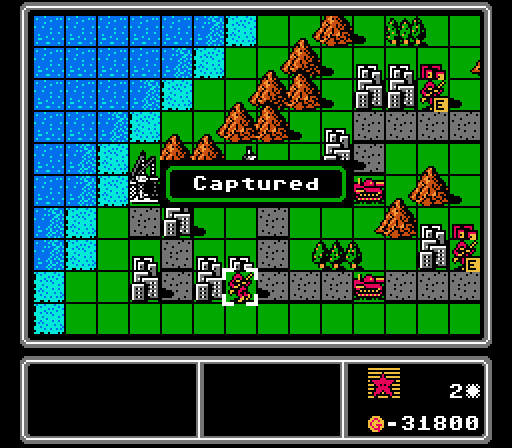
But first, let's celebrate our first city capture! We're up to a 32,000 G income now. Red's income is massive, but we're still not quite getting doubled up here.
The two bombers take out one of the battleships. We'll take a hit from the other two, but only one is at full strength and we'll actually manage to weather the strikes pretty well.
There's an enemy fighter coming, but this bomber is able to stay out of reach while finishing off this tank.
Here's a carefully-crafted formation. The enemy fighter can only reach our copter and AA tank, and will be drawn in by the chance to hit our copter. Meanwhile I have a fighter, an AA missile, and three AA tanks all waiting to pounce on it, with our bombers safely out of the way and ready to go after the enemy battleships once the skies are clear.
We also get bomber #9 and another copter, while a few other infantry make their way to the nearest enemy cities on foot. Our second fighter is back in for repairs as well.
Turn 16

Bait taken. Our copter suffered 2,400 G in damage to allow us to easily take out a 22,000 G fighter.
Our bombers will be free to act this turn, so I'm not worried about the encroaching vehicles here.
While we did take a hit from one battleship, the damaged one retreated instead of piling on, leaving the full-strength battleship without any cover.
Once we're able to move, we first remove this fighter with an AA missile and AA tank.
Our fighter and copter, suddenly left without anything to do, screen off this enemy copter so that our infantry can start capturing the airport. Now, you may be wondering, how is that copter screened off? It can still reach the infantry with its six movement? Well, that copter will actually only have four fuel left next turn, so won't be able to get around that screen.
Here's why taking the battleship hit doesn't matter that much. This bomber was already almost out of fuel and on its last shot. So I can take the damaged bomber and merge it into this one, getting back one full-strength bomber with plenty of ammo and fuel instead! All while making sure this battleship can't hurt us again.

I don't know how many of these we'll get up here, but stealing a city on Blue's island this early on feels pretty good.
Before I decide what to do with the rest of our bombers, we put out bomber #10, plus a copter for more infantry-ferrying. Our battleship has returned to port for repairs as well.
The bombers end up taking out the rocket and nearby tank, while also damaging this tank enough that it can't hurt our AA tank too badly.
Turn 17
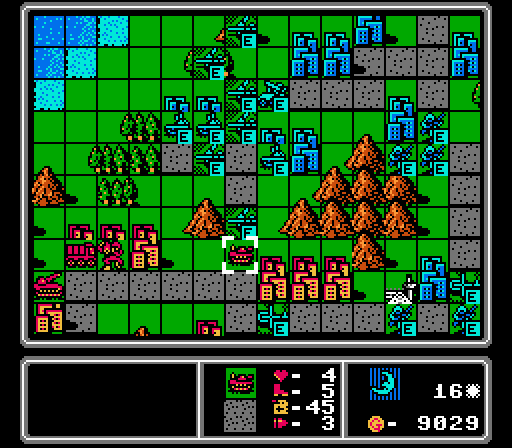
The two damaged battleships merge together. Another fresh battleship enters the scene, but isn't close enough to provide full cover.
For some reason the AI brought over three supply trucks. None of them will ever supply anything.
Taking this airport gives us an important forward refueling/rearming point. Too bad we can't build from these, too.
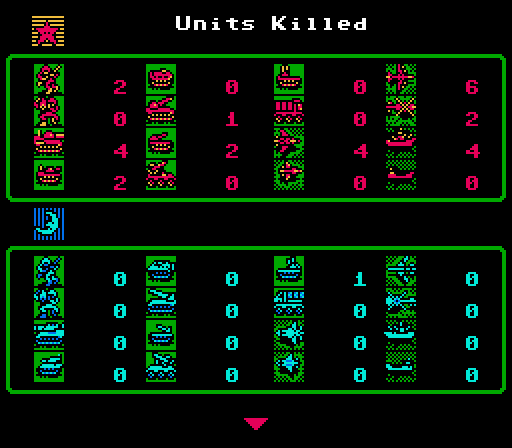
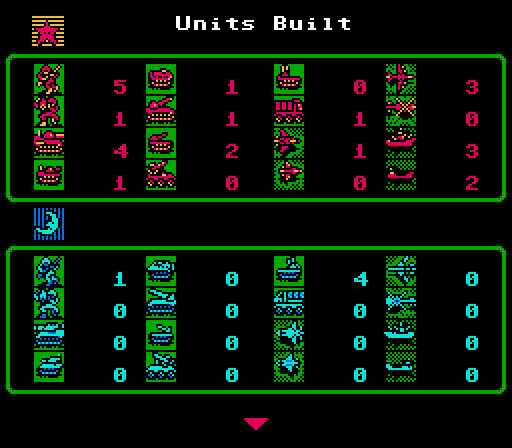
Other than a merge last turn, we haven't lost any units since the third turn. Red, however, has a ton of losses. We're turning this map around rather quickly.
I'm done with letting these battleships hang around. Our two lead bombers go after the one in the port, while two fresh bombers take out this one.
A couple bombers also hit the nearest rocket, while more air units screen off our AA tanks so that the enemy bomber has to fly within missile range to hit us.
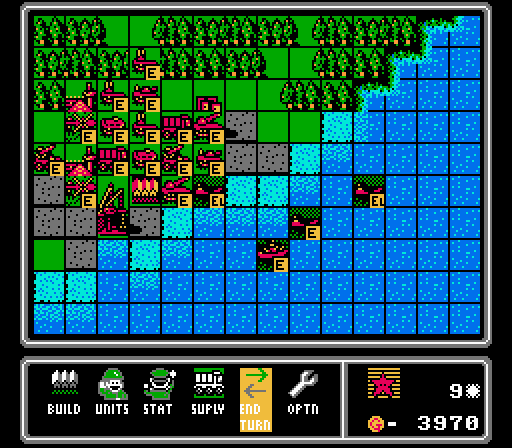
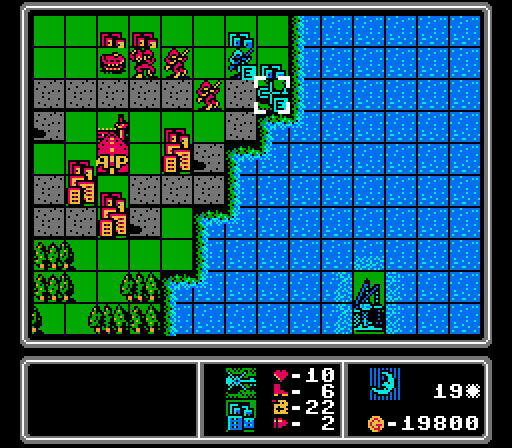
I don't think we're going to hold here, but we can at least be a solid distraction. Maybe it's time to start with the copter+mech waves. Note how this entire coastline has no beaches on it, so we can't ferry troops over on landers.
Yeah, let's get another copter wave going. And more bombers are always welcome, too.
Turn 18
We didn't get to weaken this bomber first this time, but the city's protection is still enough that we'll repair most of the damage to our AA tank right away. And that bomber is easy picking for our AA missile now.
Some enemy vehicles move up but our bombers have free action next turn so we can clean these up.
Of course, Red responds by putting out another fighter, a bomber, and a new battleship.
That fighter can't reach us quite yet, so we'll keep our bombers active over the water to finish off this battleship.
We take two more cities, and work on taking out Red's last infantry so we can move in and capture the rest of our island.
The AA missile shoots down the bomber as planned, then a bomber finishes off the rocket and two fighters wipe out this mech before it can cause any trouble.
Other bombers take out the tank and another rocket, clearing the immediate area. A supply truck also takes a hit for fun.
Close to taking this city, we merge the two infantry together.
Another bomber for us, plus another copter+mech pair for later.
Turn 19
That fighter gets to us a lot quicker the further along we get. We'll have to prepare a welcome for it.
Otherwise we've pushed Red back to a tiny corner of our island.
Ugh a second fighter right behind the first.
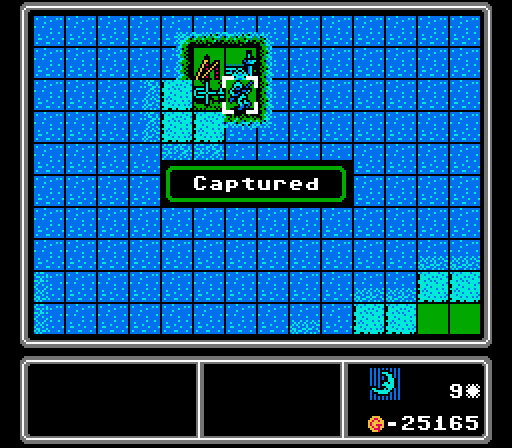
The last enemy footsoldier on our island is finally gone, and we grab one of Red's cities while starting captures on four others.
Preparing for the enemy fighter arrival next turn.
We get another city on Red's island, but have to merge our copters together since one is almost out of fuel. I think that infantry is in trouble next turn.
After getting another bomber and copter, I use our remaining cash on a lander. I have a vague idea of a couple of medium tanks being useful on Red's island eventually.
Turn 20
The AI somehow let a copter run out of fuel without ever going anywhere.
Yeah our infantry is toast. Still that copter can sit around for awhile and at least block one of the cities. That's the same super-copter from earlier, and now it's going to single-handedly hold our meager foothold on Red's island for several turns.
The fighters approach a bit more carefully. I think we'll have to lure them in directly.
Upside is the fighters are too far out to protect most of these units on the lower edge of the map, so our bombers can still run free here.
Our turn. Let's finish taking these four cities for a nice income swing.
Starting to catch up now.
Our fighters have to stick around to help with the enemy fighters later, so in the meantime they take out this loaded copter. No more enemy capturing on our island!
The bombers hang around down here out of fighter range, and take out a tank and a medium tank. Two others go after the last rocket in the area but can't quite destroy it.
More bombers, copters, and mechs. One of those bombers is actually looking for more ammo and fuel. Another bomber is at out new airport in the lower area for the same reason.
Here's our defensive formation this time. The enemy bomber can only reach an AA tank on a forest, and will be in range of two other AA tanks and the AA missile. The enemy fighter can reach our fighters, but would also be in range of our AA missile and our battleship. So plenty of options for next turn!
To Be Continued...