Part 105: Episode XCV: Our Final Cloister

Music: Inflexible Determination
.jpg)
Alright... Fine. FINE! We'll do the final Cloister of Trials. This final aeon better be rad as hell for making me put up with another of these lousy puzzle dungeons after that garbage in Bevelle and Macalania.

.jpg)
Here we are, the Zanarkand Cloister of Trials. At least it's not playing that Between Ordeals tune like most of the trials. I've got an innate gag response to hearing that music at this points. Let's see what bullshit the final temple of the pilgrimage offers.
.jpg)
.jpg)
Goddammit! The L-Block. I should have known it was behind Spira's suffering all this time. It all comes together...
.jpg)
.jpg)
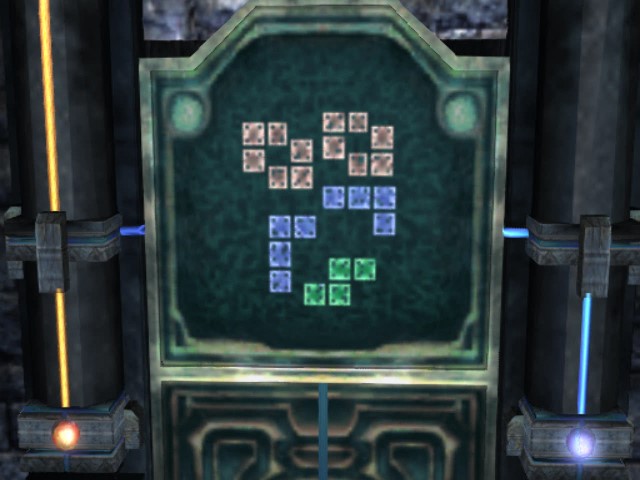
So, you may think, given the Tetris blocks I am sure The Tetris Company gave full permission to Square for using, this may be some manner of matching puzzle business. Good guess, but incorrect.
.jpg)
There actually aren't any puzzles in the Zanarkand Dome Cloister. If we click on the television set displaying the Tetris blocks, several panels on the floor will light up. The glowy bits on the floor are pressure panels to activate the corresponding spaces.
.jpg)
The gameplay conceit of this Cloister is just a memory game. Activate the screen to display all the correct panels briefly. Go activate said panels. The order doesn't matter, just so long as only the correct blocks are activated. Yeah... that's it. That's the entire challenge. How's your memory? Or in modern times: do you have your phone handy to take a quick snapshot because it's a Cloister of Trials, it's 2:00 AM, and you've been drinking a bit. Maybe that's just me.

.jpg)
.jpg)
.jpg)
.jpg)
Now that we've defeated the first mindboggler of the Final Aeon's trials, a series of pedestals emerge from walls on both sides of the room. You didn't think it would be only the one memory challenge, did you?
.jpg)
A panel slides open revealing passage further into the Cloister of Trials as well. Before we venture forth, let's take a look at the pedestals.
.jpg)
There are three pedestals on each side. The two in the center spaces both have empty slots that can fit a sphere. We'll just keep that in mind for now.
.jpg)
.jpg)
The other four, however, can all be pushed. Well, more correctly one can be pushed at a time and it will activate the next phase of the trial. By the way, the glyph here is Macalania Temple's sigil. All the Tetris patterns look vaguely like over-sized sprite art versions of their glyphs.
.jpg)
And by over-sized, I mean the next room over is the size of a couple of basketball courts stuck next to each other with a hole dug out of the center. They take back-court violations very seriously in Zanarkand.
.jpg)
To the north of the room is another view screen Tidus can activate to see where he's meant to shuffle over on the board. Since this room is so large, not all of the blocks will display at once. They all appear in rapid sequence, with the first two to light up dimming just as the last couple in the sequence appear. I just went ahead and edited all the lights that appear in one picture since whatever. There's the answer.
.jpg)
After committing the panels to memory, it's just a matter of having Tidus follow through. Simple enough, right?
.jpg)
.jpg)
So how do you feel about doing it another three times? No? Not into that? Well tough shit, champs. Suck it up. It ain't a Cloister of Trials if it isn't a tedious mess that overstays its welcome and murders pacing for a good bit.
.jpg)
.jpg)
.jpg)
Next up we have Bevelle's trial. At least we got the two most annoying puzzle dungeon callbacks out of the way first. I think Macalania might have been the worst of the lot. Bevelle is a shitty trial-and-error mess and looks like a neon mess, but you can pretty much auto-pilot through it if you know what you're doing. Macalania had sliding block puzzles and the requirement of essentially doing the entire thing twice to get the damned Destruction Sphere. Plus it murdered the pacing worse than any other Cloister in Spira.
.jpg)
.jpg)
.jpg)
I cannot even remember Djose Temple and I think I've used Thorse all of twice the entire game. It still had its full summon animation back in Via Purifico when I was grinding a few levels for Yuna out and building up aeon overdrives, so even that one part I used it to show off for the LP was just an unsaved extracurricular activity.
.jpg)
.jpg)
This one is actually the symbol for Baaj Temple. You know, the place where Tidus arrived in Spira, was nearly eaten by a monster fish, bitched a lot about being hungry for the first and only time anyone acknowledged eating in Spira, and got kidnapped by Rikku? Apparently, that used to be a recognized temple of the pilgrimage that has been cut from Yevon canon. Strangely, the far more intact and close by Remiem Temple doesn't get recognition here. Nor does whatever place the Yojimbo fayth hailed from originally.
.jpg)
Well that's the bulk of the trial done. Now for the final part of this farce of a temple.
.jpg)
Up by the larger puzzle room's TV screen is slotted a Kilika Sphere. We'll just go ahead and yoink that...
.jpg)
.jpg)
...and slot it in the center left part of the opening room's pedestals. No memory games involved. Kilika has had a rough enough go of it this season. Did you see how stomped their team got in the Blitzball Tournament? Harsh.
.jpg)
.jpg)
.jpg)
A Besaid Sphere is in the other slot by the Tetris announcement screen. Same deal as before, opposite side of the room. No puzzle for this one either.
.jpg)
.jpg)
And that is it for the final Cloister of Trials of Final Fantasy X. Our long national nightmare has finally reached its end!

.jpg)
With the activation of the path to the Fayth of the Final Aeon, the game is nice enough to throw us a save point at the start of the area. It's a good idea to use their generosity. Wouldn't want to go through all of that nonsense again.
.jpg)
Music: Enemy Attack
.jpg)
.jpg)
.jpg)
Especially since, unlike every other Cloister of Trials, this one ends with a big honkin' boss battle to cap off the proceedings. And an all-expense paid trip to the Darkness Beyond Time.
.jpg)
The Time Devourer couldn't make it today. In its place we have the Spectral Keeper. Who's up for a 52,000 HP gimmicky boss battle? Today's mechanic that will only be used once and never again: Positioning.
.jpg)
.jpg)
.jpg)
There are six platforms surrounding the Spectral Keeper. Using Trigger Commands, our party members can blow a turn teleporting to any open platform (no sharing) on that battlefield.
.jpg)
.jpg)
The reason for that soon becomes clear. First of all, after having Tidus do the usual Haste routine, we'll have Auron use Mental Break (it's immune to other types of breaks) to have Lulu pour on some damage.
.jpg)
.jpg)
.jpg)
Doing that will trigger Spectral Keeper's counter-attack, which entails swiping its scythe arms across the three platforms in front of it, hitting anyone in range for 1000-1500+ HP of damage. Any attacks against the boss will trigger the counter attack. So that's where the whole need for positioning comes into play. We've either got to waste turns moving everyone out of range. Or else prepare party members to tank some damage every time it's time to go on the offensive.
.jpg)
.jpg)
Spectral Keeper's main attack when its turns come up is using Berserk Tail, which will change the boss fiend's position to strike a party member directly behind it. So if the party has shifted positions all behind the Spectral Keeper, they're in the clear right? Not quite. For the last of the filler bosses has one last trick up its clawed, scaly appendages...
.jpg)
.jpg)
.jpg)
Glyph Mines! Two random spaces on the board will be occupied with explosive hazards that will explode as soon as their turns come up. If any of our party happens to be unfortunate enough to be standing on one of the effected platforms, it's time to drop everything and move 'em immediately. Assuming they get a chance and didn't just burn their last turn.
.jpg)
.jpg)
Being on a Glyph Mine platform when it explodes is a one-hit kill. There's no defense against it. Game over. They're super dead. You know, until you waste a turn using a Phoenix Down or Life spell.
.jpg)
And well... that's pretty much it for Spectral Keeper. Deal with Berserk status. Try to position only tanky characters in front if it while attacking. Don't explode. Lulu's boosted magic does close to 9,000 HP a turn and assorted physical attacks are no slouch. Aeons can be used too, though only for Overdrives as Spectral Keeper will Glyph Mine them to death after a single turn.
But... we really do not want to waste our Overdrive Aeons on this mid-boss bum...
.jpg)
.jpg)
.jpg)
RIP Spectral Keeper. Join your comrade Sanctuary Keeper in the realm of boss battles I completely forgot existed.
.jpg)
New Music: Hymn of the Fayth ~ Yunalesca
.jpg)
With Spectral Keeper's death, the Yevon branded elevator down to, hopefully, the final fayth chamber arrives. Welp, Yuna. This is it. Uhh... I don't think Rikku or Tidus got their shit together thinking up an alternative to your dutiful death sentence. Rotten luck, that.
.jpg)
 "The hall of the Final Summoning."
 "Go." "Yes."
.jpg)
.jpg)
Welp. See ya, Yuna. Welp. Think up some good names for Yuna's Final Aeon.
.jpg)
.jpg)
Overkilling Spectral Keeper nabbed us a couple extra Level 4 Keyspheres. That's always nice to have on hand as people are reaching the end of their Sphere Grid (Auron just hit the end of his for me.)
.jpg)
Ergh... Beg your pardon, Jecht? Spoilers! And... where is the context of this quote?
.jpg)
.jpg)
.jpg)
Yuna takes the elevator back upstairs and calls for Auron, but everyone piles on anyway. Yuna is too polite to tell everyone she just wanted Auron's assistance.
.jpg)
Welcome to the Chamber of the Fayth of the Zanarkand Dome. A bet some of you are real familiar with this particular save point.
.jpg)
 ”What? They're here already? Oh good grief! I'm coming... I'm coming! Calm down!”
.jpg)
Ghost doorkeeper emerges from a portal for some exposition. I still have no idea who this guy is supposed to be. He vanishes into the ether, never to be seen again after this scene.
.jpg) “What you see before you is all that remains of him. Lord Zaon is... his soul is gone."
“What you see before you is all that remains of him. Lord Zaon is... his soul is gone." "Gone!?"
 "You mean, there is no Final Aeon?" ”Hold your horses now. I'm still talking... Travelers these days... no patience...” "But fear not. Lady Yunalesca will show you the path. The Final Aeon will be yours.”
.jpg) *Yevon prayer* “Go to her now. Inside, the lady awaits."
*Yevon prayer* “Go to her now. Inside, the lady awaits.".jpg)
Thanks for the info, Ghost Herald. Maybe it would be less confusing if you all just put a carpet over old Zaon's stone corpse and let folks pass straight on to Yunalesca. I mean I don't want to put this guy out of a job but... eh...
.jpg)
 “Auron, you knew this was going to happen, didn't you?" “Yes.” ”Ha. I knew it!” “I have done this before. We have encountered literal images of my past self just rooms earlier. Do not congratulate your deductive skills too much.” ”...Still called it.”
.jpg) "If I had told you the truth, would that really have stopped you from coming?" ”Uhh... Well, what is in that portal thingie?” “The next room.” “That's not what I meant!”
"If I had told you the truth, would that really have stopped you from coming?" ”Uhh... Well, what is in that portal thingie?” “The next room.” “That's not what I meant!”.jpg) "I'm not going back."
"I'm not going back." “Kimahri knows.”
.jpg) ”Kimahri remember job. Kimahri always remember guardian job.” *glares around the room and steps in portal*
”Kimahri remember job. Kimahri always remember guardian job.” *glares around the room and steps in portal*.jpg)
Well, tune in next time when the Pilgrimage Pals go meet Lady Yunalesca and see what bullshit catch there inevitably will come in defeating Sin.


Video: Episode 95 Highlight Reel


Spectral Keeper Concept Art