Part 83: Episode LXXIV: Convey My Boredom
.jpg)
Sooo... Yuna escaped on Kazooie. That's nice for her. But... it didn't really help our party's situation of being trapped in a cutscene surrounded by deadly riflemen. Also despite the very cinematic CGI scene... the party didn't actually see that the thing flashing out of the sky and zooming downward caught Yuna. For all they know she's cratered in the middle of a Bevelle street. But meh... it's not like we're going to let inconsistent editing details get in our way at this point.
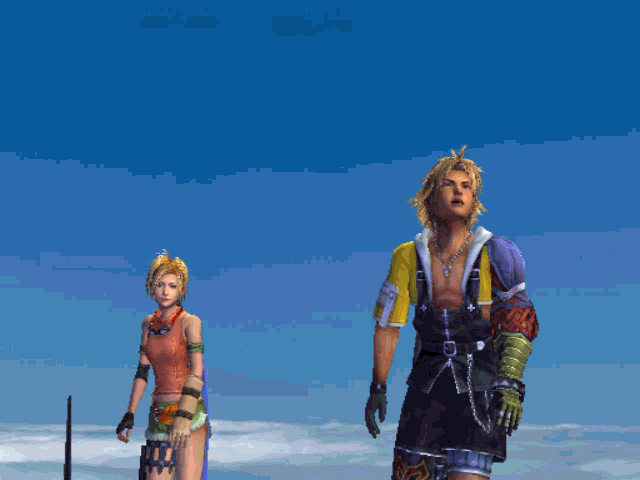
Taking the initiative, Rikku proceeds to wing absolutely nothing in the direction of Seymour.
Remember all those wily Al Bhed Flashbang grenades Rikku is always using to get out of tricky situations? What? You don't? C'mon. She uses them all the time! Just... never before this scene. And never after this scene. Look just roll with it, alright?

Music: Hurry!!
.jpg)
The entirety of the Yevon warrior monk squadron covering the wedding break out in panicked screams as the deus ex grenadia goes off. Apparently off screen, several women arrive late to the wedding just in time to scream in reaction to the flashbang as well, given half the shouting is female.
.jpg)
 "An Al Bhed flashbomb!"
 "Lemme go! I'm gonna kill that Seymour!"
 "Yuna said leave! We leave!"
 "We'll join up with her later!"
 "Break through!"
The party proceeds to book it. The Yevon Stormtroopers show remarkable discipline in not firing wildly while blinded and shooting each other in the dire crossfire they had going on just moments ago. Of course on the other hand they were all literally wearing protective visors and were instantly blinded by a stun grenade 20 yards away sooooo...
This part of the game isn't very well written.
.jpg) "Bevelle Palace is temple. Yuna goes to one place only." "The Chamber of the Fayth!"
"Bevelle Palace is temple. Yuna goes to one place only." "The Chamber of the Fayth!"The party runs further into the temple. It's worth noting there's a save point out here you can't actually use. This stairway is inaccessible during the wedding crash sequence and the party jets past it in a cutscene before an invisible wall bars the path behind them immediately afterwards. Bevelle kind of feels like it had some stuff cut.
Really, this part of the game feels like they had the first act of the story planned out going forward and the third act/ending worked out and start going backward. Then when the two halves meet around Bikanel/Bevelle, it all feels sloppily put together and hacked up best they could to make it kinda work. Things definitely seem to get more on track once Bevelle wraps up.
Spoilers, everyone survives this mess and makes it to at least the ruins of Zanarkand as seen by the narrative's framing device.

Music ends...
.jpg) “A trap?" "Who cares? Yuna's waiting for us!" ”Yes. I know. I am worried about Yuna too. But we should still probably avoid traps if we are going to make it to her...” "Huh?" *starts fiddling with a control panel and powers up a machine*
“A trap?" "Who cares? Yuna's waiting for us!" ”Yes. I know. I am worried about Yuna too. But we should still probably avoid traps if we are going to make it to her...” "Huh?" *starts fiddling with a control panel and powers up a machine* "What's a machina doing in the temple?" "I suppose it comes in handy." *looks over rail* “I mean... that's a lotta stairs.” "That's not what I mean! The teachings! What about the teachings?"
  "Hey, don't look at me!"
.jpg)
.jpg)
Don't sweat it, Wakka. Maester Mika is like a hundred years old. I'm sure there's something in the Yevon scriptures that say old ass Fantasy Popes are allowed to install escalators.
The party arrives at the bottom of the spiral stair escalator...
.jpg)
Good thing we have an Al Bhed to handle all these fancy pants forbidden machina for us. Tidus could probably swinging it bashing on buttons too but eh... Rikku's active role in the plot is just about done so we've got to throw her a bone.
.jpg) "They betray their own teachings." *sigh* "They treated us like dirt."
"They betray their own teachings." *sigh* "They treated us like dirt." 
.jpg)
So this is Bevelle Temple. And in case you cannot guess, we're about to hit up the Bevelle Cloister of Trials. So summoners and their entourage of guardians have to pass through the machina filled Yevon dungeon full of forbidden techno-wizardry. This isn't some secret crypt of Yevon secrets. This is a mandatory part of the ride.
Indeed, if you started in Bevelle like... say Yuna's old man Braska, this is the first stop on the pilgrimage train. Word of Yevon's capital really not giving the first shit about the machine ban never got out? Nobody has gone “wait what the hell” at any point prior to this, huh? Even Auron comes off like this is some sort of reveal, when he'd have to have been here before.
Final Fantasy X your narrative has some here holes!
.jpg) "I wonder if Yunie's really in there." "Let's go and see!" "Let's go!"
"I wonder if Yunie's really in there." "Let's go and see!" "Let's go!".jpg)
Hold your horses. There is a very easy to miss Al Bhed Primer blending in on the floor here. Not sure what that's doing in the capital of Yevon. But here we are. It's really important not to miss this primer. The Home primers and this one are the only permanently missable Al Bhed ciphers in the game.
Today we gain the divine revelation that [J = V!] Drec haqd Lmuecdan uv Dneymc CILGC!
Music: Between Ordeals
.jpg)
Remember that big rush to find Yuna and the fast paced action that had been going down up until now? Time to roll out the spike strips on the action road once more with another goddamn pace killing Cloister of Trials! This one might be the most tedious one in the entire game. Not the outright worst. I think Macalania Temple's sliding block puzzle bollocks took the title on that. But that might just be my opinion that sliding block puzzles have been a rotten plague on video game design since their inception.
.jpg)
.jpg)
.jpg)
This one's tedium just comes from having absolutely awful design and such a slow paced slog surrounding its gimmick that even knowing 100% exactly what you're doing with a guide to the optimal critical path in front of you, it's still a solid 20 minutes to complete.
.jpg)
The main gimmick of this puzzle dungeon is that pedestal Tidus pushed and the techno platform it produced.
.jpg)
.jpg)
For you see, this Cloister of Trials' puzzle cornerstone are slow moving conveyor belts. Ugh... Conveyor belts... Just typing that out is making me nauseous. I wonder what that's all ab—
NONONO! MAKE IT STOP! I WANT OFF! I WANT OFF!
.jpg)
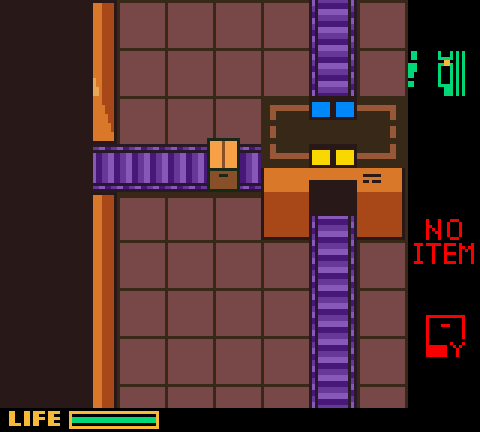
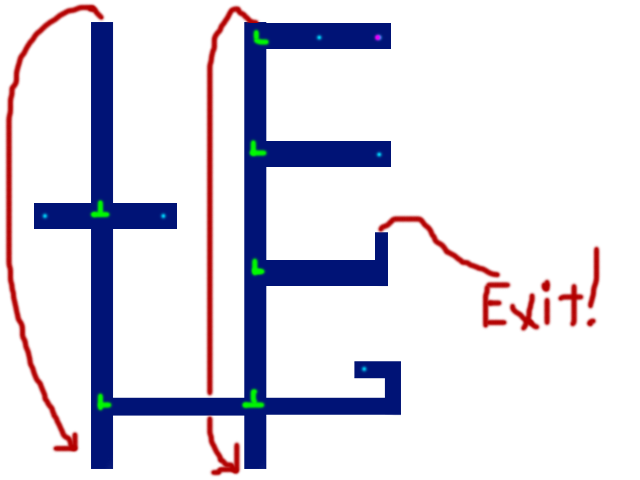
Ugh. At the beginning of the Cloister we get a rather unhelpful isometric look at the multi-layered Tron hologram conveyor belt hellscape ahead of us. I'm going to go ahead and doodle a visual aid as we go along for the Trial's layout to make it easier to understand, since hell if the game gives us anything to go on other than narrow viewpoints and trial-and-error navigation.
.jpg)
There's actually three layers to this Cloister of Trials. But you can effectively just go ahead and ignore that fact since gameplay wise it may as well be a flat plain separated into two main hallways. We'll be dealing with the upper pathway first.
.jpg)
First of all, let's get a lay of the land. Initially, we begin in a convey corridor where Tidus will automatically move north. On the path are three arrow switches. If we mash X on one of these switches, Tidus will change direction off the main conveyor belt. The first switch continues forward (which it defaults to if nothing is pressed) and heads right, down to points unknown.
.jpg)
Past that is a switcher that leads to two platforms on each side. Both look to possibly have a sphere slot on 'em. So we'll keep that in mind. Note that at any point if you want to stop and investigate, it's like an eight second animation of Tidus stopping in place, turning, and disembarking. Ditto for getting back on. And you have to ride the coaster all the way from the beginning to see the other path.
.jpg)
Towards the end of the path is one final switch that goes north or will turn Tidus back around south in case he fucked up. This switch is just confusing and useless, for one very good reason.
.jpg)
.jpg)
If we just ride the path to the very end, Tidus will tumble off a cliff to his doom... And then respawn at the beginning of the conveyor belt. And it's ultimately quicker and less disorienting just to do that than to reverse tracks.

So that's the upper level mapped out.
.jpg)
.jpg)
Now we're going to take the first juncture on the belt to the east and ride it downstairs to the second main hallway.
.jpg)
When we get to the lower platform, we're stopped and given the option of a direction. However, we can only continue downward to the third level or go back up to the first floor. The path further down the second level hallway is currently unavailable for reasons unknown! Part of the central track is missing and we need to fill it in by activating a sphere node on the upper level. How were we supposed to know that...? Fuck you! That's how.
.jpg)
.jpg)
.jpg)
.jpg)
We'll continue riding the platform to the bottom level, which deposits Tidus on a new platform and rematerializes the sphere pedestal from earlier. The sphere pedestal actually serves as our method of transportation along all these conveyor belts. It must be holding at least one sphere to properly work. But if you'll look closely, the pedestal itself can actually hold TWO spheres at a time. And that is the other big gimmick of this Cloister of Trials: shuffling secondary spheres between slots in this lousy pedestal.
.jpg)
.jpg)
Case in point: We can grab a secondary Bevelle Sphere (there's already one Bevelle Sphere in the pedestal initially) and shove that into our transportation node.
.jpg)
.jpg)
From there, we can shove the pedestal and its two Bevelle Spheres back on the tracks. Thus concluding our business on the third level.
Pictured: The most exciting part of this entire puzzle dungeon. Pay no attention to the part where Tidus phases through a solid pillar. It's just part of the experience.
.jpg)
.jpg)
.jpg)
From here we have no choice but to just head straight back to the uppermost level.
.jpg)
.jpg)
From here, we're going to wanna ride to the second switcher and disembark on the right platform. You have to time your button press as the switch flips directions automatically. It's pretty finicky about registering a button press, so you kind of have to mash X at the right time and hope for the best. Top notch level design.
.jpg)
When we make our pit-stop, the pedestal will reappear and we can snatch one of the spare Bevelle Spheres and slot it into the empty sphere slot on this platform.
.jpg)
.jpg)
That, in turn, will activate the missing part of the lower level pathway (which we had no way of knowing was missing) and allow us to travel to the second main hallway below.
.jpg)
Progress! We're almost one with the upper level. We actually need to now make it over to the platform opposite from this one. However, we cannot just immediately hop over to the opposite station. That'd be too easy.
.jpg)
Instead we need to ride another loop. Or hit that end switcher to turn ourselves around. Both take about equally as long. I think it might actually be faster to just take the loop around.
.jpg)
.jpg)
.jpg)
Anyway, the left platform on the upper level is holding another Bevelle Sphere in an empty slot. All we have to do here is nick that and add it to our pedestal for future use down below.
.jpg)
.jpg)
We're now completely done with the upper level and will be heading downstairs for the rest of the Cloister of Trials, where the real tedious fun happens.

.jpg)
.jpg)
Taking the path downstairs will once more take us to the solitary path switcher that lets us select a direction at our leisure. Down to the lowermost level is once more an option. But we're actually totally done with that level as well. Despite the dopey 15 second animation of Tidus staring blankly as he revolves like a centerpiece at a car show, that bottom level is done. I'm sure that didn't stop people from trying to slot incorrect spheres down there.
Instead, we're now going to head down the middle hallway.
.jpg)
Not counting the initial switch we start on, there are three switches leading to offshoot paths to the east.
.jpg)
The first juncture leads to an empty platform. There's ANOTHER hologram path beyond this platform. And if you look way back to that isometric view and have remarkably good spatial awareness and a keen eye for details, you'd see there is a path connected to this one that leads up out of the dungeon. That's because this path is the way out!
However, the switcher leading up to freedom is not activated at this time and pushing the pedestal further past will just lead to a dead end and a twenty second “fuck you you done messed up, now turn around” animation.
.jpg)
The second juncture off the main path leads to a long platform with a Sphere Slot at the end containing a Glyph Sphere. Unfortunately, or Sphere Pedestal is already carrying two Bevelle Spheres and the arbitrary rules of the Cloister of Trials says we cannot hot swap to spheres. Also Tidus cannot be holding a sphere and riding the platforms due to safety concerns. We'll just keep in mind the Glyph Sphere is here.
.jpg)
It's worth noting that like upstairs, if we ride the platform all the way to the end, we'll be teleported back to the beginning. Though this time you have to select “yep I wanna keep going forward down this, the only relevant section of the dungeon, goddammit” at that start-up switcher and waste 10 seconds extra of your time. Did I mention this segment was tedious yet?
.jpg)
.jpg)
The third and final juncture leads to a platform with a sphere slot. Down at the far end of the hall, past a bottomless pit
To recap: This is roughly what we're working with here. Which doesn't seem that bad. I mean there's only three relevant branches we've got to fiddle with really. But remember, it's like 20 seconds every time you restart the loop. And like 10-15 seconds every time to turn down a juncture and get off at a stop/get back onto the conveyors. And the conveyor belts running slight slower than Tidus' default running speed. And the fact you can kind of easily mess up getting off at a stop because the switches are finicky. And the timing for changing direction can just be fucked from when you start down the path and there's nothing you can do about it beyond riding another loop.
All of this starts to add up fast.
.jpg)
.jpg)
Anyway, we are going to kick things off by inserting a Bevelle Sphere into the spare slot here. This produces a light bridge over to that weird barrier further down the trail. Yeah, Tidus can just mosey on over that. It's perfectly safe.
As it turns out in Final Fantasy X-2, ALL of these motherfucking platforms were solid paths Tidus could have just walked down and saved everyone a ton of trouble. Are you KIDDING ME game?!
.jpg)
The barrier at the end of the path is unimpressed by Bevelle Spheres. And anyway, we need a Bevelle Sphere to power the pedestal platform. So we're going to just have to come back here.
.jpg)
.jpg)
Now that we have a spare sphere slot in our pedestal, we can return to the second platform and grab that Glyph Sphere we had to pass up earlier. It can be stored on the pedestal and go for a ride with us.
.jpg)
.jpg)
Now the Glyph Sphere can be taken and slotted into the glyph barrier at the end of the third path. That will dissipate the magic wall and let us continue past.
.jpg)
Wherein we'll find the Destruction Sphere. Unlike every other pilgrimage temple's Cloister of Trials, the Bevelle Temple has no extra Destruction Sphere shenanigans. It's a mandatory part of solving the cloister. Also it would be a dick move to make it optional since we can never come back here later in the game.
.jpg)
.jpg)
Now we can double back to where we found the Glyph Sphere and slot our new-found the Destruction Sphere in here.
.jpg)
This, in turn, activates the path the hell out of those slog of a dungeon. See? That wasn't THAT bad. Especially when I edited out the three times it too me to actually make the goddamn platform turn down this path and the three minutes of my life that wasted.
.jpg)
Now we could just head back to the first juncture and cruise on out of this Cloister. But there is one additional pit-stop we can make to net us an additional treasure on the way out. Remember that first Bevelle Sphere?
.jpg)
Yeah... we really don't need that light bridge anymore. So let's just go ahead and socket it back into our pedestal for a rainy day, shall we?
.jpg)
Now, we can loop back to the first juncture. From there, we can shove our pedestal further down the line...
.jpg)
.jpg)
.jpg)
And now that our Destruction Sphere has opened up the path, we are OUTTA those godforsaken convey belt purgatory!
.jpg)
The flying platform deposits Tidus on a new level. We could just run on out of here and ditch this lull in the plot. But hey, we didn't get that extra Bevelle Sphere for nothing.
.jpg)
Heading upstairs from where the lift dropped us, we find another Sphere Slot at the top of the stairs. Guess what we can use there? But first, there is a treasure chest just to the right off screen that we need to loot.
.jpg)
This holds the Destruction Sphere treasure for Bevelle Temple. It's an HP Sphere. It just turns an empty Sphere Grid node into a HP node to give someone an extra 200 HP of health. Nothing to write home about.
.jpg)
.jpg)
Now about that Bevelle Sphere... Slotting it in the open hole up here will activate a hologram path to yet another treasure chest. But it is one that would require our companion pedestal's aid to cross.
.jpg)
.jpg)
.jpg)
But as luck would have it, beneath that HP Sphere chest was a sphere pedestal teleporter. Howabout that.
.jpg)
.jpg)
Shoving that onto the Tron Tracks will allow Tidus to loot and additional treasure: the Knight Lance!
.jpg)
It's a lance weapon for Kimahri that gives him a kind of decent boost to Strength. Although he's still weaker than Wakka, Tidus, or Auron even then so... Kimahri... You're just not very good. I'm sorry to break it to you, guy...
.jpg)
Regardless, with that we can stroll the hell on out of Bevelle's Cloister of Trials and get back to the plot at hand. Now the thread begins its Two Minute Hate of Bevelle Temple.


Video: Episode 74 Highlight Reel

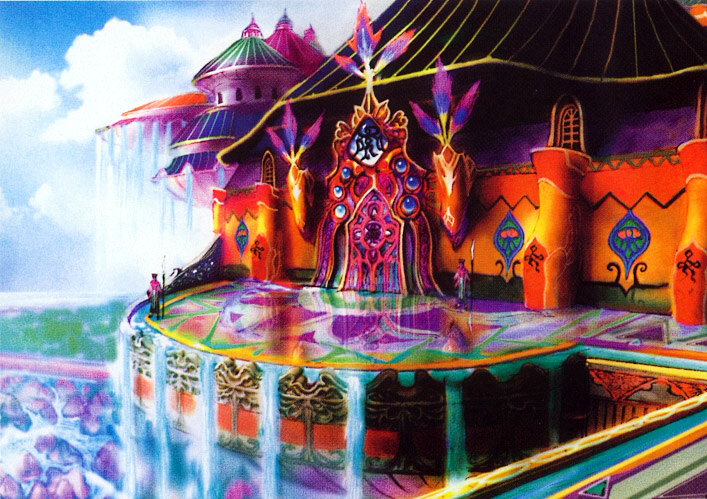
Bevelle Temple Concept Art
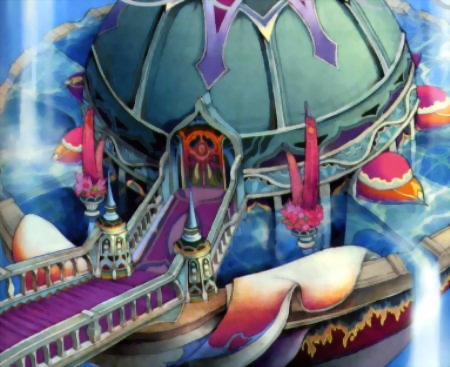
Bevelle Temple Entrance Concept Art
Bevelle Temple Glyph