Part 96: Episode LXXXVI-2: Pay My Way
.jpg)
Democracy has spoken and the aeon formerly known as Yojimbo shall henceforth be referred to only as PayToWin.
.jpg)
With that out of the way, we're done with our dealings in the Cavern of the Stolen Fayth. However, before we gather our party and venture forth to the looming Mount Gagazet, perhaps we ought to take a moment to see why PayToWin is an apt name for our new summoned ally.

New Music: Battle Theme (FFX Remaster Version) (One of many absolutely garbage remixes! It's the random battle music you'll hear literally hundreds of times. Making it twice as bombastic is not an improvement!)
.jpg)
.jpg)
Yuna's summoning calls forth immediately goes awry as a full moon and a cherry blossom tree from the non-existent Japan in Spira is called forth instead of an aeon. This seems like a waste of pyreflies. Are pyreflies a consumable energy source...? Yes, they're just fancy Mako Energy type earth juice like in Final Fantasy VII.
.jpg)
.jpg)
More importantly, an aeon pooch is here to mark its territory immediately. Don't want any other rogue aeon dogs, like Ixion, getting the jump on it.

.jpg)
.jpg)
Also
.jpg)
 “Please, clear us a path!”
.jpg)
So PayToWin is different from all other summons. Instead of having an attack, a unique elemental ability, and a handful of black magic spells, PayToWin instead has the option of... well Paying him or Dismissing his services.
.jpg)
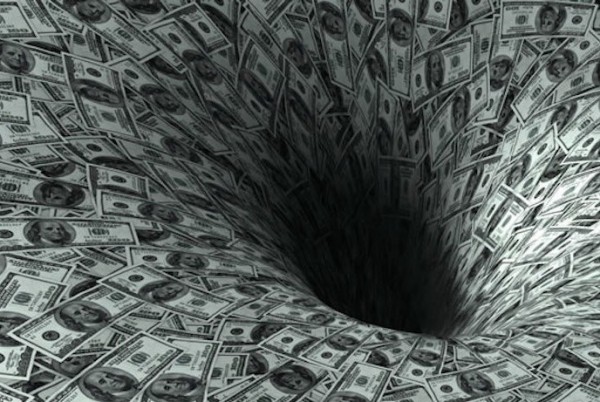
The Pay option is just what it sounds like on paper. Despite the 200,000 just to get the Yojimbo fayth off its ass and have its aeon help on Yuna's pilgrimage, it still demands on-site compensation like the scumbag contract worker he is. As such, PayToWin is a big money sink I'm pretty much never going to use again after this.
.jpg)
When Yuna pays PayToWin (henceforth referred to as PTW) we're not even given an option of what attack he'll use. Indeed, there are not even pay tiers like some shady battle Kickstarter. There is actually a complicated formula to PTW's abilities that is, of course, completely obfuscated in-game. We'll get to that in a minute. First, let's go over PayToWin's attacks.
.jpg)
.jpg)
Dismissing or Paying 0 gil to PayToWin will piss him off causing him to ninja teleport away (his dog has to walk, you don't want to cross the aeon streams.) Dismissing PTW immediately/soon after summoning him or failing to pay him has negative effects on the aeon's future performance so it is ill-advised.
.jpg)
Paying the aeon any pocket change range cash above 1 gil will result in a disapproving head shake from PayToWin and a token effort of having his dog,
.jpg)
.jpg)
PayToWin's second tier of attack is Kozuka, which will hit a single target for decent damage. Apparently, kozuka are small throwing knives that could be stored in the scabbard of larger swords. PayToWin just keeps them down his massive flamboyant sleeves to be extra anime.
.jpg)
.jpg)
.jpg)
The third and technically forth level of PayToWin's possible attack is using his Wakizashi to deal a sizable amount of damage. This attack has two flavors. One will just strike a single target on the field, while the more potent version damages all enemies. This is the attack you'll find yourself going “goddammit you motherfucker, give me my money back!”
.jpg)
That's because the final part of PayToWin's arsenal, Zanmato, is the Pay to Win nuclear option of Final Fantasy X and the only reason you'd ever mess with this crummy money sink gamble of a summon.
.jpg)
.jpg)
.jpg)
.jpg)
I showed this off during the Yojimbo boss battle where it was an instant kill to the entire party dealing 9,999 damage. The thing about Zanmato is...
.jpg)
.jpg)
.jpg)
...it's an instant kill to almost EVERYTHING in the entire game. Yes, this includes bosses. Yes, this includes superbosses. Yes, this even includes that bullshit Penance superboss from the International/PAL/HD Remaster. With the exception of one plot critical, multi-form boss (it can still instant kill the final form of said boss), one weird cinematic boss, and the final proper boss of Final Fantasy X – PayToWin lives up to its name of being able to score an instant victory given the right amount of gil... and favorable RNG Gods' machinations.
.jpg)
Now then, we should probably discuss the actual factors involved in PayToWin's money gamble. Or rather, I'm just going to copy and paste an entry from the Final Fantasy Wiki because PFFT! Talk about a bunch of obtuse bullshit you'd only ever find the mechanics behind by purchasing an expensive guide with information revealed directly from the developers or reading a FAQ that copied out of said guide.
Final Fantasy Wiki on Yojimbo's Motivation Formula posted:
There are several factors that decide what attack Yojimbo will execute. They are as follows:
- The base motivation (BM) according to how much he has been paid. The lowest base motivation is 0 if he is paid 1-3 gil and the highest is 112 if he is paid at least 536,870,912 gil. It is much lower in the NTSC version, with the lowest being 0 and the highest being 56.
- The compatibility parameter (CP) of Yojimbo to Yuna. It starts at 128 and caps at 255. It increases by 1 or 3 if Yojimbo uses Wakizashi against single or multiple enemies respectively and by 4 if Yojimbo uses Zanmato. It decreases by 20 if he is paid 0 gil; by 10 if he is KO'd during battle; by 3 if he is dismissed immediately after being summoned; and by 1 if he uses Daigoro. It remains unchanged if he uses Kozuka. This compatibility parameter is then divided by 4 in the International, PAL and HD Remaster versions of the game and by 30 in the original Japanese and NTSC versions.
- The Zanmato resistance of the enemy. A hidden variable applies depending on the choice Yuna made at Yojimbo's Chamber of the Fayth; asking to be trained as a summoner means that Yojimbo's motivation to use Zanmato will increase if Yuna hands over a greater proportion of her gil per turn; asking for the power to defeat fiends increases the likelihood of a Zanmato against random encounters and asking for the power to defeat the most powerful of enemies slightly reduces the likelihood of a Zanmato against Zanmato Level 1 fiends, while treating Level 4-6 fiends as the same with the same penalty to motivation. If the first or second choice is made, it is either 1, 0.5, 0.33, 0.25, 0.20 or 0.16 for Zanmato levels 1 to 6 respectively. If choice three is made, it is 0.8 for Zanmato level 1 to 3; and 0.4 for Zanmato level 4 to 6. (ZF)
- Additionally, if choice one is made, another factor is considered. It is (0.75 + ((amount paid * 0.50)/total gil))). Otherwise, it is 1 (CF).
- Whether or not his overdrive gauge was full when he was paid to attack. If it is full, an additional 20 points will be added to his overall motivation in the International, PAL and HD Remaster versions while only 2 will be added in the original Japanese and NTSC versions, otherwise, it is 0. (OF)
- A random factor is added to motivation. It is any number from 0 to 63.
ACTUAL CALCULATION:
((BM + CP) * ZF * CF) + OF + (random number 0-63) = Yojimbo's Motivation
---- Motivation Results -----
Considering the formula and the random factor above, if Yojimbo's overall motivation is 80 or greater, he will use Zanmato. In the International, PAL and HD Remaster versions of the game, if the overall motivation is not 80 or higher, a recalculation will be made but the Zanmato level of the enemy will be treated as 1 regardless of its actual Zanmato level.
The resulting new motivation will trigger any of the following:
The same values are considered for the original Japanese and NTSC versions of the game but there are no recalculations if the overall motivation is less than 80. In addition, Yojimbo may also attack without needing to be paid. With a compatibility parameter of 128, he will do so 13 percent of the time. If his compatibility parameter is 255, he will attack for free 25 percent of the time. The calculation made for his free attack is much simpler, which is Yojimbo's compatibility parameter divided by 4 plus a random factor from 0 to 63. If he attacks for free and his compatibility parameter is at 255, he is guaranteed to use either Wakizashi or Zanmato.
- 0 to 31 will prompt Yojimbo to use Daigoro.
- 31 to 47 will prompt Yojimbo to use Kozuka.
- 48 to 63 will prompt Yojimbo to use Wakizashi against one target.
- 64 above will prompt Yojimbo to use Wakizashi against multiple targets.
.jpg)
TLDR: Throw a bunch of money at Yojimbo and hope for the best if you don't want to deal with anything in the game. Reload if it doesn't work out. Leave Yojimbo to rot in a broom closet otherwise.
In any case, that's it for the Cavern of the Stolen Fayth and the final side area of the Calm Lands.
.jpg)
And indeed the final optional area until we hit the end game. It's back to the one trail death march to the ruins of Zanarkand.
.jpg)
We return to where we fought Defender X, who you've probably already forgotten about at this point. Crossing the bridge we passed in favor of the gorge bottom and the conclusion of Lulu's remaining back story, we're treated with one final cutscene to cap off The Calm Lands.
.jpg)
.jpg)
 ”We were a thing now, so it was alright to stare and take notice. At least Kimahri stopped giving me the evil eye about it. In fact he gave kind of a weird sorta grin if he ever saw me watching Yuna. Not sure what that was all about...”
.jpg)
.jpg)
Oh... if that were only true... Final Fantasy X's end game is my Zanarkand. This awful inevitable thing on the horizon I've got to do that looms every closer...

.jpg)
Regardless of that grim reminder, that takes care of The Calm Lands. Only one final area remains on the pilgrimage before we reach Zanarkand and hit the present day point of the narrative. That'll be weird! It's only taken over three years to get there...


Video: Episode 86-2 Highlight Reel