Part 5: Saving Private Bison At RAMSEY
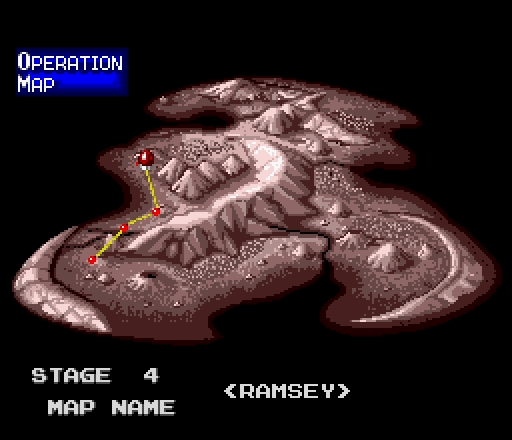
Sorry for the delay on this one, but a family crisis came up, and it's only been in the last couple days that I've been able to get it together enough to do anything involving effort.Stage 4 - RAMSEY
In today's battle, the Allies get their first taste of Axis air power.
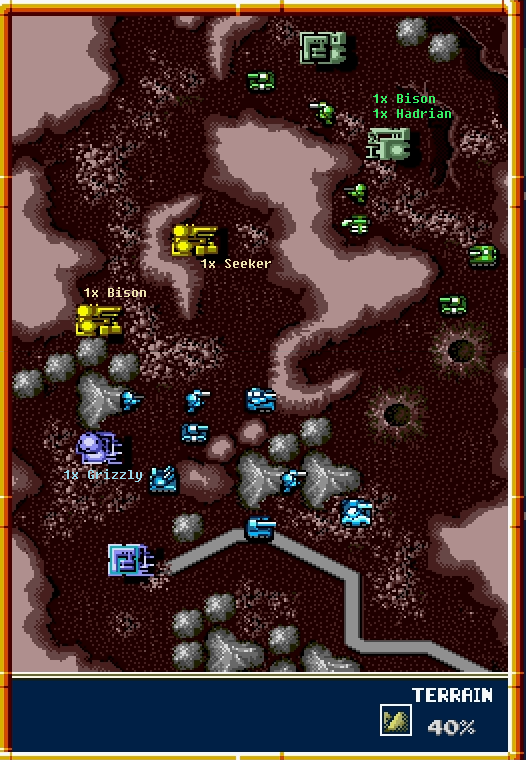
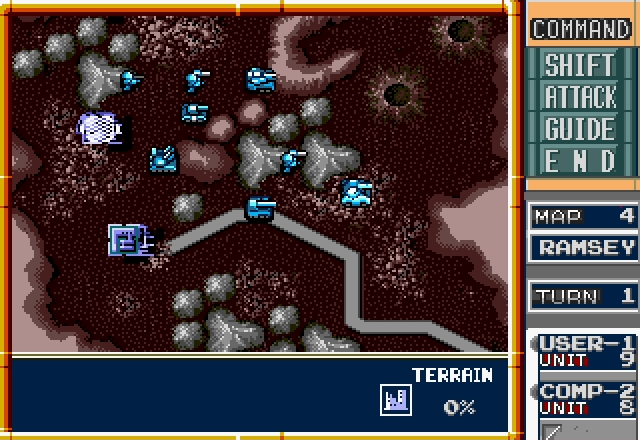
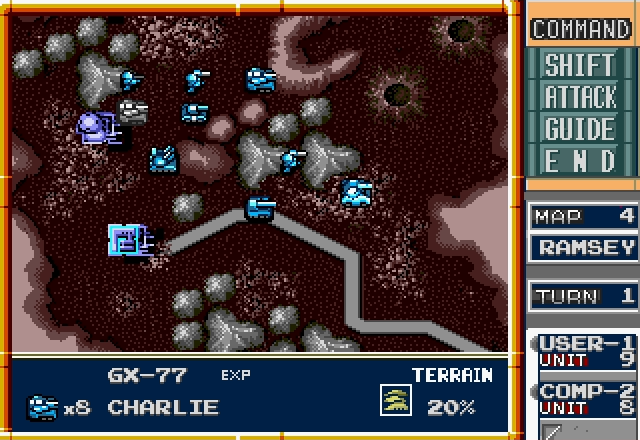
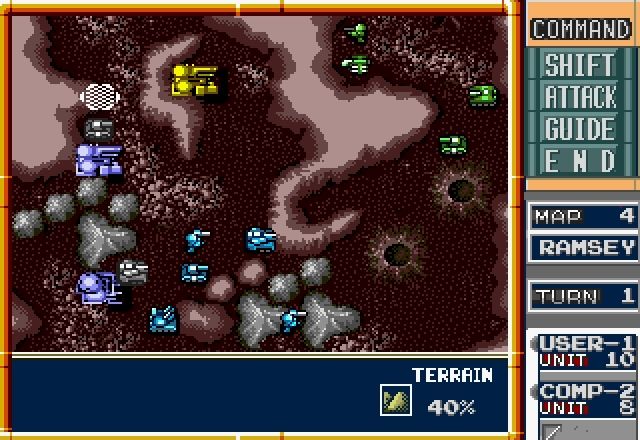
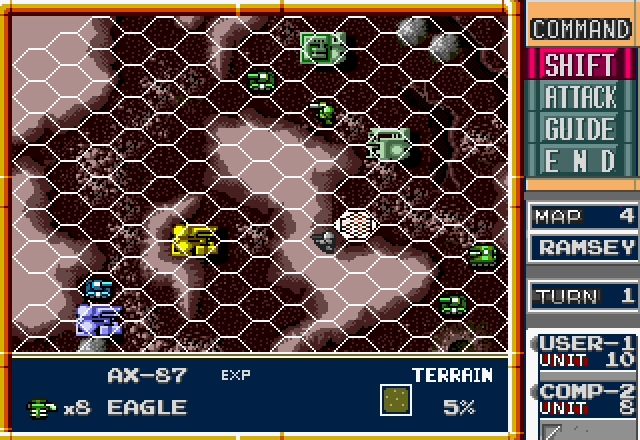
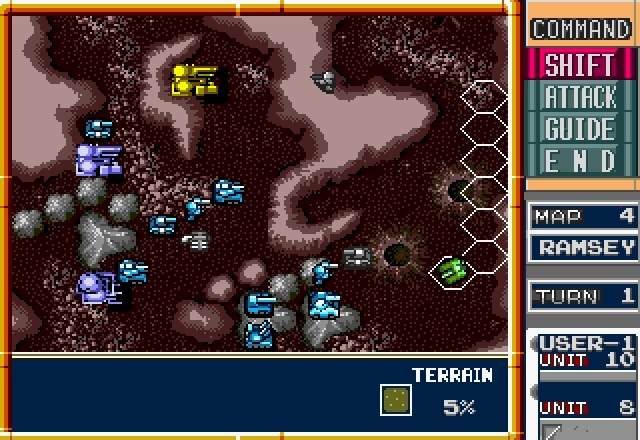
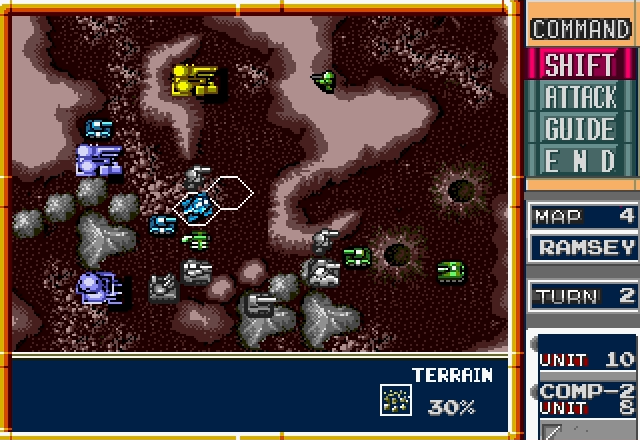
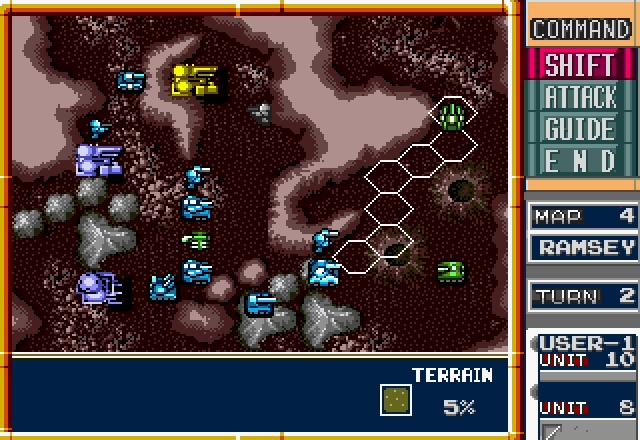
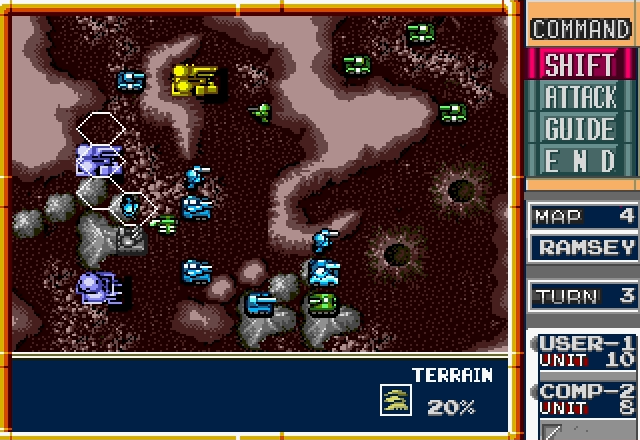
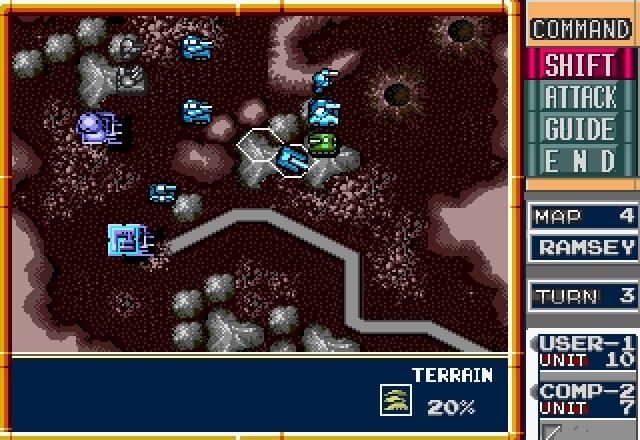
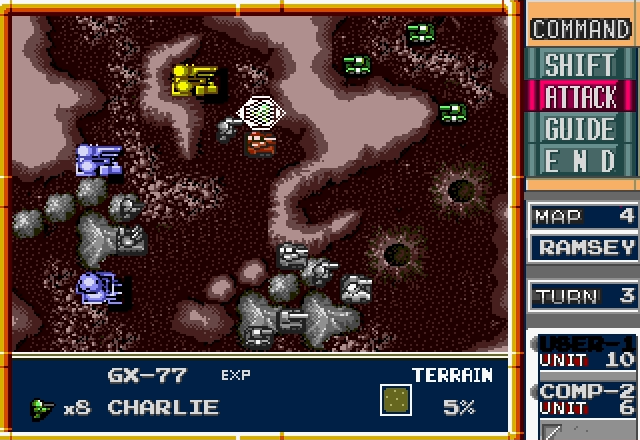
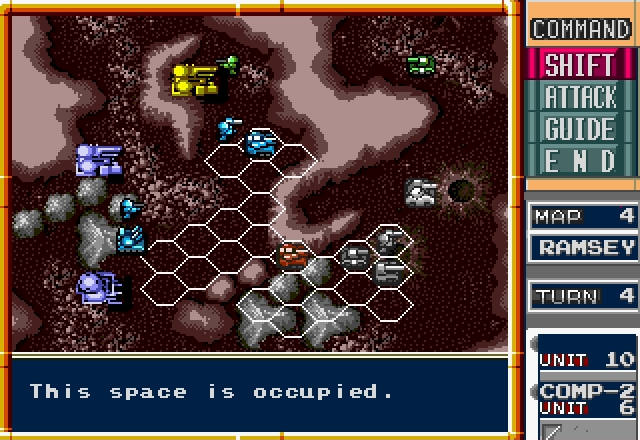
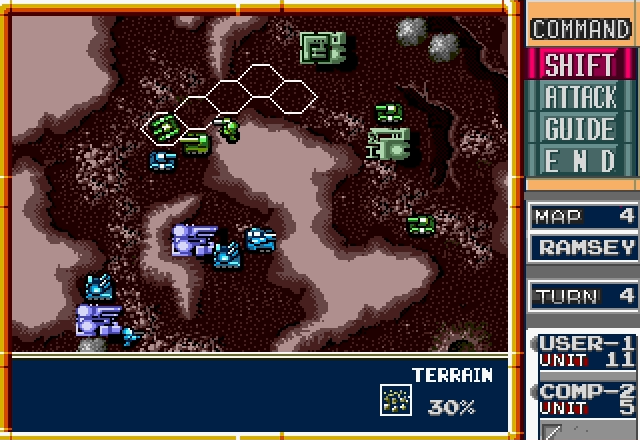
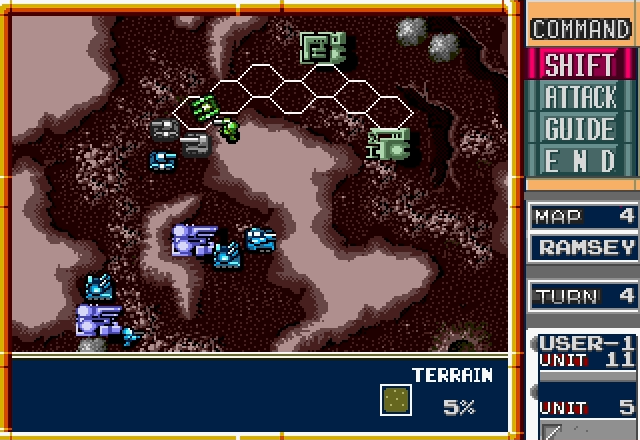
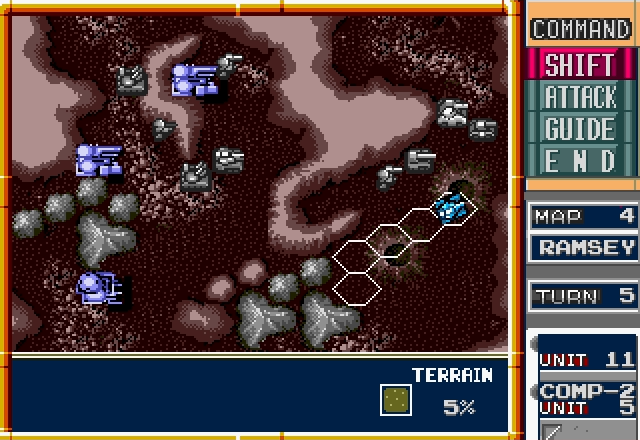
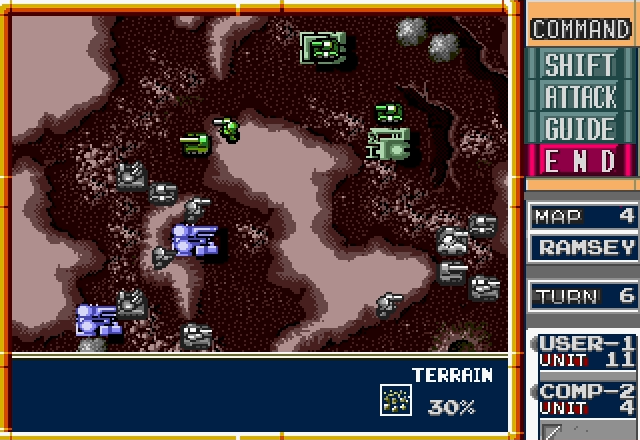
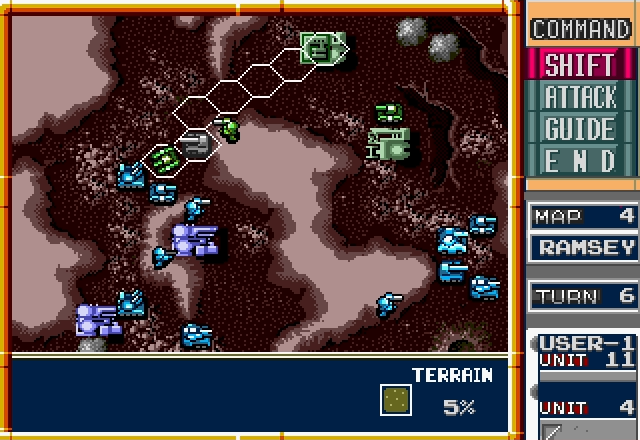
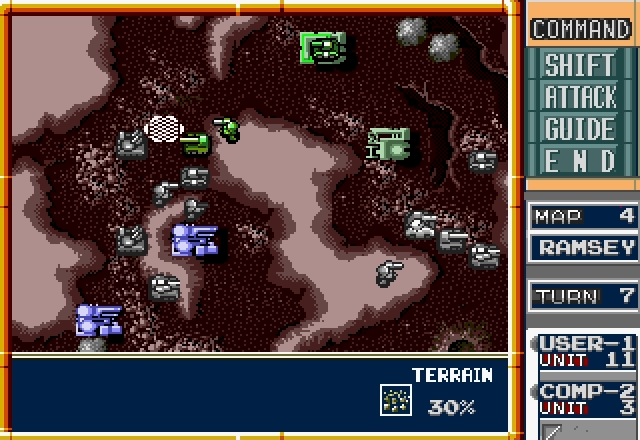
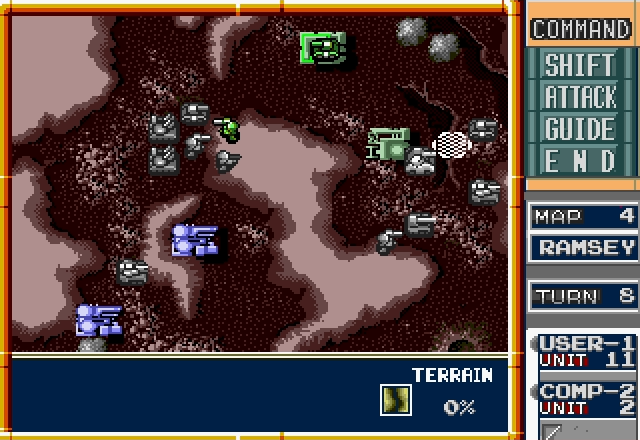
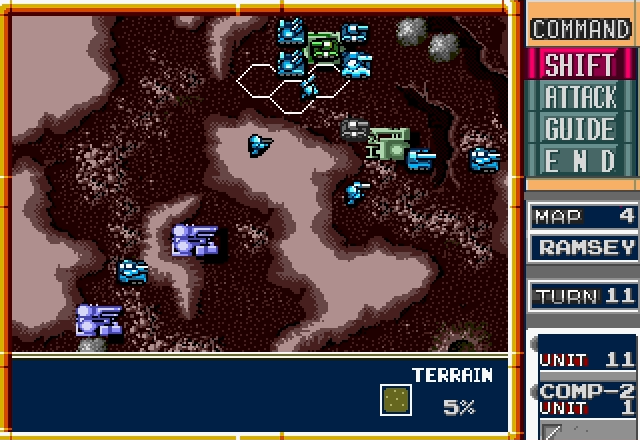
Here's the map. Starting in this mission, we'll be seeing larger maps and multiple factories in every map, so I've taken the liberty of putting the whole map here and marking which units are in which factories. Note the yellow factories: these aren't owned by anyone, so anything in them just sits idle. We've got Kilroys and Hadrians to play with now, but we haven't seen some of these other units are, so let's find out.
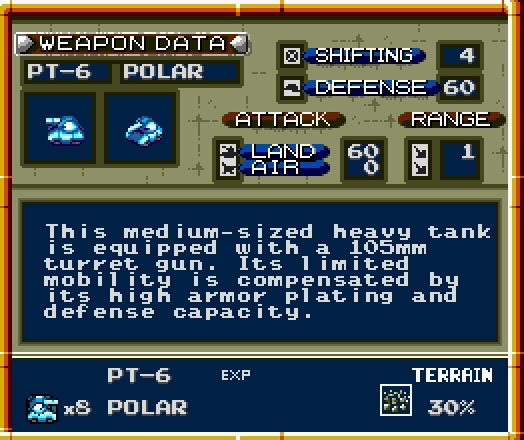
Our first new unit is the Polar heavy tank. While slower than the Bison, it hits a bit harder and has much heavier armor. The Polar has very good survivability on the frontline.
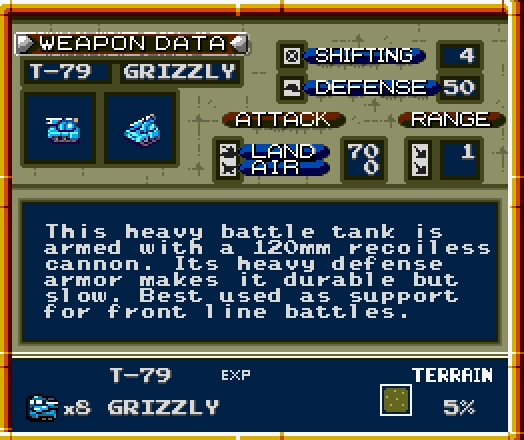
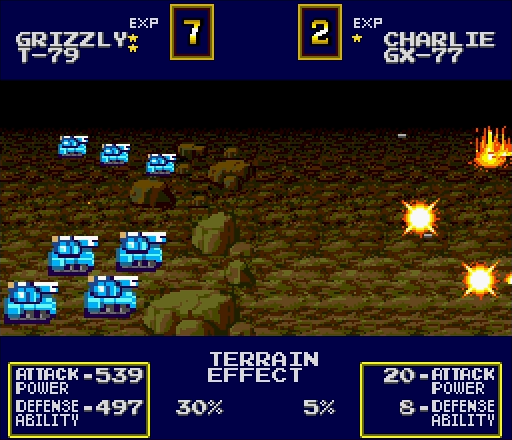
In terms of heavy tanks, the Grizzly is the Polar's opposite: it's got a bit more armor than the Bison but hits much harder. The best way to use a Grizzly is to hit targets that can't do much damage in return, or to provide a support bonus to other units. They're also useful in a straight-up fight, although they can't take a beating like Polars can.
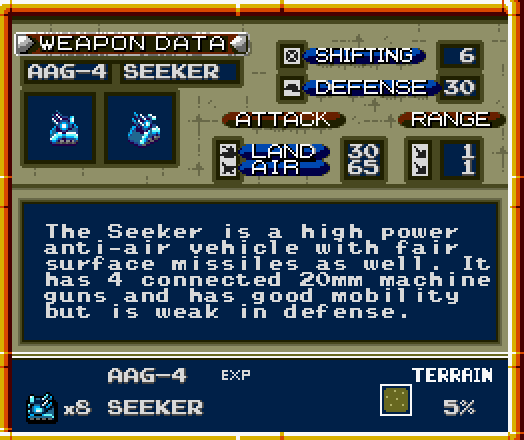
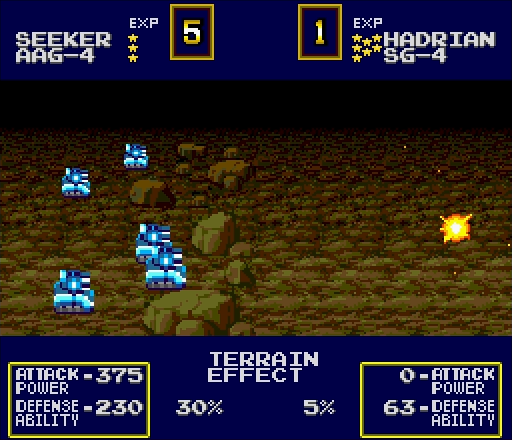
And finally, for new Allied weapons, the Seeker. It can hold its own against tanks with sufficient support, but obviously you'll get much more mileage out of it shooting down aircraft.
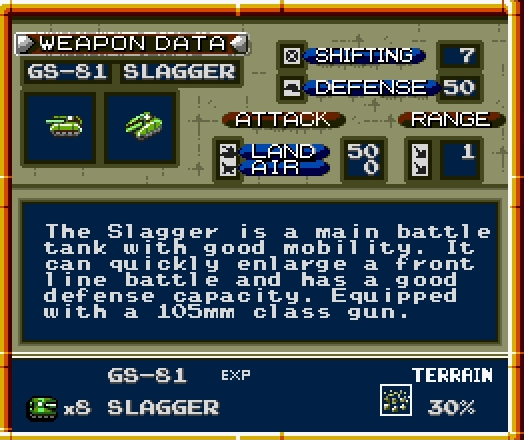
The first of two new Axis weapons is the Slagger (am I the only one who loves that name?). It's a bit better armored and a bit faster than a Bison. The Slagger is the fastest tank unit available, so we'll have to take care to make sure it doesn't escape after being weakened.
(For a bit of fun, look up "Slagger" on Urban Dictionary.)
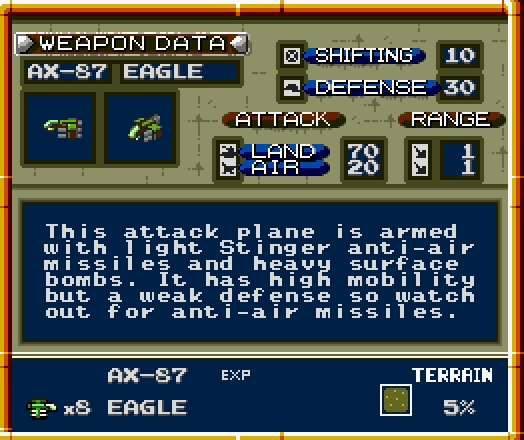
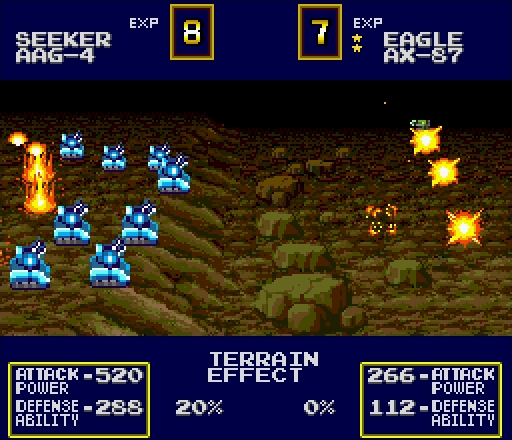
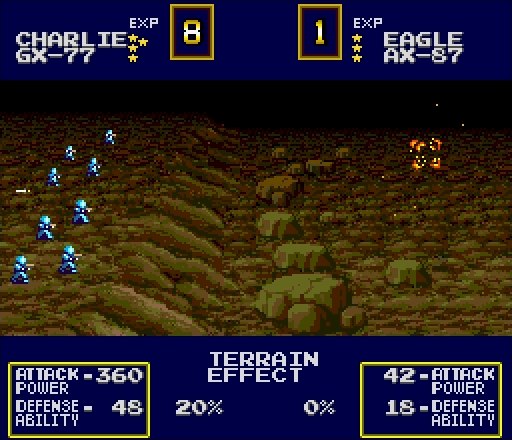
And finally, the reason we've been provided with anti-air guns, the Eagle. We can see right away the numbers aren't pretty: it's far faster than anything else we've seen, and it hits as hard as a Grizzly. It's lightly armored and has little air attack, so fighters would be our best bet for taking it out. We'll have to do the job with Seekers, though.
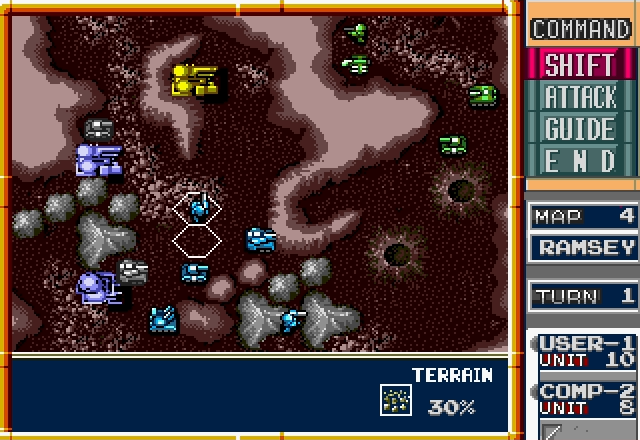
First thing to do in any map is to deploy any units we have in factories.
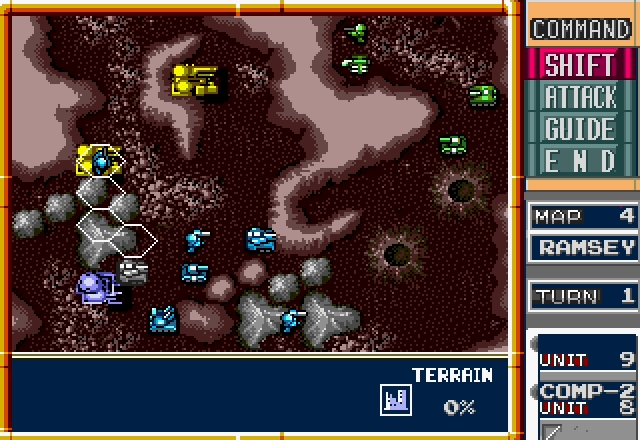
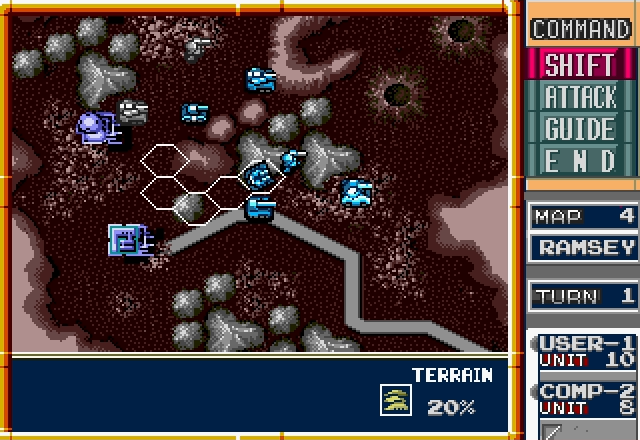
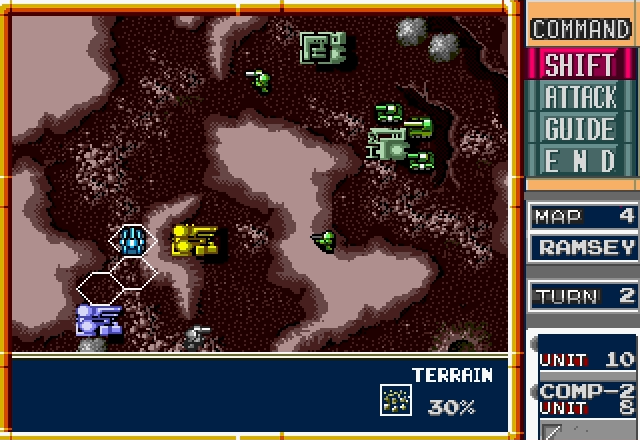
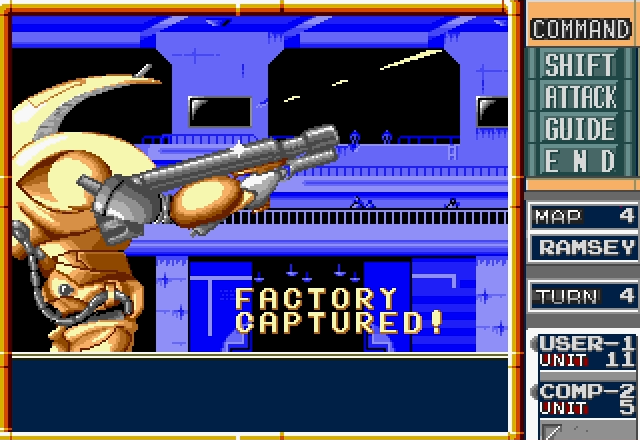
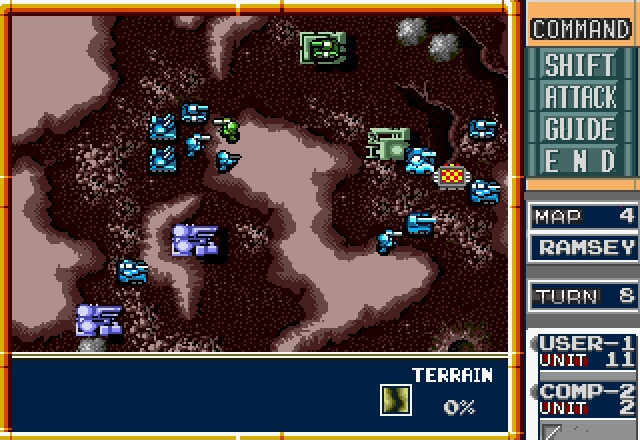
Next, we'll capture this nearby unoccupied factory and bolster our forces with an additional tank.
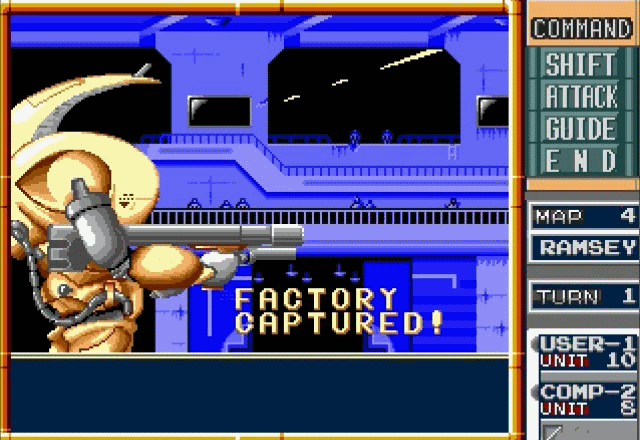
Our soldiers bring the factory's systems online and raise their rifles in triumph.
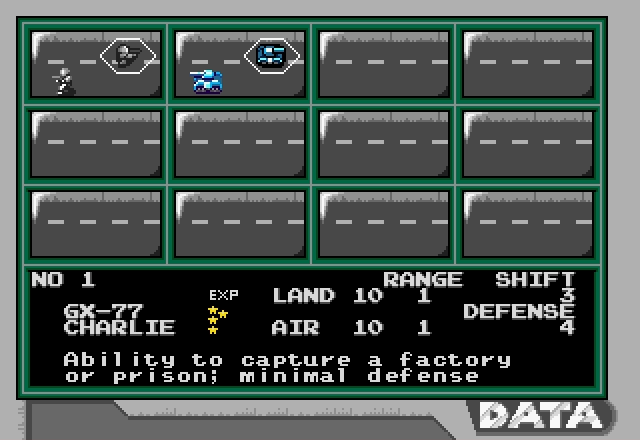
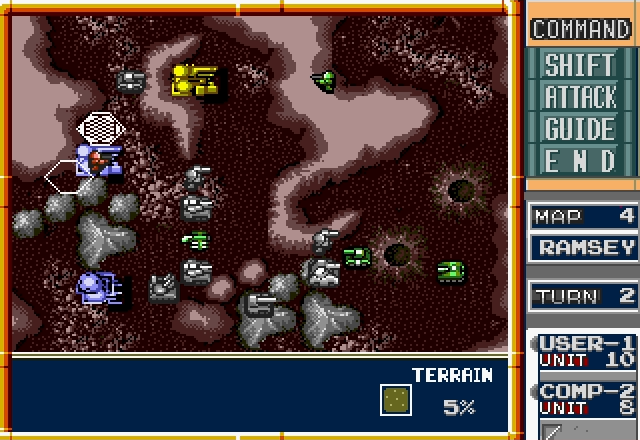
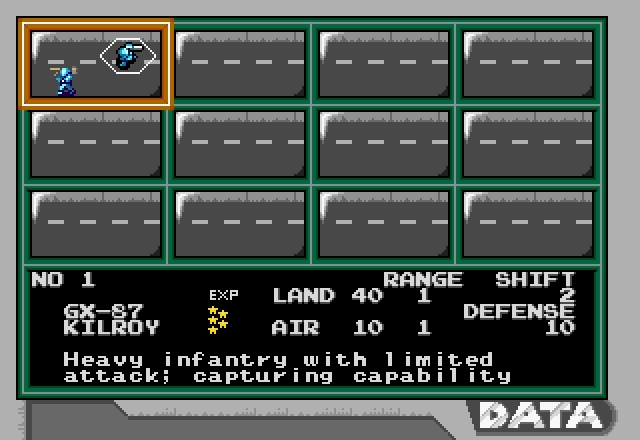
Once that's done, we have a look inside. The previously neutral Bison now belongs to us, and is ready for deployment. The Charlie that captured it will be ready next turn, and in the meantime it's gotten itself a nice 4 experience stars.
And yes, if you capture an enemy prison you get any units they had in there for repairs, instantly ready for you to use. It's pretty damn funny if you can pull it off.
Our new tank rolls out, ready to flank the enemy to the left.
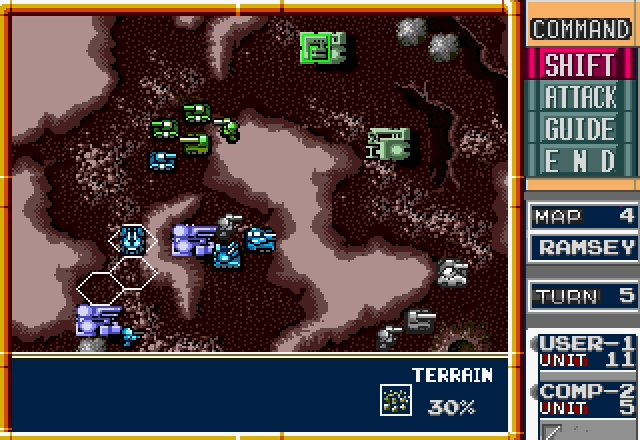
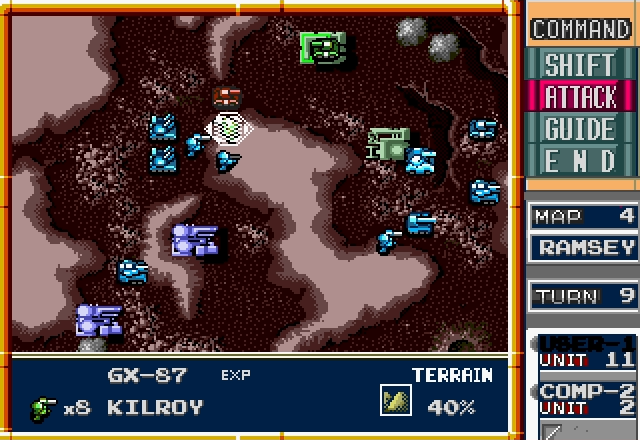
Kilroys are slow. Kilroys crossing rocky terrain are slower. It's going to be tough getting to that other factory before the enemy Charlie does.
Don't ask me why I stuck my only anti-air defense here, where it can't defend my northern Kilroy, which is trying to capture a much-needed Seeker. I honestly don't know what I was thinking. Just another
 moment, I suppose.
Luckily, I smarten up and finish my turn by positioning my remaining units much more sensibly.
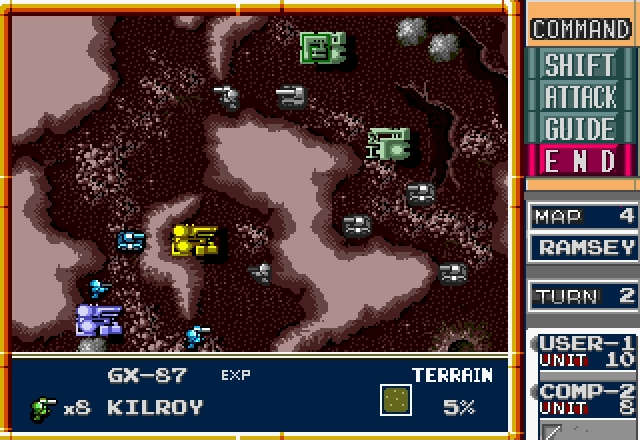
Here's a screencap of the enemy moving its Eagle, just so you can see how ridiculously fast it is compared to everything else. We've got our work cut out for us.
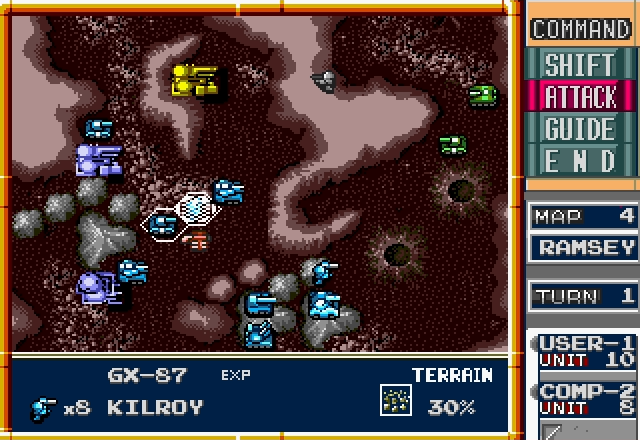
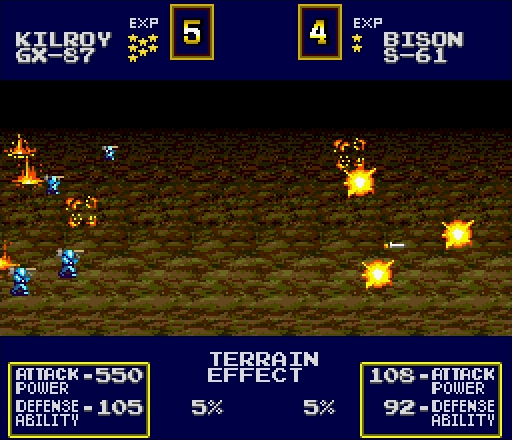
And of course, it attacks the one thing we really, really don't want it to.
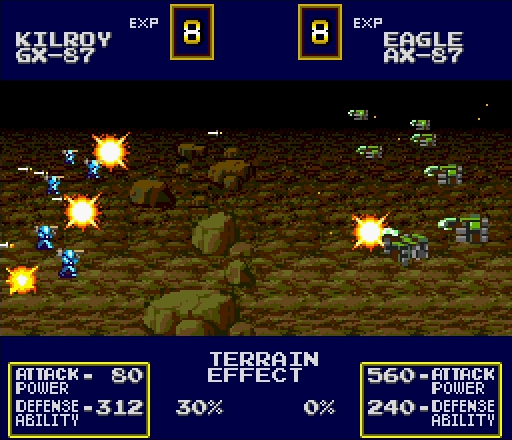
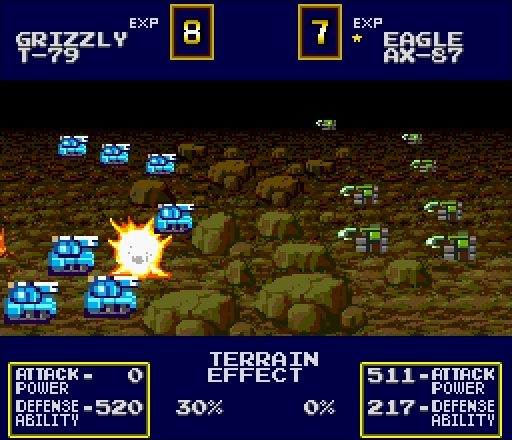
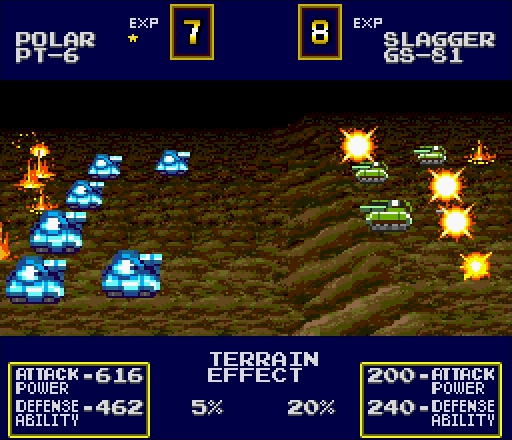
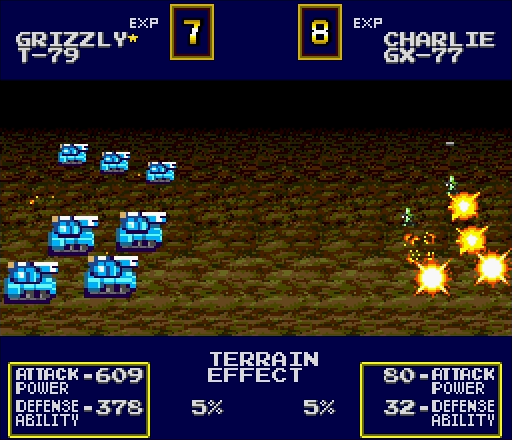
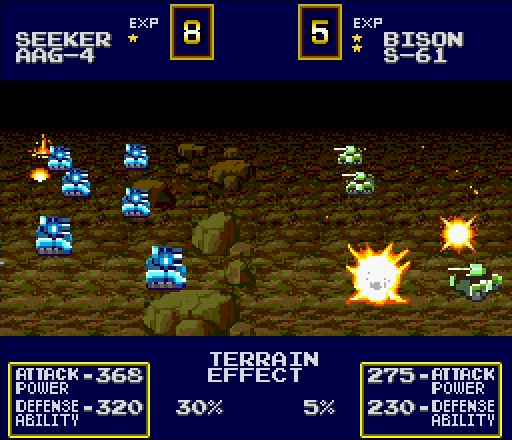
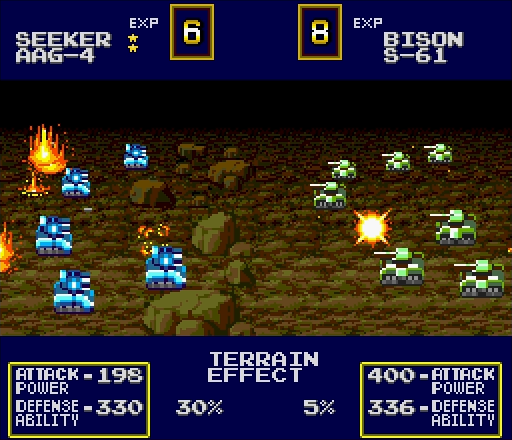
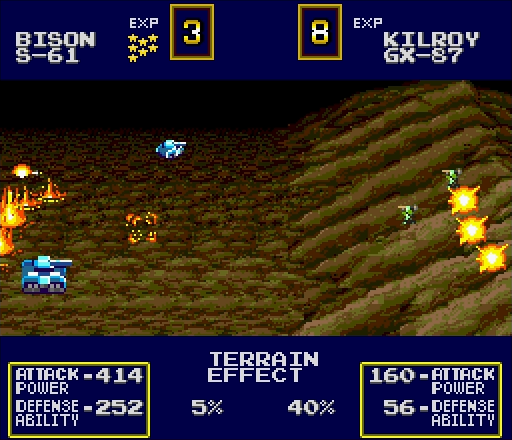
That...actually didn't go nearly as bad as I'd feared. The defense boost the Kilroy got from the Grizzly probably helped. Even better, we managed to kill an Eagle in return! That makes things easier for our Seeker, since the numbers will be on its side now.
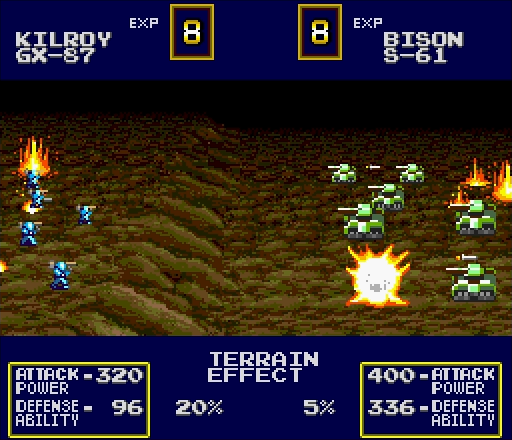
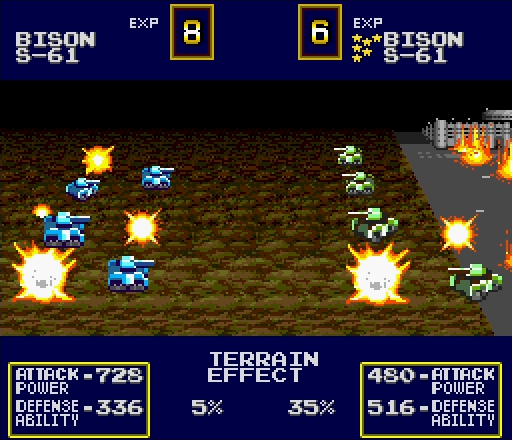
The AI continues its rampage against Kilroys by sending a Bison to attack one in the south. Our unit gives almost as good as it gets.
The Slagger follows close behind, but we've got more than enough forces south to deal with it.
The AI wraps up its turn by pushing more units south and deploying from its factories.
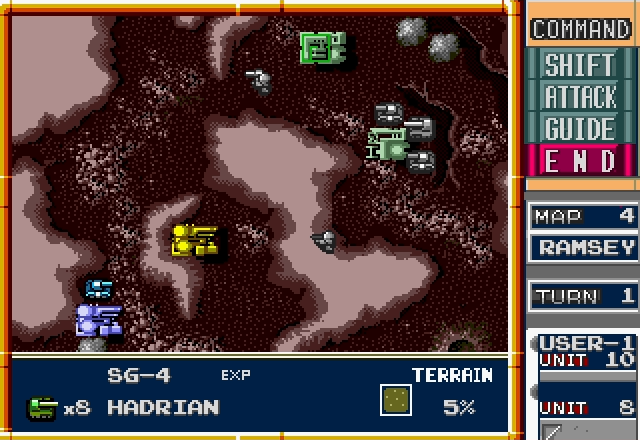
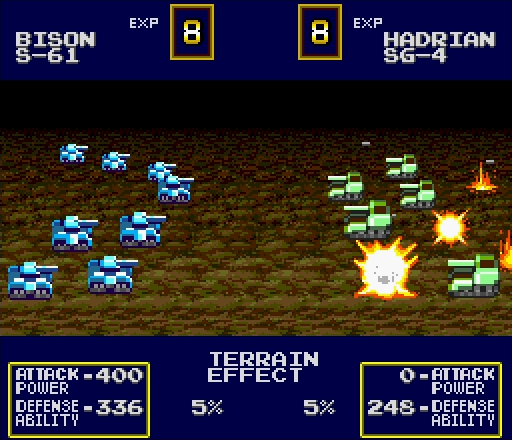
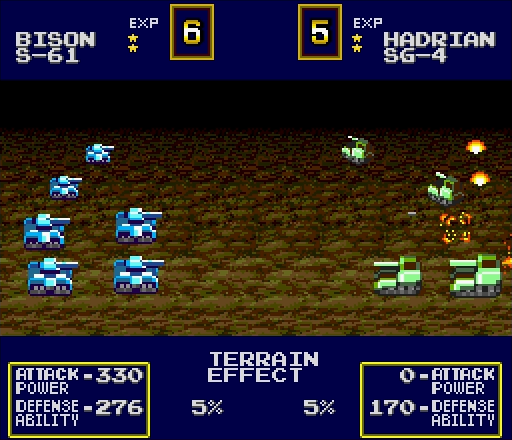
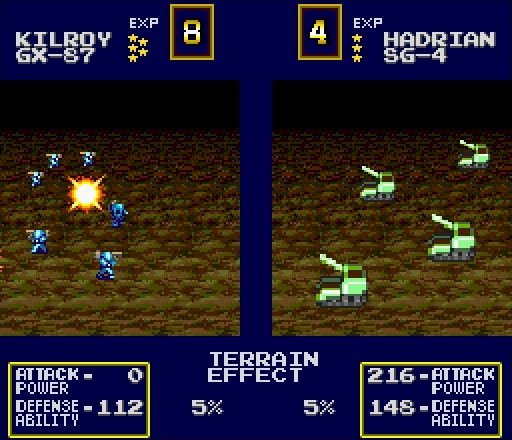
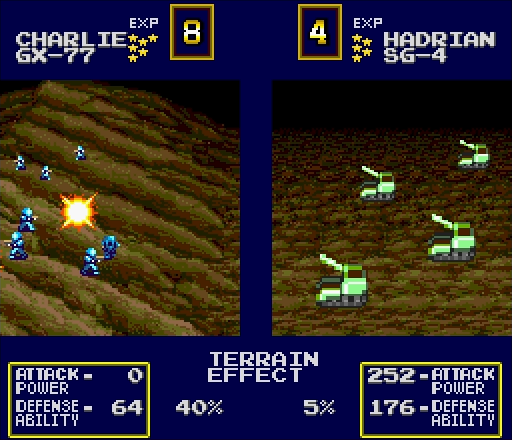
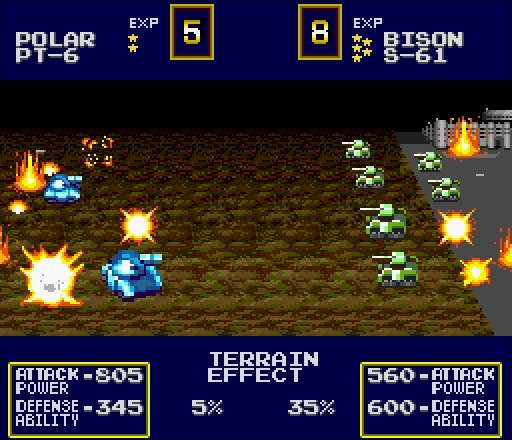
Since we haven't had the chance to use it yet, let's open our second turn by taking the Hadrian out for a spin.
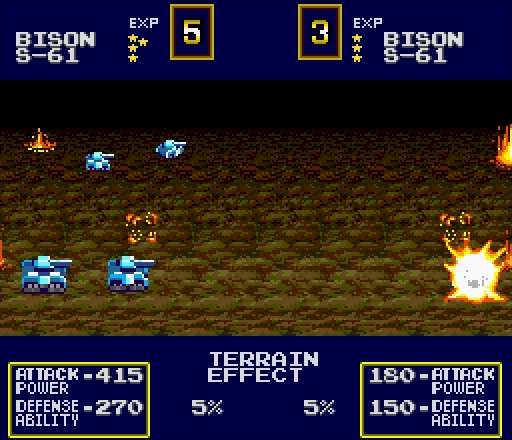
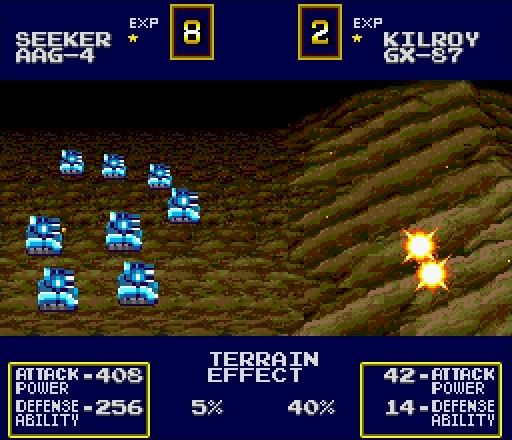
Killing two Bisons is a decent performance from a Hadrian, so we'll gladly take this. Just makes things that much easier for our tanks. Our Polars should be able to finish the job.
 POLARS!
This is going to bite me in the ass later.
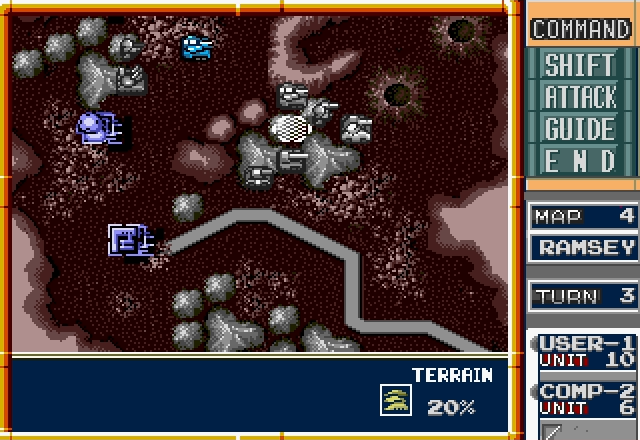
More pressingly, the Eagle's still bearing down on us. Air units are subject to Zone of Control just like ground units are, so by surrounding it with our Grizzlies we can trap it and make sure it can't hit our Kilroy again. Next turn our Seeker can roll up and shoot it down.
Pictured: Why this map annoys me. Luckily our tank's almost clear of the rough terrain, so we won't have to move two hexes at a time much longer.
Our Charlie's free again, so let's deploy it now. It won't be doing much damage, but more firepower is always welcome. That's the end of our turn.
Predictably, the AI starts its turn by telling its Bison to haul its ass out of there. You can probably guess where it's going, and why that's annoying for us.
Meanwhile the Eagle tries to punch its way out of its jail. It doesn't accomplish much.

The Slagger rolls into the fray and...uh...doesn't attack?
This game's AI is pretty good at understanding the rules and taking advantage of them, but goddamn it's scatterbrained.
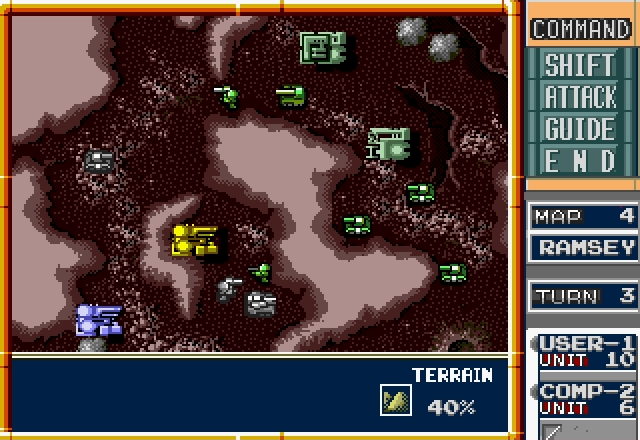
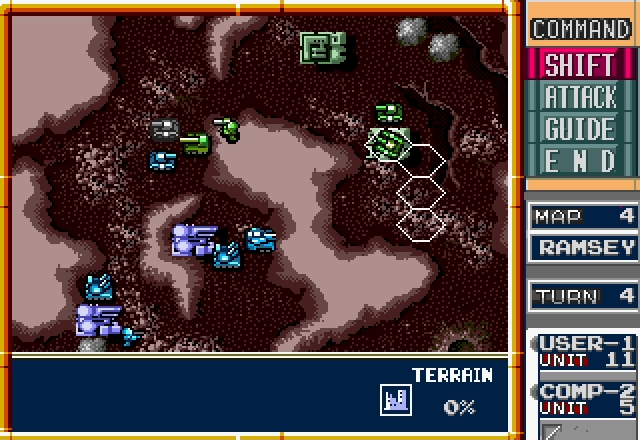
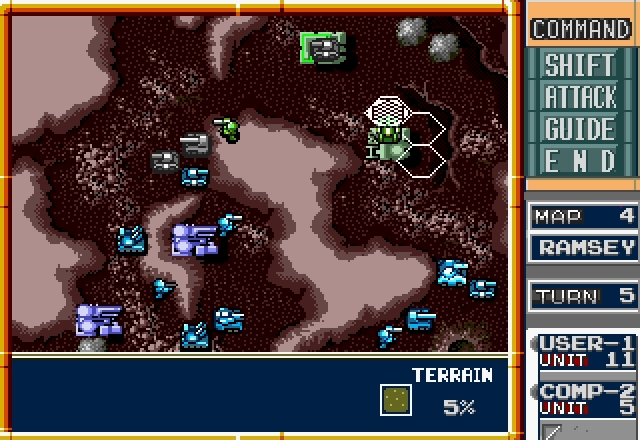
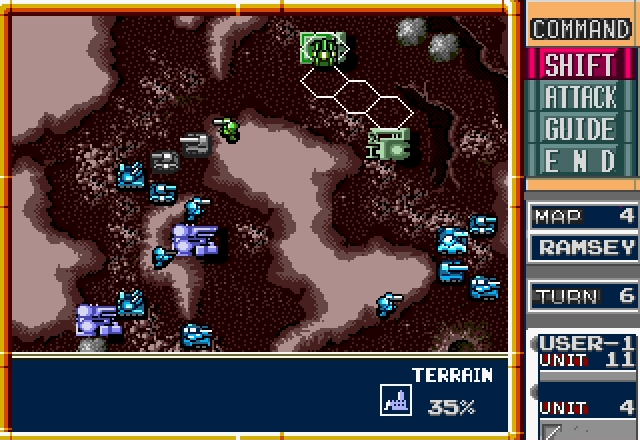
To the north, it shuffles its units around a bit. The Hadrian goes to the left, where it's going to be a huge pain in the ass unless we do something about it. More worryingly, that Charlie is in range to capture that factory.
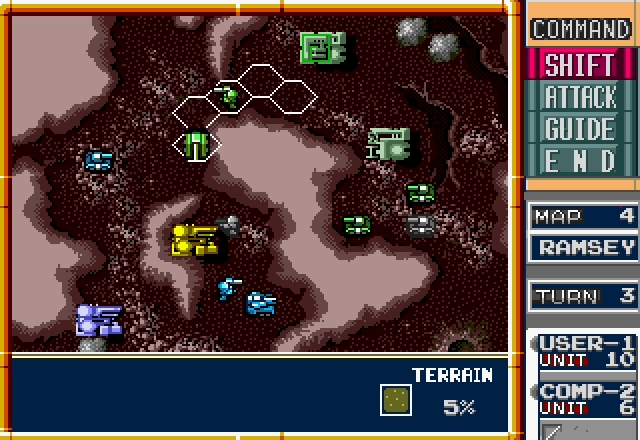
Our turn again. Let's see if we can shoot down this bird.
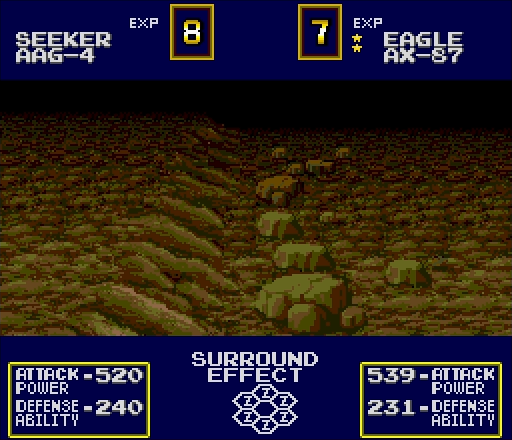
There's an important lesson in this screenshot: Units count towards the surround effect even if they don't have any way to hit the thing they're surrounding.
Ooh, almost! I'd be irritated here, but...
...this gives me the chance to do something.

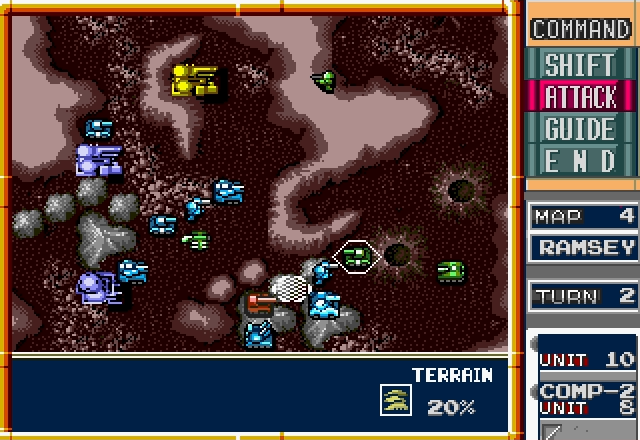
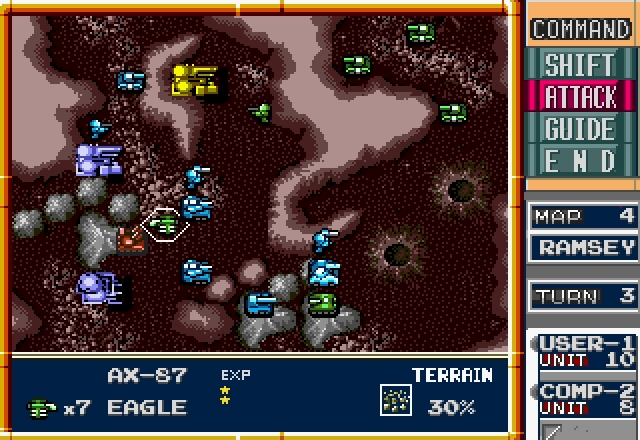
With the Eagle shot down, the enemy's only real advantage is gone. Keeping in mind the lesson we learned about surrounding, let's park our artillery next to the enemy Slagger.
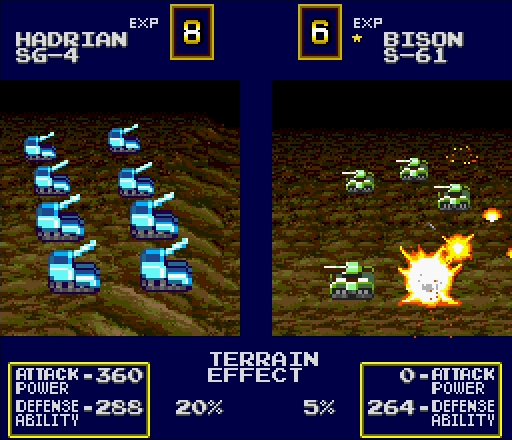
Neat as Military Madness's mechanics are, sometimes they require you to do things that make no real-life sense.
But with results like these, I'm not going to complain. Note that, even though it shouldn't be able to attack at this range, the Hadrian gives offensive support here. Offensive support ignores attack ranges, but not air/ground differences.
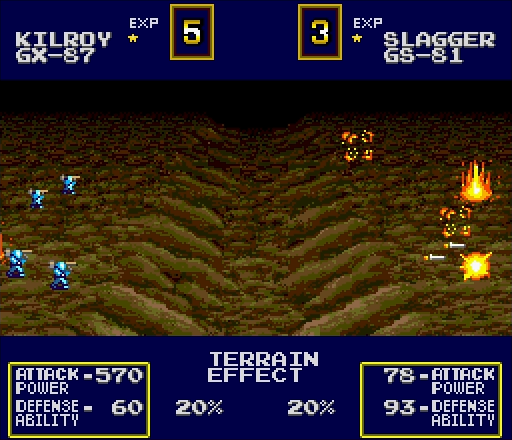
It's a quirk that works out really nicely when we finish them off.
The south is clear now, but we still need to head off the enemy Charlie headed for the factory.
Our Kilroy heads up but doesn't attack - its job is to use its ZoC so that the enemy Charlie can't capture the factory next turn.
Attacking is left to the Grizzly, and it does that quite nicely.
That's all the enemy's remaining units. I'd say things are looking up for us!
And, yep, the Hadrian moves down to bombard our units to the south. If we didn't have a Bison on its way to attack it, it would've been a huge pain in the ass.

The AI doesn't attack this turn, so there's not much to say about its movements. It just generally pushes south.
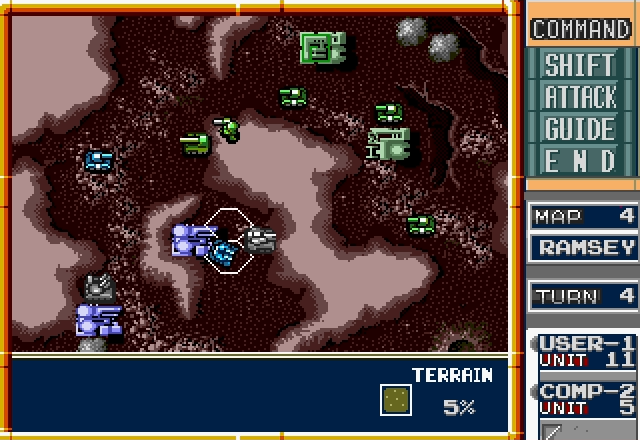
I decide to start pushing to the north here so I can attack from both sides. The Grizzly's slowness is a problem, especially when I clog the edge of its movement range with units
Our other Grizzly promptly ends the battle for the last neutral factory.
Our Kilroy moves in and captures it.
The Seeker we get for our trouble isn't especially important now that the Eagle has been shot down, but again, extra firepower. Always good.
Our Bison to the north finally breaks through the rocky fields and hits the enemy Hadrian, and does a pretty good job of it. At almost half-strength, it won't make things nearly as messy for us.
How will the AI deal with this?
By doing its damnedest to make sure we don't hurt its Hadrian any worse, that's how.
Yeah, that Bison's in trouble now. Can we save it?
The crippled enemy Bison from earlier has made it back to its factory (and shame on you if you thought it was going anywhere else), which will make our trek to the enemy prison that much harder.

Despite taking damage, the Hadrian continues the job the Eagle started, chipping away at my Grizzly.
At the end of its turn, the enemy now has its entire deployed force attacking this one Bison.
On the plus side, we start off our turn by deploying this Kilroy, which by now has a nice boost from its experience stars. It won't take long for it to cross the mountains.
Our Seeker creeps north to provide some additional backup. We're still outmatched there, but with these two joining we should have a fighting chance.
Meanwhile, the trapped Bison does its best to make 'em hurt.
Our remaining forces all push north, and it's once again the AI's turn.

Seeing our force coming up from the east, it sends a Bison back to guard its prison camp, which makes things easier for us at the frontline.
The Hadrian hits the softest target it can, and even then it doesn't do much.
Outnumbered and outgunned, our trapped Bison continues to put up a stubborn defense.
Speaking of Bisons, the enemy's has been repaired and we'll have to face it again soon. Fortunately that's the only over thing that happens this turn. The enemy can't do much with just 5 units, after all.

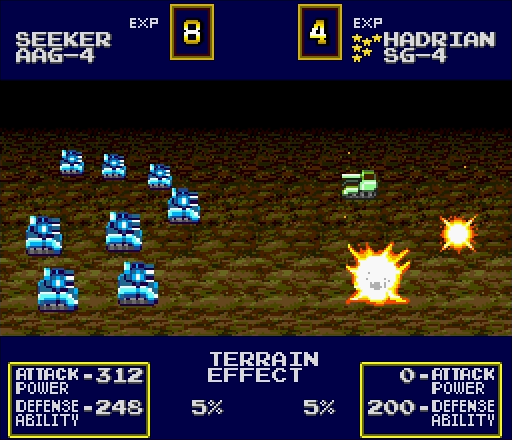
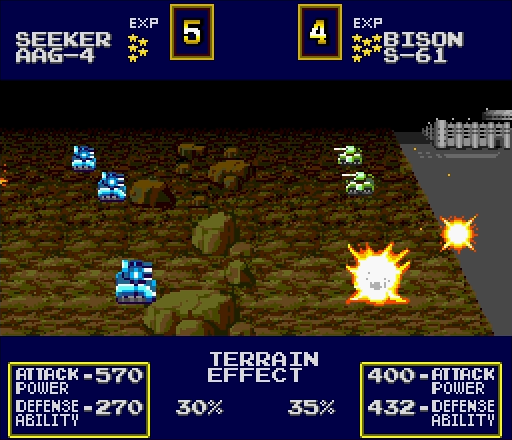
Help finally arrives to the north! Let's see how the Seeker does against ground units.
It gives as good as it gets, although that's against a damaged tank unit when it has offensive support. Definitely eases the burden on our own Bison, though.
Said Bison finishes the job.

The tide's very much in our favor now. The only real problem left is the massive rock field that our heavy tanks will have to move through one hex at a time.
I'll spare you the long version, but suffice to say moving all those units through is boring.
The enemy Hadrian keeps plugging away at our Kilroy, and by now it's actually hurting pretty badly. Still, if we retreated it, the fight would probably be over by the time it got back, so we'll just have to make do.
...Shit, I didn't see this coming.
Well, that was anticlimactic. I fully expected my Seeker to be crippled here. But hey, at least RNG bullshit goes both ways, right?
Not wanting to leave its prison camp unguarded, the AI wraps up its turn by parking its tank on top of it, effectively surrendering its only factory.

I was actually pretty worried about the sudden tank blitz, but honestly I think it's just made things easier for us. Surrounded units don't tend to put up much of a fight, after all.
As seen here.
Our damaged Kilroy unit finishes the job, earning it a full star. Knowing what we learned from willbender, this half-strength Kilroy is now as strong as a full-health rookie one. Not bad at all!
I think we can say we've started the mopup now, don't you?
I'd say the AI agrees, since it's given up on trying to do anything meaningful.

We mow down the Hadrian, which is about as difficult as you'd expect.
And we're set to surround the Kilroy next turn, with forces on both sides ready to hit the prison camp.
Pictured: Everything the AI does on its turn. It's known to do this when it's in a hopeless position, and it's always satisfying to see.
This Kilroy wasn't doing anything important, but since its ZoC is slowing us down, it's gotta go.
Our Bison's almost dead, but so is the Kilroy. Considering their starting health, I'd call this a fair trade.
A Seeker gobbles up the survivors for 2 free experience stars.

All right, finish off that last Bison and we're done here. Just give me a few turns to get everyone in position...

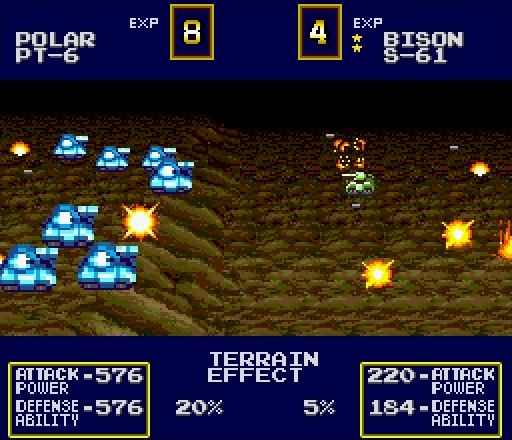
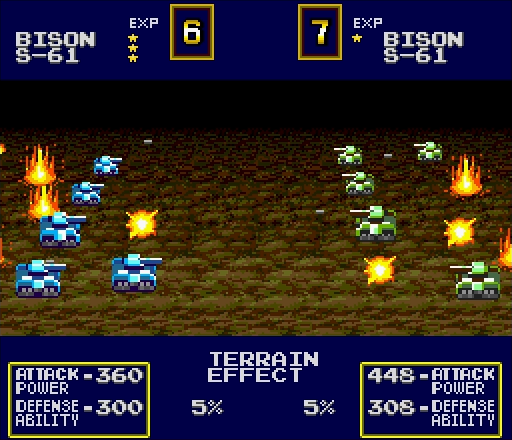
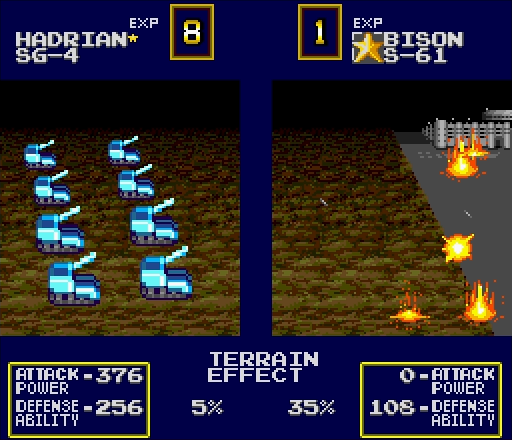
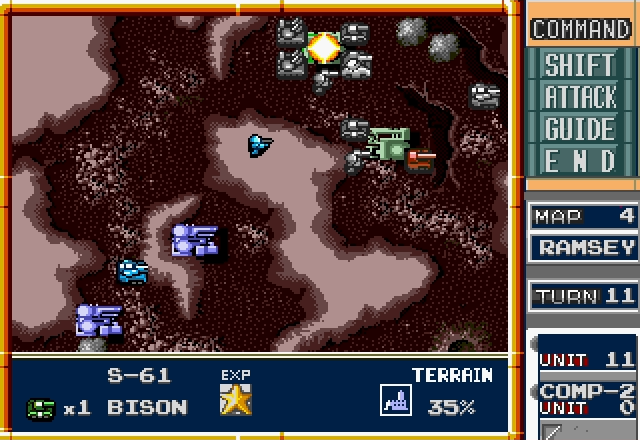
Okay, I'd say we've got enough firepower amassed here to take out one Bison, wouldn't you? The problem here is that, since it's at the edge of the map, we can't surround it. We'll have to wear it down. I'm sure a Polar should be able to kill three or four, even with the prison camp's 35% defense boost.
WHAT.
Military Madness at its most infuriating right there
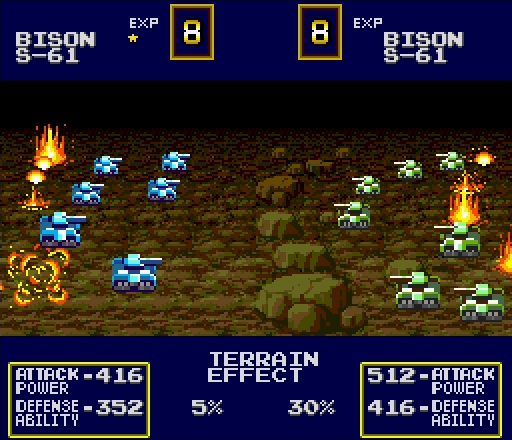
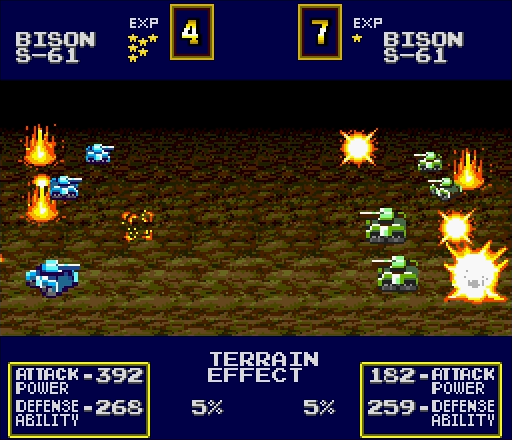
I decide to get my attack boost just a little bit higher by switching out my 2HP Bison for the 4HP Charlie. This tank's going to be a tough nut to crack.
I'll let these battle results speak for themselves:
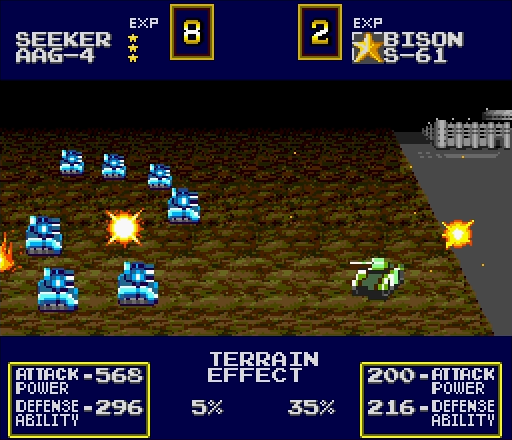
God damn, that thing took a lot of killing.
Interestingly, this is the first map we've cleared by rout rather than by capture.
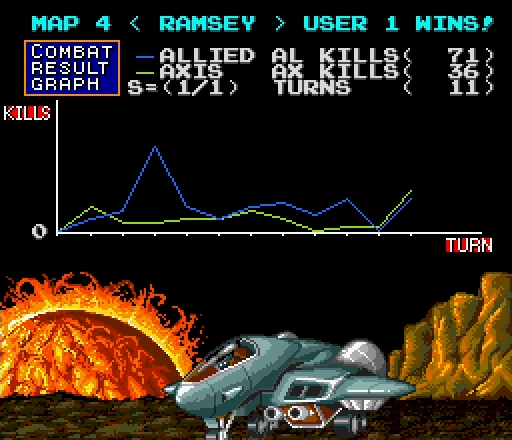
In any case, the Allies are victorious at RAMSEY. We had to adapt our tactics to the Eagle, but it wasn't the worst thing the Axis could throw at us.
NEXT TIME: The worst thing the Axis can throw at us at NEWTON.