Part 60: Turn 9 - Axis Detraining Phase: The Battles of Belgorod and Rossosh

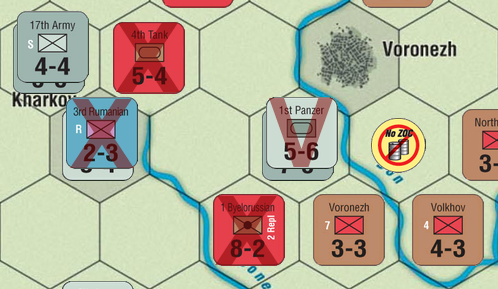
1st Panzer, 2nd Panzer vs 1st Byelorussian Front
Combat odds: 14/8 = 3:2, shifted +1 for Blitz! and +1 for Luftwaffe Support for a total of 3:1
Roll: 2 - EX
1st Panzer takes a step loss.
1st Byelorussian takes a step loss and is eliminated. It goes to the Destroyed Units Box.
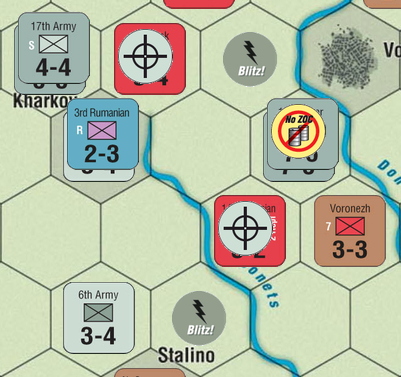
3rd Panzer, 3rd Rumanian, 11th Army, 17th Army vs 4th Tank Army
Combat odds: 15/5 = 3:1, shifted +1 for Blitz! for a total of 4:1
Roll: 1 - EX
3rd Rumanian takes a step loss and is eliminated. It goes back to the Turn Track and will return on Turn 13.
4th Tank Army takes a step loss and is eliminated. It goes to the Destroyed Units Box.
The Germans prepare to reopen the supply lines for their Panzers and smash open the Red Army line in the process. Their attack is ferocious, but this is no longer the Soviet Army of 1941, it does not just melt under German pressure. However, the Soviets find themselves unable to withstand the German push entirely and the powerful 1st Byelorussian Front largely dissolves or is pulled back from the front. Its commander, Polkovnik Gradenko, narrowly evades capture after a stray light armour raid stumbles upon his headquarters. The Axis have to pay dearly for this little victory, but they achieve the most important primary objective of the attack.
The situation is similar on the other end of the manoeuvre, where four Axis armies gather to face the huge concentration of Soviet tanks. The Red Army armour is by and large superior to its German counterparts, but the tank crews still leave a lot to be desired, which eventually spells doom of the Soviet formation. At the critical point in the battle, Polkovnik Sandman personally leads the Soviet push from his T-34, reportedly waving a cavalry sabre and yelling while approaching the German line. Shortly after, as the battlefield legend has it, his tank is knocked out by a hidden StuG and the ensuing communications breakdown allows the Germans to move in and smash the Soviet armour spearhead. Sandman only lives to see another day thanks to heroic efforts of his tank driver, who pulled the unconscious commander out and smuggled him behind the Soviet line in time. However, supply shortages mean that the fight ends without the Axis forces gaining much ground, and the 3rd Rumanian has to be pulled off the line and relegated to rear-area duties.
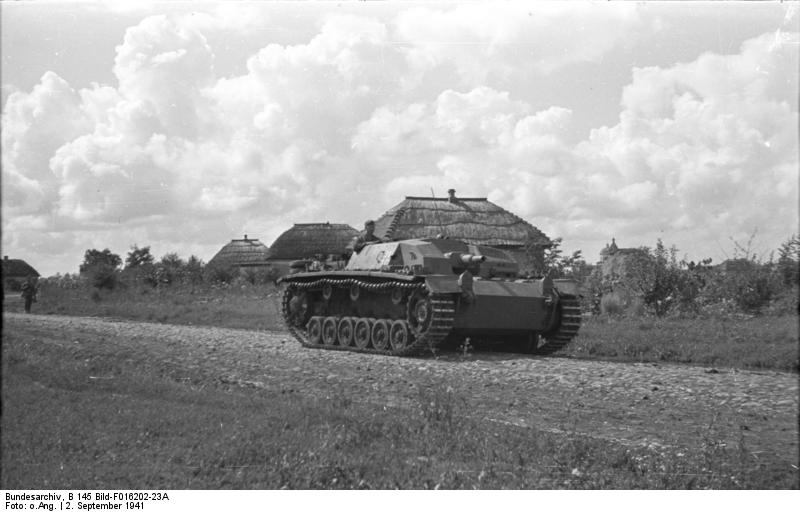
A Sturmgeschuetz (StuG) III. This weapon was designed in 1936 based on Erich von Manstein's idea that the German army needed a mobile assault artillery gun they could use to smash through strongpoints and suppress enemy activity. The task of designing such a weapons platform fell to Daimler-Benz, who used the chassis of the Panzer III, bur removed the turret in order to fit in a stronger gun. The 75 mm low-velocity gun was quite adequate against infantry and fortifications, but after the outbreak of the war against the USSR something had to be done about all those awful tanks the Soviets were fielding. The answer was to replace the gun with a longer-barrelled, high-velocity cannon of the same calibre and delegate the vehicle to AT role - at the same time the Germans also started to produce the Sturmhaeubitze 42, which was the StuG III with a 105 mm howitzer gun mounted instead. The StuGs were cheap, easy to build, effective in both roles and had a low profile, making them difficult targets and easier to conceal. The obvious drawback was the lack of a turret, but given that the weapon was not supposed to be used as a tank would be, it wasn't that bad. StuG IIIs were still in use in the 1967 Six Day Arab-Israeli War and reportedly even later than that.
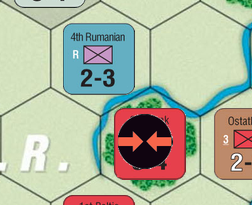
4th Rumanian vs 2nd Tank Army
Combat odds: 2/5 = 1:3, no shifts
Roll: 2 - CA!
Counterattack accepted at 5/2 = 2:1, shifted +1 for Armour Bonus - 3:1 odds
Roll: 5 - DR
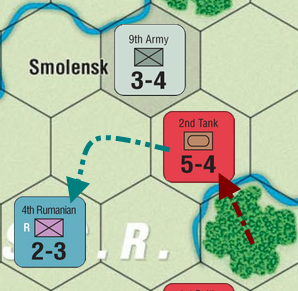
The 4th Rumanian moves to counter Soviet manoeuvres around Bryansk, but they get far more than they bargained for. Suddenly the Red Army reveals carefully concealed tank reserves and blasts through the weak Rumanian line. The Axis generals manage to maintain unit cohesion as they fall back from the unexpected Soviet onslaught, but the Red Army troops cannot advance too far after hearing of the heavy losses their comrades took near Kharkov.
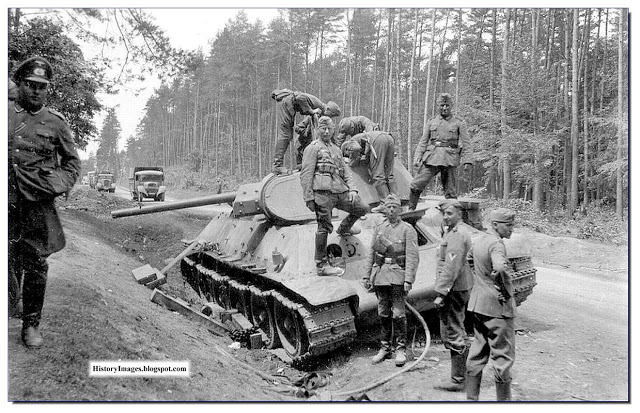
German troops inspect a knocked-out T-34.
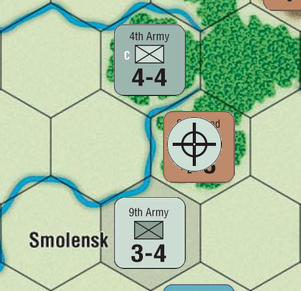
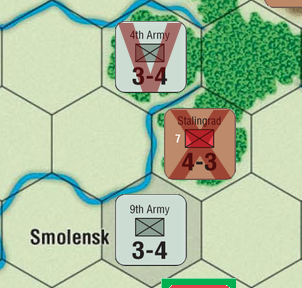
4th Army, 9th Army vs Stalingrad Front
Combat odds: 7/4 = 3:2, shifted -1 for Forest for a total of 1:1
Roll: 4 - EX
4th Army takes a step loss.
Stalingrad Front takes a step loss and is eliminated. It goes to the Destroyed Units Box.
The Germans attempt to put a little more pressure on the Soviet line around Moscow. However, lack of co-operation between Army Groups hurts this advance, resulting in a bloody pitched battle in the forests near the Soviet capital. Both sides take large casualties and gain little to nothing.
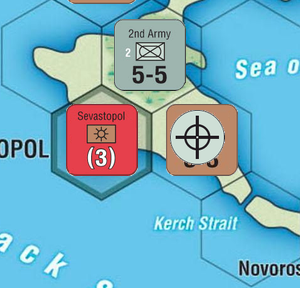
2nd Army vs South Front
Combat odds: 5/3 = 3:2, no shifts
Roll: 4 - EX
2nd Army takes a step loss.
South Front takes a step loss and is eliminated. It goes to the Destroyed Units Box.
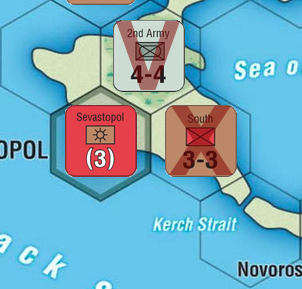
The Axis also attempt to push the Soviets out of the Crimea, but this ends in yet another prolonged encounter that does not gain them any ground. The isolated 2nd Army in the peninsula is weakened, but it's still in a lot better shape than the Soviet South Front.
Axis Removals Phase
Out-of-supply markers removed from 1st Panzer and 2nd Panzer.
Axis Detraining Phase
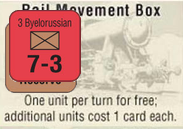
The Soviets may now place their Strategic Reserve back on the board. The unit has to go either to a friendly City hex which can trace an overland supply path or within three hexes of such a hex (but in the latter case it cannot end up in an EZOC, an enemy-controlled City or adjacent to one). The deadline for this is Sunday, March 2, 7 PM GMT.