Part 52: Competent Contest Challenger
So, if anyone is interested in it, I did a thing. Crosspeice covered Pokemon Contests pretty well, but if you want to know what happens when you combine them with insane obsessiveness... well, here. I'm sorry if the formatting isn't the best it could be; it's my first attempt at anything remotely like an LP. Putting this together has definitely given me a greater level of appreciation for the amount of work that goes into SSLPs, too.Anyway, enjoy. Or laugh at me. Whichever you prefer.
Goofy’s Dog Show Adventures
This is a little project I’ve been working on for a while now (off and on for the past two years or so), and I’m pretty excited to finally share it.
Let’s meet Goofy.

Goofy was once a fighting dog owned by the leader of a criminal organisation, abused and forced into combat regardless of his own wishes. He was rescued and rehabilitated by a defector who couldn’t countenance what the group was doing, who then put in a great deal of work to find him a new home where he wouldn’t need to fight any more. His new owner is a girl who loves contests and decided to make him the star of her ensemble (he might be a bit quirky and dance to his own tempo, but he always puts on a good show). He’s a bit of a hoarder and loves shiny ribbons so this worked out well for the both of them, and he’s quite happy now.
(Translation: He’s the shadow Smeargle from Pokemon Colosseum, which will be important for reasons we’ll get into later (though I also like the narrative it ended up creating, which was mostly an accident; I enjoyed it enough to write the above blurb but I’ll break “character” from here on). I prefer using the default/official character names, so he was rescued by Wes and is now owned by May in Emerald. Connecting Dolphin to VBA-M to make the transfer is really bloody finicky and inconsistent, and it took me several hours of failed attempts to pull off successfully.)
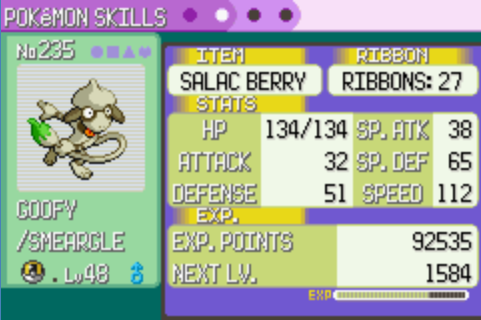
Now let’s take a look at what he can do.
Moves:
Here is the moveset he has most of the time:
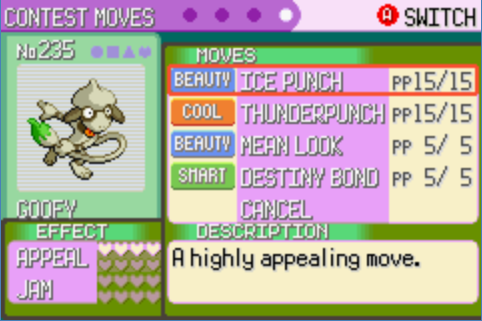

This is my favourite moveset for contests, and out of laziness I use it in every category. It works well even when it doesn’t have any on-type moves. Obviously, if I wanted to, I could tweak it to better match individual contest categories by using Heart Scales and sketching different moves between contests, but that ends up being a lot of unnecessary work (I’d do it to compete against other players though, if that were a thing I could do).
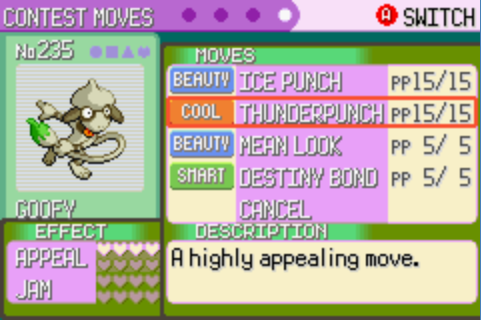
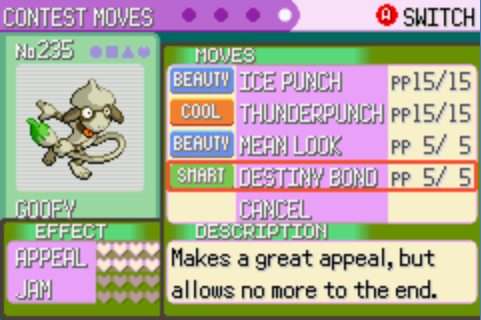
The core strategy is basically “ignore what everyone else does, just durdle and build up your own score”. (I prefer this approach to going for moves that hinder the opponents, because it has better odds of your score qualifying for a painting.) We’ve got two solid combos here. Ice Punch and Thunder Punch can be used in either order and the second one gets its points doubled, so those get alternated on the first three turns (if one of them matches the contest type, I make that the one that gets used twice for extra bonus hearts and a slim chance to “get the crowd going”). Then on turn four, we use Mean Look and combo into Destiny Bond for an insane 16 hearts on the final turn. (Curse could also be used to combo into Destiny Bond and gives one more heart, but I don’t like it as much, I prefer Mean Look’s nervousness effect to Curse’s “go last next turn”.)
This moveset actually isn’t exclusive to Smeargle – you can also get it on Gengar, Dusclops, or Gardevoir (but Gengar needs to be traded over from FR/LG, and you need to breed to get Destiny Bond for the Duskull family, and both Destiny Bond and Mean Look for the Ralts family; these are the only pokemon that get both the Destiny Bond combo and the punch combo, although the punches need to be taught by the postgame tutor in Emerald and are only available to the fully evolved forms). Unfortunately, none of these pokemon can be obtained in Colosseum or XD, which ruled them out for me (okay, there are a Duskull and Ralts in XD but they can’t get the egg moves so they don’t count).
I haven’t tried it because I think it’s more risky (and, shh, because I planned out the moveset before realising I could/had to use Smeargle), but instead of the punch combo (or any other 4/4 combo), a Smeargle could also try one of any number of combos into a move like Double-Edge that gives 6 hearts but makes it “more easily startled” (which doubles the point loss to jams), using that move on turn one and three and the move that initiates the combo on turn two. There’s definitely some potential here, though, so I’ll list the options. Only Smeargle can get these alongside the Destiny Bond combo.
Focus Energy (1, jam 3) into Double-Edge (6, double jam vulnerability)
Focus Energy (1, jam 3) into Take Down (6, double jam vulnerability)
Harden (2, protect against jam) into Double-Edge (6, double jam vulnerability)
Harden (2, protect against jam) into Take Down (6, double jam vulnerability)
Sunny Day (1+, benefits from crowd meter) into Overheat (6, double jam vulnerability)
Calm Mind (2, protect against jam) into Psycho Boost (6, double jam vulnerability)
Charge (2, bonus if same type as previous) into Volt Tackle (6, double jam vulnerability)
Lock-On (3, stop crowd excitement) into Superpower (6, double jam vulnerability)
Mind Reader (3, stop crowd excitement) into Hi Jump Kick (6, double jam vulnerability)
Mind Reader (3, stop crowd excitement) into Submission (6, double jam vulnerability)
Mind Reader (3, stop crowd excitement) into Superpower (6, double jam vulnerability)
For comparison, assuming no jams or crowd/type bonuses:
the safe strategy yields 4 + 8 + 4 = 16 hearts
versus the risky strategy 6 + (1-3) + 12 = 19-21 hearts
Charge/Volt Tackle seems like it’d have the highest potential payoff here. I might have to give this a go at some point, although I’m not expecting my preferences to change.
Pokeblocks and Contest Stats:
I refused to settle for anything less than the best here. I created my own set of Pokeblocks that would enable any pokemon to reach the maximum of 255 in every stat; there are other ways to do that, but I like mine because it’s efficient and completes in only 5-8 blocks depending on performance and the pokemon’s nature (realistically 7-8, unless you’re insanely good at the Berry Blender minigame which I’m not). That said, it brought its own set of challenges, due to requiring the e-Reader berries (including the Japan-exclusive ones).
There are 3 sets of 5 blocks, which I divide into three categories: the primary blocks, fillers to compensate for performance, and fillers to compensate for nature.
code:
Primary:
Pomeg/Petaya/Strib/Touga    (Gold, 58 Feel)    148 Spicy  97 Bitter
Kelpsy/Apicot/Eggant/Ginema (Gold, 54 Feel)    148 Dry    97 Sour
Qualot/Liechi/Chilan/Drash  (Gold, 58 Feel)    148 Sweet  97 Spicy
Hondew/Ganlon/Yago/Niniku   (Gold, 58 Feel)    148 Bitter 97 Dry
Grepa/Salac/Pumkin/Topo     (Gold, 58 Feel)    148 Sour   97 Sweet

Fillers (Performance):
Pecha/Pomeg/Nutpea/Kuo      (Grey, 9 Feel)    10 Spicy  10 Sweet  10 Bitter
Rawst/Kelpsy/Nutpea/Kuo     (Grey, 9 Feel)    10 Dry    10 Bitter 10 Sour
Aspear/Qualot/Nutpea/Kuo    (Grey, 9 Feel)    10 Spicy  10 Sweet  10 Sour
Cheri/Hondew/Nutpea/Kuo     (Grey, 9 Feel)    10 Spicy  10 Dry    10 Bitter
Chesto/Grepa/Nutpea/Kuo     (Grey, 9 Feel)    10 Dry    10 Sweet  10 Sour

Fillers (Nature):
Pinap/Pomeg/Nutpea/Kuo      (Purple,   8 Feel)    22 Spicy  10 Sweet
Razz/Kelpsy/Nutpea/Kuo      (Indigo,   8 Feel)    22 Dry    10 Bitter
Bluk/Qualot/Nutpea/Kuo      (Brown,    8 Feel)    22 Sweet  10 Sour
Nanab/Hondew/Nutpea/Kuo     (LiteBlue, 8 Feel)    22 Bitter 10 Spicy
Wepear/Grepa/Nutpea/Kuo     (Olive,    8 Feel)    22 Sour   10 Dry
The flavour values shown are assuming minigame performance of 90 RPM. If you are somehow able to exceed 106 RPM when blending, then the “primary” blocks would be sufficient by themselves to reach 255 in every stat (for a neutral-natured pokemon). If not, there is a 26 feel deficit after feeding 4 of them (as long as one of the ones fed is the 54 feel one), which we can use to squeeze in fillers (specifically, two from the “performance” group and one from the “nature” group add to exactly 26, bringing us to 254 feel used before the final block is fed).
Any two “performance” fillers can be chosen, as long as you mind the overlap so that every flavour is covered once (which means a single flavour will double up). If the pokemon has a non-neutral nature, the doubled-up stat should be the one reduced by its nature (and then the appropriate “nature” filler can be fed to further boost that stat). After this, the final primary block is fed and the pokemon should have the maximum of 255 in every stat as well as 255 Feel, for optimal performance in every contest category.
Here are some highlights from the feeding process.
This is a blank status screen. Goofy had never eaten a Pokeblock and had zero contest stats.
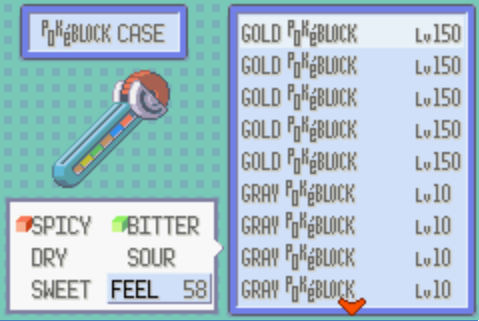
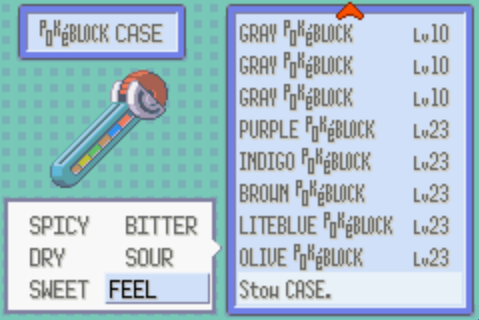
And here’s a look into my Pokeblock Case, showing 15 blocks made according to my recipes. I ended up doing slightly better than the 90 RPM assumed in my calculations, but not quite good enough to eliminate the need for the fillers. (You’ll notice the game only shows partial information, it only tells you the level of the strongest flavour.)
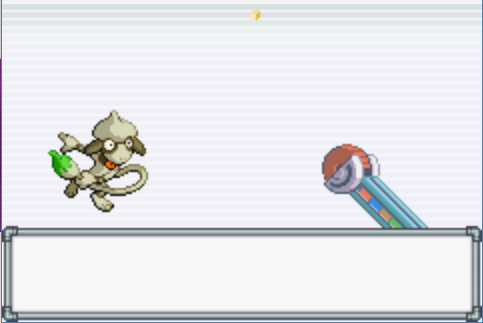
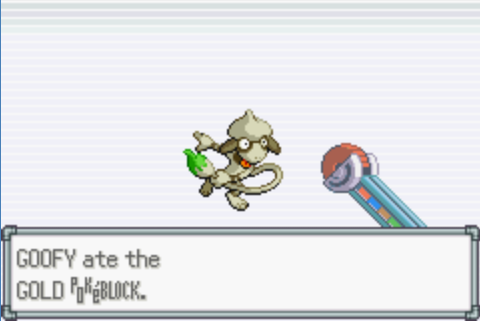
Select the Pokeblock and choose which Pokemon to give it to…
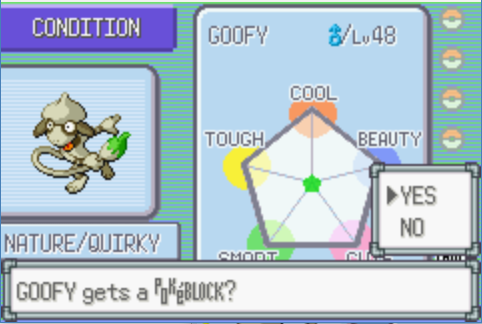
You see an animation where the Pokeblock is tossed to the Pokemon, and it eats it. (There are different animations for different natures of Pokemon, it’s pretty cute. You’ll also get a message about how much the Pokemon liked it, which depends on the nature and the flavours in the block but actually means nothing for gameplay purposes. Goofy has a neutral nature, which means he has no preferences and will never respond “happily” or “disdainfully”.)
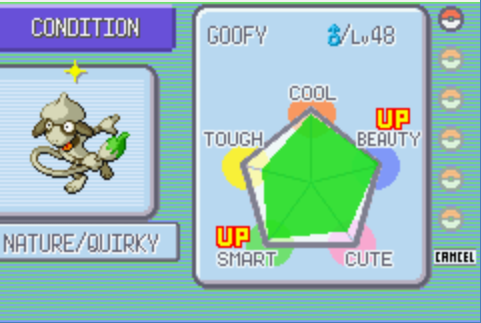
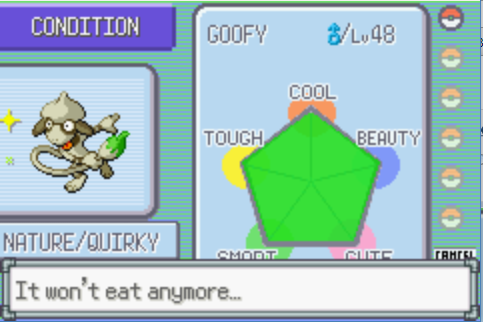
And after this, you get an animation where it shows the stats being increased on the pentagonal display. I like how this looks, even if the display’s a bit weird to parse – basically it slides the vertex of the inner polygon along a line to the corner of the pentagon as the stat increases, then it fills it in in green even though the area doesn’t represent anything (although watching it fill up makes you feel like you’ve accomplished something).
Primary Block 1. +150 Cool, +98 Smart. Feel: 0 + 58 = 58.
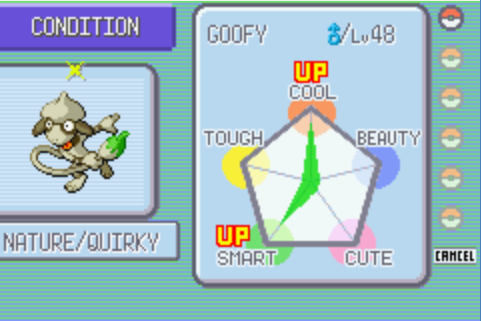
Primary Block 2. +150 Beauty, +98 Tough. Feel: 58 + 54 = 112.
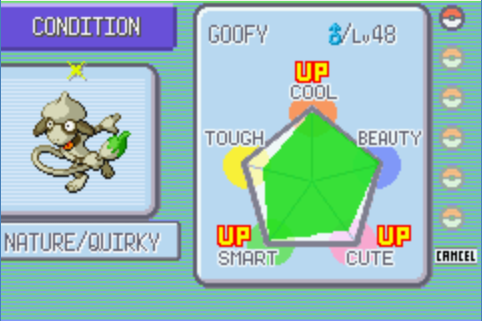
Primary Block 3. +150 Cute, +98 Cool. Feel: 112 + 58 = 170.
Primary Block 4. +150 Smart, +98 Beauty. Feel: 170 + 58 = 228.
Filler Block 1. +10 Cool, +10 Smart, +10 Cute. Feel: 228 + 9 = 237.
(I arbitrarily chose to use the first two filler blocks in the list. After eating this one, Cool and Smart are at maximum.)
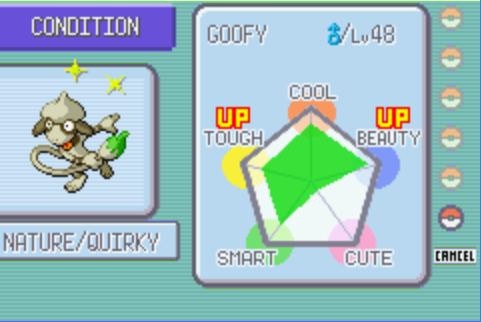
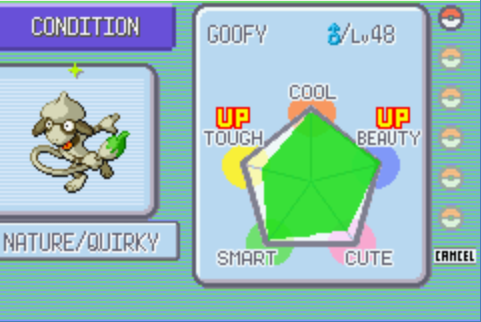
Filler Block 2. +10 Beauty, +10 Smart, +10 Tough. Feel: 237 + 9 = 246.
(Beauty is now at maximum as well. One curious thing you may notice in this screenshot is that it only shows the “UP” for two stats being increased because Smart was already at maximum.)
(If Goofy had had a non-neutral nature, here is where I would have fed the extra filler block. It would have a feel of 8, bringing the total feel consumed to 254. But it wasn’t necessary, so I didn’t.)
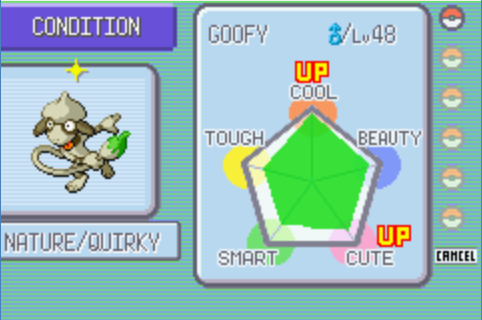
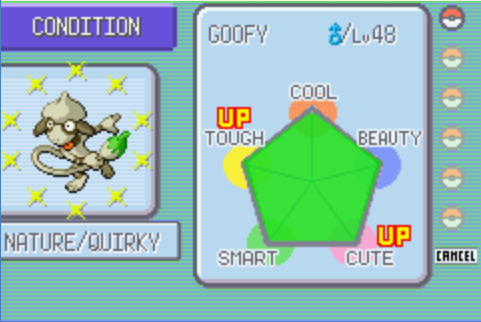
Primary Block 5. +150 Tough, +98 Cute. Feel has now hit the cap of 255.
(Tough and Cute are now maximised as well. Goofy has achieved perfect contest attributes. Look at all that green! I was really pleased with this screenshot for another reason, because you can see the full ring of stars – they’re a rough representation of how much Feel has been consumed, but they’re animated so you don’t always see all of them.)
Here’s what happens if I try to give him more. He’s so full he can never eat again. How sad.
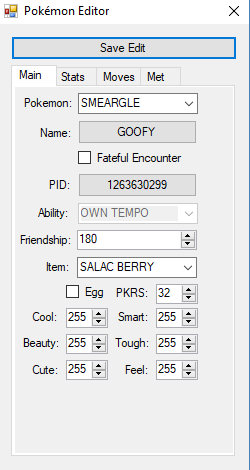
Here’s a bit of proof that it worked, using an external save editor to look at Goofy’s stats.
I’ve glossed over a lot about how these Pokeblocks were actually made, but that was actually a pretty involved process. If you're not interested in hearing about this, feel free to skip ahead to the results section.
Let’s talk a bit about the e-Reader berries first. There are twelve of these, released in two series of cards; only the first of those series got an English release. The e-Reader actually uses different encodings for the English and Japanese cards, so a Japanese e-Reader is needed (which also means Japanese Ruby or Sapphire cartridges, because you can only link the e-Reader with a same-language game). Also, a save file can have at most one type of e-Reader berry (they always go in slot 43 in the berry pouch); scanning a different card merely causes your berries to transform into the new type. Which means that it’s either necessary to stop and scan new cards after making each Pokeblock, or have 12 cartridges/save files (the minimum requirements would be 4 GBAs and 4 cartridges, at least 2 of which are Japanese Ruby/Sapphire, the Japanese e-Reader and the 12 Japanese berry cards).
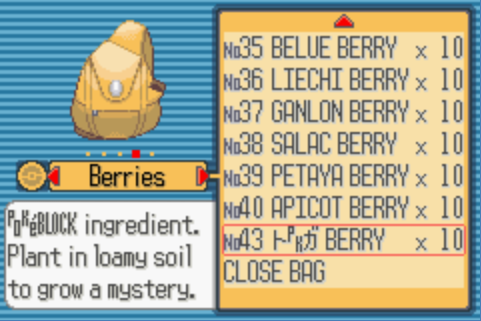
I did this in emulation rather than on hardware, which offers some shortcuts but is still a pain. I played through Ruby once and then duplicated the save to make 12 copies, one for each berry. One weird thing people may not know is that an English save file is still compatible with the Japanese version, so for the Japanese-exclusive berries I could just temporarily switch to a Japanese ROM and link with the Japanese e-Reader+ ROM (using a variant of VBA Link that supports the e-Reader), then go back to using an English ROM again once the berry was loaded. It ends up looking a bit weird: the berry’s name and “tag” page get loaded directly from the card rather than being preexistent in the game data, so it keeps the Japanese info and the English game gets confused by bits of it. The berry name ends up looking garbled in the menu, text on the tag page doesn’t show up correctly and trying to view it sometimes makes the game crash to title screen (I’m not sure if it just doesn’t work for certain berries or if the crash is random), but otherwise everything works fine, and the stats are correct when blending which is the important thing. You can do this in both directions, too, if for some reason you want the berry name to be in English in a Japanese game.
Touga berry (Japanese exclusive) in the bag, and its tag page, when viewed in an English game.

(As an unrelated aside, if you’re playing in emulation there are also some other fun tricks you can do by opening the save with a different ROM. Paired versions like Ruby/Sapphire and FR/LG often use the same save structure. Want to catch version exclusives from the other game? No problem! Of course you can also just gameshark or edit the save file, but I think it’s cool.)
And yeah, I cheated to get the Liechi berry. The Colosseum/XD berries are actually legitimate since I can link to Dolphin, but Liechi is still the biggest pain and I feel very little shame about that. My compromise was that I kept it isolated to the Ruby side files, and it only goes to my main Emerald file in Pokeblock form. And I could always have fallen back on the second set of Pokeblocks from here if I wanted to do it without the special berries. While using those recipes would no doubt have been less of a hassle, the idea of having my Pokemon consume all of the e-Reader berries tickled my completionist fancy.
After having the necessary save files set up, it was “simply” a matter of running four instances of VBA Link, playing the Berry Blender minigame in 4P mode, and swapping the save files around a bunch as necessary in order to make all of the Pokeblocks. My Emerald save was player 1, and player 2 could stay the same the whole time; players 3 and 4 got swapped around a lot. The “primary” blocks were the most annoying, as each one required a unique configuration of those files; the ten “fillers” all use Nutpea and Kuo as e-Reader berries go so they could all be done in one go with the same configuration afterward.
One thing I learned while doing this is that the red progress bar (which determines when the minigame ends) only advances when the players do button presses. I don’t think it’s entirely fixed at a certain number of inputs; it might advance different amounts depending on whether the button press is perfect, good or miss. Trying to control 4 players at once is trickier than it looks, I couldn’t work out a button mapping that felt intuitive and the best score I ended up with was around 96 RPM (hence the primary blocks ending up at 150/98). I do better than that with NPCs.
(During my first attempt at this, I completed most of the “primary” blocks and then had a boneheaded file-manipulation mishap, accidentally deleting my working directory for this project in a way that ended up being unrecoverable (even after dumping some money on a licence for a recovery program, I’d been moving too many things around too often for there to be anything stable to find). This was painful; I think I literally screamed when I realised. Thankfully I had sufficient backups not to lose my Emerald save or Goofy himself, but it was bad enough and the amount of work I had to redo was very frustrating. In retrospect, I regretted not thinking to name him Smeagol, because my aggravation at this proved he is my preciousss (and it sounds like Smeargle).)
Anyway, here’s the only interesting screenshot to show from this process:
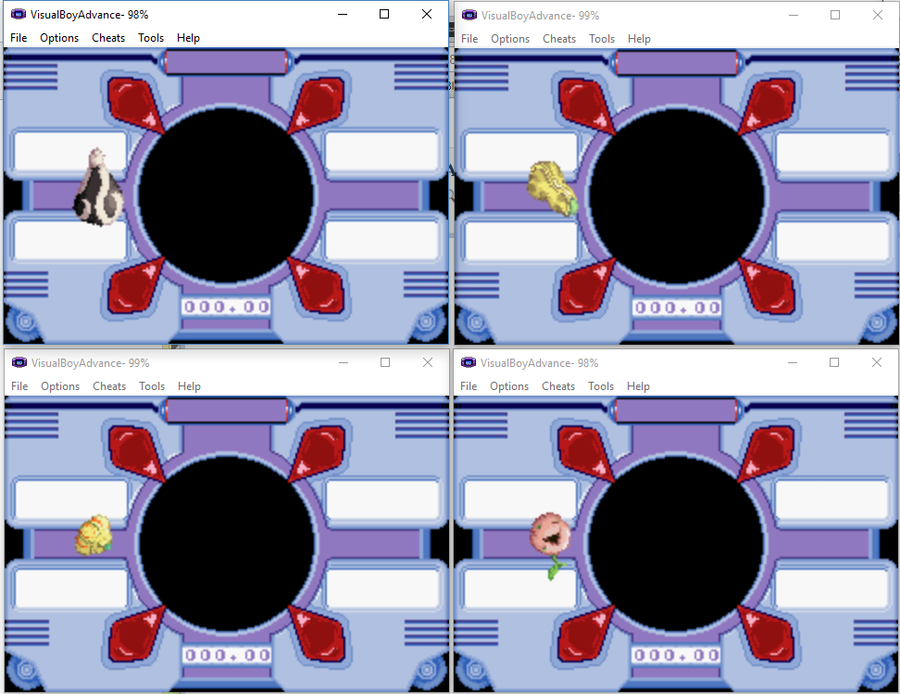
Here I am starting a round of Berry Blender with 4 instances, this was the 5th primary block (Grepa/Salac/Pumkin/Topo). The interesting thing is that each player here is seeing a different berry sprite go in simultaneously; normally, they go in sequence, so everyone sees P1’s berry first, then P2’s berry, and so on. But when an e-Reader berry goes in, it gets weirder: since the berry sprite data is in the actual cards, each player sees whichever sprite is loaded in their file regardless of what the actual berry is. This screenshot was either the third or fourth berry that went in; I don’t remember which, since it ends up repeating the same sprites twice.
P1 (upper left) here is the Emerald file; May always sees the sprite for the Enigma Berry (which is the placeholder entry when there’s no e-Reader berry, English Emerald can’t see any others since it has no e-Reader functionality). P2 (upper right) sees the Nutpea Berry, which happens to be the one that file had, even though there’s no Nutpea Berry anywhere in the recipe. P3 (lower left) sees the Pumkin Berry, and P4 (lower right) sees the Topo Berry.
Despite this oddity, the stats of the output Pokeblock correctly reflect the berries that were chosen, not the sprites that were shown going in (I worried about this the first time I saw it). Every player receives an identical copy of the Pokeblock.
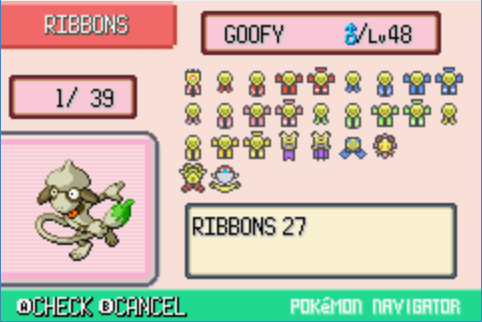
Results: Ribbons and Paintings
And here’s the reward for having done this: Goofy’s ribbon collection. As far as I know, these 27 ribbons are all that’s currently available in generation 3 (according to Bulbapedia there were some event ribbons given out at official tournaments and such, but these would be incredibly rare and obviously I have no way to get those). 21 of them are contest-related, as you’ll see.
Champion Ribbon (“Champion-beating, Hall Of Fame Member Ribbon”)
Given to any pokemon in the party upon beating the Kanto (FR/LG) or Hoenn (RSE) Elite Four.
Contest Ribbons (“$Category Contest $RankName Rank Winner!”)
Normal/Super/Hyper/Master rank ribbons for each of Cool/Beauty/Cute/Smart/Tough contest categories. 4 ribbons in each of 5 categories makes 20 total. You get awarded the ribbon the first time the Pokemon wins the appropriate contest, and a Pokemon can’t be entered in a higher-rank contest unless it already has the ribbons for the lower ranks.
For better or worse, it’s really not worth showing screenshots of the actual contests. They can be fun to play at times, but there’s not a whole lot to see, and even the most difficult NPC opponents don’t offer any challenge to a pokemon like this. He crushed everything.
Winning Ribbon (“For clearing Lv 50 at the Battle Tower”)
Victory Ribbon (“For clearing Open Level at the Battle Tower”)
These were the toughest ribbons to get. They’re given to all three pokemon in the party when you win a series of 7 battles in the Battle Tower, provided your streak is at least 50 battles long. The party can change between rounds, so there was no need to actually have Goofy in the party for the entire streak; I could use a full team of three for most of it and then only sub him in for the round that mattered (I admit to doing a bit of savestate abuse here so I wouldn’t have to redo the previous rounds).
For obvious reasons he didn’t really fight (especially in Open Level). I had him learn Endure temporarily to cheese things with Destiny Bond where possible (it’s kind of like the FEAR strategy in later gens but worse: he’d use Endure to activate the Salac Berry and get +1 speed stage, then try to outspeed with Destiny Bond the next turn and take the enemy with him). Goofy doesn’t like fighting, but if you hit him he’ll make you regret it. If I couldn’t pull this off, at least he could do a sacrifice play to give me a free switch-in. Dragging him through these battles was definitely a challenge, but it was more interesting than I thought it would be.
Artist Ribbon (“Ribbon for being chosen as a super sketch model”)
If you win a Master-rank contest with a good enough score (800 points), and have already met the curator in Lilycove Museum, an artist will paint a portrait of the Pokemon and offer to have it displayed there. The first time you accept this offer, he’ll give the Pokemon this ribbon. The ribbon doesn’t prevent the Pokemon from being painted again as long as it’s not already in the museum for that category; I’ll show the paintings momentarily.
Effort Ribbon (“Ribbon awarded for being a hard worker”)
An NPC in Slateport City’s open-air marketplace will give this ribbon to your lead pokemon if it has maximum (510 total) Effort Values (EVs). I think this one’s mainly in the game to give you a way to find out if you’ve maxed the EVs, but collectors can’t be picky.
National Ribbon (“Ribbon awarded for clearing all challenges”)
The description of this ribbon is nonsense. It’s actually awarded to Shadow Pokemon when you purify them in Colosseum or XD, and the reason Goofy needed to be that particular Smeargle. Only pokemon that started out as Shadow in those games are eligible for the maximum ribbon count. Apparently, according to Bulbapedia, the description of this ribbon isn’t in the game naturally and will be blank if it’s hacked in rather than trading properly from the Gamecube.
Earth Ribbon (“100 straight win commemorative ribbon”)
This is awarded to every pokemon in the party when completing Mount Battle start to finish uninterrupted in Colosseum or XD (during the story mode, not Colosseum’s Battle Mode). Unlike the National Ribbon, this one is still theoretically available to any pokemon, provided you can transfer it to a Gamecube game. This one also doesn’t have its description properly set if you hack it in.
The other reward is having these paintings in Lilycove Museum:
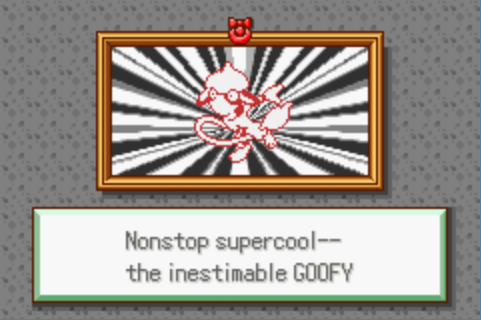

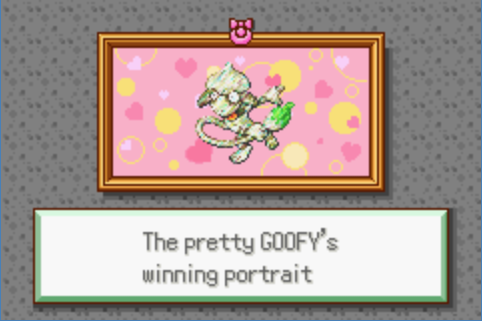
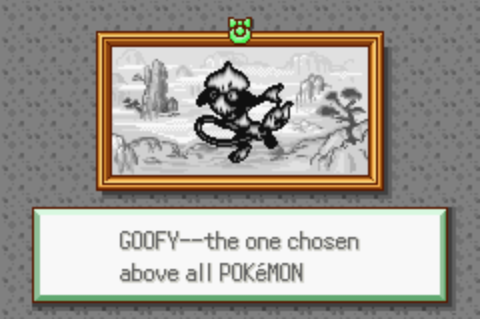
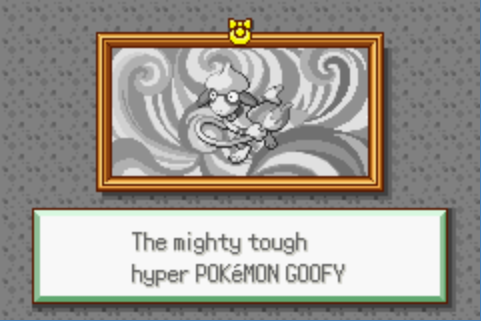
This is art and perfect in every way, I will not hear otherwise. There are several different possible captions for each of them, I think three? Regardless, they’re often hilarious, especially if you named the pokemon something silly like Goofy.
I also think it’s quite neat seeing the same pokemon rendered in all of these different filters and backgrounds.
Well, there you have it, my best shot at an "ultimate" Pokemon Contest competitor, and a complete Generation 3 ribbon collection (and no doubt proof that I am utterly insane). Was it worth it? Honestly, probably not, but I enjoyed working out how to do it and at the very least I'm glad it turned out to be possible.