Part 24: Into the Mine
 Puzzles Remix
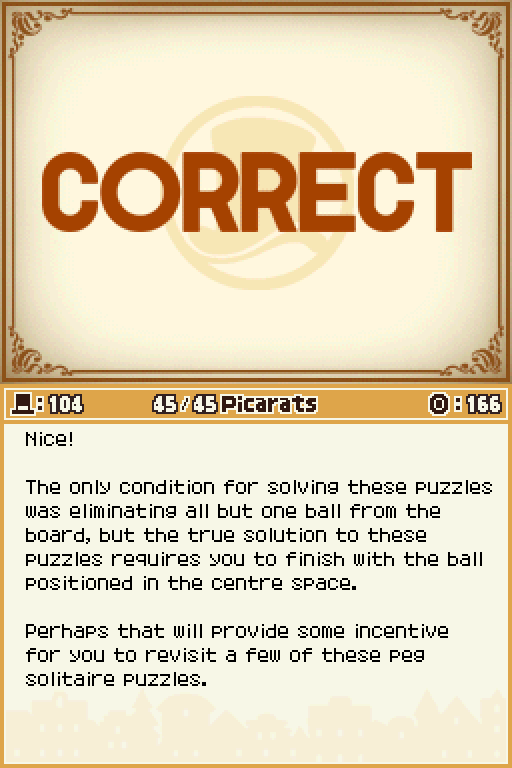
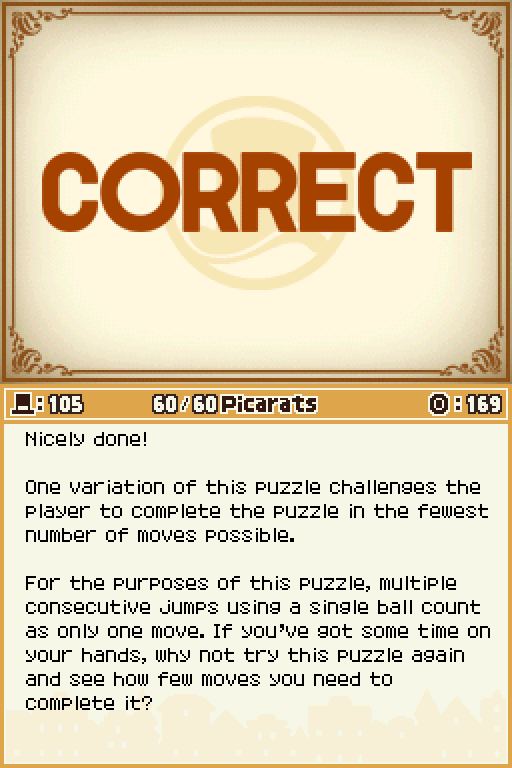
3. Did you figure out which three faces of the unmarked cube were hidden? They are A, D, and E.
Alright, I promise this time we will be going to the mine!


 I don't think I've got much to offer you in the way of help, but I'll be rooting for you.
2. Draw a line right down the middle of the map from top to bottom.
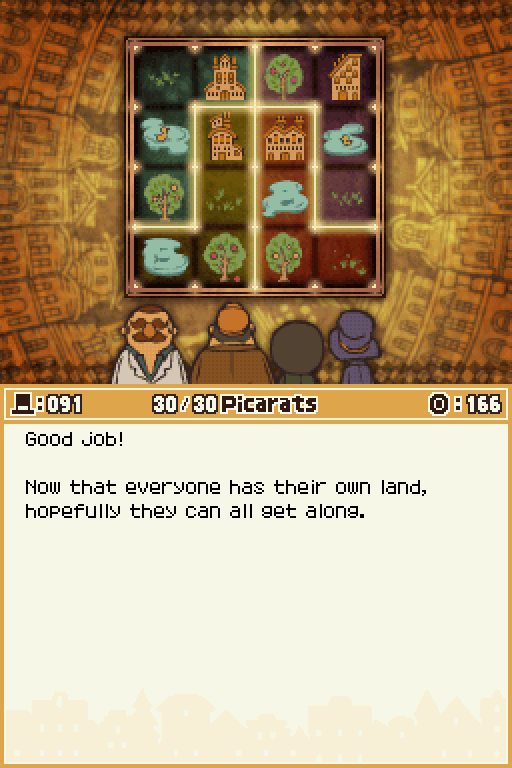
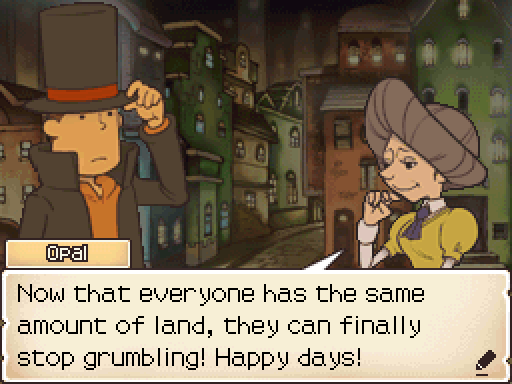
3. Next, lay down some boundaries so that no two houses are positioned on the same parcel of land.
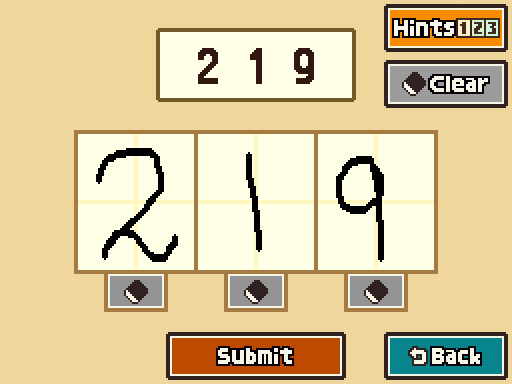
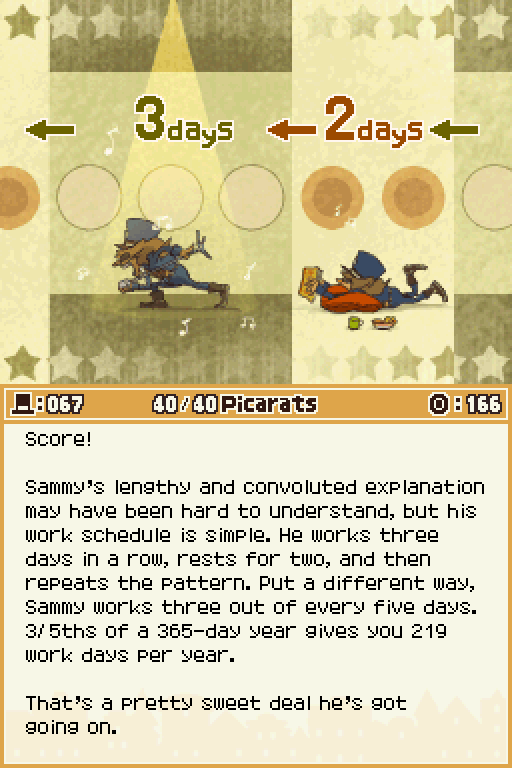
2. Sammy's schedule is a cycle that consists of three days on the job, followed by two days of downtime.
3. Sammy works 3/5ths of the days in the year. With that fact under your belt, you should be able to find the answer using a simple calculation.
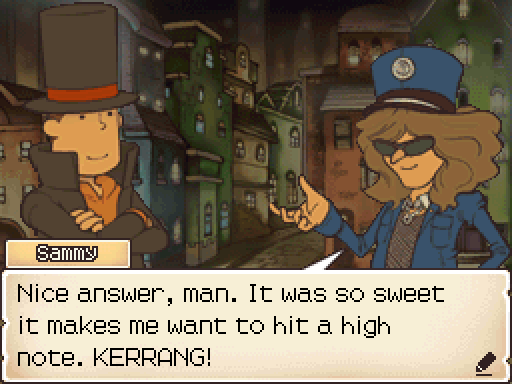
..."Kerrang?" Like I know that that's a thing, but really?
 You know, the boss is a pretty lucky guy. I mean, the dude owns his own train! And here we are out in the middle of nowhere, searching for some old guy's loot. Don't get me wrong, some moolah would be sweet, but sometimes the boss can be real greedy. Folsense (Live Version)
Recap is the same as before, so let's get movin'!
Right by the gate, though, there are a few last bits to deal with. Like so.

 But before we do that, let's take care of a little business first. Puzzles Remix

1. These puzzles are a lot more fun if you experiment and try to come to the answer on your own. Don't depend on Hints Two and Three to give away much of the puzzles. Start this puzzle by moving the ball in the center of the second row from the top.
2. No more hints be had here! Instead, here's a little fun fact. Did you know that peg solitaire is actually known as brainvita in India? Oh, and just so you know, Three is also trivia.
3. Fun-fact time! The first evidence of peg solitaire can be traced back to the court of Louis IV.
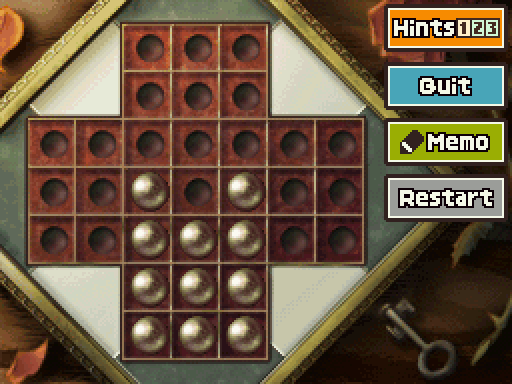
Well, this is the first of these that's not completely easy. I had a bit of an issue with it, even running on memory, at least.
 Folsense (Live Version)
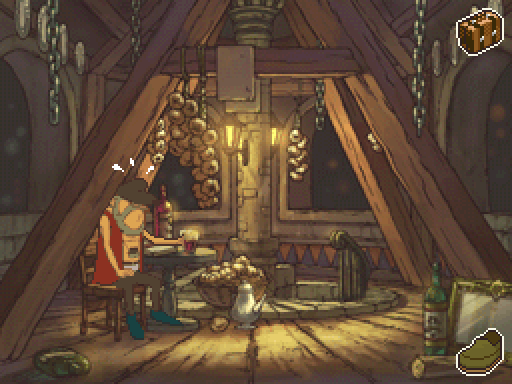
 Here in Folsense, there aren't many people or much to do, so folks tend to fixate on their hobbies. After all, hobbying sure beats sitting around staring at the wall. Believe me, I know.
Alright, now we'll... uh... head on inside the grocer's I guess?
Mostly for this. As an aside, because these aren't guaranteed, it took about 2 minutes for this to be doable. Thanks, Garland!
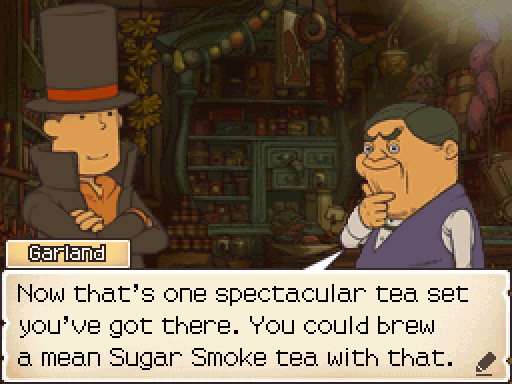
 You ever had Sugar Smoke tea? Brewing it's a doddle. All you need to do is take your basic Citrus Classic and make one little substitution.
 Is that so? We're open to giving it a shot. Let's see just how difficult this Sugar Smoke tea is to make.
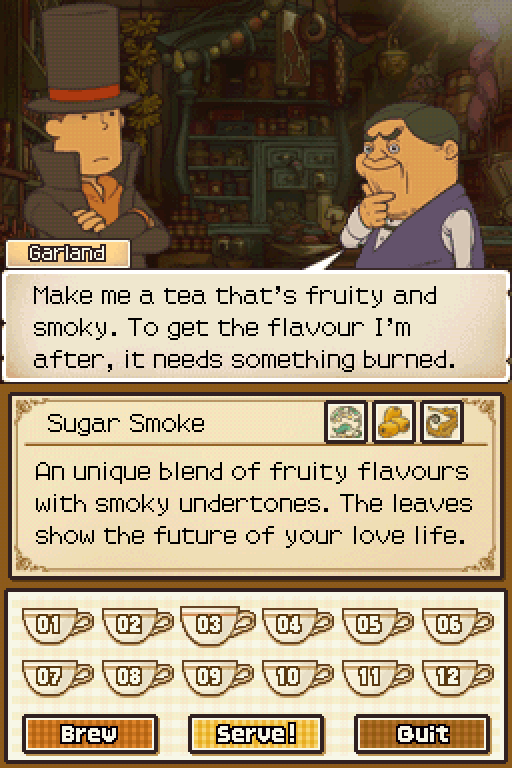
We've already made it, and the game even told us outright what the solution here is.
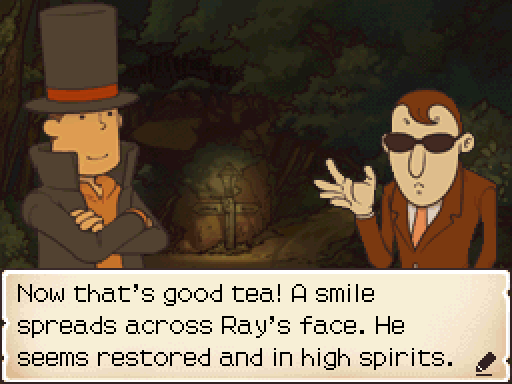
 Mmm. That's nice tea, and drinking it out of a nice porcelain cup like this makes it all the tastier.
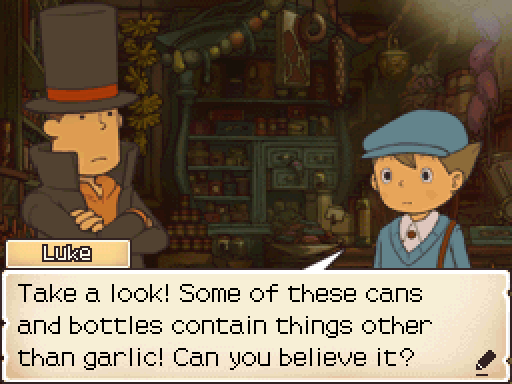
 I've got to say, it's a miracle you could even taste the tea with this place smelling like it does. I do love garlic, though. It's a wonder food! Oh, and don't get me started on how well it keeps! Here, take a look at this chap. I've been holding onto him for 10 years. One sniff is guaranteed to send vampires running for the hills. Did you say 10-year-old garlic? Blech! Carry one of those around with you and vampires won't be the only ones trying to stay out of your way.
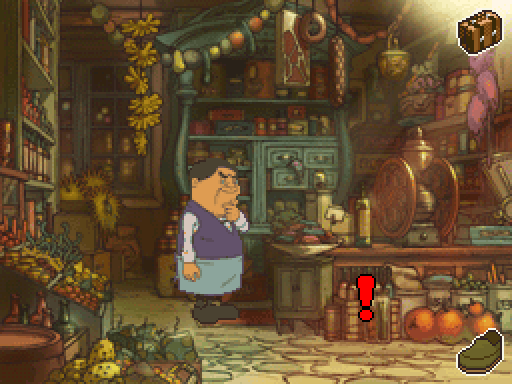
Oh right, and there's a new puzzle down here for good measure.
 Everything here appears to be in order. Tell me, Luke, have you ever heard this one? Puzzles Remix
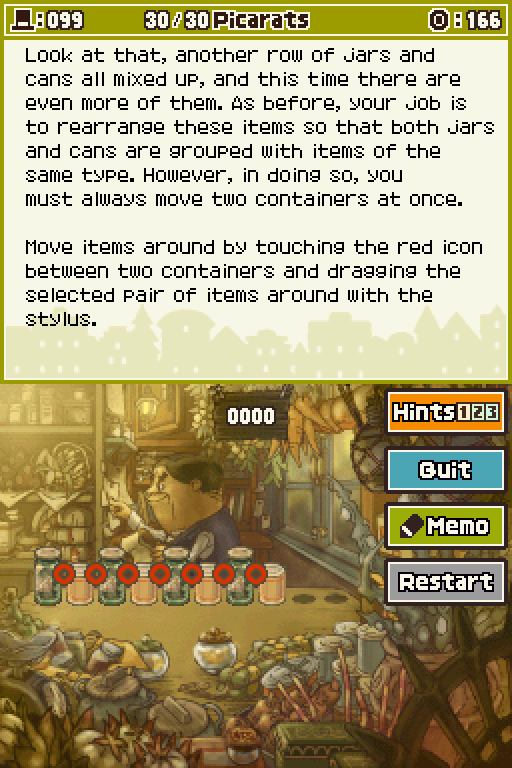
1. This is another puzzle where the order of your moves is key. You won't get any hints on this one, but as a general tip for this type of puzzle, you should take care not to return items to their original position while moving them around. Also, you should know that this puzzle, like the previous one of the same type, can be solved in as few as four moves. Pretty interesting, considering you have more cans and jars to deal with this time.
2. In Japan, the type of puzzle you are playing now is known as a Mandarin duck puzzle. Mandarin ducks are famous for the affectionate way male and female pairs of ducks get along. Some theorize that the game is known by this name because of the way Mandarin duck couples tend to move about together.
3. Here's another piece of fun trivia. As stated in Hint Two, these puzzles are referred to as Mandarin duck puzzles, because of the affectionate behavior Mandarin duck couples exhibit toward each other. But it turns out that these birds are said to change mates every year.
Ah, the second version of this puzzle. Okay.
Just as easy as the first one.


 Folsense (Live Version)

Now this thing? THIS is the last hamster toy. We could even make a 64-step workout for Hamtaro if we wanted to. There's no point, but it's doable and it's the highest step value you can reach.
Last stop before we head to the gate, I swear, is visiting Geoff again. Remember Geoff? Didn't think so.
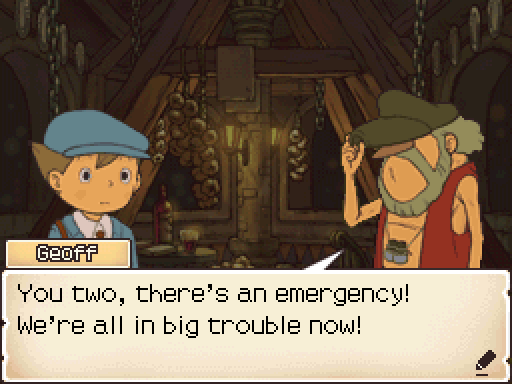 Oh, no! Wh-what's going on?
 It's my tea! It's not sweet at all! How's a man supposed to fight vampires without sweet tea?! HOW? I was going to go home and brew up some more, but I can't leave my post. We're trapped here like rats! Oh, is that all? What do you mean, "is that all"? What'll we do if the vampire busts in? How will I quench my thirst mid-vanquish? Hmmm? Exactly what kind of tea would allow you to continue your fight?
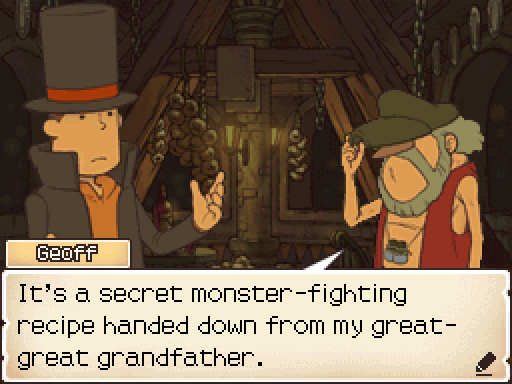 It's got Joy Root Clover and a little something else for a thirst-obliterating smoky taste! I see. I believe we might be able to make you something that would approximate that tea. Oho, aren't you well prepared! All right then, if you can brew it, bring it on!
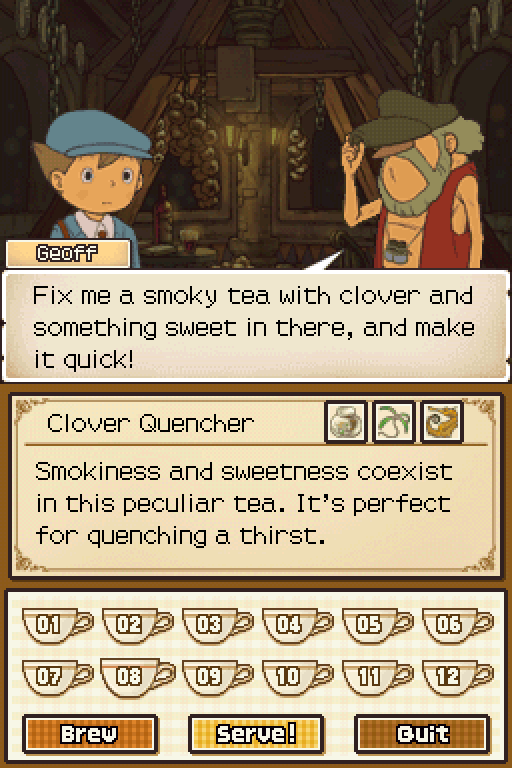
Smoky and sweet, huh? That's the first three words of this description. Perfect.
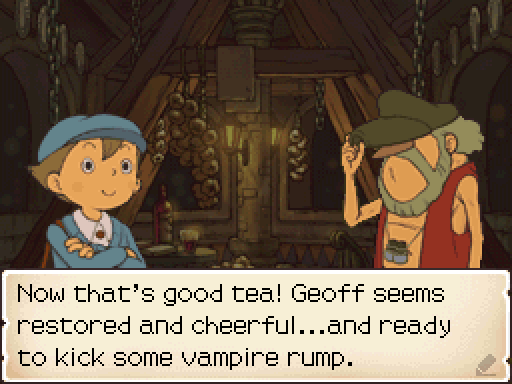 Mmm, oh yes, now that hits the spot! I've gotta hand it to you, you really came through for me here. You've done a great thing for the people of this town. They'll be safe now, thanks to my protection! I'm sure you're trying your best, but I think you can afford to relax just a little bit! Relax? Listen to me, boy, you can't underestimate vampires! They're cunning creatures. Just when you think you've spotted one, kazaaam! He vanishes on you! The bottom line is: don't tempt fate when it comes to vampires, so stay away from Herzen Castle!
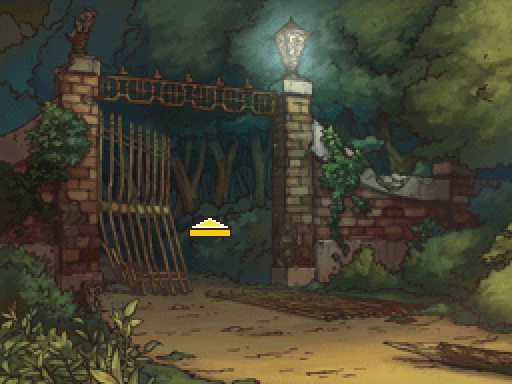
Alright, NOW we can head on past this gate and see what lies beyond...
A few new hint coins, a thirsty man and two paths to take? Well, I remember very well that we were informed of a stagecoach that heads to/from Herzen Castle, so the right path clearly leads that way. Now, let's deal with this guy.
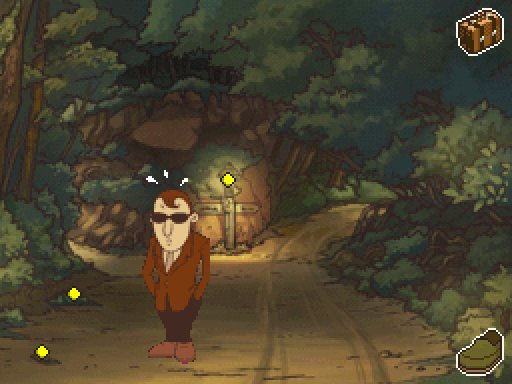
 From where I stand, the lenses look just fine. Perhaps the root of the problem isn't you glasses at all. Tell me, do your eyes feel strained?
 Hmm, now that you mention it, I suppose they do. Blow we down! Aren't you the fast thinker! If you can learn to relax, your eyes might feel better. How about a cup of nice tea to that end? Tea, eh? Well, if it's no bother, I'll take you up on that offer. Something relaxing and, what the heck, a little spicy and earthy would be great.
Huh, unless I'm forgetting someone (and at this point that's VERY possible!!), I do believe Ray is the only person who drinks this drink. How odd.
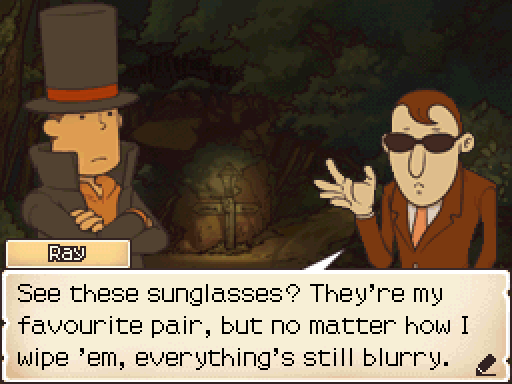
 Ooh, that's one spicy finish. I am loving it! And, you know, I think my eyes do feel better. Thanks for the tea. It really helped me out. Huh. Ack, not again! What's the matter now, sir? I can still see that stupid fog. Maybe the air in Folsense is just really polluted.
Oh, right, Ray was the final thirsty denizen of Folsense. We've now successfully delivered All of the Tea.
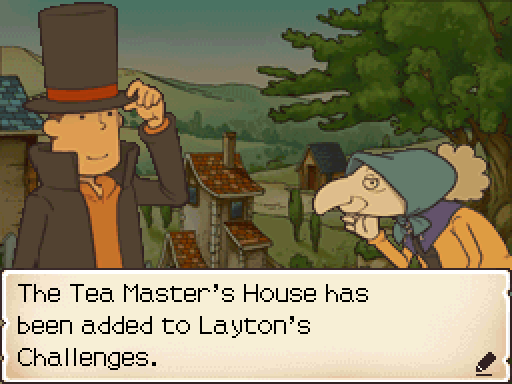
And this opens up the second of five post-game puzzle collections.
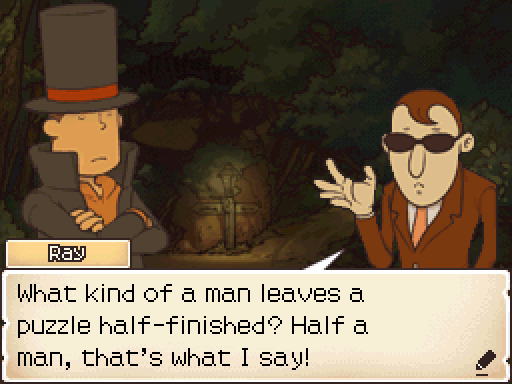
Speaking of puzzles! Ray, what's up?
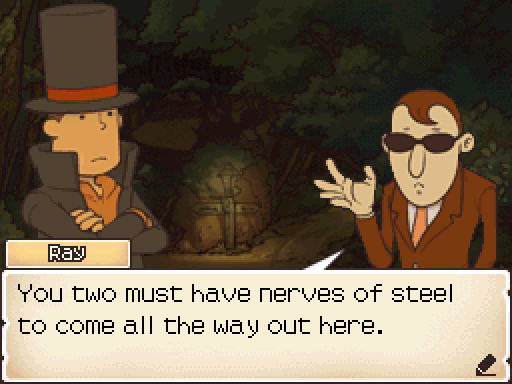 But that doesn't mean I won't need to see what you're made of. Try this puzzle on for size.
Uh, let's not and say we did.
Because by pretending like we did it...

This gives us a second one from Ray.
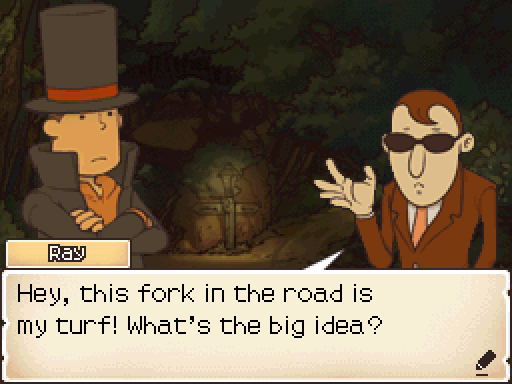 Oh well, since you came all the way here, why not try your hand at this puzzle I've got? Puzzles Remix
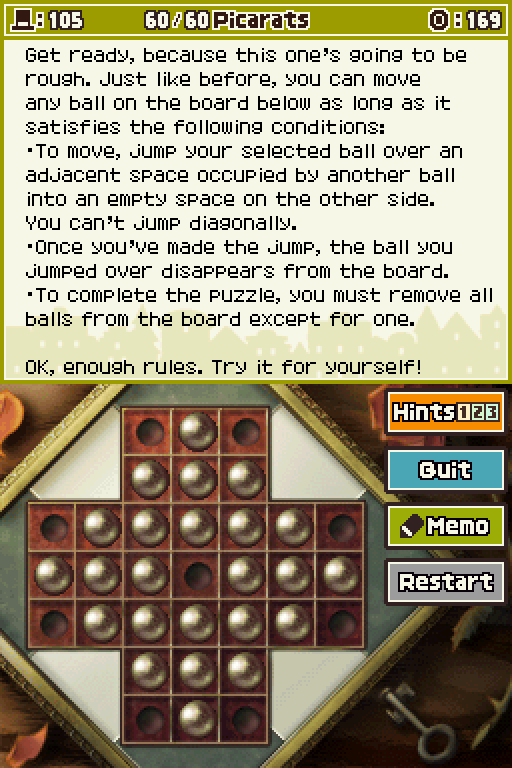
1. Remember all that stuff we told you about thinking out this one on your own? OK, fine, you can have one more hint, but this is seriously the last one you'll get. We strongly recommend that you not start off this puzzle by moving a ball into the center space. Instead, your first goal should be to move things so you get rid of one of those four balls at the very edge of the shape. But where to start?
2. We were only kidding about not giving you any more hints. Start by moving a ball second from either edge in the third row from the bottom. Move this ball down to clear one ball and then across to remove the ball at the of the shape. Then you can move one ball in the third row from the bottom into the space that the ball you used in your first move originally occupied. Then move the ball you used from your first move into the spot that opened up.
3. If you follow Hint Two and continue playing a little yourself, you should be able to arrange the remaining balls into a triangular, pine-tree-like shape like the one in Disappearing Act 3. Use what you've learned to finish the rest of this puzzle.
I, uh, kinda think this one is easier than #4.
 Folsense (Live Version)
 Wild things live in the forest, pal. If you're set on going deeper, you gotta be prepared for danger.
Before we head on over to the mine, we'll take a brief detour...

Towards Herzen Castle, in fact. Just to collect these hint coins because they might not all be available later. They probably are, but it's just a precaution.
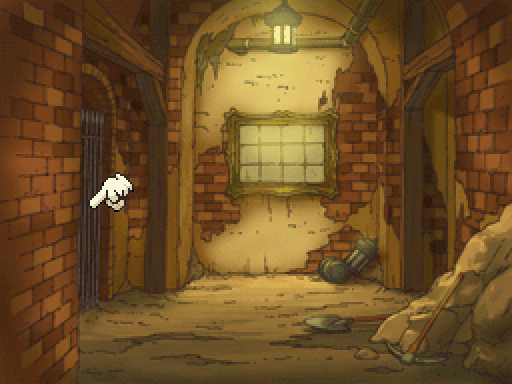
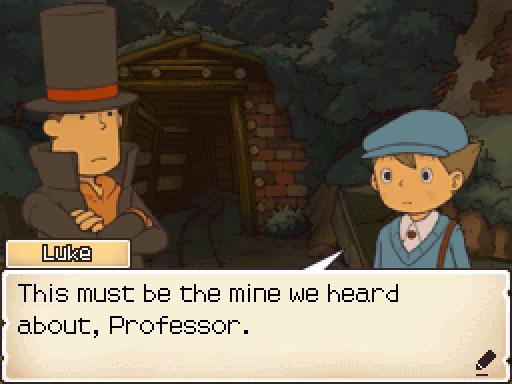 Yes, and it appears to be sealed off. Just imagine it, Luke. They used to dig for gold here. There must have been a lot if gold down there if it had such a huge effect on the entire town. But if it brought so much wealth, why on earth would they ever close the mine down? That's a question we might be able to answer if we can find some account of what transpired here. There's no sense in any more speculation. Let's venture in.
We'll head on in shortly, but first we have a few more hint coins to collect, and that hidden puzzle connected to that there camera to deal with.
To The Darkness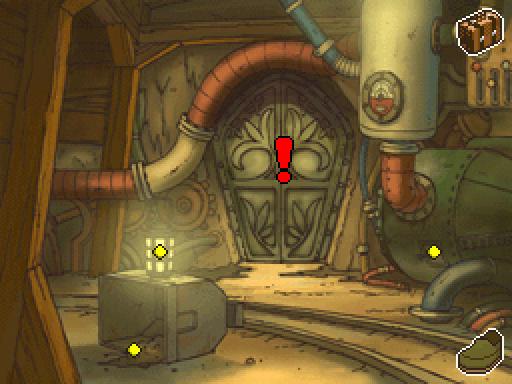
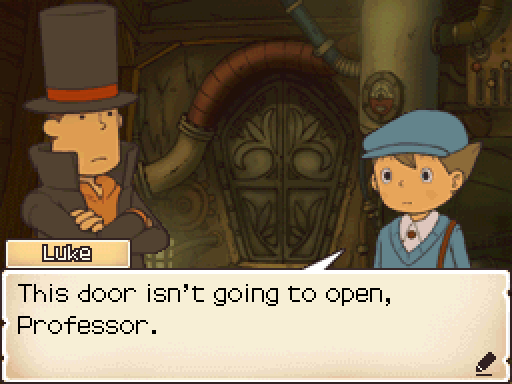
Inside the mine, we've gotten a few more coins to collect and a very linear path to deal with. We do need to get past that door, though, and it's... clearly not going to be easy.
 Yes, it would seem we need to solve this puzzle first.
Now, we could cut the update here but we just got into the mine at last so we'll keep on goin' for now.

Progress is not based on that puzzle, for the first and last time in this mine. I'm surprised too.
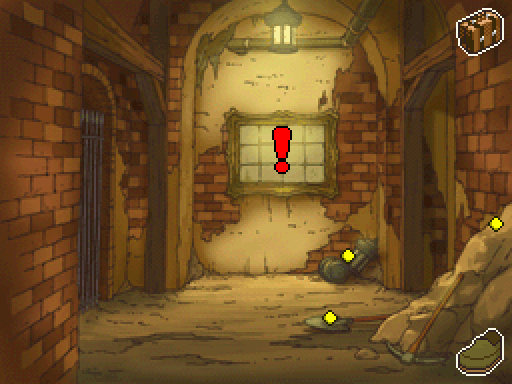
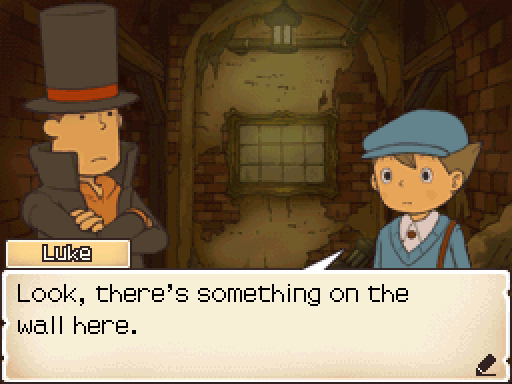 That is most certainly a puzzle. Let's take a closer look, shall we?
Eh, nah, we shall not.
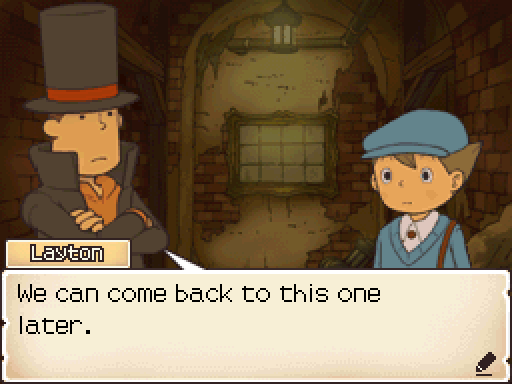
Because we CAN come back to this later.
Actual progress is this way.

This is a weird one. There's no puzzle here at first, but when we try to head down that elevator...
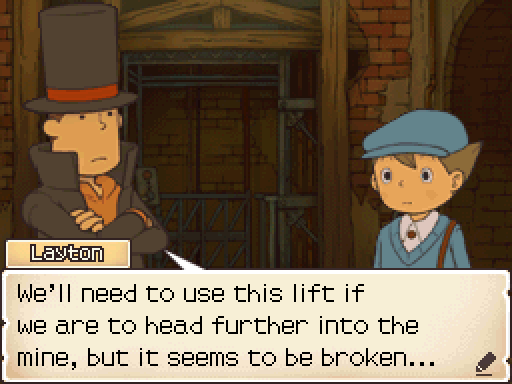 How can we get it running again...? Aha, there's a circuit board over here. We should be able to use this to restore power to the elevator. Let's see... Hmm, yes. Follow the instructions on the circuit board, Luke. That should fix our problem.
 080 The Puzzling Lift Puzzles Remix
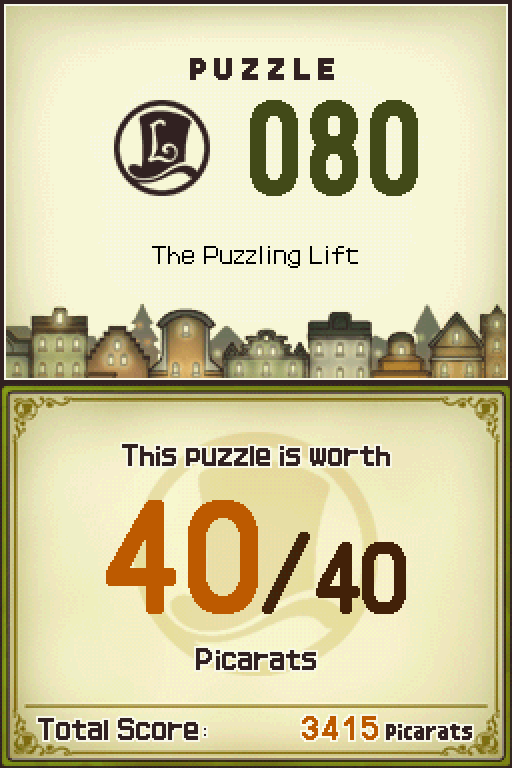
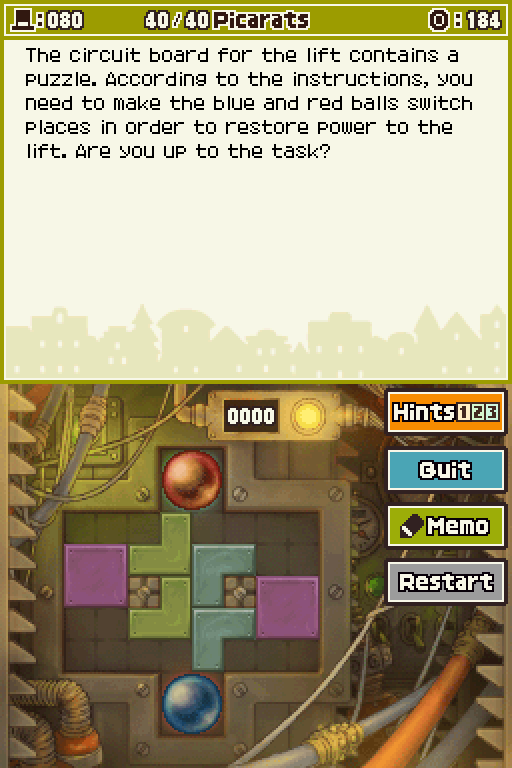
1. There are several ways you could go about solving this puzzle. One surefire technique is to work with the L shaped blocks. You can free up some extra room by moving those blocks so that they fit together neatly with neighboring blocks.
2. In order to get both of those balls to swap places, you first need to move one ball out of its hole and park it somewhere while you move the other one. To do so, clear out some space by gathering all those L-shaped blocks in either the left or right side of the box.
3. If the method from Hint Two isn't working, here's another technique to try. Create space by slotting L-shaped blocks together to create pairs. In order to do this, move the L-shaped blocks to the opposite edges of the box, then combine them.
For a sliding puzzle, this one's pretty simple which is totally okay because it's mandatory. Hard to complain, really.
 End To The Darkness
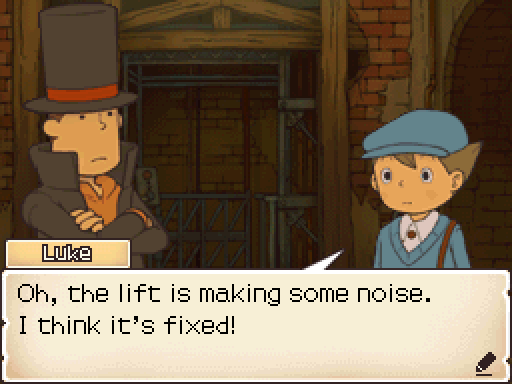 Excellent. I suppose our next move should be to head down.
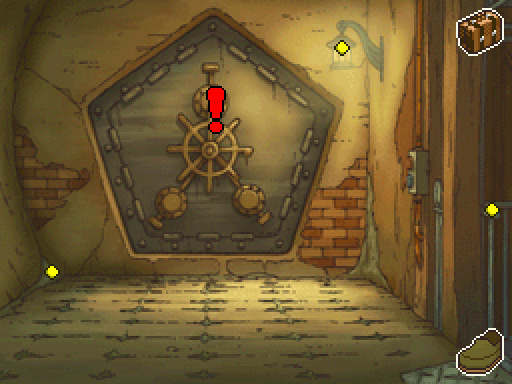
Once again, gotta solve another mandatory puzzle before we can progress. Let's go then.
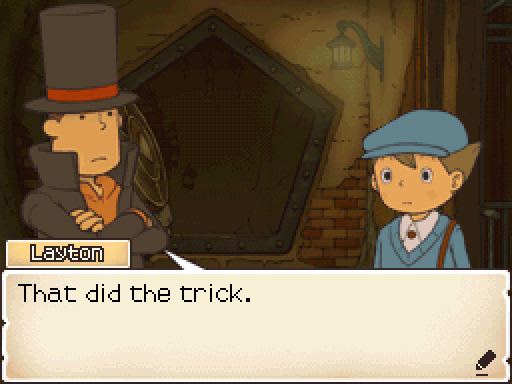
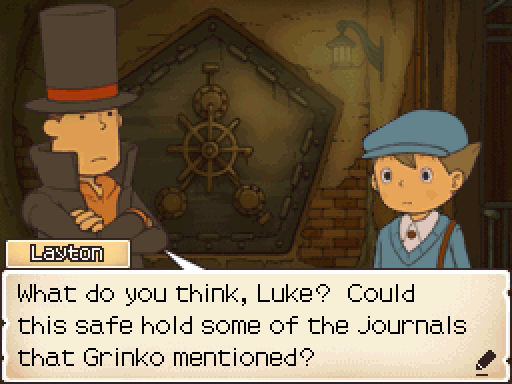 Well, we won't know until we open it... How DO we open it? The lock is rather complicaed. Let me see if I can decipher the code.
We'll just skip right past this.
 Have a look at this, Professor. Ah, this looks like a miner's diary. This is just the thing we've been looking for, Luke! Perhaps it can shed some light on what transpired here. Let's see what it says. Silence
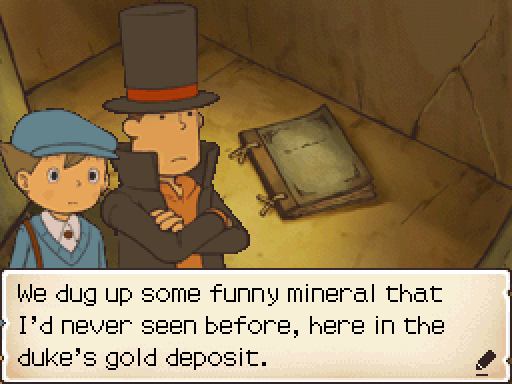
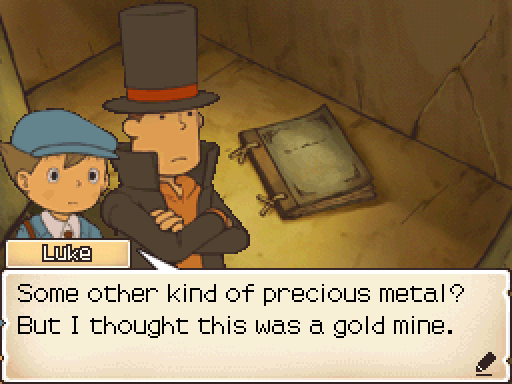
He's sure the ore can be refined into some other kind of precious metal.
Personally, I feel like there's something sinister about the stuff. Not that the duke cares one bit.
No, he'll have his way and we'll keep digging. I'd bet my life on that.
Ever since we unearthed that awful ore, people have been dropping like flies from some unknown illness.
There's so many sick people in town that half our miners have stopped coming in to work.
What in the world is going on here?
Gosh, that's just terrible. So many people must have been sick.
I suspect we're just days away from shutting down this awful mine for good.
I leave this diary behind so that anyone who tries to reopen the mine may think twice about it.
To The Darkness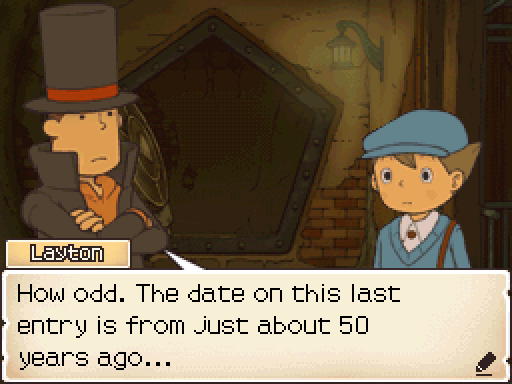 But that can't be right. The mine was up and running until recently. Yes, or so we've been told. But this has got me thinking.
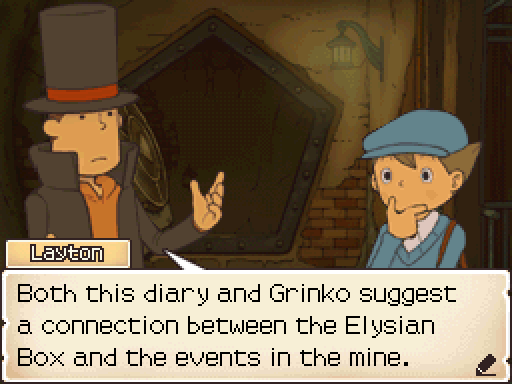 From what I can tell, all of this traces back to a single man: the duke himself. Even if he himself is long gone, his castle may yet contain the answers to all of our questions. So, um... Does that mean we have to visit that spooky castle for ourselves? Ha ha ha! Do you mean to tell me you're scared of the place? Of c-course not! A million vampires wouldn't scare me!
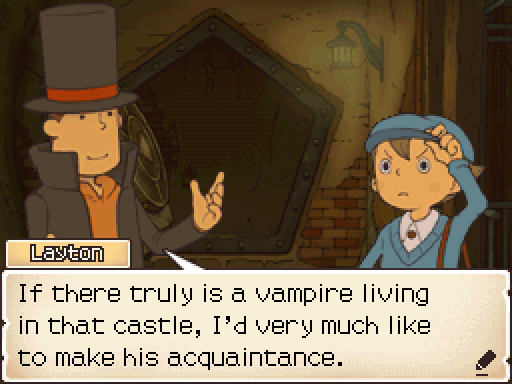 Don't say things like that, Professor! If we met one, I'm sure he'd eat us on the spot!
Alright, so now we're off at last. Next time, we set forth towards Herzen Castle! Only been building up to it for like half the game at this point. It better be worth it...
 Puzzles Remix
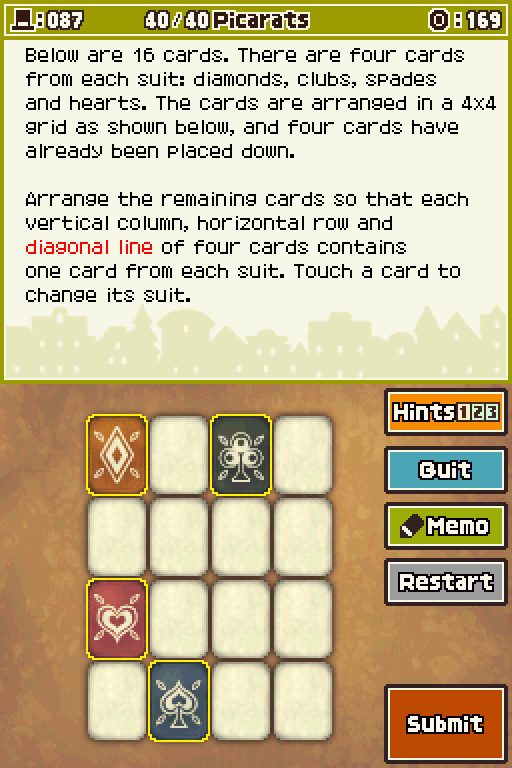
1. Let's start by seeing if we can't dig up a few hints to work from. There's a card on the table that belongs to the row the heart is in, the column the club is in, and the diagonal line the diamond is in. Therefore, you can safely conclude that this card in question must be a spade. This is the kind of logic you'll need to use to solve the problem.
2. What card do suppose belongs in the bottom-left corner? The column this space is a part of already has a diamond and heart in it, and there's a spade to the immediate right of it. Taking the above into consideration, we can conclude the card in question must be a club. Knowing this, we can also fill in the last card in the leftmost column, which has to be a spade.

Hidden puzzle:
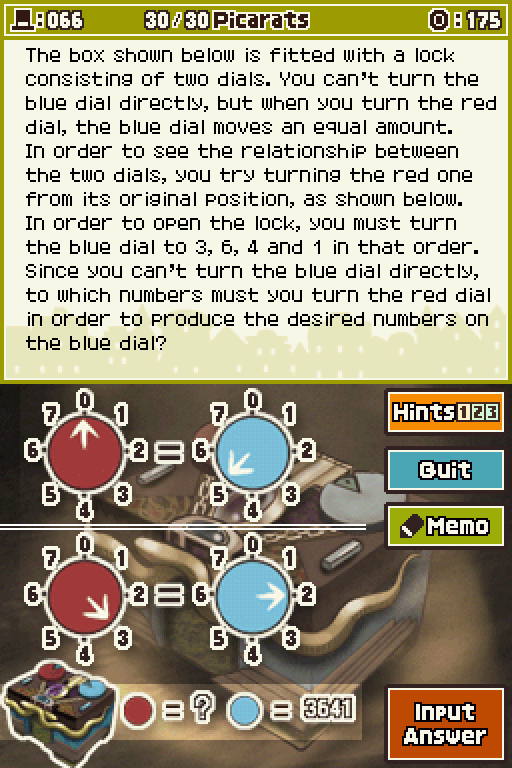
1. When the red dial reads 0, the blue dial reads 5. When the red dial reads 3, the blue dial reads 2. As stated in the puzzle, the distance the blue dial moves is equal to the distance the red dial moves. When the red dial moves from 0 to 3, the blue dial moves from 5 to 2. Read that last sentence and again and think about what it says about the dials' relationship.
2. Did you catch on to what Hint One was trying to tell you? The red and blue dials turn the exact same amount, but as you may have noticed, as the numbers on one dial turn in one direction, the numbers on the other dial turn the other way.
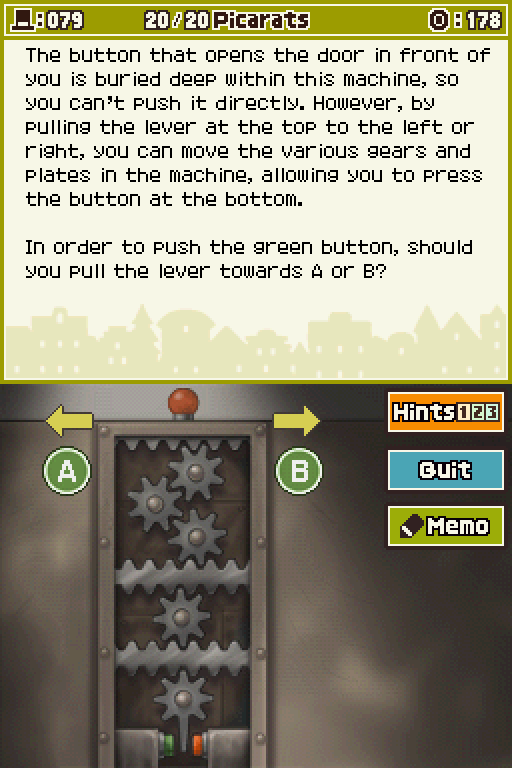
1. When one gear rotates with another, the two gears must rotate in opposite directions. Use the Memo function to keep track of the direction of each gear's rotation.
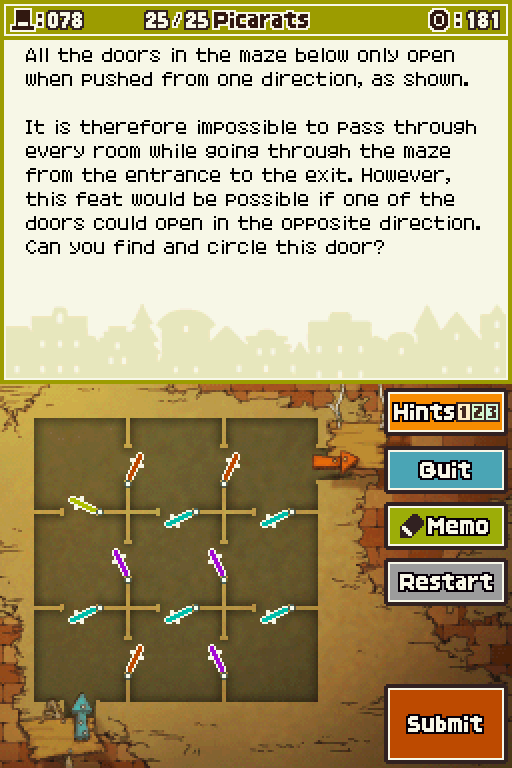
1. Let's review this puzzle's conditions. You need to make one door open in the opposite direction, and you must pass through every room on your way to the exit.
2. Starting from the IN sign, you'll soon bump into a door that should open the opposite way. So to proceed, one of the first doors you meet will have to open in the opposite direction. The upper door in the first room and the two doors in the room to the immediate right of the first room open in a direction that keeps you from passing though. One of these three doors is the door you'll need to change.
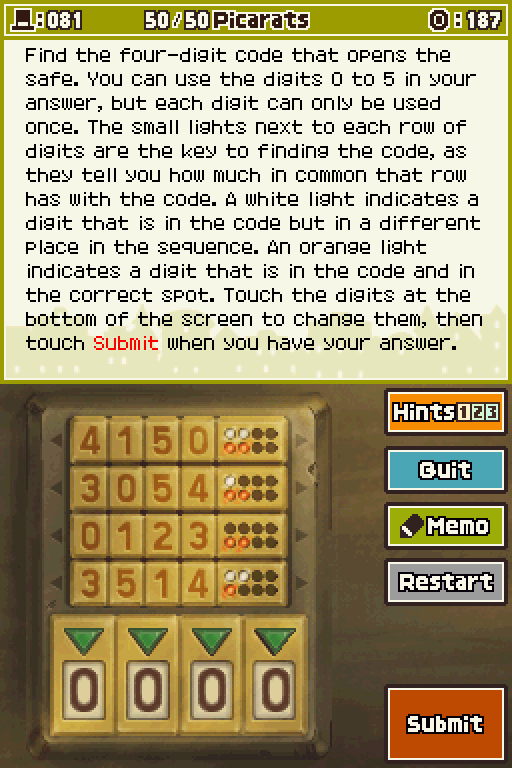
1. Start by figuring out which numbers belong in the code, regardless of order.
2. You may have already noticed, but every number in the code is in the very top row of numbers. Two of the numbers in 4150 are even in the correct spot relative to where they should be in the code.