Part 4: The Greater Graymel
Last time on Tales of Eternia
We got COMPLETELY sidetracked by a minigame

We headed into Nostos Cave to reach Morle, where professor Mazet lives. We ran into a man whose parter was killed by an eggbear.

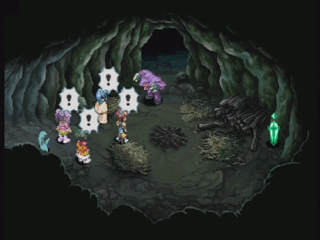
and we came face-to-face with the beast itself!!

Part 1 (Morle): [YOUTUBE] (~18 minutes)
Part 2 (Undine Stream): [YOUTUBE] (~12 minutes, plus 3 minutes Undinechat)
We finially reach Professor Mazet's place. After a few shenanigans, we finally come to understand Meredy and learn more about Craymels. Our quest takes us to Undine Stream, where we get in over our heads and find ourselves in a situation that may be a little out of our league.
Recipes found: Garden Salad (20% TP recovery) and Fruit Juice (10% TP recovery)
Lens found: 10
Optional extra: Undine live
Boss time!

 Undine is the first difficult boss in the game if you're playing on Normal (of course on Hardcore Hyades takes that spot) and the most reliable way to damage her is with spellcasting, although you can still get some good damage on her with your own attacks.
The fight gets phenominally easier when you learn about her most dangerous move: the Spear of Baptism. When she shouts "You can't hide", she'll fire it across the screen through whoever she's pointing at, doing damage to everyone on that side and interrupting your spells. If you block it, though, it will terminate at you and your casters can carry on. Once you get the blocking part of the equation down, she's much easier to beat - this is where having a second player as the fighter helps a lot, since the AI never blocks.
Her other dangerous attack is Subterranian Divide, which hits at close range - there's not a whole lot you can do about this move except just deal with it. It comes out too suddenly to be able to handle easily.
She can also cast Spread, and on Hardcore it will extend into Maelstrom, giving an extra whirlpool with huge range. The Maelstrom part of the spell doesn't do very much damage, so it's not really worth worrying about - just make sure she's focusing on the fighters and not the casters and you'll be fine.
 Once she's on your side, you get the spell Spread, which makes a huge pillar of water that damages enemies. It takes a little bit to come out, making it less useful against faster enemies. Even against quick enemies though, the pillar itself can provide useful cover for allies. Since spread hits enemies away to the right, it does the most damage when the enemy is against the right side of the screen - rather than hit them once, it'll pin them to the side hitting them up to three times. Unlaunchable enemies will find themselves hit three times as well, so Spread can be useful against larger and heavier foes.
When Undine's Craymel Lv. hits 15, it becomes possible to use Maelstrom. Spread will automatically turn into Maelstrom depending on 1) the caster's water resistance, and 2) Undine's vitality. If the caster is wearing an Aqua Cape (30% water/ice resist), it will turn into Maelstrom when her vitality is 7 or higher. With a Watercloud (50% water resist), it will extend at 5 vitality. With both (80%) it'll extend at 2 vitality. By then you'll have some much better spells, but if you rely on Spread a lot it can be useful to keep this in mind, since the Maelstrom thrashes enemies around a bit and provides an even larger area of temporary cover.
Undine is the base craymel for pretty much all the healing spells in the game, and as such you'll wind up summoning her a lot. When you summon her, she'll show up and do 500 damage to all enemies, and heal all non-KO'd allies fully. She doesn't actually have any healing spells until Fringed with other Craymels, though, so for now all you have is Spread.