Part 47: Interstice of the Dimension
#45 - Interstice of the Dimension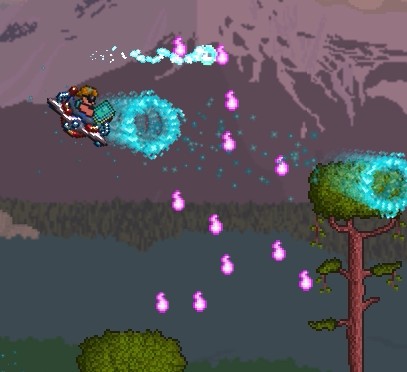
Hello everyone, and welcome back to Rivershire. This is the penultimate update of this LP.
Last time when we left off...

Yeah, that. Impending Doom was approaching. There's only one piece of music that leaps to mind when I see that sentence.
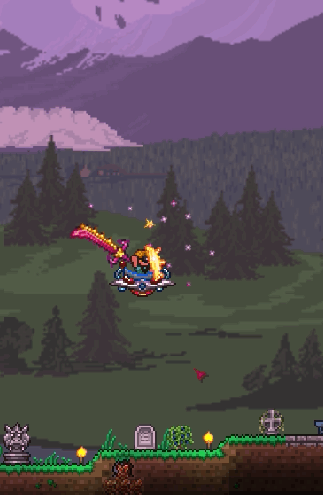
Anyway, we have exactly 1 minute to prepare.

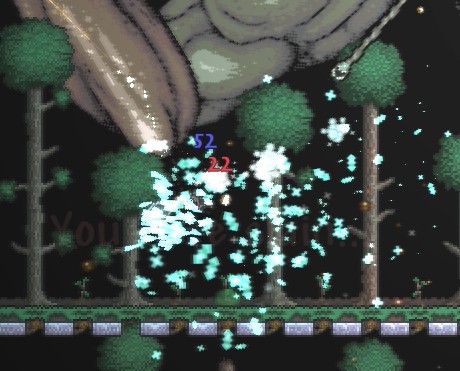
This fight is not going to go well. We have 9 seconds left on potion sickness, and we barely have any potion buffs. There is, frankly, no way we're going to survive this beyond sheer blind luck.

In the minute leading up to the final boss spawning, the game gets blurry and unfocused, and then refocuses. The BGM drops to incredibly quiet as well. Then in the last 10 seconds or so, the screen darkens considerably and the background music completely cuts out.

And then finally the background cuts out.


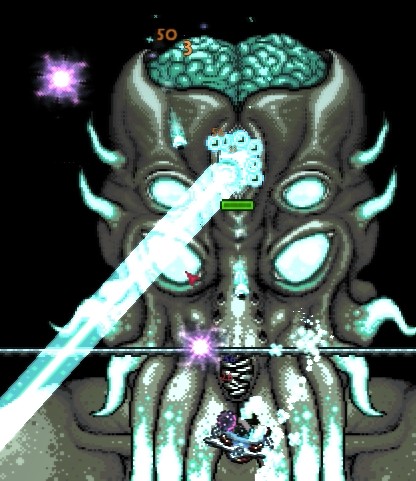
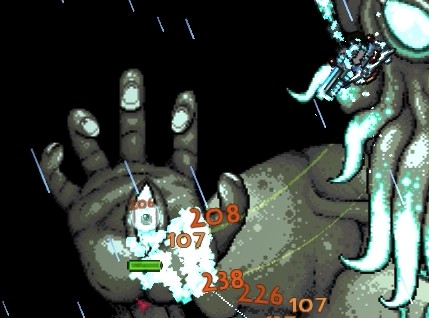
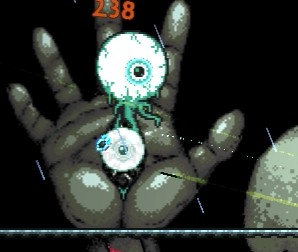
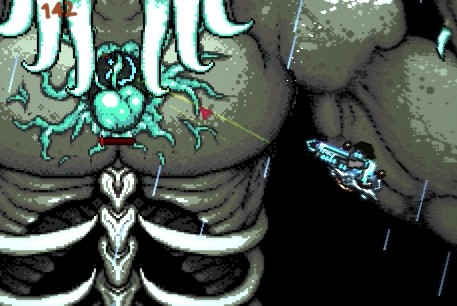
Meet the Moon Lord. Wait... excuse me a second.

Click on that to embiggen. NOW meet the Moon Lord. This is the final boss of Terraria. He has four attackable parts, and 145,000 HP between all of them. This fight is incredibly hectic. In fact, you might even use the term "clusterfuck."
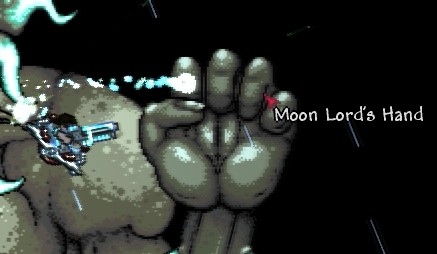
At this point in the game, you will not win unless you are flight capable.
Terraria Soundtrack vol. 3 - Moon Lord
Moon Lord Boss Fight
You should probably watch that. I have two failed attempts in the video first. The Moon Lord's theme is pretty kickass as well, so give that a listen as well.
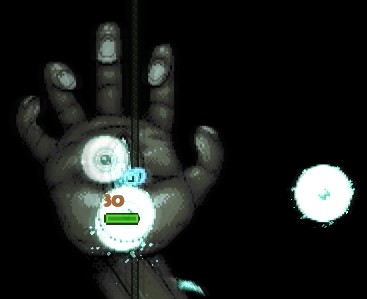
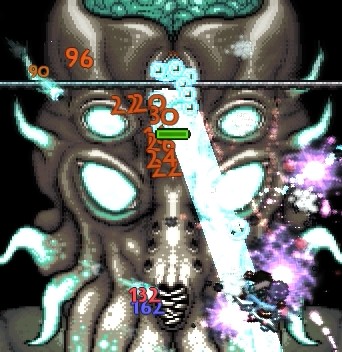
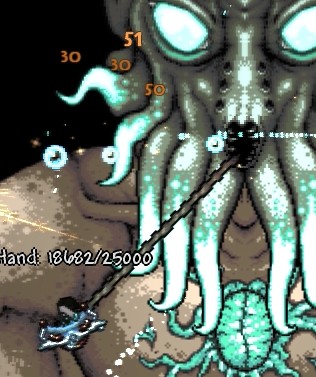
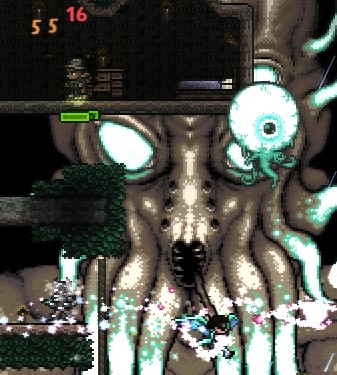
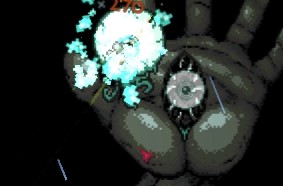
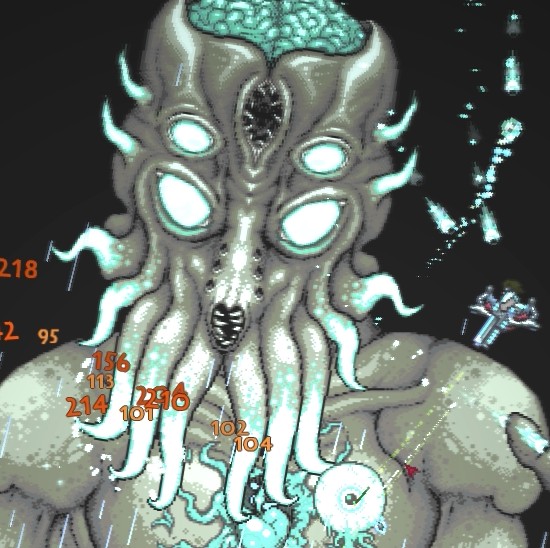
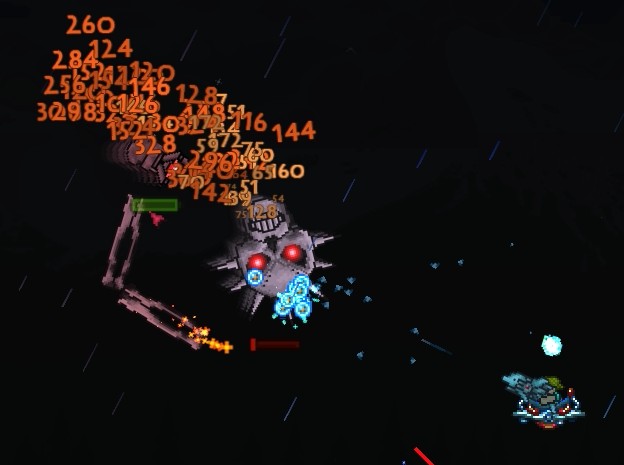
The two hands are two of the four breakable parts. Each hand has 25,000 HP and 40 defense. They have three attacks.
Pictured here are Phantasmal Spheres. These floating spheres hang out for a second, and then charge directly at the player. 100 damage.

Phantasmal Bolts actually lead your position. So you have to abruptly swerve to avoid taking 60 points of damage.
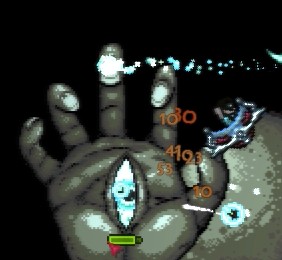
The hands can also spawn Phantasmal Eyes. Like the spheres, these charge at you, but they only deal 60 points of damage.
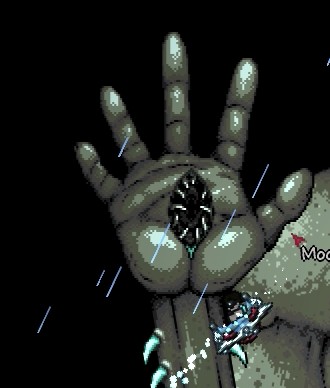
Lastly, when you defeat the hands, a toothy maw is left behind. Coming into contact with this deals 80 points of damage.

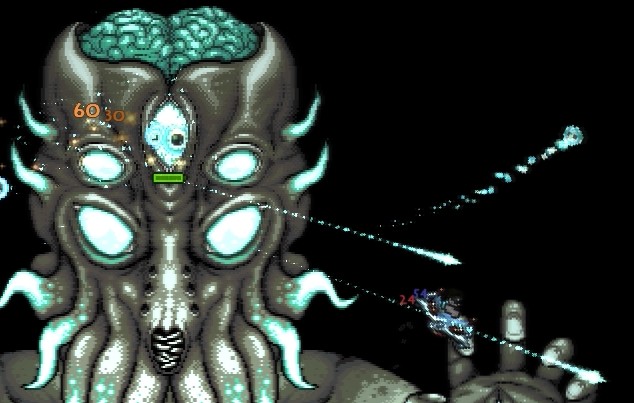
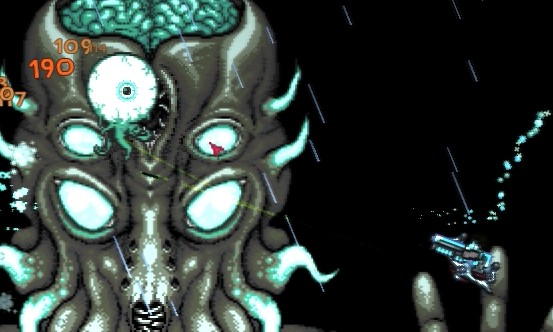
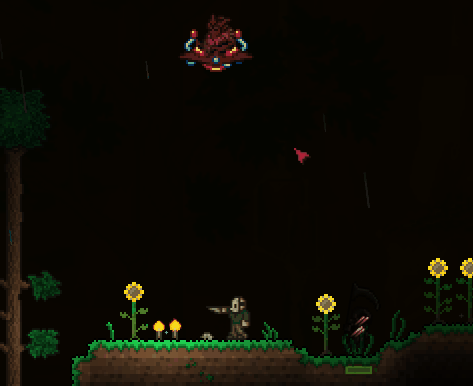
The head is the third target. It has 45,000 HP and 50 defense.
This is the Phantasmal Deathray, by far the Moon Lord's most dangerous attack. It deals 150 points of damage, and the Moon Lord also likes to move in such a way to keep it directly on top of you no matter where you run.
The head will sometimes attach a sucker tentacle to you. If you get hit by this, you get afflicted with a debuff that prevents you from benefiting from regenerative effects like the Vampire Knives and Spectre Armor.

Being hit by the tentacle will also spawn Moon Leech Clots. These little buggers have 400 HP and fly out of you. If you don't destroy them quickly, they will heal the first damaged part of the Moon Lord they can find for 1,000 points. Thankfully they can't revive dead parts.
Finally, like the hands before it, the head can also shoot out Phantasmal Bolts.
That takes care of the head and hands, but Moon Lord is an incredibly hard fight. Probably the hardest fight in the game, truth be told.

So, once you die to the Moon Lord, the world is reset to the pre-endgame status. So the Lunatic Cultist is back and the Pillars need to be killed again. So it's time to offscreen about 45 minutes of work...

AND we're back. If you combine 6 of each type of fragment at the Ancient Manipulator, you can create the Lunar Hook, the best hookshot in the game... for whatever that's worth.

You can also combine 20 of each fragment to create an item that summons the Moon Lord. Right now, all of our fragments are otherwise spoken for. Gotta create the weapons we skipped out on the first time, right?

Oh, by the way, that was in the minute before the Moon Lord showed up again.
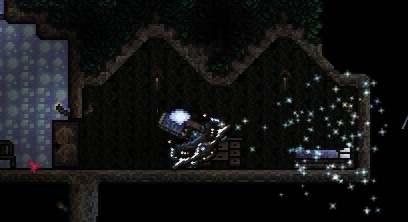
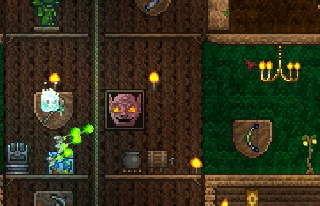
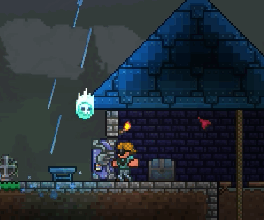
I'll save you 2 and a half minutes of desperate flailing. But if you're interested in what ultimately killed me, take a gander. Yep. The house layout.
The Nurse's room is on the far side of the house from the spawn point. It's also nowhere near the exit, so I'm going to take a lot of damage just by virtue of being tied up in these tiny rooms.
We're already down to 380 out of 500 HP by the time we get out of that maze of a deathtrap. Going back in would be suicide, so this is basically the point in the fight where it went down hill for us.
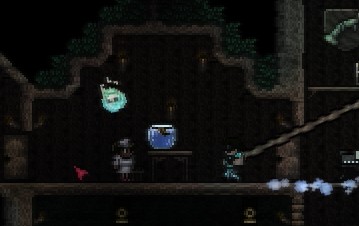
By the way, do you see that huge eye? That's a True Eye of Cthulhu. It's completely invulnerable to all attacks and continues to perform the attacks of the part it broke out from. So even if you kill the Hand or Head, it'll still harass you with its attacks via this True Eye.

So that's two attempts where I didn't prepare and two failures as a consequence. Let's amend that, shall we?

First off, the Dryad and Nurse now have new living quarters. Effective immediately.
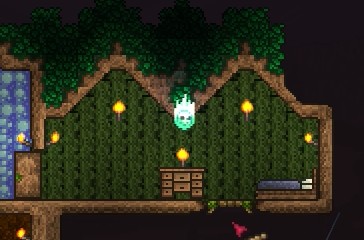
It also doesn't matter that it doesn't match. I'm now officially in function over form mode. I need a quick way out of the base once I heal. Thankfully the NPCs have the good sense to stay in their bedrooms during the fight.
For what it's worth, here's the Phantasm in action. It's similar to the Chlorophyte Shotbow that we put to excellent use, except its free arrows also home in on the enemy.
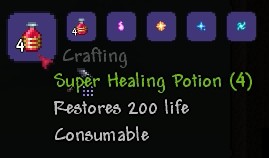
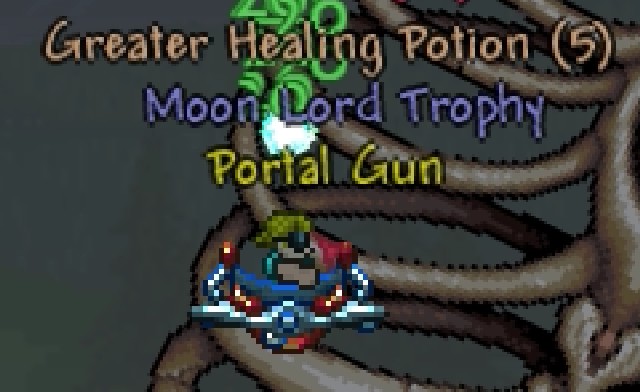
To further prepare, you can combine 1 of each type of fragment, plus 4 Greater Healing Potions to create a Super Healing Potion. It's probably best if you do this at a Brewing Table for the chance to not consume ingredients.
Next we're going to make a metric fuckton of buff potions. More than we probably need.
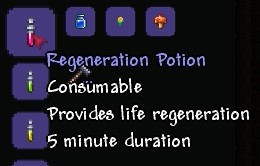
Regeneration Potion: 1 Bottle of Water + 1 Daybloom + 1 Mushroom

Swiftness Potion: 1 Bottle of Water + 1 Blinkroot + 1 Cactus
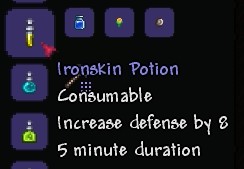
Ironskin Potion: 1 Bottle of Water + 1 Daybloom + 1 Iron/Lead Ore
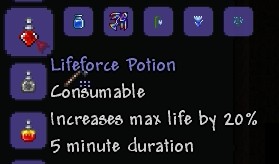
Lifeforce Potion: 1 Bottle of Water + 1 Moonglow + 1 Shiverthorn + 1 Waterleaf + 1 Prismite Fish. Boosts max HP by 20%, allowing you to hit a maximum of 600. Prismite can be caught by fishing in the Hallow.
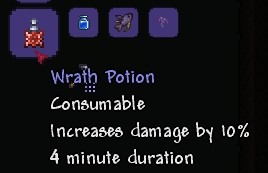
Wrath Potion: 1 Bottle of Water + 1 Ebonkoi + 1 Deathweed. Increases damage dealt by 10%. Ebonkoi can be caught by fishing in Corruption.
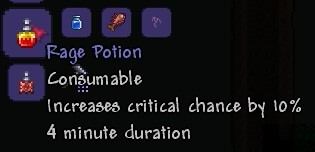
Rage Potion: 1 Bottle of Water + 1 Deathweed + 1 Hemopiranha. Boost crit chance by 10%. Hemopiranha can be caught by fishing in Crimson.

Endurance Potion: 1 Bottle of Water + 1 Blinkroot + 1 Armored Cavefish. Reduces damage taken by 10%. Armored Cavefish can be found by fishing in any underground pool.
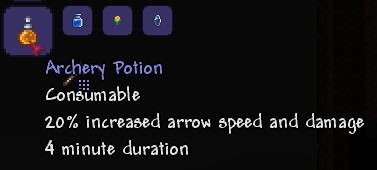
Archery Potion: 1 Bottle of Water + 1 Daybloom + 1 Lens
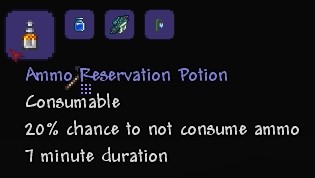
Ammo Reservation Potion: 1 Bottle of Water + 1 Double Cod + 1 Moonglow. The ammo box buff, but in potion form. Double Cod can be caught in Sky or Surface jungle pools.
Yeah, I think that looks a lot better.


Let's skip the formalities this time, and just put on some ass kicking music.
La-Mulana OST - 41 - Good Night Mom
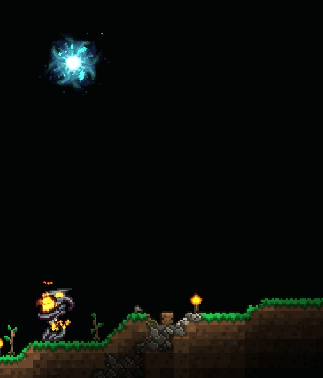
Unlike the Cultist, the Moon Lord doesn't take reduced damage from homing bullets. So we can use our beautiful Vortex Beater to its full potential here.
Unlike other bosses, the weak points aren't always open. So you sometimes have to wait around to damage them.
That's one hand down!
And two!
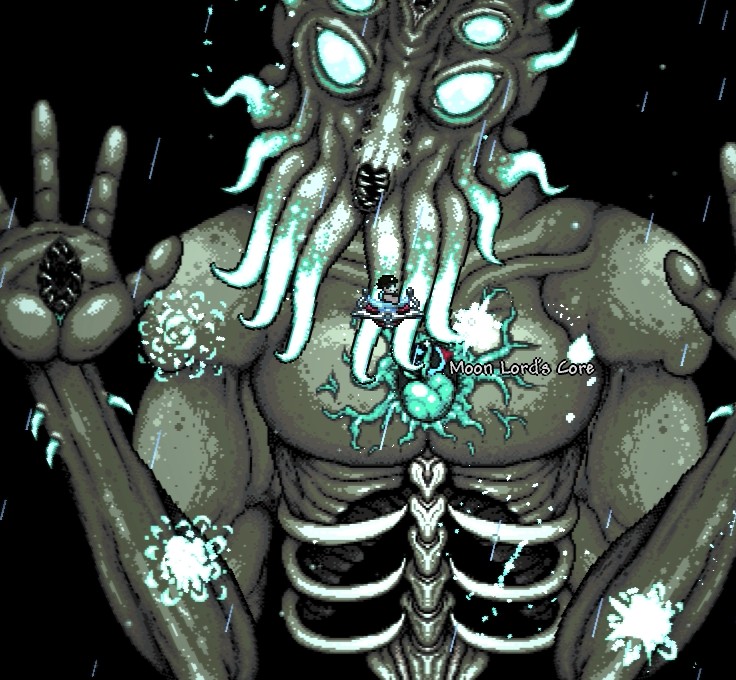
And with the head down, the fight enters its second phase.
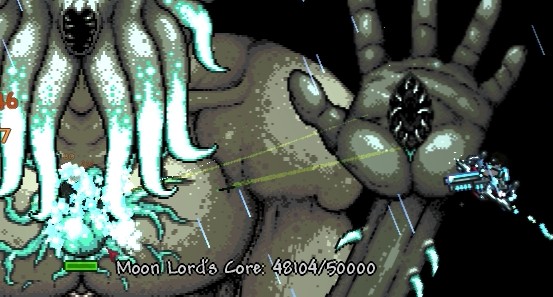
The Moon Lord's heart is the final target, and it has 50,000 HP and 70 defense. It doesn't have any additional attacks, but by this point there are three True Eyes of Cthulhu floating around and shitting out projectiles.
So stay on top of dodging every projectile in existence while laying out damage, and this fucker will die.
It may be a cosmic horror from beyond space and time, but something about its face here makes it look like it's regretful. Probably because it's dying.
It's exploding!
God that brings me a lot of relief to see and...
Wait a second.
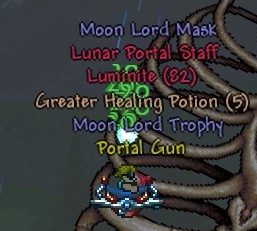


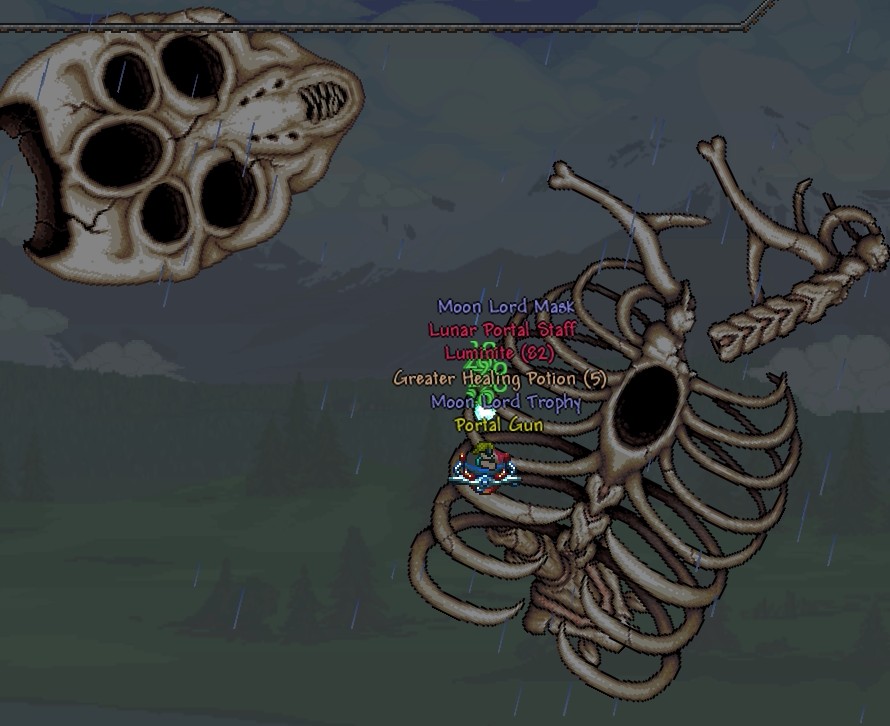
So let's cover his drops. He has 9 weapons, and one of them will always drop, giving each weapon a 11.11% chance to drop from any given kill.
Luminite - (70-90 pcs. The postgame ore, used in the crafting of the four postgame armor sets.)
Meowmere - (200 melee damage. It's a sword that creates bouncing cats that meow.)
Terrarian - (190 melee damage. The strongest yoyo in the game. Potentially the highest DPS weapon in the game if paired with the yoyo bag. The projectiles it shoots bounce around and home in on enemies.)
Star Wrath - (110 melee damage. I never covered it, but in sky chests, you can occasionally find a sword called the Starfury. It calls down a shooting star when you swing it. Star Wrath is its bigger, meaner, beefier brother. My personal favorite of the three melee weapons.)
S.D.M.G. - (77 ranged damage. 50% chance to not consume ammo. Space Dolphin Machine Gun. A massive upgrade over the Megashark in every way.)
Speaks for itself, I think. By the way, that Skeletron Prime kill lasted 8.3 seconds. Yeah, we're that powerful.
Celebration - (65 ranged damage. A rocket launcher that shoots two rockets at once. When the rockets explode, they create a firework pattern. I don't think I've ever used this item before.)
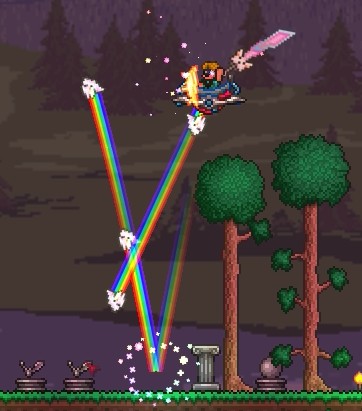
Last Prism - (100 magic damage. Absurdly high mana cost makes this weapon inefficient to use unless you're basically soloing Pumpkin or Frost Moon events.)

The wiki's gif of the prism in action.
Lunar Flare - (100 magic damage. Remember that Blizzard Staff I mentioned a few updates back? This is its bigger brother. It's easily the best magic weapon the Moon Lord drops.)

It's raining space lasers of death.

Rainbow Crystal Staff - (150 summon damage. It's a sentry staff, so you can use this in addition to other summons. Creates a crystal to guard a piece of land. The crystal blasts anything that gets close for a lot of damage.)
The wiki's gif.
Lunar Portal Staff - (50 summon damage. It's another sentry staff. This one summons a portal that shoots a tracking laser, similar to the Moon Lord's death beam.)
This thing is basically capable of holding one side of a tier 3 Tower Defense by itself. I'll be showing that off next time.
Portal Gun - (Yes. That Portal Gun.)
Speaking of which...
NEXT TIME: Tier 3 tower defense and postgame armors. Also the final update.