Part 12: Incorruptus Use 101

Oh my god, we still have more bloody gameplay to cover? I thought I said the game was “complete?”
Christ.
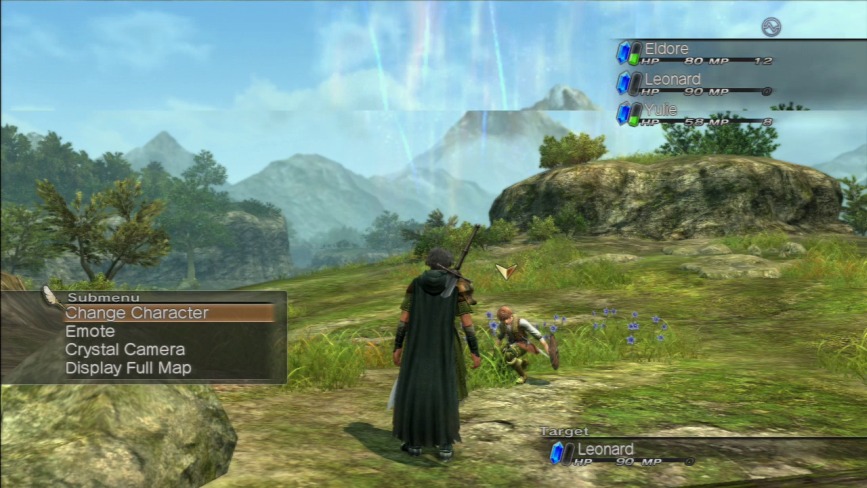
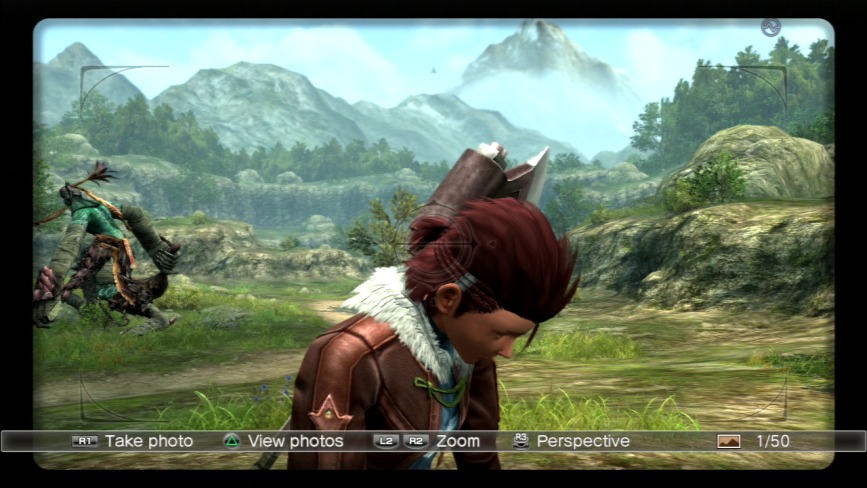
Welcome to Greydall Plain, my lovelies. Just like Balastor Plain, it’s dull and samey. All you need to do for this part is run from one end of the map to the other to get to the boss fight with Ahwahnee and the Nordia Tunnels.
As you’ll see on the map, Greydall Plain is a somewhat open area, so we’re back to ripping off Final Fantasy XII rather than Final Fantasy XIII.
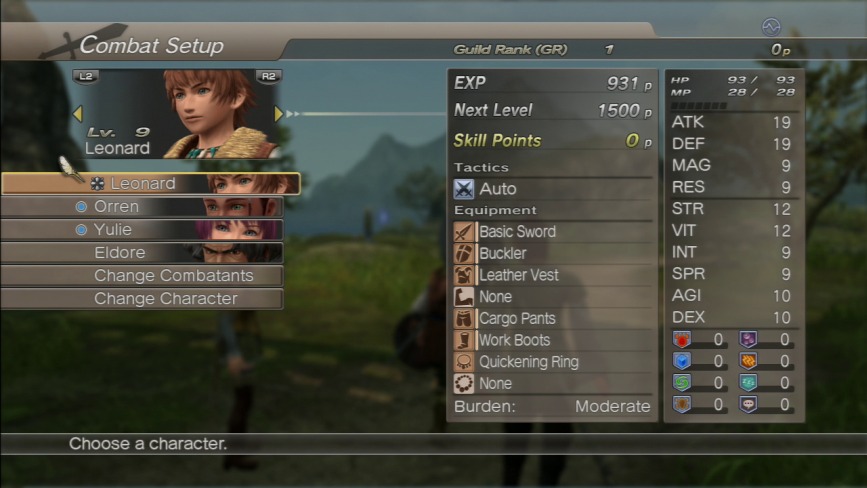
The big change to things however (aside from having the White Knight at our disposal) is that we’ve got a new party member: Eldore.
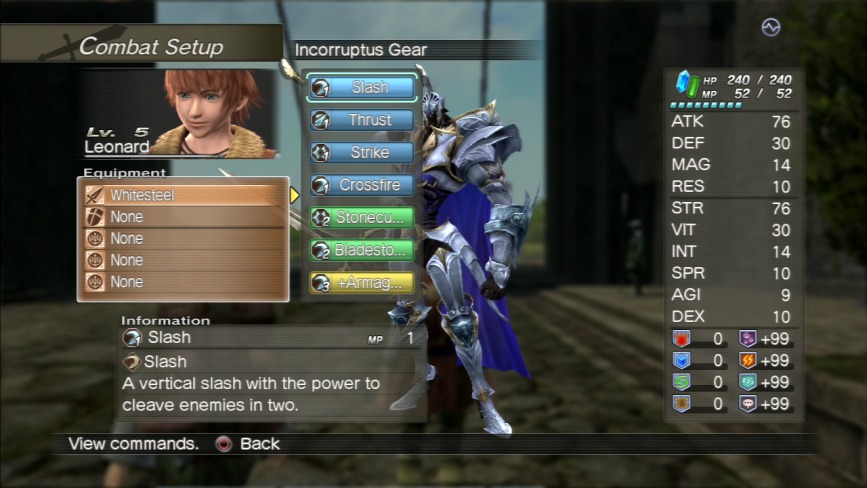
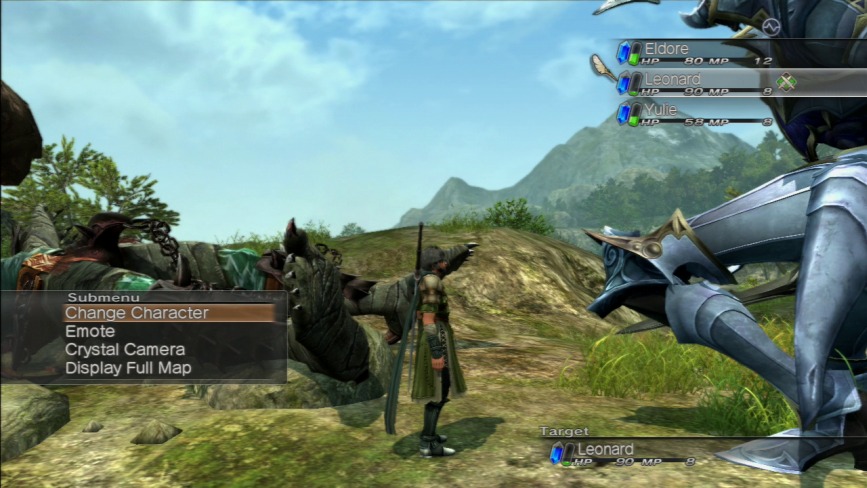
You can also see that the third option in the Combat Setup sub-menu, which used to be ? ? ?, has been replaced with ‘Equip Incorruptus.’ It’s grayed out for everyone but Leonard, for obvious reasons, he’s the only one with a Knight.
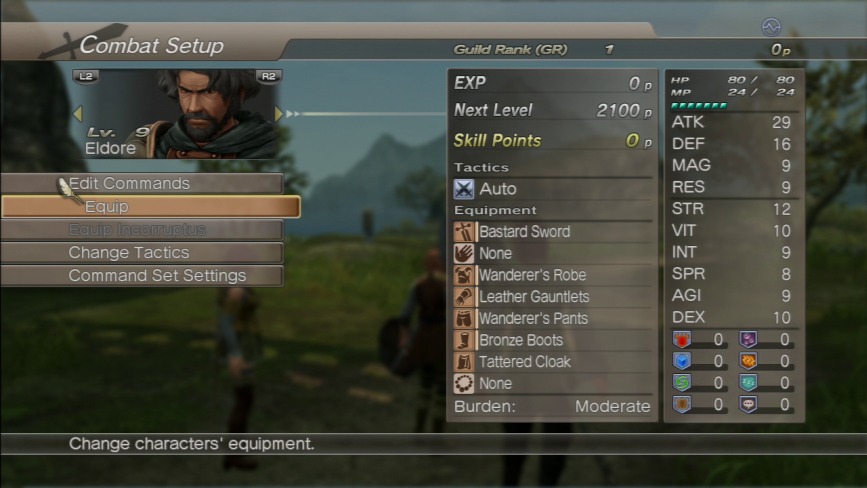
So here’s Eldore’s equipment loadout. Again, I’m playing him as close to ‘canon’ as I can, so he’s got the outfit he entered the Plot with equipped and a two-handed longsword, because that’s what he has equipped if you start the second game fresh.
Plus I love the fact that, 1) the middle-aged man wields the giant zweihänder, and 2) the sword clips right through his cape. …It’s almost like Level-5 either just didn’t care or were too incompetent to find a workaround or something. Zounds!
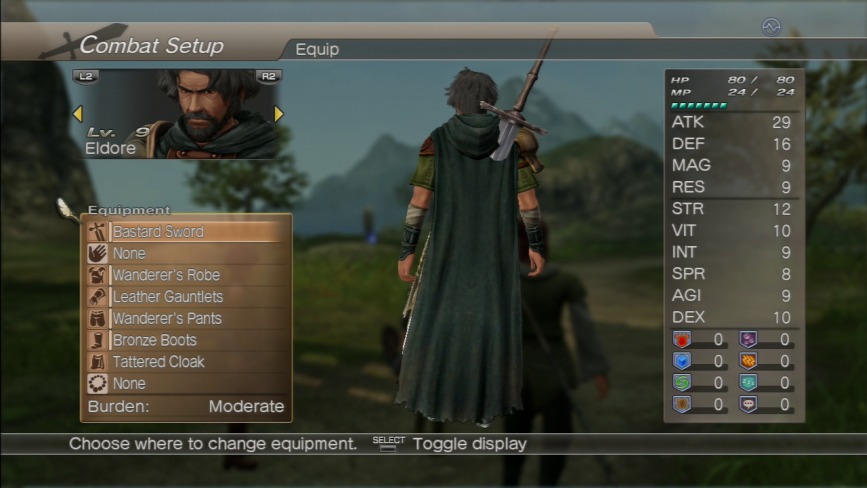
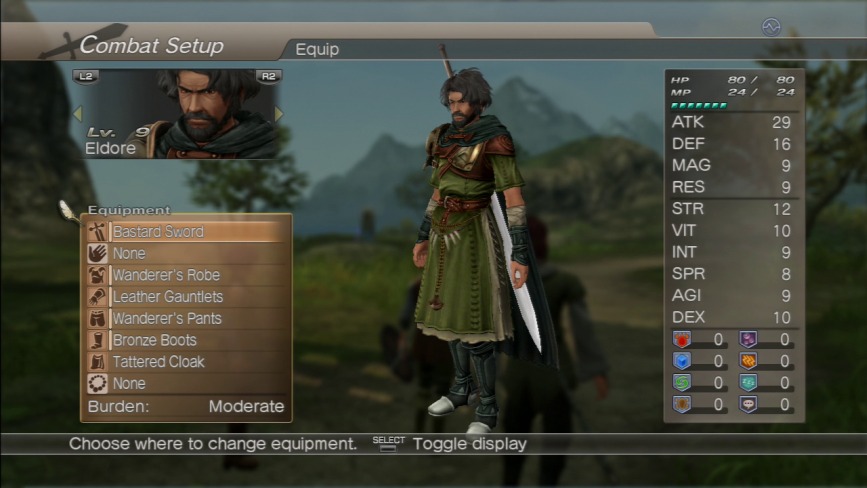
Case in point. Stay gold Level-5. Also note how Eldore’s cloak looks like it has a hood on it. For all the boundless equipment choices (or illusions of choices if you can’t be asked to put the time in to grind away at unlocking everything) you don’t get the option of hoods for you characters, which I find kind of sad.
One last thing: this was the outfit—cloak and all—that Eldore was wearing under his suspicious old man robe, which also had a hood on it.
Yo dawg…
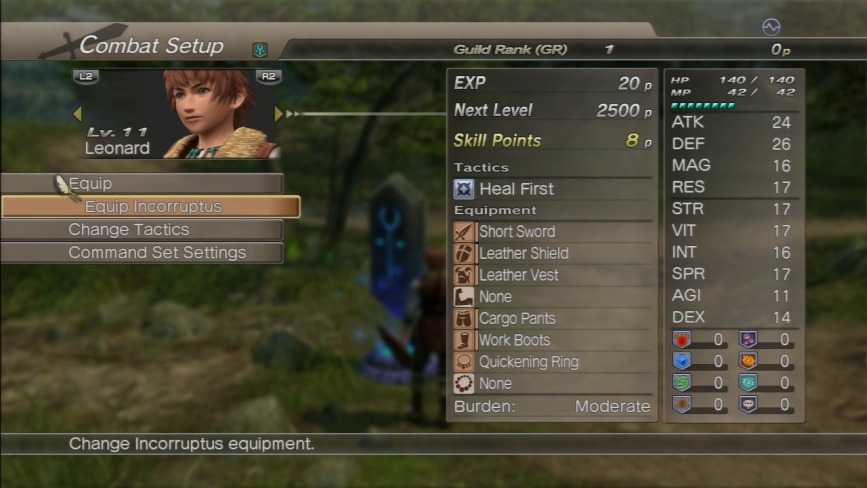
The other addition to our party, in a manner of speaking, is the White Knight itself. The ‘Equip Incorruptus’ option, molded here by Leonard, is only available in towns, on the World Map, or at Logic Stones.
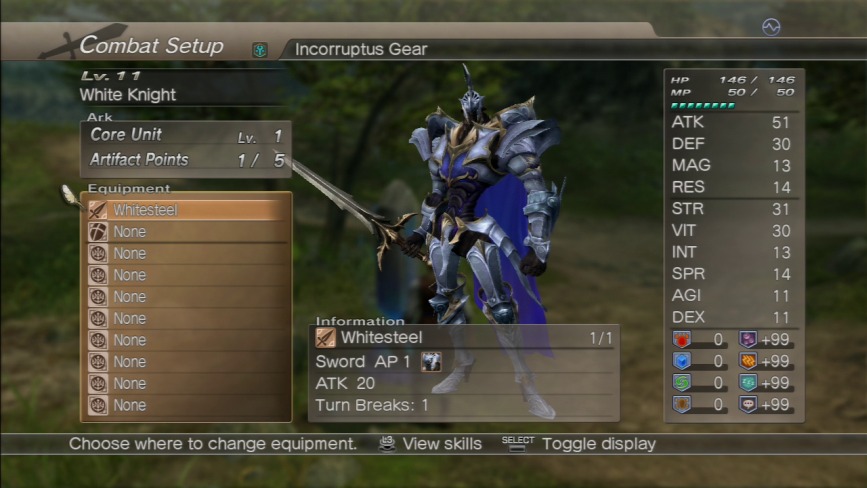
Clicking it opens up this screen where we get to see the White Knight’s equipment options are sort of like we can see on the human characters’ equipment page.
But Knight equipment is somewhat different from human equipment. For starters, a Knight must always have a weapon equipped. Whereas you can de-equip a character’s weaponry and have them just be absolutely useless in battle because of all the things Level-5 ripped off from other JRPG developers, they didn’t rip off the ‘barefisted monk’ trope.
The White Knight, for example has two weapon slots, one for a sword and the other for a shield. It also has room for a potential 8 additional pieces of equipment: a defense-boosting ‘armor’ called Relic Arts, and any combination of various other stat-augmenting accessories.
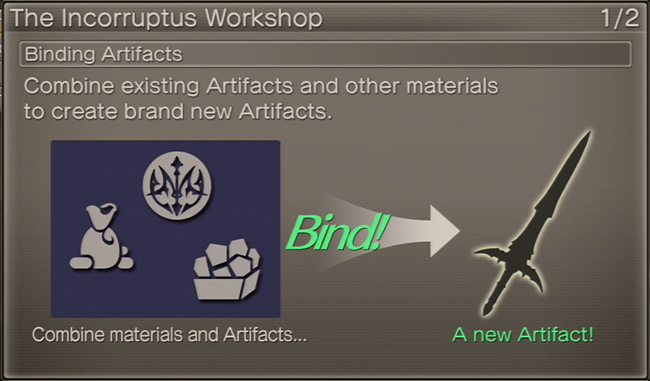
Some of these things you will stumble across in the game, the rest you will need to bind at an Incorruptus Workshop. More on that coming soon.
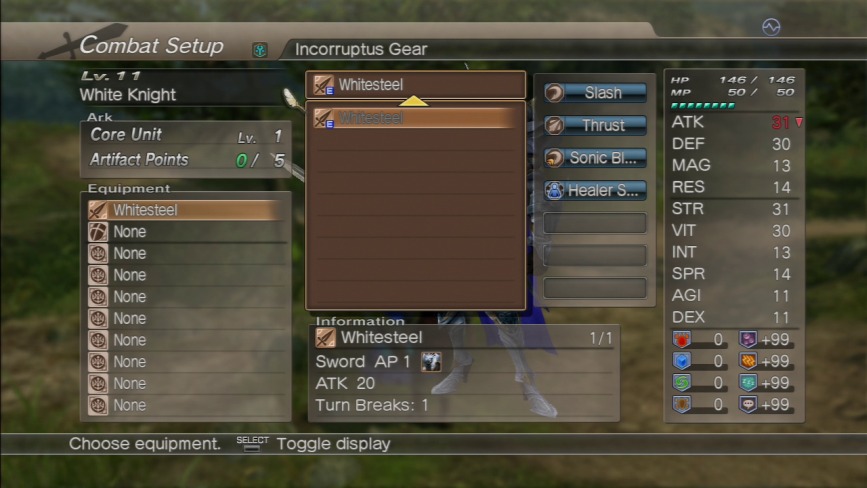
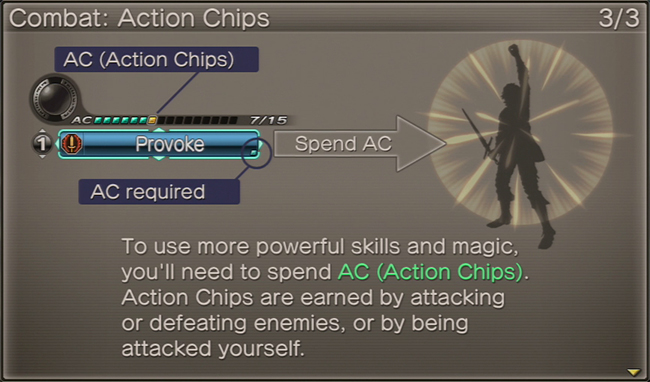
Clicking on each slot opens up a sub-menu that shows off all the equipable parts for this section of the Incorruptus. The middle right panel that appears shows off the abilities of each different Incorruptus weapon.
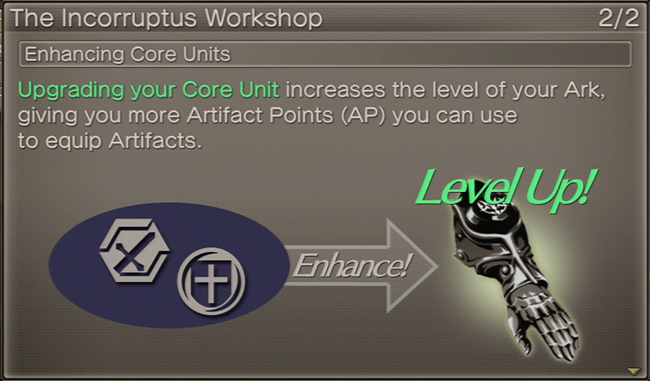
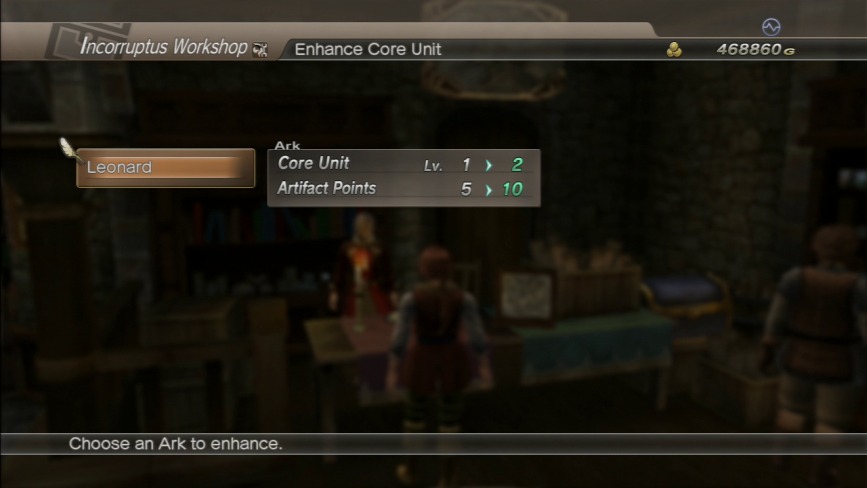
The key stats to pay attention to are in the upper left hand corner: Core Level and Artifact Points. Core Level is essentially how strong the Knight is, while Artifact Points or AP limit what you can equip on the Knight, as every weapon, Relic Arts, and accessory has a certain AP value attached to it. Whitesteel, for instance, has 1 AP, so it takes up 1 of the White Knight’s available 5 AP, meaning we’ve got 4 AP of wiggle room to equip any combination of other accessories so long as they add up to or are under 4 AP.
The Core Level and AP’s stat growth are linked together and can only be raised at an Incorruptus Workshop. And as you can imagine, boosting the Core Level raises the Knight’s stats, and gaining more AP gives you more space to equip more and stronger accessories.
Also note those status ailment defence stats: Incorrupti can’t be poisoned, paralyzed, put to sleep or silenced.
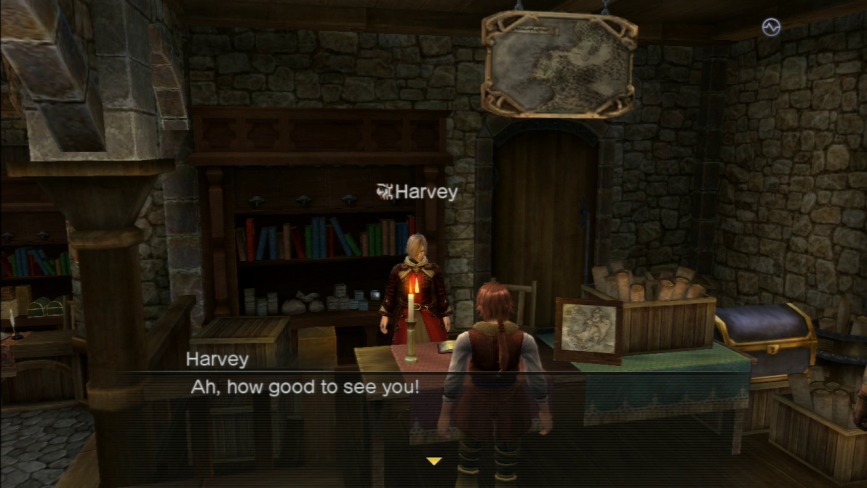
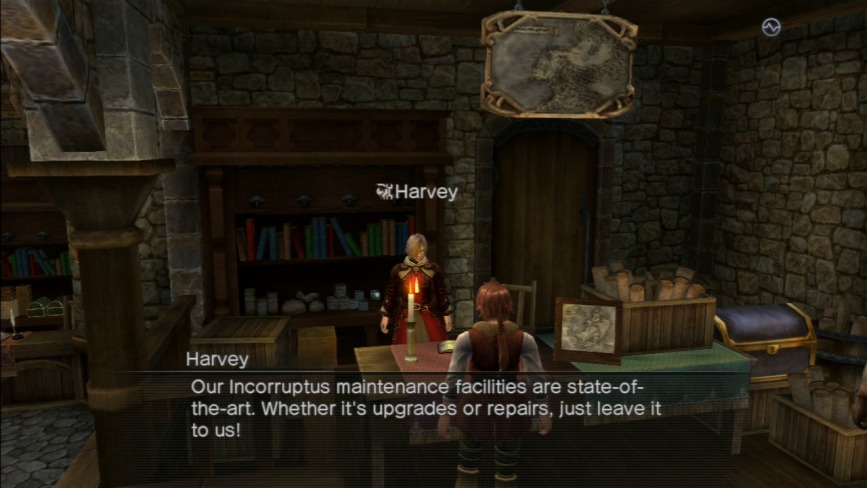
So speaking of the Incorruptus Workshop, hey, Harvey’s finally open for business now. How convenient now that we suddenly have an Incorruptus for him to do some work on.
Fun fact: Incorruptus Workshops doesn't exist in the original version of the first game. The shopkeeper characters like Harvey simply do not exist period in the original version.
Also note the maps on the table and hanging from the ceiling. The bottom one shows the entire map of Nadias which, not even the full World Map screen shows off, and the top one was the scrapped pre-production world map.
How the even fuck?
This is what I was hinting at earlier. How the hell does this even exist? Incorrupti were all but a rumour until the other night. The White Knight was a Balandor state secret. Sarvain explicitly said the best and brightest minds from all over Balandor wasted an entire decade reverse engineering it and they weren’t able to learn anything more about it than what was already written about it in some random old book.
…And yet this guy is running a ‘state-of-the-art’ Incorruptus maintenance facility. HOW?! What’s more, we walked in here and saw him setting up shop before the Magi attack. He was anticipating there being a market for Incorruptus repairpeople in the near future. And what’s more, he’s not the only person who does this in the game. There’s a whole goddamn guild of them, at least one in every town save for Parma because Parma’s a backwater shithole, but the point remains.
I mean, urgh. You couldn’t have come up with a better way to handwave a key aspect of gameplay, Level-5? This game makes my critical thinking skills hurt.
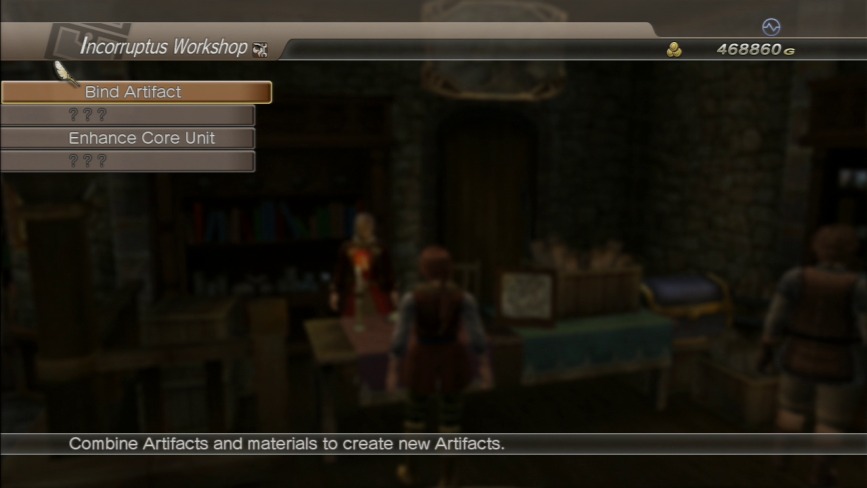
Anyway, fuck it. Let’s explore the Incorruptus Workshop.
We’ve got two options available to us: Bind Artifact and Enhance Core Unit. The two grayed out ? ? ? options pertain to the Arc Knight, which we don’t get until the end of game 2.
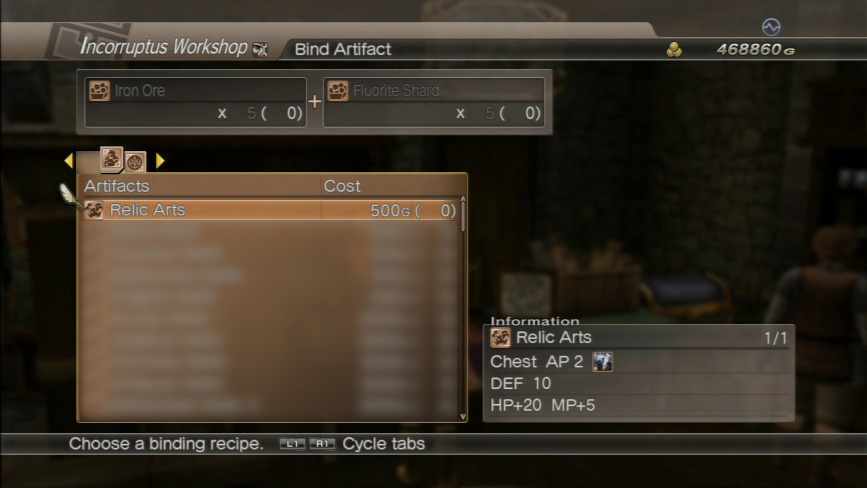
So in the binding screen you’ve got
In fact we shouldn’t even be able to bind Knight weaponry yet, but again that’s all DLC so it gets blurred. Sorry if it’s obnoxious.
Only the Relic Arts is actually available for binding at this point in the game. Everything else is DLC Arc Knight armor pieces. Yes, I was one of those desperate rubes I mocked in my ‘Level-5 is a scummy, soulless whore of a company’ rant.
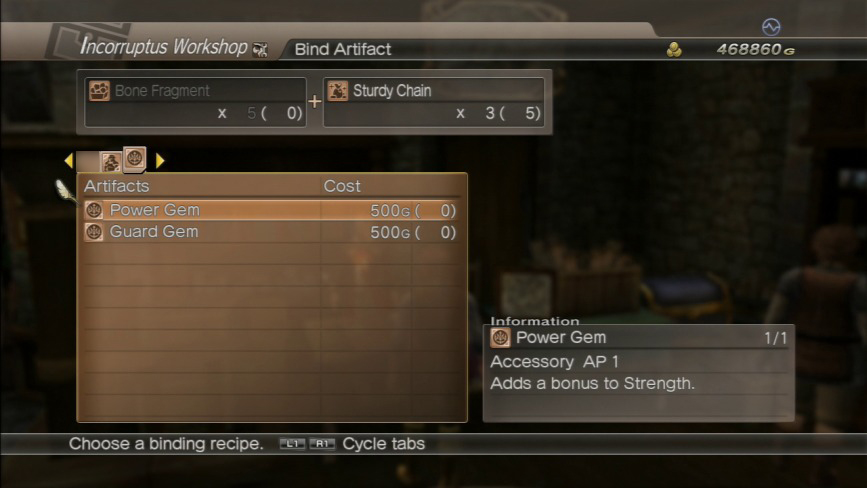
No blurring on this page at least. Also you can see above the item requirements needed to create each individual item. The item requirements for most Knight items go from infuriatingly ridiculous to pants-on-head insane in terms of what you need to do to get them, the higher up the hierarchy we go.
So the other option we have is the Enhance Core Unit option. You can see the AP growth for the White Knight just going from Level 1 to 2.
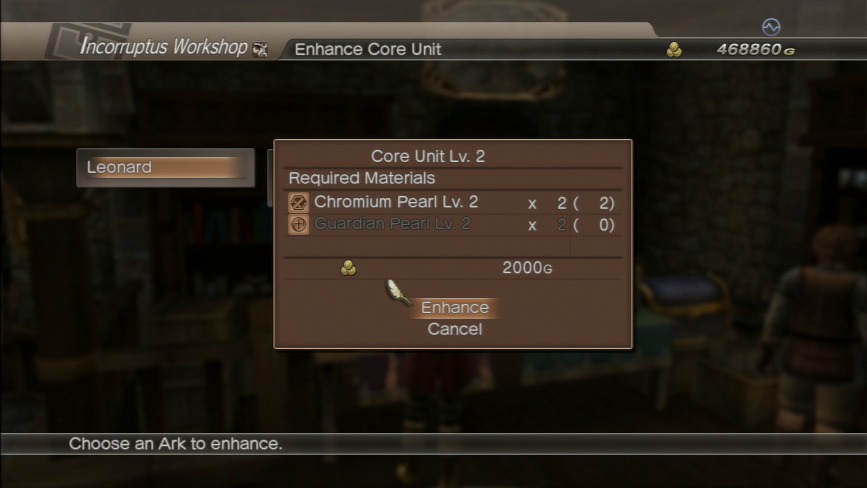
And just like everything else in this game there are stupid requirements preventing you from leveling up right away. To go from lv. 1 to 2 you need two Chromium Pearl lv. 2s and two Guardian Pearl lv. 2s in addition to 2000 gold. And the difficulty spikes like mad after you clear the first little bit.
Okay, back to the actual combat.
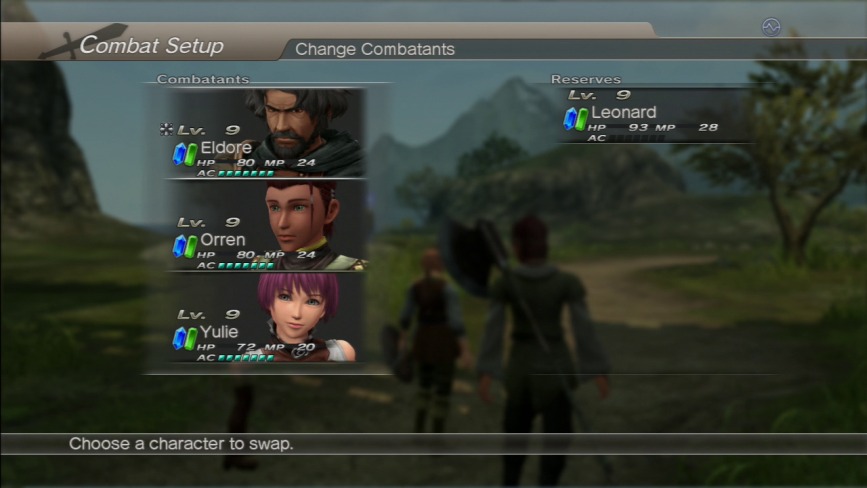
For the sake of showing more stuff off in this post, I’m putting Eldore in the driver’s seat… because he’s a marginally better leader than Leonard.
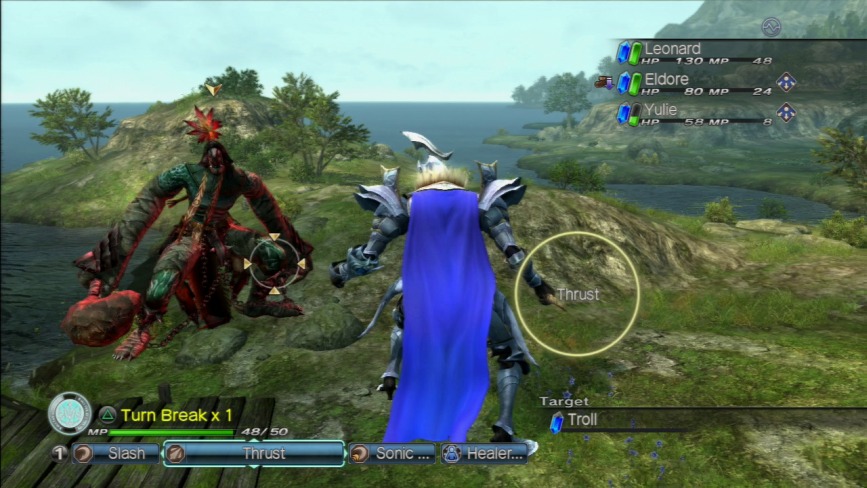
So here’s what combat as a longsword wielder looks like. As you can see, it looks more-or-less like EVERYTHING ELSE IN THIS GAME!
I did some ‘power levelling’ to so we have some more skills than normal.
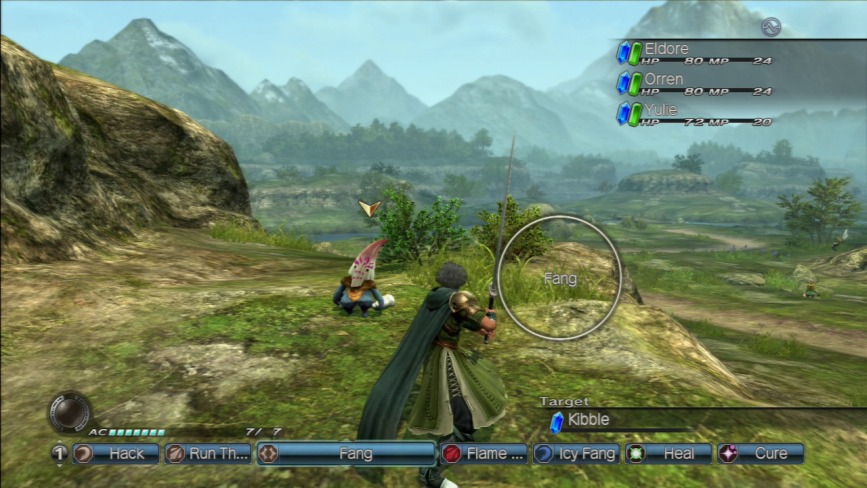
Longswords have fire and ice attribute physical attacks.
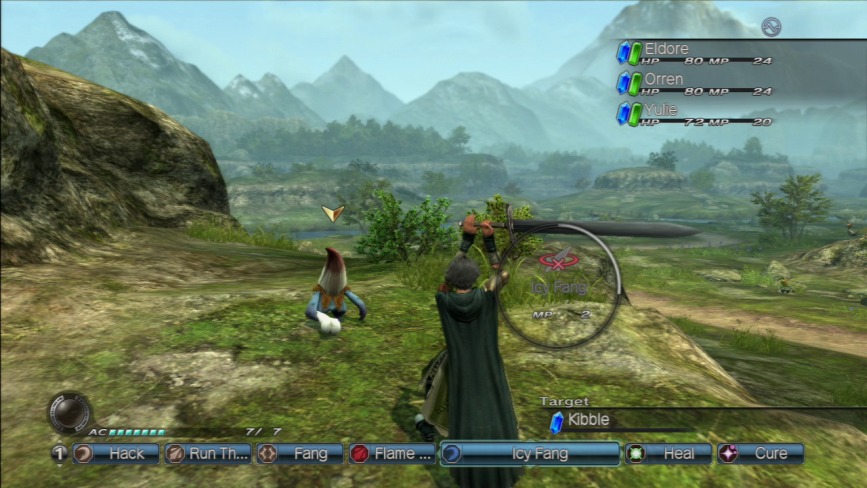
This is Icy Fang, for instance.
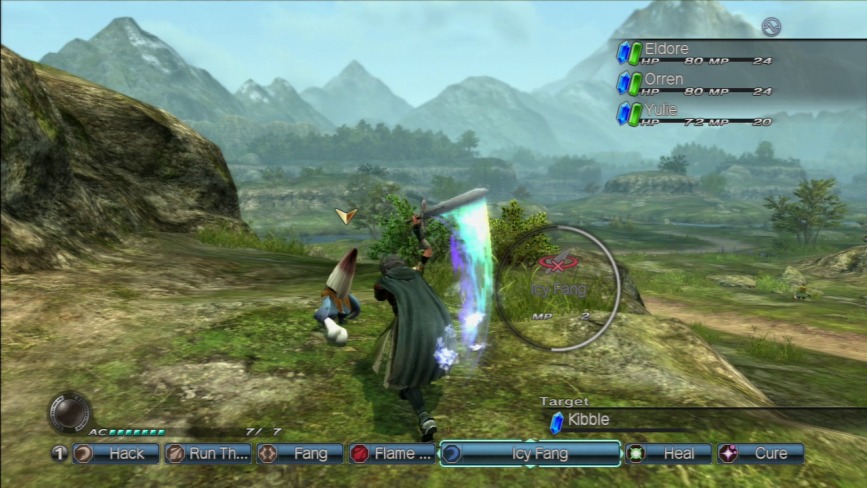
As you can tell by the icon and the name, it’s a slash attack with an ice elemental attribute.
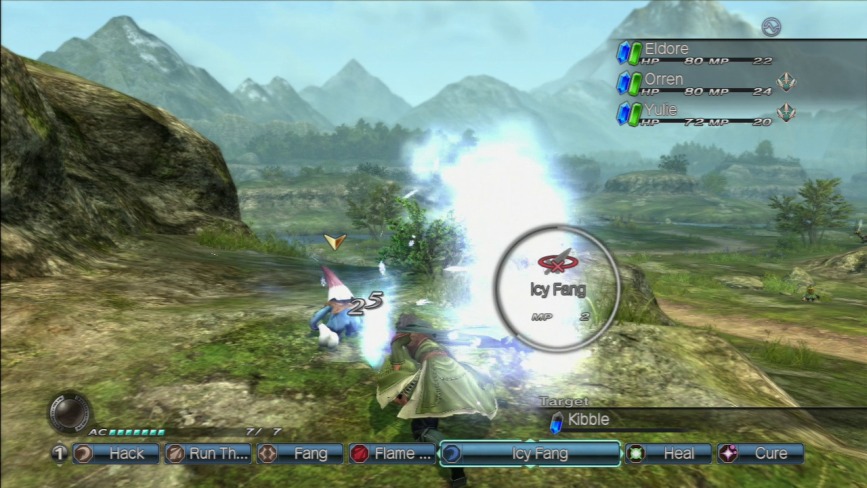
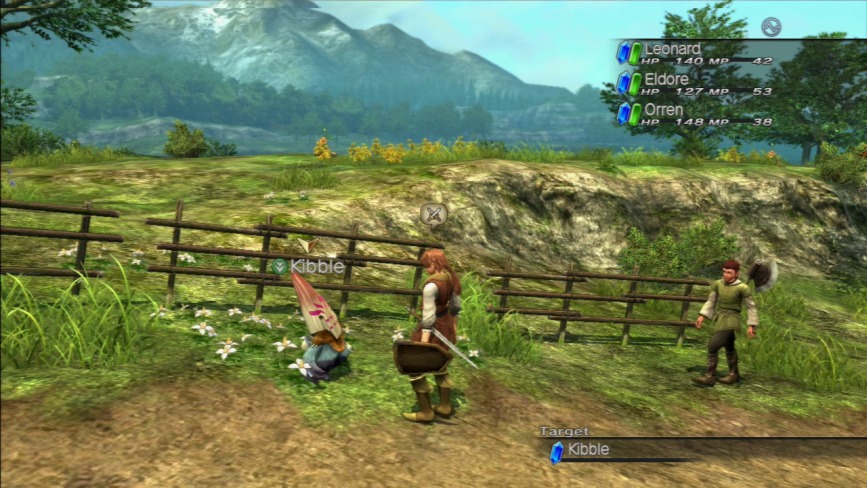
So of course, I use it on a Kibble, which is weak against neither slash attacks nor ice attacks. Brilliant, crow, absolutely brilliant.
Also note how the longsword is slower than the short sword, but has a faster cooldown time than the axe/hammer.
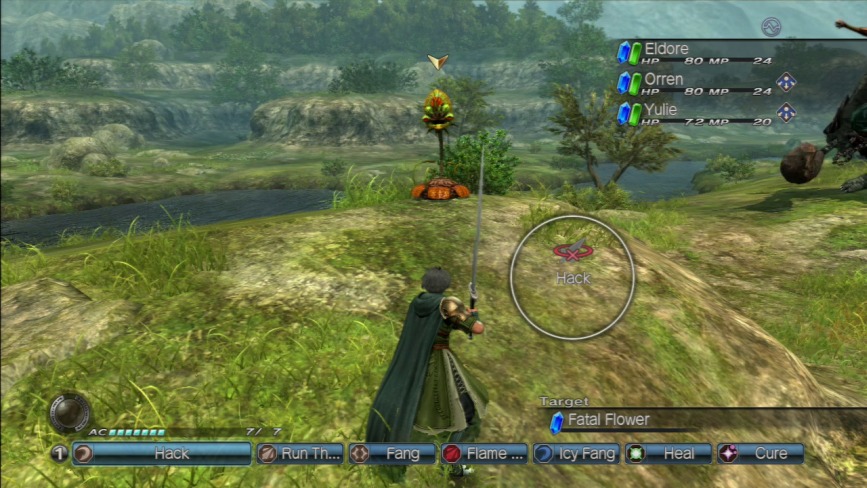
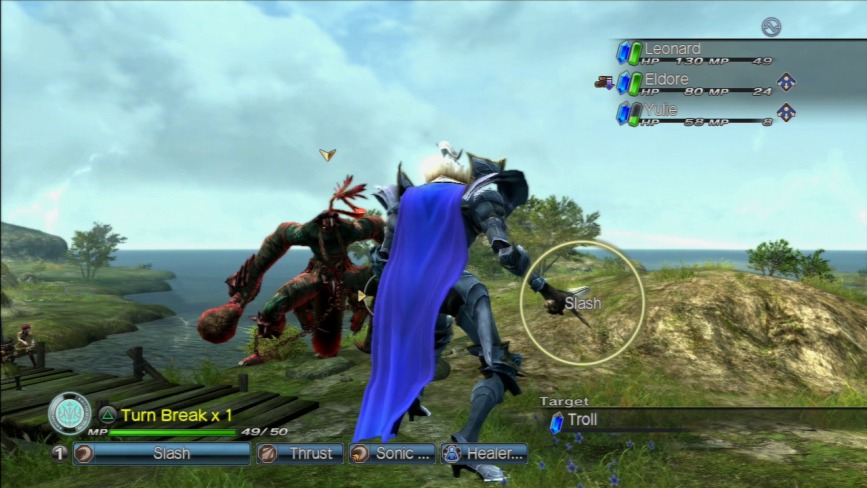
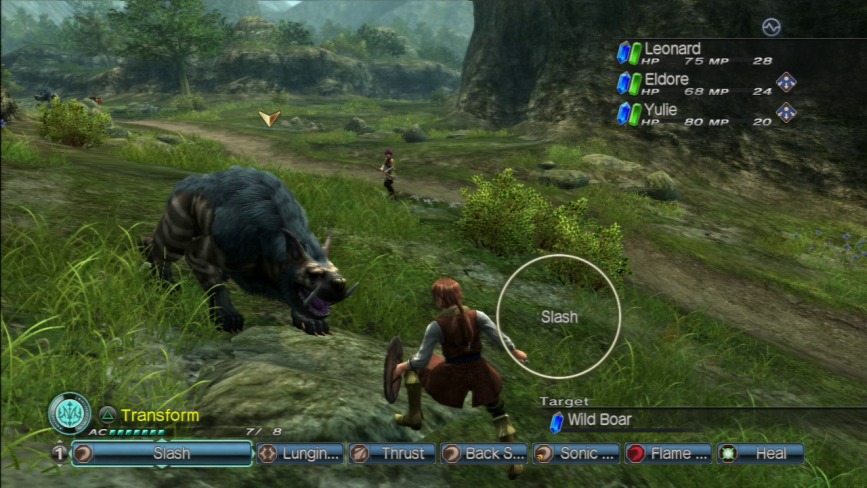
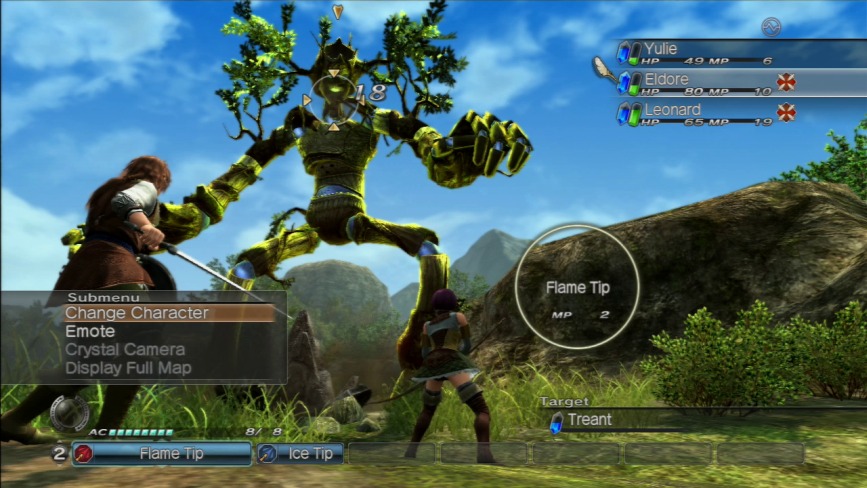
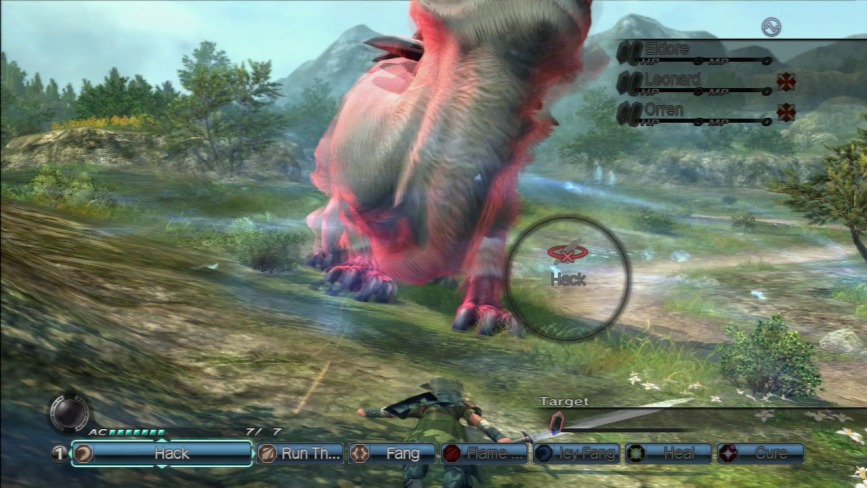
In addition to the Polkans, Kibbles, and Vespids we’ve already seen, Greydall Plain has four new enemy types (technically three, honestly), and you can see one-and-a-half of them in this picture.
This one is the Fatal Flower. They’re plants that shuffle around and spit stuff at you, occasionally inflicting status effects. They’re weak against slashing attacks.
The other enemy you can see off to the side is our old friend the troll. More on those in a moment.
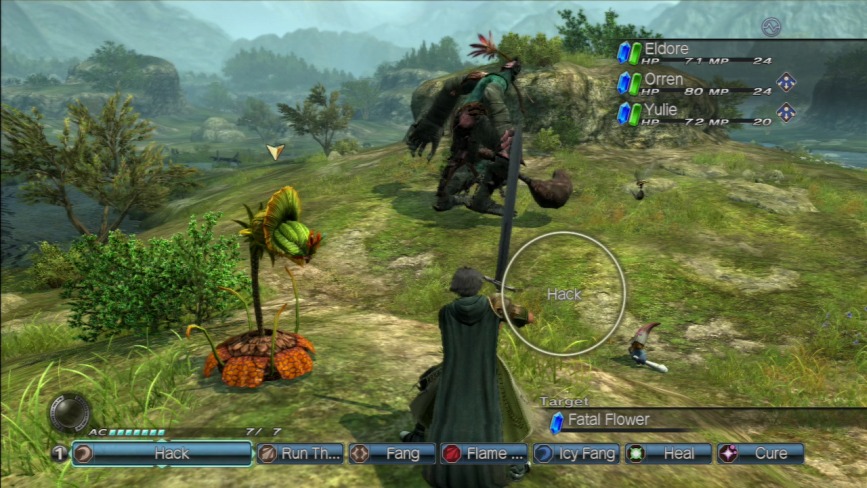
Here’s a better shot of both of them. So like I said in a few chapters ago, from now on we’ll be encountering giant sized enemies in fields. Giant enemies can mostly optional. If you know their weaknesses and have everyone set to Heal First, you can easily take down giant enemies after some attrition… early on.
Again though, like I said, the game has a horrific difficulty curve so giant enemies get insanely hard to beat the further into the game you go. You can, however, outrun them rather easily. They’re incredibly aggressive, but not particularly persistent.
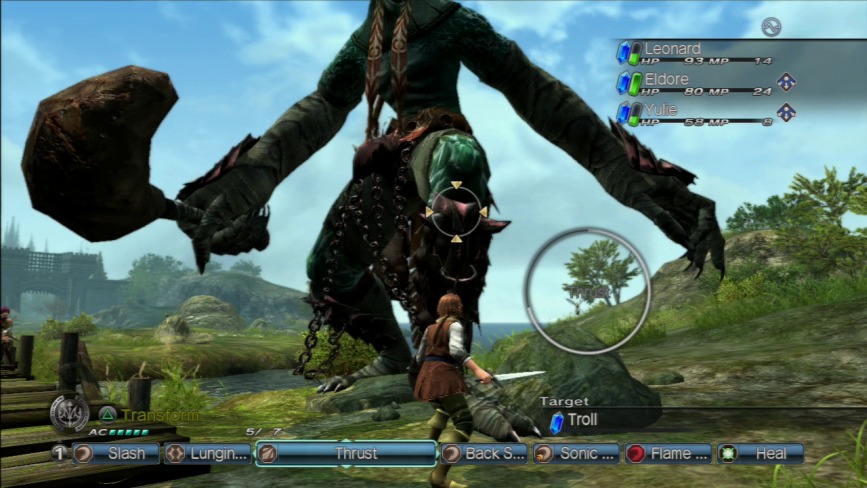
So having giant enemies on the field now lets me show off how Knight combat plays in the game… even you already saw everything in the Pyredaemos boss fight.
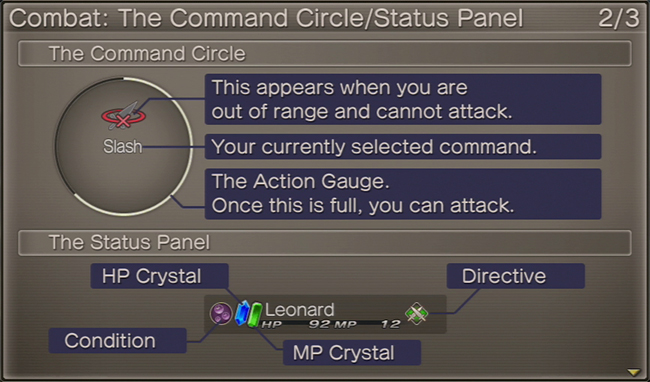
That strange circle in the bottom left corner over the Command Bar that was previously blank now, for Leonard at least, has the Yshrenian seal in the middle of it, as well as the Triangle bottom command ‘Transform.’
Transforming into a Knight requires 7 AC, so you need to wail on enemies and take damage until you accumulate enough AC to transform.
When you make it to 7 AC, the seal lights up teal and the Transform command also lights up, letting you know you can transform into the Knight at your leisure.
Later in the game as the characters gain more AC, you’ll unlock various transformation levels. Level 2 is 10 AC, and the seal turns green, and level 3 is the full 15 AC you eventually gain and the seal turns orange.
If you take the time to build up your AC and transform at levels 2 or 3, supposedly the Knight receives some sort of stat boost for the duration of the battle. I never honestly noticed one way or another, so again, great job on that one Level-5.
Here's another "OG game 1" fun fact: in the original version of the game, Knight power levels actually matter. You can see in this version of the White Knight's various skills that certain skills are colour coded to the three Knight power levels. The more AC you transform with in the original version of game 1, the more attacks the Knights can use in combat.
But because the enhanced remake of game 1 on the White Knight Chronicles II disc has more than three Knight swords for you to use with a wider array of abilities, it kind of renders the power level attack unlock mechanic utterly useless. So Level-5 just left it in there as a vaguely functional vestige rather than just dummy it out of the remake.
Because, “eh, fuck it
 ,” that's why.
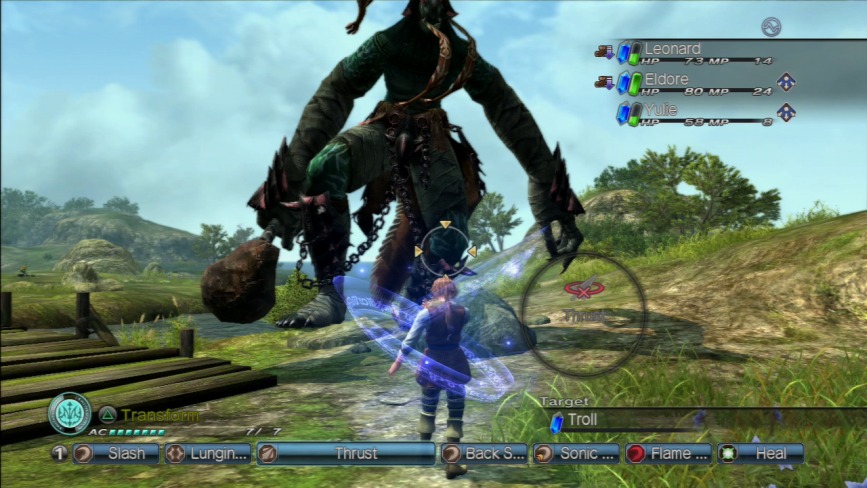
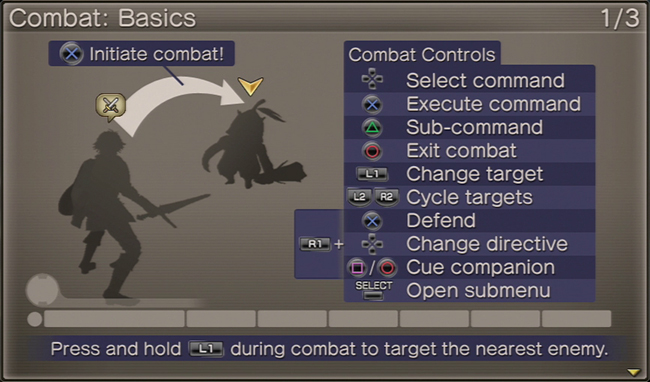
So you’ve got two options for transforming into the Knight. Either press the Triangle hot key, or scroll through the command bar to get down to the special Transform option on line 4.
Hmmm, press one button instantly. Or take 10 seconds to press multiple buttons. Choices.
The Triangle shortcut was added to the remake in the name of speeding combat up a little more. The original version of game 1 only had the transform command on the fourth rung of the command bar.
After selecting Transform, a bunch of blue rings and sparkly energy flow around Leonard (which also doesn't appear in the original version of the game) as he recites the White Knight’s transformation incantation, “O Wizel, white warrior, wielder of the ancient sword, grant me your power…”
And just like preforming magic in this game, Leonard has to come to a complete stop to do the transformation sequence. That means he can’t move, can’t cancel the sequence on his own, and can’t attack or defend while he pauses for 20 seconds and says the words. He can also be damaged and killed during this period until the incantation is complete. Giant enemies or enemies with attacks the game deems ‘powerful’ can also knock Leonard off balance and interrupt the transformation, costing you your AC in addition to severely weakening you.
And if you think that’s kind of shitty of it, then gird yourselves, because the game is just beginning to unveil its seething contempt for you, the player.
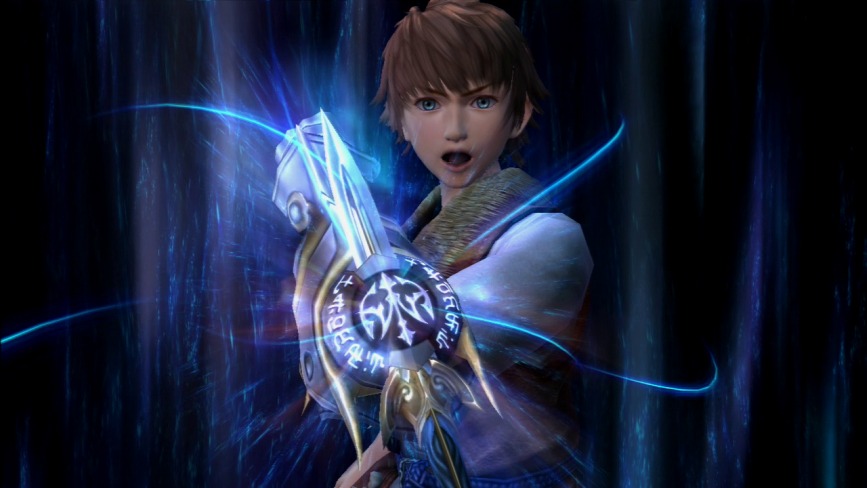
After running through the whole verse, eventually you get a quick cutscene of Leonard shouting “VERTO!”
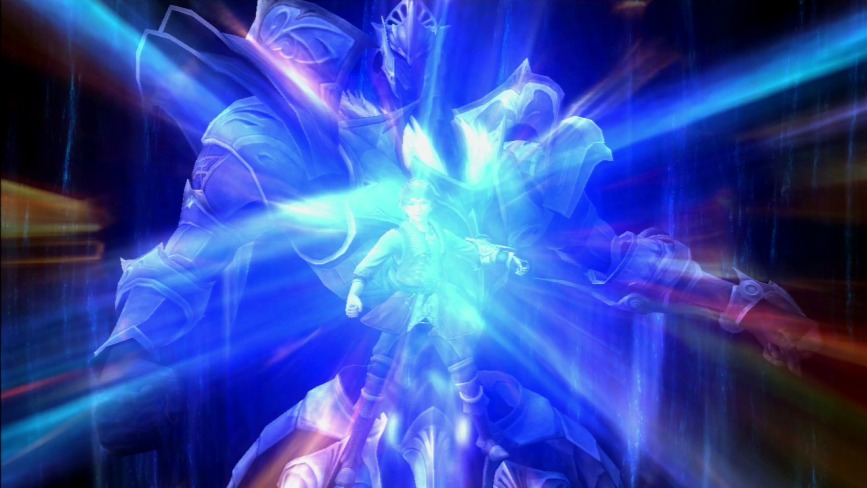
Unlike the first time, however, you don’t get the elaborate Sailor Moon/Kamen Raider/Digimon Frontier/[Your Favourite Henshin Hero Show Here]-style transformation sequence. Leonard does a thing and the Knight appears behind him doing the thing in unison, and the game cuts back to the battlefield with the Knight in Leonard’s place now.
…If you have the transformation cutscene on, that is. You can turn it off in the settings, and instead when Leonard says ‘Verto,’ he’s engulfed in a pillar of light and replaced by the Knight instantly. This is also how Knight transformation works online with the Arc Knight, or rather how it worked when GeoNet was still online.
The Arc Knight has its own quasi-transformation sequence though, but we’ll cover that in due time.
Okay, let’s (try to) kick some ass.
Also of note: the White Knight’s theme overrides the standard battle music for as long as the Knight is on the battlefield, so you get to feel all badass and heroic while doing relatively nothing of the sort.
So this is it. This right here is the game’s alleged selling point: the ability to confront giant enemies and then level the playing field on them by whipping out a similarly sized Knight and going to town on them while the rest of your party acts all tiny and pathetic and shit.
Unfortunately the Knight doesn’t play with kind of weight and gravity you would expect a 20 foot tall walking suit of magical armor with astounding physical power to have. It’s also hemmed in by the same invisible walls as the human characters are in when really all barriers should be broken at this point because you’re controlling an indestructible flying brick of force, mass, and acceleration.
But again, incompetent gameplay design wins the day here.
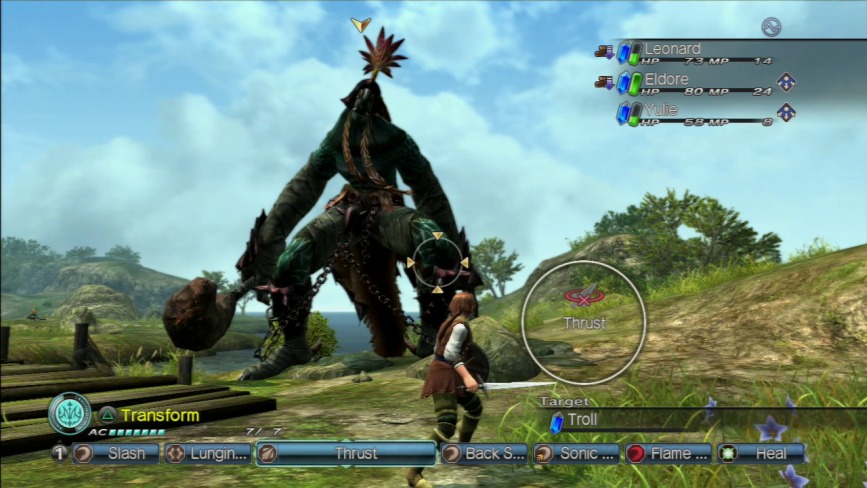
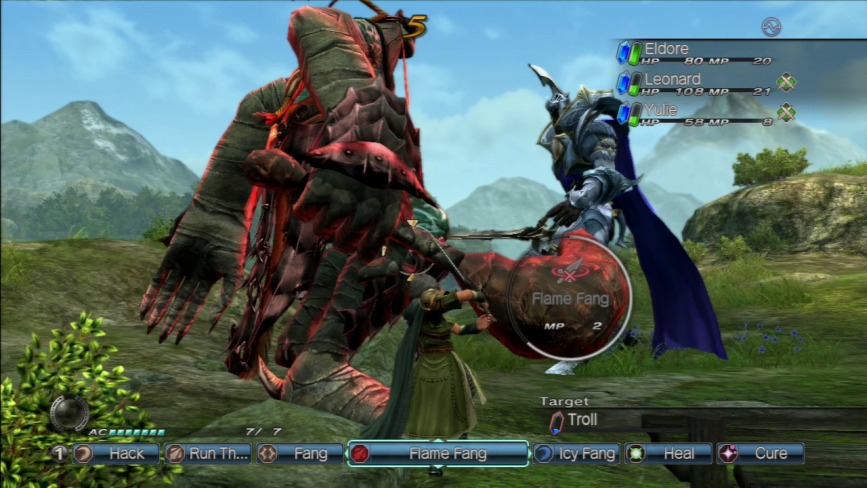
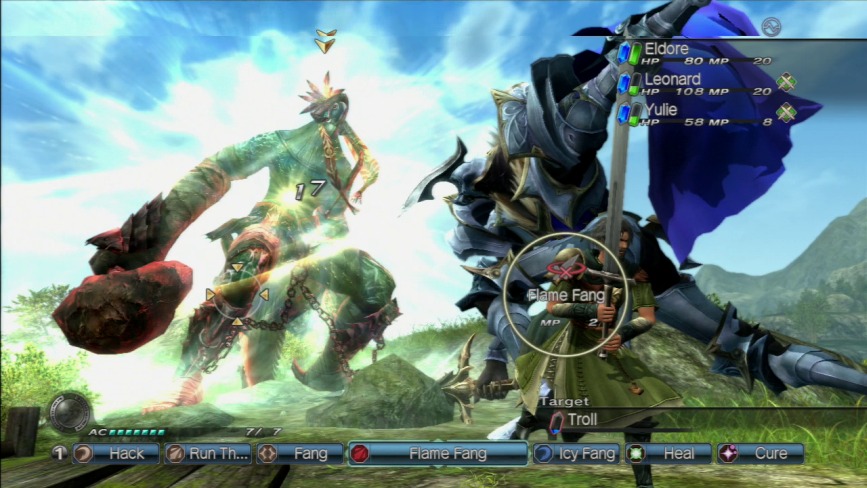
You can see here just for size comparison, the tiny specs that are Yulie and Eldore there in the background on the bridge compared to the Knight and the troll. We can also now attack the troll’s upper body now that we’re on an even footing with it.
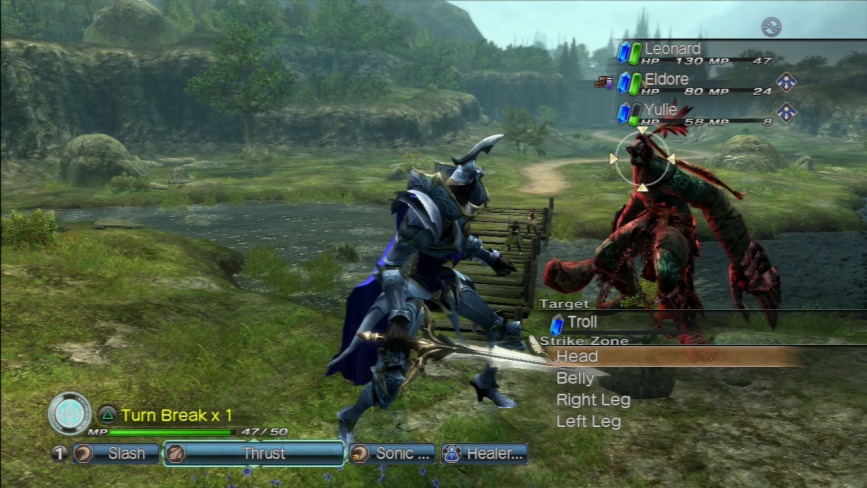
Standard fare for giant enemies and Knight combat is the higher up their body you target, the more damage your attacks do. For instance, belly blows do more damage than leg blows, and head shots do nearly 1.5x the damage of belly shots.
So to beat a troll using the White Knight, Leonard will stab it repeatedly right in its face. Because Leonard is a ‘hero.’
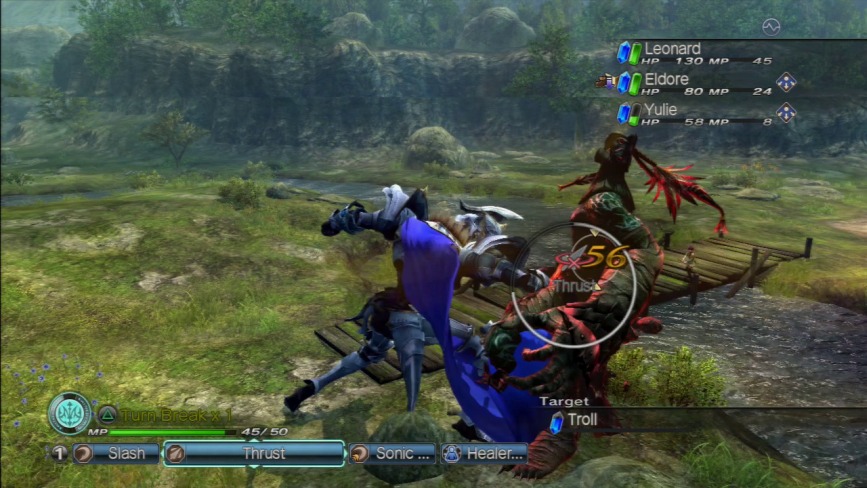
Here’s that principle in action. Leonard plows Whitesteel clean through the troll’s torso for 56 damage…
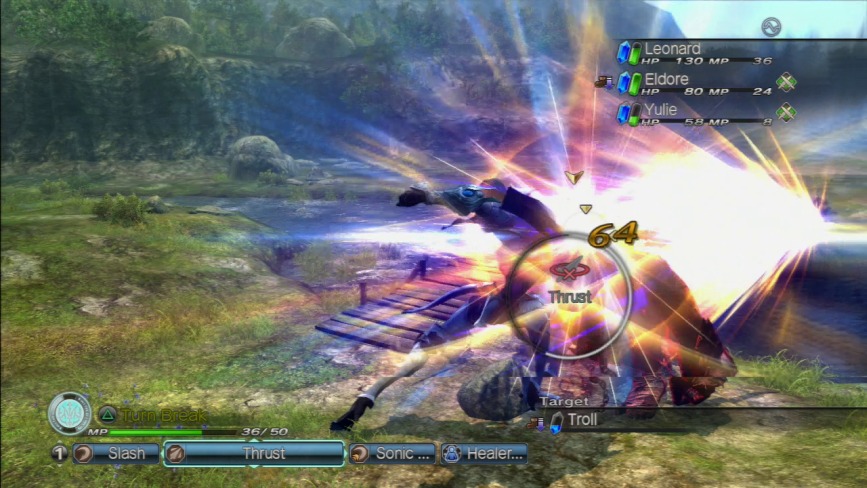
And then drills it through the troll’s head for 64 damage.
I should also point out that the MP bar that’s replace the AC bar over the Command Bar. The MP bar will slowly and constantly diminish in any battle that isn’t a plot boss battle. It’s a countdown timer for how long you have left in Knight mode and will diminish even if you just stand there and do nothing.
Standard attacks like Slash and Thrust don’t use MP per se, but in the time it takes you to complete them you will guaranteed lose at least two or three MP anyway.
Stronger attacks like Sonic Blade or magical abilities like Healer’s Soul take up more MP. So there is some strategy involved in Knight combat where you have to manage doing more damage per turn or even healing at times vs. just staying in the fight for as long as possible.
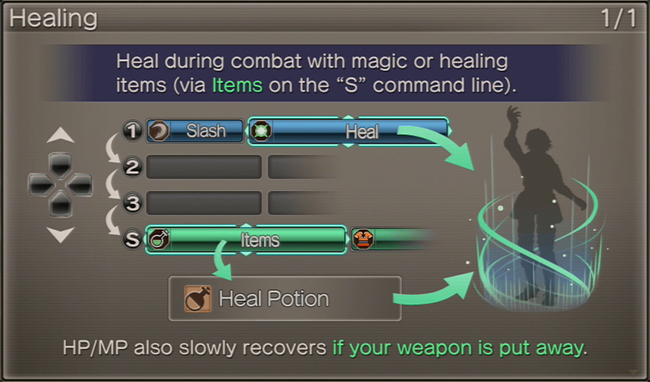
The upshot to this is that regular items and skills work just as well on the Knight as they do human characters, so you can buff it with support spells, clear status ailments from it, and heal it with Divine Magic skills or healing items, and even replenish its MP with Mana Potions to keep it in the fight for longer... although we don’t have steady access to Mana Potions at this point in the game, so you’re limited to what you’ve got in the here and now.
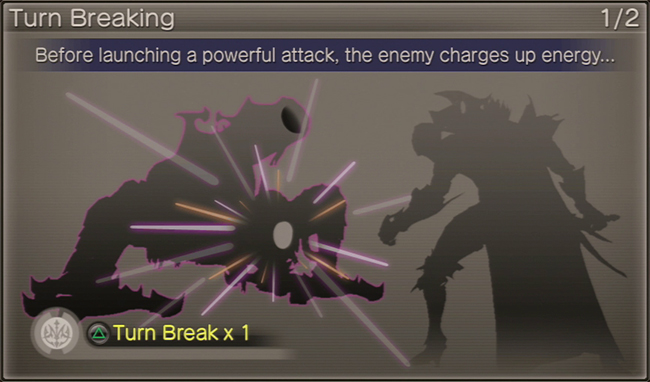
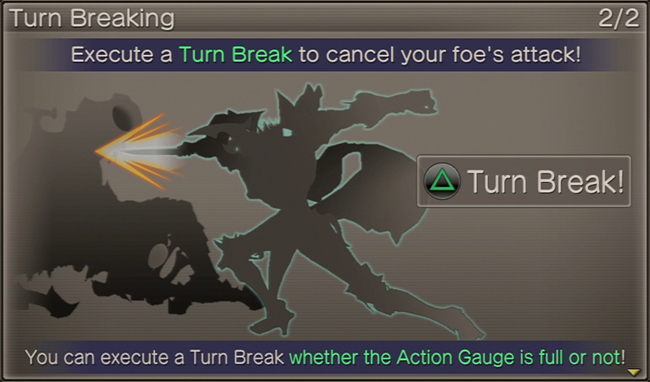
One last thing of import in the above image: the troll is on its knees right now because in the time between these attacks, I Turn Broke it and then Yulie broke its leg with a well-placed arrow shot in what I can only imagine was some kind of lucky fluke because I refuse to believe the AI is smart enough to properly capitalize on an enemy weakness like that.
The AI just doesn’t do that.
At all.
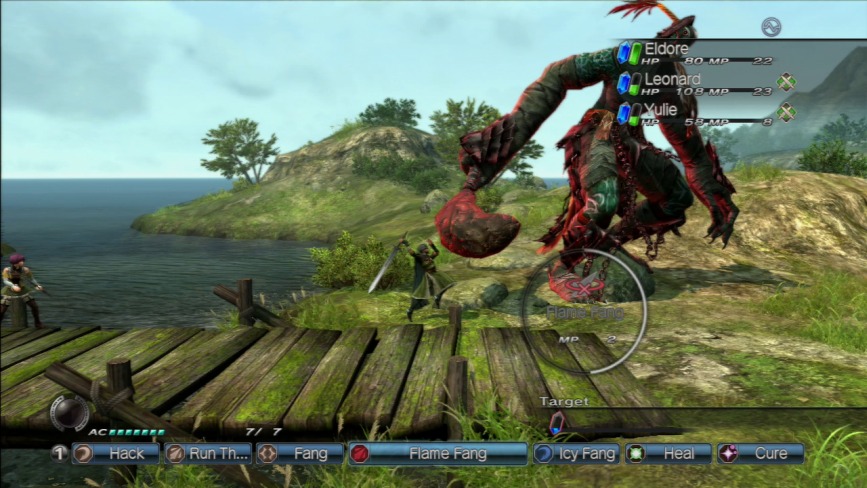
And to prove that, I’m going to hop into control over Eldore right now to get some outside perspective on Knight combat.
Again, credit where it’s due, the game does scale very well. We’re still trying to get believability out of beta though. Eldore barely comes up to either of these titans’ knees, and yet he’s in the fray mixing it up and in serious danger of being crushed to death in the melee between them… or he would be if this game had even a modicum of realism to it.
And behold, the game’s dumb AI in action. The troll is weak to stabbing attacks. It always has been weak to stabbing attacks. It always will be weak to stabbing attacks. I’ve been using stabbing attacks on it while controlling Leonard for the whole fight. So what does the AI start using the second I relinquish control over Leonard? Slashing attacks. Which the troll is strong against and do nearly a quarter the damage.
And it keeps using slashing attacks for the rest of the battle.
To call this game’s AI stupid is an insult to legitimately unintelligent people.
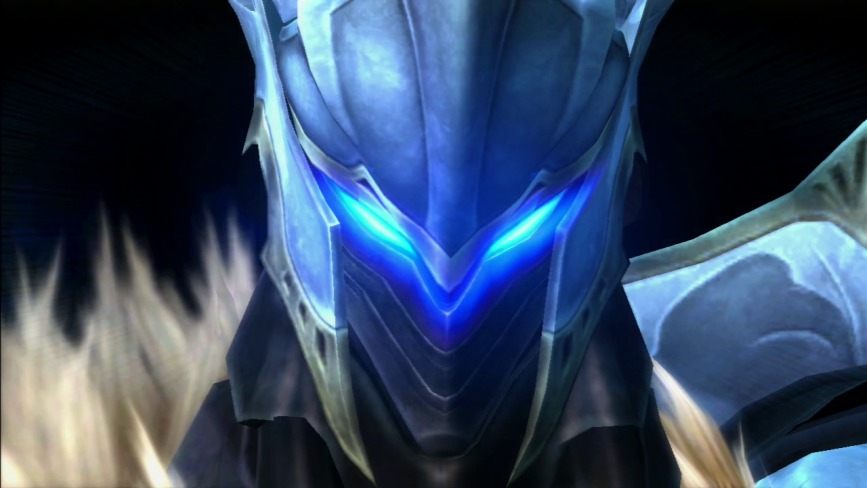
So with the troll defeated (by Eldore now that AI-Leonard went all derpy), the White Knight crouches down and dissipates into that funky orange energy we saw in Chapter IV.
Leonard is left in its place with 0 MP now.

The upshot is that when you’re not in combat, your HP and MP will steadily replenish themselves, albeit slowly. You can speed it along, however by making use to two particular emotes…
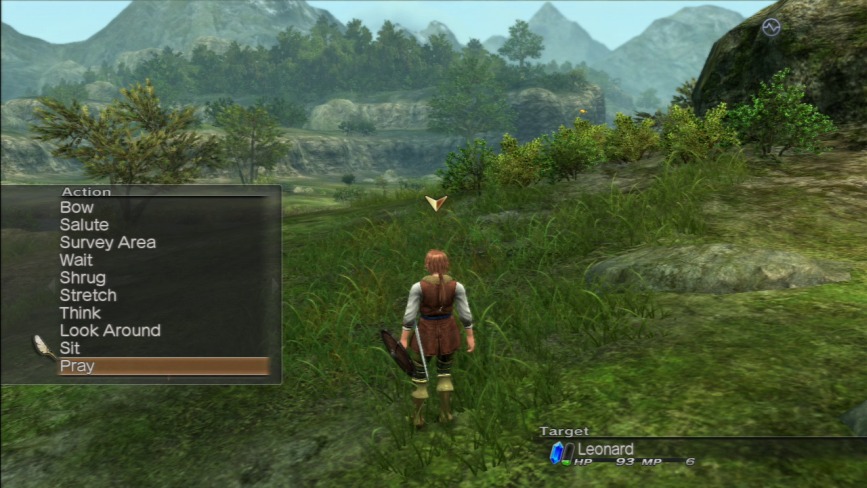
If you select the ‘Pray’ option…
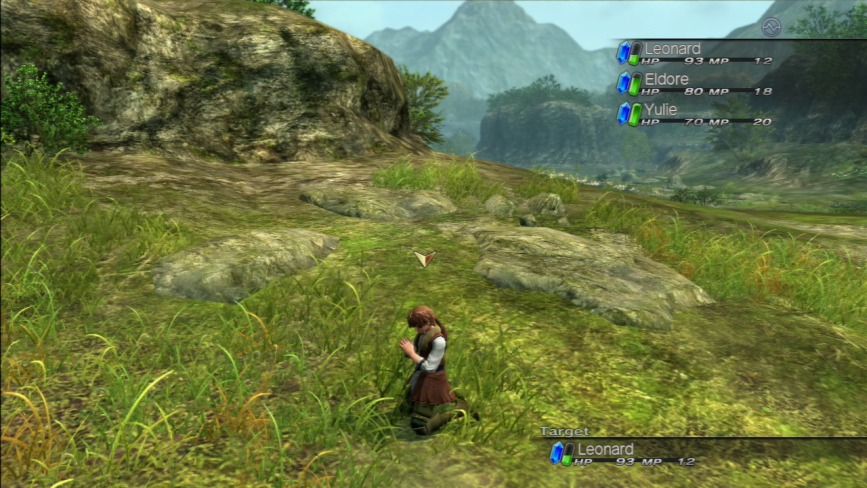
Your party leader will knee down and start miming like they’re praying. And notice from the previous image Leonard’s MP spiked from 6 to 12 the second he knelt down.
Praying causes your entire party’s MP to recharge stupid fast.
The other useful emote option is ‘Sit.’ Sitting works the same way but for HP instead of MP. If you sit down for like 10 or 20 seconds, your party’s HP will recharge super fast allowing you to get back up and at ‘em without using healing items or MP for healing spells.
Just two little nifty things aspects that the game doesn’t even bother explaining or pointing out to you. I discovered them on my own back when the multiplayer was still online by observing other players.
Leave it to Level-5 to bury the lead on actual useful gameplay elements in an adventure game.
So skipping ahead some, these are one of the other new enemy types we’ll be encountering from here out in the game: boars. These are the third shittiest common enemies in the game after Vespids and the damn fish that start showing up in the second game. They’re not particularly strong, but they are annoying.
They’re incredibly aggressive, fast and have a wide field of view, so they will pursue you if you choose to run from one that’s tweaked on to you, but unlike the Vespids, they can eventually be outran.
They’re weak to slashing attacks. The only other notable thing about them is that the different types of boars we’ll be encountering in various areas are more than just pallet swaps like most of the other enemies are. There are some actual design variations between different species while still maintaining the same body type and strengths/weaknesses. Only two other enemy types do that: spiders and elementals.
Hey, Level-5 had to hit that
button eventually, right?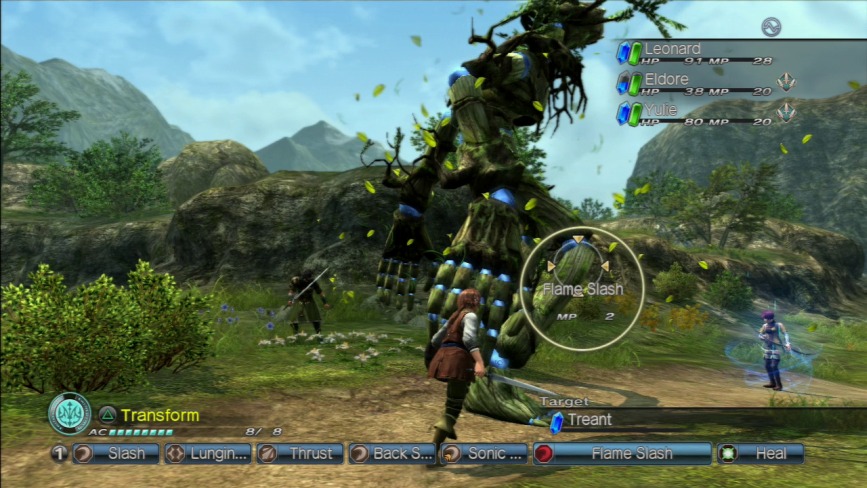
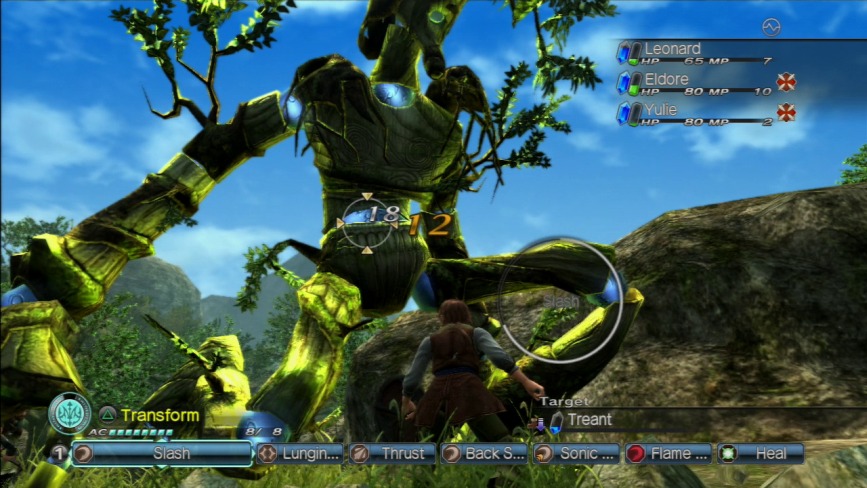
The last new enemy we encounter is the Treant, aka the Dungeons & Dragons public domain version of Ents.
These guys are walking trees held together by some sort of blue gelatinous material in their joints. Kind of cool, all told.
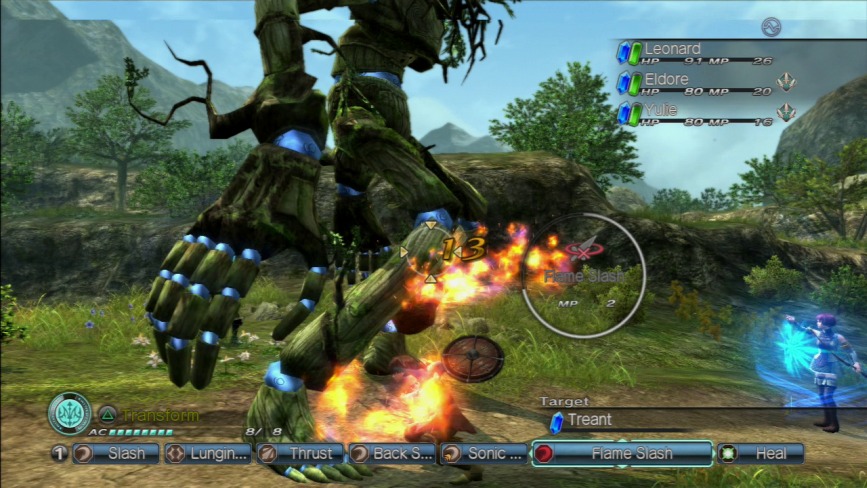
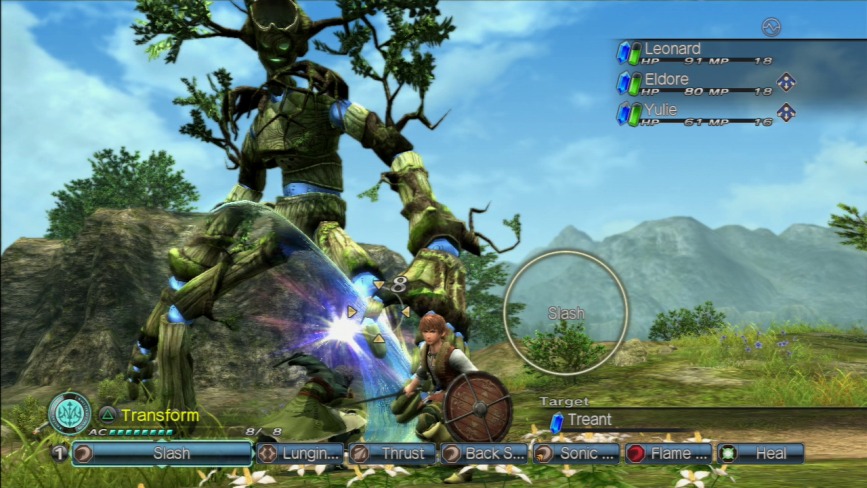
Being made of wood, they’re weak against fire and slashing attacks, so Leonard’s Flame Slash is the perfect attack for whittling these guys down. Hah. Whittling.

Here’s a better shot of the whole thing, including its creepy Heart Tree face.
One last thing about treants: they, as well as golems turn yellow when get become enraged as opposed to red like every other giant enemy. I have no idea why, because at times they also turn red. I don’t know what the significance of the yellow is, nor do I honestly care.
Also, for whatever reason, treants have penis-beards. More unintended sexual imagery from a game that doesn’t even have kissing in it. Sorry if I ruined Leonard and Cisna’s non-relationship for anyone.

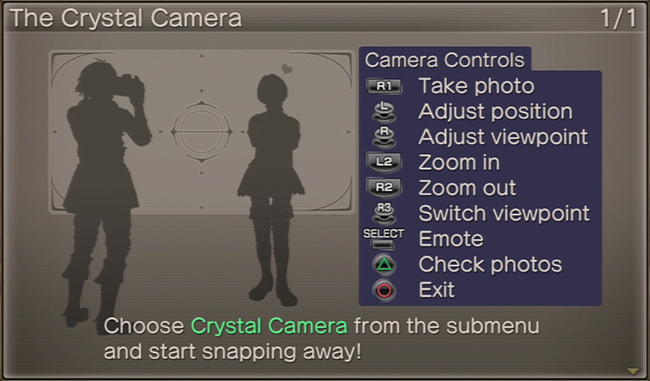
And now a derail about the Crystal Camera we had to go out of our way to pick up this chapter. Because I guess this is technically still a thing in this game.
Pressing the Select button on the DualShock3 opens up the submenu, and you can see now that the Crystal Camera option has been shoehorned into the panel we originally saw in the Chapter II gameplay update.
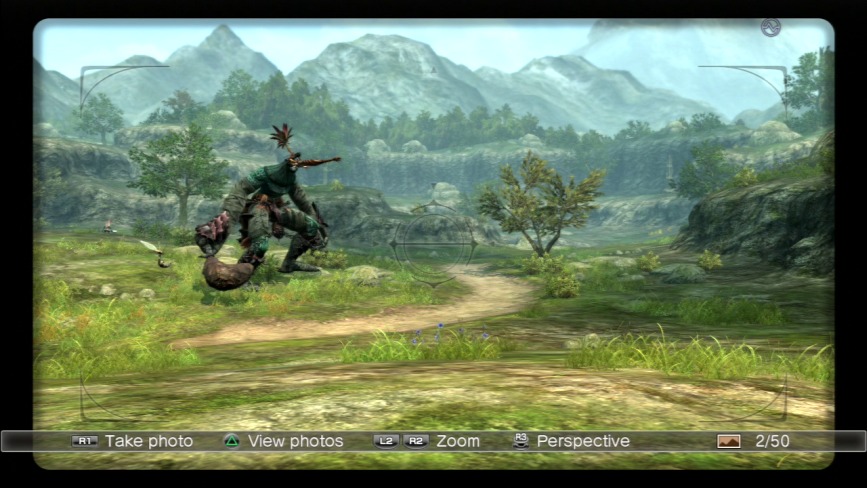
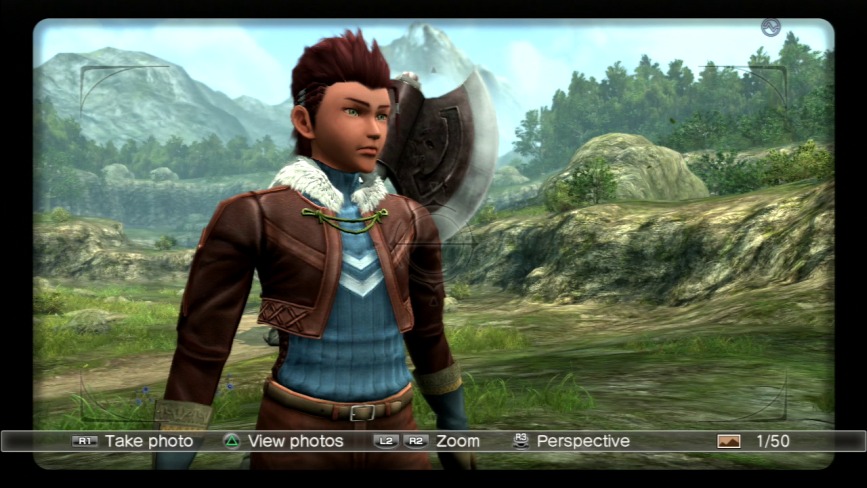
Selecting it brings up the camera reticule. Whichever character you were playing as at that moment disappears and the camera starts off pointing in whatever direction the in-game camera was pointing.
You can allegedly take screen shots of the game using the Crystal Camera. Though you were often very limited with the angles you could get on things. Here, for example is a very Level-5 appropriate
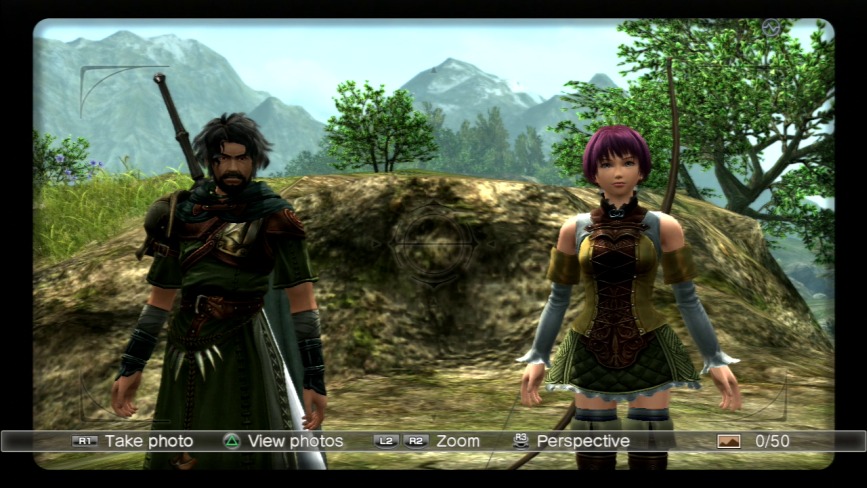
-y angle on Yulie and Eldore. Eldore: Niles, what the bloody hell are you doing?
 Orren: Ya ever hear of Instagram, old fart?
 Yulie: Ooo! Use the sepia filter!
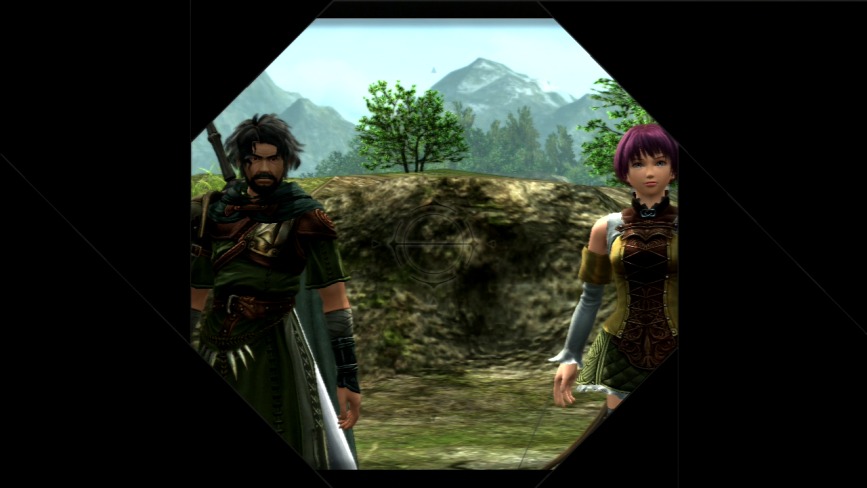
Pressing the R1 button snaps the picture and you get this camera iris effect for a second.

You're also permitted the briefest glimpse at what the "finished" photo looks like before the Camera UI reappears on screen.
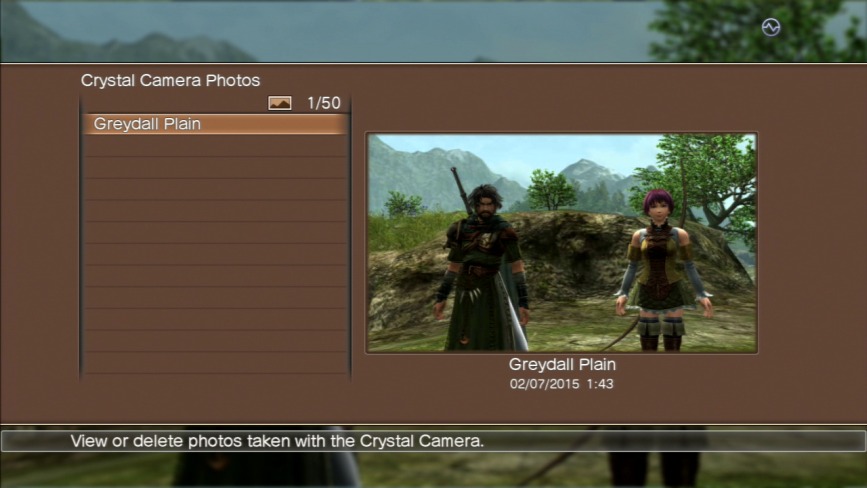
Pressing the Triangle button brings up the catalog of every photo you've taken with the Crystal Camera on that particular save file.
And you can't view them in any size larger than what they appear at in the preview window. So there's that.
From this screen you could (in theory) share your photos with your guild or your online mode friends list or whatever. It literally was a low-effort in-game Instagram. It really, REALLY kind of sucked.
Pressing the R3 button flips the camera around to the selfie angle. The interesting thing with this mechanic was that the character you’d be using the camera with would suddenly be pointed in whatever direction the camera viewfinder was facing when you made the transition, rather than the original direction they were facing when you first entered the camera mode.
Because
, that’s why.
Pressing the Select button a second time in Crystal Camera mode opens up the Emotes submenu.
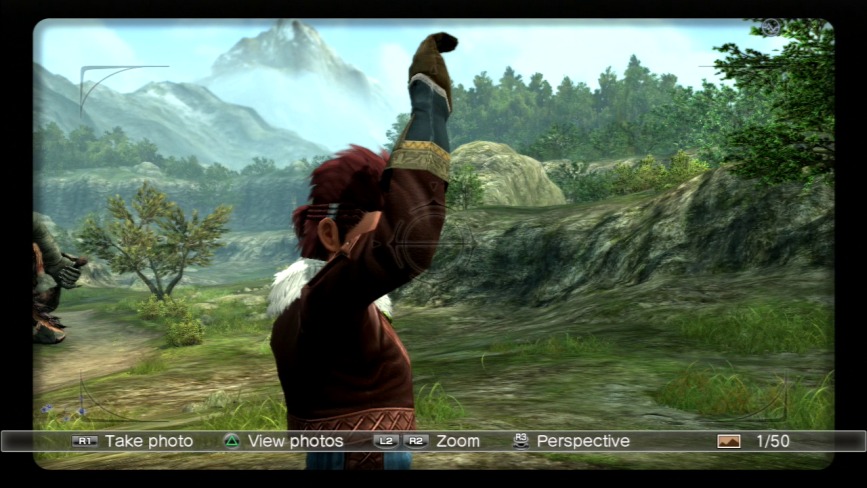
This would allow you to pose your characters in various ways to try and make screenshots more interesting. Basically, everything extra-canonical I have done or will do for this LP was almost entirely done in-engine with the Crystal Camera (and a bit of Photoshop
 ).
).It's actually easier to get screenshots for the game without using the camera, or at least without using it as it’s intended to be used, anyway. If you press the Triangle button and bring up the photo album screen and then rapidly close it, you’ve got about a 1 second window where you’ll have a more-or-less clean screen to grab an image off of. Combining this with in-engine animations gets a little tricky some times, but it works rather decently for grabbing headshots of characters who don’t otherwise get decent angles in cutscenes to use instead.
 Leonard: Hey, Orren, can I gave it a try now? Orren: Sure, I’d love to see what Rapacci does to you when you break it. Knock yourself out… literally.
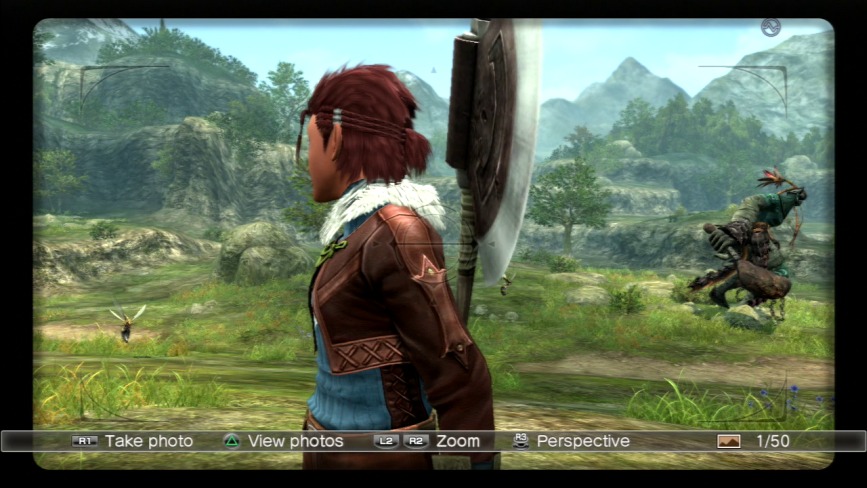 Orren: Okay, this is boring, let’s do something else.
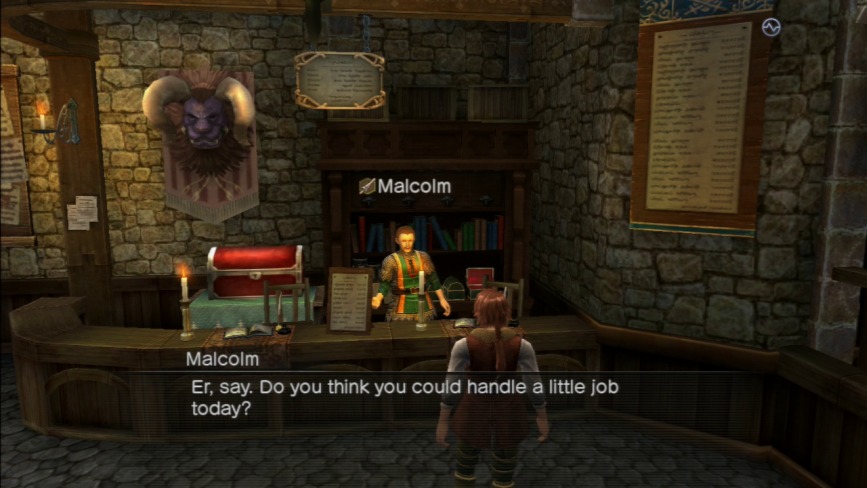
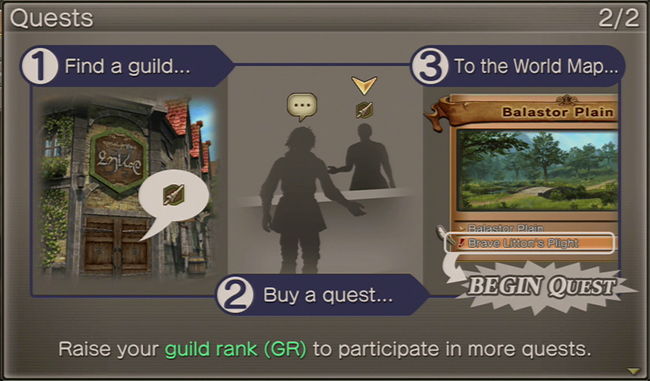
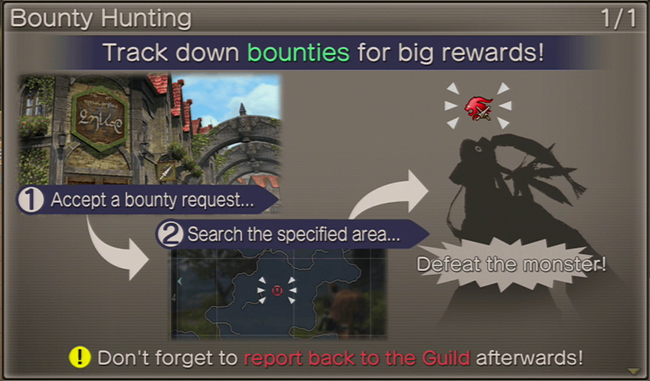
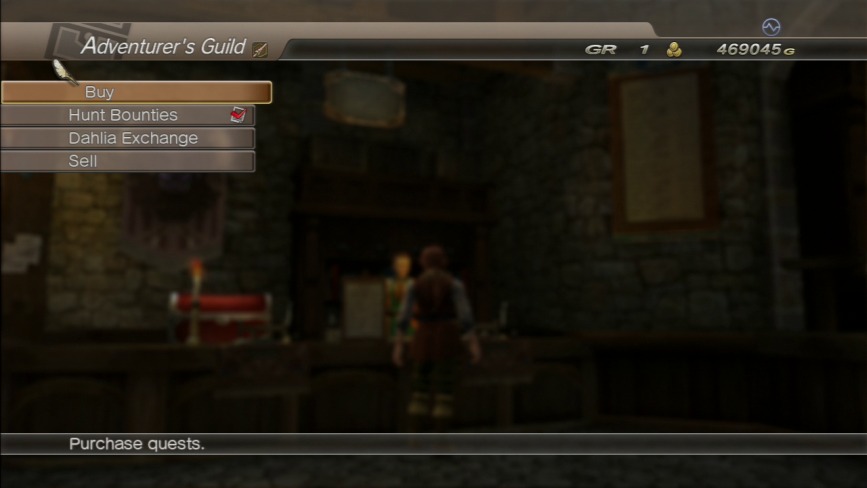
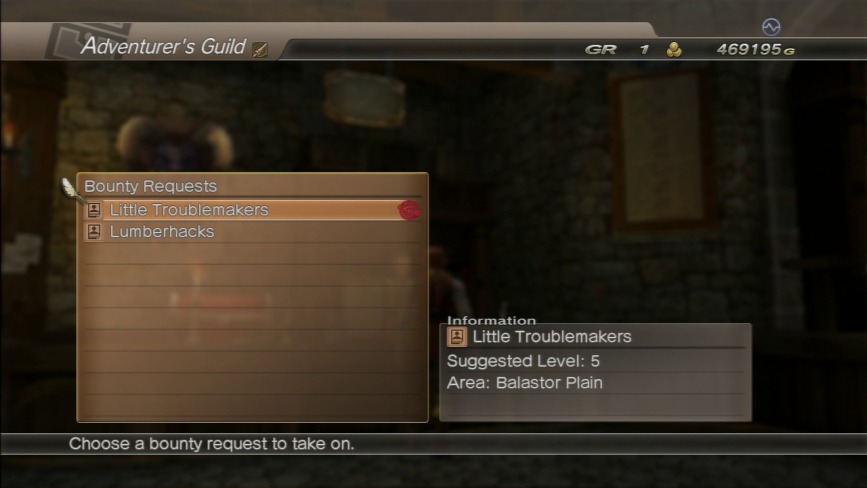
Also, because screw transitions, the Adventurer’s Guild is open now too.
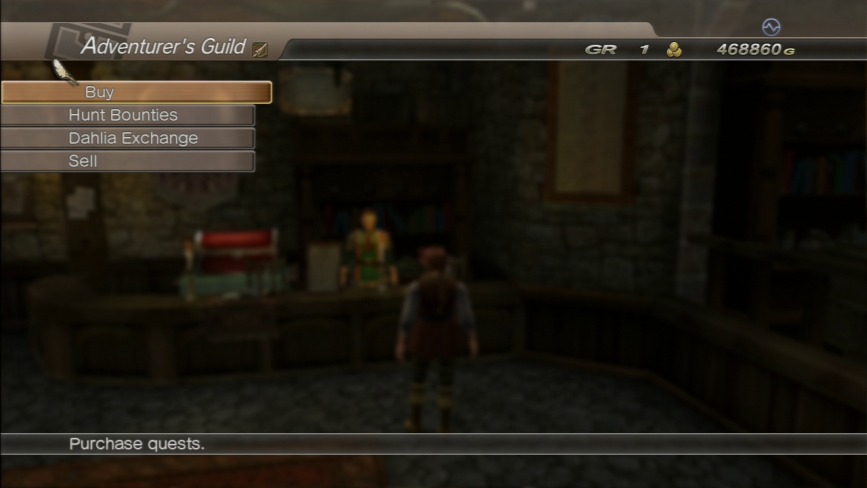
There are four options to the AG menu: Buy, Hunt Bounties, Dahlia Exchange and Sell.

In terms of Buy, the only things you can buy from the Guild is quest contracts. Quests are timed missions done with the Avatar as the party leader which comprised the online section of the game. I’ll be posting a video of the quest highlighted here, Brave Litton’s Plight. I dare you to sit through the whole thing.
In this instance, Brave Litton’s Plight is grayed out because I’d already bought it by this point in the footage capture process.
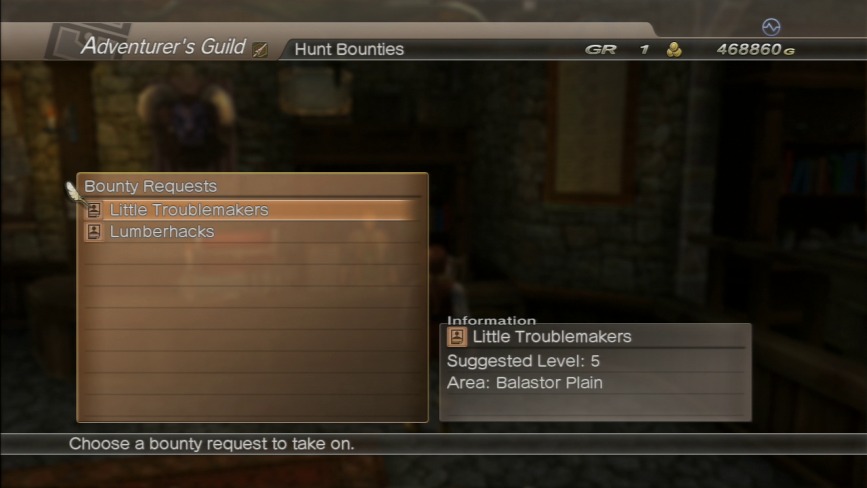
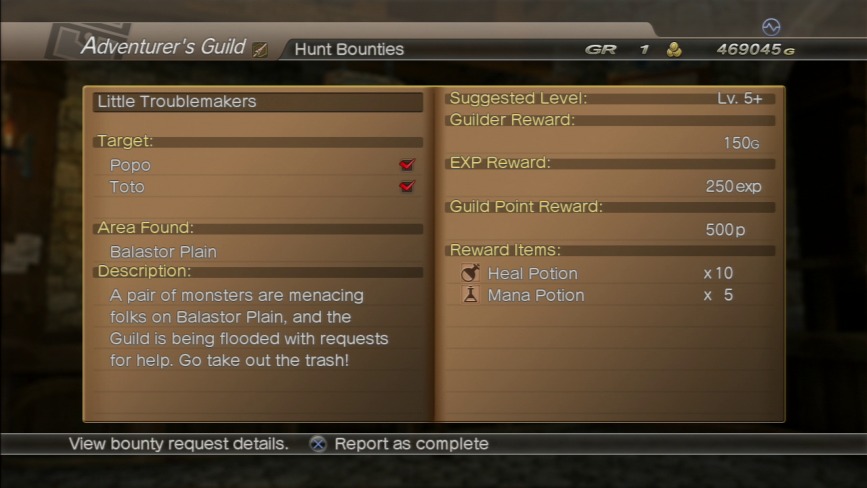
The Hunt Bounties option allows you to pick up contracts to hunt down and kill specific enemies for various loot and monetary rewards. Again, if you’ve played Final Fantasy XII for more than two hours, you should know what this is all about.
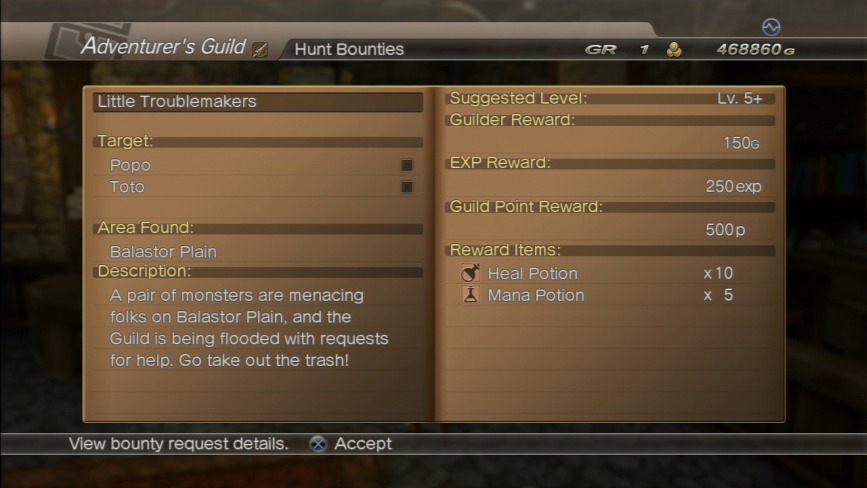
Selecting a contract opens up this screen telling you all you need to know about each particular mark and what you’ll get from clearing it.

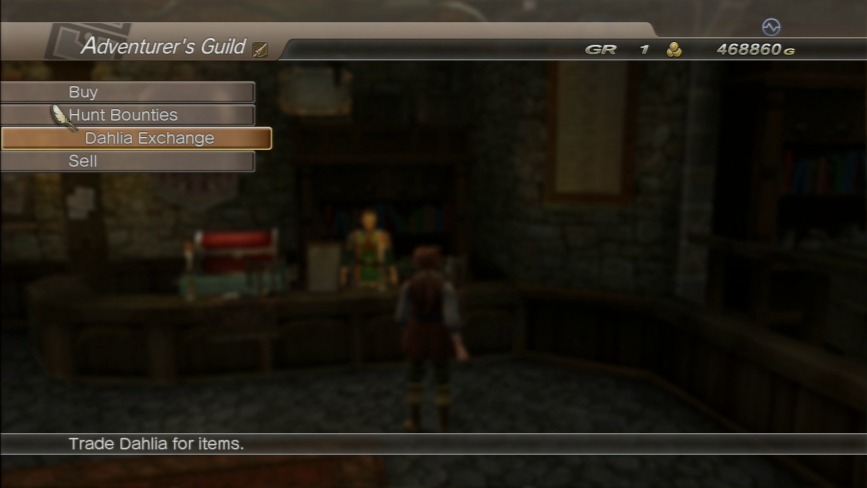
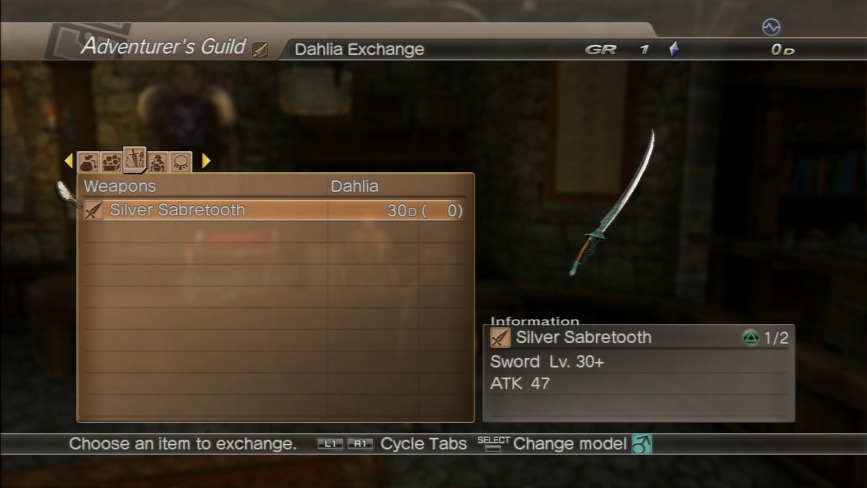
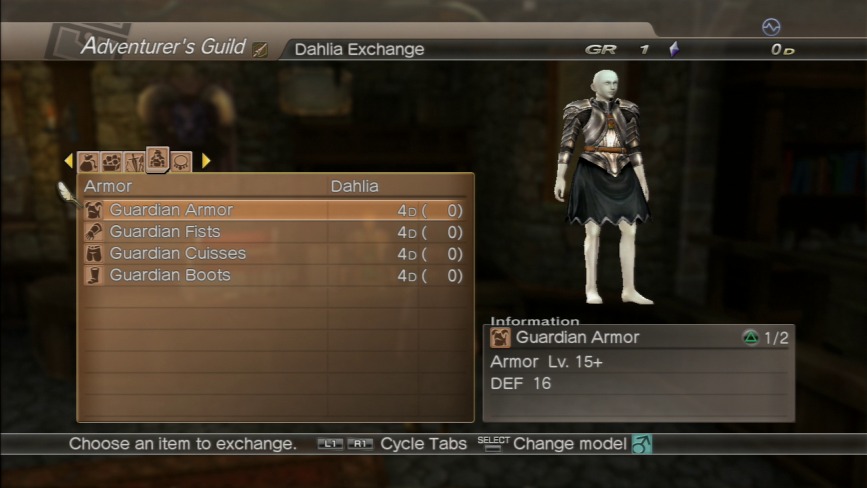
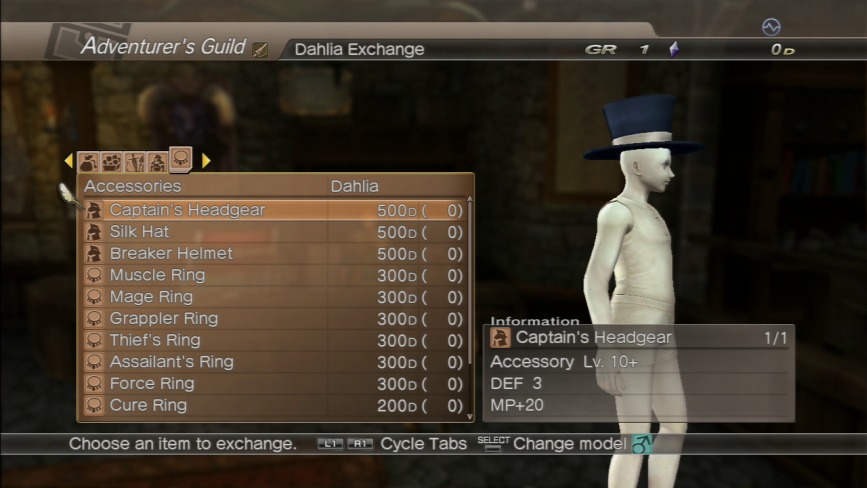
The last option of note is the Dahlia Exchange.
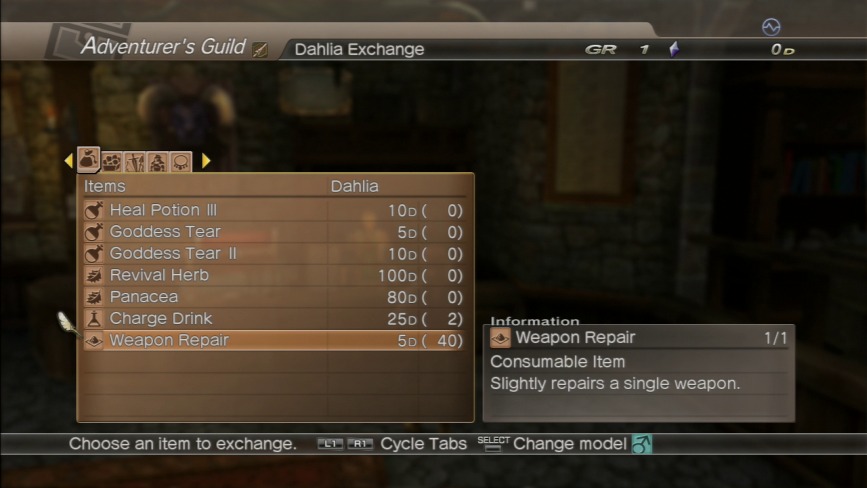
Dahlia is the special currency you earn from completing quests. You can exchange it here for specific special items like powerful items ahead of where you normally get them in-game and unique weapons, armor and accessories.
Ta da.
By and large, the Dahlia Exchange is analogous to an arcade or carnival prize exchange booth. The amount of Dahlia you earn per quest is often piddly, like 5 or 10 D per half-hour quest and as you can see, a lot of stuff here (particularly the useful or interesting looking stuff) is in the hundred or thousand or even ten thousand Dahlia range at the upper extremes.
It’s just another example of how the game is structurally designed to suck your life away from you through its failed MMORPG element.

But enough about World of FailCraft, let’s go out there and track down those bounties we picked up.
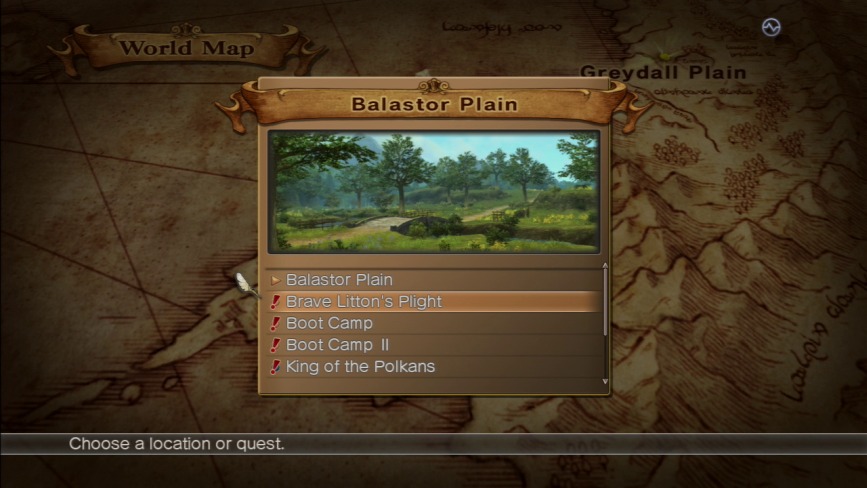
So Popo and Toto were on Balastor Plain. Going to the World Map and opening up Balastor Plain’s page brings up this list options now. You can either go right into Balastor plain proper or you can select one of the quests that take place in Balastor Plain (that you have access to, remember).
Quests with big red !s in front of them are new or not-yet-attempted quests. Quests with yellow-ish orbs in front of their names are regular quests. Most areas come with at least one default quest for you to play through without having to buy a contract for, such as Boot Camp for Balastor Plain and Boot Camp II, which is a more-or-less identical quest only with stronger monsters/bosses, the occasional additional completion requirement, and a beefed up reward.
Quests with blue orbs in front of their name such as King of the Polkans there are DLC quests. Unlike about 99.9% of the other DLC for this game, when D3 put out the 1.01 patch for White Knight Chronicles II, it included a whole swath of additional quests which were actually proven to be unlocks for on-disc DLC they didn’t get around to completing before going to print with the game.
Because not even the people who localized it gave a shit about it by the time they were done with it.
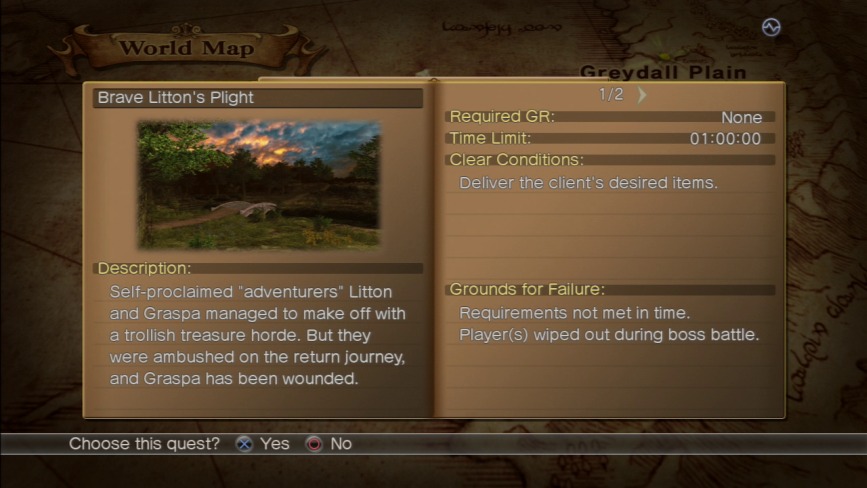
So here’s an example of a quest page. It show’s you a synopsis of either what the quest wants you to do or some background on the situation pertaining to the quest, what you need to do to complete it, how much time you have to complete it, any restrictions that are on the quest, and of course, ways to fail at completing the quest.
Thanks for reinforcing my thesis, White Knight Chronicles!
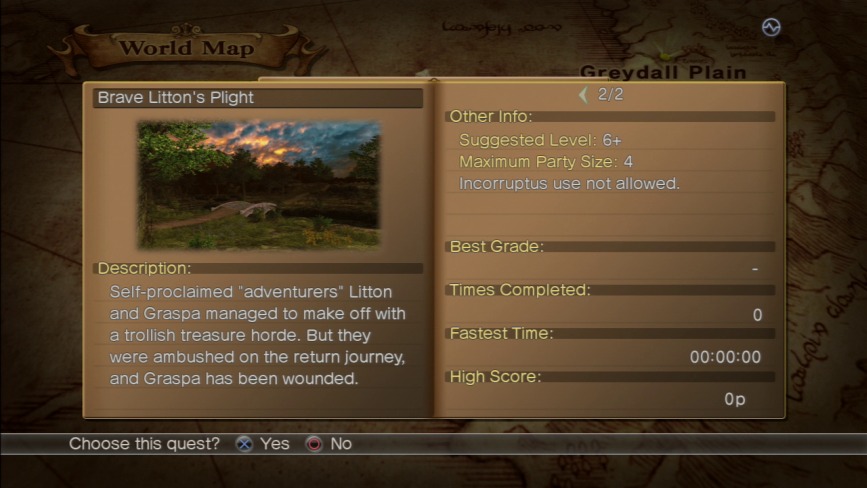
The second page gives you additional info like the size of an online party you can bring with you and whether or not you can use the Arc Knight in the quest, and stats for the quest once you’ve completed it.
You could only use the Arc Knight in quests from White Knight Chronicles II, FYI.
Anyway…
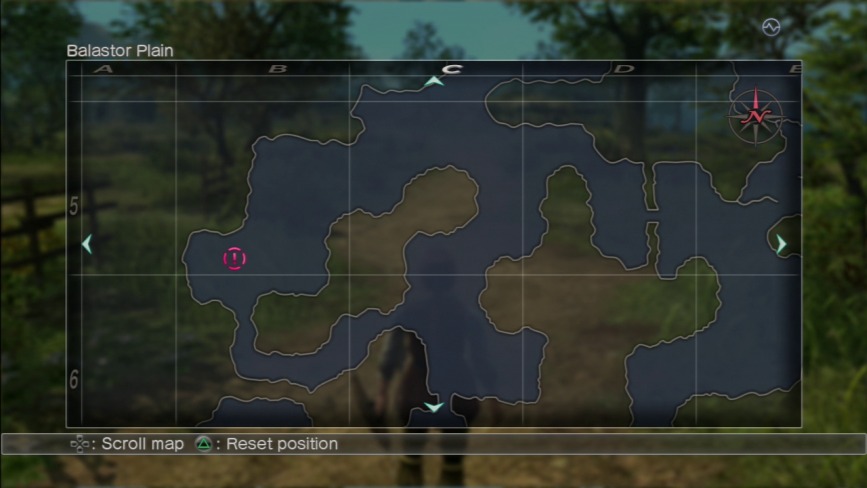
If you open the map on whatever field your marks are in and scroll through it, you’ll eventually find a big red circled exclamation point somewhere on the map. Run there and kill whatever you find.
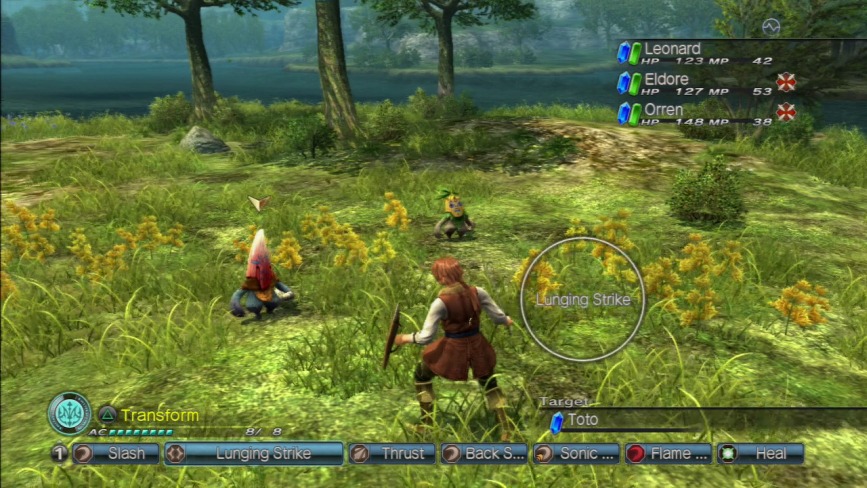
Again, credit where it’s due. Bounty enemies are usually unique versions of enemies encounter at various points in the game. Popo and Toto here are a unique Polkan and Kibble, respectively.
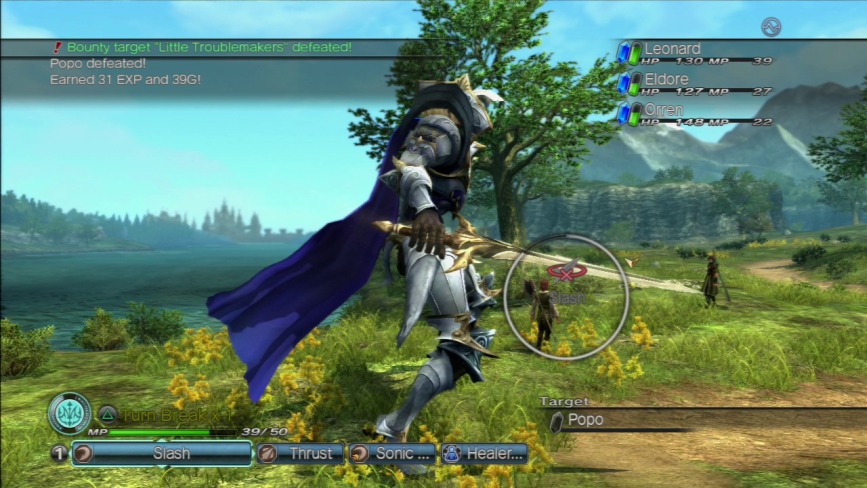
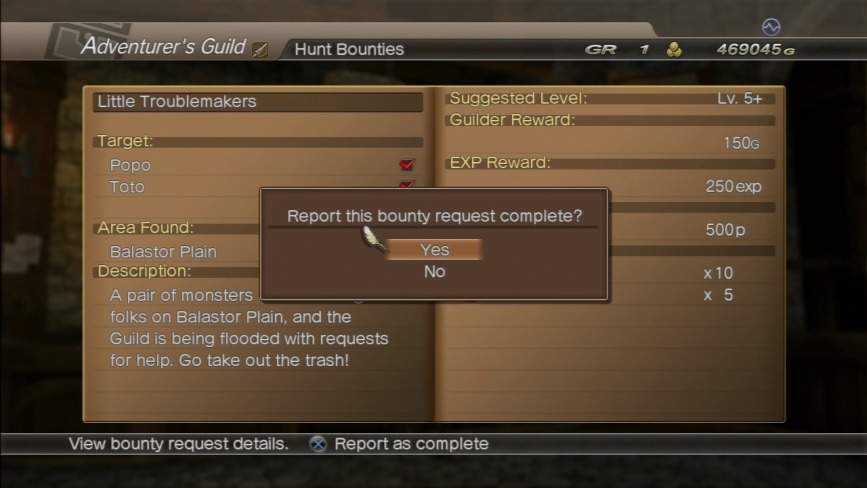
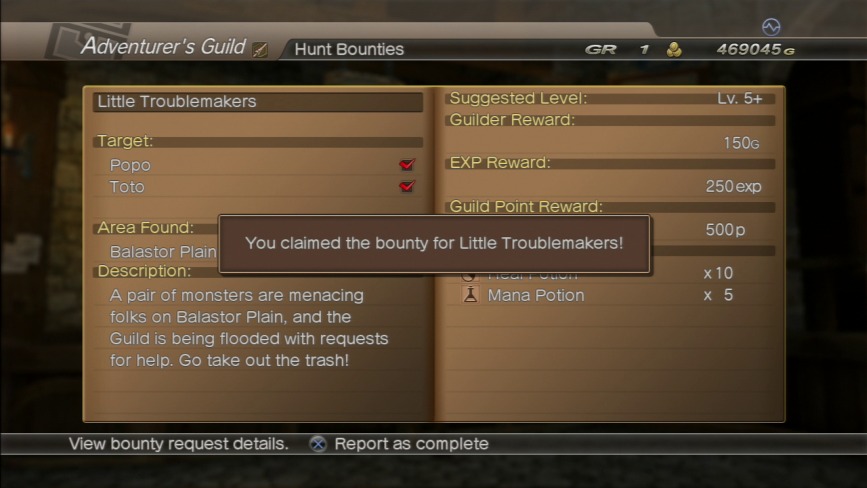
When you kill both of them, an update appears on the Live Log proclaiming the bounty is complete.
And no, I did not whip out the White Knight to kill a goddamn palletswapped Polkan, there was a Treant just off camera behind me in the previous screenshot so I used the Knight to kill it, then wasted Toto and Popo.
And then I lured a Vespid into following me across Balastor Plain so I could keep the White Knight active and then ran back to Balandor Castletown gate using the Knight to cover the distance in like 20 seconds as opposed to 3 minutes on foot.
Like a boss.

…The only problem is the camera is locked onto the Vespid the whole time with no way to change it, so you’re essentially running blind with the camera stuck looking backwards and tend to run into an invisible wall every ten steps.
This also presents another oprotunity to point out where the game is inferior to Xenoblade Chronicles in terms of similar gameplay mechanics which play vastly different. In Xenoblade often times the second you completed an errand for someone out on the field or killed a bounty monster or fulfilled a quest, it was wrapped up right then and there with you getting your reward instantly.
In White Knight Chronicles you have to hoof it back to the nearest Adventurer’s Guild and manual report the bounty completed before you get your reward and you’re free pick up another bounty contract. And here’s no fast-travel system in this game like in Xenoblade. The closes you get it maybe going to a Logic Stone and exiting to the World Map and then entering a town and then running whatever distance it takes to get to the Adventurer’s Guild.
It’s goddamn tedious.

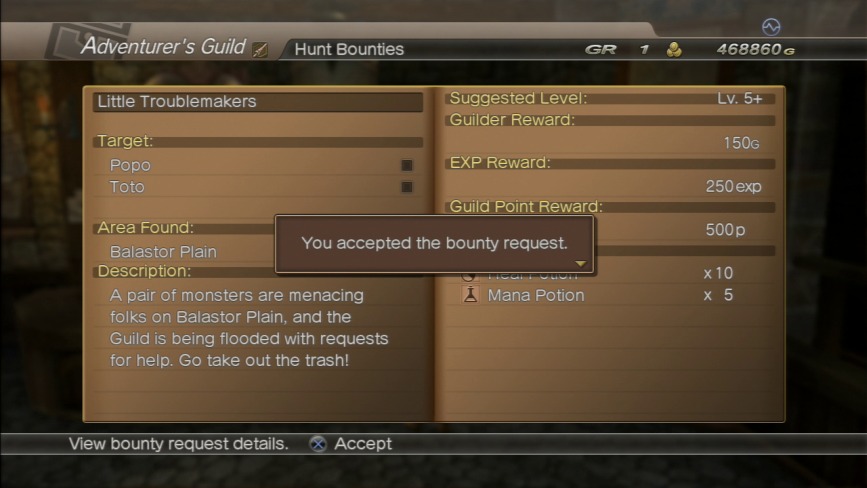
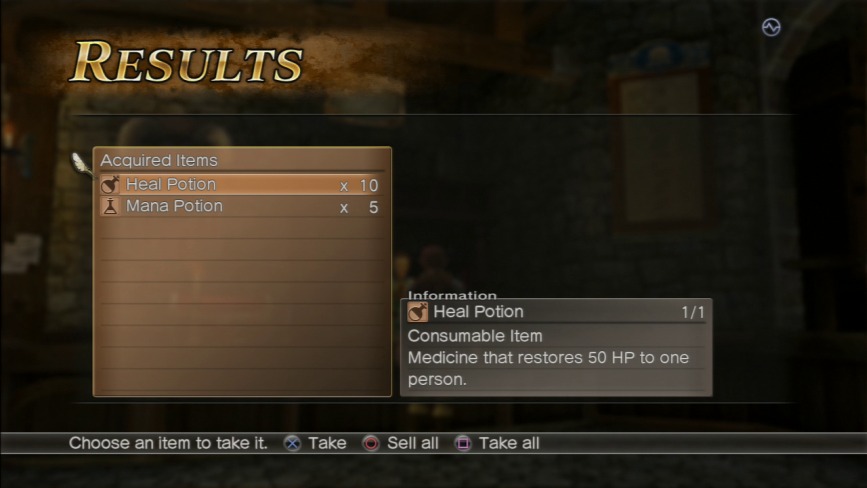
So reporting the bounty complete gets us 10 Heal Potions and 5 Mana Potions as well as 150G and 250 EXP. We also get something called Guild Points which correspond to that little GR 1 up in the upper right, but I will cover the whole Guild Rank thing later on.
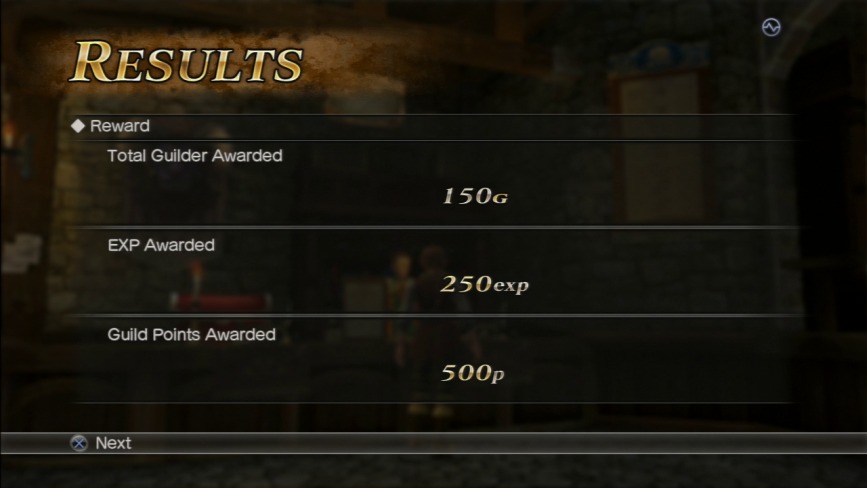
Yay, results screens.
Completed bounties are denoted by a red stamp mark next to them. Unlike Quests they cannot be repeated once they are closed out, so you can’t farm them for EXP or money.
Not that you would honestly care to, anyway…
Aaaaaand in the interest of full disclosure: the first time I took on Ahwahnee, it completely ruined me. I got a little arrogant and was appropriately humiliated by dying to essentially a giant albino Chu-Chu with dental problems.
Fuck you, White Knight Chronicles.
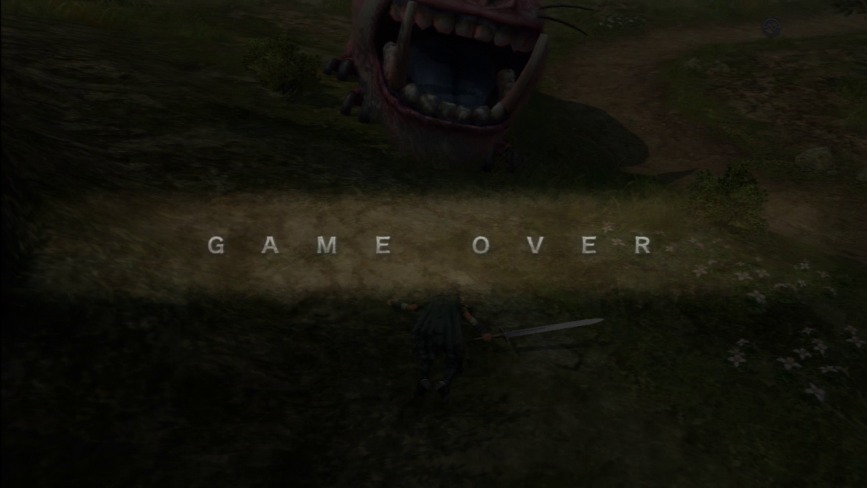
So here’s what the game over screen looks like.
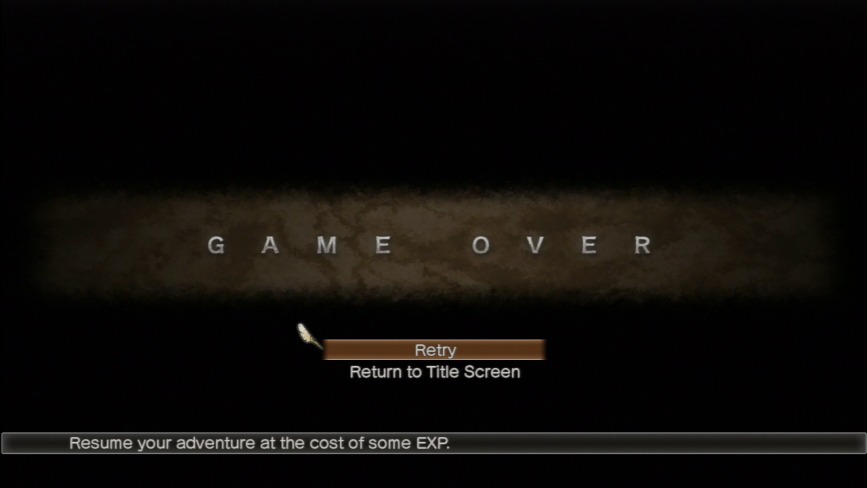
If you die, the game lets you return to the nearest Logic Stone to where you died after taking a hit to your EXP. You can actually lose whole levels through this if you die and restart enough times.
Fuck this game.
But that’s a rather dour note to end this part on. So here’s a precious moment between Leonard and a Kibble.
It’s cute because they’re on roughly the same intellectual level as living beings.

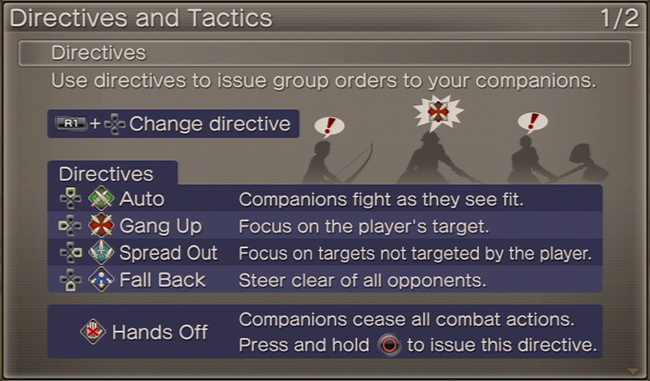
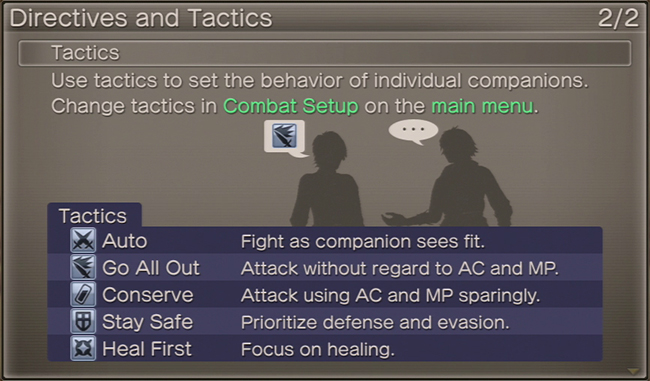
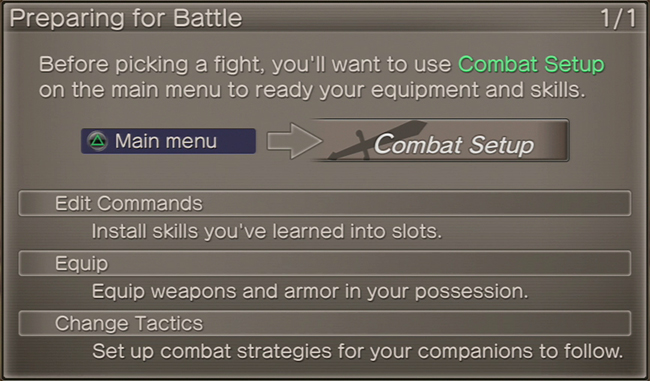
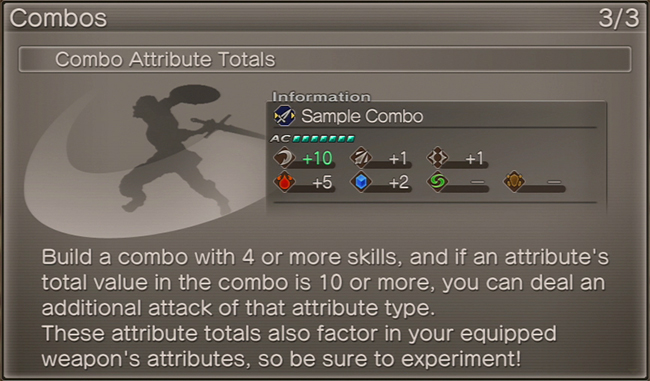
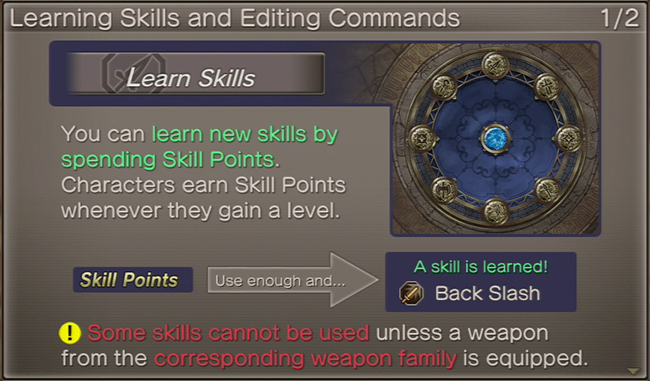
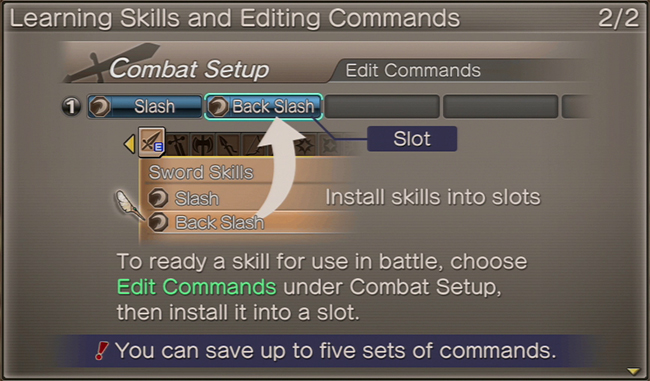
INFOGRAPHICS!
Chapter 4 leftovers
Chapter 6