Part 2: Tutorials - Movement

There are two types of movement in War in the East, strategic and regular. Regular movement involves the unit walking or riding it's attached vehicles to wherever you've told it to go. Moving like this consumes Movement Points, which the unit gets a set number of every turn. The amount any unit gets varies based on several factors including the type of unit, the commander and the supply level.

As you can see walking through different types of terrain costs more MP than just walking across clear fields. You also rack up penalties for walking into enemy controlled hexes, or hexes that were enemy controlled at the start of the turn.
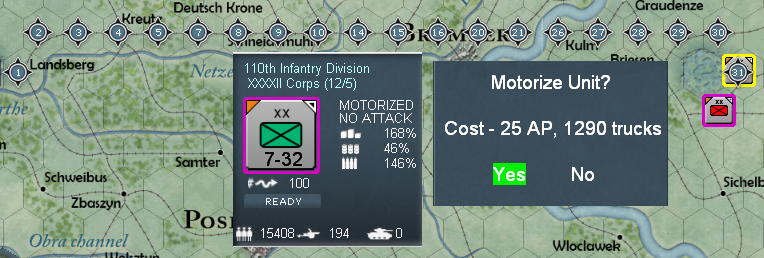
Units that don't move on vehicles also have the option to temporarily motorize for the remainder of the turn. This is incredibly expensive in both trucks and admin points, things the Soviets desperately need so you'll be seeing me do this approximately never. The other downside to moving like this, as you can see on the units counter is the unit is labeled as MOTORIZED NO ATTACK. This means that the unit is riding trucks in lines and is not in formation to engage an enemy. So they'll be unable to start attacks, enter enemy controlled hexes or hexes that were enemy controlled at the start of turn. The upside is that the unit can really haul ass, in this particular case it's doubled the units MP from 16 to 32.
Getting on a train is by far the most efficient method of movement in the game. The unit pays a small amount of MP in exchange for having their MP increased to 100 and being able to move any number of hexes for 1 point per hex. This has a few limitations, namely the number of trains you have per turn is limited and the unit can obviously only move where you control a rail network. Also units on a train cannot fight at all, so you'll need to get off the train (which costs MP) before you reach the front lines.
The final two forms of movement are on boats. You can transport from a friendly port to a friendly port, which can be useful but it's very situational. You can also perform an amphibious landing, but I've never found a use for this and I doubt I'll be launching any amphibious attacks in this game.

Fighting! Since we're not going to be launching any real attacks for quite some time I'll sadly have to explain how combat in this game works here. For this demonstration we've loaded up the Don to the Danube's 'Red Army Resurgent' scenario which covers the encirclement and mass surrender of the German 6th army at Stalingrad.
The first type of attack is called hasty, symbolized by this arrow over an explosion. It's a disorganized attack launched from 1 hex at an enemy hex. You rack up a ton of penalties for launching a hasty attack and they'll rarely work vs an equal enemy, the only upside is they're much cheaper MP wise. They're best used for harrying a retreating enemy, or clearing weak units like German regiments or Italian divisions out of the way.
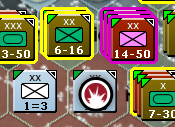
Deliberate attacks are the meat of an offense. A deliberate attack is a planned attack that can be launched from all ajacent hexes and has a much better chance of working than hasty. The downside is it's much more expensive to launch, meaning you won't be able to do as many or move as far after attacking.
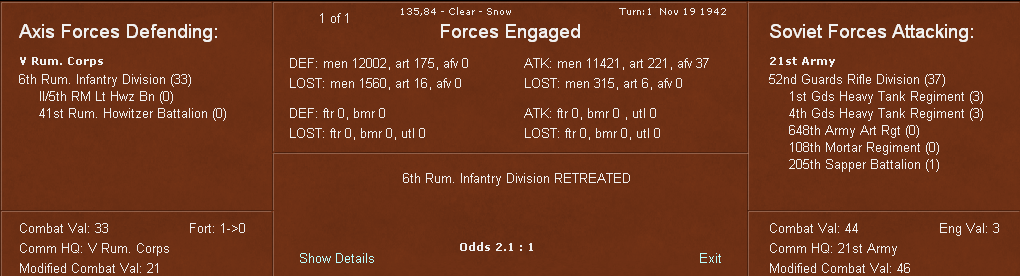
When you actually launch an attack this is the screen you get. Axis forces are always on the left, Soviets are always on the right. The sheet lists the formations involved in the fight and lists the number of men and weapons lost during the fight. Along the bottom you can see the combat values for the to sides as well as the final result of the engagement. This is the lowest level of detail and is the one I'm going to be using most of the time. There are 8 levels of detail above this, each one breaking the fight down more and more until you're seeing individual shots fired by rifle squads.
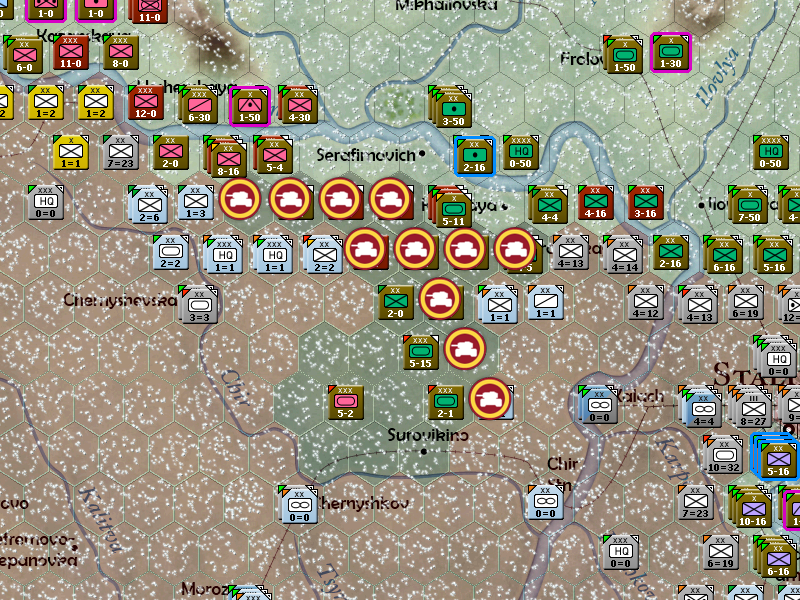
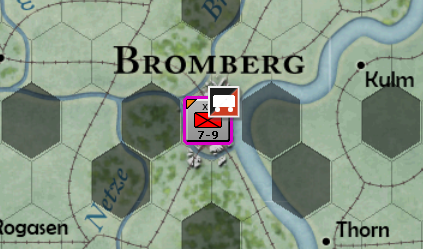
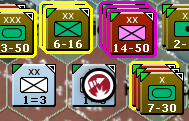
Here you're able to see a visual representation of where a series of battles took place, the end result being a hole blasted in the Romanian line which has allowed 3 Tank corps to roll out and cut the rail line leading into Stalingrad. I could click on those symbols to see a recap of any battles that took place in that hex this turn if I was interested in the details. If we wanted we could follow this up by blasting through the Romanians to the south of Stalingrad and completing the encirclement, but I think this is enough to show off the basics of combat.
I'll probably throw turn 2 up tonight after work.
Grey Hunter posted:
Not to steal from Upen, but if you want to see the game in action, then I did a video turn here - that may give you an idea of whats going on.
Looking good so far! maybe once your done we can do a MP LP.
Ah that's perfect, doing a video of this game would be awful because I'd have to actually be efficient in taking my turn. Normally I sit around drinking tea and watching videos on youtube for an hour while panning around the map. Once I'm done with this maybe I'll understand the game enough to actually put up a fight in MP.